javascript和css实现瀑布流排列

news2025/1/12 1:06:30

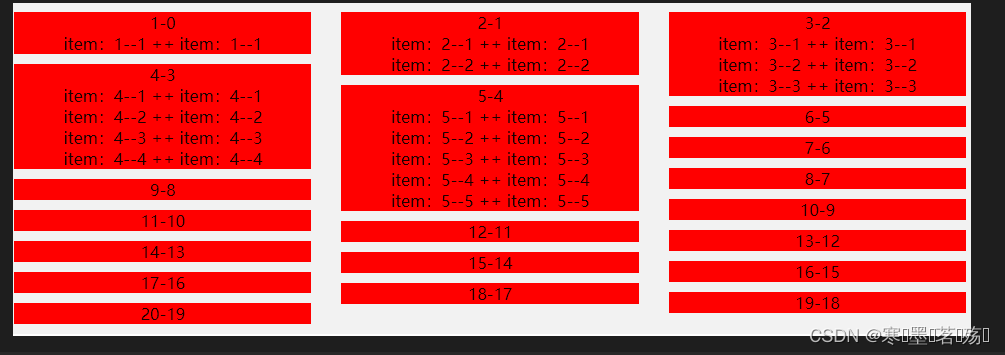
Grid 布局 实现瀑布流

  • html

    <div class="gridDiv">
      <div
        v-for="(item,index) in 20"
        :style="{'grid-row': `auto / span ${heightArray[index]}`}"
      >
        <div class="gridItemConten">
          <div class="gridText">
            {{item}}-{{index}}
            <div v-for="el in item" v-if="item<6">
              item:{{item}}--{{el}} ++ item:{{item}}--{{el}}
            </div>
          </div>
        </div>
      </div>
    </div>
    <style lang="scss" scoped>
      .gridDiv {
        width: calc(100% - 20px);
        margin: 0 auto;
        display: grid;
        grid-template-columns: repeat(3, 1fr); // 指定三列,自动宽度
        grid-column-gap: 30px; //横向间隔
        grid-auto-flow: row dense; // 是否自动补齐空白
        grid-auto-rows: 1px; // base高度,grid-row基于此运算
        // justify-items: center;
        .gridItemConten {
          padding-bottom: 10px; // 纵向间距
          .gridText {
            text-align: center;
            background-color: red;
          }
        }
      }
    </style>
    
  • js

     data() {
        return {
          heightArray:[]
        }
      },
      created(){
         this.$nextTick(()=>{
                const gridHeightFn=()=>{
                        Array.prototype.slice.call(document.querySelectorAll('.gridDiv .gridItemConten')).forEach((item,index)=>{
                                this.heightArray.splice(index,1,parseInt(item.getBoundingClientRect().height))
                        })
                }
                window.onresize=()=>{
                        gridHeightFn()
                }
                gridHeightFn()
        })
      },
    
  • 实现:
    在这里插入图片描述

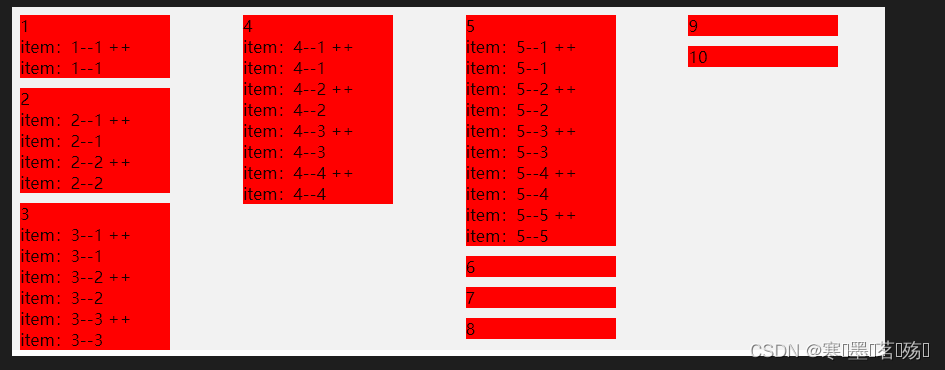
multi-column 多列布局实现瀑布流

  • html:

    <div class="gapDiv">
      <div class="gapItem" v-for="item in 10">
        {{item}}
        <div v-for="el in item" v-if="item<6">
          item:{{item}}--{{el}} ++ item:{{item}}--{{el}}
        </div>
      </div>
    </div>
    <style lang="scss" scoped>
      .gapDiv {
        width: calc(100% - 20px);
        margin: 0 auto;
        column-count: 4; // 默认列数
        column-gap: 30px; // 列间距
        .gapItem {
          break-inside: avoid; // 防止item展示不全裂开
          width: 150px;
          background-color: red;
          margin-bottom: 10px;
        }
      }
    </style>
    
  • 实现:
    在这里插入图片描述

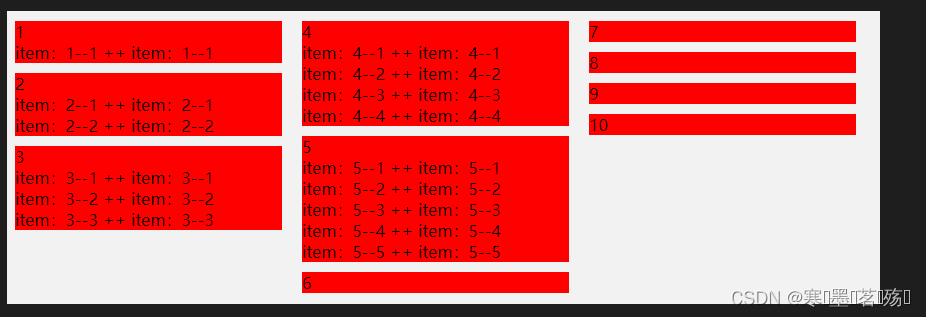
flex 布局实现瀑布流

  • html:

    <div class="flexDiv">
      <div class="flexItem" v-for="item in 10">
        {{item}}
        <div v-for="el in item" v-if="item<6">
          item:{{item}}--{{el}} ++ item:{{item}}--{{el}}
        </div>
      </div>
    </div>
    <style lang="scss" scoped>
      .flexDiv {
        width: calc(100% - 20px);
        margin: 0 auto;
        display: flex;
        flex-flow: column wrap;
        height: 30vh;
        .flexItem {
          background-color: red;
          margin-bottom: 10px;
          width: calc(100% / 3 - 20px);
        }
      }
    </style>
    
  • 实现:

    在这里插入图片描述

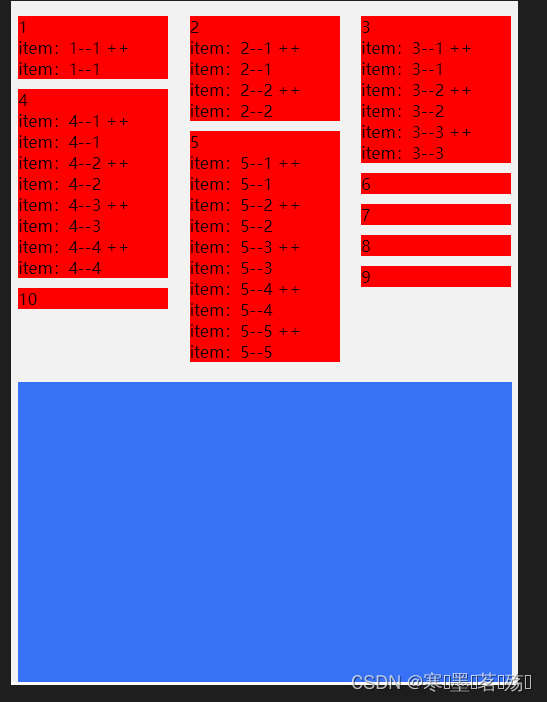
js 实现

  • html:

    <div class="divBox" id="divBox1">
      <div class="boxItem" v-for="item in 10">
        {{item}}
        <div v-for="el in item" v-if="item<6">
          item:{{item}}--{{el}} ++ item:{{item}}--{{el}}
        </div>
      </div>
      <div class="div-main"></div>
    </div>
    <style lang="scss" scoped>
      .divBox {
        width: calc(100% - 20px);
        margin: 0 auto;
        .boxItem {
          // width:150px;
          background-color: red;
        }
        .div-main {
          margin-top: 20px;
          width: 100%;
          height: 300px;
          background-color: #3772f6;
        }
      }
    </style>
    
  • js:

    created(){
      this.$nextTick(()=>{
          window.onresize=()=>{
            this.waterfallView('#divBox1',{itemEl:'.boxItem',paddingX:20,paddingY:10,isFollow:true,justifyContent:'center'})
          }
          this.waterfallView('#divBox1',{itemEl:'.boxItem',paddingX:20,paddingY:10,isFollow:true,justifyContent:'center'})
        })
    },
    methods:{
      // 瀑布流
        /**
         * elName:父级元素的class 或者id,如:'.boxItem'、'#boxItem'
        * objectData:{
          * itemEl:对应item的calss,如:'.boxItem',不传入默认是父级元素下面的所有元素
          * paddingX:横向的间距
          * paddingY:竖向的间距
          * rowNum:显示多少列,不传就设置固定宽度
          * justifyContent:横向的位置,left、center、right(设置这个的时候,不需要传入rowNum才会生效)
          * isFollow:是否自动填充到最小列
        * }
        * */
        waterfallView(elName,objectData){
          let thisIsReset=false
          const elDom=document.querySelectorAll(elName)
          const changeView = async (el)=>{
            const {itemEl=null,paddingX=0,paddingY=0,rowNum=0,isFollow=false,justifyContent=''}=objectData
            let thisRowNum=rowNum
            let thisPaddingX=paddingX
            const allWidth = el.offsetWidth
            const thisBlaknDom=el.querySelector('.--blakn-div--')
            if(thisBlaknDom && el.getAttribute('elWidth')){
              if(thisBlaknDom.offsetWidth!=Number(el.getAttribute('elWidth'))){
                thisIsReset=true
              }else{
                thisIsReset=false
              }
            }
            el.setAttribute('elWidth',allWidth)
            el.style.position='relative'
            // 获取已经存在的对应列的数组
            const heightArray=thisIsReset?[]:(el.getAttribute('heightArray')?JSON.parse(el.getAttribute('heightArray')):[]);
            // 获取需要瀑布流的dom的元素组
            const elChildrenArray=itemEl? Array.prototype.slice.call(el.querySelectorAll(itemEl)):Array.prototype.slice.call(el.children).filter(n=>n.className.indexOf('--blakn-div--')==-1)
            let firstLeft=0
            let itemWidth =0
            if(thisRowNum>0){
              itemWidth = (allWidth-(thisRowNum-1)*thisPaddingX)/thisRowNum
            }else{
              itemWidth = elChildrenArray[0].offsetWidth
              thisRowNum = parseInt((allWidth+thisPaddingX) / (itemWidth + thisPaddingX))
              if(justifyContent!=''){
                thisPaddingX=0
                if(justifyContent=='left'){
                  thisPaddingX=paddingX
                  thisRowNum = parseInt((allWidth+thisPaddingX) / (itemWidth + thisPaddingX))
                }else if(justifyContent=='center'){
                  let newRowNum= parseInt(allWidth/itemWidth)
                  newRowNum=newRowNum>elChildrenArray.length?elChildrenArray.length:newRowNum
                  if(newRowNum-1>0){
                    thisPaddingX = (allWidth - itemWidth*newRowNum)/(newRowNum-1)-0.5
                  }else{
                    thisPaddingX=0
                    firstLeft=(allWidth-itemWidth) /2
                  }
                  thisRowNum = parseInt((allWidth+thisPaddingX) / (itemWidth + thisPaddingX))
                }else{
                  thisPaddingX=paddingX
                  thisRowNum = parseInt((allWidth+thisPaddingX) / (itemWidth + thisPaddingX))
                  firstLeft = allWidth-(itemWidth*thisRowNum + thisPaddingX*(thisRowNum-1))
                  if(allWidth <= itemWidth){
                    firstLeft = 0
                  }
                }
              }
    
            }
            thisRowNum = thisRowNum<=0?1:thisRowNum
            const elLength=elChildrenArray.length
            // 获取开始循环的index
            const addIndex=thisIsReset?0:(el.getAttribute('lastIndex')?Number(el.getAttribute('lastIndex')):0)
            for (let i=addIndex+1;i<=elLength;i++){
              const thisIndex=i-1
              const item=elChildrenArray[thisIndex]
              const indexNum=i%thisRowNum==0?thisRowNum:i%thisRowNum
              // --------------------
              // const itemHeight=elChildrenArray[0].offsetHeight
              // item.style.height=itemHeight+(indexNum-1)*40+'px'
              // --------------------
              let newIndex=indexNum
              // 动态将item追加到最小高度列的数组位置
              if(isFollow){
                const newHeightArray=heightArray.map(n=>n+item.offsetHeight+(thisIndex-thisRowNum<0?0:paddingY))
                if(newHeightArray.length>=thisRowNum){
                  newIndex=newHeightArray.indexOf(Math.min(...newHeightArray))+1
                }
              }
              const styleObject={}
              // 获取对应列的高度,并计算当前item对应的top
              let thisTop=heightArray[newIndex-1]?heightArray[newIndex-1]:0
              thisTop=(thisTop + (thisIndex-thisRowNum<0?0:paddingY))
              // 计算对应item的left
              let thisLeft=(newIndex-1)*itemWidth
              thisLeft =firstLeft+thisLeft+(newIndex==1?0:thisPaddingX*(newIndex-1))
              // 设置item对应的style
              styleObject['position']='absolute'
              styleObject['top']=thisTop+'px'
              styleObject['left']=thisLeft+'px'
              styleObject['width']=itemWidth+'px'
              Object.keys(styleObject).forEach(key=>{
                item.style[key]=styleObject[key]
              })
              // 给对应列的高度增加当前item的高度
              heightArray[newIndex-1]=thisTop+item.offsetHeight
    
              // 设置当前的index
              item.setAttribute('index',thisIndex)
            }
            // 在父级元素设置每列高度的数组
            el.setAttribute('heightArray',JSON.stringify(heightArray))
            // 设置当前循环的最后一个元素的index
            el.setAttribute('lastIndex',elLength)
            // 为父级元素填充占位div
            const blaknDivStyle=`width:100%;height:${Math.max(...heightArray)}px`
            if(el.querySelectorAll('.--blakn-div--').length>0){
              Array.prototype.slice.call(el.querySelectorAll('.--blakn-div--'))[0].style=blaknDivStyle
            }else{
              const blaknDom=document.createElement('div')
              blaknDom.setAttribute('class','--blakn-div--')
              blaknDom.style=blaknDivStyle
              el.insertBefore(blaknDom, elChildrenArray[0]);
            }
          }
          Array.prototype.slice.call( elDom ).forEach(elItem=>{
            changeView(elItem)
          })
        },
    }
    
  • 实现:
    在这里插入图片描述

本文来自互联网用户投稿,该文观点仅代表作者本人,不代表本站立场。本站仅提供信息存储空间服务,不拥有所有权,不承担相关法律责任。如若转载,请注明出处:http://www.coloradmin.cn/o/705442.html

如若内容造成侵权/违法违规/事实不符,请联系多彩编程网进行投诉反馈,一经查实,立即删除!

相关文章

VS2022编译运行VS2015的项目

最近新装了VisualStudio2022&#xff0c;有一些VS2015老的项目需要运行&#xff0c;但不想再安装VS2015&#xff0c;就想能否直接在VS2022编译运行&#xff0c;研究一下发现可行&#xff0c;记录一下。 1. 直接升级VS2015项目到2022使用windows sdk 10.0 发现老代码里的一些语…

#10044 「一本通 2.2 例 2」Power Strings(KMP)(内附封面)

题目描述 原题来自&#xff1a;POJ 2406 给定若干个长度 \le 10^6 的字符串&#xff0c;询问每个字符串最多是由多少个相同的子字符串重复连接而成的。如&#xff1a;ababab 则最多有 3 个 ab 连接而成。 输入格式 输入若干行&#xff0c;每行有一个字符串。特别的&#xf…

第一章:R-CNN网络详解(丰富特征层次用于准确的目标检测和语义分割技术报告(v5))

(目标检测篇&#xff09;系列文章目录 第一章:R-CNN网络详解 第二章:Fast R-CNN网络详解 第三章:Faster R-CNN网络详解 第四章:YOLO v1网络详解 第五章:YOLO v2网络详解 第六章:YOLO v3网络详解 文章目录 系列文章目录技术干货集锦前言一、摘要二、正文分析 1.引入库2.读入…

迅为RK3568/RK3588开发板视频教程 | RKNPU2 从入门到实践一套搞定!

迅为电子嵌入式视频教程更新了&#xff01;——「AI深度学习推理加速器--RKNPU2 从入门到实践」&#xff08;基于RK3588和RK3568&#xff09; 课程内容分为三个阶段&#xff1a;认识RKNPU、RKNPU开发学习以及项目实战。 首先&#xff0c;我们将从认识RKNPU阶段开始&#xff0…

Redis实战——短信登录(一)

项目搭建 前期准备 导入SQL CREATE TABLE tb_user (id bigint unsigned NOT NULL AUTO_INCREMENT COMMENT 主键,phone varchar(11) CHARACTER SET utf8mb4 COLLATE utf8mb4_general_ci NOT NULL COMMENT 手机号码,password varchar(128) CHARACTER SET utf8mb4 COLLATE utf8mb4…

【Redis】Redis主从复制哨兵模式集群

文章目录 一、Redis 持久化1. 主从复制2. 哨兵模式3. 集群 二、 Redis 主从复制1. 概述2. 主从复制的作用3. 主从复制流程4. 搭建 Redis 主从复制4.1 环境准备4.2 安装 Redis4.3 修改 Master 节点配置文件4.4 修改Slave节点配置文件&#xff08;Slave1和Slave2配置相同&#xf…

关于Docker中 docker build 时no such file or directory报错

ERROR: failed to solve: failed to read dockerfile: open /var/lib/docker/tmp/buildkit-mount545066663/Dockerfile: no such file or directory 主要原因是命令行没有在文件夹下执行docker build&#xff0c;cd到指定文件夹下执行即可

windows-x86使用qemu打开x86和arm虚拟机

1、下载qemu软件 下载固件&#xff08;UEFI固件镜像文件&#xff0c;BIOS的替代方案&#xff09;&#xff09; 2、配置qemu环境变量 使用cmd执行qemu命令&#xff0c;配置好环境变量比较方便 3、准备镜像 准备好一个x86的镜像或者arm的镜像&#xff0c;格式可以为qcow2 4、打…

STM32 时钟 寄存器 异常和中断

时钟: 51单片机中有时钟和时钟树的概念&#xff0c;外设只有GPIO、定时器、和一个串口&#xff0c;使用的都是11.0592MHZ的频率&#xff0c;除了定时器外&#xff0c;其他外设只要上电就可以使用。 stm32不同外设对应的时钟频率不同&#xff0c;故有时钟树的概念 PLL&#xf…

提升半导体制造效率,了解半导体CMS系统的关键作用

随着半导体制造业的不断发展&#xff0c;提高生产效率成为企业追求的核心目标。在这一背景下&#xff0c;CMS系统&#xff08;中央设备状态监控系统&#xff09;的关键作用愈发凸显。本文将深入探讨CMS系统在提升半导体制造效率方面的关键作用&#xff0c;帮助读者全面了解该系…

Android Studio Could not reserve enough space for 2097152KB object heap

Android Studio Could not reserve enough space for 2097152KB object heap android studio 编译的项目的时候&#xff0c;出现的内存不足问题&#xff0c;实际上android studio会有引导设置内存大小&#xff0c;可能都不太在意在哪个地方&#xff0c;设置完就完事了&#xff…

linux上搭建samba服务

Samba是在Linux和UNIX系统上实现SMB协议的一个免费软件&#xff0c;由服务器及客户端程序构成。SMB&#xff08;Server Messages Block&#xff0c;信息服务块&#xff09;是一种在局域网上共享文件和打印机的一种通信协议&#xff0c;它为局域网内的不同计算机之间提供文件及打…

【NOSQL数据库】Rdeis持久化

目录 一、Redis高可用1.2Redis高可用技术 二、Redis持久化2.1Redis提供的两种持久话方式 三、RDB持久化3.1触发条件3.1.1手动触发3.1.2自动触发3.1.3其他自动触发机制 3.2执行流程3.3启动时加载 四、AOF持久化4.1 开启AOF4.2执行流程4.2.1命令追加(append)4.2.2文件写入(write)…

【LeetCode热题100】打卡第30天:从前序遍历与中序遍历序列构造二叉树二叉树展开为链表

文章目录 【LeetCode热题100】打卡第30天&#xff1a;从前序遍历与中序遍历序列构造二叉树&二叉树展开为链表⛅前言 从前序与中序遍历构造二叉树&#x1f512;题目&#x1f511;题解 从中序与后序遍历构造二叉树&#x1f512;题目&#x1f511;题解 二叉树展开为链表&#…

使用 Maya Mari 设计 3D 波斯风格道具(p1)

今天瑞云渲染小编给大家带来了Simin Farrokh Ahmadi 分享的Persian Afternoon 项目过程&#xff0c;解释了 Maya 和 Mari 中的建模、纹理和照明过程。 介绍 我的名字是西敏-法罗赫-艾哈迈迪&#xff0c;人们都叫我辛巴 在我十几岁的时候&#xff0c;我就意识到我喜欢艺术和创造…

python最佳开发环境组合(pycharm+anaconda)

一、pycharmanaconda是python 最佳开发环境组合 1.pycharm与vscode对比 pycharm社区版与pycharm pro pycharm pro 与vscode 二、anaconda Anaconda Python 集成包 工具箱。 所以没有必要下载传统Python (cPython)个人十分不推荐使用传统python做科学计算&#xff0c; 一来…

【王道·操作系统】第五章 输入输出管理【未完】

一、I/O设备 1.1 I/O设备的基本概念 I/O&#xff0c;Input/Output&#xff1a;输入/输出I/O 设备&#xff1a;将数据输入到计算机&#xff0c;或者可以接收计算机输出数据的外部设备&#xff0c;属于计算机中的硬件部件UNIX系统将外部设备抽象为一种特殊的文件&#xff0c;用户…

C语言无类型指针 void* 学习

int * 类型的指针变量&#xff0c;只能保存int型的数据的地址&#xff1b; double * 类型的指针变量&#xff0c;只能保存double型的数据的地址&#xff1b; void 指针可以指向任意类型的数据&#xff0c;可以用任意类型的指针对 void 指针赋值&#xff1b; void 在英文中作为…

基于PyQt5的桌面图像调试仿真平台开发(3)黑电平处理

系列文章目录 基于PyQt5的桌面图像调试仿真平台开发(1)环境搭建 基于PyQt5的桌面图像调试仿真平台开发(2)UI设计和控件绑定 基于PyQt5的桌面图像调试仿真平台开发(3)黑电平处理 基于PyQt5的桌面图像调试仿真平台开发(4)白平衡处理 基于PyQt5的桌面图像调试仿真平台开发(5)…

【LeetCode】动态规划 刷题训练(七)

文章目录 918. 环形子数组的最大和题目解析状态转移方程f[i]状态转移方程g[i]状态转移方程 初始化返回值完整代码 152. 乘积最大子数组题目解析状态转移方程f[i]状态转移方程g[i]状态转移方程 初始化完整代码 1567. 乘积为正数的最长子数组长度题目解析状态转移方程f[i]状态转移…