django-vue-admin 运行记录
https://django-vue-admin.com/document/hjbs.html
https://django-vue-admin.com/document/hjbs.html
https://bbs.django-vue-admin.com/article/9.html
https://gitee.com/liqianglog/django-vue-admin/tree/demo_project
1. 安装 ubuntu-20.04.6 桌面版
ubuntu-20.04.6-desktop-amd64.iso
桌面版本
桌面版的目的是 有浏览器可以看 django vue 的localhost网页。
用server版,需要用别的机器看,别的机器在权限上可能有问题。
sudo apt install vim -y
sudo apt install lrzsz
rz
sz
命令
2. 设置 ssh
sudo apt-get update
sudo apt-get install openssh-server -y
sudo systemctl status ssh
sudo vim /etc/ssh/sshd_config 不用修改
sudo service ssh restart
ssh username@your_server_ip_address -p port_number
systemctl restart sshd
// 开启防火墙ssh的服务端口
ufw allow ssh
// 查看ssh服务状态
systemctl status ssh
// 关闭ssh服务
systemctl stop ssh
// 开启ssh服务
systemctl start ssh
// 重启ssh服务
systemctl restart ssh
// 设置开启自启
sudo systemctl enable ssh
// 关闭开机自启
sudo systemctl disable ssh
3. 桌面版设置固定ip地址
sudo apt install net-tools
ens33
cd /etc/netplan/
sudo vi /etc/netplan/01-network-manager-all.yaml
# Let NetworkManager manage all devices on this system
network:
  ethernets:
    ens33:
      dhcp4: no
      addresses: [192.168.99.143/24]
      optional: true
      gateway4: 192.168.99.1
      nameservers:
        addresses: [114.114.114.114]
  version: 2
  renderer: NetworkManager
~
sudo netplan apply
4. server版本设置固定ip地址
cat /etc/netplan/00-installer-config.yaml
# This is the network config written by 'subiquity'
network:
  ethernets:
    ens33:
      dhcp4: no
      addresses: [192.168.99.57/24]
      optional: true
      gateway4: 192.168.99.1
      nameservers:
              addresses: [114.114.114.114]
  version: 2
sudo netplan apply
5. 查看python版本
python3 -V
Python 3.8.10
sudo apt install python3-pip -y
6. 安装 mysql 8.0
sudo apt-get update
sudo apt install mysql-server -y
systemctl status mysql
netstat -an |grep 3306
mysqladmin --version
mysqladmin Ver 8.0.33-0ubuntu0.20.04.2 for Linux on x86_64 ((Ubuntu))
sudo apt-get install mysql-client
sudo systemctl start mysql.service
sudo systemctl restart mysql.service
sudo systemctl stop mysql.service
sudo systemctl enable mysql.service
sudo netstat -anp | grep mysql
sudo ufw allow 3306
sudo netstat -anp | grep mysql
netstat -ntulp | grep 3306
6.1 配置文件
sudo cp /etc/mysql/mysql.conf.d/mysqld.cnf /etc/mysql/mysql.conf.d/bak_mysqld.cnf
sudo vi /etc/mysql/mysql.conf.d/mysqld.cnf

有的地方说是 只注释掉,好像是不行
sudo systemctl restart mysql
6.2 修改
sudo mysql
use mysql
select host,user from user;
update user set host=‘%’ where user=‘root’;
select host,user from user;
alter user ‘root’@‘%’ identified with mysql_native_password by ‘123456’;
exit
mysql -u root -p123456
exit
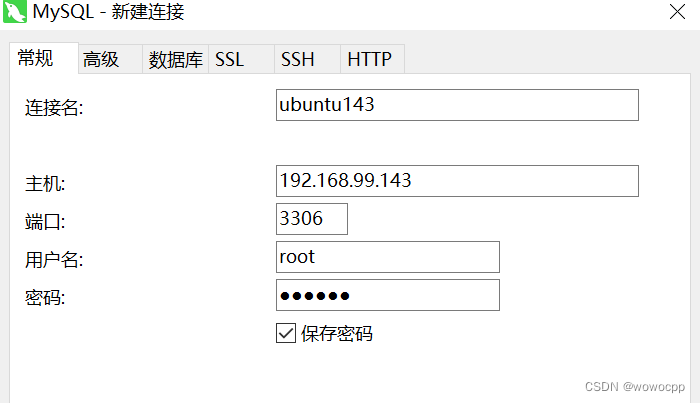
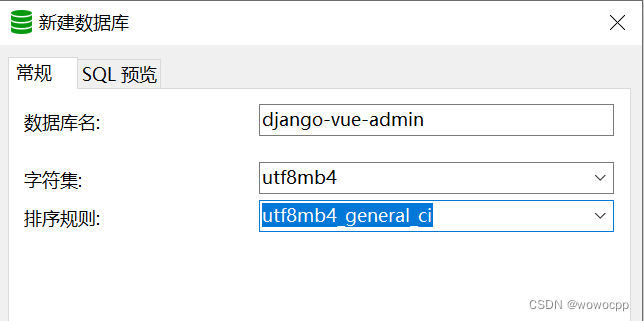
创建数据库
django-vue-admin
utf8mb4
utf8mb4_general_ci
6.2 登录
mysql -h ip(本机) -uroot –p
mysql -hlocalhost -uroot –p
mysql -h 192.168.99.57 -uroot –p
mysql -h 127.0.0.1 -uroot –p
mysql -h127.0.0.1 -uroot –p
mysql -uroot -p
mysql -u root –p
6.3 远程访问
Ubuntu22.04.2安装&卸载MySQL8.0.33详细步骤
https://blog.csdn.net/m0_56349886/article/details/130751157
7. 安裝 redis
sudo apt update
sudo apt install redis -y
https://redis.io/
https://redis.io/docs/getting-started/
sudo systemctl status redis
sudo systemctl restart redis
配置文件 应该是不用修改
sudo cp /etc/redis/redis.conf /etc/redis/bak_redis.conf
sudo vi /etc/redis/redis.conf
redis-cli
127.0.0.1:6379> keys *
(empty list or set)
127.0.0.1:6379> select 1
OK
127.0.0.1:6379[1]> keys *
(empty list or set)
127.0.0.1:6379[1]>
8. 安装 nodejs
cd ~
sudo apt install curl -y
curl -sL https://deb.nodesource.com/setup_14.x | sudo -E bash -
## Run `sudo apt-get install -y nodejs` to install Node.js 14.x and npm
## You may also need development tools to build native addons:
     sudo apt-get install gcc g++ make
## To install the Yarn package manager, run:
     curl -sL https://dl.yarnpkg.com/debian/pubkey.gpg | gpg --dearmor | sudo tee /usr/share/keyrings/yarnkey.gpg >/dev/null
     echo "deb [signed-by=/usr/share/keyrings/yarnkey.gpg] https://dl.yarnpkg.com/debian stable main" | sudo tee /etc/apt/sources.list.d/yarn.list
     sudo apt-get update && sudo apt-get install yarn
sudo apt-get install -y nodejs
node --version
v14.21.3
npm --version
6.14.18
sudo apt install build-essential (可以不执行)
正式工作
https://django-vue-admin.com/document/hjbs.html
sudo apt-get install libmysqlclient-dev -y
cd ~
mkdir work
cd work
下载正式 版
django-vue-admin-v2.1.4.tar.gz
tar xvf django-vue-admin-v2.1.4.tar.gz
cd django-vue-admin-v2.1.4/
cd backend/
cd conf/
cp env.example.py env.py
vi env.py
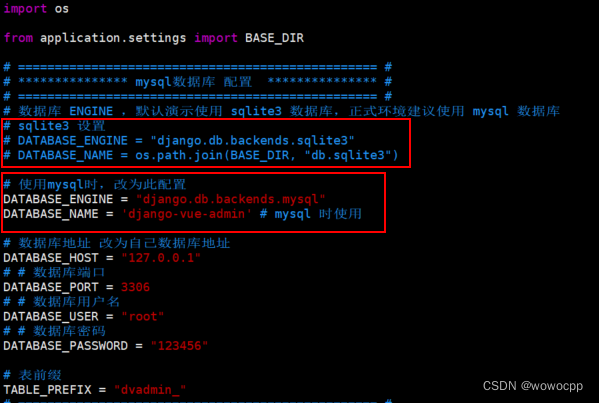
import os

from application.settings import BASE_DIR

# ================================================= #
# *************** mysql数据库 配置  *************** #
# ================================================= #
# 数据库 ENGINE ,默认演示使用 sqlite3 数据库,正式环境建议使用 mysql 数据库
# sqlite3 设置
# DATABASE_ENGINE = "django.db.backends.sqlite3"
# DATABASE_NAME = os.path.join(BASE_DIR, "db.sqlite3")

# 使用mysql时,改为此配置
DATABASE_ENGINE = "django.db.backends.mysql"
DATABASE_NAME = 'django-vue-admin' # mysql 时使用

# 数据库地址 改为自己数据库地址
DATABASE_HOST = "127.0.0.1"
# # 数据库端口
DATABASE_PORT = 3306
# # 数据库用户名
DATABASE_USER = "root"
# # 数据库密码
DATABASE_PASSWORD = "123456"

# 表前缀
TABLE_PREFIX = "dvadmin_"
# ================================================= #
# ******** redis配置,无redis 可不进行配置  ******** #
# ================================================= #
# REDIS_PASSWORD = ''
# REDIS_HOST = '127.0.0.1'
# REDIS_URL = f'redis://:{REDIS_PASSWORD or ""}@{REDIS_HOST}:6380'
# ================================================= #
# ****************** 功能 启停  ******************* #
# ================================================= #
DEBUG = True
# 启动登录详细概略获取(通过调用api获取ip详细地址。如果是内网,关闭即可)
ENABLE_LOGIN_ANALYSIS_LOG = True
# 登录接口 /api/token/ 是否需要验证码认证,用于测试,正式环境建议取消
LOGIN_NO_CAPTCHA_AUTH = True
# 是否启动API日志记录
API_LOG_ENABLE = locals().get("API_LOG_ENABLE", True)
# API 日志记录的请求方式
API_LOG_METHODS = locals().get("API_LOG_METHODS", ["POST", "UPDATE", "DELETE", "PUT"])
# API_LOG_METHODS = 'ALL' # ['POST', 'DELETE']
# ================================================= #
# ****************** 其他 配置  ******************* #
# ================================================= #
ENVIRONMENT = "local"  # 环境,test 测试环境;prod线上环境;local本地环境
ALLOWED_HOSTS = ["*"]
# 系统配置存放位置:redis/memory(默认)
DISPATCH_DB_TYPE = 'redis'
cd …
pwd
/home/jack/work/django-vue-admin-v2.1.4/backend
echo ‘export PATH=/home/jack/.local/bin:$PATH’ >> ~/.bashrc
source ~/.bashrc
echo $PATH
pip3 install -r requirements.txt
ERROR: launchpadlib 1.10.13 requires testresources, which is not installed.
  WARNING: The script chardetect is installed in '/home/jack/.local/bin' which is not on PATH.
  Consider adding this directory to PATH or, if you prefer to suppress this warning, use --no-warn-script-location.
  WARNING: The script normalizer is installed in '/home/jack/.local/bin' which is not on PATH.
  Consider adding this directory to PATH or, if you prefer to suppress this warning, use --no-warn-script-location.
  WARNING: The script sqlformat is installed in '/home/jack/.local/bin' which is not on PATH.
  Consider adding this directory to PATH or, if you prefer to suppress this warning, use --no-warn-script-location.
  WARNING: The script django-admin is installed in '/home/jack/.local/bin' which is not on PATH.
  Consider adding this directory to PATH or, if you prefer to suppress this warning, use --no-warn-script-location.
  WARNING: The script pypinyin is installed in '/home/jack/.local/bin' which is not on PATH.
  Consider adding this directory to PATH or, if you prefer to suppress this warning, use --no-warn-script-location.
  WARNING: The script automat-visualize is installed in '/home/jack/.local/bin' which is not on PATH.
  Consider adding this directory to PATH or, if you prefer to suppress this warning, use --no-warn-script-location.
  WARNING: The scripts cftp, ckeygen, conch, mailmail, pyhtmlizer, tkconch, trial, twist and twistd are installed in '/home/jack/.local/bin' which is not on PATH.
  Consider adding this directory to PATH or, if you prefer to suppress this warning, use --no-warn-script-location.
  WARNING: The scripts wamp, xbrnetwork and xbrnetwork-ui are installed in '/home/jack/.local/bin' which is not on PATH.
  Consider adding this directory to PATH or, if you prefer to suppress this warning, use --no-warn-script-location.
  WARNING: The script daphne is installed in '/home/jack/.local/bin' which is not on PATH.
  Consider adding this directory to PATH or, if you prefer to suppress this warning, use --no-warn-script-location.
  WARNING: The script uvicorn is installed in '/home/jack/.local/bin' which is not on PATH.
  Consider adding this directory to PATH or, if you prefer to suppress this warning, use --no-warn-script-location.
  WARNING: The script gunicorn is installed in '/home/jack/.local/bin' which is not on PATH.
  Consider adding this directory to PATH or, if you prefer to suppress this warning, use --no-warn-script-location.
echo ‘export PATH=/home/jack/.local/bin:$PATH’ >> ~/.bashrc
source ~/.bashrc
echo $PATH
pip3 uninstall -r requirements.txt -y
pip3 install -r requirements.txt
python3 -m pip install launchpadlib
安装依赖环境:
pip3 install -r requirements.txt
执行迁移命令:
python3 manage.py makemigrations
python3 manage.py migrate
初始化数据:
python3 manage.py init
初始化省市县数据:
python3 manage.py init_area
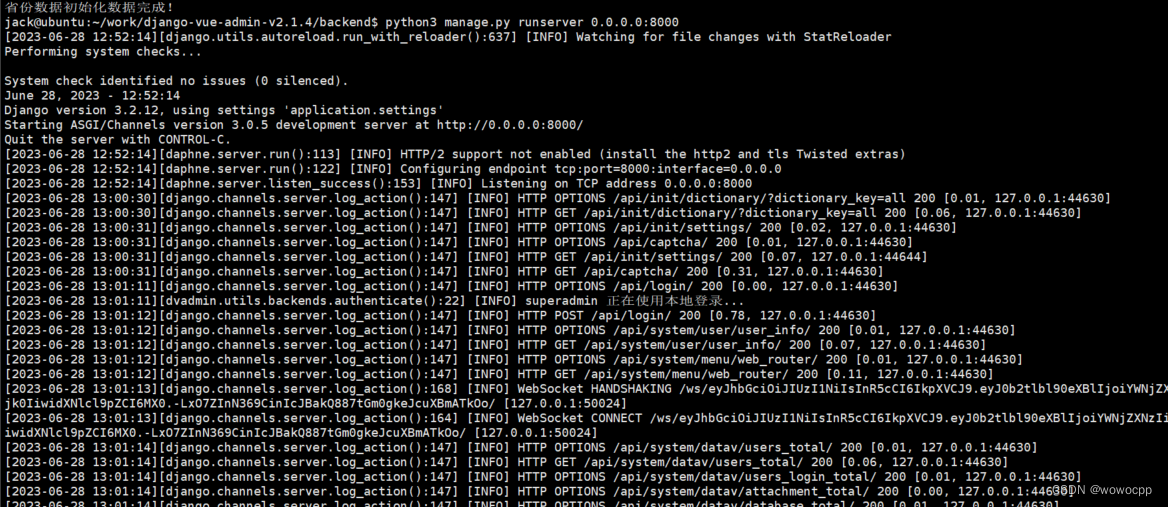
启动项目:
python3 manage.py runserver 0.0.0.0:8000
web
cd /home/jack/work/django-vue-admin-v2.1.4/web
前端运行
进入前端项目目录 cd web
安装依赖 npm install --registry=https://registry.npm.taobao.org
启动服务 npm run dev
#访问项目
访问地址:http://localhost:8080 (opens new window)(默认为此地址,如有修改请按照配置文件)
账号:superadmin 密码:admin123456
[vue-echarts] Switched to Vue 2 environment.
npm notice created a lockfile as package-lock.json. You should commit this file.
npm WARN optional SKIPPING OPTIONAL DEPENDENCY: fsevents@~2.3.2 (node_modules/chokidar/node_modules/fsevents):
npm WARN notsup SKIPPING OPTIONAL DEPENDENCY: Unsupported platform for fsevents@2.3.2: wanted {"os":"darwin","arch":"any"} (current: {"os":"linux","arch":"x64"})
npm WARN optional SKIPPING OPTIONAL DEPENDENCY: fsevents@^1.2.7 (node_modules/watchpack-chokidar2/node_modules/chokidar/node_modules/fsevents):
npm WARN notsup SKIPPING OPTIONAL DEPENDENCY: Unsupported platform for fsevents@1.2.13: wanted {"os":"darwin","arch":"any"} (current: {"os":"linux","arch":"x64"})
npm WARN optional SKIPPING OPTIONAL DEPENDENCY: fsevents@^1.2.7 (node_modules/jest-haste-map/node_modules/fsevents):
npm WARN notsup SKIPPING OPTIONAL DEPENDENCY: Unsupported platform for fsevents@1.2.13: wanted {"os":"darwin","arch":"any"} (current: {"os":"linux","arch":"x64"})
npm WARN optional SKIPPING OPTIONAL DEPENDENCY: fsevents@^1.2.7 (node_modules/webpack-dev-server/node_modules/chokidar/node_modules/fsevents):
npm WARN notsup SKIPPING OPTIONAL DEPENDENCY: Unsupported platform for fsevents@1.2.13: wanted {"os":"darwin","arch":"any"} (current: {"os":"linux","arch":"x64"})
npm WARN cosmiconfig-typescript-loader@4.3.0 requires a peer of cosmiconfig@>=7 but none is installed. You must install peer dependencies yourself.
npm WARN acorn-jsx@5.3.2 requires a peer of acorn@^6.0.0 || ^7.0.0 || ^8.0.0 but none is installed. You must install peer dependencies yourself.
npm WARN django-vue-admin@2.1.4 No license field.

added 2252 packages from 1183 contributors in 122.451s

146 packages are looking for funding
  run `npm fund` for details
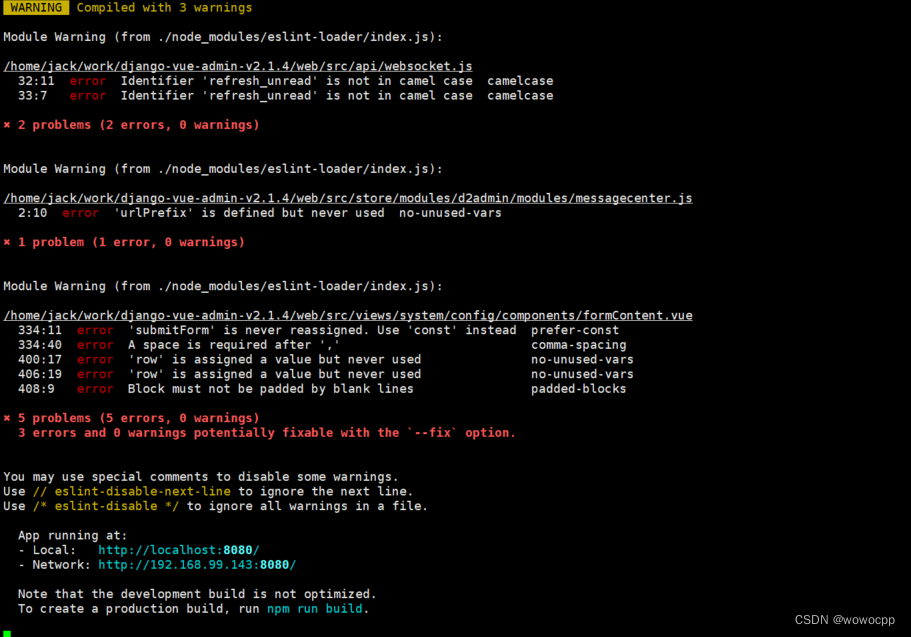
http://localhost:8080 火狐浏览器 可以
http://192.168.99.143:8080/ 谷歌浏览器 不可以
如果想让他可以,需要部署一下
安装 nginx服务器
保证以 sudo 用户身份登录,并且你不能运行 Apache 或者 其他处理进程在80端口和443端口。
sudo apt install nginx
sudo systemctl status nginx
查看安装版本
nginx -v
查看状态
sudo systemctl status nginx
启动
sudo systemctl start nginx
停止
sudo systemctl stop nginx
重启
sudo systemctl restart nginx
sudo systemctl enable nginx
sudo systemctl start nginx
如何在Ubuntu20.04上配置Nginx以及使用Nginx部署一个网站
https://developer.aliyun.com/article/895750
①打包Vue项目——npm run build
②将静态资源文件上传至服务器
③配置Nginx文件开启一个网点
使用vim打开该配置文件——vim /etc/nginx/nginx.conf
修改完成之后进行保存退出。
④重启Nginx服务——service nginx restart
普通部署流程
进入如下目录:
/home/jack/work/django-vue-admin-v2.1.4/web/
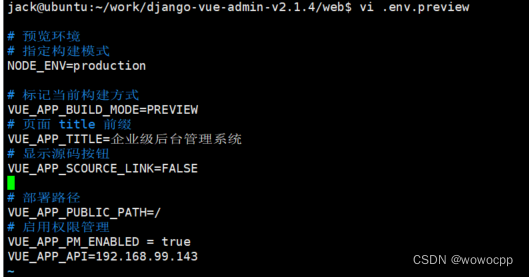
修改环境配置 .env.preview 文件中,VUE_APP_API 地址为后端服务器地址
VUE_APP_API=192.168.99.143
/home/jack/work/django-vue-admin-v2.1.4/web
构建生产环境 npm run build,等待生成 dist 文件夹
生成的 dist 文件放到服务器 /opt/django-vue-admin/web/dist 目录下
使用 nginx 进行静态文件代理
Nginx配置
sudo cp /etc/nginx/nginx.conf /etc/nginx/bak_nginx.conf
sudo vi /etc/nginx/nginx.conf
修改为如下内容,并重启sudo systemctl restart nginx
# 此nginx配置默认项目放在服务器的 /opt 目录下,前端默认端口为 8080,后端为8000,如需修改请自行对照修改

events {
    worker_connections  1024;
}
http {
    include       mime.types;
    default_type  application/octet-stream;
    sendfile        on;

	server {
        listen 80 default_server;
        server_name _;
        return 404;
        }
    # 前端配置
    server {
        listen       8080;
        client_max_body_size 100M;
        server_name  dvadmin-web;
        charset utf-8;
        location / {
            proxy_set_header Host $http_host;
            proxy_set_header X-Real-IP $remote_addr;
            proxy_set_header X-Forwarded-For $proxy_add_x_forwarded_for;
            proxy_set_header X-Forwarded-Proto https;
            root /opt/django-vue-admin/web/dist;
            index  index.html index.php index.htm;
        }
        # 后端服务
        location /api {
          root html/www;
          proxy_set_header Host $http_host;
          proxy_set_header  X-Real-IP $remote_addr;
          proxy_set_header X-Forwarded-For $proxy_add_x_forwarded_for;
          proxy_set_header X-Forwarded-Proto $scheme;
          rewrite ^/api/(.*)$ /$1 break;  #重写
          proxy_pass http://127.0.0.1:8000;

        }
        # Django media
        location /media  {
            root /opt/django-vue-admin/backend;  # your Django project's media files - amend as required
        }
        # Django static
        location /static {
            root /opt/django-vue-admin/backend; # your Django project's static files - amend as required
        }
        #禁止访问的文件或目录
        location ~ ^/(\.user.ini|\.htaccess|\.git|\.svn|\.project|LICENSE|README.md)
        {
            return 404;
        }
    }
}
后端启动
进入如下目录:
/home/jack/work/django-vue-admin-v2.1.4/backend
使用daphne启动:daphne -b 0.0.0.0 -p 8000 application.asgi:application
后台运行: nohup daphne -b 0.0.0.0 -p 8000 application.asgi:application > run.log 2>&1 &
不用sudo

访问项目
访问地址:http://公网或本服务器ip:8080 (服务器需注意供应商端防火墙是否开启对应端口)
账号:superadmin 密码:admin123456
http://192.168.99.143:8080/
谷歌浏览器
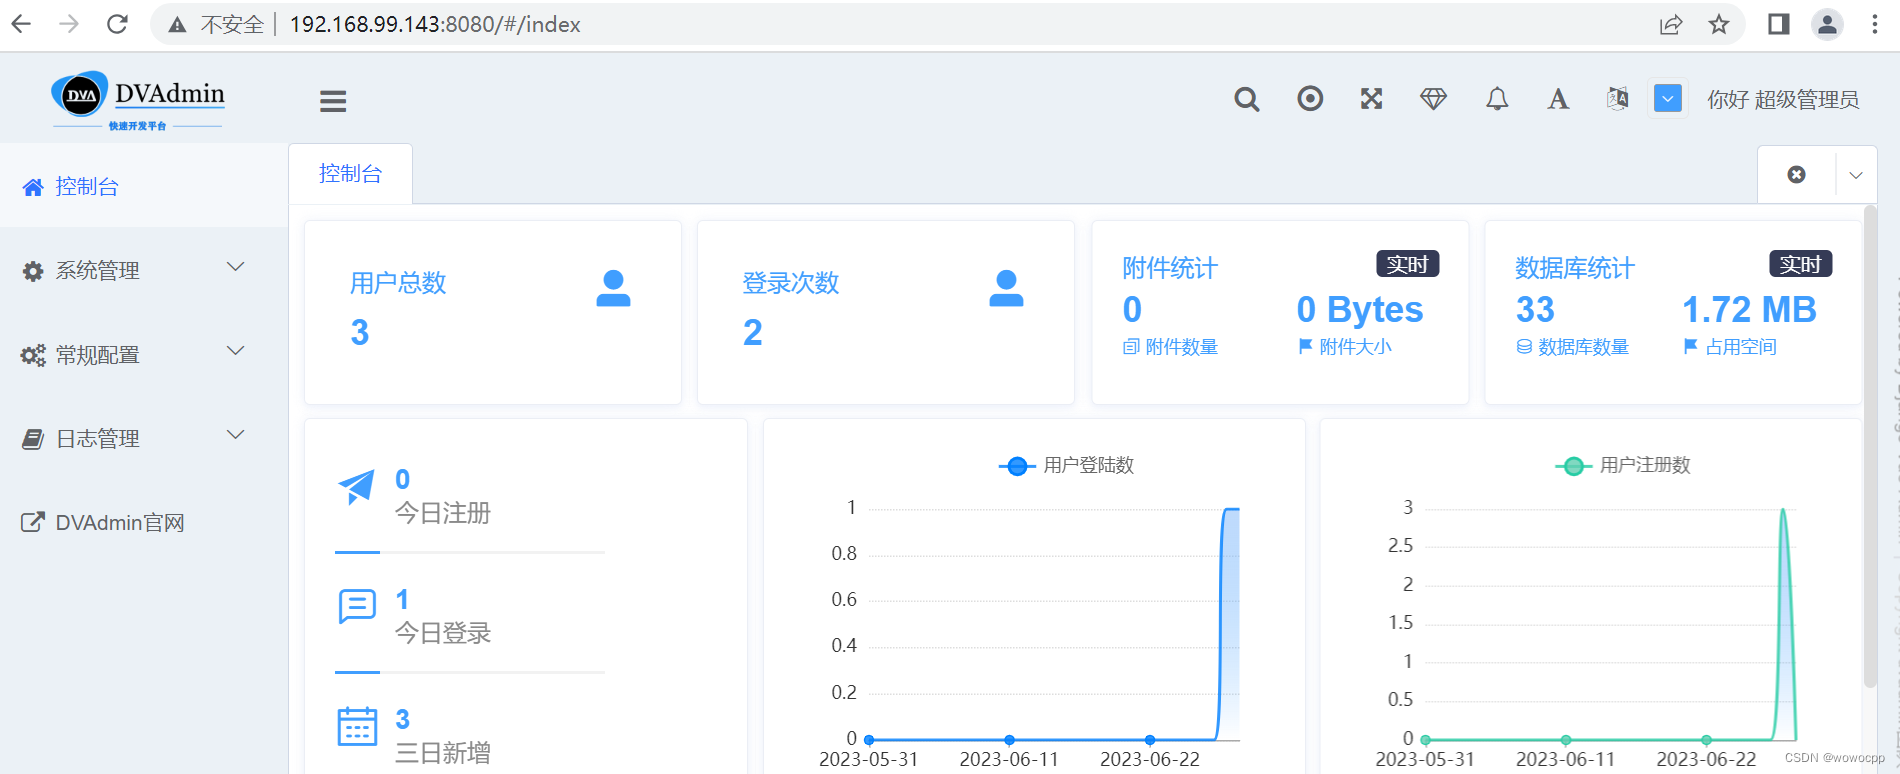
运行项目并查看接口
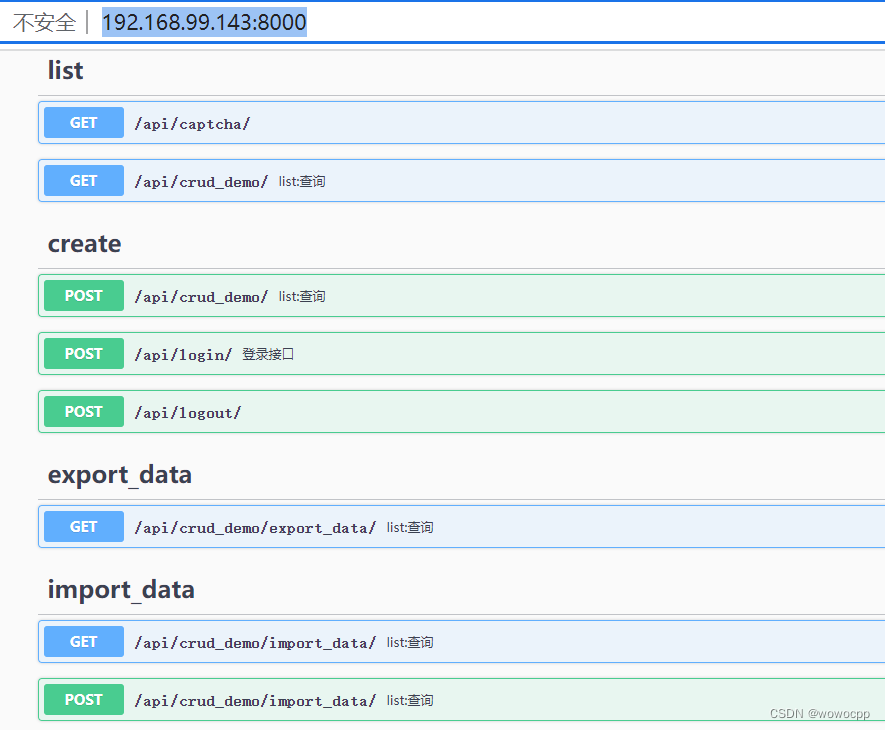
打开swgger可以看到我们配置的接口已经生效了
http://192.168.99.143:8000/
