一、初识死信交换机(P159)
当一个队列中的消息满足下列情况之一时,可以成为死信(dead letter):
(1)消费者使用basic.reject或 basic.nack声明消费失败,并且消息的requeue参数设置为false
(2)消息是一个过期消息,超时无人消费
(3)要投递的队列消息堆积满了,最早的消息可能成为死信
如果该队列配置了dead-letter-exchange属性,指定了一个交换机,那么队列中的死信就会投递到这个交换机中,而这个交换机称为死信交换机(Dead Letter Exchange,简称DLX)。
二、TTL
TTL,也就是Time-To-Live。如果一个队列中的消息TTL结束仍未消费,则会变为死信,ttl超时分为两种情况:
(1)消息所在的队列设置了存活时间
(2)消息本身设置了存活时间
我们声明一组死信交换机和队列,基于注解方式:
@Slf4j
@Component
public class SpringRabbitListener {

    @RabbitListener(bindings = @QueueBinding(
            value = @Queue(name = "dl.queue", durable = "true"),
            exchange = @Exchange(name = "dl.direct"),
            key = "dl"
    ))
    public void listenDlQueue(String msg) {
        log.info("消费者接收到了dl.queue的延迟消息");
    }

}
要给队列设置超时时间,需要在声明队列时配置 x-message-ttl 属性:
@Configuration
public class TTLMessageConfig {

    @Bean
    public DirectExchange ttlDirectExchange(){
        return new DirectExchange("ttl.direct");
    }

    @Bean
    public Queue ttlQueue(){
        return QueueBuilder
                .durable("ttl.queue")
                .ttl(10000)
                .deadLetterExchange("dl.direct")
                .deadLetterRoutingKey("dl")
                .build();
    }

    @Bean
    public Binding ttlBinding(){
        return BindingBuilder.bind(ttlQueue()).to(ttlDirectExchange()).with("ttl");
    }
}
发送消息时,给消息本身设置超时时间
    @Test
    public void testTTLMessage() {
        // 1.准备消息
        Message message = MessageBuilder
                .withBody("hello, ttl messsage".getBytes(StandardCharsets.UTF_8))
                .setDeliveryMode(MessageDeliveryMode.PERSISTENT)
                .setExpiration("5000")
                .build();
        // 2.发送消息
        rabbitTemplate.convertAndSend("ttl.direct", "ttl", message);
        // 3.记录日志
        log.info("消息已经成功发送!");
    }
队列和消息设置 ttl 属性,两者共存时,以时间短的 ttl 为准。
三、延迟队列
利用TTL结合死信交换机,我们实现了消息发出后,消费者延迟收到消息的效果。这种消息模式就称为延迟队列(Delay Queue)模式。
延迟队列的使用场景包括:
(1)延迟发送短信
(2)用户下单,如果用户在15 分钟内未支付,则自动取消
(3)预约工作会议,20分钟后自动通知所有参会人员
因为延迟队列的需求非常多,所以RabbitMQ的官方也推出了一个插件,原生支持延迟队列效果。
1. SpringAMQP使用延迟队列插件
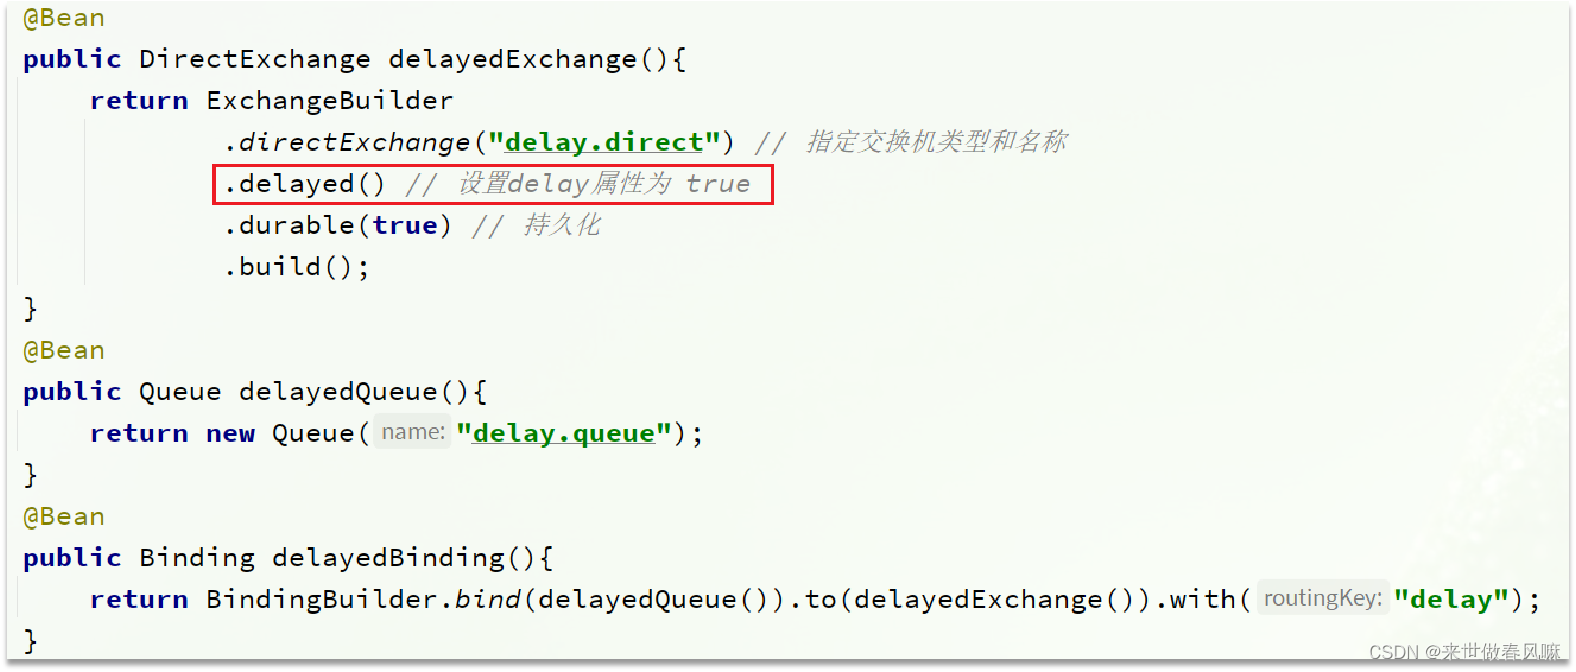
DelayExchange的本质还是官方的三种交换机,只是添加了延迟功能。因此使用时只需要声明一个交换机,交换机的类型可以是任意类型,然后设定delayed属性为true即可。
基于注解方式:
@Slf4j
@Component
public class SpringRabbitListener {


    @RabbitListener(bindings = @QueueBinding(
            value = @Queue(name = "delay.queue", durable = "true"),
            exchange = @Exchange(name = "delay.direct", delayed = "true"),
            key = "delay"
    ))
    public void listenDelayExchange(String msg) {
        log.info("消费者接收到了delay.queue的延迟消息");
    }
}
基于java代码的方式:
然后我们向这个delay为true的交换机中发送消息,一定要给消息添加一个header:x-delay,值为延迟的时间,单位为毫秒:
    @Test
    public void testSendDelayMessage() throws InterruptedException {
        // 1.准备消息
        Message message = MessageBuilder
                .withBody("hello, ttl messsage".getBytes(StandardCharsets.UTF_8))
                .setDeliveryMode(MessageDeliveryMode.PERSISTENT)
                .setHeader("x-delay", 5000)
                .build();
        // 2.准备CorrelationData
        CorrelationData correlationData = new CorrelationData(UUID.randomUUID().toString());
        // 3.发送消息
        rabbitTemplate.convertAndSend("delay.direct", "delay", message, correlationData);

        log.info("发送消息成功");
    }
判断是否是延迟消息。是一个延迟消息,忽略这个错误提示
@Slf4j
@Configuration
public class CommonConfig implements ApplicationContextAware {

    @Override
    public void setApplicationContext(ApplicationContext applicationContext) throws BeansException {
        // 获取RabbitTemplate对象
        RabbitTemplate rabbitTemplate = applicationContext.getBean(RabbitTemplate.class);
        // 配置ReturnCallback
        rabbitTemplate.setReturnCallback((message, replyCode, replyText, exchange, routingKey) -> {
            // 判断是否是延迟消息
            Integer receivedDelay = message.getMessageProperties().getReceivedDelay();
            if (receivedDelay != null && receivedDelay > 0) {
                // 是一个延迟消息,忽略这个错误提示
                return;
            }
            // 记录日志
            log.error("消息发送到队列失败,响应码:{}, 失败原因:{}, 交换机: {}, 路由key:{}, 消息: {}",
                     replyCode, replyText, exchange, routingKey, message.toString());
            // 如果有需要的话,重发消息
        });
    }
}
延迟队列插件的使用步骤包括哪些?
(1)声明一个交换机,添加delayed属性为true
(2)发送消息时,添加x-delay头,值为超时时间


