Scrapy定义
它是一个为了爬取网站的数据,提取结构性数据而编写的应用框架。可以应用在包括数据挖掘信息处理或存储历史数据等一系列的程序中
Scrapy 安装
pip install scrapy
安装过程中可能出现的错误:
报错1:building ‘twisted.test.raiser’ extension
error: Microsoft Visual C++ 14.0 is required. Get it with "Microsoft Visual C++
Build Tools": http://landinghub.visualstudio.com/visual‐cpp‐build‐tools
解决办法:
    下载twisted库,网址:http://www.lfd.uci.edu/~gohlke/pythonlibs/#twisted

    注意:cp后面是 python版本,amd64代表64位
下载对应版本,下载完成后使用 pip install twisted的路径 进行安装
安装完成后在进行安装scrapy。
报错2:提示升级pip指令:python.exe ‐m pip install ‐‐upgrade pip
解决办法:运行指令python.exe ‐m pip install ‐‐upgrade pip 即可。
报错3: win32错误。
解决办法: 运行指令 pip install pypiwin32
再报错 安装anaconda
scrapy 应用
1、创建爬虫项目 就是创建个框架
在cmd终端执行
scrapy startproject 项目名 # 项目的名字不能以数字打头,且不能包含中文
2、创建爬虫文件
爬虫文件要创建在spiders文件下
cd 项目名称\项目名称\spiders
3、创建爬虫文件
scrapy genspider 爬虫程序项目名 网址 # 网址不要带协议
4、运行爬虫文件
scrapy crawl 项目名称

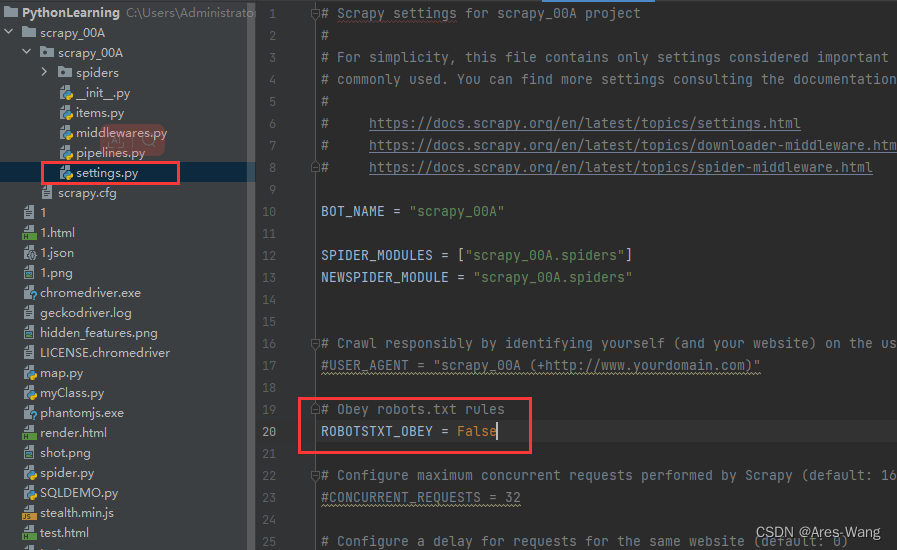
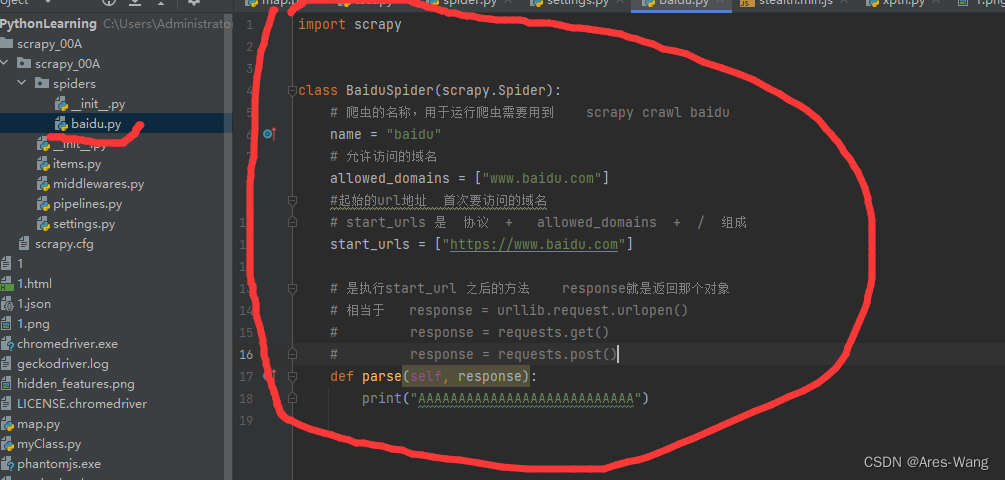
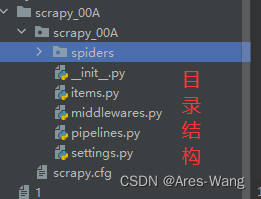
scrapy 框架结构
项目名称
项目名称
spiders —存储爬虫文件
init.py
自定义的爬虫文件.py
init.py
items.py ----定义数据结构的地方 爬取的数据包含哪些
middleware.py ----中间件 跟Vue 一样 代理
pipelines.py -----管道 用来处理下载的数据
settings.py ------配置文件 robots协议 UA定义等
所有selector对象还可以调用xpath方法
    #scr "//ul/li/a/img/@src"
    # alt = "//ul/li/a/img/@alt"

    for x in response.xpath('//ul/li/a/img'):
        print(x.xpath('./@src').extract())
import scrapy


class BaiduSpider(scrapy.Spider):
    # 爬虫的名称,用于运行爬虫需要用到    scrapy crawl baidu
    name = "baidu"
    # 允许访问的域名
    allowed_domains = ["www.baidu.com"]
    #起始的url地址  首次要访问的域名
    #  新版本的python 会自动判断 html会去掉/
    # start_urls 是  协议  +   allowed_domains  +  /  组成
    start_urls = ["https://www.baidu.com"]

    # 是执行start_url 之后的方法    response就是返回那个对象
    # 相当于   response = urllib.request.urlopen()
    #         response = requests.get()
    #         response = requests.post()
    def parse(self, response):
        print("AAAAAAAAAAAAAAAAAAAAAAAAAAA")
        # 获取响应  以字符串形式显示
        print(response.text)
        # 获取响应  以二进制数据   不是content
        print(response.body)
        # 可以直接用xpath方法来定位元素  response.xpath('xpath 语法') 返回Selector对象列表
        ###
        ##  所有selector对象还可以调用xpath方法
        ###
        ele = response.xpath('xpath 语法')[0]
        print(response.xpath('xpath 语法'))
        # 提取selector对象的data属性值
        print(ele.extract())
        # 提取selector列表的第一个数据
        print(ele.extract_first())
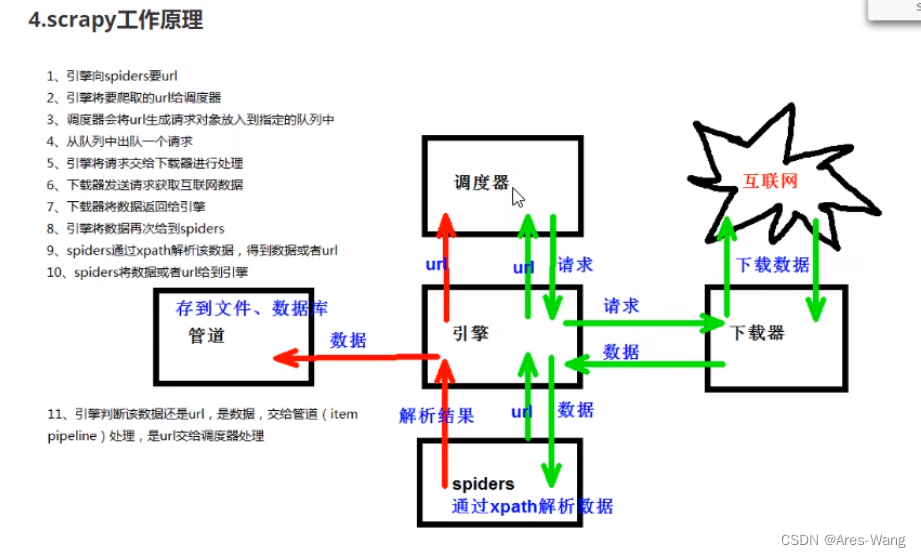
scrapy 工作原理
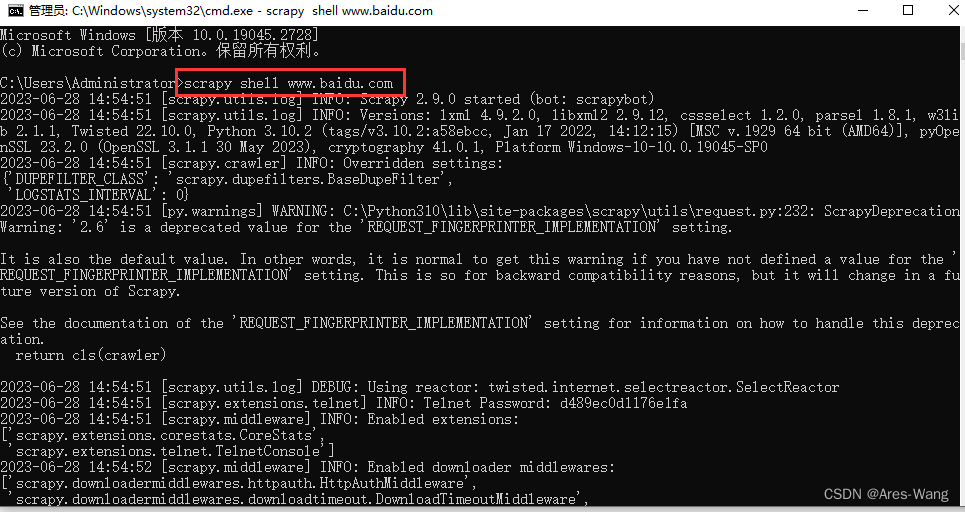
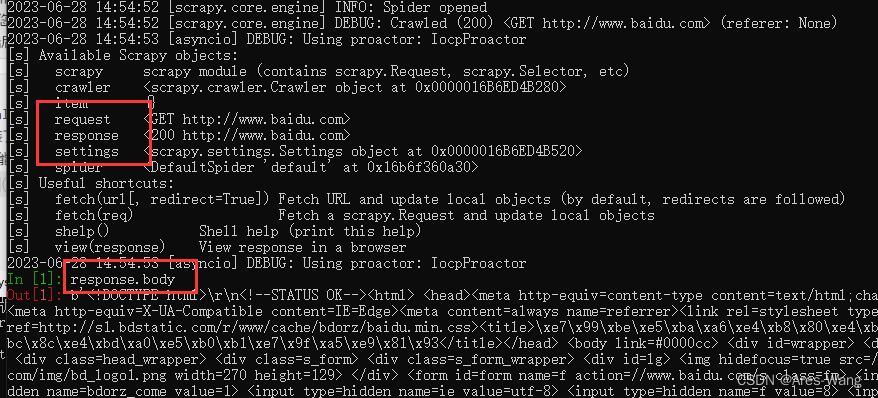
scrapy shell
实际用处不大


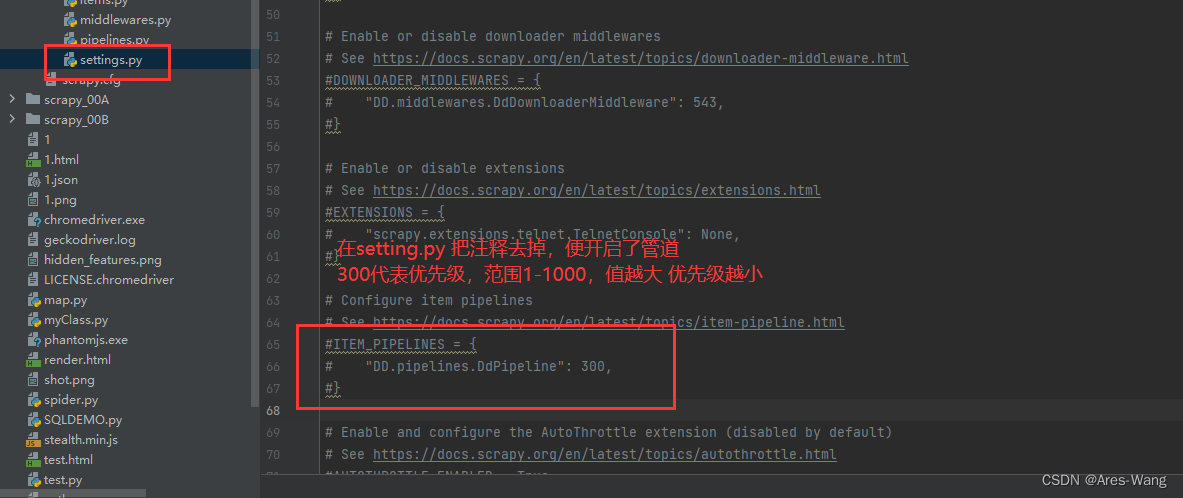
开启管道控制
要在自定义爬虫文件中,导入items.py的类
from 项目名称.items import XXItem
然后要在自定义爬虫文件def.parse 中初始化这个类
def parse(self, response)
# 参数就定义在Items.py的数据结构 xxx=scrapy.Field()
yy=xxItem(形参=实参)
# 提交给pipelines管道 yield相当于return ,只是每次都记录当前位置,下次会从下一个位置继续执行 原理跟C#yield ,foreach一样 迭代
yield yy
pipelins.py
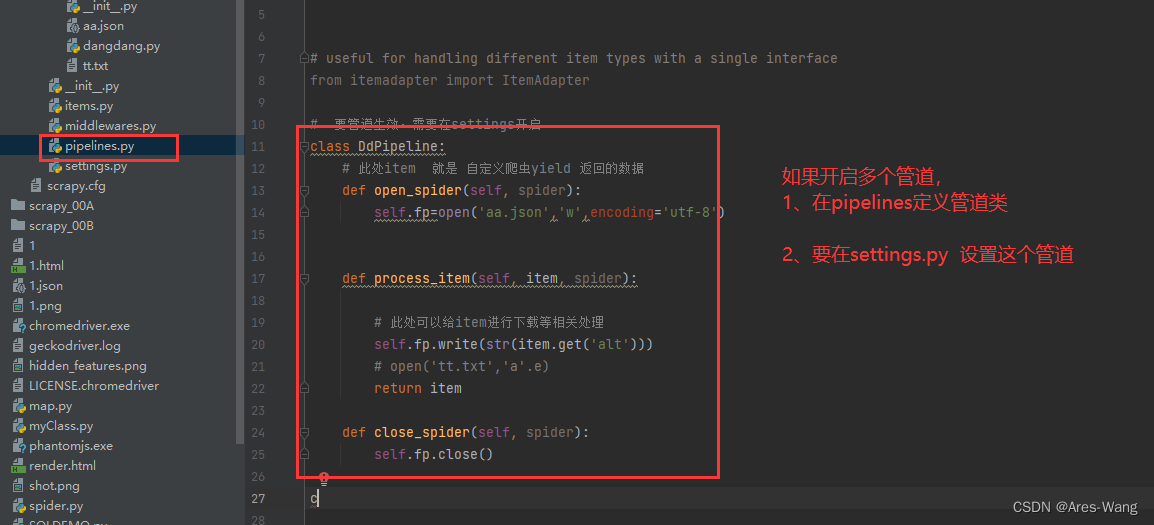
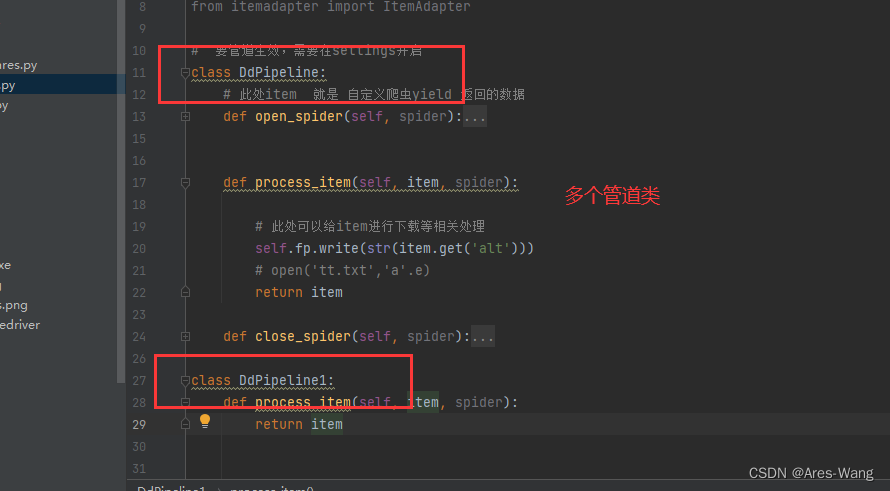
#  要管道生效,需要在settings开启
class DdPipeline:
    # 此处item  就是 自定义爬虫yield 返回的数据
    def process_item(self, item, spider):
        # 此处可以给item进行下载等相关处理
        return item

开启多管道
ITEM_PIPELINES = {
	# 爬虫项目名 . pipelines . 管道类
	# 管道类 就是在pipelines.py  定义的 class xxxx
    'myproject.pipelines.Pipeline1': 300,
    'myproject.pipelines.Pipeline2': 400,
}

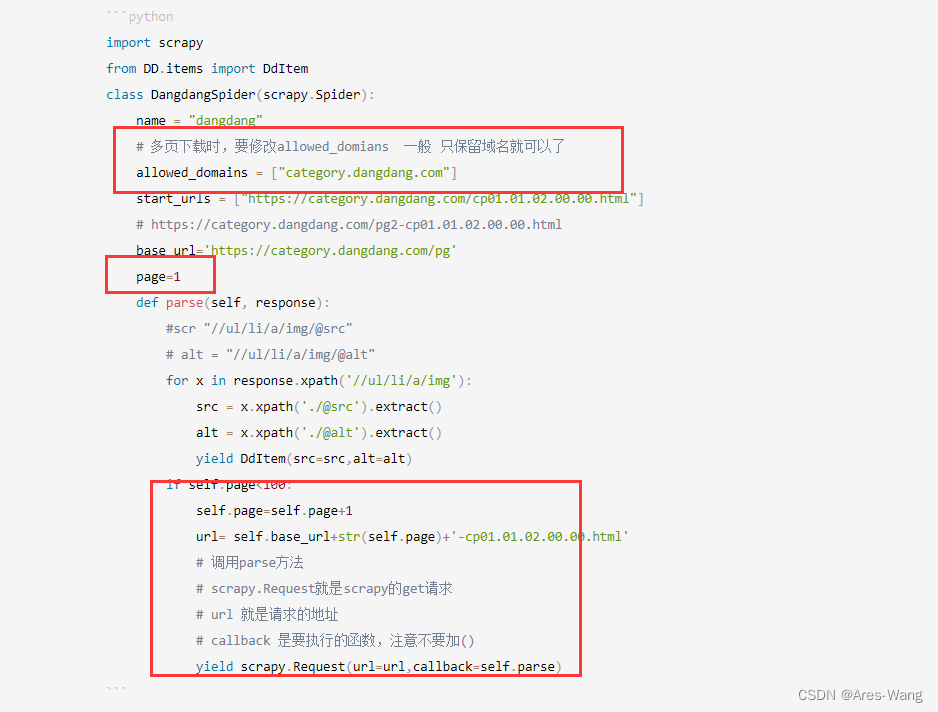
import scrapy
from DD.items import DdItem
class DangdangSpider(scrapy.Spider):
    name = "dangdang"
    # 多页下载时,要修改allowed_domians  一般 只保留域名就可以了
    allowed_domains = ["category.dangdang.com"]
    start_urls = ["https://category.dangdang.com/cp01.01.02.00.00.html"]
    # https://category.dangdang.com/pg2-cp01.01.02.00.00.html
    base_url='https://category.dangdang.com/pg'
    page=1
    def parse(self, response):
        #scr "//ul/li/a/img/@src"
        # alt = "//ul/li/a/img/@alt"
        for x in response.xpath('//ul/li/a/img'):
            src = x.xpath('./@src').extract()
            alt = x.xpath('./@alt').extract()
            yield DdItem(src=src,alt=alt)
        if self.page<100:
            self.page=self.page+1
            url= self.base_url+str(self.page)+'-cp01.01.02.00.00.html'
            # 调用parse方法
            # scrapy.Request就是scrapy的get请求
            # url 就是请求的地址
            # callback 是要执行的函数,注意不要加()
            yield scrapy.Request(url=url,callback=self.parse)
