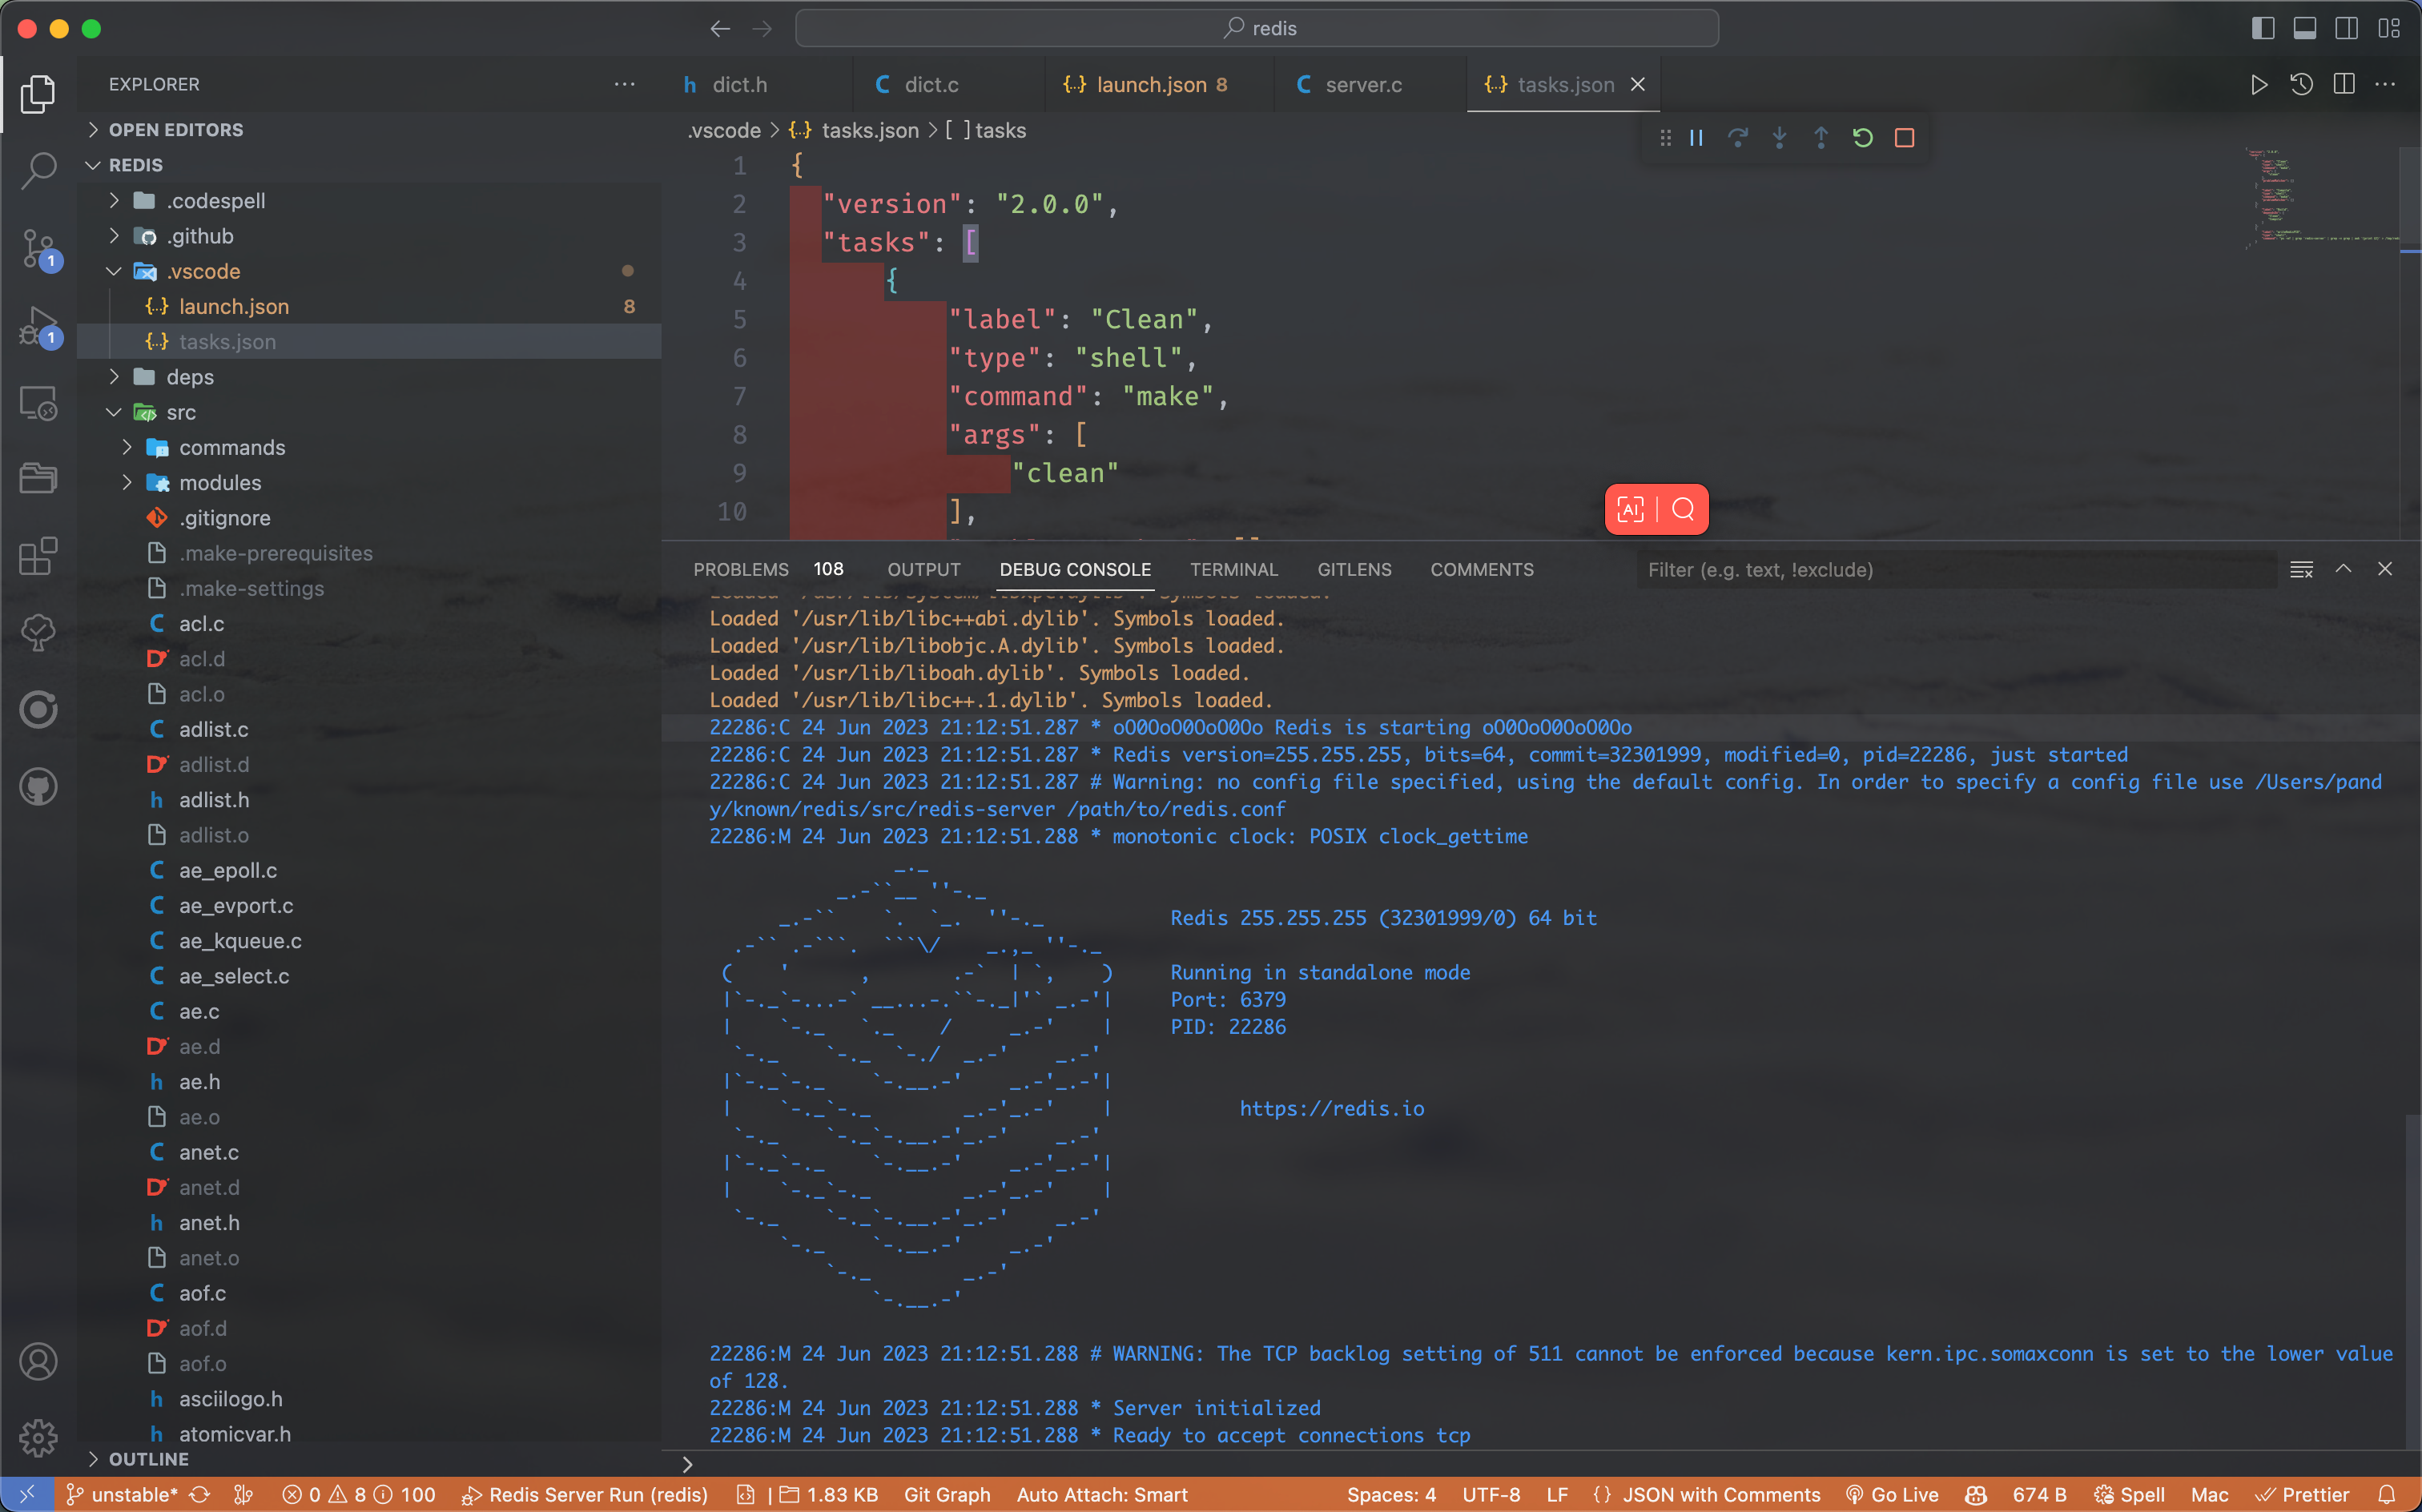
学习使用 Redis 时,从 GitHub 下载 Redis 源码是个不错的选择。在下载后,通过创建 task.json 和 launch.json 两个文件,可以方便地在本地进行 Redis 的编译、运行和调试。通过这些步骤,你可以更好地理解 Redis 的内部实现,并快速上手使用 Redis。
首先,从 GitHub 下载 Redis 源码:
Redis GitHub 链接:https://github.com/redis/redis
其次,在根目录下创建这两个文件:

创建 task.json 文件
{
  "version": "2.0.0",
  "tasks": [
      {
          "label": "Clean",
          "type": "shell",
          "command": "make",
          "args": [
              "clean"
          ],
          "problemMatcher": []
      },
      {
          "label": "Compile",
          "type": "shell",
          "command": "make",
          "problemMatcher": []
      },
      {
          "label": "Build",
          "dependsOn": [
              "Clean",
              "Compile"
          ]
      },
      {
          "label": "writeRedisPID",
          "type": "shell",
          "command": "ps -ef | grep 'redis-server' | grep -v grep | awk '{print $2}' > /tmp/redis.pid"
      }
  ]
}
创建 launch.json 文件
{
  "version": "0.2.0",
  "configurations": [
      {
          "name": "Redis Server Run",
          "type": "cppdbg",
          "request": "launch",
          "program": "${workspaceFolder}/src/redis-server",
          "args": [],
          "stopAtEntry": false,
          "cwd": "${fileDirname}",
          "environment": [],
          "externalConsole": false,
          "MIMode": "lldb",
          "preLaunchTask": "Build"
      },
      {
          "name": "Redis Server Attach",
          "type": "cppdbg",
          "request": "attach",
          "processId": "${input:redisPID}",
          "program": "${workspaceFolder}/src/redis-server",
          "args": [],
          "stopAtEntry": false,
          "cwd": "${fileDirname}",
          "environment": [],
          "externalConsole": false,
          "MIMode": "lldb",
          "preLaunchTask": "writeRedisPID",
          "subProcess": true,
          "justMyCode": true,
          "redirectOutput": true,
      }
  ],
  "inputs": [
      {
        "id": "redisPID",
        "type": "command",
        "command": "extension.commandvariable.file.content",
        "args": {
          "fileName": "/tmp/redis.pid"
        }
      }
    ]
}
按 F5 运行,可以看到,Redis 以 Debugger 形式跑起来:
