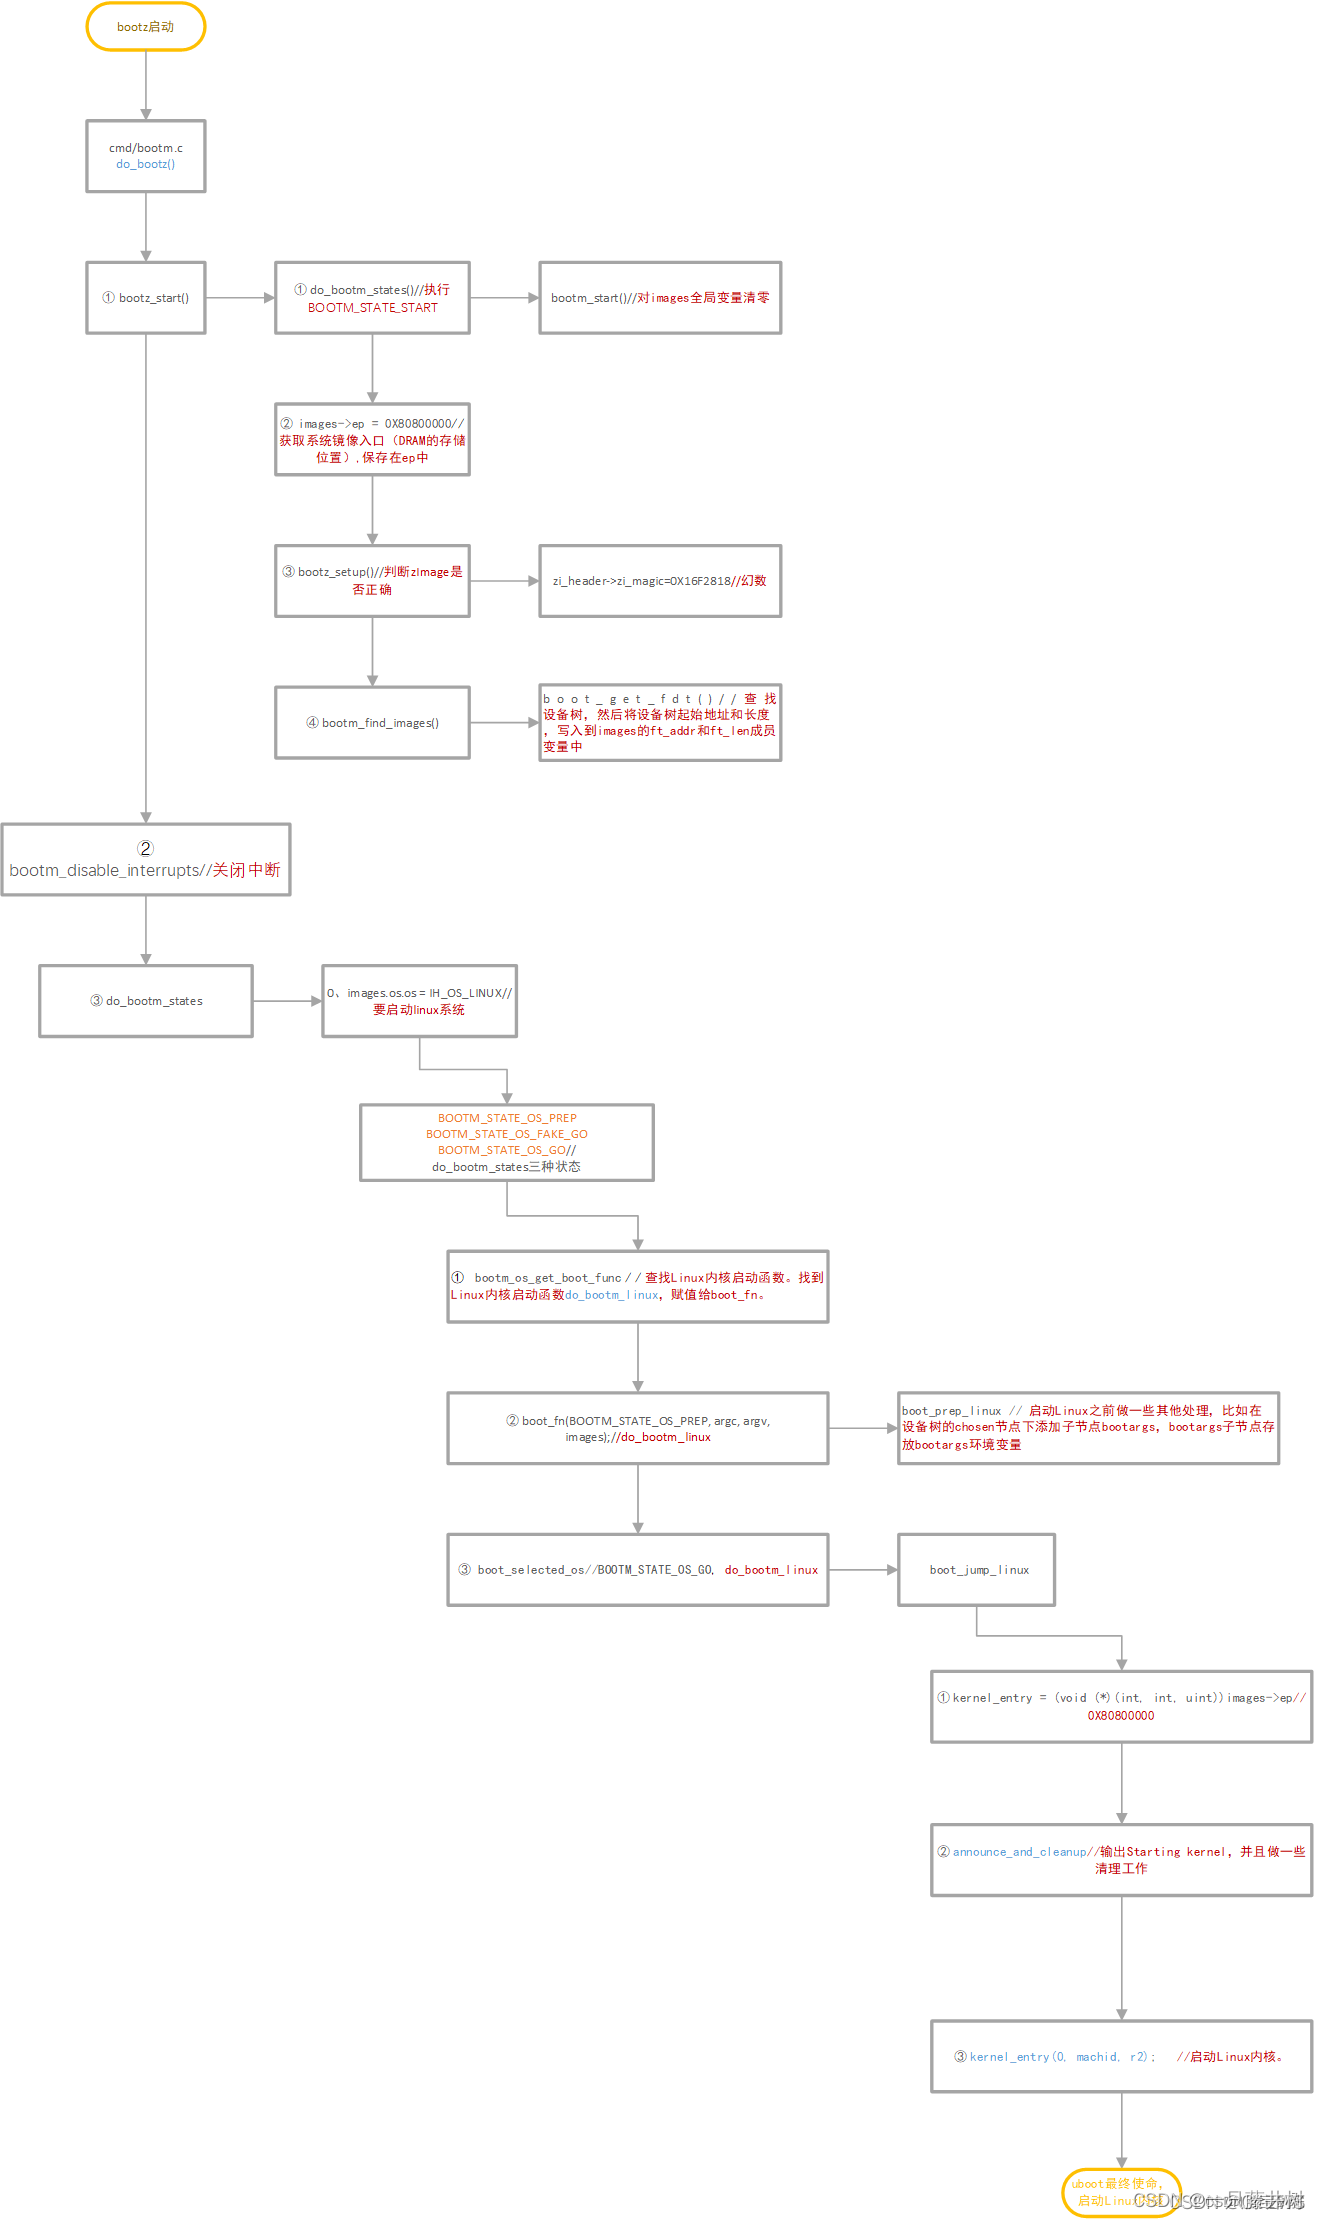
既然说要搬到Docker上,那么肯定是要把咱日常习惯用的那些东西都往docker上堆一堆看的。我最先考虑的居然是SSH,乃至于到现在我都不知道我为什么第一个想到的是SSH——因为对虚拟机来说,首先考虑的当然是如何远程管理集群中的每个机器,这个自然是需要SSH的;但是对于docker来说,难道不是直接使用docker命令就可以了?为什么要SSH?
本篇的内容,记录了诸如此类的,我在初入docker时的一系列奇思妙想,以及在这些奇思妙想引导下掉进的一个有一个大坑。不幸的是,没几个坑最终爬出来了;幸运的是,正是因为扑街得很惨,所以更容易体会“docker不是虚拟机,只是进程隔离的工具”这句话的涵义。有助于后面在使用docker时正确的认识并定位它。
一、Systemd
直接在docker里执行systemctl,一般只会得到如下反馈:
[root@d47ccf7a7196 /]# systemctl
System has not been booted with systemd as init system (PID 1). Can't operate.
Failed to connect to bus: Host is down
原因?就藏在docker的run命令里面——为什么docker run命令后面会跟一个/bin/bash之类的默认执行程序地址?或者在dockerfile文件里会使用[CMD]或者[ENTRYPOINT]来指示docker执行时默认执行程序?——从进程隔离的角度来理解,docker就是干这个事的,给你一个能够执行某个进程的最小操作系统环境而已。所以,如果没有明确的只是,docker是不会执行一个特定的进程的,比如systemd,这也就导致systemctl所依赖的服务不会被启动起来,从而我们也就没有办法使用systemctl。
1. 提前启动systemd
Linux系统的启动过程大致分为5个阶段:①内核引导;②运行init程序;③系统初始化;④建立终端;⑤用户登录操作系统。从Centos7以后,init程序就由systemd来实现,其配置文件在/usr/lib/systemd/system和/etc/systemd/system下。 
可以看到systemd包含了多个类型的服务配置,实际上systemd和之前init的区别在于init是逐个启动的,systemd支持多线程并行启动,效率上要高很多。为了提前启动systemd,可以执行/sbin/init,将其作为docker启动时的默认入口
C:\Users\dell>docker run -it --name pig01 --privileged centos:latest /sbin/init

Welcome to CentOS Linux 8!

[  OK  ] Reached target Swap.
[  OK  ] Listening on Process Core Dump Socket.
[  OK  ] Listening on udev Control Socket.
[  OK  ] Reached target Remote File Systems.
[  OK  ] Listening on Journal Socket (/dev/log).
[  OK  ] Reached target Network is Online.
[  OK  ] Set up automount Arbitrary Executable File Formats File System Automount Point.
[  OK  ] Started Forward Password Requests to Wall Directory Watch.
[  OK  ] Reached target Local File Systems.
[  OK  ] Started Dispatch Password Requests to Console Directory Watch.
[  OK  ] Reached target Local Encrypted Volumes.
[  OK  ] Reached target Paths.
[  OK  ] Listening on udev Kernel Socket.
[  OK  ] Reached target Slices.
[  OK  ] Listening on initctl Compatibility Named Pipe.
[  OK  ] Listening on Journal Socket.
         Starting udev Coldplug all Devices...
         Starting Rebuild Dynamic Linker Cache...
         Starting Rebuild Journal Catalog...
         Starting Restore /run/initramfs on shutdown...
         Starting Read and set NIS domainname from /etc/sysconfig/network...
         Starting Load/Save Random Seed...
         Starting Journal Service...
         Mounting Kernel Debug File System...
         Starting Create System Users...
         Starting Apply Kernel Variables...
         Starting Rebuild Hardware Database...
[  OK  ] Started Restore /run/initramfs on shutdown.
[  OK  ] Started Read and set NIS domainname from /etc/sysconfig/network.
[  OK  ] Mounted Kernel Debug File System.
[  OK  ] Started Create System Users.
[  OK  ] Started Apply Kernel Variables.
[  OK  ] Started Rebuild Hardware Database.
         Starting Create Static Device Nodes in /dev...
[  OK  ] Started Rebuild Journal Catalog.
[  OK  ] Started Load/Save Random Seed.
[  OK  ] Started Create Static Device Nodes in /dev.
         Starting udev Kernel Device Manager...
[  OK  ] Started Journal Service.
         Starting Flush Journal to Persistent Storage...
[  OK  ] Started Flush Journal to Persistent Storage.
         Starting Create Volatile Files and Directories...
[  OK  ] Started Rebuild Dynamic Linker Cache.
         Starting Update is Completed...
[  OK  ] Started udev Coldplug all Devices.
[  OK  ] Started udev Kernel Device Manager.
[  OK  ] Started Create Volatile Files and Directories.
[  OK  ] Started Update is Completed.
         Starting Update UTMP about System Boot/Shutdown...
[  OK  ] Started Update UTMP about System Boot/Shutdown.
[  OK  ] Reached target System Initialization.
[  OK  ] Started dnf makecache --timer.
[  OK  ] Started Daily Cleanup of Temporary Directories.
[  OK  ] Reached target Timers.
[  OK  ] Listening on D-Bus System Message Bus Socket.
[  OK  ] Reached target Sockets.
[  OK  ] Reached target Basic System.
[  OK  ] Started D-Bus System Message Bus.
         Starting Permit User Sessions...
         Starting dnf makecache...
         Starting Cleanup of Temporary Directories...
[  OK  ] Started Permit User Sessions.
[  OK  ] Reached target Multi-User System.
         Starting Update UTMP about System Runlevel Changes...
[  OK  ] Started Cleanup of Temporary Directories.
[  OK  ] Started Update UTMP about System Runlevel Changes.
See 'systemctl status dnf-makecache.service' for details.
看起来是不是特别像系统启动时的样子——其实就是一摸一样的。
系统服务目录/usr/lib/systemd下边有系统(system)和用户(user),system是需要开机没有登陆情况下就能运行的程序,user是用户登录后才能运行的程序。
然后这个程序就挂住了,需要以exec重新进入这个容器:
C:\Users\dell>docker exec -it pig01 bash
[root@6f9f323be393 /]# systemctl
  UNIT                                   LOAD   ACTIVE     SUB       DESCRIPTION
  proc-sys-fs-binfmt_misc.automount      loaded active     waiting   Arbitrary Executable File Formats File System Automount Point
  dev-sdc.device                         loaded activating tentative /dev/sdc
  -.mount                                loaded active     mounted   Root Mount
  dev-mqueue.mount                       loaded active     mounted   POSIX Message Queue File System
  etc-hostname.mount                     loaded active     mounted   /etc/hostname
  etc-hosts.mount                        loaded active     mounted   /etc/hosts
  etc-resolv.conf.mount                  loaded active     mounted   /etc/resolv.conf
  sys-kernel-debug.mount                 loaded active     mounted   Kernel Debug File System
  systemd-ask-password-console.path      loaded active     waiting   Dispatch Password Requests to Console Directory Watch
  systemd-ask-password-wall.path         loaded active     waiting   Forward Password Requests to Wall Directory Watch
  init.scope                             loaded active     running   System and Service Manager
  dbus.service                           loaded active     running   D-Bus System Message Bus
  ldconfig.service                       loaded active     exited    Rebuild Dynamic Linker Cache
  nis-domainname.service                 loaded active     exited    Read and set NIS domainname from /etc/sysconfig/network
  systemd-hwdb-update.service            loaded active     exited    Rebuild Hardware Database
  systemd-journal-catalog-update.service loaded active     exited    Rebuild Journal Catalog
  systemd-journal-flush.service          loaded active     exited    Flush Journal to Persistent Storage
  systemd-journald.service               loaded active     running   Journal Service
  systemd-random-seed.service            loaded active     exited    Load/Save Random Seed
  systemd-sysctl.service                 loaded active     exited    Apply Kernel Variables
  systemd-sysusers.service               loaded active     exited    Create System Users
  systemd-tmpfiles-setup-dev.service     loaded active     exited    Create Static Device Nodes in /dev
  systemd-tmpfiles-setup.service         loaded active     exited    Create Volatile Files and Directories
  systemd-udev-trigger.service           loaded active     exited    udev Coldplug all Devices
  systemd-udevd.service                  loaded active     running   udev Kernel Device Manager
  systemd-update-done.service            loaded active     exited    Update is Completed
  systemd-update-utmp.service            loaded active     exited    Update UTMP about System Boot/Shutdown
  systemd-user-sessions.service          loaded active     exited    Permit User Sessions
  -.slice                                loaded active     active    Root Slice
  system.slice                           loaded active     active    System Slice
  dbus.socket                            loaded active     running   D-Bus System Message Bus Socket
  systemd-coredump.socket                loaded active     listening Process Core Dump Socket
lines 1-35
systemctl也能够使用了。(使用dokken/centos-stream-8试验,如果使用官方的那个centos:latest,因为已经不更了,所以yum库会有问题,需要后面手工更改)
为了测试一下这个ssh是否确实通了,我们另开一个容器,安装openssh-clients来测试:
C:\Users\dell>docker run -it --name pig02 dokken/centos-stream-8 bash
[root@fc88b5d2d81f /]#
[root@fc88b5d2d81f /]#
[root@fc88b5d2d81f /]#
[root@fc88b5d2d81f /]# yum list openssh*
CentOS Stream 8 - AppStream                                                             6.7 MB/s |  26 MB     00:03
CentOS Stream 8 - BaseOS                                                                2.4 MB/s |  26 MB     00:10
CentOS Stream 8 - Extras                                                                 30 kB/s |  18 kB     00:00
CentOS Stream 8 - Extras common packages                                                2.8 kB/s | 5.2 kB     00:01
Available Packages
openssh.x86_64                                              8.0p1-16.el8                                       baseos
openssh-askpass.x86_64                                      8.0p1-16.el8                                       appstream
openssh-cavs.x86_64                                         8.0p1-16.el8                                       baseos
openssh-clients.x86_64                                      8.0p1-16.el8                                       baseos
openssh-keycat.x86_64                                       8.0p1-16.el8                                       baseos
openssh-ldap.x86_64                                         8.0p1-16.el8                                       baseos
openssh-server.x86_64                                       8.0p1-16.el8                                       baseos
[root@fc88b5d2d81f /]# yum install -y openssh-clients
Last metadata expiration check: 0:00:27 ago on Fri Dec  2 04:07:55 2022.
Dependencies resolved.
========================================================================================================================
 Package                        Architecture          Version                               Repository             Size
========================================================================================================================
Installing:
 openssh-clients                x86_64                8.0p1-16.el8                          baseos                669 k
Installing dependencies:
 libedit                        x86_64                3.1-23.20170329cvs.el8                baseos                102 k
 openssh                        x86_64                8.0p1-16.el8                          baseos                523 k

Transaction Summary
========================================================================================================================
Install  3 Packages

Total download size: 1.3 M
Installed size: 4.5 M
Downloading Packages:
(1/3): libedit-3.1-23.20170329cvs.el8.x86_64.rpm                                        1.1 MB/s | 102 kB     00:00
(2/3): openssh-clients-8.0p1-16.el8.x86_64.rpm                                          3.8 MB/s | 669 kB     00:00
(3/3): openssh-8.0p1-16.el8.x86_64.rpm                                                  837 kB/s | 523 kB     00:00
------------------------------------------------------------------------------------------------------------------------
Total                                                                                   1.1 MB/s | 1.3 MB     00:01
Running transaction check
Transaction check succeeded.
Running transaction test
Transaction test succeeded.
Running transaction
  Preparing        :                                                                                                1/1
  Running scriptlet: openssh-8.0p1-16.el8.x86_64                                                                    1/3
  Installing       : openssh-8.0p1-16.el8.x86_64                                                                    1/3
  Installing       : libedit-3.1-23.20170329cvs.el8.x86_64                                                          2/3
  Installing       : openssh-clients-8.0p1-16.el8.x86_64                                                            3/3
  Running scriptlet: openssh-clients-8.0p1-16.el8.x86_64                                                            3/3
  Verifying        : libedit-3.1-23.20170329cvs.el8.x86_64                                                          1/3
  Verifying        : openssh-8.0p1-16.el8.x86_64                                                                    2/3
  Verifying        : openssh-clients-8.0p1-16.el8.x86_64                                                            3/3

Installed:
  libedit-3.1-23.20170329cvs.el8.x86_64      openssh-8.0p1-16.el8.x86_64      openssh-clients-8.0p1-16.el8.x86_64

Complete!
[root@fc88b5d2d81f /]# ssh
usage: ssh [-46AaCfGgKkMNnqsTtVvXxYy] [-B bind_interface]
           [-b bind_address] [-c cipher_spec] [-D [bind_address:]port]
           [-E log_file] [-e escape_char] [-F configfile] [-I pkcs11]
           [-i identity_file] [-J [user@]host[:port]] [-L address]
           [-l login_name] [-m mac_spec] [-O ctl_cmd] [-o option] [-p port]
           [-Q query_option] [-R address] [-S ctl_path] [-W host:port]
           [-w local_tun[:remote_tun]] destination [command]
安装openssh-server的容器,ip地址是172.17.0.2;
C:\Users\dell>docker run -it --name pig02 dokken/centos-stream-8 bash
[root@fc88b5d2d81f /]#
[root@fc88b5d2d81f /]#
[root@fc88b5d2d81f /]#
[root@fc88b5d2d81f /]# yum list openssh*
CentOS Stream 8 - AppStream                                                             6.7 MB/s |  26 MB     00:03
CentOS Stream 8 - BaseOS                                                                2.4 MB/s |  26 MB     00:10
CentOS Stream 8 - Extras                                                                 30 kB/s |  18 kB     00:00
CentOS Stream 8 - Extras common packages                                                2.8 kB/s | 5.2 kB     00:01
Available Packages
openssh.x86_64                                              8.0p1-16.el8                                       baseos
openssh-askpass.x86_64                                      8.0p1-16.el8                                       appstream
openssh-cavs.x86_64                                         8.0p1-16.el8                                       baseos
openssh-clients.x86_64                                      8.0p1-16.el8                                       baseos
openssh-keycat.x86_64                                       8.0p1-16.el8                                       baseos
openssh-ldap.x86_64                                         8.0p1-16.el8                                       baseos
openssh-server.x86_64                                       8.0p1-16.el8                                       baseos
[root@fc88b5d2d81f /]# yum install -y openssh-clients
Last metadata expiration check: 0:00:27 ago on Fri Dec  2 04:07:55 2022.
Dependencies resolved.
========================================================================================================================
 Package                        Architecture          Version                               Repository             Size
========================================================================================================================
Installing:
 openssh-clients                x86_64                8.0p1-16.el8                          baseos                669 k
Installing dependencies:
 libedit                        x86_64                3.1-23.20170329cvs.el8                baseos                102 k
 openssh                        x86_64                8.0p1-16.el8                          baseos                523 k

Transaction Summary
========================================================================================================================
Install  3 Packages

Total download size: 1.3 M
Installed size: 4.5 M
Downloading Packages:
(1/3): libedit-3.1-23.20170329cvs.el8.x86_64.rpm                                        1.1 MB/s | 102 kB     00:00
(2/3): openssh-clients-8.0p1-16.el8.x86_64.rpm                                          3.8 MB/s | 669 kB     00:00
(3/3): openssh-8.0p1-16.el8.x86_64.rpm                                                  837 kB/s | 523 kB     00:00
------------------------------------------------------------------------------------------------------------------------
Total                                                                                   1.1 MB/s | 1.3 MB     00:01
Running transaction check
Transaction check succeeded.
Running transaction test
Transaction test succeeded.
Running transaction
  Preparing        :                                                                                                1/1
  Running scriptlet: openssh-8.0p1-16.el8.x86_64                                                                    1/3
  Installing       : openssh-8.0p1-16.el8.x86_64                                                                    1/3
  Installing       : libedit-3.1-23.20170329cvs.el8.x86_64                                                          2/3
  Installing       : openssh-clients-8.0p1-16.el8.x86_64                                                            3/3
  Running scriptlet: openssh-clients-8.0p1-16.el8.x86_64                                                            3/3
  Verifying        : libedit-3.1-23.20170329cvs.el8.x86_64                                                          1/3
  Verifying        : openssh-8.0p1-16.el8.x86_64                                                                    2/3
  Verifying        : openssh-clients-8.0p1-16.el8.x86_64                                                            3/3

Installed:
  libedit-3.1-23.20170329cvs.el8.x86_64      openssh-8.0p1-16.el8.x86_64      openssh-clients-8.0p1-16.el8.x86_64

Complete!
[root@fc88b5d2d81f /]# ssh
usage: ssh [-46AaCfGgKkMNnqsTtVvXxYy] [-B bind_interface]
           [-b bind_address] [-c cipher_spec] [-D [bind_address:]port]
           [-E log_file] [-e escape_char] [-F configfile] [-I pkcs11]
           [-i identity_file] [-J [user@]host[:port]] [-L address]
           [-l login_name] [-m mac_spec] [-O ctl_cmd] [-o option] [-p port]
           [-Q query_option] [-R address] [-S ctl_path] [-W host:port]
           [-w local_tun[:remote_tun]] destination [command]
我们从client的容器登录测试一下
[root@fc88b5d2d81f /]# ssh root@172.17.0.2
The authenticity of host '172.17.0.2 (172.17.0.2)' can't be established.
ECDSA key fingerprint is SHA256:qIaSvGeRl5K7FEw7Es39eiUyf1tV7p0h7tPRY0YT9HA.
Are you sure you want to continue connecting (yes/no/[fingerprint])? yes
Warning: Permanently added '172.17.0.2' (ECDSA) to the list of known hosts.
root@172.17.0.2's password:
Last failed login: Fri Dec  2 04:15:46 UTC 2022 from 172.17.0.3 on ssh:notty
There were 3 failed login attempts since the last successful login.
[root@dd1e49279724 ~]#
从前面提示的容器号的改变可以看出,已经切换到server容器中了。
PS1:更改密码
dokken/centos-stream-8镜像载入容器是默认以root用户登录的,在ssh的时候需要提供密码——当然我并不知道初始密码是什么。不过解决办法也很简单,在容器内更改就是:
[root@dd1e49279724 system]# whoami
root
[root@dd1e49279724 system]# passwd
Changing password for user root.
New password:
Retype new password:
passwd: all authentication tokens updated successfully.
[root@dd1e49279724 system]#
PS2:为什么是新开一个容器
细心的话,可能已经看到了我们前面标红的一段字——新开一个容器?至于为什么这么麻烦,不是直接从windows的CMD直接ssh,我们后文分解。
2.安装systemctl替代工具
由于systemctl要以来systemd服务。那么,想在没有systemd支持的情况下使用systemctl功能的另一种方法,是使用第三方提供的systemctl替代工具gdraheim2 docker-systemctl-replacement。
该工具基于python2脚本,所以实现需要在容器中安装python2:
[root@44ed0fe563f3 bin]# yum install python2 -y
Last metadata expiration check: 0:00:12 ago on Fri Dec  2 04:55:56 2022.
Dependencies resolved.
======================================================================================================================================================================
 Package                                     Architecture              Version                                                     Repository                    Size
======================================================================================================================================================================
Installing:
 python2                                     x86_64                    2.7.18-11.module_el8.7.0+1179+42dadd5f                      appstream                    110 k
Installing dependencies:
 python2-libs                                x86_64                    2.7.18-11.module_el8.7.0+1179+42dadd5f                      appstream                    6.0 M
 python2-pip-wheel                           noarch                    9.0.3-19.module_el8.6.0+987+71f62bb6                        appstream                    892 k
 python2-setuptools-wheel                    noarch                    39.0.1-13.module_el8.5.0+743+cd2f5d28                       appstream                    287 k
Installing weak dependencies:
 python2-pip                                 noarch                    9.0.3-19.module_el8.6.0+987+71f62bb6                        appstream                    1.6 M
 python2-setuptools                          noarch                    39.0.1-13.module_el8.5.0+743+cd2f5d28                       appstream                    642 k
Enabling module streams:
 python27                                                              2.7

Transaction Summary
======================================================================================================================================================================
Install  6 Packages

Total download size: 9.5 M
Installed size: 37 M
Downloading Packages:
(1/6): python2-2.7.18-11.module_el8.7.0+1179+42dadd5f.x86_64.rpm                                                                      1.0 MB/s | 110 kB     00:00
(2/6): python2-pip-wheel-9.0.3-19.module_el8.6.0+987+71f62bb6.noarch.rpm                                                              2.3 MB/s | 892 kB     00:00
(3/6): python2-pip-9.0.3-19.module_el8.6.0+987+71f62bb6.noarch.rpm                                                                    2.4 MB/s | 1.6 MB     00:00
(4/6): python2-setuptools-39.0.1-13.module_el8.5.0+743+cd2f5d28.noarch.rpm                                                            2.5 MB/s | 642 kB     00:00
(5/6): python2-setuptools-wheel-39.0.1-13.module_el8.5.0+743+cd2f5d28.noarch.rpm                                                      2.4 MB/s | 287 kB     00:00
(6/6): python2-libs-2.7.18-11.module_el8.7.0+1179+42dadd5f.x86_64.rpm                                                                 4.4 MB/s | 6.0 MB     00:01
----------------------------------------------------------------------------------------------------------------------------------------------------------------------
Total                                                                                                                                 5.2 MB/s | 9.5 MB     00:01
Running transaction check
Transaction check succeeded.
Running transaction test
Transaction test succeeded.
Running transaction
  Preparing        :                                                                                                                                              1/1
  Installing       : python2-setuptools-wheel-39.0.1-13.module_el8.5.0+743+cd2f5d28.noarch                                                                        1/6
  Installing       : python2-pip-wheel-9.0.3-19.module_el8.6.0+987+71f62bb6.noarch                                                                                2/6
  Installing       : python2-libs-2.7.18-11.module_el8.7.0+1179+42dadd5f.x86_64                                                                                   3/6
  Installing       : python2-pip-9.0.3-19.module_el8.6.0+987+71f62bb6.noarch                                                                                      4/6
  Installing       : python2-setuptools-39.0.1-13.module_el8.5.0+743+cd2f5d28.noarch                                                                              5/6
  Installing       : python2-2.7.18-11.module_el8.7.0+1179+42dadd5f.x86_64                                                                                        6/6
  Running scriptlet: python2-2.7.18-11.module_el8.7.0+1179+42dadd5f.x86_64                                                                                        6/6
  Verifying        : python2-2.7.18-11.module_el8.7.0+1179+42dadd5f.x86_64                                                                                        1/6
  Verifying        : python2-libs-2.7.18-11.module_el8.7.0+1179+42dadd5f.x86_64                                                                                   2/6
  Verifying        : python2-pip-9.0.3-19.module_el8.6.0+987+71f62bb6.noarch                                                                                      3/6
  Verifying        : python2-pip-wheel-9.0.3-19.module_el8.6.0+987+71f62bb6.noarch                                                                                4/6
  Verifying        : python2-setuptools-39.0.1-13.module_el8.5.0+743+cd2f5d28.noarch                                                                              5/6
  Verifying        : python2-setuptools-wheel-39.0.1-13.module_el8.5.0+743+cd2f5d28.noarch                                                                        6/6

Installed:
  python2-2.7.18-11.module_el8.7.0+1179+42dadd5f.x86_64                          python2-libs-2.7.18-11.module_el8.7.0+1179+42dadd5f.x86_64
  python2-pip-9.0.3-19.module_el8.6.0+987+71f62bb6.noarch                        python2-pip-wheel-9.0.3-19.module_el8.6.0+987+71f62bb6.noarch
  python2-setuptools-39.0.1-13.module_el8.5.0+743+cd2f5d28.noarch                python2-setuptools-wheel-39.0.1-13.module_el8.5.0+743+cd2f5d28.noarch

Complete!
[root@44ed0fe563f3 bin]#
从github上将替代脚本拷贝到/usr/bin/下,替换systemctl,并赋予执行权限:
[root@44ed0fe563f3 bin]# wget https://raw.githubusercontent.com/gdraheim/docker-systemctl-replacement/master/files/docker/systemctl.py -O /usr/bin/systemctl
--2022-12-02 05:01:51--  https://raw.githubusercontent.com/gdraheim/docker-systemctl-replacement/master/files/docker/systemctl.py
Resolving raw.githubusercontent.com (raw.githubusercontent.com)... 185.199.110.133, 185.199.109.133, 185.199.111.133, ...
Connecting to raw.githubusercontent.com (raw.githubusercontent.com)|185.199.110.133|:443... connected.
HTTP request sent, awaiting response... 200 OK
Length: 291424 (285K) [text/plain]
Saving to: ‘/usr/bin/systemctl’

/usr/bin/systemctl                        100%[===================================================================================>] 284.59K  1.65MB/s    in 0.2s

2022-12-02 05:01:51 (1.65 MB/s) - ‘/usr/bin/systemctl’ saved [291424/291424]

[root@44ed0fe563f3 bin]# chmod a+x /usr/bin/systemctl
执行,虽然格式上没有官方的好看,但总是能用了嘛:
[root@44ed0fe563f3 /]# systemctl
README.service  loaded inactive dead
arp-ethers.service      loaded inactive dead    Load static arp entries
atd.service     loaded inactive dead    Job spooling tools
autovt@.service loaded inactive dead    Getty on
basic.target    loaded inactive dead    Basic System
bluetooth.target        loaded active dead      Bluetooth
boot-complete.target    loaded active dead      Boot Completion Check
console-getty.service   loaded inactive dead
…………
…………
time-sync.target        loaded active dead      System Time Synchronized
timers.target   loaded active dead      Timers
tmp.mount       loaded unknown dead     Temporary Directory (/tmp)
umount.target   loaded active dead      Unmount All Filesystems
unbound-anchor.service  loaded inactive dead    update of the root trust anchor for DNSSEC validation in unbound
unbound-anchor.timer    loaded unknown dead     daily update of the root trust anchor for DNSSEC
user-runtime-dir@.service       loaded inactive dead    User runtime directory /run/user/
user.slice      loaded unknown dead     User and Session Slice
user@.service   loaded inactive dead    User Manager for UID

185 loaded units listed.
To show all installed unit files use 'systemctl list-unit-files'.
[root@44ed0fe563f3 /]#
回头再来看一看作者提供的dockerfile:
FROM centos:7.7.1908

LABEL __copyright__="(C) Guido U. Draheim, licensed under the EUPL" \
      __version__="1.4.4147"
ARG PASSWORD=Test.P@ssw0rd
EXPOSE 22

# RUN yum install -y epel-release
RUN yum search sshd
RUN yum install -y openssh-server
RUN rpm -q --list openssh-server
COPY files/docker/systemctl.py /usr/bin/systemctl
RUN : \
  ; mkdir /etc/systemd/system/sshd-keygen.service.d \
  ; { echo "[Install]"; echo "WantedBy=multi-user.target"; } \
        > /etc/systemd/system/sshd-keygen.service.d/enabled.conf
RUN systemctl enable sshd-keygen
RUN systemctl enable sshd
#
RUN yum install -y openssh-clients
RUN rpm -q --list openssh-clients
RUN useradd -g nobody testuser
RUN echo $PASSWORD | passwd --stdin testuser
RUN date -I > /home/testuser/date.txt
CMD /usr/bin/systemctl作者给出了很多版本和服务的dockerfile,可以用来编译对应的images。以上面ssh的为例,实际就是在基础映像上安装了openssl,替换systemctl,然后启动ssh服务。这里一个需要注意的问题是,默认的程序入口设置在了/user/bin/systemctl。这个应该跟docker的管理机制有关。据该工具作者的说法,docker将CMD/ENTRYPOINT启动的程序的PID置为1,而docker向容器发送的stop命令,只有PID为1的程序能收到。这个白话一点,就是容器的生命周期管理等同于对容器中PID=1的进程的管理,不能随心所欲——比如不是我们正经用来干活的app,而是某个服务进程等等。所以,这里作者以这个替换的systemctl作为默认程序启动,在其内部还处理了一部分docker进程管理的内容;感兴趣的话可以cat一下systemctl.py的代码,搜索一下'pid'关键字。
二、Service那些事
不管是直接/sbin/init的方法,还是第三方工具替代的方法,总是给人一种不太稳妥的感觉。一个是一次启动一大堆,也不知道哪个有用哪个没用,环境对或不对——实际总能不经意看到各种报错信息;另一种是把生杀大权完全交给第三方,不知道它在那倒腾啥。相比之下,我们还是比较喜欢纯手撸的感觉,比如是否可以以非systemctl的方式将服务启动起来?
答案当然是完全可以,服务也是一个程序而已。
前面说到,与服务相关的配置文件,在系统中有2个地方,一个是/usr/lib/systemd/system,一个是etc/system/systemd。根据菜鸟教程上的解释:
etc 是etcetera(等等)的简写,该目录用来存放所有的系统管理所需要的配置文件,有那么一点类似于windows下的注册表。
usr 是unix share resource的简写,该目录用来存放用户应用程序,类似于windows下的program files目录。
据说,系统的服务存放在/usr/lib/systemd/system/下,用户的存放在/etc/systemd/user/下,虽然两边的systemd下其实都有system和user子目录。
手工启动服务,实际上只不过是根据服务配置文件描述,准备好服务的启动环境,然后以daemon方式启动服务的程序而已。
1. .service文件格式
继续以ssh为例。载入dokken/centos-stream-8镜像,yum安装openssl-server后,在/usr/lib/systemd/system下,可以找到sshd.service文件,它指出了ssh服务启动的条件,及其与其他服务的关系:
[root@6f8f39825b78 /]# cd /usr/lib/systemd
[root@6f8f39825b78 systemd]# cd system
[root@6f8f39825b78 system]# ls
arp-ethers.service                      network.target                        systemd-backlight@.service
…… ……
initrd-cleanup.service                  sshd-keygen.target                    systemd-udev-trigger.service
initrd-fs.target                        sshd-keygen@.service                  systemd-udev-trigger.service.d
initrd-parse-etc.service                sshd.service                          systemd-udevd-control.socket
initrd-root-device.target               sshd.socket                           systemd-udevd-kernel.socket
initrd-root-fs.target                   sshd@.service                         systemd-udevd.service
…… ……
network-pre.target                      systemd-ask-password-wall.service
[root@6f8f39825b78 system]# cat sshd.service
[Unit]
Description=OpenSSH server daemon
Documentation=man:sshd(8) man:sshd_config(5)
After=network.target sshd-keygen.target
Wants=sshd-keygen.target

[Service]
Type=notify
EnvironmentFile=-/etc/crypto-policies/back-ends/opensshserver.config
EnvironmentFile=-/etc/sysconfig/sshd
ExecStart=/usr/sbin/sshd -D $OPTIONS $CRYPTO_POLICY
ExecReload=/bin/kill -HUP $MAINPID
KillMode=process
Restart=on-failure
RestartSec=42s

[Install]
WantedBy=multi-user.target
[root@6f8f39825b78 system]#
(1)unit字段:描述依赖关系与启动顺序
Description:服务的描述
Documention:服务的文档
After:表示不涉及依赖关系的启动顺序,本服务在该服务之后启动。不涉及依赖关系的含义指即使前序服务未启动,也不至于影响本服务的正常启动,但可能造成功能性问题。
Before:不涉及依赖关系的启动顺序,本服务在该服务之前启动。
Wants:表示本服务和某服务存在弱依赖关系,该服务停止运行或退出不影响本服务继续运行。
Requires:表示强依赖关系,即该服务停止运行或退出,则本服务也必须停止运行
(2)service字段:描述环境变量,启动、重启与停止方式
Type:服务启动类型。simple为立即启动,并不会启动其它服务(子进程方式);notify,与simple一样,不同在于其会向systemd回发一个通知信号;forking,该服务fork,且父进程退出后服务启动成功,使用该类型需要指定PIDFile,以便systemd管理;oneshot,适用于启动后完成一项操作立即退出的服务;dbus,当指定的busname出现在Dbus总线上时,服务启动成功。
EnvironmentFile:环境配置文件,用于配置服务程序运行时需要的环境变量
ExecStart:指定启动服务的命令(程序)及启动的命令行方式
ExeStartPre/ExeStartPost:指定在服务启动前后需要执行的用户自定义脚本
ExecStop:指定停止服务的命令及命令行方式
(3)install字段:描述开机自启动方式
RequiredBy:强依赖关系。
Also:指出需要被一起安装的协同服务。
DefaultInstance:允许运行的实例个数。
WantedBy字段:表示该服务所在的Target组。Target表示一组服务,WantedBy=multi-user.target指的是服务所在的Target组是multi-user.target。multi-user.target时systemd的默认启动组,在该组内的服务都会开机启动。
2.ssh服务配置
根据上面介绍的的服务配置字段,剥一下sshd.service的洋葱:
(1)启动顺序
After=network.target sshd-keygen.target。这个必须的,如果网络都不同这事就不用搞了
(2)依赖关系
Wants=sshd-keygen.target。指sshd服务对于sshd-keygen这个服务组是弱依赖关系
我们知道sshd-keygen是ssh的密钥生成与管理程序。那么sshd-keygen这个服务组里有什么呢?:
[root@6f8f39825b78 system]# cat sshd-keygen.target
[Unit]
Wants=sshd-keygen@rsa.service
Wants=sshd-keygen@ecdsa.service
Wants=sshd-keygen@ed25519.service
PartOf=sshd.service
从配置文件可以看出,这个服务组里包括一系列密码算法服务。 注意到服务名称里面的@,@符号前是基础的服务名,@符号后面是服务的参数。所以这3个服务的配置方式,其实都在sshd-kegen@.service里面:
[root@6f8f39825b78 system]# cat sshd-keygen@.service
[Unit]
Description=OpenSSH %i Server Key Generation
ConditionFileNotEmpty=|!/etc/ssh/ssh_host_%i_key

[Service]
Type=oneshot
EnvironmentFile=-/etc/sysconfig/sshd
ExecStart=/usr/libexec/openssh/sshd-keygen %i

[Install]
WantedBy=sshd-keygen.target
这里提一句这个ConditionFileNotEmpty,应该是存在这个文件的意思,但是值里面多了一个逻辑反的符号,应该是说,前提条件是这几个文件必须不存在。事实上,在启动服务前,这几个文件确实不存在。
首先是需要设置环境etc/sysconfig/sshd,这个文件里面实际就是环境变量:
[root@6f8f39825b78 sysconfig]# cat sshd
# Configuration file for the sshd service.

# The server keys are automatically generated if they are missing.
# To change the automatic creation, adjust sshd.service options for
# example using  systemctl enable sshd-keygen@dsa.service  to allow creation
# of DSA key or  systemctl mask sshd-keygen@rsa.service  to disable RSA key
# creation.

# Do not change this option unless you have hardware random
# generator and you REALLY know what you are doing

SSH_USE_STRONG_RNG=0
# SSH_USE_STRONG_RNG=1

# System-wide crypto policy:
# To opt-out, uncomment the following line
# CRYPTO_POLICY=
[root@6f8f39825b78 sysconfig]#
然后执行/usr/libexec/openssh/sshd-keygen命令,以上述那些算法名称为参数。
(3)环境变量
EnvironmentFile=-/etc/crypto-policies/back-ends/opensshserver.config
EnvironmentFile=-/etc/sysconfig/sshd
其中一个和sshd-keygen相同,另一个如下:
[root@6f8f39825b78 sysconfig]# cat /etc/crypto-policies/back-ends/opensshserver.config
CRYPTO_POLICY='-oCiphers=aes256-gcm@openssh.com,chacha20-poly1305@openssh.com,aes256-ctr,aes256-cbc,aes128-gcm@openssh.com,aes128-ctr,aes128-cbc -oMACs=hmac-sha2-256-etm@openssh.com,hmac-sha1-etm@openssh.com,umac-128-etm@openssh.com,hmac-sha2-512-etm@openssh.com,hmac-sha2-256,hmac-sha1,umac-128@openssh.com,hmac-sha2-512 -oGSSAPIKexAlgorithms=gss-curve25519-sha256-,gss-nistp256-sha256-,gss-group14-sha256-,gss-group16-sha512-,gss-gex-sha1-,gss-group14-sha1- -oKexAlgorithms=curve25519-sha256,curve25519-sha256@libssh.org,ecdh-sha2-nistp256,ecdh-sha2-nistp384,ecdh-sha2-nistp521,diffie-hellman-group-exchange-sha256,diffie-hellman-group14-sha256,diffie-hellman-group16-sha512,diffie-hellman-group18-sha512,diffie-hellman-group-exchange-sha1,diffie-hellman-group14-sha1 -oHostKeyAlgorithms=ecdsa-sha2-nistp256,ecdsa-sha2-nistp256-cert-v01@openssh.com,ecdsa-sha2-nistp384,ecdsa-sha2-nistp384-cert-v01@openssh.com,ecdsa-sha2-nistp521,ecdsa-sha2-nistp521-cert-v01@openssh.com,ssh-ed25519,ssh-ed25519-cert-v01@openssh.com,rsa-sha2-256,rsa-sha2-256-cert-v01@openssh.com,rsa-sha2-512,rsa-sha2-512-cert-v01@openssh.com,ssh-rsa,ssh-rsa-cert-v01@openssh.com -oPubkeyAcceptedKeyTypes=ecdsa-sha2-nistp256,ecdsa-sha2-nistp256-cert-v01@openssh.com,ecdsa-sha2-nistp384,ecdsa-sha2-nistp384-cert-v01@openssh.com,ecdsa-sha2-nistp521,ecdsa-sha2-nistp521-cert-v01@openssh.com,ssh-ed25519,ssh-ed25519-cert-v01@openssh.com,rsa-sha2-256,rsa-sha2-256-cert-v01@openssh.com,rsa-sha2-512,rsa-sha2-512-cert-v01@openssh.com,ssh-rsa,ssh-rsa-cert-v01@openssh.com -oCASignatureAlgorithms=ecdsa-sha2-nistp256,ecdsa-sha2-nistp384,ecdsa-sha2-nistp521,ssh-ed25519,rsa-sha2-256,rsa-sha2-512,ssh-rsa'[root@6f8f39825b78 sysconfig]#
就是对加密算法策略的设置
(4)启动方式
ExecStart=/usr/sbin/sshd -D $OPTIONS $CRYPTO_POLICY
可以看到,其实就是以daemon方式启动sshd,参数是已经在配置文件中明确的环境变量。
2. 启动sshd服务
所以,根据配置文件翻译成shell脚本,我们就可以一步一步启动sshd了。比如我们在/下创建了一个test.sh文件,编辑如下:
[root@6f8f39825b78 /]# cat test.sh
source /etc/sysconfig/sshd
source /etc/crypto-policies/back-ends/opensshserver.config
/usr/libexec/openssh/sshd-keygen rsa
/usr/libexec/openssh/sshd-keygen ecdsa
/usr/libexec/openssh/sshd-keygen ed25519
echo OPTIONS=$OPTIONS
echo CRYPTO-POLICY=$CRYPTO_POLICY
/usr/sbin/sshd -D $OPTIONS $CRYPTO_POLICY
执行
[root@6f8f39825b78 /]# chmod a+x ./test.sh
[root@6f8f39825b78 /]# ./test.sh
完毕以后,到sshd-keygen@.service里面ConditionFileNotEmpty=|!/etc/ssh/ssh_host_%i_key所指示的路径,发现这些文件已经成功生成了:
[root@6f8f39825b78 ssh]# pwd
/etc/ssh
[root@6f8f39825b78 ssh]# ls
moduli              ssh_host_ecdsa_key.pub  ssh_host_ed25519_key.pub  ssh_host_rsa_key.pub
ssh_host_ecdsa_key  ssh_host_ed25519_key    ssh_host_rsa_key          sshd_config
[root@6f8f39825b78 ssh]#
从另一个容器中访问:
[root@723680cac971 /]# ssh root@172.17.0.2
The authenticity of host '172.17.0.2 (172.17.0.2)' can't be established.
ECDSA key fingerprint is SHA256:KL2b74VslHW8Lgs8z/2EYBONdt0YhFl21L1HaqkD3/s.
Are you sure you want to continue connecting (yes/no/[fingerprint])? yes
Warning: Permanently added '172.17.0.2' (ECDSA) to the list of known hosts.
root@172.17.0.2's password:
[root@6f8f39825b78 ~]#
成功。
3. 配置开机启动
所谓配置开机启动,实际是需要利用dockerfile文件的RUN命令,RUN可以作为构建docker image时运行的命令,将之前我们手撸的sh COPY到image中,然后在RUN中执行。基于这一点生成新的镜像来使用。这个和我们之前提到的gdraheim2 docker-systemctl-replacement的dockerfile的做法是一样的。因为要抢饭去,所以就不测试了哈。
三、容器的网络问题
然而,解决服务问题并不是docker最大的坑——网络才是。
鉴于关于docker的组网有大量的文章介绍,这里不赘述了,之说结果——结果就是,docker desktop无法解决从宿主机向容器的网络路由,从而除非使用docker的网络映射机制(就是-p -P 等等将端口映射到主机的端口,然后使用localhost加端口来访问),从宿主机机器外部是无法访问docker的。从这个角度看,更应该在docker视作进程隔离的工具,而不应该将其作为虚拟机。
下面通过几个实验来说明这个问题。
1.在Linux上的Docker网络
第一个实验,是在我的windows主机上安装vmware,vmware上安装centos作为docker的宿主机,并在这个centos中启动一个centos的docker:
(1)centos宿主机上的网络配置

宿主机上,Vmware安装Centos时使用NAT配置方式,使用的Vmnet8.
(2)Linux宿主机的网络配置
[root@pig ~]# ifconfig
docker0: flags=4099<UP,BROADCAST,MULTICAST>  mtu 1500
        inet 172.17.0.1  netmask 255.255.0.0  broadcast 172.17.255.255
        ether ……  txqueuelen 0  (Ethernet)
        RX packets 114  bytes 3192 (3.1 KiB)
        RX errors 0  dropped 0  overruns 0  frame 0
        TX packets 19  bytes 2141 (2.0 KiB)
        TX errors 0  dropped 0 overruns 0  carrier 0  collisions 0

ens160: flags=4163<UP,BROADCAST,RUNNING,MULTICAST>  mtu 1500
        inet 192.168.21.11  netmask 255.255.255.0  broadcast 192.168.21.255
        inet6 fe80::20c:29ff:fec0:ce6f  prefixlen 64  scopeid 0x20<link>
        ether ……  txqueuelen 1000  (Ethernet)
        RX packets 102612  bytes 149526664 (142.5 MiB)
        RX errors 0  dropped 0  overruns 0  frame 0
        TX packets 23494  bytes 1351782 (1.2 MiB)
        TX errors 0  dropped 0 overruns 0  carrier 0  collisions 0
…………………………
…………………………
[root@pig ~]# ip route show
default via 192.168.21.2 dev ens160 proto static metric 100
192.168.21.0/24 dev ens160 proto kernel scope link src 192.168.21.11 metric 100
Linux下的docker宿主机,除了本机网卡(192.168.21.11)以外,还能看到传说中的docker0网卡。 注意这里网关,时192.168.21.2。
(3)容器中的网络配置
[root@8a32b6f65a57 /]# ip address
1: lo: <LOOPBACK,UP,LOWER_UP> mtu 65536 qdisc noqueue state UNKNOWN group default qlen 1000
    link/loopback 00:00:00:00:00:00 brd 00:00:00:00:00:00
    inet 127.0.0.1/8 scope host lo
       valid_lft forever preferred_lft forever
17: eth0@if18: <BROADCAST,MULTICAST,UP,LOWER_UP> mtu 1500 qdisc noqueue state UP group default
    link/ether …… brd ff:ff:ff:ff:ff:ff link-netnsid 0
    inet 172.17.0.2/16 brd 172.17.255.255 scope global eth0
       valid_lft forever preferred_lft forever
[root@8a32b6f65a57 /]# ip route show
default via 172.17.0.1 dev eth0
172.17.0.0/16 dev eth0 proto kernel scope link src 172.17.0.2
容器中,网络地址为172.17.0.2
(4)Ping 测试
Ping测试之前,要把防火墙关闭,以免半天测了个寂寞。
windows 到 docker宿主机
C:\Users\lhyzw>ping 192.168.21.11

正在 Ping 192.168.21.11 具有 32 字节的数据:
来自 192.168.21.11 的回复: 字节=32 时间<1ms TTL=64
来自 192.168.21.11 的回复: 字节=32 时间<1ms TTL=64
来自 192.168.21.11 的回复: 字节=32 时间<1ms TTL=64
docker宿主机到windows主机
[root@pig ~]# ping 192.168.21.1
PING 192.168.21.1 (192.168.21.1) 56(84) bytes of data.
64 bytes from 192.168.21.1: icmp_seq=1 ttl=64 time=0.829 ms
64 bytes from 192.168.21.1: icmp_seq=2 ttl=64 time=0.508 ms
64 bytes from 192.168.21.1: icmp_seq=3 ttl=64 time=0.616 ms
docker宿主机到容器
[root@pig ~]# ping 172.17.0.2
PING 172.17.0.2 (172.17.0.2) 56(84) bytes of data.
64 bytes from 172.17.0.2: icmp_seq=1 ttl=64 time=0.164 ms
64 bytes from 172.17.0.2: icmp_seq=2 ttl=64 time=0.109 ms
64 bytes from 172.17.0.2: icmp_seq=3 ttl=64 time=0.069 ms
容器到docker宿主机
[root@d8436f439c04 /]# ping 192.168.21.11
PING 192.168.21.11 (192.168.21.11) 56(84) bytes of data.
64 bytes from 192.168.21.11: icmp_seq=1 ttl=64 time=0.227 ms
64 bytes from 192.168.21.11: icmp_seq=2 ttl=64 time=0.074 ms
64 bytes from 192.168.21.11: icmp_seq=3 ttl=64 time=0.082 ms
容器到windows
[root@d8436f439c04 /]# ping 192.168.21.1
PING 192.168.21.1 (192.168.21.1) 56(84) bytes of data.
64 bytes from 192.168.21.1: icmp_seq=1 ttl=63 time=1.70 ms
64 bytes from 192.168.21.1: icmp_seq=2 ttl=63 time=0.684 ms
64 bytes from 192.168.21.1: icmp_seq=3 ttl=63 time=0.493 ms
windows到容器
C:\Users\lhyzw>ping 172.17.0.2
正在 Ping 172.17.0.2 具有 32 字节的数据:
请求超时。
请求超时。
(5)连接windows到容器
从Windows连接到容器不通,是因为windows并不知道Vmware中的docker0下有个172.17.0.0/16的网段。这个没关系,在windows下使用超级管理员打开CMD,执行route add加一条路由,将172.17.0.0/16网段的报文流转到Vmware中的docker宿主机就行了。
PS C:\Users\lhyzw> route add 172.17.0.0 mask 255.255.0.0 192.168.21.11
 操作完成!
PS C:\Users\lhyzw> ping 172.17.0.2

正在 Ping 172.17.0.2 具有 32 字节的数据:
来自 172.17.0.2 的回复: 字节=32 时间<1ms TTL=63
来自 172.17.0.2 的回复: 字节=32 时间<1ms TTL=63

172.17.0.2 的 Ping 统计信息:
    数据包: 已发送 = 2,已接收 = 2,丢失 = 0 (0% 丢失),
往返行程的估计时间(以毫秒为单位):
    最短 = 0ms,最长 = 0ms,平均 = 0ms
Control-C
PS C:\Users\lhyzw> ping 172.17.0.1

正在 Ping 172.17.0.1 具有 32 字节的数据:
来自 172.17.0.1 的回复: 字节=32 时间<1ms TTL=64
来自 172.17.0.1 的回复: 字节=32 时间=1ms TTL=64
来自 172.17.0.1 的回复: 字节=32 时间<1ms TTL=64

172.17.0.1 的 Ping 统计信息:
    数据包: 已发送 = 3,已接收 = 3,丢失 = 0 (0% 丢失),
往返行程的估计时间(以毫秒为单位):
    最短 = 0ms,最长 = 1ms,平均 = 0ms
2.在windows docker desktop上的网络
实际上,基于windows docker desktop来使用容器,本质上和安装Vmware,使用Vmware上的centos作为docker宿主机是一样的。只不过此时替换Vmware的,是wsl中的Ubuntu而已。
PS C:\Users\lhyzw> wsl -l
适用于 Linux 的 Windows 子系统分发:
Ubuntu (默认)
docker-desktop
docker-desktop-data
PS C:\Users\lhyzw>
(1)Windows网络设置
Windows的网络设置与前面并无两样。但是需要提一下的是,在Win10下,观察网络适配器,会发现一个名为wsl的虚拟适配器,但是在win11下没有。不过使用ipconfig命令,还是能够看到的,不知缘故,也许是因为该适配器默认隐藏的原因。
win10

win11
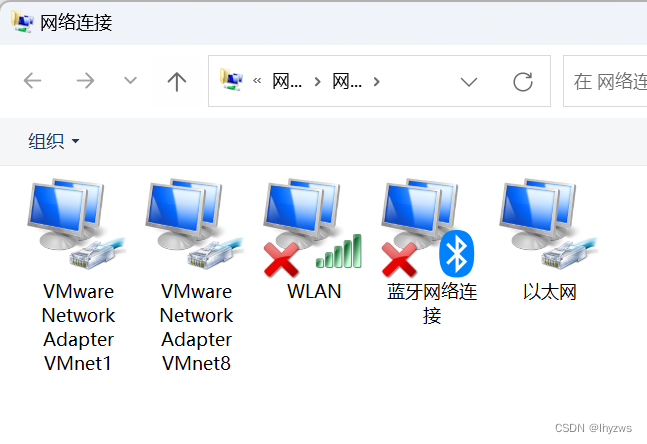
win11下的命令行方式查看适配器结果:
PS C:\Users\lhyzw> ipconfig
Windows IP 配置
以太网适配器 VMware Network Adapter VMnet1:
   连接特定的 DNS 后缀 . . . . . . . :
   本地链接 IPv6 地址. . . . . . . . : fe80::dd77:d5f2:85e8:29e4%7
   IPv4 地址 . . . . . . . . . . . . : 192.168.70.1
   子网掩码  . . . . . . . . . . . . : 255.255.255.0
   默认网关. . . . . . . . . . . . . :
以太网适配器 VMware Network Adapter VMnet8:
   连接特定的 DNS 后缀 . . . . . . . :
   本地链接 IPv6 地址. . . . . . . . : fe80::97ff:5834:a003:eabe%4
   IPv4 地址 . . . . . . . . . . . . : 192.168.21.1
   子网掩码  . . . . . . . . . . . . : 255.255.255.0
   默认网关. . . . . . . . . . . . . :
无线局域网适配器 WLAN:
   连接特定的 DNS 后缀 . . . . . . . :
   IPv6 地址 . . . . . . . . . . . . :
   临时 IPv6 地址. . . . . . . . . . :
   本地链接 IPv6 地址. . . . . . . . :
   IPv4 地址 . . . . . . . . . . . . : 192.168.1.26
   子网掩码  . . . . . . . . . . . . : 255.255.255.0
   默认网关. . . . . . . . . . . . . :
                                      192.168.1.1
以太网适配器 vEthernet (WSL):
   连接特定的 DNS 后缀 . . . . . . . :
   本地链接 IPv6 地址. . . . . . . . : fe80::696d:4cf5:ade2:eee2%60
   IPv4 地址 . . . . . . . . . . . . : 172.23.160.1
   子网掩码  . . . . . . . . . . . . : 255.255.240.0
   默认网关. . . . . . . . . . . . . :
或者直接找它的名字:
PS C:\Users\lhyzw>  Get-NetAdapter -IncludeHidden 'vEthernet (WSL)' | Get-NetIPAddress


IPAddress         : fe80::696d:4cf5:ade2:eee2%60
InterfaceIndex    : 60
InterfaceAlias    : vEthernet (WSL)
AddressFamily     : IPv6
Type              : Unicast
PrefixLength      : 64
PrefixOrigin      : WellKnown
SuffixOrigin      : Link
AddressState      : Preferred
ValidLifetime     :
PreferredLifetime :
SkipAsSource      : False
PolicyStore       : ActiveStore

IPAddress         : 172.23.160.1
InterfaceIndex    : 60
InterfaceAlias    : vEthernet (WSL)
AddressFamily     : IPv4
Type              : Unicast
PrefixLength      : 20
PrefixOrigin      : Manual
SuffixOrigin      : Manual
AddressState      : Preferred
ValidLifetime     :
PreferredLifetime :
SkipAsSource      : False
PolicyStore       : ActiveStore
(2)宿主机WSL网络设置
确认Ubuntu是默认的子系统,否则下面的操作可能会报错。如果不是,可以使用--setdefault参数指定默认子系统,或者在使用wsl启动子系统的时候使用-d参数明确要启动的子系统。
PS C:\Users\lhyzw> wsl
To run a command as administrator (user "root"), use "sudo <command>".
See "man sudo_root" for details.
pig@LAPTOP-SA9UAFHF:/mnt/c/Users/lhyzw$ ip address
1: lo: <LOOPBACK,UP,LOWER_UP> mtu 65536 qdisc noqueue state UNKNOWN group default qlen 1000
    link/loopback 00:00:00:00:00:00 brd 00:00:00:00:00:00
    inet 127.0.0.1/8 scope host lo
       valid_lft forever preferred_lft forever
    inet6 ::1/128 scope host
       valid_lft forever preferred_lft forever
2: bond0: <BROADCAST,MULTICAST,MASTER> mtu 1500 qdisc noop state DOWN group default qlen 1000
    link/ether …… brd ff:ff:ff:ff:ff:ff
3: dummy0: <BROADCAST,NOARP> mtu 1500 qdisc noop state DOWN group default qlen 1000
    link/ether …… brd ff:ff:ff:ff:ff:ff
4: tunl0@NONE: <NOARP> mtu 1480 qdisc noop state DOWN group default qlen 1000
    link/ipip 0.0.0.0 brd 0.0.0.0
5: sit0@NONE: <NOARP> mtu 1480 qdisc noop state DOWN group default qlen 1000
    link/sit 0.0.0.0 brd 0.0.0.0
6: eth0: <BROADCAST,MULTICAST,UP,LOWER_UP> mtu 1500 qdisc mq state UP group default qlen 1000
    link/ether …… brd ff:ff:ff:ff:ff:ff
    inet 172.23.162.71/20 brd 172.23.175.255 scope global eth0
       valid_lft forever preferred_lft forever
    inet6 fe80::215:5dff:fe0a:6609/64 scope link
       valid_lft forever preferred_lft forever
pig@LAPTOP-SA9UAFHF:/mnt/c/Users/lhyzw$ ip route show
default via 172.23.160.1 dev eth0 proto kernel
172.23.160.0/20 dev eth0 proto kernel scope link src 172.23.162.71
可以看到,宿主机WSL上的ubuntu,网络设置为172.23.162.71 ,网关是172.23.160.1。但是改宿主机上不存在传说中的docker0虚拟适配器。
(3)容器上的网络配置
在WSL中启动容器,进入容器中查看可以发现,其网络配置和前面基本是一样的
[root@ecfdc9c636d6 /]# ip address
1: lo: <LOOPBACK,UP,LOWER_UP> mtu 65536 qdisc noqueue state UNKNOWN group default qlen 1000
    link/loopback 00:00:00:00:00:00 brd 00:00:00:00:00:00
    inet 127.0.0.1/8 scope host lo
       valid_lft forever preferred_lft forever
2: tunl0@NONE: <NOARP> mtu 1480 qdisc noop state DOWN group default qlen 1000
    link/ipip 0.0.0.0 brd 0.0.0.0
3: sit0@NONE: <NOARP> mtu 1480 qdisc noop state DOWN group default qlen 1000
    link/sit 0.0.0.0 brd 0.0.0.0
8: eth0@if9: <BROADCAST,MULTICAST,UP,LOWER_UP> mtu 1500 qdisc noqueue state UP group default
    link/ether …… brd ff:ff:ff:ff:ff:ff link-netnsid 0
    inet 172.17.0.2/16 brd 172.17.255.255 scope global eth0
       valid_lft forever preferred_lft forever
[root@ecfdc9c636d6 /]# ip route show
default via 172.17.0.1 dev eth0
172.17.0.0/16 dev eth0 proto kernel scope link src 172.17.0.2
[root@ecfdc9c636d6 /]#
本机IP为172.17.0.2,网关为172.17.0.1.
(4)Ping测试
Windows到WSL宿主机
PS C:\Users\lhyzw> ping 172.23.162.71

正在 Ping 172.23.162.71 具有 32 字节的数据:
来自 172.23.162.71 的回复: 字节=32 时间<1ms TTL=64
来自 172.23.162.71 的回复: 字节=32 时间<1ms TTL=64
来自 172.23.162.71 的回复: 字节=32 时间<1ms TTL=64
来自 172.23.162.71 的回复: 字节=32 时间<1ms TTL=64

172.23.162.71 的 Ping 统计信息:
    数据包: 已发送 = 4,已接收 = 4,丢失 = 0 (0% 丢失),
往返行程的估计时间(以毫秒为单位):
    最短 = 0ms,最长 = 0ms,平均 = 0ms

PS C:\Users\lhyzw> ping 172.23.160.1

正在 Ping 172.23.160.1 具有 32 字节的数据:
来自 172.23.160.1 的回复: 字节=32 时间<1ms TTL=64
来自 172.23.160.1 的回复: 字节=32 时间<1ms TTL=64
来自 172.23.160.1 的回复: 字节=32 时间<1ms TTL=64

172.23.160.1 的 Ping 统计信息:
    数据包: 已发送 = 3,已接收 = 3,丢失 = 0 (0% 丢失),
往返行程的估计时间(以毫秒为单位):
    最短 = 0ms,最长 = 0ms,平均 = 0ms
Ping宿主机与宿主机的网关均没有问题
WSL宿主机到容器
pig@LAPTOP-SA9UAFHF:/mnt/c/Users/lhyzw$ ping 172.17.0.1
PING 172.17.0.1 (172.17.0.1) 56(84) bytes of data.
--- 172.17.0.1 ping statistics ---
4 packets transmitted, 0 received, 100% packet loss, time 3115ms

pig@LAPTOP-SA9UAFHF:/mnt/c/Users/lhyzw$ ping 172.17.0.2
PING 172.17.0.2 (172.17.0.2) 56(84) bytes of data.
--- 172.17.0.2 ping statistics ---
45 packets transmitted, 0 received, 100% packet loss, time 45789ms

pig@LAPTOP-SA9UAFHF:/mnt/c/Users/lhyzw$
这里会发现,实际上从WSL上的Ubuntu,是不可能Ping到内部的容器的
Windows到容器
这就不用试了,因为WSL就连不到容器,Windows更不可能连到
容器到WSL宿主机
[root@ecfdc9c636d6 /]# ping 172.23.162.71
PING 172.23.162.71 (172.23.162.71) 56(84) bytes of data.
64 bytes from 172.23.162.71: icmp_seq=1 ttl=37 time=1.71 ms
64 bytes from 172.23.162.71: icmp_seq=2 ttl=37 time=2.56 ms
64 bytes from 172.23.162.71: icmp_seq=3 ttl=37 time=1.79 ms
宿主机到Windows
pig@LAPTOP-SA9UAFHF:/mnt/c/Users/lhyzw$ ping 172.23.160.1
PING 172.23.160.1 (172.23.160.1) 56(84) bytes of data.
64 bytes from 172.23.160.1: icmp_seq=1 ttl=64 time=0.196 ms
64 bytes from 172.23.160.1: icmp_seq=2 ttl=64 time=0.240 ms
--- 172.23.160.1 ping statistics ---
2 packets transmitted, 2 received, 0% packet loss, time 1017ms
rtt min/avg/max/mdev = 0.196/0.218/0.240/0.022 ms

pig@LAPTOP-SA9UAFHF:/mnt/c/Users/lhyzw$ ping 192.168.1.26
PING 192.168.1.26 (192.168.1.26) 56(84) bytes of data.
64 bytes from 192.168.1.26: icmp_seq=1 ttl=63 time=0.206 ms
64 bytes from 192.168.1.26: icmp_seq=2 ttl=63 time=0.197 ms
64 bytes from 192.168.1.26: icmp_seq=3 ttl=63 time=0.242 ms
可以看到宿主机确实是可以Ping通WSL网关和Windows的
容器到Windows
[root@ecfdc9c636d6 /]# ping 172.23.160.1
PING 172.23.160.1 (172.23.160.1) 56(84) bytes of data.
64 bytes from 172.23.160.1: icmp_seq=1 ttl=37 time=1.07 ms
64 bytes from 172.23.160.1: icmp_seq=2 ttl=37 time=2.02 ms
64 bytes from 172.23.160.1: icmp_seq=3 ttl=37 time=1.20 ms
--- 172.23.160.1 ping statistics ---
3 packets transmitted, 3 received, 0% packet loss, time 2002ms
rtt min/avg/max/mdev = 1.070/1.430/2.021/0.421 ms

[root@ecfdc9c636d6 /]# ping 192.168.1.26
PING 192.168.1.26 (192.168.1.26) 56(84) bytes of data.
64 bytes from 192.168.1.26: icmp_seq=1 ttl=37 time=0.977 ms
64 bytes from 192.168.1.26: icmp_seq=2 ttl=37 time=1.49 ms
64 bytes from 192.168.1.26: icmp_seq=3 ttl=37 time=1.98 ms
--- 192.168.1.26 ping statistics ---
3 packets transmitted, 3 received, 0% packet loss, time 2003ms
rtt min/avg/max/mdev = 0.977/1.481/1.980/0.409 ms
容器也可以Ping到WSL的网关,以及Windows主机。
容器互联
在WSL下启动多个容器是否能够互联呢?事实证明确实是可以的:
[root@b5cf7a4cf154 /]# ip address
1: lo: <LOOPBACK,UP,LOWER_UP> mtu 65536 qdisc noqueue state UNKNOWN group default qlen 1000
    link/loopback 00:00:00:00:00:00 brd 00:00:00:00:00:00
    inet 127.0.0.1/8 scope host lo
       valid_lft forever preferred_lft forever
2: tunl0@NONE: <NOARP> mtu 1480 qdisc noop state DOWN group default qlen 1000
    link/ipip 0.0.0.0 brd 0.0.0.0
3: sit0@NONE: <NOARP> mtu 1480 qdisc noop state DOWN group default qlen 1000
    link/sit 0.0.0.0 brd 0.0.0.0
10: eth0@if11: <BROADCAST,MULTICAST,UP,LOWER_UP> mtu 1500 qdisc noqueue state UP group default
    link/ether 02:42:ac:11:00:03 brd ff:ff:ff:ff:ff:ff link-netnsid 0
    inet 172.17.0.3/16 brd 172.17.255.255 scope global eth0
       valid_lft forever preferred_lft forever
[root@b5cf7a4cf154 /]# ping 172.17.0.2
PING 172.17.0.2 (172.17.0.2) 56(84) bytes of data.
64 bytes from 172.17.0.2: icmp_seq=1 ttl=64 time=0.039 ms
64 bytes from 172.17.0.2: icmp_seq=2 ttl=64 time=0.064 ms
64 bytes from 172.17.0.2: icmp_seq=3 ttl=64 time=0.065 ms
^C
--- 172.17.0.2 ping statistics ---
3 packets transmitted, 3 received, 0% packet loss, time 2061ms
rtt min/avg/max/mdev = 0.039/0.056/0.065/0.012 ms
(5)连通WSL到容器?
那么是否我们也可以像连通Windows到容器一样,连通WSL到容器呢?这里有一个问题,就是windows不知道如何连通172.17.0.0/16网段,但是windows知道如何连到宿主机,宿主机又知道如何连到172.17.0.0/16,所以我们可以通过宿主机来构建路由通道。但是,WSL上的Ubuntu作为宿主机的情况下,它自己就不知道如何到通172.17.0.0/16网段,还能找谁去?!
所以,这个坑我们是爬不出去了……
当然了,Docker官方给出过正确的办法,就是使用--net:host,并-p绑定端口到主机端口上,直接使用主机IP加端口的方式来访问容器。这正是docker基于进程隔离的理念要求我们采用的“正确方式”。
3.可能的原因
这是一个很让人抓狂的事。网络上多数说法,是WSL没有docker0这个虚拟器。这个我们在前面也确实看到了。但是如果真的没有适配器,可能连从容器上行到WSL Ubuntu和Windows都不行,容器互联也应该不行。可见这一部分还是有程序在处理的。只是不太清除的是,为啥这个功能只实现了一半——WSL Ubuntu没有172.17.0.1这样一个适配器做网关,但是容器像172.17.0.1发的包确实被处理了;反过来,虽然容器主动发起的通信能够正常的返回,但WSL端主动发起的通信,却找不到172.17.0.1在哪——一个没有适配器的半拉儿网络暗流。
有空的话可以考虑截包来看看到底发生了什么……
当然,除了没有docker0,如果你在WSL Ubuntu上执行一下systemctl命令的话……
pig@LAPTOP-SA9UAFHF:/mnt/c/Users/lhyzw$ systemctl
System has not been booted with systemd as init system (PID 1). Can't operate.
Failed to connect to bus: Host is down
你会发现,这玩意和容器挺像的,都没有启动systemd服务,是一个阉割版的子系统,这也许是真正的原因所在吧~~~
PS:当然,在WSL Ubuntu下面也可以安装一个替代的systemctl:
 git clone https://github.com/DamionGans/ubuntu-wsl2-systemd-script.git

cd ubuntu-wsl2-systemd-script/

bash ubuntu-wsl2-systemd-script.sh
只不过对联网这件事而言,并不会有啥作用。
四、从虚拟机到(超级大的)容器
好了,为什么折腾了这么久的什么服务啊、网络啊这样的大坑呢。其实起源于本篇一开头提过的“奇思妙想”——从scratch创建镜像,从镜像/容器创建镜像我们都试过了。能不能从虚拟机创建一个镜像呢?
答案当然是可以的,因为前面提到过,其实镜像就是一个文件系统,容器不过使用一个通用的核心加载了这个文件系统而已。所以,从虚拟机到容器,只需要把虚拟机系统里面的文件系统打包出来就行了。
1.全盘压缩虚拟机文件系统
[root@localhost ~]# tar --numeric-owner --exclude=/proc --exclude=/sys --exclude=/mnt --exclude=/var/cache --exclude=/var/log --exclude=/root/share -zcvf ~/share/centos-stream-8.tar.gz /
对虚拟机中的CentOS系统——我们前面安装的可是很全的版本,各种工具及包括图形桌面都安装了,所以文件系统不会太小。当然,在tar的时候,可以使用--exclude参数排除一些对系统来说并不重要的目录。比如:
/proc:因为存储的是内核运行时状态的相关文件,是从内存映射出来的虚拟目录,伪文件系统。docker会使用承载系统的内核进行替代,所以可以不要。
/sys:Linux内核设备树及文件系统的映射。同样由于被替代,不需要
/var:日志文件等通常不断增加的变量性文件存放在这里,不需要。但是/var/lib还是不该轻易删除,不知道会不会映像一些已经安装的软件。所以选择性删一下
/mnt:用户临时挂载的别的文件系统,不需要
/root/share:我们自己在虚拟机上映射的共享目录,tar的结果会放在这里,不能被循环压缩,排除。
/tmp:存放临时文件的目录,事实上也不需要,可以考虑排除,不过我没尝试
/run:系统运行时生成的临时文件系统,重启时会被删除,应该排除,不过我也没有尝试
我们这里完全是在反docker之道而行之,不管系统里面的东西有用没用全给打包了,这当然是不理智的行为——正确的方法应该是在scratch的基础上,带上busybox等已经压缩得很紧凑的必要工具集,然后根据需要一点一点的添加。
当然,做实验的话就无所谓了:) 运行完以后,确实好大一个
[root@localhost share]# pwd
/root/share
[root@localhost share]# ls -lh
总用量 2.1G
-rwxrwxrwx. 1 root root 2.1G 11月 10 03:34 centos-stream-8.tar.gz
[root@localhost share]#
可以在rar里看看

有5G那么多…… 。可以看到除了/boot、/etc、/usr、/bar/lib等绝对不能瘦身和不敢瘦身的东西外,其余目录其实所占空间也不算太多,大面还能节省的一眼看去也只有/run和/tmp了。/root下面还有一些桌面系统用的东西,也没有敢删,毕竟一会还想着用一下……。所以真要是想构造生产环境,还是别从虚拟机这头开始搞吧。
2.向docker导入镜像
[root@localhost ~]# cat share/centos-stream-8.tar.gz |docker import - centos-stream-8:pig01
sha256:3cf07981b4d47f1a90675d3bbcdb7e83e7053daec3f45d1abd1c5e0e3bb26d9e
[root@localhost ~]# docker images
REPOSITORY        TAG       IMAGE ID       CREATED         SIZE
centos-stream-8   pig01     3cf07981b4d4   2 minutes ago   5GB
hello-world       latest    feb5d9fea6a5   13 months ago   13.3kB
[root@localhost ~]#
很大,导入很慢……。不过这个工作最好在Linux环境下操作。直接在Windows CMD下操作似乎会因为字符编码问题出错。
PS D:\vm\share> cat .\centos-stream-8.tar.gz |docker import - centos-stream-8:pig01
程序“docker.exe”无法运行: 引发类型为“System.OutOfMemoryException”的异常。所在位置 行:1 字符: 31
+ cat .\centos-stream-8.tar.gz |docker import - centos-stream-8:pig01
+                               ~~~~~~~~~~~~~~~~~~~~~~~~~~~~~~~~~~~~~。
所在位置 行:1 字符: 1
+ cat .\centos-stream-8.tar.gz |docker import - centos-stream-8:pig01
+ ~~~~~~~~~~~~~~~~~~~~~~~~~~~~~~~~~~~~~~~~~~~~~~~~~~~~~~~~~~~~~~~~~~~
    + CategoryInfo          : ResourceUnavailable: (:) [], ApplicationFailedException
    + FullyQualifiedErrorId : NativeCommandFailed
3.确实能用
然后我们迫不及待的用一下看看,果然是可以的:
[root@localhost ~]# docker run -it centos-stream-8:pig01 bash
[root@c44c3094af96 /]# ls
bin  boot  dev  etc  home  lib  lib64  media  opt  proc  root  run  sbin  srv  sys  tmp  usr  var
[root@c44c3094af96 /]# ls root
公共  模板  视频  图片  文档  下载  音乐  桌面  anaconda-ks.cfg  initial-setup-ks.cfg
[root@c44c3094af96 /]#
4.导出以后换到Windows下面看看
如果需要在Windows下使用,可以从Linux环境下的Docker中导出dockers镜像
[root@localhost ~]# docker save -o share/testcentoimage.tar centos-stream-8:pig01
[root@localhost ~]# ls -lh share
总用量 6.8G
-rwxrwxrwx. 1 root root 2.1G 11月 10 03:34 centos-stream-8.tar.gz
-rwxrwxrwx. 1 root root 4.8G 11月 10 04:02 testcentoimage.tar
看大小就不一样,所以应当是不能直接使用docker load命令去load那个我们之前打包的2G大小的压缩包的。
D:\VM\share>dir
 驱动器 D 中的卷没有标签。
 卷的序列号是 0E5B-11E5

 D:\VM\share 的目录

2022/11/10  17:02    <DIR>          .
2022/11/10  17:02    <DIR>          ..
2022/11/04  10:39         6,832,413 cascade-server-master.zip
2022/11/10  16:34     2,150,854,714 centos-stream-8.tar.gz
2022/11/04  15:03        32,118,944 mongodb-org-server-6.0.2-1.el8.x86_64.rpm
2022/11/10  17:02     5,093,537,792 testcentoimage.tar
               4 个文件  7,283,343,863 字节
               2 个目录 3,864,828,567,552 可用字节

D:\VM\share>docker load -i testcentoimage.tar
4d9db9558c67: Loading layer [==================================================>]  5.094GB/5.094GB
Loaded image: centos-stream-8:pig01
嗯,看看命令行的风格都不一样了,就知道我换系统了
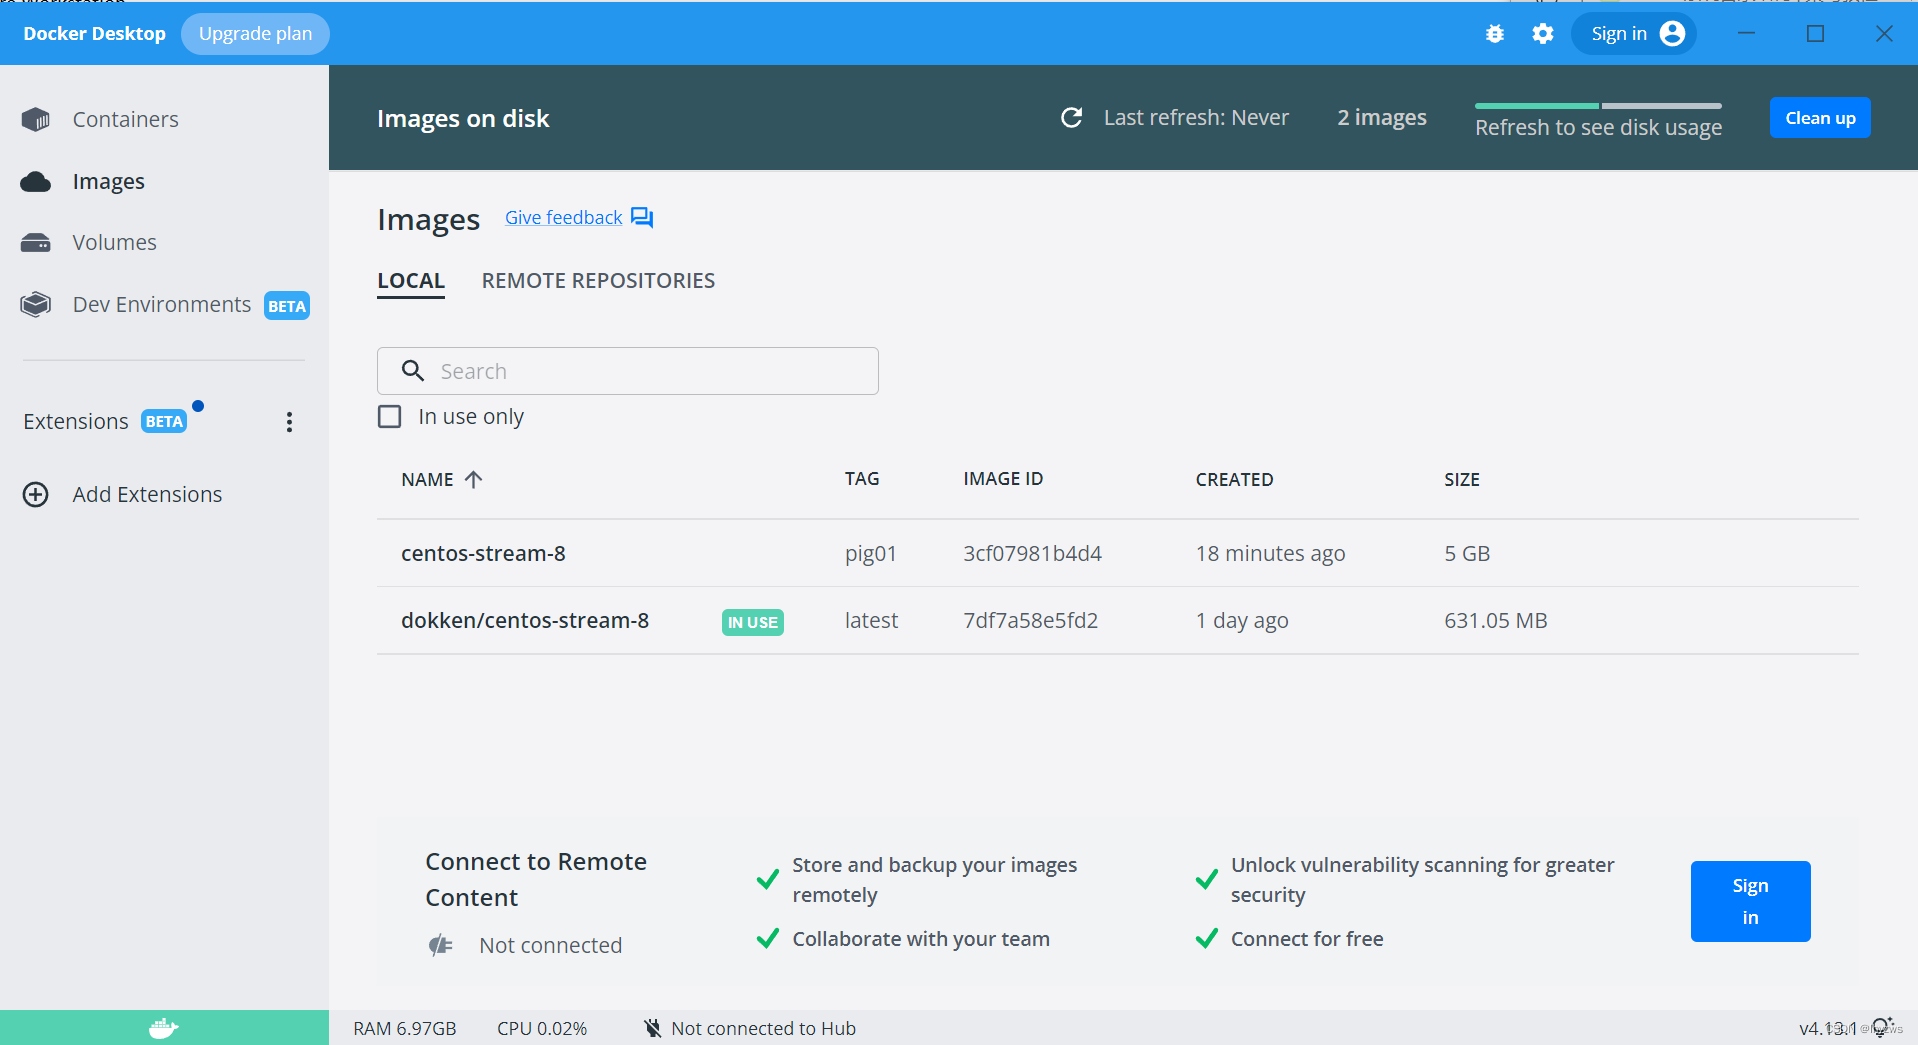
在docker desktop窗口也能看到。在命令行里先运行一下,这样会比较简单地生成容器,如果在窗口中还需要选择一些环境参数,就不研究了。

然后就可以从窗口进去,在docker命令行中使用了:

命令行:
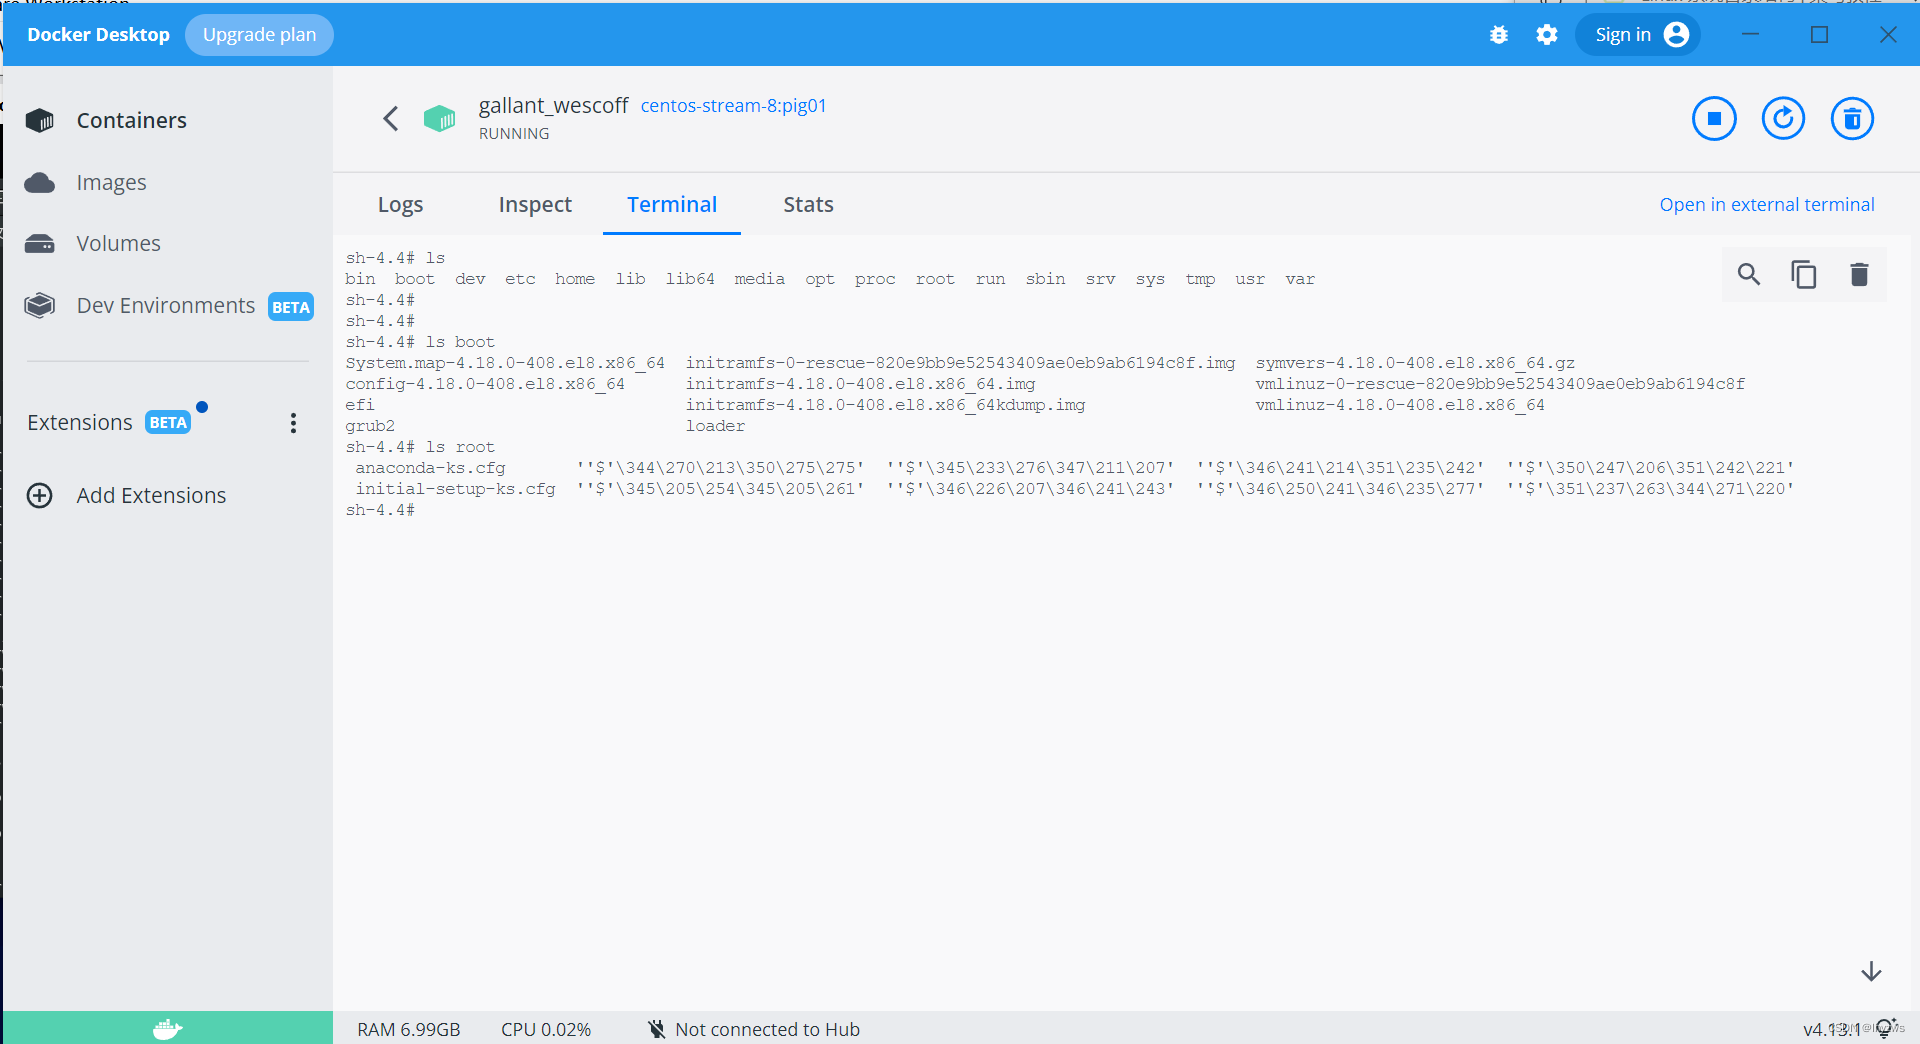
呃……存在一点UTF-8的问题。先放着不管。
五、远程桌面
之所以会搞这么大个镜像,是因为客户希望可以直接操作我们远程集群上的app,而且不希望通过浏览器连接,要通过VPN加远程桌面的方式连接,然后在桌面上使用浏览器连接本地集群……用户就是上帝,虽然我也不知道为啥。不过紧接着就突发奇想,能不能把这东西弄到docker上呢?
1. 使用xrdp远程桌面
当然事情还得一步一步做,至少我得先解决在虚拟机上能够使用远程桌面的问题。网上有好多使用xshell、vnc的方案,不过要么是需要购买,要么是配置起来太麻烦,不确定性太多。还在在我一通收罗下,找着一个不错的远程桌面XRDP。这个家伙不仅好安装,而且就连客户端都可以直接使用Windows的远程桌面。
xrdp需要首先安装epel的repo。
[root@localhost ~]# yum install epel-release
CentOS Stream 8 - AppStream                     1.4 MB/s |  25 MB     00:18
CentOS Stream 8 - BaseOS                        644 kB/s |  26 MB     00:40
CentOS Stream 8 - Extras                         12 kB/s |  18 kB     00:01
CentOS Stream 8 - Extras common packages        5.5 kB/s | 5.2 kB     00:00
依赖关系解决。
================================================================================
 软件包                架构            版本               仓库             大小
================================================================================
安装:
 epel-release          noarch          8-11.el8           extras           24 k

事务概要
================================================================================
安装  1 软件包

总下载:24 k
安装大小:35 k
确定吗?[y/N]: y
下载软件包:
epel-release-8-11.el8.noarch.rpm                 40 kB/s |  24 kB     00:00
--------------------------------------------------------------------------------
总计                                             21 kB/s |  24 kB     00:01
CentOS Stream 8 - Extras                        1.2 MB/s | 1.6 kB     00:00
导入 GPG 公钥 0x8483C65D:
 Userid: "CentOS (CentOS Official Signing Key) <security@centos.org>"
 指纹: 99DB 70FA E1D7 CE22 7FB6 4882 05B5 55B3 8483 C65D
 来自: /etc/pki/rpm-gpg/RPM-GPG-KEY-centosofficial
确定吗?[y/N]: y
导入公钥成功
运行事务检查
事务检查成功。
运行事务测试
事务测试成功。
运行事务
  准备中  :                                                                                                                                   1/1
  安装    : epel-release-8-11.el8.noarch                                                                                                      1/1
  运行脚本: epel-release-8-11.el8.noarch                                                                                                      1/1
  验证    : epel-release-8-11.el8.noarch                                                                                                      1/1

已安装:
  epel-release-8-11.el8.noarch

完毕!
安装xrdp
[root@localhost ~]# yum install xrdp -y
Extra Packages for Enterprise Linux 8 - x86_64                                                                    1.7 MB/s |  13 MB     00:07
Extra Packages for Enterprise Linux Modular 8 - x86_64                                                            1.0 MB/s | 733 kB     00:00
上次元数据过期检查:0:00:01 前,执行于 2022年11月11日 星期五 01时28分27秒。
依赖关系解决。
==================================================================================================================================================
 软件包                               架构                           版本                                      仓库                          大小
==================================================================================================================================================
安装:
 xrdp                                 x86_64                         1:0.9.20-1.el8                            epel                         471 k
安装依赖关系:
 imlib2                               x86_64                         1.4.9-8.el8                               epel                         222 k
安装弱的依赖:
 xrdp-selinux                         x86_64                         1:0.9.20-1.el8                            epel                          24 k

事务概要
==================================================================================================================================================
安装  3 软件包

总下载:717 k
安装大小:2.8 M
下载软件包:
(1/3): xrdp-selinux-0.9.20-1.el8.x86_64.rpm                                                                       184 kB/s |  24 kB     00:00
(2/3): imlib2-1.4.9-8.el8.x86_64.rpm                                                                              942 kB/s | 222 kB     00:00
(3/3): xrdp-0.9.20-1.el8.x86_64.rpm                                                                               983 kB/s | 471 kB     00:00
--------------------------------------------------------------------------------------------------------------------------------------------------
总计                                                                                                              794 kB/s | 717 kB     00:00
Extra Packages for Enterprise Linux 8 - x86_64                                                                    1.6 MB/s | 1.6 kB     00:00
导入 GPG 公钥 0x2F86D6A1:
 Userid: "Fedora EPEL (8) <epel@fedoraproject.org>"
 指纹: 94E2 79EB 8D8F 25B2 1810 ADF1 21EA 45AB 2F86 D6A1
 来自: /etc/pki/rpm-gpg/RPM-GPG-KEY-EPEL-8
导入公钥成功
运行事务检查
事务检查成功。
运行事务测试
事务测试成功。
运行事务
  准备中  :                                                                                                                                   1/1
  安装    : imlib2-1.4.9-8.el8.x86_64                                                                                                         1/3
  安装    : xrdp-selinux-1:0.9.20-1.el8.x86_64                                                                                                2/3
  运行脚本: xrdp-selinux-1:0.9.20-1.el8.x86_64                                                                                                2/3
  安装    : xrdp-1:0.9.20-1.el8.x86_64                                                                                                        3/3
  运行脚本: xrdp-1:0.9.20-1.el8.x86_64                                                                                                        3/3
  验证    : imlib2-1.4.9-8.el8.x86_64                                                                                                         1/3
  验证    : xrdp-1:0.9.20-1.el8.x86_64                                                                                                        2/3
  验证    : xrdp-selinux-1:0.9.20-1.el8.x86_64                                                                                                3/3

已安装:
  imlib2-1.4.9-8.el8.x86_64                    xrdp-1:0.9.20-1.el8.x86_64                    xrdp-selinux-1:0.9.20-1.el8.x86_64

完毕!
[root@localhost ~]#
启动并设置服务
[root@localhost ~]# systemctl start xrdp
[root@localhost ~]# systemctl status xrdp
● xrdp.service - xrdp daemon
   Loaded: loaded (/usr/lib/systemd/system/xrdp.service; disabled; vendor preset: disabled)
   Active: active (running) since Fri 2022-11-11 01:29:55 EST; 10s ago
     Docs: man:xrdp(8)
           man:xrdp.ini(5)
 Main PID: 23053 (xrdp)
    Tasks: 1 (limit: 23329)
   Memory: 1004.0K
   CGroup: /system.slice/xrdp.service
           └─23053 /usr/sbin/xrdp --nodaemon

11月 11 01:29:55 localhost.localdomain systemd[1]: Started xrdp daemon.
11月 11 01:29:55 localhost.localdomain xrdp[23053]: [INFO ] starting xrdp with pid 23053
11月 11 01:29:55 localhost.localdomain xrdp[23053]: [INFO ] address [0.0.0.0] port [3389] mode 1
11月 11 01:29:55 localhost.localdomain xrdp[23053]: [INFO ] listening to port 3389 on 0.0.0.0
11月 11 01:29:55 localhost.localdomain xrdp[23053]: [INFO ] xrdp_listen_pp done
[root@localhost ~]# systemctl enable xrdp
Created symlink /etc/systemd/system/multi-user.target.wants/xrdp.service → /usr/lib/systemd/system/xrdp.service.
[root@localhost ~]#
停止防火墙。一般来说很早就会干这个事,不过这次我换了个新的虚拟机,把这个忘了,坑了一小会……
[root@localhost ~]# netstat -antpl
Active Internet connections (servers and established)
Proto Recv-Q Send-Q Local Address           Foreign Address         State       PID/Program name
tcp        0      0 0.0.0.0:111             0.0.0.0:*               LISTEN      1/systemd
tcp        0      0 192.168.122.1:53        0.0.0.0:*               LISTEN      2129/dnsmasq
tcp        0      0 0.0.0.0:22              0.0.0.0:*               LISTEN      1241/sshd
tcp        0      0 127.0.0.1:631           0.0.0.0:*               LISTEN      1237/cupsd
tcp6       0      0 :::111                  :::*                    LISTEN      1/systemd
tcp6       0      0 ::1:3350                :::*                    LISTEN      1292/xrdp-sesman
tcp6       0      0 :::22                   :::*                    LISTEN      1241/sshd
tcp6       0      0 ::1:631                 :::*                    LISTEN      1237/cupsd
tcp6       0      0 :::3389                 :::*                    LISTEN      1295/xrdp
[root@localhost ~]# systemctl stop firewalld.service
[root@localhost ~]# systemctl disable firewalld.service
Removed /etc/systemd/system/multi-user.target.wants/firewalld.service.
Removed /etc/systemd/system/dbus-org.fedoraproject.FirewallD1.service.
[root@localhost ~]#
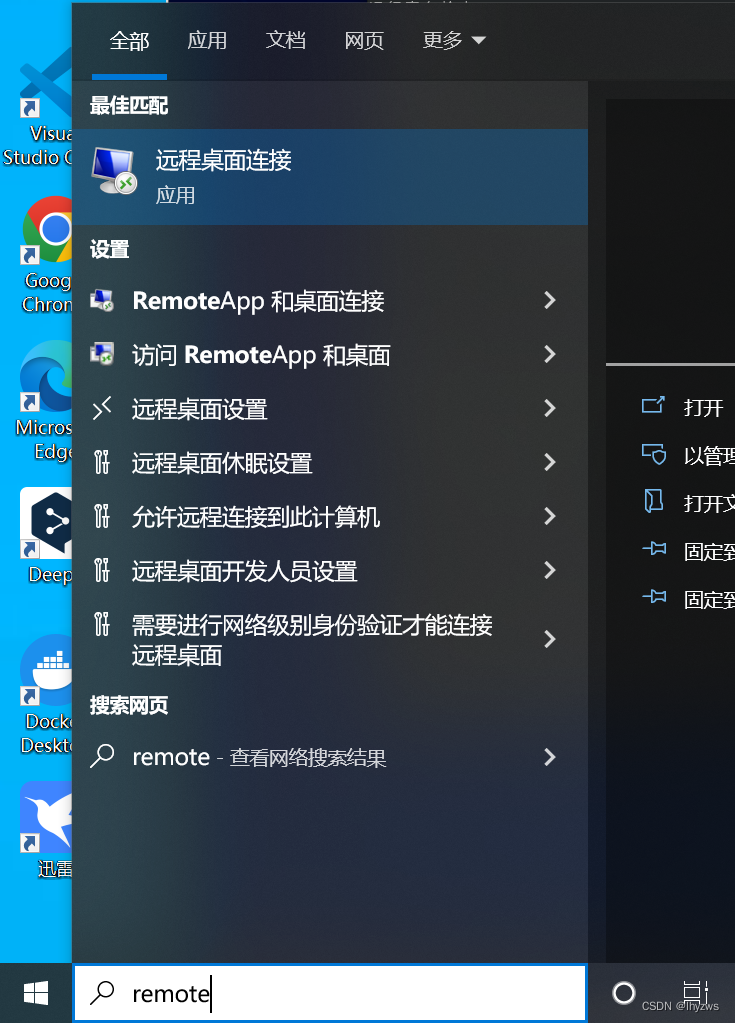
安装好了以后,就可以使用Windows的远程桌面连接进行登录。
提示证书什么不用管,直接连接就好。但是有一件事需要注意,就是和windows远程桌面一样,不允许一个用户同时登录2次。在windows中,新的用户会把原来的用户挤下来,但是在Linux中,是新的用户挤不进去,闪退……
我被这个坑了好久,一直在查软件配置的问题,知道半天多以后猛然灵光一闪……
换了个用户,这样就登进去了
显示设置也可以更改一下,方便放多个窗口
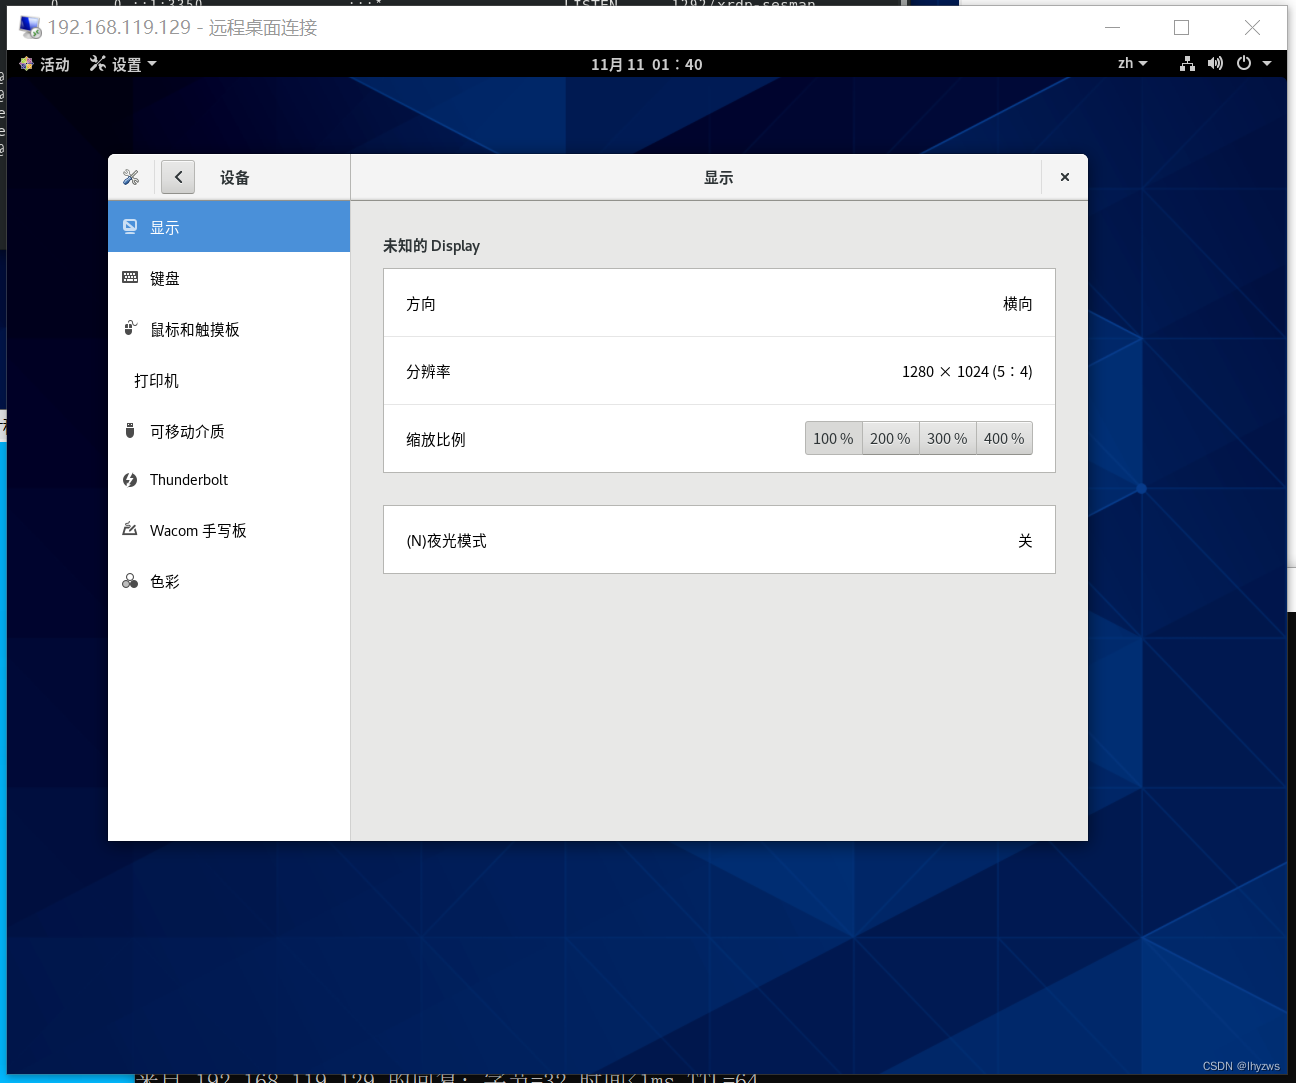
有趣的是,和Windows中不一样的是,如果在远程桌面中关机,不是注销用户,而是直接把主机也关掉了。这个要是用在生产环境中,哪个用户一关机……就相当尴尬了。
2. 把远程桌面架到Docker上
下一步该琢磨的,是怎么在dockers中装上远程桌面。
(1)安装epel和xrdp
首先是在我们现有的超大镜像上再构造一层,把epel和xrdp装上。
这个使用Dockerfile文件比较简单的可以做到:
FROM centos-stream-8:pig01
RUN yum install epel-release -y \
	&& yum install xrdp -y
CMD ["/bin/bash"]
然后如上一篇中所述,docker build -t centos-stream-8:pig02,把我的pig01更新一版就好。
PS D:\vm\share\docker> docker build -t centos-stream-8:pig02 .
[+] Building 0.4s (2/2) FINISHED
 => [internal] load build definition from Dockerfile                                                                                                                   0.1s
 => => transferring dockerfile: 282B                                                                                                                                   0.0s
 => [internal] load .dockerignore                                                                                                                                      0.1s
 => => transferring context: 2B                                                                                                                                        0.0s
failed to solve with frontend dockerfile.v0: failed to create LLB definition: dockerfile parse error line 3: unknown instruction: &&
[+] Building 451.9s (5/6)
 => [internal] load build definition from Dockerfile                                                                                                                   0.1s
 => => transferring dockerfile: 281B                                                                                                                                   0.0s
 => [internal] load .dockerignore                                                                                                                                      0.0s
 => => transferring context: 2B                                                                                                                                        0.0s
 => [internal] load metadata for docker.io/library/centos-stream-8:pig01                                                                                               0.0s
 => [1/3] FROM docker.io/library/centos-stream-8:pig01                                                                                                                 0.1s
 => [2/3] RUN yum install epel-release -y  && yum install xrdp -y                                                                                                    212.3s
 => [3/3] RUN source /etc/sysconfig/xrdp  && /usr/sbin/xrdp-sesman $SESMAN_OPTIONS --nodaemon  && /usr/sbin/xrdp $XRDP_OPTIONS --nodaemon                            239.1s
(2)启动xrdp服务
xrdp的服务配置如下所示:
[root@localhost system]# cat xrdp-sesman.service
[Unit]
Description=xrdp session manager
Documentation=man:xrdp-sesman(8) man:sesman.ini(5)
Wants=network-online.target nss-lookup.target nss-user-lookup.target
After=network-online.target nss-lookup.target nss-user-lookup.target
StopWhenUnneeded=true
BindsTo=xrdp.service

[Service]
EnvironmentFile=/etc/sysconfig/xrdp
ExecStart=/usr/sbin/xrdp-sesman $SESMAN_OPTIONS --nodaemon

[Install]
WantedBy=multi-user.target
[root@localhost system]# cat xrdp.service
[Unit]
Description=xrdp daemon
Documentation=man:xrdp(8) man:xrdp.ini(5)
Requires=xrdp-sesman.service
After=xrdp-sesman.service

[Service]
EnvironmentFile=/etc/sysconfig/xrdp
ExecStart=/usr/sbin/xrdp $XRDP_OPTIONS --nodaemon

[Install]
WantedBy=multi-user.target
[root@localhost system]#
可以看到,xrdp还依赖于xrdp-sesman服务,并且这些服务都需要再ns-lookup/nss-user-lookup等systemd的核心组成模块启动后才能正常运行。所以在启动这些服务前,还需要把systemd启动起来。
为什么我们没有在Dockerfile里面使用RUN来启动这几个服务呢?因为前面说过,不管是手撸还是使用RUN,本质上都是单线程的在启动程序,一旦碰见一个不支持-d参数按照daemon模式启动的,就会挂住。事实上如果都放在RUN里面,构造镜像的时候就会挂在那里不动了。
好在如果手撸,可以采取exec的方式,只要容器还在运行,就多开一个交互式bash挂进去,如此反复,可以将所有的服务都启动起来。
但是这里还有一个问题,就是systemd,xrdp在systemd没有启动的情况下,是不能正常工作的。所以我们最终还是得回到前面说的/sbin/init大法,在docker启动的时候指定启动/sbin/init,强行把systemd启动起来。
另外,如前所述的网络问题,我们还需要将docker的3350(xrdp-sesman)和3389(xrdp)端口和主机绑定:
PS D:\vm\share\docker> docker run -it -p 3350:3350 -p 3389:3389 --name pig02 --privileged centos-stream-8:pig02 /sbin/init

Welcome to CentOS Stream 8!

[  OK  ] Created slice User and Session Slice.
[  OK  ] Created slice system-getty.slice.
[  OK  ] Listening on initctl Compatibility Named Pipe.
[  OK  ] Created slice system-sshd\x2dkeygen.slice.
[  OK  ] Listening on udev Kernel Socket.
[  OK  ] Reached target Login Prompts.
[  OK  ] Set up automount Arbitrary Executable File Formats File System Automount Point.
[  OK  ] Listening on Journal Socket.
         Starting Load Kernel Modules...
         Starting Read and set NIS domainname from /etc/sysconfig/network...
         Starting Remount Root and Kernel File Systems...
         Mounting Kernel Debug File System...
         Starting Setup Virtual Console...
[  OK  ] Listening on Journal Socket (/dev/log).
         Starting Journal Service...
[  OK  ] Created slice Virtual Machine and Container Slice.
         Mounting Huge Pages File System...
[  OK  ] Listening on udev Control Socket.
         Starting udev Coldplug all Devices...
[  OK  ] Started Forward Password Requests to Wall Directory Watch.
[  OK  ] Listening on Device-mapper event daemon FIFOs.
         Starting Monitoring of LVM2 mirrors, snapshots etc. using dmeventd or progress polling...
[  OK  ] Listening on Process Core Dump Socket.
[  OK  ] Listening on RPCbind Server Activation Socket.
[  OK  ] Reached target RPC Port Mapper.
[  OK  ] Listening on LVM2 poll daemon socket.
[  OK  ] Reached target Slices.
[  OK  ] Started Read and set NIS domainname from /etc/sysconfig/network.
[  OK  ] Mounted Kernel Debug File System.
[  OK  ] Mounted Huge Pages File System.
[FAILED] Failed to start Load Kernel Modules.
See 'systemctl status systemd-modules-load.service' for details.
[  OK  ] Started Remount Root and Kernel File Systems.
         Starting Load/Save Random Seed...
         Starting Create Static Device Nodes in /dev...
         Mounting FUSE Control File System...
         Starting Apply Kernel Variables...
[  OK  ] Started Load/Save Random Seed.
[  OK  ] Mounted FUSE Control File System.
[  OK  ] Started Apply Kernel Variables.
[  OK  ] Started Create Static Device Nodes in /dev.
         Starting udev Kernel Device Manager...
[  OK  ] Started Journal Service.
         Starting Flush Journal to Persistent Storage...
[  OK  ] Started Setup Virtual Console.
[  OK  ] Started udev Kernel Device Manager.
[  OK  ] Started udev Coldplug all Devices.
         Starting udev Wait for Complete Device Initialization...
         Starting Show Plymouth Boot Screen...
[  OK  ] Started Flush Journal to Persistent Storage.
[  OK  ] Started Show Plymouth Boot Screen.
[  OK  ] Started Forward Password Requests to Plymouth Directory Watch.
[  OK  ] Reached target Local Encrypted Volumes.
[  OK  ] Started Monitoring of LVM2 mirrors, snapshots etc. using dmeventd or progress polling.
[  OK  ] Started udev Wait for Complete Device Initialization.
[  OK  ] Reached target Local File Systems (Pre).
[ TIME ] Timed out waiting for device dev-mapper-cs\x2dswap.device.
[DEPEND] Dependency failed for /dev/mapper/cs-swap.
[DEPEND] Dependency failed for Swap.
[ TIME ] Timed out waiting for device dev-mapper-cs\x2dhome.device.
[DEPEND] Dependency failed for /home.
[DEPEND] Dependency failed for Local File Systems.
[DEPEND] Dependency failed for Mark the need to relabel after reboot.
[ TIME ] Timed out waiting for device dev-disk-by\x2duuid-074b94e8\x2dbc92\x2d4781\x2d8880\x2d50e42d4aaeea.device.
[DEPEND] Dependency failed for /boot.
[  OK  ] Reached target Timers.
[  OK  ] Reached target User and Group Name Lookups.
[  OK  ] Reached target Network (Pre).
[  OK  ] Reached target Paths.
[  OK  ] Reached target Network.
[  OK  ] Reached target Network is Online.
         Starting Notify NFS peers of a restart...
         Starting Logout off all iSCSI sessions on shutdown...
[  OK  ] Started Emergency Shell.
         Starting Tell Plymouth To Write Out Runtime Data...
[  OK  ] Reached target Emergency Mode.
         Starting Create Volatile Files and Directories...
[  OK  ] Reached target Sockets.
[  OK  ] Started Notify NFS peers of a restart.
[  OK  ] Started Logout off all iSCSI sessions on shutdown.
[  OK  ] Started Tell Plymouth To Write Out Runtime Data.
[  OK  ] Started Create Volatile Files and Directories.
         Mounting RPC Pipe File System...
         Starting Security Auditing Service...
         Starting RPC Bind...
[  OK  ] Mounted RPC Pipe File System.
[  OK  ] Reached target rpc_pipefs.target.
[  OK  ] Reached target NFS client services.
[  OK  ] Reached target Remote File Systems (Pre).
[  OK  ] Reached target Remote File Systems.
[FAILED] Failed to start Security Auditing Service.
See 'systemctl status auditd.service' for details.
         Starting Update UTMP about System Boot/Shutdown...
[  OK  ] Started RPC Bind.
[  OK  ] Started Update UTMP about System Boot/Shutdown.
         Starting Update UTMP about System Runlevel Changes...
[  OK  ] Started Update UTMP about System Runlevel Changes.
You are in emergency mode. After logging in, type "journalctl -xb" to view
system logs, "systemctl reboot" to reboot, "systemctl default" or "exit"
to boot into default mode.
?? root ?????
(?? Control-D ???):
?????
启动到中间(看具体如何镜像的系统而定),我这个会报错,输入一下密码就进去了。
如果没有替换systemctl,直接使用系统原有的systemctl启动xrdp服务还是会存在问题。所以我们开了几个交互式界面进行手撸:
第一个:
PS D:\vm\share\docker> docker exec -it pig02 bash
[root@d84fc5536215 /]# /usr/sbin/xrdp-sesman --nodaemon
第二个:
PS D:\vm\share\docker> docker exec -it pig02 bash
[root@d84fc5536215 /]# /usr/sbin/xrdp --nodaemon
再开一个看看端口是否打开了:
C:\Users\dell>docker port pig02
3350/tcp -> 0.0.0.0:3350
3389/tcp -> 0.0.0.0:3389
(3)连接测试
最终,我们可以成功的启动xrdp服务,并且使用远程桌面连接也可以访问容器中的服务了。当然,在绑定主机端口时,所谓的主机实际上是wsl上的那个Ubuntu子系统,所以使用IP地址的时候不要弄错了。
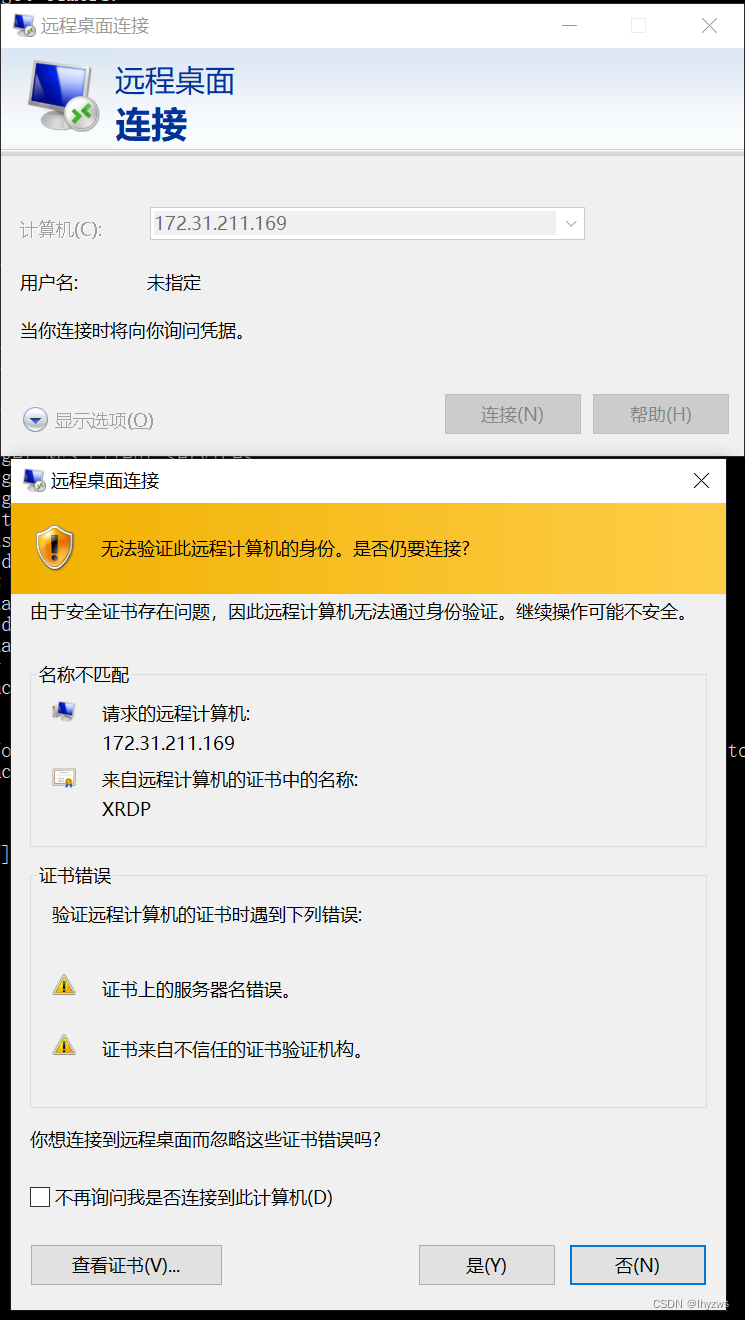

登录的过程中,如果是手撸的服务,那个进程会不断的输出log来。
但最终的结果,还是闪退……但是对比虚拟机上成功的访问,和docker上不成功的访问,2者几乎没有区别,xrdp也没有报错(如果服务启动不正确的话,会有大量的[ERROR]和[WARNING]):
[root@925f040afc94 /]# /usr/sbin/xrdp-sesman --nodaemon
xauth:  file .Xauthority does not exist

Xvnc TigerVNC 1.12.0 - built Aug 27 2022 13:07:52
Copyright (C) 1999-2021 TigerVNC Team and many others (see README.rst)
See https://www.tigervnc.org for information on TigerVNC.
Underlying X server release 12011000, The X.Org Foundation


Mon Dec  5 02:10:45 2022
 vncext:      VNC extension running!
 vncext:      Listening for VNC connections on local interface(s), port 5910
 vncext:      created VNC server for screen 0
 Connections: accepted: 127.0.0.1::56400
 SConnection: Client needs protocol version 3.3
 VNCSConnST:  Server default pixel format depth 32 (32bpp) little-endian rgb
              max 255,255,255 shift 16,8,0
Global configuration:
    UseUnixSocket (derived):   true

Security configuration:
    RestrictOutboundClipboard: none
    RestrictInboundClipboard:  none

Chansrv configuration:
    EnableFuseMount            true
    FuseMountName:             thinclient_drives
    FileMask:                  077
    Nautilus 3 Flist Format:   false
chansrv::main: using log file [/home/pig/.local/share/xrdp/xrdp-chansrv.10.log]
 VNCSConnST:  Client pixel format depth 24 (32bpp) little-endian rgb888

Mon Dec  5 02:10:46 2022
 VNCSConnST:  closing 127.0.0.1::56400: Server shutdown
 EncodeManager: Framebuffer updates: 1
 EncodeManager:   Raw:
 EncodeManager:     Solid: 136 rects, 8.2944 Mpixels
 EncodeManager:            31.6422 MiB (1:1 ratio)
 EncodeManager:   Total: 136 rects, 8.2944 Mpixels
 EncodeManager:          31.6422 MiB (1:1 ratio)
 ComparingUpdateTracker: 0 pixels in / 0 pixels out
 ComparingUpdateTracker: (1:-nan ratio)
如果成功(比如在VMware上),应该是这样的
[root@localhost ~]# /usr/sbin/xrdp-sesman --nodaemon

Xvnc TigerVNC 1.12.0 - built Aug 27 2022 13:07:52
Copyright (C) 1999-2021 TigerVNC Team and many others (see README.rst)
See https://www.tigervnc.org for information on TigerVNC.
Underlying X server release 12011000, The X.Org Foundation


Mon Dec  5 02:51:29 2022
 vncext:      VNC extension running!
 vncext:      Listening for VNC connections on local interface(s), port 5911
 vncext:      created VNC server for screen 0
Global configuration:
    UseUnixSocket (derived):   true

Security configuration:
    RestrictOutboundClipboard: none
    RestrictInboundClipboard:  none

Chansrv configuration:
    EnableFuseMount            true
    FuseMountName:             thinclient_drives
    FileMask:                  077
    Nautilus 3 Flist Format:   false
chansrv::main: using log file [/home/pig/.local/share/xrdp/xrdp-chansrv.11.log]
 Connections: accepted: 127.0.0.1::32882
 SConnection: Client needs protocol version 3.3
 VNCSConnST:  Server default pixel format depth 32 (32bpp) little-endian rgb
              max 255,255,255 shift 16,8,0
 VNCSConnST:  Client pixel format depth 24 (32bpp) little-endian rgb888

Mon Dec  5 02:51:33 2022
 ComparingUpdateTracker: 0 pixels in / 0 pixels out
 ComparingUpdateTracker: (1:-nan ratio)
 VNCSConnST:  FramebufferUpdateRequest 3840x2160 at 0,0 exceeds framebuffer
              1280x1024
具体出了啥问题我就不知道了,只有最后那一步FramebufferUpdateRequest没有成功。
3.可能的原因
(1)宿主机和容器同操作系统的实验
接下来我突发奇想,如果就在VMware上的centos-stream-8中安装docker,并就在这个docker中运行一个同样版本的centos-stream-8的镜像,尽可能给它们一样的环境,xrdp是否能正常呢?结果还真是——又前进了一小步:在pig02从默认的/sbin/init启动时,居然整个主机都进入了交互式界面的欢迎界面:
当然,最后仍然不出意外的进入了emergency模式,毕竟不太可能在docker中直接进入交互式界面,想来docker也不会支持这个……。所以,远程桌面进入容器也不太可能进入交互界面。
(2)docker的那个scratch内核到底是什么?
由于在不同的宿主机下,尝试远程登陆交互式界面得到的结果不一样,所以我多做了一步实验,看看不同宿主机下的容器的内核到底是什么:
WSL下:
宿主机,也就WSL下的Ubuntu子系统

容器,使用的还是我们造的那个centos-strem-8的超大镜像:

VMware Centos-Stream-8下:
宿主机,那个超级大镜像的母体:

容器,那个超级大镜像载入后得到的容器:

可见,容器所使用的内核——也就是scratch所对应的内核,其实就是docker宿主机上那个Linux系统的内核——如果希望容器工作得更稳定一些,考虑宿主机和容器同内核看起来比较靠谱一点。
这正好强有力的说明了一个问题,对于基于操作系统虚拟化的Docker来说,进程隔离才是它真正的主业。
关于远程docker交互式界面这个事,如果docker确实能支持的话(从前面看应该是不支持的),也许仔细地去构建支持xrdp的服务树还是有可能办到的。鉴于我还没有打算去研究xrdp,也没有功夫去回溯systemd的服务树。在一顿磕磕绊绊下能走到这一步也还算不错,倒在革命的最后一步虽然心有不甘也只能就此罢了。
六、结论
结论就是重要的事情说三遍:docker不是虚拟机!docker不是虚拟机!docker不是虚拟机!
所以,无可奈何的最后结论——反过来也算我扣题了——“搬到Docker上?”,为什么我一早要加个问好来着?重要的还在于我们应该正确的认识docker,这只是个进程隔离的工具,其真正的运行基础核心其实在WSL的子系统上,我们所谓的镜像对docker来说,只是一些文件,如果在核心上能转起来就转起来了,如果支持不到位,分分钟撂挑子也是说来就来的。所以,用好Docker关键还在于认识Docker。






![[附源码]计算机毕业设计框架的食品安全监督平台的设计与实现Springboot程序](https://img-blog.csdnimg.cn/2d334224e1d44e54b6faf404af3e1e26.png)
