目录
2.3.8 使用mark给固定装置传递数据
2.3.9 将固定装置工厂化
2.3.10 参数化固定装置
2.3.11 使用带有参数化固定装置的标记
2.3.12 使用来自固定装置功能中的固定装置 - 模块化
2.3.13 按固定装置实例自动分组测试
2.3.14 在类和模块中使用usefixtures
2.3.15 固定装置覆盖在不同级别上
2.3.16 使用从其他项目中获得的固定装置
🎁更多干货
完整版文档下载方式:
2.3.8 使用mark给固定装置传递数据
使用请求对象,夹具还可以访问应用于测试功能的标记。这对于将测试中的数据传递到夹具中非常有用:
import pytest


@pytest.fixture()
def fixt(request):
    marker = request.node.get_closest_marker("fixt_data")
    if marker is None:
        # Handle missing marker in some way...
        data = None
    else:
        data = marker.args[0]
    # Do something with the data
    return data


@pytest.mark.fixt_data(42)
def test_fixt(fixt):
    assert fixt == 42
2.3.9 将固定装置工厂化
“工厂即夹具”模式可以在一次测试中需要多次获得夹具结果的情况下提供帮助。固定装置不是直接返回数据,而是返回一个生成数据的函数。这个函数可以在测试中多次调用
import pytest

@pytest.fixture
def make_customer_record():
	def _make_customer_record(name):
		return {"name": name, "orders": []}
	return _make_customer_record

def test_customer_records(make_customer_record):
	customer_1 = make_customer_record("Lisa")
	customer_2 = make_customer_record("Mike")
	customer_3 = make_customer_record("Meredith")
	print(customer_1, customer_2, customer_3)
如果工厂函数创建的数据需要管理,那么设备可以处理这些问题:
import pytest

@pytest.fixture
def make_customer_record():
	created_records = []
	def _make_customer_record(name):
		record = models.Customer(name=name, orders=[])
		created_records.append(record)
		return record
	yield _make_customer_record
	for record in created_records:
		record.destroy()

def test_customer_records(make_customer_record):
	customer_1 = make_customer_record("Lisa")
	customer_2 = make_customer_record("Mike")
	customer_3 = make_customer_record("Meredith")
	print(customer_1, customer_2, customer_3)
2.3.10 参数化固定装置
夹具函数可以参数化,在这种情况下,它们将被调用多次,每次执行一组依赖的测试时,即依赖于此固定装置的测试。测试函数通常不需要知道它们的重新运行,夹具参数化有助于为组件编写详尽的功能测试,这些组件本身可以以多种方式进行配置。
数字、字符串、布尔值和None将在测试ID中使用它们通常的字符串表示形式,对于其他对象,pytest将根据参数名称创建一个字符串。可以使用id关键字参数自定义特定固定值的测试ID中使用的字符串:
上面显示了id如何可以是一个要使用的字符串列表,或者是一个将用固定装置值调用的函数,然后必须返回一个要使用的字符串。在后一种情况下,如果函数返回None,那么将使用pytest的自动生成的ID。
import pytest

@pytest.fixture(params=[0,1], ids=["spam", "ham"])
def a(request):
    return request.param

def test_a(a):
    pass

def idfn(fixture_value):
    if fixture_value == 0:
        return "eggs"
    else:
        return None

@pytest.fixture(params=[0, 1], ids=idfn)
def b(request):
    return request.param

def test_b(b):
    pass
C:\Users\mc\Desktop\python基础>pytest test_ids.py -vs
================================== test session starts ==================================
platform win32 -- Python 3.9.6, pytest-7.1.1, pluggy-0.13.1 -- c:\python39\python.exe
cachedir: .pytest_cache
rootdir: C:\Users\mc\Desktop\python基础
collected 4 items
test_ids.py::test_a[spam] PASSED
test_ids.py::test_a[ham] PASSED
test_ids.py::test_b[eggs] PASSED
test_ids.py::test_b[1] PASSED
=================================== 4 passed in 0.02s ===================================
2.3.11 使用带有参数化固定装置的标记
# content of test_fixture_marks.py
import pytest
@pytest.fixture(params=[0, 1, pytest.param(2, marks=pytest.mark.skip)])
def data_set(request):
    return request.param
def test_data(data_set):
    pass
pytest.param()可以用于在参数化装置的值集中应用标记,就与@pytest.mark.parametrize使用一样。
collected 3 items
test_fixture_marks.py::test_data[0] PASSED
test_fixture_marks.py::test_data[1] PASSED
test_fixture_marks.py::test_data[2] SKIPPED (unconditional skip)
2.3.12 使用来自固定装置功能中的固定装置 - 模块化
除了在测试功能中使用固定装置外,装置功能还可以使用其他装置本身。这有助于实现设备的模块化设计,并允许在许多项目中重用特定于框架的设备。作为一个简单的示例,我们可以扩展前面的示例,并实例化一个对象应用程序,其中我们将已经定义的smtp_connection资源插入其中:
# content of test_appsetup.py
import pytest
class App:
    def __init__(self, smtp_connection):
        self.smtp_connection = smtp_connection

@pytest.fixture(scope="module")
def app(smtp_connection):
    return App(smtp_connection)

def test_smtp_connection_exists(app):
    assert app.smtp_connection
2.3.13 按固定装置实例自动分组测试
在测试过程中最小化活动装置的数量。如果您有一个参数化的装置,那么使用它的所有测试将首先使用一个实例执行,然后在创建下一个固定实例之前调用终结器。除此之外,这还简化了对创建和使用全局状态的应用程序的测试。
下面的示例使用两个参数化的固定装置,其中一个是基于每个模块的范围,所有函数都执行打印调用以显示设置/拆卸流程:
# content of test_module.py
import pytest

@pytest.fixture(scope="module", params=["mod1", "mod2"])
def modarg(request):
    param = request.param
    print(" SETUP modarg", param)
    yield param
    print(" TEARDOWN modarg", param)

@pytest.fixture(scope="function", params=[1, 2])
def otherarg(request):
    param = request.param
    print(" SETUP otherarg", param)
    yield param
    print(" TEARDOWN otherarg", param)

def test_0(otherarg):
    print(" RUN test0 with otherarg", otherarg)
def test_1(modarg):
    print(" RUN test1 with modarg", modarg)
def test_2(otherarg, modarg):
    print(f" RUN test2 with otherarg {otherarg} and modarg {modarg}")
特别注意,test_0是完全独立的,首先完成。然后用mod1执行test_1,然后用mod1执行test_2,然后用mod2执行test_1,最后用mod2执行test_2
C:\Users\mc\Desktop\python基础>pytest test_module.py -vs
================================== test session starts ==================================
platform win32 -- Python 3.9.6, pytest-7.1.1, pluggy-0.13.1 -- c:\python39\python.exe
cachedir: .pytest_cache
rootdir: C:\Users\mc\Desktop\python基础
collected 8 items

test_module.py::test_0[1]  SETUP otherarg 1
 RUN test0 with otherarg 1
PASSED TEARDOWN otherarg 1

test_module.py::test_0[2]  SETUP otherarg 2
 RUN test0 with otherarg 2
PASSED TEARDOWN otherarg 2

test_module.py::test_1[mod1]  SETUP modarg mod1
 RUN test1 with modarg mod1
PASSED
test_module.py::test_2[mod1-1]  SETUP otherarg 1
 RUN test2 with otherarg 1 and modarg mod1
PASSED TEARDOWN otherarg 1

test_module.py::test_2[mod1-2]  SETUP otherarg 2
 RUN test2 with otherarg 2 and modarg mod1
PASSED TEARDOWN otherarg 2

test_module.py::test_1[mod2]  TEARDOWN modarg mod1
 SETUP modarg mod2
 RUN test1 with modarg mod2
PASSED
test_module.py::test_2[mod2-1]  SETUP otherarg 1
 RUN test2 with otherarg 1 and modarg mod2
PASSED TEARDOWN otherarg 1

test_module.py::test_2[mod2-2]  SETUP otherarg 2
 RUN test2 with otherarg 2 and modarg mod2
PASSED TEARDOWN otherarg 2
 TEARDOWN modarg mod2
=================================== 8 passed in 0.05s ===================================
2.3.14 在类和模块中使用usefixtures
有时,测试函数并不需要直接访问夹具对象。例如,测试可能需要使用一个空目录作为当前工作目录进行操作,否则就不关心具体目录。下面是你如何使用标准的诱惑文件和最糟糕的固定装置来实现它。我们将该设备的创建分离成一个conftest.py文件:
# content of conftest.py
import os
import tempfile
import pytest

@pytest.fixture
def cleandir():
    with tempfile.TemporaryDirectory() as newpath:
        old_cwd = os.getcwd()
        os.chdir(newpath)
        yield
        os.chdir(old_cwd)
# content of test_setenv.py
import os
import pytest
@pytest.mark.usefixtures("cleandir")
class TestDirectoryInit:
def test_cwd_starts_empty(self):
assert os.listdir(os.getcwd()) == []
with open("myfile", "w") as f:
f.write("hello")
def test_cwd_again_starts_empty(self):
assert os.listdir(os.getcwd()) == []由于使用装置标记,执行每个测试方法都需要清理dir夹,就像您为每个测试方法指定了一个“清理dir”函数参数一样。让我们运行它来验证我们的固定装置是否被激活,并且测试是否通过:
C:\Users\mc\Desktop\python基础>pytest -q test_setenv.py
..                                                                                 [100%]
2 passed in 0.02s
您可以像这样指定多个固定装置:
@pytest.mark.usefixtures("cleandir", "anotherfixture")
def test():
	...
您可以使用测试标记在测试模块级别指定固定装置的使用:
pytestmark = pytest.mark.usefixtures("cleandir")也可以将项目中所有测试所需的固定装置放入一个ini文件中:
# content of pytest.ini
[pytest]
usefixtures = cleandir
2.3.15 固定装置覆盖在不同级别上
在相对较大的测试套件中,您很可能需要使用本地定义的设备覆盖全局或根设备,以保持测试代码的可读性和可维护性。
- 覆盖文件夹(conftest)级别
tests/
	__init__.py
	conftest.py
		# content of tests/conftest.py
		import pytest

		@pytest.fixture
		def username():
		return 'username'
	test_something.py
		# content of tests/test_something.py
		def test_username(username):
		assert username == 'username'
subfolder/
	__init__.py
	conftest.py
		# content of tests/subfolder/conftest.py
		import pytest
		@pytest.fixture
		def username(username):
		return 'overridden-' + username
	test_something.py
		# content of tests/subfolder/test_something.py
		def test_username(username):
		assert username == 'overridden-username'
- 用直接的测试参数化来覆盖一个固定装置 在上面的示例中,夹具值会被测试参数值覆盖。请注意,即使测试没有直接使用它(在函数原型中没有提到它)
tests/
	__init__.py
	conftest.py
		# content of tests/conftest.py
		import pytest
		@pytest.fixture
		def username():
			return 'username'
		@pytest.fixture
		def other_username(username):
			return 'other-' + username
	test_something.py
		# content of tests/test_something.py
		import pytest
		@pytest.mark.parametrize('username', ['directly-overridden-username'])
		def test_username(username):
			assert username == 'directly-overridden-username'
		@pytest.mark.parametrize('username', ['directly-overridden-username-other'])
		def test_username_other(other_username):
			assert other_username == 'other-directly-overridden-username-other'
- 用非参数化的装置覆盖参数化的装置,反之亦然
tests/
	__init__.py
	conftest.py
		# content of tests/conftest.py
		import pytest
		@pytest.fixture(params=['one', 'two', 'three'])
		def parametrized_username(request):
			return request.param
		@pytest.fixture
		def non_parametrized_username(request):
			return 'username'
	test_something.py
		# content of tests/test_something.py
		import pytest
		@pytest.fixture
		def parametrized_username():
			return 'overridden-username'
		@pytest.fixture(params=['one', 'two', 'three'])
		def non_parametrized_username(request):
			return request.param
		def test_username(parametrized_username):
			assert parametrized_username == 'overridden-username'
		def test_parametrized_username(non_parametrized_username):
			assert non_parametrized_username in ['one', 'two', 'three']
	test_something_else.py
		# content of tests/test_something_else.py
		def test_username(parametrized_username):
			assert parametrized_username in ['one', 'two', 'three']
		def test_username(non_parametrized_username):
			assert non_parametrized_username == 'username'
在上面的例子中,参数化的装置被非参数化版本覆盖,而非参数化的装置被特定测试模块的参数化版本覆盖。显然,这也同样适用于测试文件夹级别。
2.3.16 使用从其他项目中获得的固定装置
假设你在我的库中有一些固定装置。固定装置,你想将它们重用到你的应用程序/测试目录中。您所需要做的就是在app/tests/conftest.py中定义指向该模块的pytest_plugins
pytest_plugins = "mylibrary.fixtures"这有效地注册了我的程序库。固定装置作为一个插件,使它的所有固定装置和钩子都可以在应用程序/测试中进行测试
🎁更多干货
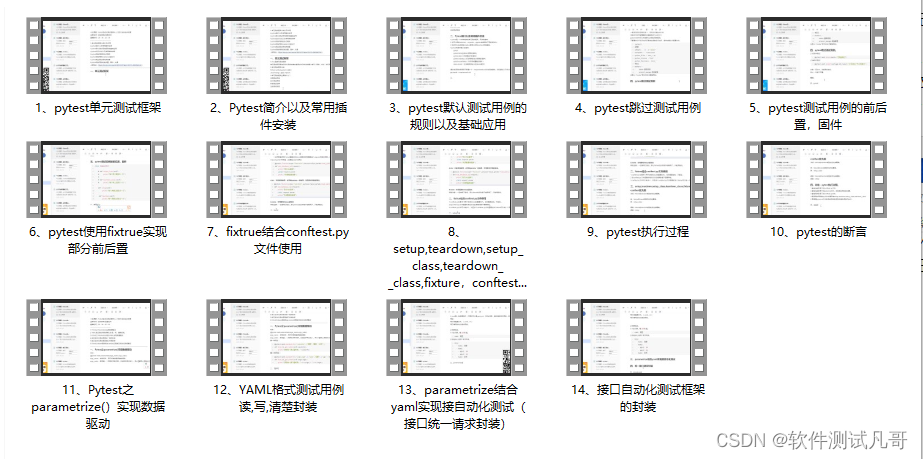

完整版文档下载方式:
这些资料,对于从事【软件测试】等相关工作的朋友来说应该是最全面最完整的备战仓库,这个仓库也陪伴我走过了最艰难的路程,希望也能帮助到你!以上均可以分享。
在评论区和我互动交流或者私❤我【软件测试学习】领取即可,拿走不谢。
如果我的博客对你有帮助、如果你喜欢我的博客内容,请 “👍点赞” “✍️评论” “💙收藏” 一键三连哦!

