背景介绍
Prometheus是由SoundCloud开发的开源监控报警系统和时序列数据库(TSDB)。Prometheus使用Go语言开发,是Google BorgMon监控系统的开源版本。
Prometheus的特点
多维度数据模型。
灵活的查询语言。
不依赖分布式存储,单个服务器节点是自主的。
通过基于HTTP的pull方式采集时序数据。
可以通过中间网关进行时序列数据推送。
通过服务发现或者静态配置来发现目标服务对象。
支持多种多样的图表和界面展示,比如Grafana等。
相关组件
Prometheus Server — Prometheus组件中的核心部分,负责实现对监控数据的获取,存储以及查询。
Push Gateway — Prometheus数据采集基于Pull模型,当Prometheus Server不能直接与Exporter进行通信时,可利用PushGateway来进行中转。即通过PushGateway将内部网络的监控数据主动Push到Gateway当中,Prometheus Server再采用同样Pull的方式从PushGateway中获取监控数据。
Exporter — 数据采集组件,它并不向中央服务器发送数据,而是等待中央服务器主动前来抓取。其将监控数据采集的端点通过HTTP服务的形式暴露给Prometheus Server,Prometheus Server通过访问该Exporter提供的Endpoint端点,即可获取到需要采集的监控数据。
alertmanager — 若Promtheus Server中发现某监控项满足PromQL中定义的告警规则,则会产生一条告警,并将其交于AlertManager进行管理。在AlertManager中可以配置各种通知方式,也可以定义Webhook自定义告警处理方式。AlertManager即Prometheus体系中的告警处理中心。
一.安装Prometheus Server
Prometheus基于Golang编写,编译后的软件包,不依赖于任何的第三方依赖。用户只需要下载对应平台的二进制包,解压并且添加基本的配置即可正常启动Prometheus Server。
1.二进制部署
参考官网地址 https://prometheus.io/docs/introduction/first_steps/
wget https://github.com/prometheus/prometheus/releases/download/v2.45.0/prometheus-2.45.0.linux-amd64.tar.gz

tar -zxvf prometheus-2.45.0.linux-amd64.tar.gz
cd prometheus-2.45.0.linux-amd64
nohup ./prometheus --config.file=prometheus.yml  2>&1 &

http://localhost:9090/metrics
 http://localhost:9090/graph
2.docker方式部署
参考网址 https://yunlzheng.gitbook.io/prometheus-book/parti-prometheus-ji-chu/quickstart/prometheus-quick-start/install-prometheus-server
docker run -itd --name=prometheus -p 9090:9090 prom/prometheus
mkdir -p /etc/prometheus/
docker cp prometheus:/etc/prometheus/prometheus.yml /etc/prometheus/
docker rm -f prometheus
docker run -itd --name=prometheus -p 9090:9090 -v /etc/prometheus/prometheus.yml:/etc/prometheus/prometheus.yml prom/prometheus
http://localhost:9090/metrics
二.安装Node Exporter
在Prometheus的架构设计中,Prometheus Server并不直接服务监控特定的目标,其主要任务负责数据的收集,存储并且对外提供数据查询支持。因此为了能够能够监控到某些东西,如主机的CPU使用率,我们需要使用到Exporter。Prometheus周期性的从Exporter暴露的HTTP服务地址(通常是/metrics)拉取监控样本数据。
从上面的描述中可以看出Exporter可以是一个相对开放的概念,其可以是一个独立运行的程序独立于监控目标以外,也可以是直接内置在监控目标中。只要能够向Prometheus提供标准格式的监控样本数据即可。
这里为了能够采集到主机的运行指标如CPU, 内存,磁盘等信息。我们可以使用Node Exporter,下载地址 https://github.com/prometheus/node_exporter
Node Exporter同样采用Golang编写,并且不存在任何的第三方依赖,只需要下载,解压即可运行。可以从https://prometheus.io/download/获取最新的node exporter版本的二进制包。

二进制安装部署,可以自行选择版本
下载node_exporter二进制包压缩包:
github: https://github.com/prometheus/node_exporter
wget https://github.com/prometheus/node_exporter/releases/download/v1.4.0/node_exporter-1.4.0.linux-amd64.tar.gz
解压:
tar -zxvf node_exporter-1.4.0.linux-amd64.tar.gz
cd node_exporter-1.4.0.linux-amd64
cp node_exporter /usr/local/bin/
nohup ./node_exporter --web.listen-address=":9101"  2>&1 &
创建node_exporter systemctl文件
vim /usr/lib/systemd/system/node_export.service
[Service]
User=root
Group=root
ExecStart=/usr/local/bin/node_exporter

[Install]
WantedBy=multi-user.target

[Unit]
Description=node_exporter
After=network.target

# 重载/开机自启/查看状态/启动
systemctl daemon-reload
systemctl enable node_exporter
systemctl status node_exporter
systemctl start node_exporter

# 查看服务是否启动
lsof -i:9100
访问: http://ip:9100/metrics
启动成功后,可以看到以下输出:
INFO[0000] Listening on :9100 source=“node_exporter.go:76”
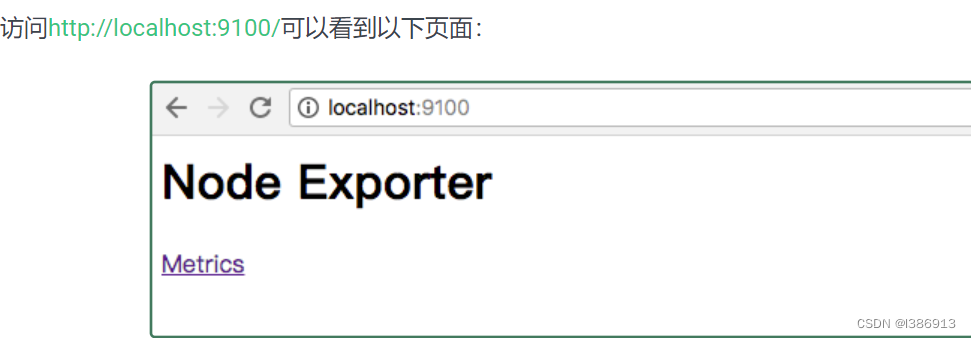
初始Node Exporter监控指标
访问http://localhost:9100/metrics,可以看到当前node exporter获取到的当前主机的所有监控数据,如下所示:
node_boot_time:系统启动时间
node_cpu:系统CPU使用量
nodedisk*:磁盘IO
nodefilesystem*:文件系统用量
node_load1:系统负载
nodememeory*:内存使用量
nodenetwork*:网络带宽
node_time:当前系统时间
go_:node exporter中go相关指标
process_:node exporter自身进程相关运行指标
从Node Exporter收集监控数据
为了能够让Prometheus Server能够从当前node exporter获取到监控数据,这里需要修改Prometheus配置文件。编辑prometheus.yml并在scrape_configs节点下添加以下内容:
scrape_configs:
  - job_name: 'prometheus'
    static_configs:
      - targets: ['localhost:9090']
  # 采集node exporter监控数据
  - job_name: 'export_test2'
    static_configs:
      - targets: ['192.168.20.137:9100']
        labels:
          instance: 'node2'
重新启动Prometheus Server
nohup ./prometheus --config.file=prometheus.yml 2>&1 &
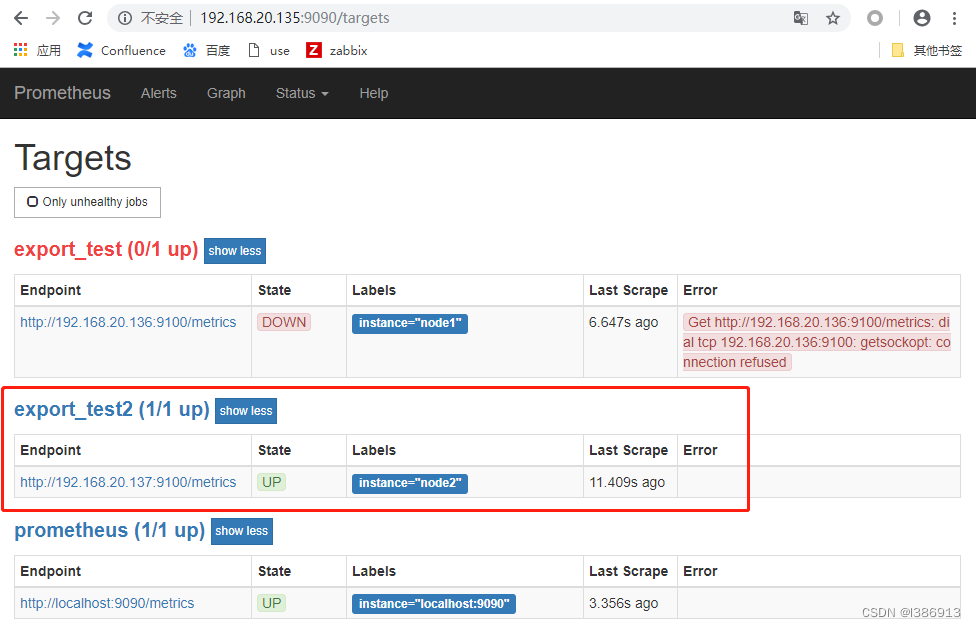
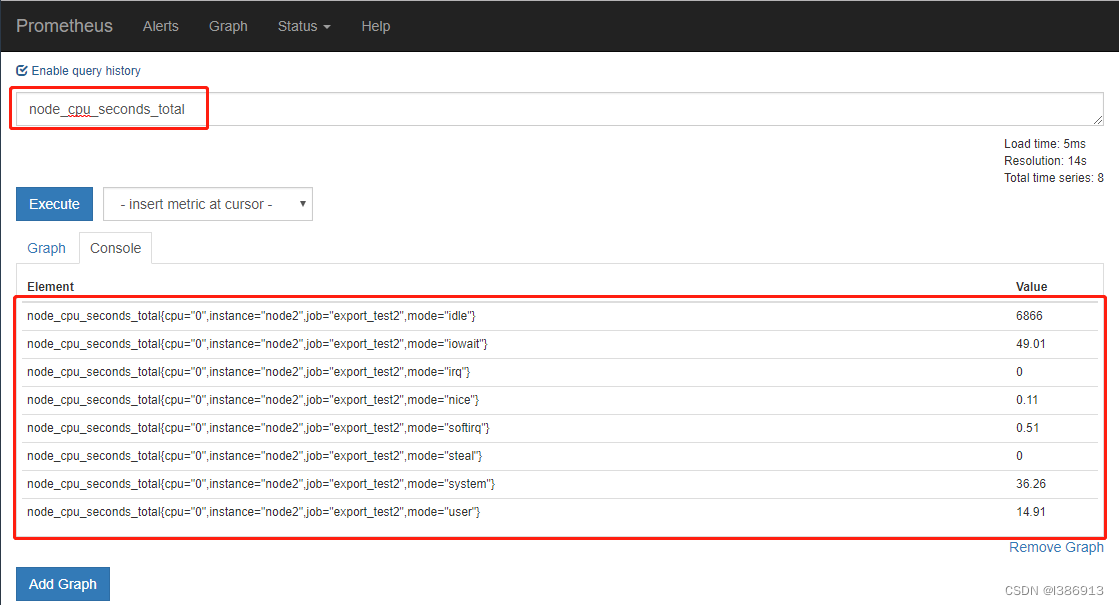
访问http://localhost:9090,进入到Prometheus Server。如果输入“up”并且点击执行按钮以后,可以看到如下结果:
up{instance=“localhost:9090”,job=“prometheus”} 1
up{instance=“localhost:9100”,job=“node”} 1
其中“1”表示正常,反之“0”则为异常。
在prometheus的web界面查看:status --> targets
三.安装grafana
https://www.cnblogs.com/huandada/p/10299639.html 参考资料
https://grafana.com/grafana/download/9.0.0?pg=get&platform=linux&plcmt=selfmanaged-box1-cta1&edition=oss 官网下载地址
grafana与prometheus进行对接,可以对数据进行更好的展示
wget https://dl.grafana.com/oss/release/grafana-9.0.0.linux-amd64.tar.gz
tar -zxvf grafana-9.0.0.linux-amd64.tar.gz  -C /usr/local/
启动grafana

cd /usr/local/grafana-9.0.0/bin/
./grafana-server &
登录grafana的web页面
http://192.168.20.135:3000/
admin/admin
添加数据源与自带模板
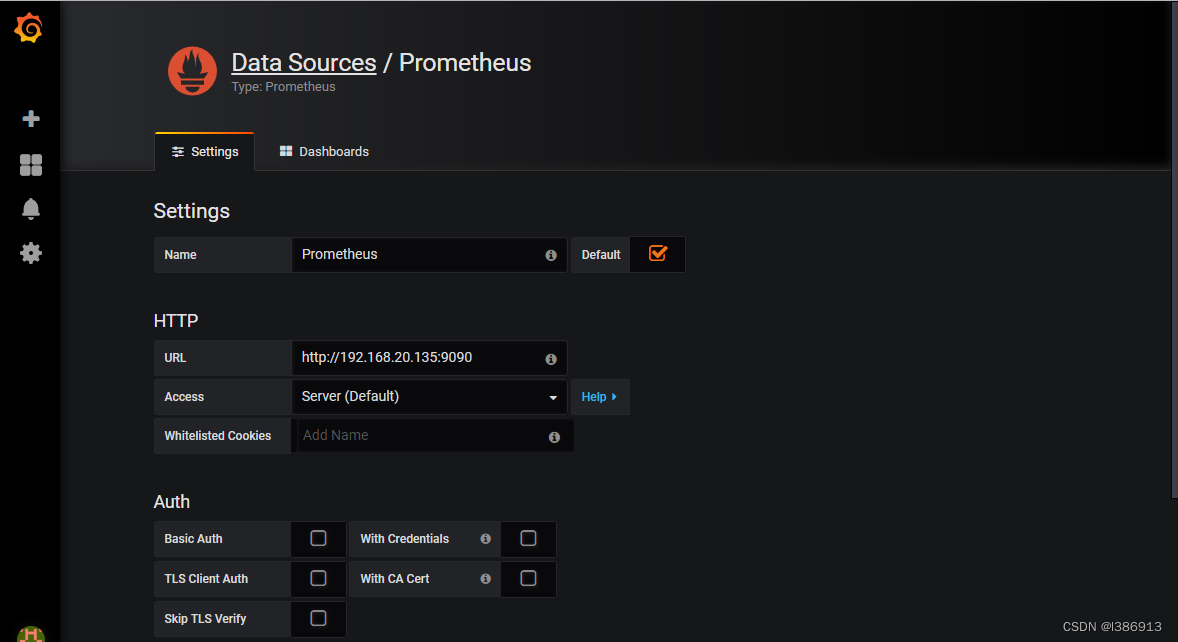
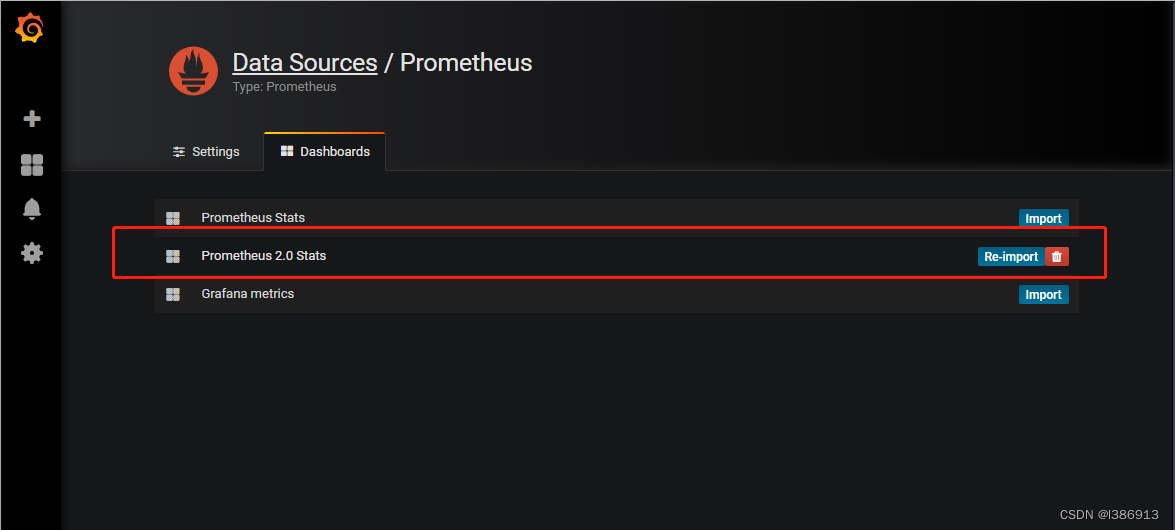
Add data source --> http://192.168.20.135:9090 --> Dashboards --> prometheus2.0 --> save&test
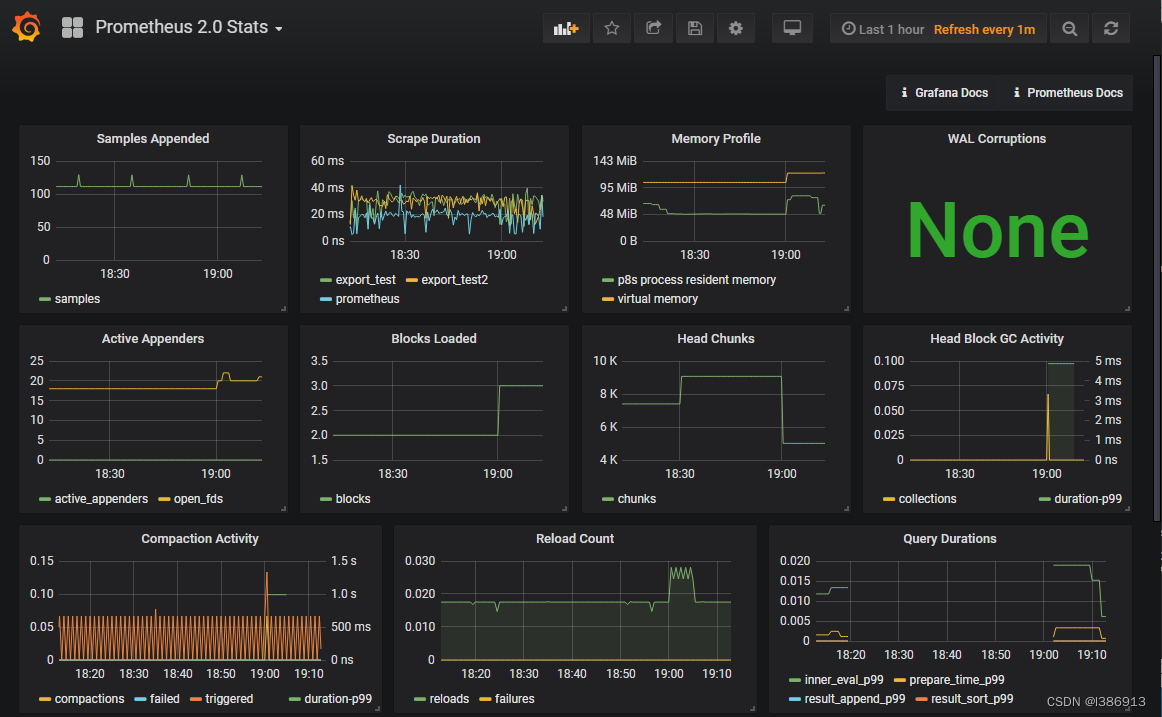
添加node-exporter-server-metrics 模板
下载方法:https://grafana.com/dashboards/405 --> Dashboards -->在如图搜索框搜索node-exporter-server-metrics -->点击第一个进去 --> version --> download
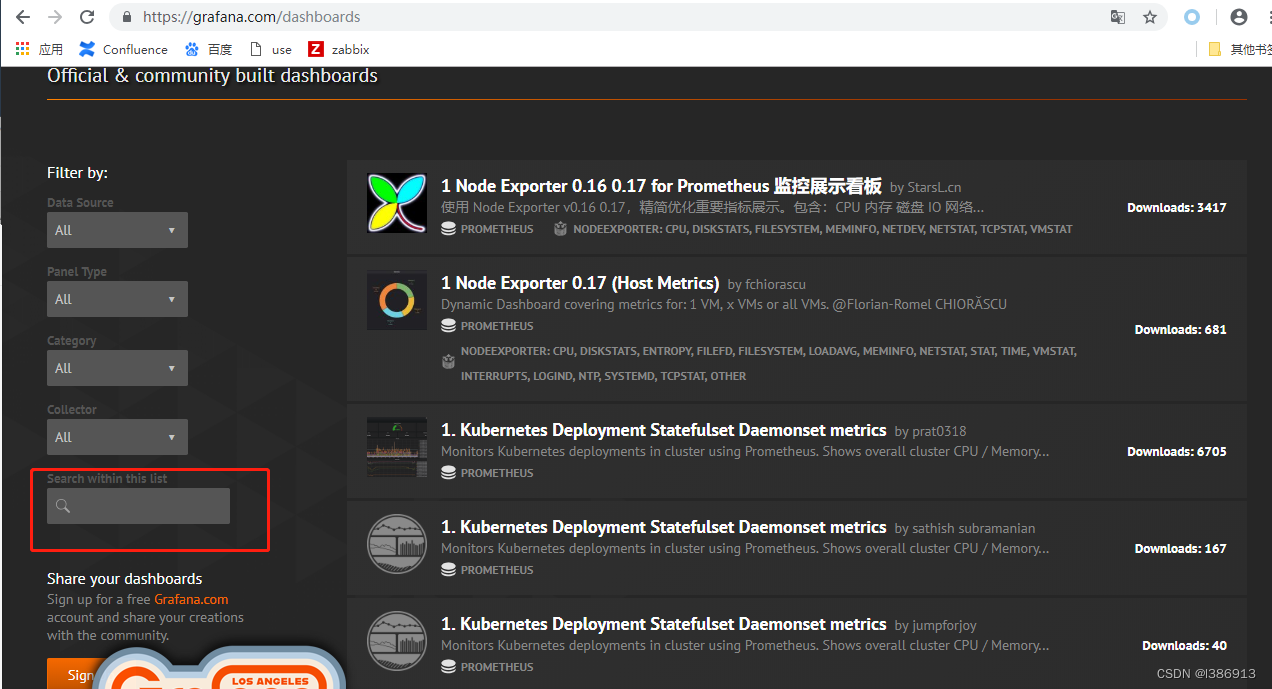
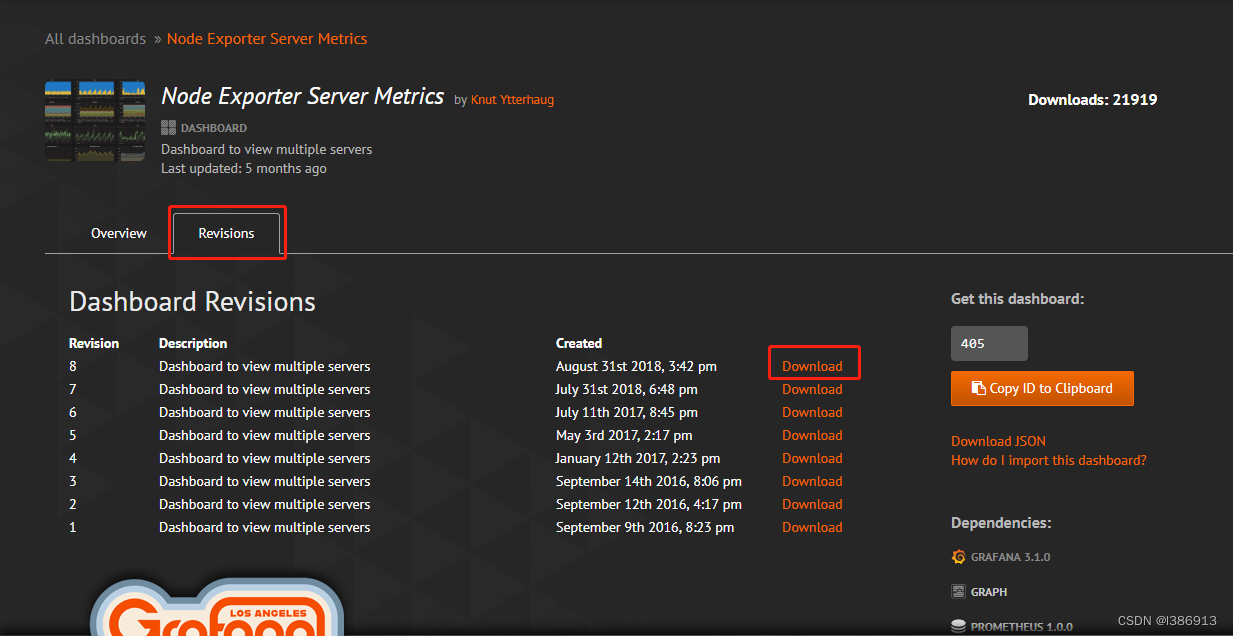
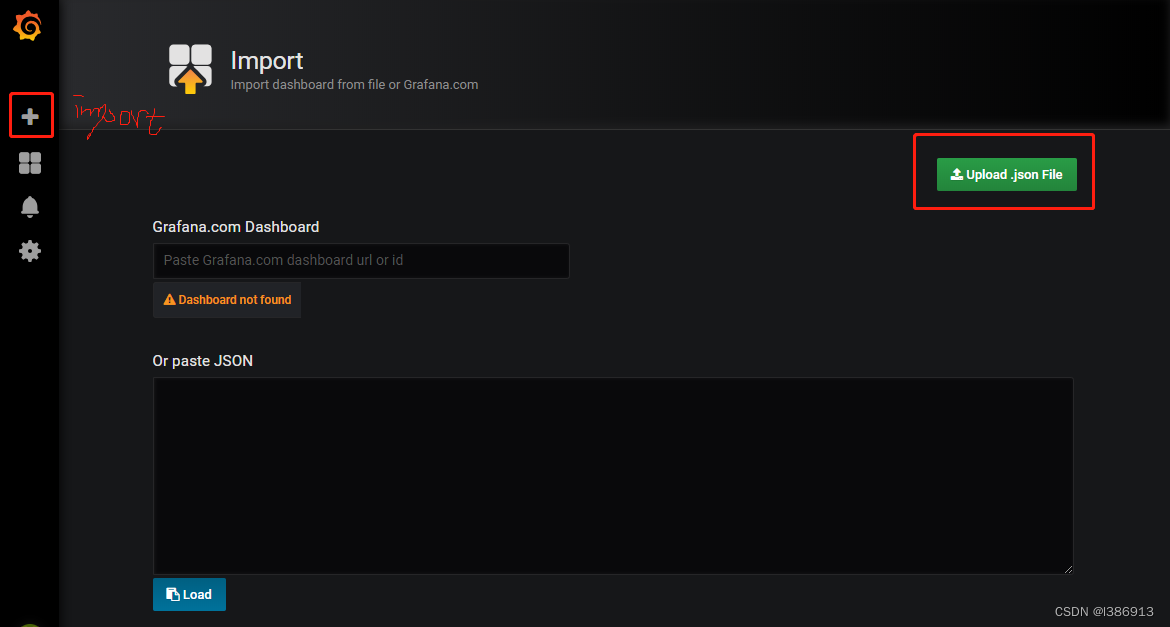
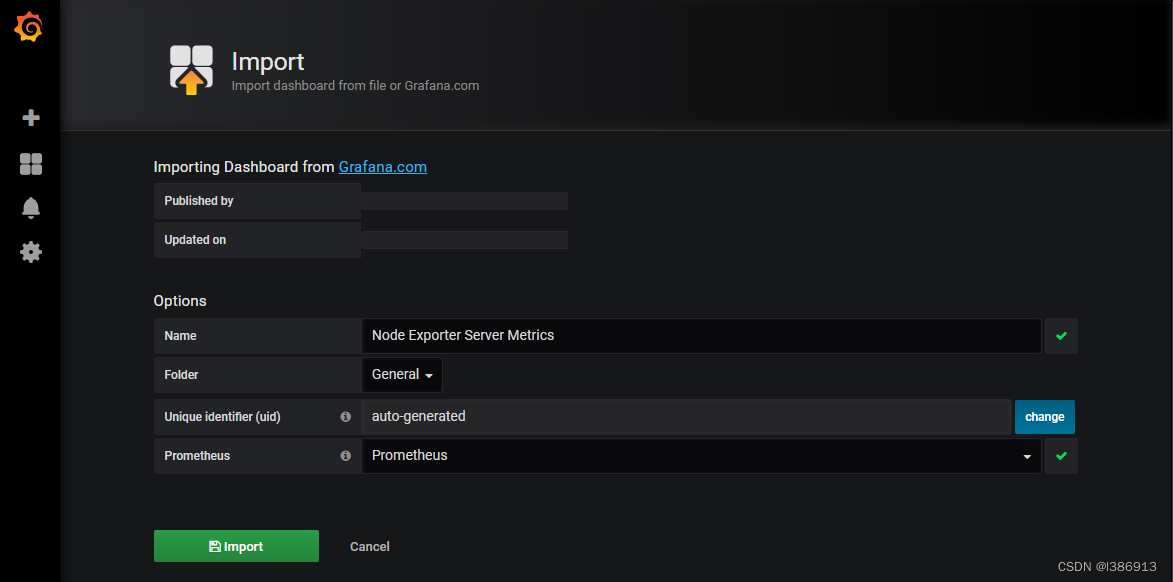
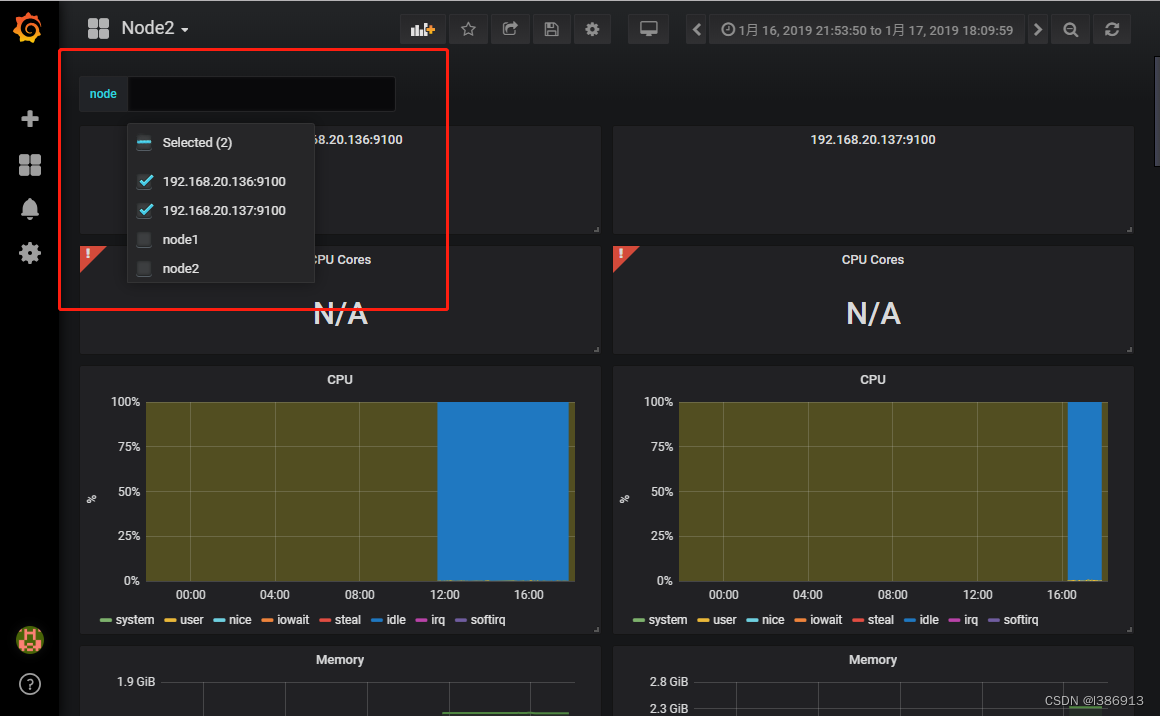
添加1 Node Exporter 0.16 0.17 for Prometheus 监控展示看板
此监控模板基于node_exporter 可以更好的展示多项基本监控项
模板url: https://grafana.com/dashboards/8919
在grafana所在server安装饼图插件,并重启grafana
cd /usr/local/grafana/bin
./grafana-cli plugins install grafana-piechart-panel
killall grafana-server
./grafana-server restart &
图形界面配置
grafana + --> import --> 将以上该模板的url 填到Grafana.com Dashboard中 -->
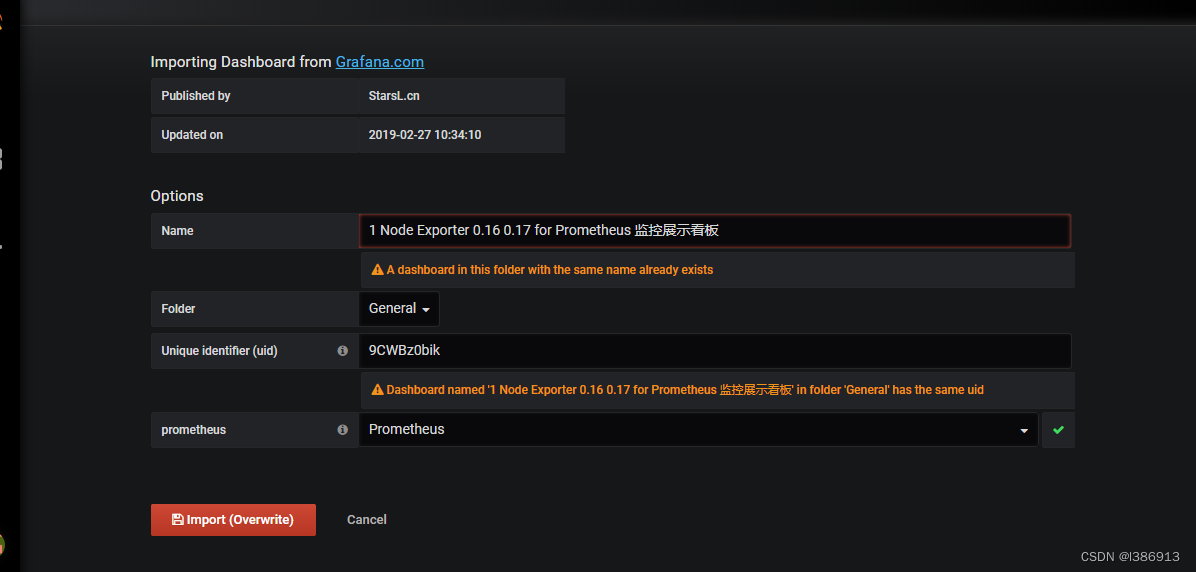
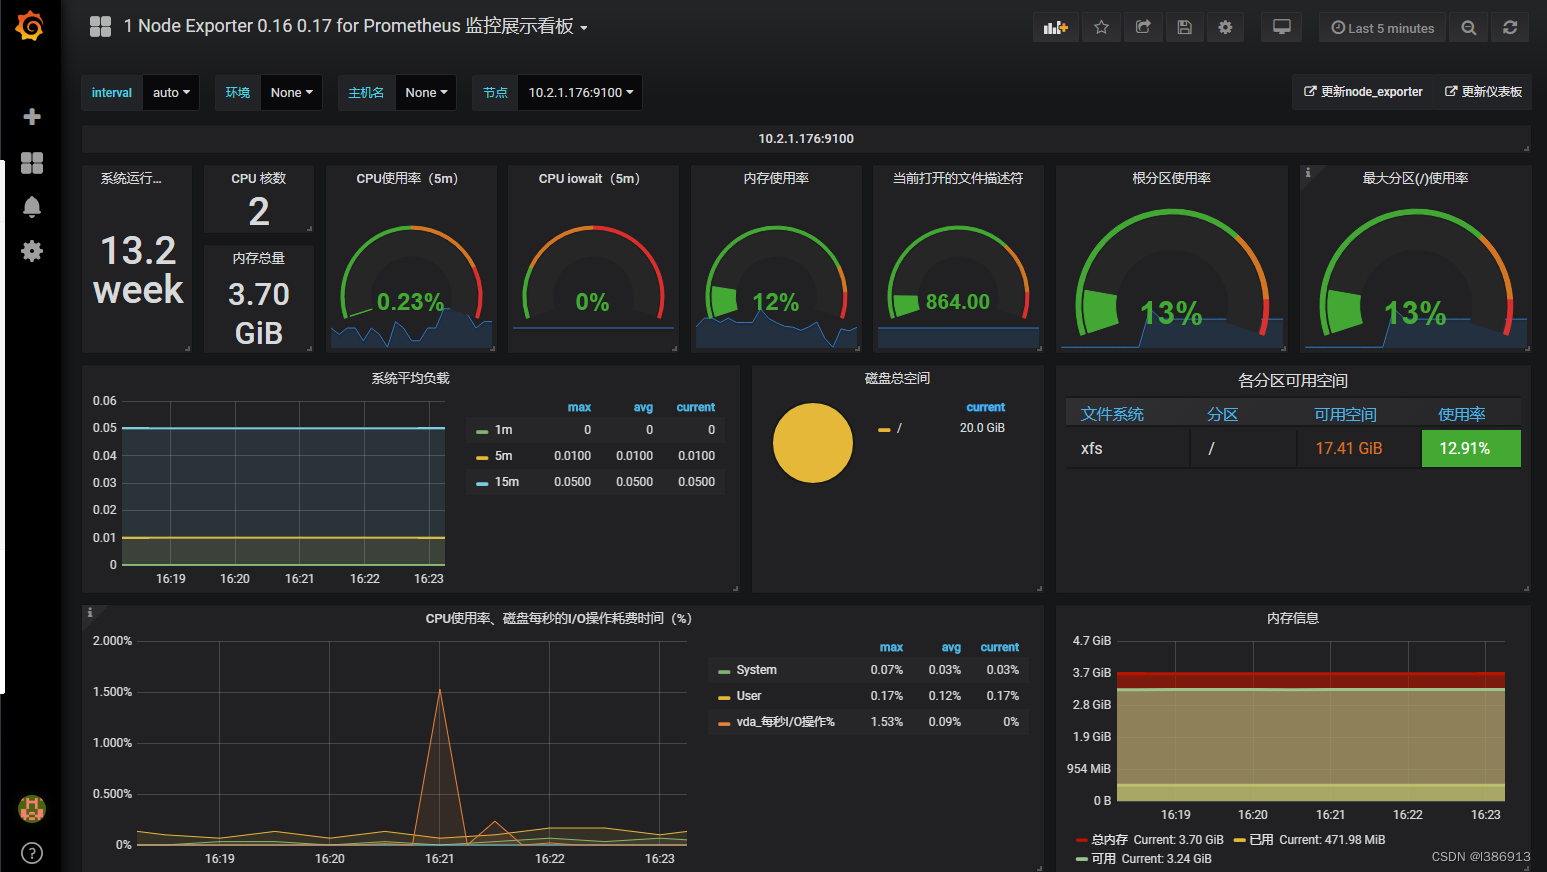
alertmanager的告警配置
自定义prometheus告警规则
以下规则定义当job export_test2的node_exporter服务挂掉,即产生一个告警
vim /usr/local/prometheus-2.1/rule.yml
groups:
- name: alert-rules                               #告警的分组,后续告警优化时,可通过分组做优化配置
  rules:
  - alert: InstanceStatus                        #告警规则名称
    expr: up{job="export_test2"} == 0    #1是服务正常 ,0服务挂了
    for: 10s                                             #评估等待10s,等待期间报警状态为pending
    labels:                                               #此标签可用于match之后的通知操作
      severity: 'critical'
    annotations:                                      #描述告警信息
      description: 服务器 已宕机
      summary: 服务器 运行状态
在prometheus的配置文件中添加该规则
vim /usr/local/prometheus-2.1/prometheus.yml
rule_files:
  - "/usr/local/prometheus-2.1/rule.yml"
安装alertmanager
https://github.com/prometheus/alertmanager/releases/download/v0.15.2/alertmanager-0.15.2.linux-amd64.tar.gz
tar -xvf alertmanager-0.15.2.linux-amd64.tar.gz -C /usr/local
mv /usr/local/alertmanager-0.15.2.linux-amd64 /usr/local/alertmanager-0.15.2
启动alertmanager
cd /usr/local/alertmanager-0.15.2
./alertmanager &
在prometheus的配置文件中配置alertmanager地址,让其知晓alertmanager的地址,以传送告警信息
vim /usr/local/prometheus-2.1/prometheus.yml
alerting:
  alertmanagers:
  - static_configs:
    - targets: ['localhost:9093']
重启promethous
killall prometheus
cd /usr/local/prometheus-2.1/
./prometheus
测试:
此时关闭192.168.20.137的node_exporter服务
killall node_exporter
查看prometheus的web界面,已经产生告警:
