如上图,在前面的章节中我们通过设置物体的纹理和材质实现了一个3d的立体门框的效果
完整代码如下:
import * as THREE from "three";
// 导入轨道控制器
import { OrbitControls } from "three/examples/jsm/controls/OrbitControls";

// 目标:纹理常用属性 偏移、旋转、重复、中心点
// 1、创建场景
const scene = new THREE.Scene();
scene.background = new THREE.Color(0x003261); // 将背景色设置为蓝色

// 2、创建相机
const camera = new THREE.PerspectiveCamera(75, window.innerWidth / window.innerHeight, 0.1, 1000);

// 设置相机位置
camera.position.set(0, 0, 10);
scene.add(camera);

// 导入纹理
const textureLoader = new THREE.TextureLoader();
const doorColorTexture = textureLoader.load("./textures/door/color.jpg");
const doorAplhaTexture = textureLoader.load("./textures/door/alpha.jpg");
const doorAoTexture = textureLoader.load(
  "./textures/door/ambientOcclusion.jpg"
);

// 添加物体
const cubeGeometry = new THREE.BoxBufferGeometry(1, 1, 1);
// 材质
const basicMaterial = new THREE.MeshBasicMaterial({
  map: doorColorTexture,
  alphaMap: doorAplhaTexture,
  transparent: true,
  aoMap: doorAoTexture,
  aoMapIntensity: 1
  // opacity: 0.3,
  //   side: THREE.DoubleSide,
});
basicMaterial.side = THREE.DoubleSide;
const cube = new THREE.Mesh(cubeGeometry, basicMaterial);
scene.add(cube);
// 给cube添加第二组uv
cubeGeometry.setAttribute(
  "uv2",
  new THREE.BufferAttribute(cubeGeometry.attributes.uv.array, 2)
);

// 初始化渲染器
const renderer = new THREE.WebGLRenderer();
// 设置渲染的尺寸大小
renderer.setSize(window.innerWidth, window.innerHeight);
// console.log(renderer);
// 将webgl渲染的canvas内容添加到body
document.body.appendChild(renderer.domElement);

// // 使用渲染器,通过相机将场景渲染进来
// renderer.render(scene, camera);

// 创建轨道控制器
const controls = new OrbitControls(camera, renderer.domElement);
// 设置控制器阻尼,让控制器更有真实效果,必须在动画循环里调用.update()。
controls.enableDamping = true;

// 添加坐标轴辅助器
const axesHelper = new THREE.AxesHelper(5);
scene.add(axesHelper);

function render() {
  controls.update();
  renderer.render(scene, camera);
  //   渲染下一帧的时候就会调用render函数
  requestAnimationFrame(render);
}

render();

// 监听画面变化,更新渲染画面
window.addEventListener("resize", () => {
  //   console.log("画面变化了");
  // 更新摄像头
  camera.aspect = window.innerWidth / window.innerHeight;
  //   更新摄像机的投影矩阵
  camera.updateProjectionMatrix();

  //   更新渲染器
  renderer.setSize(window.innerWidth, window.innerHeight);
  //   设置渲染器的像素比
  renderer.setPixelRatio(window.devicePixelRatio);
});
接下来我们继续通过设置物体的PBR材质和HDR环境贴图,让这个门框更加的真实
什么是PBR?
PBR代表物理上逼真的渲染,是一种在计算机图形学中用于模拟光线如何从材料反射,折射和吸收的方法。在three.js中,PBR包含使用物理基础渲染代码和材料处理技术来模拟光线和材料之间的物理相互作用,以创建逼真的材料外观和光照效果。这种渲染技术可以提供更真实的阴影,高光,反射和漫反射效果,使场景看起来更加真实。
一、设置光照

three.js官网中说标准的网络材质是支持PBR的,所以我们将以前的用MeshBasicMaterial生成的材质,改为MeshStandardMaterial
// 材质
const basicMaterial = new THREE.MeshStandardMaterial({
  map: doorColorTexture,
  alphaMap: doorAplhaTexture,
  transparent: true,
  aoMap: doorAoTexture,
  aoMapIntensity: 1
  // opacity: 0.3,
  //   side: THREE.DoubleSide,
});
更改完的效果如图:

此时上面所有的贴图都看不到了,这是因为通过MeshStandardMaterial生成的标准网络材质需要配合灯光才能显示
如下:
// 环境光
// 参数 1:光源颜色 2:光源强度
const light = new THREE.AmbientLight(0xffffff, 1); // soft white light
scene.add(light);
我们在场景中添加上灯光,效果如图:
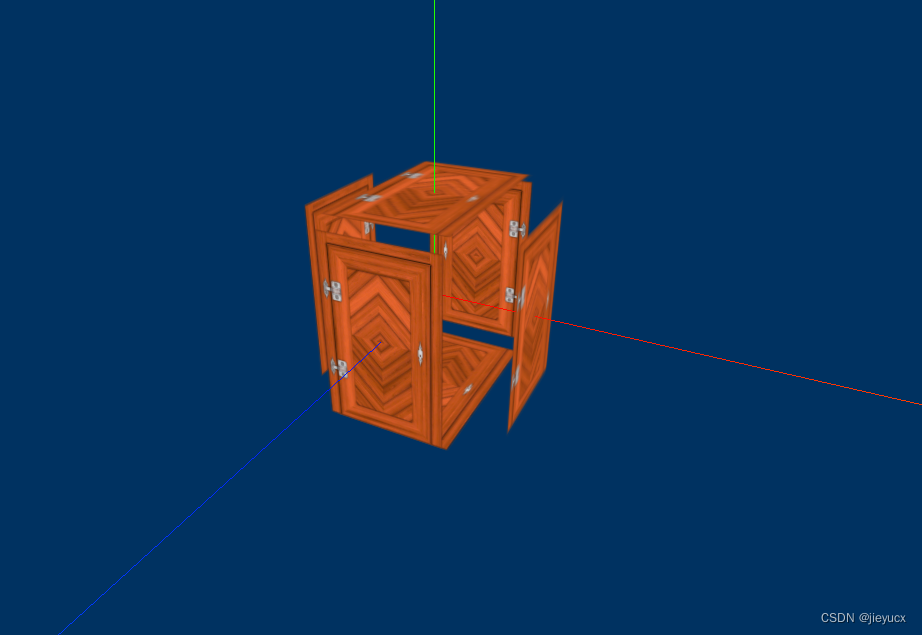
这样我们的门框又可以显示拉。
接下来我们设置一下环境光源,让这个门框有一种处在真实的光照下的效果,
//直线光源
const directionalLight = new THREE.DirectionalLight(0xffffff, 1);
directionalLight.position.set(10, 10, 10);
scene.add(directionalLight);
效果如图:
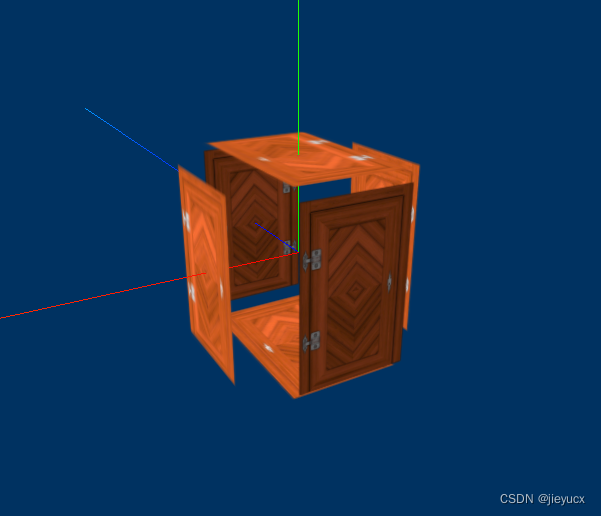
此时在没有直线光源照射到的背面,就有一种阴影的效果,看上去是不是更加真实了呢?
二、置换贴图,让门框更具立体感

如上图,这里我们的门框效果还是一个完全的平面图,没有立体效果。
想要门框具有立体效果我们可以使用材质的displacementMap属性进行设置,具体修改如下:
//导入置换贴图
const doorHeightTexture = textureLoader.load("./textures/door/height.jpg");
// 参数:长、宽、高、长分段、宽分段、高分段
const cubeGeometry = new THREE.BoxBufferGeometry(1, 1, 1, 100, 100, 100);
// 材质
const basicMaterial = new THREE.MeshStandardMaterial({
  map: doorColorTexture, // 漫反射贴图
  alphaMap: doorAplhaTexture, // 透明贴图
  transparent: true, // 开启透明
  aoMap: doorAoTexture, // 环境光遮挡贴图
  aoMapIntensity: 1, // 环境光遮挡贴图强度
  displacementMap: doorHeightTexture, // 置换贴图
  displacementScale: 0.1, // 置换贴图强度
});
添加了displacementMap,displacementScale之后效果如下:

可以看到门框就有了明显的立体感
三、粗糙度与粗糙度贴图
以上的效果中我们的光源照射到物体上之后,整个物体的光照面全部都亮了,没有那种真实的环境中的反光效果,亮度应该有大小差异。
这个效果我们可以通过设置粗糙度与粗糙度贴图来实现
- 设置粗糙度roughness
const basicMaterial = new THREE.MeshStandardMaterial({
  map: doorColorTexture, // 漫反射贴图
  alphaMap: doorAplhaTexture, // 透明贴图
  transparent: true, // 开启透明
  aoMap: doorAoTexture, // 环境光遮挡贴图
  aoMapIntensity: 1, // 环境光遮挡贴图强度
  displacementMap: doorHeightTexture, // 置换贴图
  displacementScale: 0.1, // 置换贴图强度
  roughness: 0, // 粗糙度
});
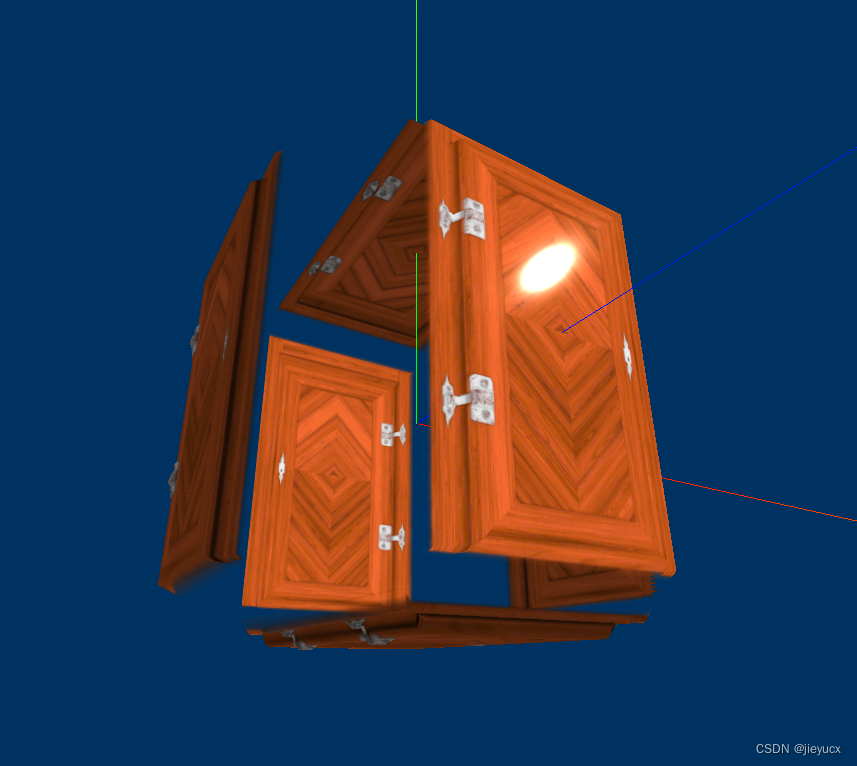
roughness:0,就代表非常光滑,所以这是我们可以看到门框上有很明显的反光效果,
- 设置粗糙度贴图,让合页反光更加逼真
// 导入粗糙度贴图
const roughnessTexture = textureLoader.load("./textures/door/roughness.jpg");

// 添加物体
// 参数:长、宽、高、长分段、宽分段、高分段
const cubeGeometry = new THREE.BoxBufferGeometry(1, 1, 1, 100, 100, 100);
// 材质
const basicMaterial = new THREE.MeshStandardMaterial({
  map: doorColorTexture, // 漫反射贴图
  alphaMap: doorAplhaTexture, // 透明贴图
  transparent: true, // 开启透明
  aoMap: doorAoTexture, // 环境光遮挡贴图
  aoMapIntensity: 1, // 环境光遮挡贴图强度
  displacementMap: doorHeightTexture, // 置换贴图
  displacementScale: 0.1, // 置换贴图强度
  roughness: 1, // 粗糙度
  roughnessMap: roughnessTexture, // 粗糙度贴图
});
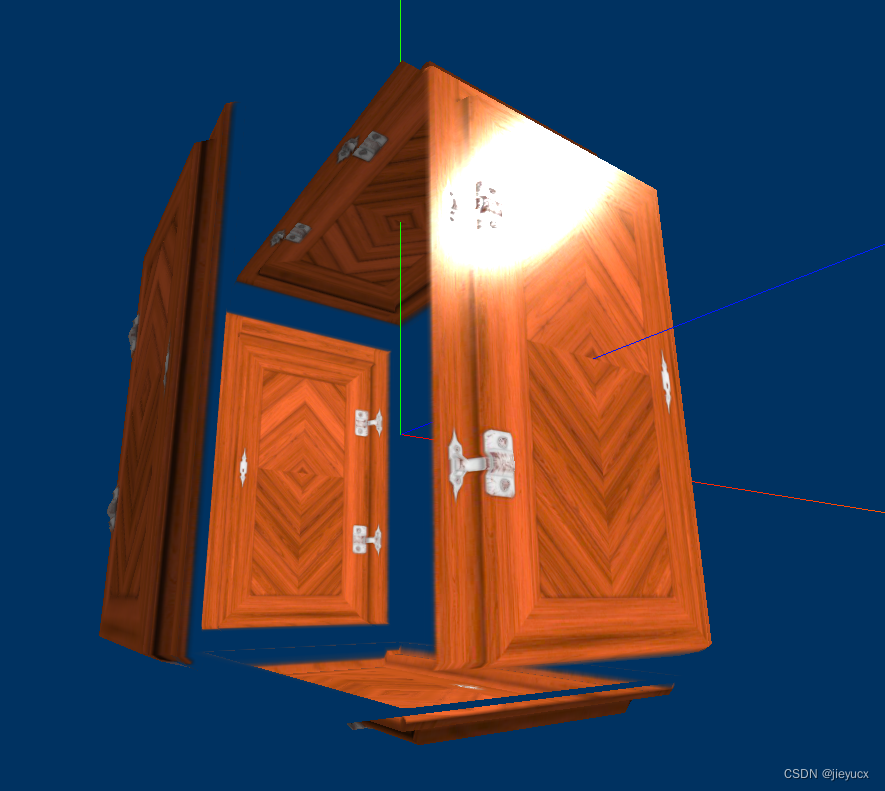
当同时设置roughness,和roughnessMap时,此时的粗糙度是两者相乘

四、金属度与金属贴图
从上面的效果图可以看到我们的合页还是白色的,没有那种金属质感,
要设置金属质感,和设置粗糙度差不多,我们配置一下metalness和metalnessMap属性就可以了

// 导入金属贴图
const metalnessTexture = textureLoader.load("./textures/door/metalness.jpg");

// 添加物体
// 参数:长、宽、高、长分段、宽分段、高分段
const cubeGeometry = new THREE.BoxBufferGeometry(1, 1, 1, 100, 100, 100);
// 材质
const basicMaterial = new THREE.MeshStandardMaterial({
  map: doorColorTexture, // 漫反射贴图
  alphaMap: doorAplhaTexture, // 透明贴图
  transparent: true, // 开启透明
  aoMap: doorAoTexture, // 环境光遮挡贴图
  aoMapIntensity: 1, // 环境光遮挡贴图强度
  displacementMap: doorHeightTexture, // 置换贴图
  displacementScale: 0.1, // 置换贴图强度
  roughness: 1, // 粗糙度
  roughnessMap: roughnessTexture, // 粗糙度贴图
  metalness: 1, // 金属度
  metalnessMap: metalnessTexture, // 金属度贴图
});
效果如图:

可以看到,这时门的合页就很有金属质感了。
五、法线贴图

如上图,这时的灯光反射效果还是不够真实,它是将这一块全部置成了白光,我们期望这里可以有种门框棱角的光照效果,这时需要设置法线,我们使用法线题图来实现
// 导入法线贴图
const normalTexture = textureLoader.load("./textures/door/normal.jpg");

// 添加物体
// 参数:长、宽、高、长分段、宽分段、高分段
const cubeGeometry = new THREE.BoxBufferGeometry(1, 1, 1, 100, 100, 100);
// 材质
const basicMaterial = new THREE.MeshStandardMaterial({
  map: doorColorTexture, // 漫反射贴图
  alphaMap: doorAplhaTexture, // 透明贴图
  transparent: true, // 开启透明
  aoMap: doorAoTexture, // 环境光遮挡贴图
  aoMapIntensity: 1, // 环境光遮挡贴图强度
  displacementMap: doorHeightTexture, // 置换贴图
  displacementScale: 0.1, // 置换贴图强度
  roughness: 1, // 粗糙度
  roughnessMap: roughnessTexture, // 粗糙度贴图
  metalness: 1, // 金属度
  metalnessMap: metalnessTexture, // 金属度贴图
  normalMap: normalTexture, // 法线贴图
});
设置了之后的效果
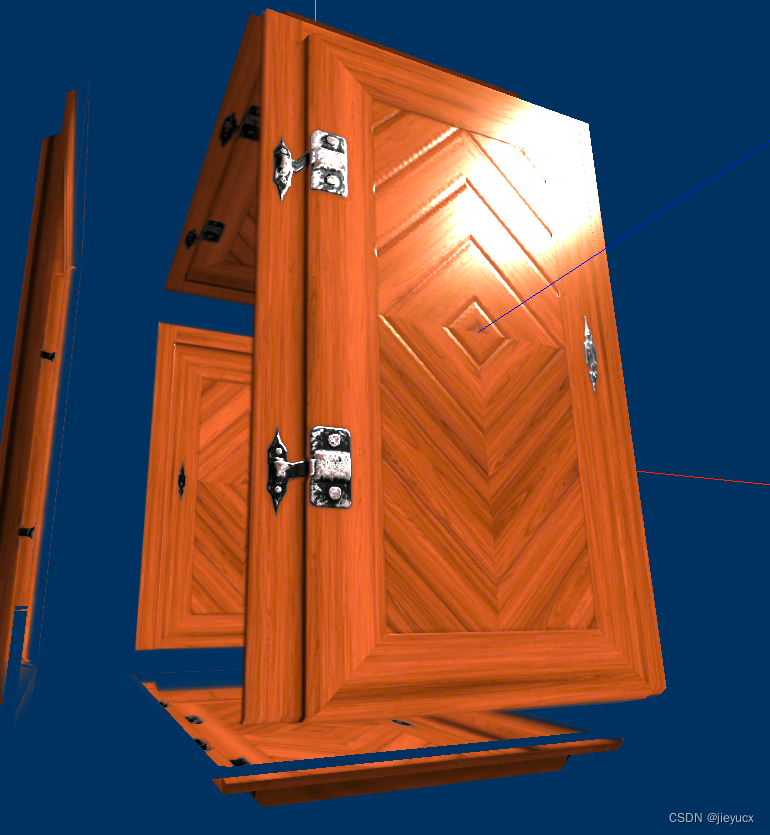
以上就是对物体的材质和纹理设置已达到一种真实环境的3D效果的介绍了,
最终的完整代码如下:
import * as THREE from "three";
// 导入轨道控制器
import { OrbitControls } from "three/examples/jsm/controls/OrbitControls";

// 目标:纹理常用属性 偏移、旋转、重复、中心点
// 1、创建场景
const scene = new THREE.Scene();
scene.background = new THREE.Color(0x003261); // 将背景色设置为蓝色

// 2、创建相机
const camera = new THREE.PerspectiveCamera(75, window.innerWidth / window.innerHeight, 0.1, 1000);

// 设置相机位置
camera.position.set(0, 0, 10);
scene.add(camera);

// 导入纹理
const textureLoader = new THREE.TextureLoader();
const doorColorTexture = textureLoader.load("./textures/door/color.jpg");
const doorAplhaTexture = textureLoader.load("./textures/door/alpha.jpg");
const doorAoTexture = textureLoader.load(
  "./textures/door/ambientOcclusion.jpg"
);

//导入置换贴图
const doorHeightTexture = textureLoader.load("./textures/door/height.jpg");
// 导入粗糙度贴图
const roughnessTexture = textureLoader.load("./textures/door/roughness.jpg");
// 导入金属贴图
const metalnessTexture = textureLoader.load("./textures/door/metalness.jpg");
// 导入法线贴图
const normalTexture = textureLoader.load("./textures/door/normal.jpg");

// 添加物体
// 参数:长、宽、高、长分段、宽分段、高分段
const cubeGeometry = new THREE.BoxBufferGeometry(1, 1, 1, 100, 100, 100);
// 材质
const basicMaterial = new THREE.MeshStandardMaterial({
  map: doorColorTexture, // 漫反射贴图
  alphaMap: doorAplhaTexture, // 透明贴图
  transparent: true, // 开启透明
  aoMap: doorAoTexture, // 环境光遮挡贴图
  aoMapIntensity: 1, // 环境光遮挡贴图强度
  displacementMap: doorHeightTexture, // 置换贴图
  displacementScale: 0.1, // 置换贴图强度
  roughness: 1, // 粗糙度
  roughnessMap: roughnessTexture, // 粗糙度贴图
  metalness: 1, // 金属度
  metalnessMap: metalnessTexture, // 金属度贴图
  normalMap: normalTexture, // 法线贴图
});
basicMaterial.side = THREE.DoubleSide;
const cube = new THREE.Mesh(cubeGeometry, basicMaterial);
scene.add(cube);
// 给cube添加第二组uv
cubeGeometry.setAttribute(
  "uv2",
  new THREE.BufferAttribute(cubeGeometry.attributes.uv.array, 2)
);

// 灯光
// 环境光
// 参数 1:光源颜色 2:光源强度
const light = new THREE.AmbientLight(0xffffff, 0.5); // soft white light
scene.add(light);
//直线光源
const directionalLight = new THREE.DirectionalLight(0xffffff, 1);
directionalLight.position.set(10, 10, 10);
scene.add(directionalLight);

// 初始化渲染器
const renderer = new THREE.WebGLRenderer();
// 设置渲染的尺寸大小
renderer.setSize(window.innerWidth, window.innerHeight);
// 将webgl渲染的canvas内容添加到body
document.body.appendChild(renderer.domElement);

// 创建轨道控制器
const controls = new OrbitControls(camera, renderer.domElement);
// 设置控制器阻尼,让控制器更有真实效果,必须在动画循环里调用.update()。
controls.enableDamping = true;

// 添加坐标轴辅助器
const axesHelper = new THREE.AxesHelper(5);
scene.add(axesHelper);

function render() {
  controls.update();
  renderer.render(scene, camera);
  //   渲染下一帧的时候就会调用render函数
  requestAnimationFrame(render);
}

render();

// 监听画面变化,更新渲染画面
window.addEventListener("resize", () => {
  //   console.log("画面变化了");
  // 更新摄像头
  camera.aspect = window.innerWidth / window.innerHeight;
  //   更新摄像机的投影矩阵
  camera.updateProjectionMatrix();

  //   更新渲染器
  renderer.setSize(window.innerWidth, window.innerHeight);
  //   设置渲染器的像素比
  renderer.setPixelRatio(window.devicePixelRatio);
});


