1.编码和解码的基本介绍
-
编写网络应用程序时,因为数据在网络中传输的都是二进制字节码数据,在发送数据时就需要编码,接收数据时就需要解码

-
codec(编解码器)的组成部分有两个:decoder(解码器)和encoder(编码器)。encoder 负责把业务数据转换成字节码数据,decoder 负责把字节码数据转换成业务数据
2. Netty 本身的编码解码的机制和问题分析
- Netty 自身提供了一些
codec(编解码器) - Netty 提供的编码器
StringEncoder,对字符串数据进行编码ObjectEncoder,对 Java 对象进行编码- …
- Netty 提供的解码器
StringDecoder, 对字符串数据进行解码ObjectDecoder,对 Java 对象进行解码- …
- Netty 本身自带的 ObjectDecoder 和 ObjectEncoder 可以用来实现POJO对象或各种业务对象的编码和解码,底层使用的仍是 Java 序列化技术 , 而Java 序列化技术本身效率就不高,存在如下问题
- 无法跨语言
- 序列化后的体积太大,是二进制编码的 5 倍多。
- 序列化性能太低
结论:所以我们使用Protobuf
3. Protobuf
3.1 Protobuf基本介绍和使用示意图
-
Protobuf 是 Google 发布的开源项目,全称 Google Protocol Buffers,是一种轻便高效的结构化数据存储格式,可以用于结构化数据串行化,或者说序列化。它很适合做数据存储或 RPC[远程过程调用 remote procedure call ] 数据交换格式。
- 目前很多公司 http+json 向 tcp+protobuf转型
-
Protobuf 是以 message 的方式来管理数据的.
-
支持跨平台、跨语言,即[客户端和服务器端可以是不同的语言编写的] (支持目前绝大多数语言,例如 C++、C#、Java、python 等)
-
高性能,高可靠性
- 在序列化和反序列化数据方面,Protobuf 比JSON 快得多。由于格式是二进制的,在Protobuf 中读写结构化数据所需的时间比在JSON 中要短。
-
使用 protobuf 编译器能自动生成代码,Protobuf 是将类的定义使用
.proto文件进行描述。说明,在idea 中编写 .proto 文件时,会自动提示是否下载.ptotot 编写插件.可以让语法高亮。 -
然后通过 protoc.exe 编译器根据.proto 自动生成.java 文件
-
protobuf 使用示意图
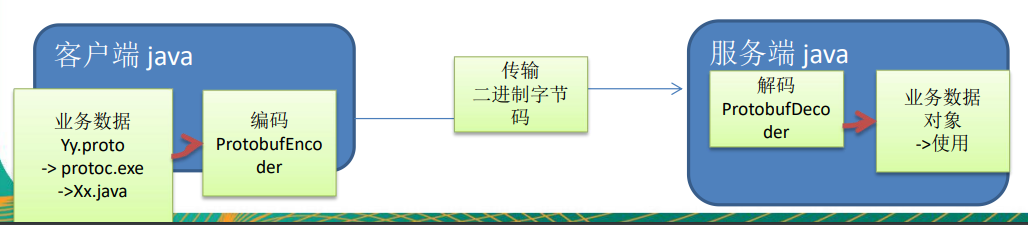
- 客户端通过protoc.exe 编译器根据.proto 自动生成.java 文件
- 客户端再将生成的java文件对应的对象通过
ProtobufEncoder编码为二进制字节码,通过二进制进行传输 - 服务端拿到二进制文件再通过
ProtobufDecoder解码为业务数据对象即可使用
3.2 Protobuf快速入门实例1
需求:
- 客户端可以发送一个Student PoJo 对象到服 务器 (通过 Protobuf 编码)
- 服务端能接收Student PoJo 对象,并显示信 息(通过 Protobuf 解码)
protoc-3.6.1-win32.zip官方下载地址
-
将我们之前写的Netty核心技术五–Netty高性能架构设计的
Netty快速入门实例-TCP服务案例直接复用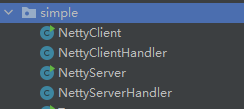
-
Protobuf的使用–Java
-
通过Maven的方式导入Protobuf相关依赖
<!-- https://mvnrepository.com/artifact/com.google.protobuf/protobuf-java --> <dependency> <groupId>com.google.protobuf</groupId> <artifactId>protobuf-java</artifactId> <version>3.6.1</version> </dependency> -
protobuf定义属性各语言对照表官方文档https://protobuf.dev/programming-guides/proto3/#scalar
.proto Type C++ Type Java/Kotlin Type[1] Python Type[3] Go Type Ruby Type C# Type PHP Type Dart Type double double double float float64 Float double float double float float float float float32 Float float float double int32 int32 int int int32 Fixnum or Bignum (as required) int integer int int64 int64 long int/long[4] int64 Bignum long integer/string[6] Int64 uint32 uint32 int[2] int/long[4] uint32 Fixnum or Bignum (as required) uint integer int uint64 uint64 long[2] int/long[4] uint64 Bignum ulong integer/string[6] Int64 sint32 int32 int int int32 Fixnum or Bignum (as required) int integer int sint64 int64 long int/long[4] int64 Bignum long integer/string[6] Int64 fixed32 uint32 int[2] int/long[4] uint32 Fixnum or Bignum (as required) uint integer int fixed64 uint64 long[2] int/long[4] uint64 Bignum ulong integer/string[6] Int64 sfixed32 int32 int int int32 Fixnum or Bignum (as required) int integer int sfixed64 int64 long int/long[4] int64 Bignum long integer/string[6] Int64 bool bool boolean bool bool TrueClass/FalseClass bool boolean bool string string String str/unicode[5] string String (UTF-8) string string String bytes string ByteString str (Python 2) bytes (Python 3) []byte String (ASCII-8BIT) ByteString string List -
新建一个.proto文件
Student.protosyntax = "proto3"; //协议版本,因为我们的protobuf的版本是3.6.1 option java_outer_classname = "StudentPOJO";//生成的外部类名,同时也是文件名 //protobuf 使用message 管理数据 message Student { //会在 StudentPOJO 外部类生成一个内部类 Student, 他是真正发送的POJO对象 int32 id = 1; // Student 类中有 一个属性 名字为 id 类型为int32(protobuf类型) 1表示属性序号,不是值 string name = 2; } -
客户端通过protoc.exe 编译器根据.proto 自动生成.java 文件
-
将拷贝到 protoc.exe 同级目录或者自己配置一个环境变量

-
使用protoc.exe编译
protoc.exe --java_out=. Student.proto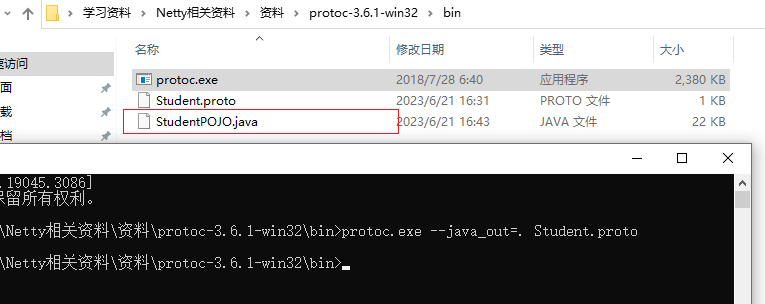
-
-
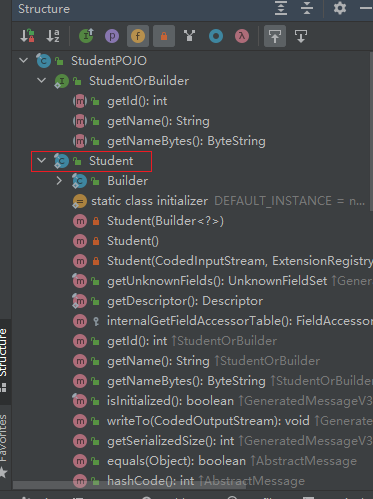
我们将 StudentPOJO.java拷贝回目录
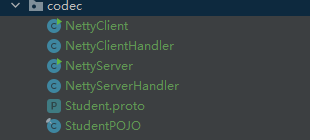
StudentPOJO有一个内部类Student,这个类才是我们传输的对象
-
编写服务端和客户端(因为我们是复用的代码,所以只需要修改一下)
-
3.2.1 客户端NettyClient
较之前的代码在initChannel的最前面加上了
ProtoBufEncoderhandler
package site.zhourui.nioAndNetty.netty.codec;

import io.netty.bootstrap.Bootstrap;
import io.netty.channel.ChannelFuture;
import io.netty.channel.ChannelInitializer;
import io.netty.channel.nio.NioEventLoopGroup;
import io.netty.channel.socket.SocketChannel;
import io.netty.channel.socket.nio.NioSocketChannel;
import io.netty.handler.codec.protobuf.ProtobufEncoder;

public class NettyClient {
    public static void main(String[] args) throws InterruptedException {
        //客户端需要一个事件循环组
        NioEventLoopGroup group = new NioEventLoopGroup();
        try {
            //创建客户端启动对象
            //注意客户端使用的不是 ServerBootstrap 而是 Bootstrap
            Bootstrap bootstrap = new Bootstrap();
            bootstrap.group(group)
                    .channel(NioSocketChannel.class)
                    .handler(new ChannelInitializer<SocketChannel>() {
                        @Override
                        protected void initChannel(SocketChannel socketChannel) throws Exception {
                            //在pipeline中加入 ProtoBufEncoder
                            socketChannel.pipeline().addLast("encoder", new ProtobufEncoder());
                            socketChannel.pipeline().addLast(new NettyClientHandler());
                        }
                    });
            System.out.println("客户端 ok..");
            //启动客户端去连接服务器端
            //关于 ChannelFuture 要分析,涉及到netty的异步模型
            ChannelFuture cf = bootstrap.connect("127.0.0.1", 6668).sync();
            //给关闭通道进行监听
            cf.channel().closeFuture().sync();
        }finally {
            group.shutdownGracefully();
        }

    }
}
3.2.2 客户端NettyClientHandler
- 将重写的channelActive方法修改为发送一个StudentPOJO.Student实例对象
package site.zhourui.nioAndNetty.netty.codec;

import io.netty.buffer.ByteBuf;
import io.netty.buffer.Unpooled;
import io.netty.channel.ChannelHandlerContext;
import io.netty.channel.ChannelInboundHandlerAdapter;
import io.netty.util.CharsetUtil;

public class NettyClientHandler extends ChannelInboundHandlerAdapter {
    //当通道就绪就会触发该方法
    @Override
    public void channelActive(ChannelHandlerContext ctx) throws Exception {
        //发生一个Student 对象到服务器
        StudentPOJO.Student student = StudentPOJO.Student.newBuilder().setId(4).setName("智多星 吴用").build();
        ctx.pipeline().writeAndFlush(student);
    }

    //当通道有读取事件时,会触发
    @Override
    public void channelRead(ChannelHandlerContext ctx, Object msg) throws Exception {
        ByteBuf buf = (ByteBuf) msg;
        System.out.println("服务器回复的消息:" + buf.toString(CharsetUtil.UTF_8));
        System.out.println("服务器的地址: "+ ctx.channel().remoteAddress());
    }

    //当通道有异常时触发
    @Override
    public void exceptionCaught(ChannelHandlerContext ctx, Throwable cause) throws Exception {
        cause.printStackTrace();
        ctx.close();
    }
}
3.2.3 服务端NettyServer
- 较之前的代码在initChannel的最前面加上了
ProtoBufDecoderhandler
package site.zhourui.nioAndNetty.netty.codec;
import io.netty.bootstrap.ServerBootstrap;
import io.netty.channel.ChannelFuture;
import io.netty.channel.ChannelFutureListener;
import io.netty.channel.ChannelInitializer;
import io.netty.channel.ChannelOption;
import io.netty.channel.nio.NioEventLoopGroup;
import io.netty.channel.socket.SocketChannel;
import io.netty.channel.socket.nio.NioServerSocketChannel;
import io.netty.handler.codec.protobuf.ProtobufDecoder;
public class NettyServer {
public static void main(String[] args) throws InterruptedException {
//创建BossGroup 和 WorkerGroup
//说明
//1. 创建两个线程组 bossGroup 和 workerGroup
//2. bossGroup 只是处理连接请求 , 真正的和客户端业务处理,会交给 workerGroup完成
//3. 两个都是无限循环
//4. bossGroup 和 workerGroup 含有的子线程(NioEventLoop)的个数
// 默认实际 cpu核数 * 2
NioEventLoopGroup bossGroup = new NioEventLoopGroup(1);
NioEventLoopGroup workerGroup = new NioEventLoopGroup(8);
try {
//创建服务器端的启动对象,配置参数
ServerBootstrap bootstrap = new ServerBootstrap();
//使用链式编程来进行设置
bootstrap.group(bossGroup,workerGroup)//设置两个线程组
.channel(NioServerSocketChannel.class)//使用NioSocketChannel 作为服务器的通道实现
.option(ChannelOption.SO_BACKLOG,128)// 设置线程队列得到连接个数
.childOption(ChannelOption.SO_KEEPALIVE,true)//设置保持活动连接状态
.childHandler(new ChannelInitializer<SocketChannel>() {//创建一个通道初始化对象(匿名对象)
//给pipeline 设置处理器
@Override
protected void initChannel(SocketChannel socketChannel) throws Exception {
//可以使用一个集合管理 SocketChannel, 再推送消息时,可以将业务加入到各个channel 对应的 NIOEventLoop 的 taskQueue 或者 scheduleTaskQueue
System.out.println("客户socketchannel hashcode=" + socketChannel.hashCode());
//在pipeline加入ProtoBufDecoder
//指定对哪种对象进行解码
socketChannel.pipeline().addLast("decoder", new ProtobufDecoder(StudentPOJO.Student.getDefaultInstance()));
socketChannel.pipeline().addLast(new NettyServerHandler());
}
});
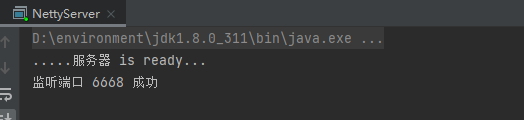
System.out.println(".....服务器 is ready...");
//绑定一个端口并且同步, 生成了一个 ChannelFuture 对象
//启动服务器(并绑定端口)
ChannelFuture cf = bootstrap.bind(6668).sync();
//给cf 注册监听器,监控我们关心的事件
cf.addListener(new ChannelFutureListener() {
@Override
public void operationComplete(ChannelFuture channelFuture) throws Exception {
if (channelFuture.isSuccess()){
System.out.println("监听端口 6668 成功");
}else {
System.out.println("监听端口 6668 失败");
}
}
});
//对关闭通道进行监听
cf.channel().closeFuture().sync();
}finally {
bossGroup.shutdownGracefully();
workerGroup.shutdownGracefully();
}
}
}
3.2.4 服务端NettyServerHandler
- 将
ChannelInboundHandlerAdapter修改为SimpleChannelInboundHandler<StudentPOJO.Student>,这样就需要我们手动将Object对象转为StudentPOJO.Student- 重新channelRead0方法
- 打印出接收到的消息
package site.zhourui.nioAndNetty.netty.codec;

import io.netty.buffer.Unpooled;
import io.netty.channel.ChannelHandlerContext;
import io.netty.channel.ChannelInboundHandlerAdapter;
import io.netty.channel.SimpleChannelInboundHandler;
import io.netty.util.CharsetUtil;

import java.util.concurrent.TimeUnit;

/*
说明
1. 我们自定义一个Handler 需要继续netty 规定好的某个HandlerAdapter(规范)
2. 这时我们自定义一个Handler , 才能称为一个handler
 */
//public class NettyServerHandler extends ChannelInboundHandlerAdapter {
public class NettyServerHandler extends SimpleChannelInboundHandler<StudentPOJO.Student> {
    //读取数据实际(这里我们可以读取客户端发送的消息)
    /*
    1. ChannelHandlerContext ctx:上下文对象, 含有 管道pipeline , 通道channel, 地址
    2. Object msg: 就是客户端发送的数据 默认Object
     */

    @Override
    protected void channelRead0(ChannelHandlerContext ctx, StudentPOJO.Student msg) throws Exception {
        //读取从客户端发送的StudentPojo.Student
        System.out.println("客户端发送的数据 id=" + msg.getId() + " 名字=" + msg.getName());
    }


    //数据读取完毕
    @Override
    public void channelReadComplete(ChannelHandlerContext ctx) throws Exception {
        //writeAndFlush 是 write + flush
        //将数据写入到缓存,并刷新
        //一般讲,我们对这个发送的数据进行编码
        ctx.writeAndFlush(Unpooled.copiedBuffer("hello, 客户端~(>^ω^<)喵1", CharsetUtil.UTF_8));
    }
    //处理异常, 一般是需要关闭通道
    @Override
    public void exceptionCaught(ChannelHandlerContext ctx, Throwable cause) throws Exception {
        ctx.close();
    }
}
3.2.5 测试
-
启动服务端
-
启动客户端
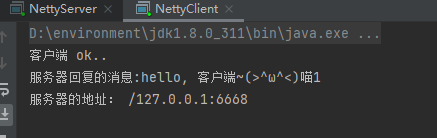
服务端接收到了客户端发送的对象

3.3 Protobuf快速入门实例2
需求:
- 客户端可以随机发送Student PoJo/ Worker PoJo 对象到服务器 (通过 Protobuf 编码)
- 服务端能接收Student PoJo/ Worker PoJo 对象(需要判断是哪种类型),并显示信息(通过 Protobuf 解码)
个人理解如果是每个对象都像实例1一样都生成一个.java,那么就很麻烦,所以我们将需要发送的对象(类)封装在一个.proto文件中就只需要编译一次
3.3.1 复用案例1的代码
因为实现具体功能都差不多,我们直接复用案例1的代码
3.3.2 修改 Student.proto
较之案例1的差异:
- 加快解析
- 指定.java生成的位置
- protobuf 可以使用message 管理其他的message
- 定义三个message:
MyMessage是用于管理Student,WorkerMyMessage中定义枚举:在proto3 要求enum的编号从0开始- 用data_type 来标识传的是哪一个枚举类型
oneof:表示每次枚举类型最多只能出现其中的一个, 节省空间- 将编写的Student.proto再次编译为.java,放在codec2包下
syntax = "proto3";
option optimize_for = SPEED; // 加快解析
option java_package="site.zhourui.nioAndNetty.netty.codec2";   //指定生成到哪个包下
option java_outer_classname="MyDataInfo"; // 外部类名, 文件名

//protobuf 可以使用message 管理其他的message
message MyMessage {

  //定义一个枚举类型
  enum DataType {
    StudentType = 0; //在proto3 要求enum的编号从0开始
    WorkerType = 1;
  }

  //用data_type 来标识传的是哪一个枚举类型
  DataType data_type = 1;

  //表示每次枚举类型最多只能出现其中的一个, 节省空间
  oneof dataBody {
    Student student = 2;
    Worker worker = 3;
  }

}


message Student {
  int32 id = 1;//Student类的属性
  string name = 2; //
}
message Worker {
  string name=1;
  int32 age=2;
}
3.3.3 客户端NettyClientHandler
- 客户端端在通道连接的时候随机发送Student或Worker对象
package site.zhourui.nioAndNetty.netty.codec2;

import io.netty.buffer.ByteBuf;
import io.netty.channel.ChannelHandlerContext;
import io.netty.channel.ChannelInboundHandlerAdapter;
import io.netty.util.CharsetUtil;

import java.util.Random;

public class NettyClientHandler extends ChannelInboundHandlerAdapter {
    //当通道就绪就会触发该方法
    @Override
    public void channelActive(ChannelHandlerContext ctx) throws Exception {
        //随机的发送Student 或者 Workder 对象
        int random = new Random().nextInt(3);
        MyDataInfo.MyMessage myMessage = null;

        if(0 == random) { //发送Student 对象

            myMessage = MyDataInfo.MyMessage.newBuilder().setDataType(MyDataInfo.MyMessage.DataType.StudentType).setStudent(MyDataInfo.Student.newBuilder().setId(5).setName("玉麒麟 卢俊义").build()).build();
        } else { // 发送一个Worker 对象

            myMessage = MyDataInfo.MyMessage.newBuilder().setDataType(MyDataInfo.MyMessage.DataType.WorkerType).setWorker(MyDataInfo.Worker.newBuilder().setAge(20).setName("老李").build()).build();
        }

        ctx.writeAndFlush(myMessage);
    }

    //当通道有读取事件时,会触发
    @Override
    public void channelRead(ChannelHandlerContext ctx, Object msg) throws Exception {
        ByteBuf buf = (ByteBuf) msg;
        System.out.println("服务器回复的消息:" + buf.toString(CharsetUtil.UTF_8));
        System.out.println("服务器的地址: "+ ctx.channel().remoteAddress());
    }

    //当通道有异常时触发
    @Override
    public void exceptionCaught(ChannelHandlerContext ctx, Throwable cause) throws Exception {
        cause.printStackTrace();
        ctx.close();
    }
}
3.3.4 服务端NettyServer
- 因为是发送消息是编码所以不需要修改

3.3.5 服务端NettyServerHandler
- 修改SimpleChannelInboundHandler泛型为MyDataInfo.MyMessage
- channelRead0中根据dataType 来显示不同的信息
package site.zhourui.nioAndNetty.netty.codec2;

import io.netty.buffer.Unpooled;
import io.netty.channel.ChannelHandlerContext;
import io.netty.channel.SimpleChannelInboundHandler;
import io.netty.util.CharsetUtil;

/*
说明
1. 我们自定义一个Handler 需要继续netty 规定好的某个HandlerAdapter(规范)
2. 这时我们自定义一个Handler , 才能称为一个handler
 */
//public class NettyServerHandler extends ChannelInboundHandlerAdapter {
public class NettyServerHandler extends SimpleChannelInboundHandler<MyDataInfo.MyMessage> {
    //读取数据实际(这里我们可以读取客户端发送的消息)
    /*
    1. ChannelHandlerContext ctx:上下文对象, 含有 管道pipeline , 通道channel, 地址
    2. Object msg: 就是客户端发送的数据 默认Object
     */

    @Override
    protected void channelRead0(ChannelHandlerContext ctx, MyDataInfo.MyMessage msg) throws Exception {
        //根据dataType 来显示不同的信息

        MyDataInfo.MyMessage.DataType dataType = msg.getDataType();
        if(dataType == MyDataInfo.MyMessage.DataType.StudentType) {

            MyDataInfo.Student student = msg.getStudent();
            System.out.println("学生id=" + student.getId() + " 学生名字=" + student.getName());

        } else if(dataType == MyDataInfo.MyMessage.DataType.WorkerType) {
            MyDataInfo.Worker worker = msg.getWorker();
            System.out.println("工人的名字=" + worker.getName() + " 年龄=" + worker.getAge());
        } else {
            System.out.println("传输的类型不正确");
        }
    }


    //数据读取完毕
    @Override
    public void channelReadComplete(ChannelHandlerContext ctx) throws Exception {
        //writeAndFlush 是 write + flush
        //将数据写入到缓存,并刷新
        //一般讲,我们对这个发送的数据进行编码
        ctx.writeAndFlush(Unpooled.copiedBuffer("hello, 客户端~(>^ω^<)喵1", CharsetUtil.UTF_8));
    }
    //处理异常, 一般是需要关闭通道
    @Override
    public void exceptionCaught(ChannelHandlerContext ctx, Throwable cause) throws Exception {
        ctx.close();
    }


}
3.3.6 测试
开启一次服务端,多次重启服务端模拟发送不同类型的消息