Butterfly官方网站,请 点击进入
部分特效来源于网站的总结,请点击进入
本章目标:
选择自己需要的内容,然后加以实现。本文中涉及的修改方式主要包含三种:1、修改源码;2、扩展源码;3、添加插件;
一、引入自定义js、css文件
在/source/下新建css目录用于存放自定义的js和css,然后修改主题文件
inject: # 插入代码到头部 </head> 之前 和 底部 </body> 之前
  head:
    - <link rel="stylesheet" href="/css/custom.css">
  bottom:
    - <link rel="stylesheet" href="/css/footer.css">
二、UI美化
1、自定义字体
这个字体是对全站生效的,在custom.css中添加以下内容
@font-face {
    font-family: 'bodyfont';
    src: url('https://npm.elemecdn.com/ethan4116-blog/lib/font/ZhuZiAWan.ttf');
    font-display: swap;
}

body,
.bfont {
    font-family: bodyfont !important;
}
2、top图增加视频功能
这个稍有点复杂,教程是用butterfly 4.9.0版本改的,这个功能一般用于page类型的页面会比较合适。
- 修改
custom.css添加如下代码
/*视频功能*/
#index-video {
    z-index: 0;
    position: absolute;
    top: 0;
    left: 0;
    height: 80vh;
    width: 100%;
    object-fit: cover;
}
@media only screen and (max-width: 768px) {
    #index-video {
        display: none;
    }
}

@media only screen and (min-width: 768px) {
    .bg-cover {
        background-image: none !important;
    }
}
- 修改
/themes/butterfly/source/css/_layout/head.styl添加如下代码,注意代码缩进
    &.has-video
    position: relative
    height: 80vh !important

  #page-site-info-video
    position: absolute
    top: 300px
    padding: 0 10px
    width: 100%

    +maxWidth768()
      top: 140px
- 修改
/themes/butterfly/layout/includes/header/index.pug第23行左右,替换原来var isHomeClass实现,变成如下代码
    // - var isHomeClass = is_home() ? 'full_page' : 'not-home-page'
    - var isHomeClass = is_home() ? 'full_page' : (page.banner_type == 'video' ) ? 'not-home-page has-video bg-cover' : 'not-home-page'
并在这个文章最后添加
    if page.banner_type == 'video'
        video#index-video(autoplay='' loop='' muted='')
          source(src=page.top_img)
        #page-site-info-video
          h1#site-title=site_title
4、测试,可以随便找一个页面,修改front-matter,添加如下两行:
top_img: https://xxxx.mp4
banner_type: video
上面代码中的
banner_type和video是自定义的类型,可以自己定义,但需要同时修改index.pug文件。
这个视频功能不支持默认配置,只能在单个page页中配置;
三、功能套件
比如某些文章不想对外看到或是为了拉粉需要填加微信公众号后,然后才能得到就可以用到此功能了。
1、文章加密
npm install --save hexo-blog-encrypt;,github地址请查看- 在需要加密的文章的front-matter中设置
password: hello
password: hello1
message: 您好, 这里需要密码, 请微信联系博主获取.
theme: Wave
wrong_pass_message: 抱歉, 这个密码看着不太对, 请微信联系管理员获取.
2、本地搜索
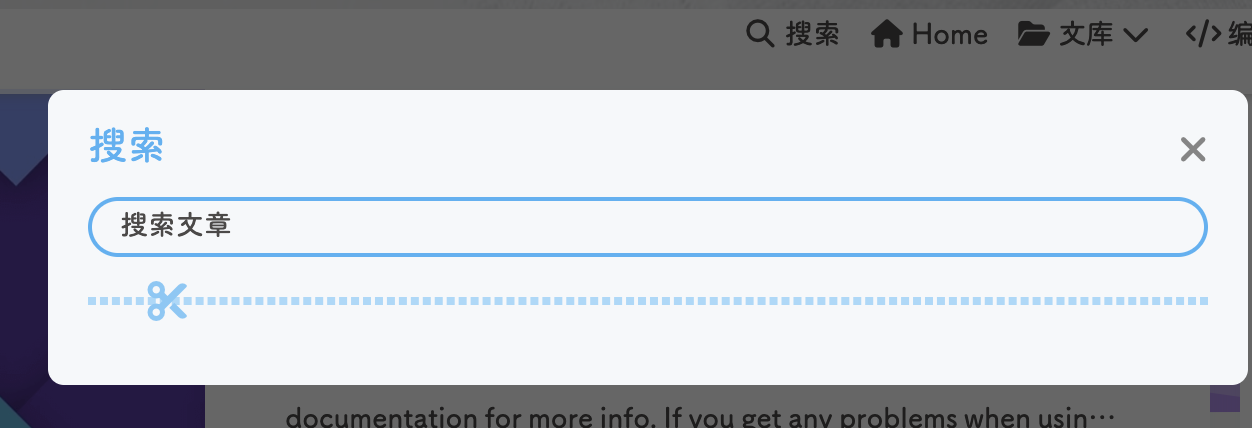
安装插件 : npm install hexo-generator-search --save
- 修改
_config.xml文件,添加以下内容
search:
  path: search.xml
  field: post
  content: true
  format: html
- 修改
_config.butterfly.xml文件,添加以下内容
local_search: # search (搜索)
  enable: true
  preload: false
  top_n_per_article: 1
  unescape: false
  CDN:
3、在线聊天-TIDIO
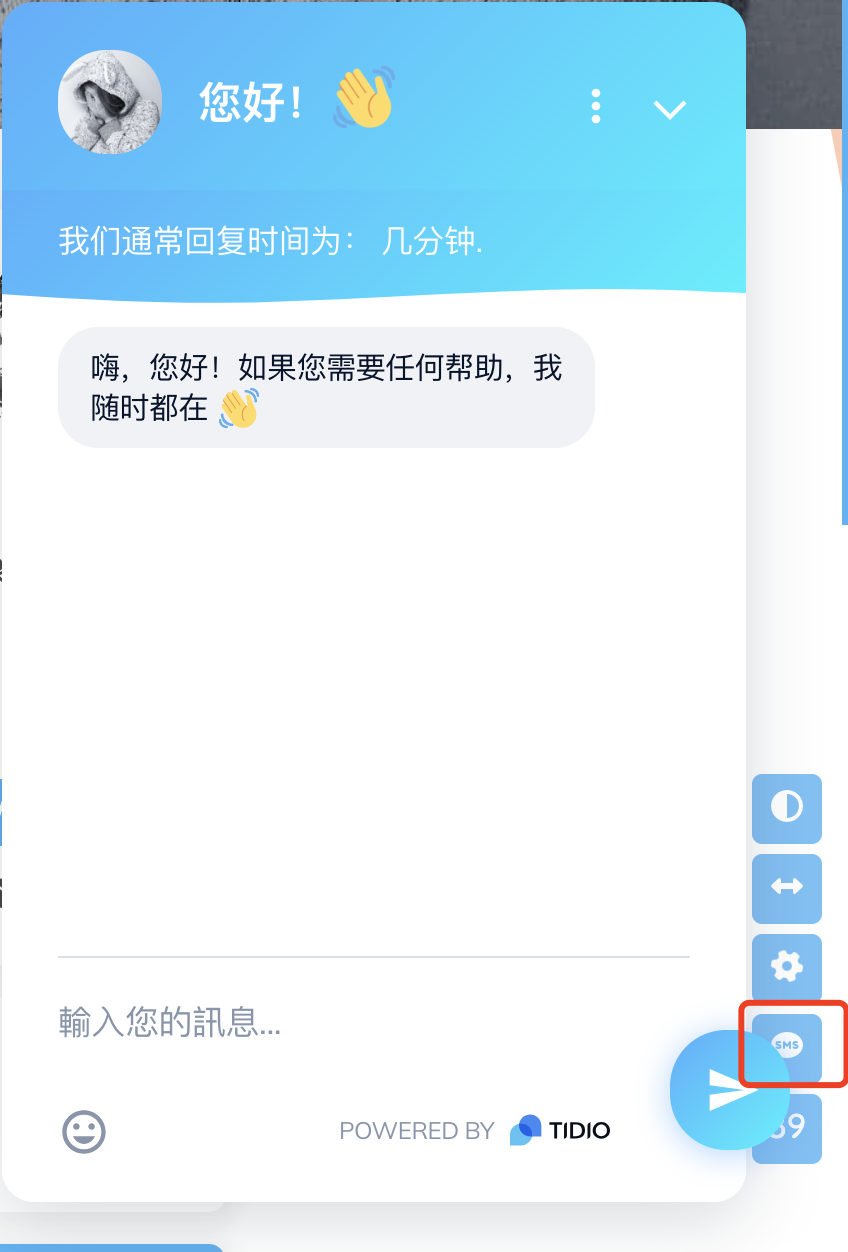
- 在tidio官网注册帐号,注册过程需要设置几步操作,挺简单的按说明选择就好。 ;
2、修改_config.butterfly.xml文件,添加以下内容,不再需要引入额外的js文件了:
chat_btn: true # 工具栏的聊天按钮
chat_hide_show: true #向上滚动时才显示,向下滚动时隐藏

tidio:
  enable: true
  public_key: aokypncqxxxxxx
其中 Public key 在 tidio 的 TIDIO操作面板中取,如下图:

4、侧边栏添加个人微信二维码
- 在
/themes/butterfly/layout/includes/widget文件夹下新建card_wx.pug文件,内容如下:
#card-wechat.card-widget.tzy-right-widget
    #flip-wrapper
      #flip-content
        .face
        .back.face
- 修改
/themes/butterfly/layout/includes/widget/index.pug文件,添加如下内容
    else
      !=partial('includes/widget/card_author', {}, {cache: true})
      !=partial('includes/widget/card_announcement', {}, {cache: true})
      !=partial('includes/widget/card_wx', {}, {cache: true}) # 新增这行
      !=partial('includes/widget/card_top_self', {}, {cache: true})
  else
    //- page
    !=partial('includes/widget/card_author', {}, {cache: true})
    !=partial('includes/widget/card_announcement', {}, {cache: true})
    !=partial('includes/widget/card_wx', {}, {cache: true}) # 新增这行
- 复制以下内容到
custom.css文件中,custom.css文件如何添加见本章开头描述;
/* 公众号 Start */

[data-theme='light'] #aside-content .card-widget#card-wechat {
    background: #49b1f5 !important;
}

#aside-content .card-widget#card-wechat {
    background: var(--card-bg);
    display: flex;
    justify-content: center;
    align-content: center;
    padding: 0;
    cursor: pointer !important;
    border: none;
    height: 110px;
}

/* 如果你设置了aside 的 mobile 为 false,记得放开下面这段注释;
   如果你设置了aside 的 mobile 为 true ,不需要改动。 */

/* @media screen and (max-width: 768px) {
    #aside-content .card-widget#card-wechat {
        display: none !important;
    }
} */

@media screen and (min-width: 1300px) {
    #aside-content .card-widget {
        margin-top: 1rem;
    }
}

#flip-wrapper {
    -webkit-perspective: 1000;
    perspective: 1000;
    position: relative;
    width: 235px;
    height: 110px;
    z-index: 1;
}

#flip-wrapper:hover #flip-content {
    -webkit-transform: rotateY(180deg);
    transform: rotateY(180deg);
}

#flip-content {
    width: 100%;
    height: 100%;
    -webkit-transform-style: preserve-3d;
    transform-style: preserve-3d;
    transition: cubic-bezier(0, 0, 0, 1.29) 0.3s;
}

.face {
    position: absolute;
    width: 100%;
    height: 100%;
    -webkit-backface-visibility: hidden;
    backface-visibility: hidden;
    background: url(/img/wx_cover.png) center center no-repeat;
    background-size: 100%;
}

.back.face {
    display: block;
    -webkit-transform: rotateY(180deg);
    transform: rotateY(180deg);
    box-sizing: border-box;
    background: url(/img/wx.png) center center no-repeat;
    background-size: 100%;
}
- 设置上面的css中图片部分为自己的图片
5、页脚部分设置
本节候改的内容比较多,本站最终设置好的样子如下图所示:

- 修改
/themes/butterfly/layout/includes/footer.pug文件,完整代码如下:
#footer-wrap
#ft
.ft-item-1
.t-top
.t-t-l
p.ft-t.t-l-t 关于本站
.bg-ad
div
| (这里的内容随你写,但是不要过长影响整体美观度,具体可根据实现效果修改)随便说点什么说点什么、随便说点什么说点什么随便说点什么说点什么随。
.t-t-r
p.ft-t.t-l-t 快捷导航
ul.ft-links
li
a(href='https://') 建站指南
a(href='https://') 网址导航
li
a(href='https:///') 来杯咖啡
a(href='https:///') 留点什么
li
a(href='https:///') 关于博主
a(href='https:///') 文章归档
.ft-item-2
p.ft-t 推荐链接
.ft-img-group
.img-group-item
a(href='https://aa11.top/')
img(src='https://bu.dusays.com/2022/05/02/626f92e193879.jpg' alt='')
if theme.footer.owner.enable
- var now = new Date()
- var nowYear = now.getFullYear()
if theme.footer.owner.since && theme.footer.owner.since != nowYear
.copyright!= `©${theme.footer.owner.since} - ${nowYear + ' '} By ${config.author}`
else
.copyright!= `©${nowYear + ' '} <i id="heartbeat" class="fa fas fa-heartbeat"></i> ${config.author}`
if theme.footer.copyright
.framework-info
span= _p('footer.framework') + ' '
a(href='https://hexo.io')= 'Hexo'
span.footer-separator |
span= _p('footer.theme') + ' '
a(href='https://github.com/jerryc127/hexo-theme-butterfly')= 'Butterfly'
if theme.footer.custom_text
.footer_custom_text!=`${theme.footer.custom_text}`
- 将以下代码复制到自定义的
custom.css中,custom.css的创建方法见本章开头描述
/* 自定义底部  start */
#ft {
    max-width: 1200px;
    margin: 0 auto 12px;
    display: flex;
    color: rgb(255 255 255 / 80%) !important;
    text-align: left;
    flex-wrap: wrap;
}

.ft-item-1,
.ft-item-2 {
    display: flex;
    height: 100%;
    padding: 10px 14px;
}

.ft-item-1 {
    flex-direction: column;
    flex: 2;
}

.ft-item-2 {
    flex: 1;
    flex-direction: column;
}

.t-top {
    display: flex;
}

.t-top .t-t-l {
    display: flex;
    flex-direction: column;
    flex: 1.4;
    margin-right: 10px;
}

.t-top .t-t-l .bg-ad {
    width: 85%;
    border-radius: 10px;
    padding: 0 10px;
}

.t-top .t-t-r {
    display: flex;
    flex-direction: column;
    flex: 1;
}

.ft-links {
    padding: 0 14px;
    list-style: none;
    margin-top: 0 !important;
}

.ft-links li a {
    display: inline-block !important;
    width: 50%;
    cursor: pointer !important;
}

.ft-links li a:hover {
    text-decoration: none !important;
    color: #6f42c1 !important;
}

.ft-item-2 .ft-img-group {
    width: 100%;
}

.ft-t {
    font-size: 0.8rem;
    margin-bottom: 20px;
    line-height: 1;
    font-weight: 600;
}

.t-l-t {
    padding-left: 14px;
}

.ft-item-2 .ft-img-group .img-group-item {
    display: inline-block;
    width: 18.4%;
    margin-right: 14px;
    margin-bottom: 6px;
}

.ft-item-2 .ft-img-group .img-group-item a {
    display: inline-block;
    width: 100%;
    height: 100%;
    cursor: pointer !important;
}

.ft-item-2 .ft-img-group .img-group-item a img {
    width: 100%;
    max-height: 80px;
}

@media screen and (max-width: 768px) {

    .ft-item-1 {
        flex-basis: 100% !important;
    }

    .ft-item-2 {
        flex-basis: 100% !important;
    }

    .t-top .t-t-l .bg-ad {
        width: 100%;
    }
}

@media screen and (max-width: 576px) {
    .t-top {
        flex-wrap: wrap;
    }

    .t-top .t-t-l {
        flex-basis: 100% !important;

    }

    .t-top .t-t-r {
        margin-top: 16px;
        flex-basis: 100% !important;
    }
}
/* 自定义底部  End */
3、如果未调整过主题颜色的话还需要修改以下代码,否则在light模式下,链接hover的效果是白色,看不见,修改themes/butterfly/source/css/_mode/darkmode.styl,在文章最后添加如下代码,注意缩进:
    .ft-links li a:hover {
      text-decoration: none !important;
      color: $light-blue !important;
    }

