目录
- 环境配置
- 依赖库安装
- blynk 基础设置
- GPIO 点灯实验
环境配置
依赖库安装
参考 blynk 官方快速上手文档
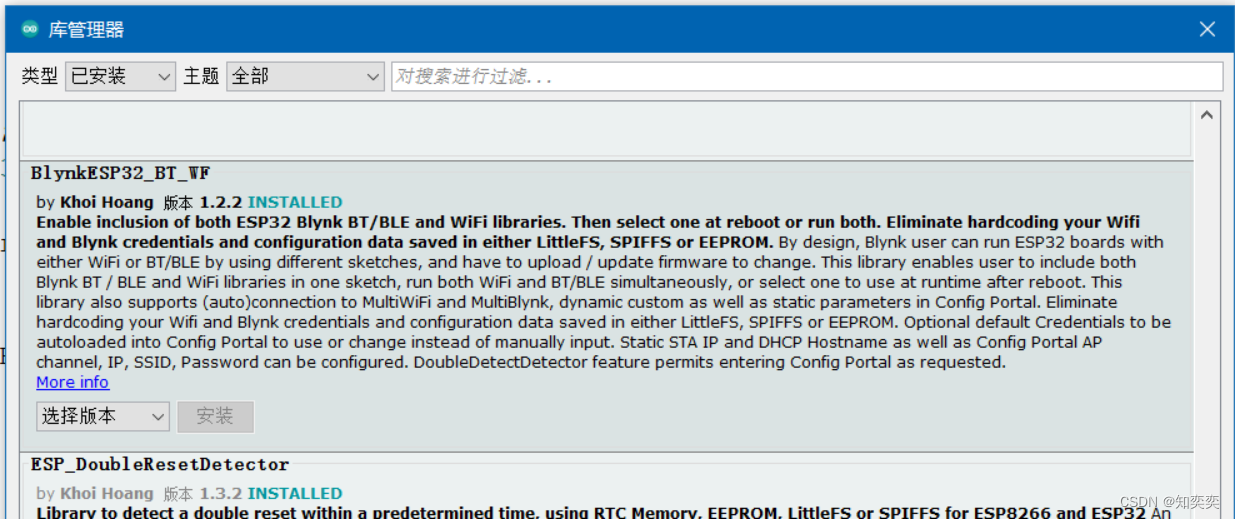
如果要使用 blynk 提供的环境,我们就必须安装对应的库
选择基于 blynk 且适用于 ESP32 的库并安装到 arduino 上:
blynk 基础设置
进入官网并且注册一个账号 https://blynk.io/
直接跳过向导,进入控制台
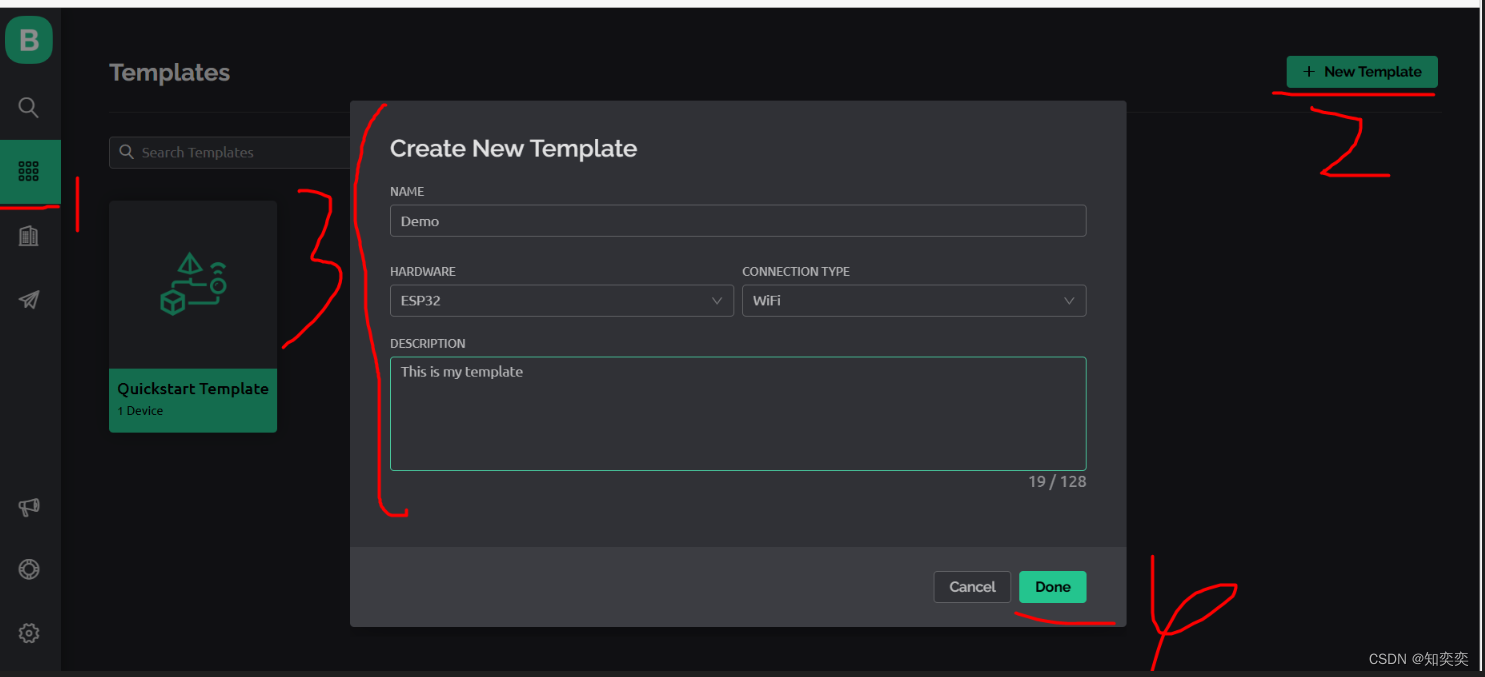
按照下图所示,点击 new template 新建模板,模板名称自取,HARDWARE 选择 ESP32,连接类型选择 WIFI
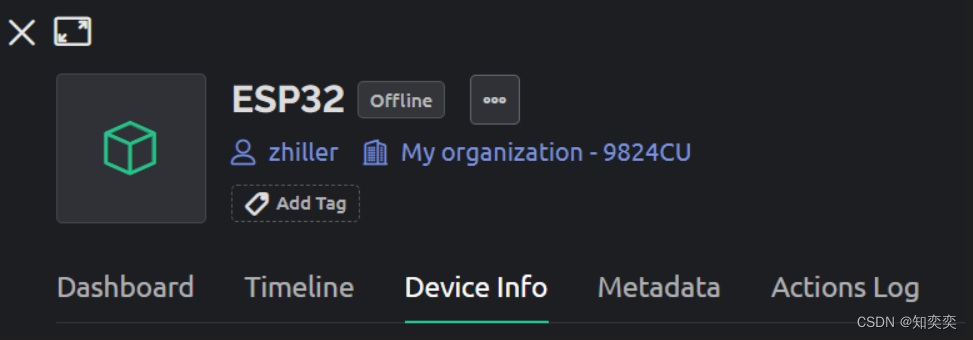
点开这个 template,查看对应的 device info
我们需要拿小本本记下以下三个参数
- AUTHTOKEN
- TEMPLATE NAME
- TEMPLATE ID
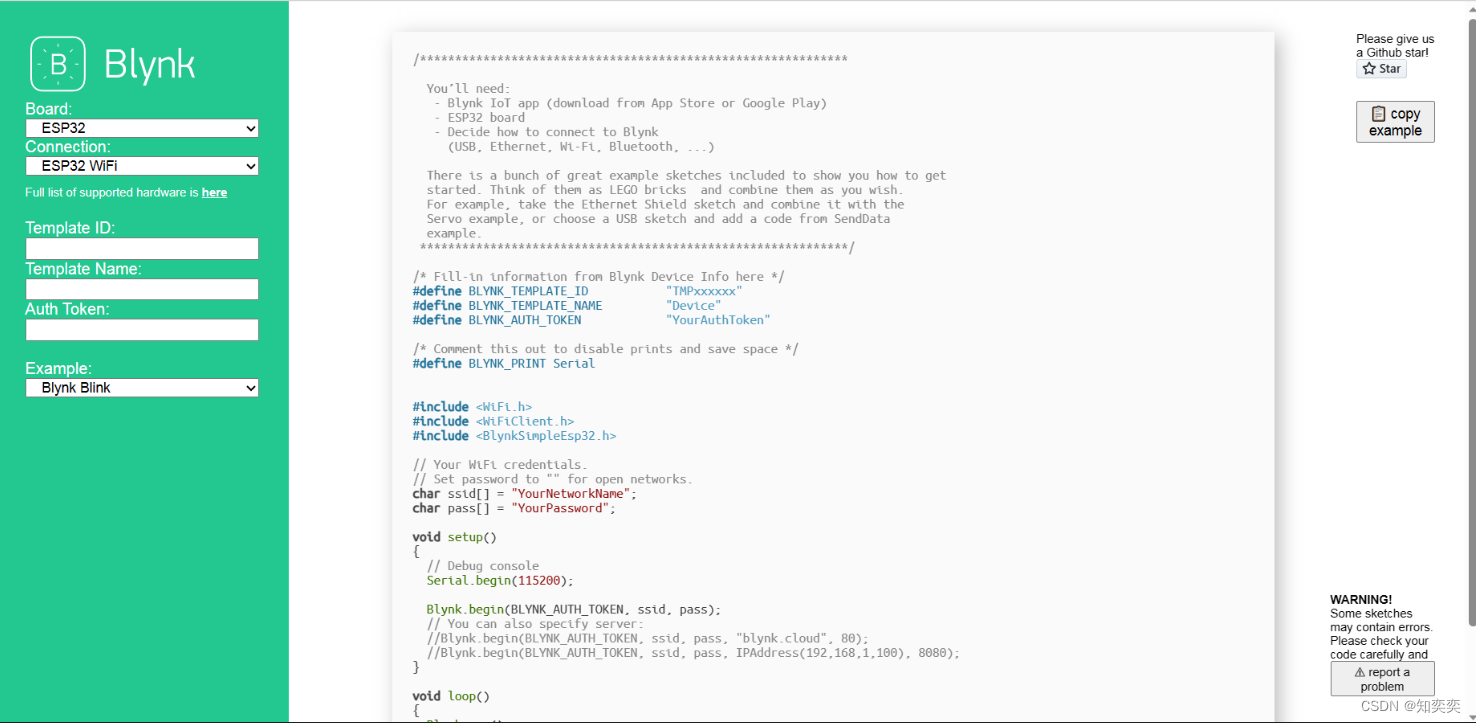
之后进入 blynk 模板代码生成网站
选择板子为 esp32,把刚刚记下来的三个参数全部填进去,复制右侧生成的一大段代码
把代码黏贴到 arduino 里面,现在看应该是这样的
注意补全示例代码的 ssid 以及 pass 常量,这是你链接到的路由器或者热点
/* Fill-in information from Blynk Device Info here */
#define BLYNK_TEMPLATE_ID           "xxx"
#define BLYNK_TEMPLATE_NAME         "xxx"
#define BLYNK_AUTH_TOKEN            "xxx"

/* Comment this out to disable prints and save space */
#define BLYNK_PRINT Serial


#include <WiFi.h>
#include <WiFiClient.h>
#include <BlynkSimpleEsp32.h>

// 在这里我设置了手机热点SSID以及对应密码
char ssid[] = "zhiller";
char pass[] = "pp12345678";

void setup()
{
  // Debug console
  Serial.begin(115200);

  Blynk.begin(BLYNK_AUTH_TOKEN, ssid, pass);
  // You can also specify server:
  //Blynk.begin(BLYNK_AUTH_TOKEN, ssid, pass, "blynk.cloud", 80);
  //Blynk.begin(BLYNK_AUTH_TOKEN, ssid, pass, IPAddress(192,168,1,100), 8080);
}


void loop()
{
  Blynk.run();
  // You can inject your own code or combine it with other sketches.
  // Check other examples on how to communicate with Blynk. Remember
  // to avoid delay() function!
}
此时可直接把代码上传到 esp32 里面去
上传完毕并且成功连接到 WIFI 后,回到 blynk 控制台,你会发现 template 上面显示设备状态为 online
这就表示成功的将设备连接到了服务器上!
GPIO 点灯实验
还是依据上面创建的 template
我们进入 web dashboard 界面,即 blynk 为我们提供的能快速操纵 esp32 的一个图形化控制面板
免费版用户可以创建 10 个控件,这也足够我们学习使用了
默认他给了我们一个按钮空间,我们点开它的设置,将其 DATASTREAM 项改为 Switch Control
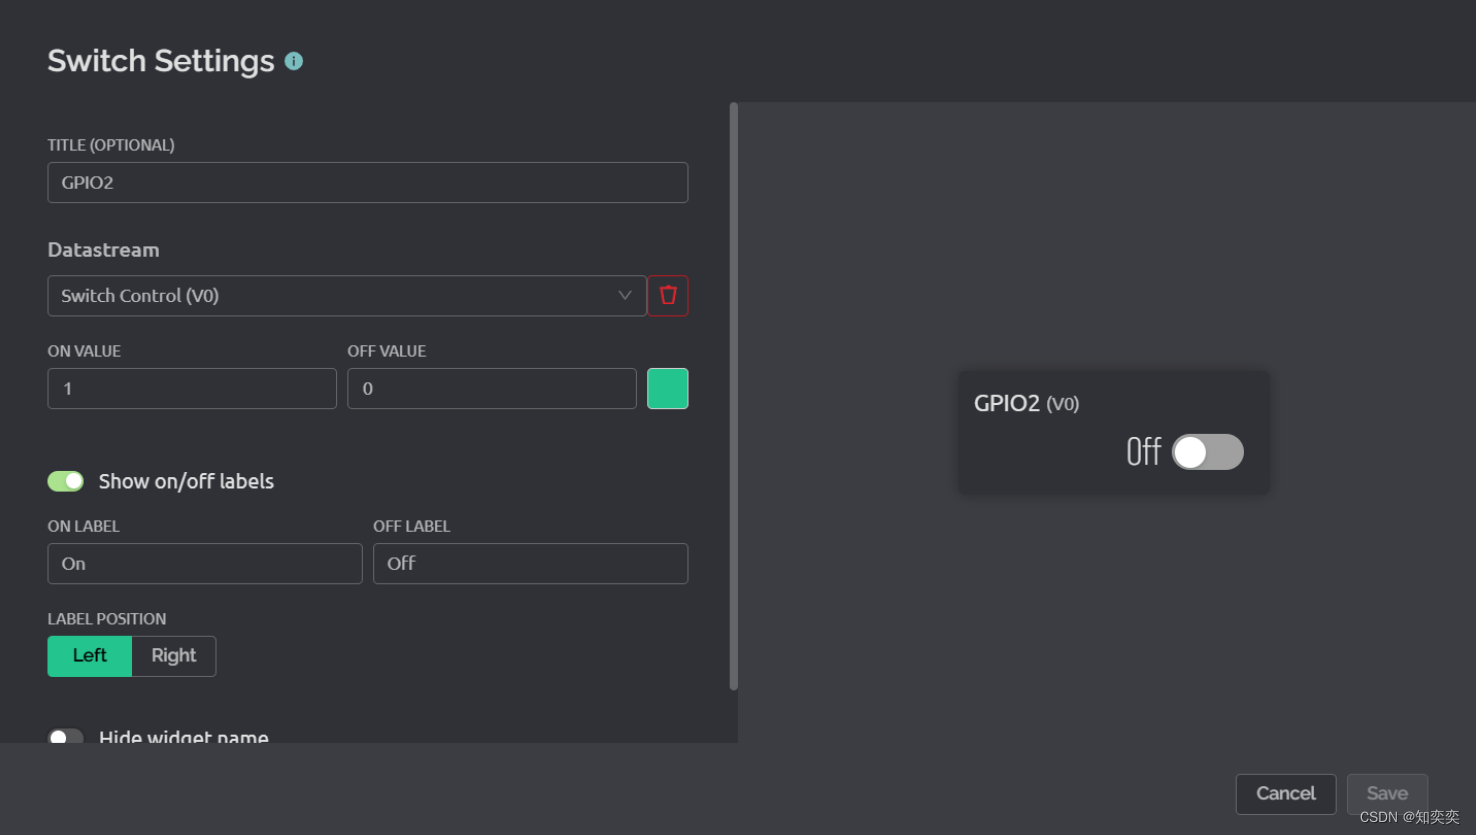
回到我们的 arduino,修改代码如下
在 setup 方法里面添加 pinMode 方法设置 GPIO2 口(即蓝色 LED 对应的端口)为输出状态
定义的 BLYNK_WRITE(V0) 表示:当我们在云端 blynk 的 dashboard 点击对应按钮时,就会触发该方法内的响应
我们即可通过此方法实现对 LED 灯的开灭控制!
#define BLYNK_TEMPLATE_ID           "xxx"
#define BLYNK_TEMPLATE_NAME         "xxx"
#define BLYNK_AUTH_TOKEN            "xxx"

#define BLYNK_PRINT Serial


#include <WiFi.h>
#include <WiFiClient.h>
#include <BlynkSimpleEsp32.h>

char ssid[] = "zhiller";
char pass[] = "pp12345678";

void setup()
{
  Serial.begin(115200);

  // 设置引脚2口为输出状态OUTPUT
  pinMode(2, OUTPUT);

  Blynk.begin(BLYNK_AUTH_TOKEN, ssid, pass);
}

// 当V0口在云端被改变时,就会触发如下代码
BLYNK_WRITE(V0) // Executes when the value of virtual pin 0 changes
{
  if(param.asInt() == 1)
  {
    // execute this code if the switch widget is now ON
    digitalWrite(2,HIGH);  // Set digital pin 2 HIGH
  }
  else
  {
    // execute this code if the switch widget is now OFF
    digitalWrite(2,LOW);  // Set digital pin 2 LOW
  }
}

void loop()
{
  Blynk.run();
}
上传代码到 esp32
blynk 看见 online 状态后,前往 dashboard,以较低频率点击按钮(由于网络延迟的原因,手速太快切换开关的话会导致紊乱,板子无法响应)
可以看见蓝色 LED 根据按钮点击实现了开闭
此云端控制还可通过下载 blynk 对应的手机 APP,实现移动控制,十分方便!
