目录
一.创建一个jsp文件,命名为login.jsp
代码:
1.
2.
3.
4.
5.
6.
编辑
二. 创建一个css文件,并命名为style.css
1.
编辑效果如下:
编辑 代码解析:
2.
效果如下:
代码解析:
3.
效果如下:
代码解析:
4.
效果如下:
代码解析:
5.
效果如下:
编辑
代码解析:
6.
效果如下:
编辑
代码解析:
7.
效果如下:
代码解析:
8.
效果如下:
代码解析:
9.
10.
效果如下:
11.
效果如下:
三.代码
效果图
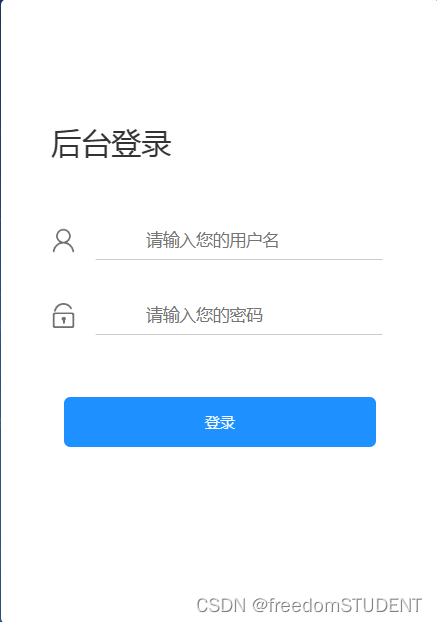
一.创建一个jsp文件,命名为login.jsp
制作如下样本
代码:
<%@ page contentType="text/html;charset=UTF-8" language="java" %>
<html>
<head>
<title>Title</title>
</head>
<body>
<body>
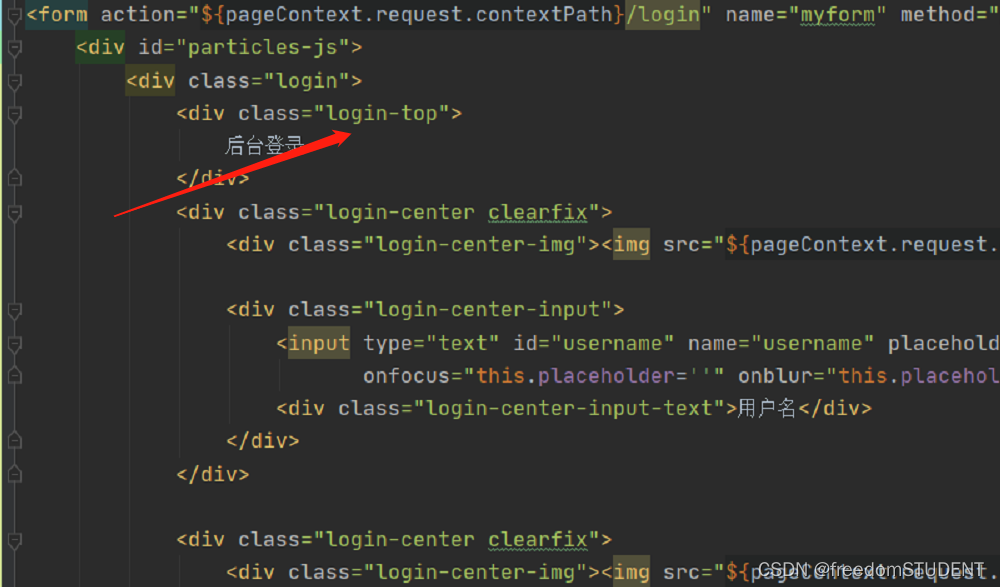
<form action="${pageContext.request.contextPath}/login" name="myform" method="post">
<div id="particles-js">
<div class="login">
<div class="login-top">
后台登录
</div>
<div class="login-center clearfix">
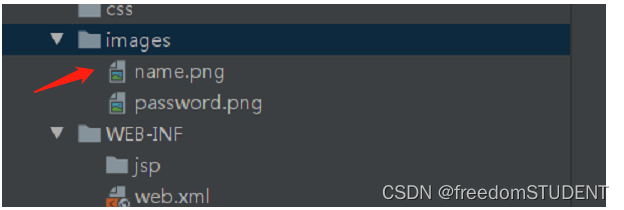
<div class="login-center-img"><img src="${pageContext.request.contextPath}/images/name.png"/></div>
<div class="login-center-input">
<input type="text" id="username" name="username" placeholder="请输入您的用户名" onfocus="this.placeholder=''" onblur="this.placeholder='请输入您的用户名'"/>
<div class="login-center-input-text">用户名</div>
</div>
</div>
<div class="login-center clearfix">
<div class="login-center-img"><img src="${pageContext.request.contextPath}/images/password.png"/></div>
<div class="login-center-input">
<input type="password" id="password" name="password" placeholder="请输入您的密码" onfocus="this.placeholder=''" onblur="this.placeholder='请输入您的密码'"/>
<div class="login-center-input-text">密码</div>
</div>
</div>
<div class="login-button" onclick="check()">
登录
</div>
<span style="text-align: center;color: red;"><br>       ${msg}</span>
</div>
<div class="sk-rotating-plane"></div>
</div>
</form>
</body>
此段代码只完成前端页面展示的任务
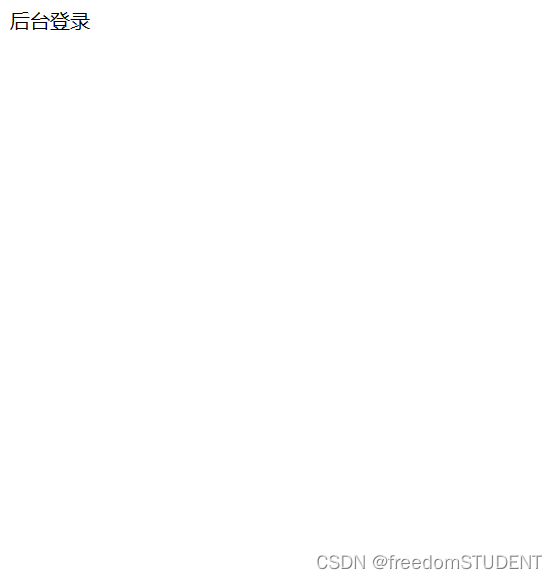
1.
<form action="${pageContext.request.contextPath}/login" name="myform" method="post">
    <div id="particles-js">
        <div class="login">
            <div class="login-top">
                后台登录
            </div>


        </div>

    </div>
效果如下:
2.
<form action="${pageContext.request.contextPath}/login" name="myform" method="post">
    <div id="particles-js">
        <div class="login">
            <div class="login-top">
                后台登录
            </div>
            <div class="login-center clearfix">
                <div class="login-center-img"><img src="${pageContext.request.contextPath}/images/name.png"/></div>

                </div>


        </div>

    </div>
效果如下:

<div class="login-center-img"><img src="${pageContext.request.contextPath}/images/name.png"/></div>
此行代码调用了images文件中的name.png图像
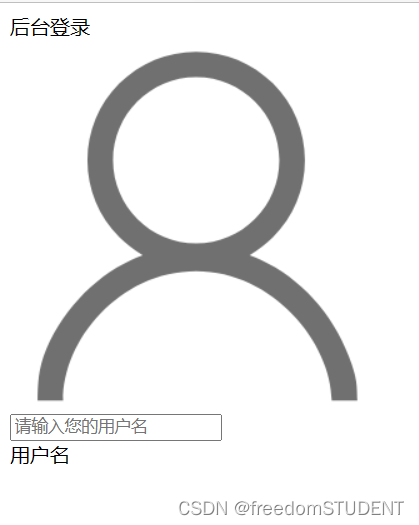
3.
<div id="particles-js">
    <div class="login">
        <div class="login-top">
            后台登录
        </div>
        <div class="login-center clearfix">
            <div class="login-center-img"><img src="${pageContext.request.contextPath}/images/name.png"/></div>

            <div class="login-center-input">
                <input type="text" id="username" name="username" placeholder="请输入您的用户名" onfocus="this.placeholder=''" onblur="this.placeholder='请输入您的用户名'"/>
                <div class="login-center-input-text">用户名</div>
            </div>

        </div>


    </div>

</div>
<div class="login-center-input">
<input type="text" id="username" name="username" placeholder="请输入您的用户名" οnfοcus="this.placeholder=''" οnblur="this.placeholder='请输入您的用户名'"/>
<div class="login-center-input-text">用户名</div>
</div>
type="text":表示该输入框是一个文本框。
id="username":为该输入框指定了一个唯一的标识符,可以通过该标识符来访问和操作该输入框。
name="username":指定了该输入框的名称,可以在表单提交时将输入框的值与名称一起提交到服务器。
placeholder="请输入您的用户名":该属性为输入框提供了一个提示文本,当用户未输入任何内容时,该文本将显示在输入框中。在这种情况下,它将显示"请输入您的用户名"。
οnfοcus="this.placeholder=''":当用户将焦点放在输入框内时,该代码将清空提示文本,以便用户可以直接输入内容。
οnblur="this.placeholder='请输入您的用户名'":当用户将焦点移出输入框时,如果该输入框中没有输入任何内容,则该代码将重新显示"请输入您的用户名"提示文本。
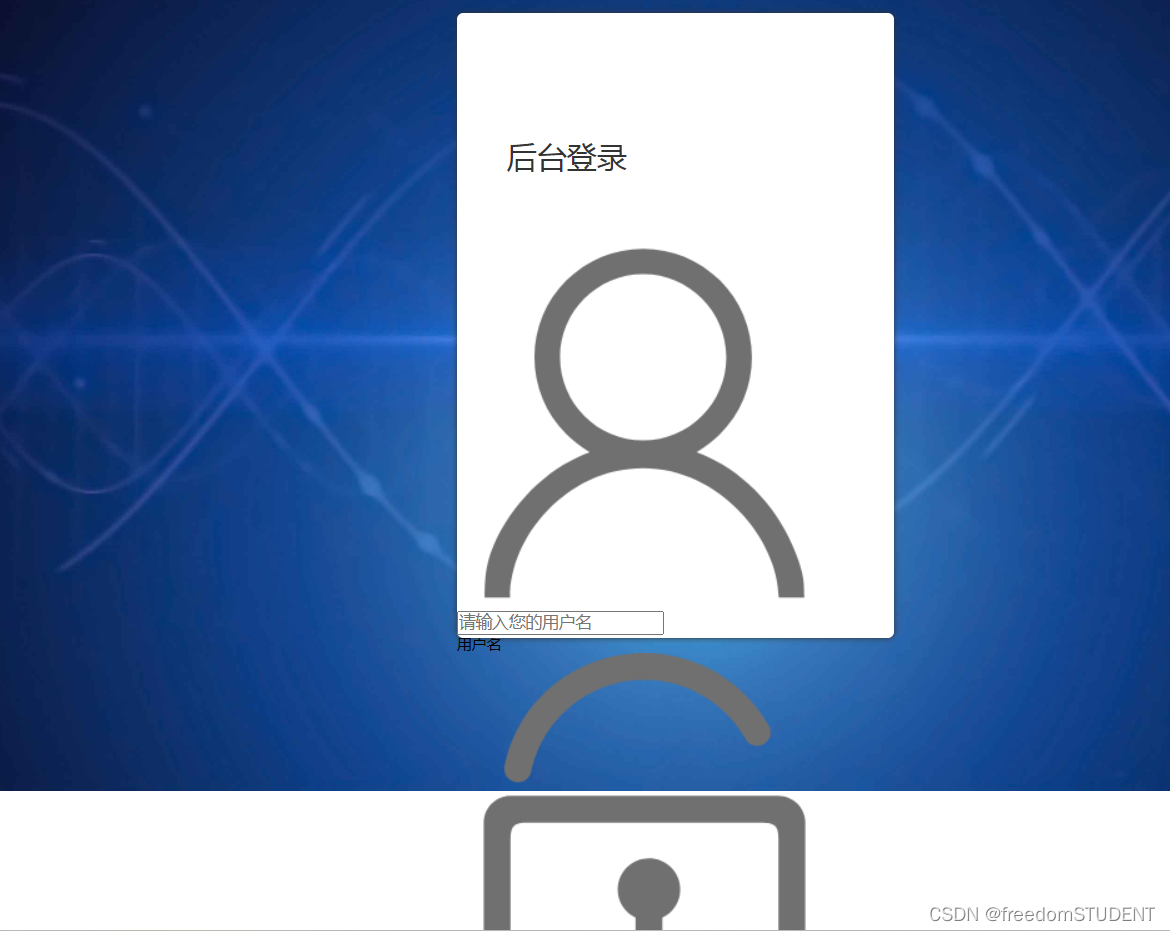
效果如下:
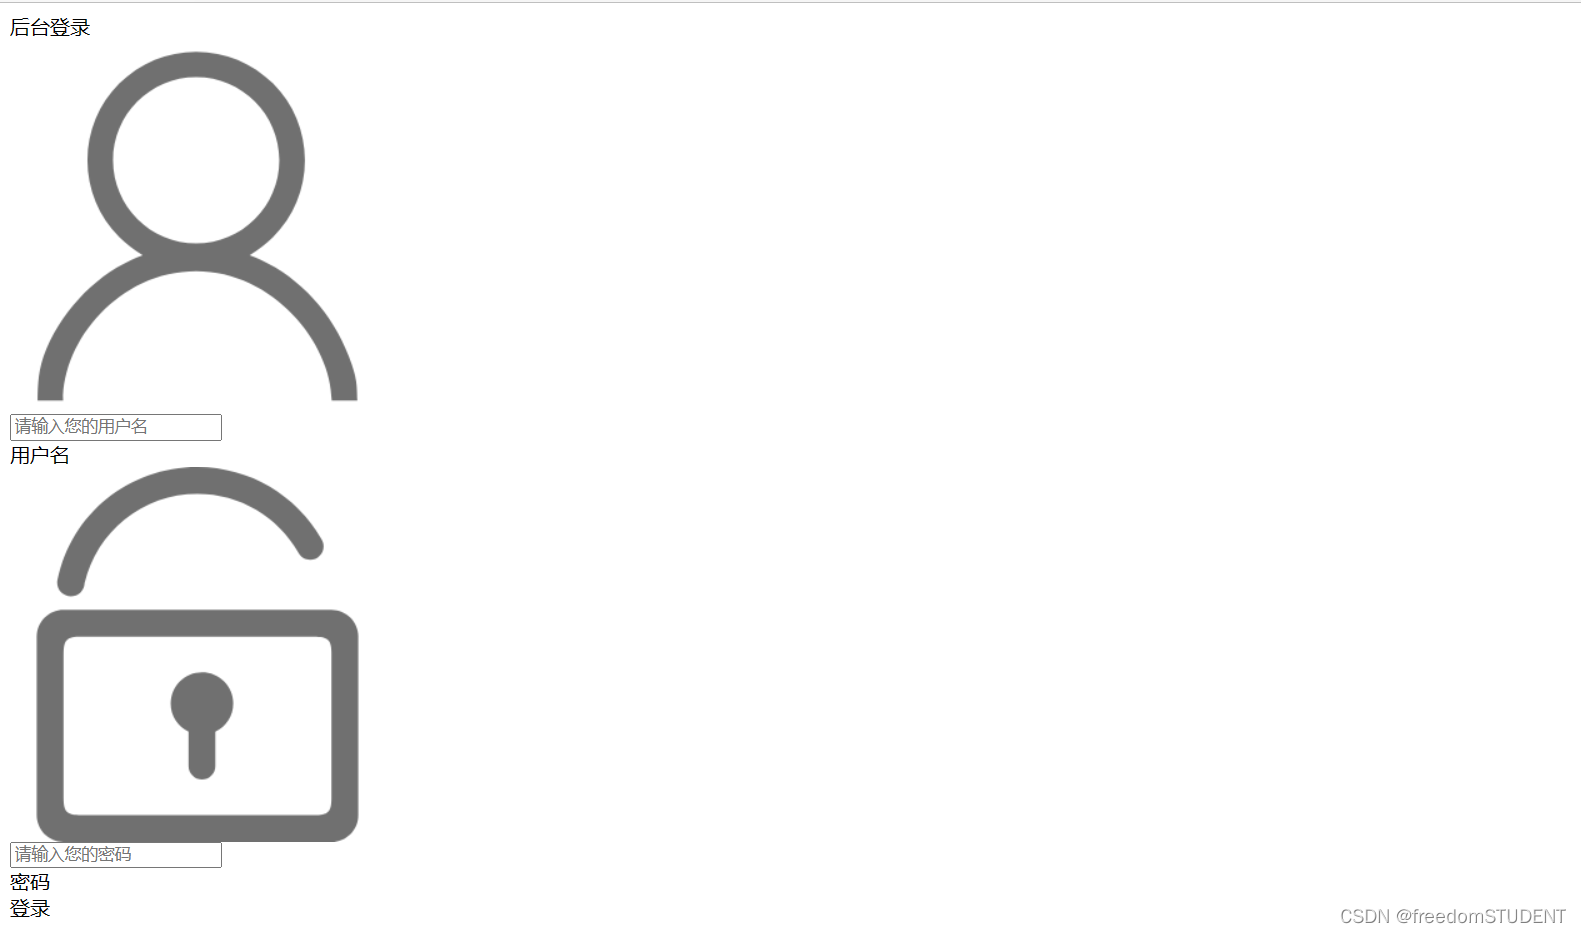
4.
<body>
<form action="${pageContext.request.contextPath}/login" name="myform" method="post">
    <div id="particles-js">
        <div class="login">
            <div class="login-top">
                后台登录
            </div>
            <div class="login-center clearfix">
                <div class="login-center-img"><img src="${pageContext.request.contextPath}/images/name.png"/></div>

                <div class="login-center-input">
                    <input type="text" id="username" name="username" placeholder="请输入您的用户名"
                           onfocus="this.placeholder=''" onblur="this.placeholder='请输入您的用户名'"/>
                    <div class="login-center-input-text">用户名</div>
                </div>
            </div>

            <div class="login-center clearfix">
                <div class="login-center-img"><img src="${pageContext.request.contextPath}/images/password.png"/></div>
                <div class="login-center-input">
                    <input type="password" id="password" name="password" placeholder="请输入您的密码"
                           onfocus="this.placeholder=''" onblur="this.placeholder='请输入您的密码'"/>
                    <div class="login-center-input-text">密码</div>
                </div>
            </div>


        </div>

    </div>
</form>
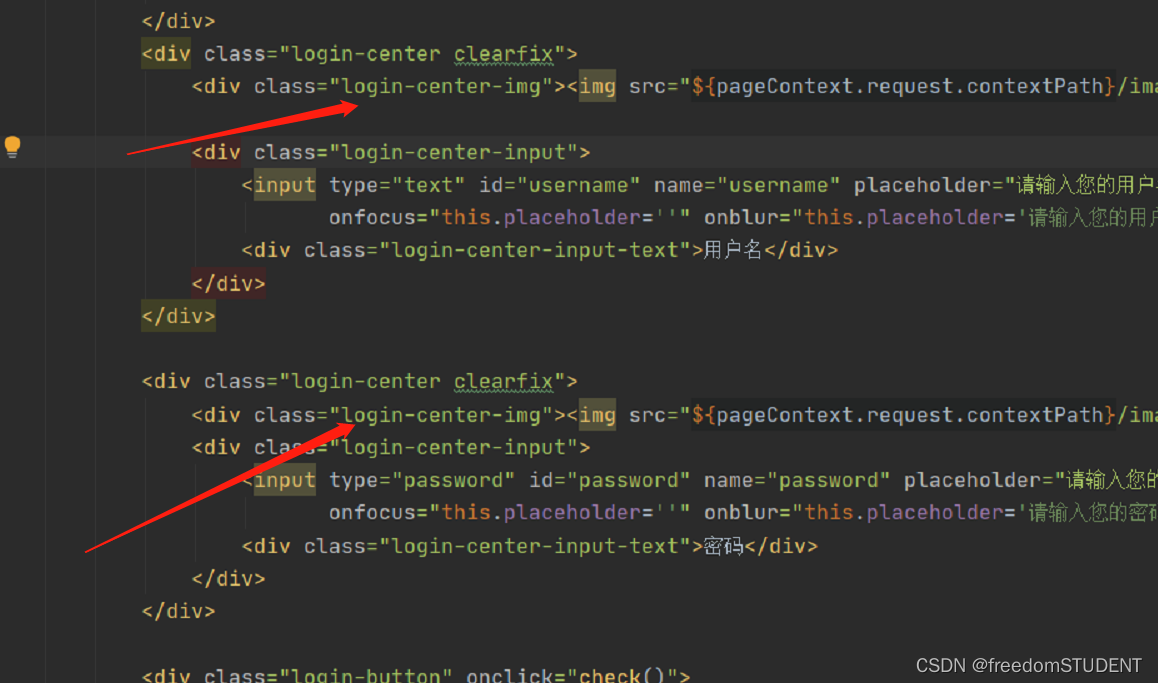
<div class="login-center clearfix">
    <div class="login-center-img"><img src="${pageContext.request.contextPath}/images/password.png"/></div>
    <div class="login-center-input">
        <input type="password" id="password" name="password" placeholder="请输入您的密码"
               οnfοcus="this.placeholder=''" οnblur="this.placeholder='请输入您的密码'"/>
        <div class="login-center-input-text">密码</div>
    </div>
</div>
效果如下:

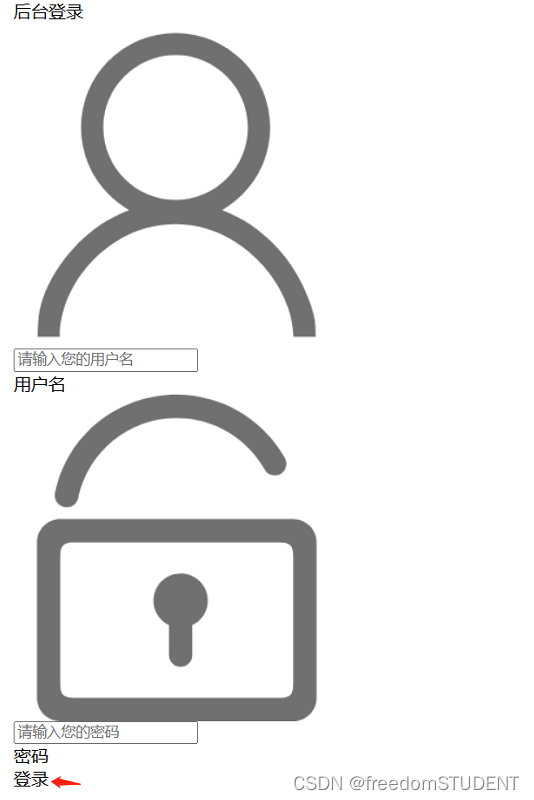
5.
<form action="${pageContext.request.contextPath}/login" name="myform" method="post">
<div id="particles-js">
<div class="login">
<div class="login-top">
后台登录
</div>
<div class="login-center clearfix">
<div class="login-center-img"><img src="${pageContext.request.contextPath}/images/name.png"/></div>
<div class="login-center-input">
<input type="text" id="username" name="username" placeholder="请输入您的用户名"
onfocus="this.placeholder=''" onblur="this.placeholder='请输入您的用户名'"/>
<div class="login-center-input-text">用户名</div>
</div>
</div>
<div class="login-center clearfix">
<div class="login-center-img"><img src="${pageContext.request.contextPath}/images/password.png"/></div>
<div class="login-center-input">
<input type="password" id="password" name="password" placeholder="请输入您的密码"
onfocus="this.placeholder=''" onblur="this.placeholder='请输入您的密码'"/>
<div class="login-center-input-text">密码</div>
</div>
</div>
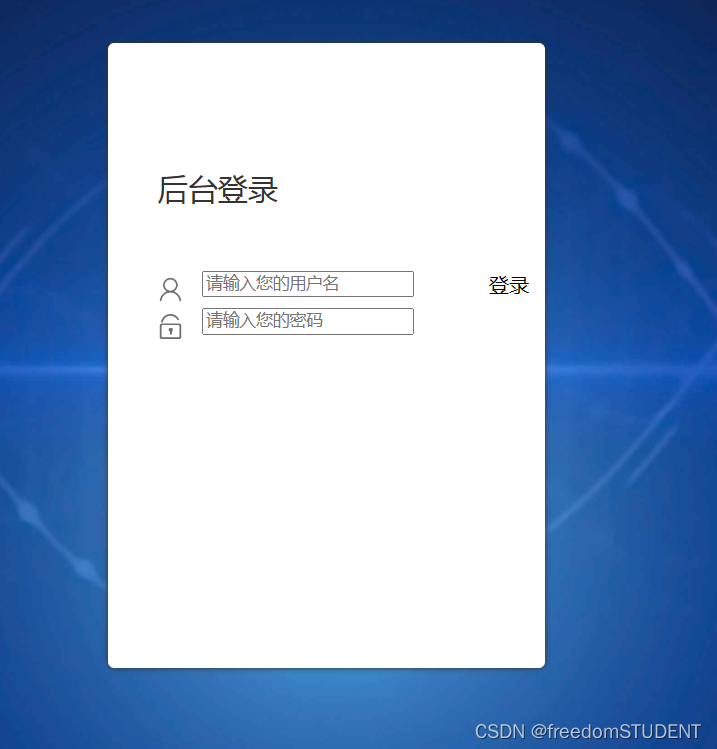
<div class="login-button" onclick="check()">
登录
</div>
</div>
</div>
</form>
<div class="login-button" οnclick="check()">
登录
</div>
效果如下:
6.

<span style="text-align: center;color: red;"><br>       ${msg}</span>
这段代码是在HTML或其他网页标记语言中使用的,它会在页面上显示一个红色文本(文字颜色为红色)的信息,其中${msg}是一个占位符,表示实际显示的消息将由程序或代码动态生成并填充到此处。通过使用居中对齐样式(text-align: center),文本将被放置在页面的中心位置。如果您使用的是某个Web框架或库,这段代码可能已经被预先定义在其中,并且可以非常方便地在您的项目中使用。
二. 创建一个css文件,并命名为style.css
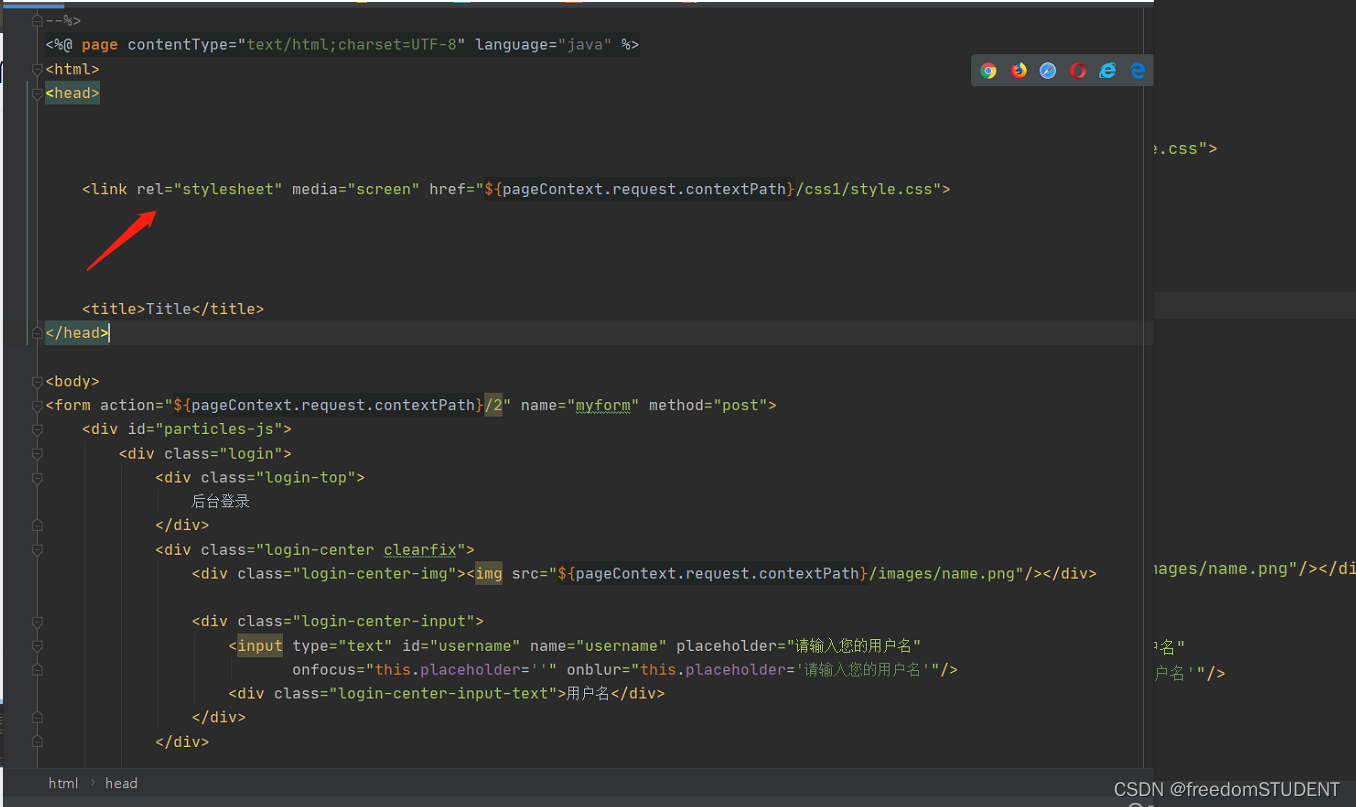
要使用style.css里的样式,必须在login里添加
<link rel="stylesheet" media="screen" href="${pageContext.request.contextPath}/css1/style.css">
1.
html,body{
	width:100%;
	height:100%;
}

#particles-js{
	width: 100%;
	height: 100%;
	position: relative;
	background-image: url(../images/bg.jpg);
	background-position: 50% 50%;
	background-size: cover;
	background-repeat: no-repeat;
	margin-left: auto;
	margin-right: auto;
}
此段代码是关于背景图像的样式
对应如下图所示
 效果如下:
效果如下:
 代码解析:
代码解析:
`width: 100%;`: 设置该元素的宽度为 100%。
- `height: 100%;`: 设置该元素的高度为 100%。
- `position: relative;`: 设置该元素在文档流中的定位为相对定位。
- `background-image: url(../images/bg.jpg);`: 设置该元素的背景图片为 `../images/bg.jpg`。
- `background-position: 50% 50%;`: 设置背景图片在元素中水平和垂直方向上的位置为 50%。
- `background-size: cover;`: 设置背景图片按比例缩放以完全覆盖整个元素。
- `background-repeat: no-repeat;`: 禁止背景图片在元素中重复显示。
- `margin-left: auto;`: 设置该元素的左侧外边距为自动。
- `margin-right: auto;`: 设置该元素的右侧外边距为自动。
2.
html,body{
	width:100%;
	height:100%;
}

#particles-js{
	width: 100%;
	height: 100%;
	position: relative;
	background-image: url(../images/bg.jpg);
	background-position: 50% 50%;
	background-size: cover;
	background-repeat: no-repeat;
	margin-left: auto;
	margin-right: auto;
}


.login{z-index: 2;position:absolute;width: 350px;border-radius: 5px;height: 500px;background: white;box-shadow: 0px 0px 5px #333333;top: 50%;left: 50%;margin-top: -250px;margin-left: -175px;transition: all 1s;-moz-transition: all 1s;	/* Firefox 4 */-webkit-transition: all 1s;	/* Safari 和 Chrome */-o-transition: all 1s;	/* Opera */}
.login{z-index: 2;
       position:absolute;
       width: 350px;
       border-radius: 5px;
       height: 500px;
       background: white;
       box-shadow: 0px 0px 5px #333333;
       top: 50%;
       left: 50%;
       margin-top: -250px;
       margin-left: -175px;
       transition: all 1s;
       -moz-transition: all 1s;
       transition: all 1s;
       -o-transition: all 1s;   }
此行代码对应

效果如下:

代码解析:
- z-index: 2; 控制元素的层级,数值越大越靠前显示。
- position: absolute; 元素的定位方式,这里是绝对定位,相对于父级元素进行定位。
- width:350px; 宽设置为350px- height: 500px; 高设置为500px
- border-radius: 5px; 元素的圆角度数。(效果图中白色盒子四个圆角的度数)
- background: white; 元素的背景颜色。
- box-shadow: 0px 0px 5px #333333; 元素的阴影样式。-top: 50%;
- left: 50%;
- top和left: 元素相对于父级元素的顶部和左侧位置。- margin-top: -250px;
- margin-left: -175px;
- margin-top和margin-left: 元素相对于自身所在位置的上方和左侧的距离,一般用于居中元素。transition: all 1s;
-moz-transition: all 1s;
transition: all 1s;
-o-transition: all 1s;
- transition和-moz-transition和-o-transition: 控制元素变化过程的动画时长和效果。
3.
html,body{
	width:100%;
	height:100%;
}

#particles-js{
	width: 100%;
	height: 100%;
	position: relative;
	background-image: url(../images/bg.jpg);
	background-position: 50% 50%;
	background-size: cover;
	background-repeat: no-repeat;
	margin-left: auto;
	margin-right: auto;
}


.login{z-index: 2;position:absolute;width: 350px;border-radius: 5px;height: 500px;background: white;box-shadow: 0px 0px 5px #333333;top: 50%;left: 50%;margin-top: -250px;margin-left: -175px;transition: all 1s;-moz-transition: all 1s;	/* Firefox 4 */-webkit-transition: all 1s;	/* Safari 和 Chrome */-o-transition: all 1s;	/* Opera */}
.login-top{font-size: 24px;margin-top: 100px;padding-left: 40px;box-sizing: border-box;color: #333333;margin-bottom: 50px;}
.login-top{font-size: 24px;
           margin-top: 100px;
           padding-left: 40px;
           box-sizing: border-box;
           color: #333333;
           margin-bottom: 50px;}
此行代码对应
此行代码主要作用于后台登录这四个字上
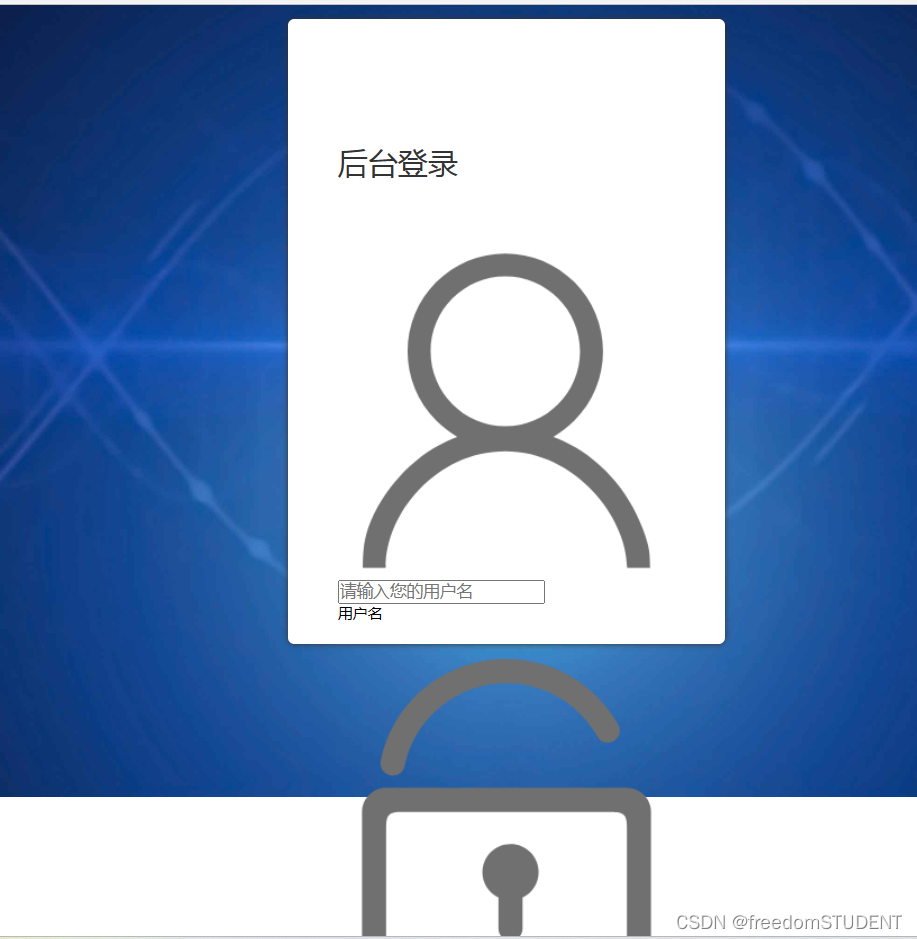
效果如下:
代码解析:
font-size: 24px; 设置字体大小为24像素。
- margin-top: 100px; 设置该元素的顶部边缘距离它的容器顶部边缘100像素的距离。
- padding-left: 40px; 设置该元素左侧内边距为40像素。
- box-sizing: border-box; 指定元素的盒模型为border-box,也就是指定元素的宽度和高度包括边框(border)和内边距(padding)。
- color: #333333; 设置文本颜色为#333333,即十六进制颜色码之一。
- margin-bottom: 50px; 设置该元素的底部边缘距离它的容器底部边缘50像素的距离。
4.
html,body{
width:100%;
height:100%;
}
#particles-js{
width: 100%;
height: 100%;
position: relative;
background-image: url(../images/bg.jpg);
background-position: 50% 50%;
background-size: cover;
background-repeat: no-repeat;
margin-left: auto;
margin-right: auto;
}
.login{z-index: 2;position:absolute;width: 350px;border-radius: 5px;height: 500px;background: white;box-shadow: 0px 0px 5px #333333;top: 50%;left: 50%;margin-top: -250px;margin-left: -175px;transition: all 1s;-moz-transition: all 1s; /* Firefox 4 */-webkit-transition: all 1s; /* Safari 和 Chrome */-o-transition: all 1s; /* Opera */}
.login-top{font-size: 24px;margin-top: 100px;padding-left: 40px;box-sizing: border-box;color: #333333;margin-bottom: 50px;}
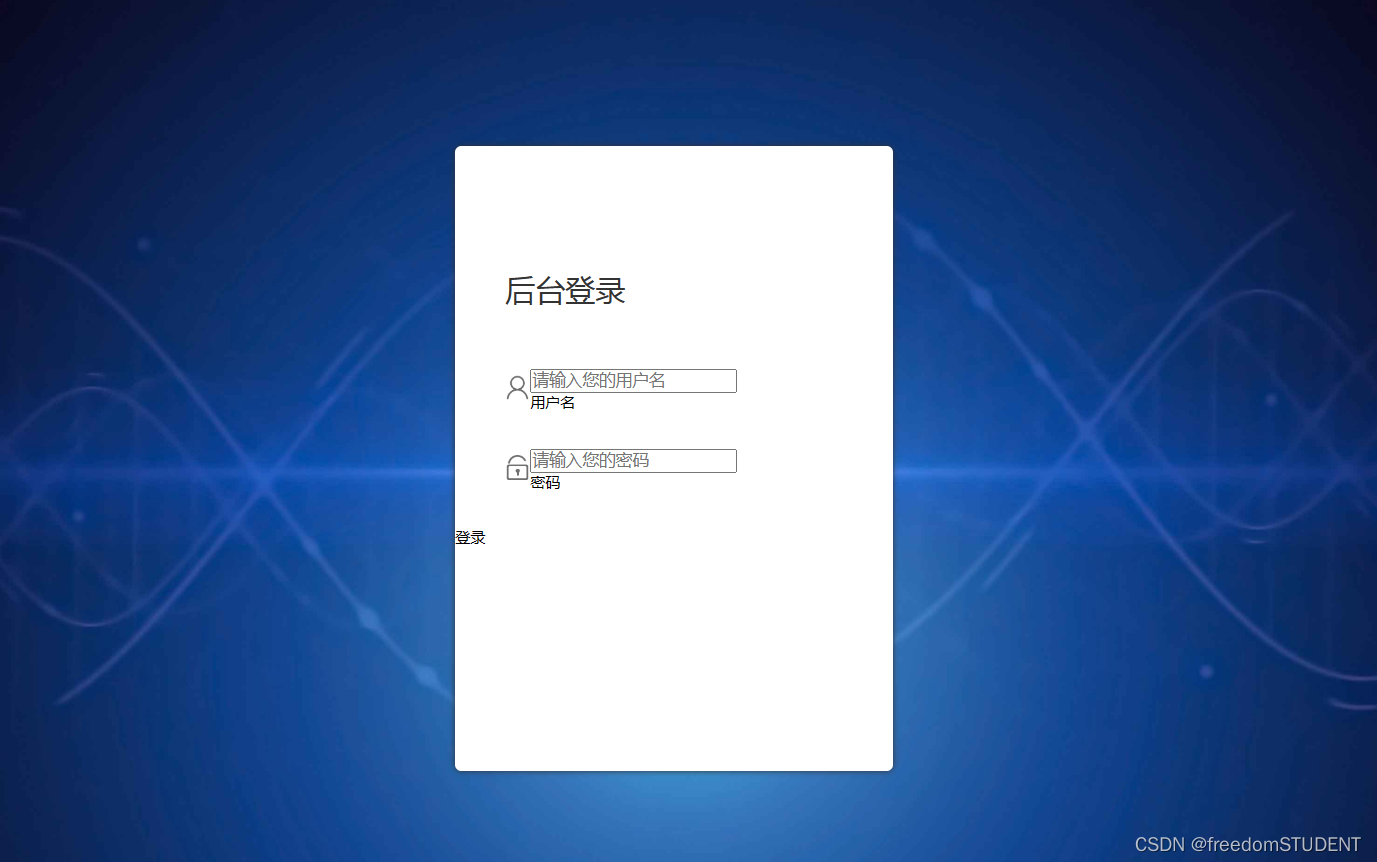
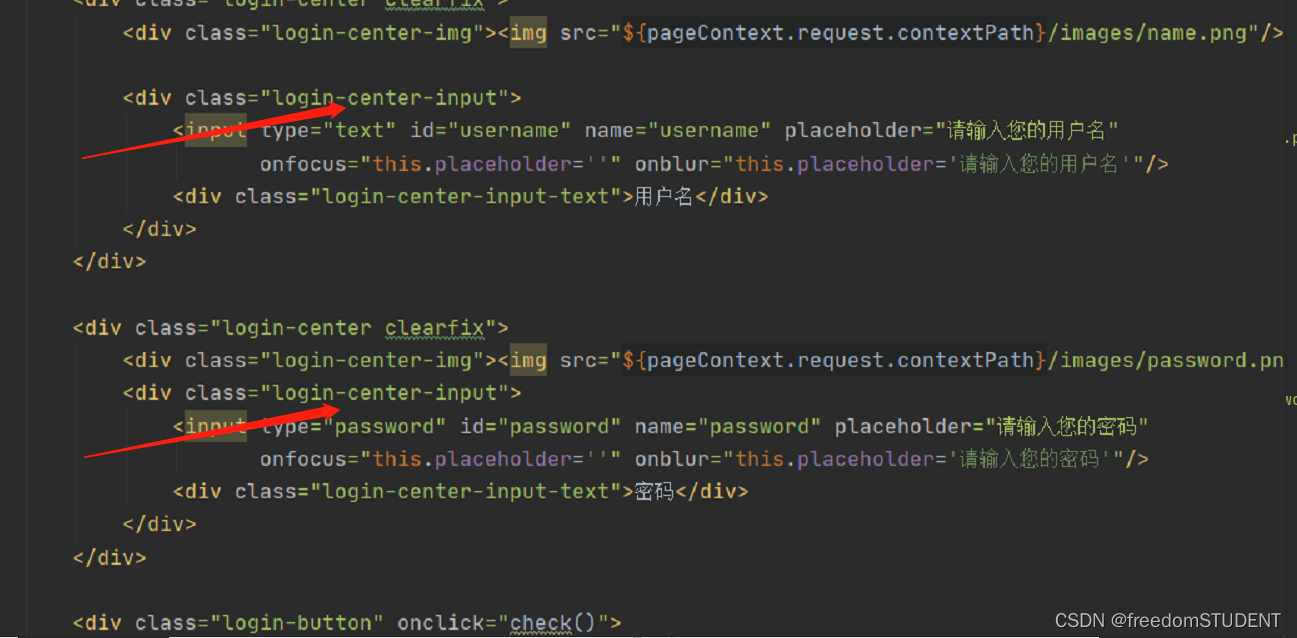
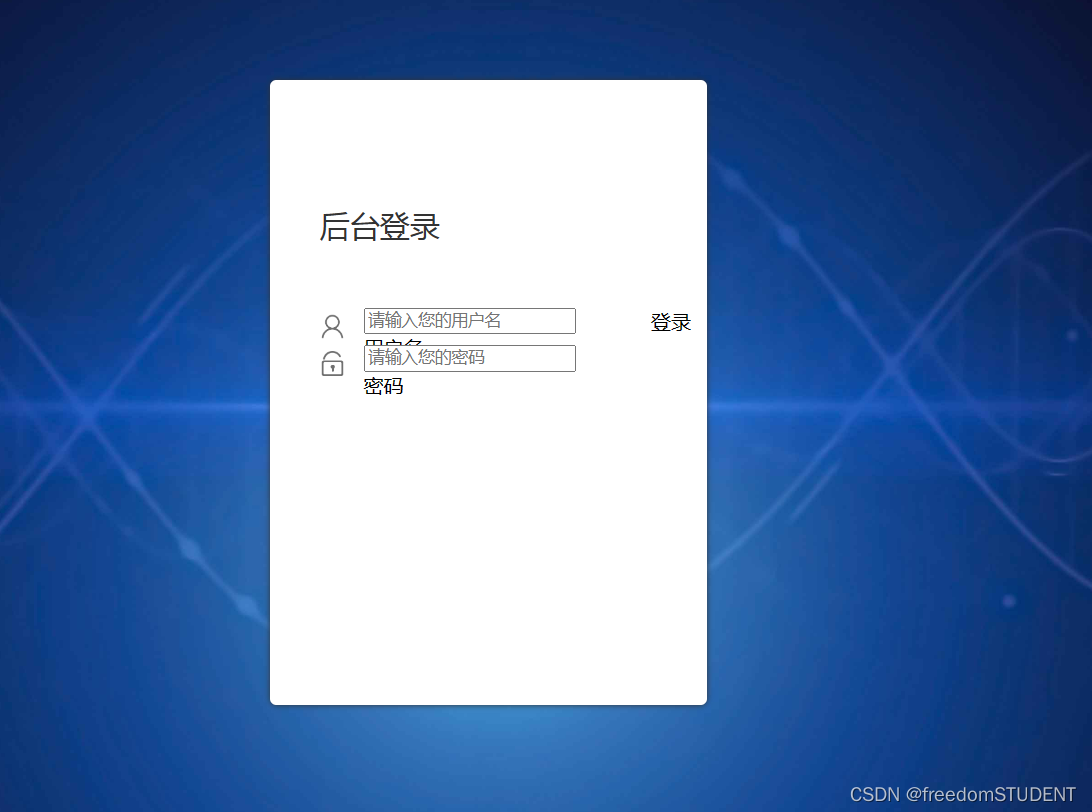
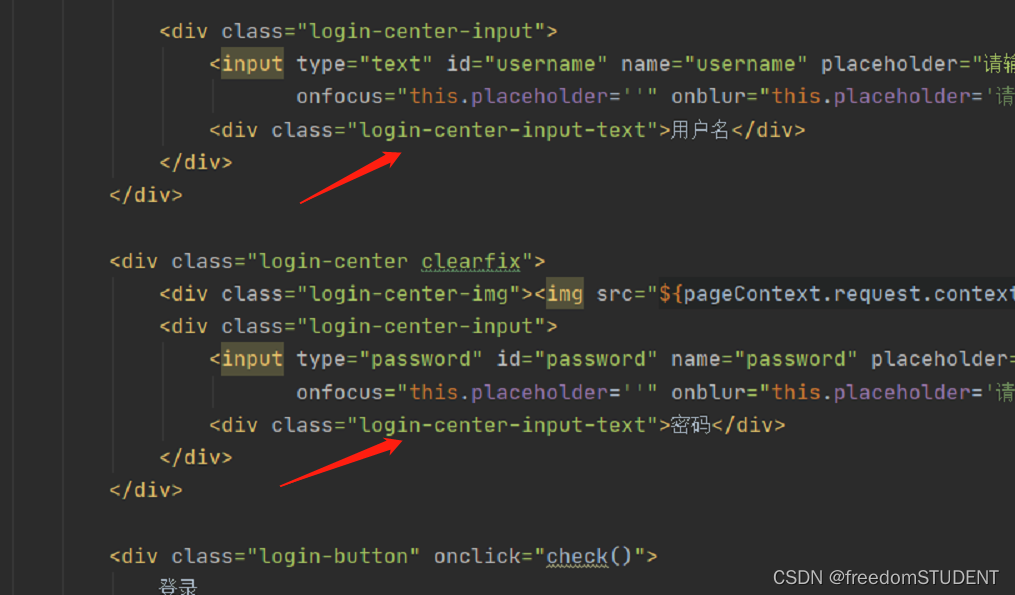
.login-center{width: 100%;box-sizing: border-box;padding: 0 40px;margin-bottom: 30px;}
.login-center{width: 100%;
              box-sizing: border-box;
              padding: 0 40px;
              margin-bottom: 30px;}
此段代码的作用起到居中的作用
此段代码如下:

效果如下:
代码解析:
.login-center { width: 100%; // 设置该元素的宽度为100%
box-sizing: border-box; // 定义元素的盒模型为border-box,即元素的border和padding值不会增加元素宽度和高度
padding: 0 40px; // 设置元素内边距为0,左右间距为40px
margin-bottom: 30px; // 设置元素下方的外边距为30px }
5.
html,body{
	width:100%;
	height:100%;
}

#particles-js{
	width: 100%;
	height: 100%;
	position: relative;
	background-image: url(../images/bg.jpg);
	background-position: 50% 50%;
	background-size: cover;
	background-repeat: no-repeat;
	margin-left: auto;
	margin-right: auto;
}


.login{z-index: 2;position:absolute;width: 350px;border-radius: 5px;height: 500px;background: white;box-shadow: 0px 0px 5px #333333;top: 50%;left: 50%;margin-top: -250px;margin-left: -175px;transition: all 1s;-moz-transition: all 1s;	/* Firefox 4 */-webkit-transition: all 1s;	/* Safari 和 Chrome */-o-transition: all 1s;	/* Opera */}
.login-top{font-size: 24px;margin-top: 100px;padding-left: 40px;box-sizing: border-box;color: #333333;margin-bottom: 50px;}
.login-center{width: 100%;box-sizing: border-box;padding: 0 40px;margin-bottom: 30px;}
.login-center-img{width: 20px;height: 20px;float: left;margin-top: 5px;}
.login-center-img>img{width: 100%;}
.login-center-img{width: 20px;
height: 20px;
float: left;
margin-top: 5px;}
.login-center-img>img{width: 100%;}
此行代码对应:
效果如下:
代码解析:
.login-center-img表示该元素的类名;
width: 20px; 表示该元素的宽度为20像素;
height: 20px; 表示该元素的高度为20像素;
float: left; 表示该元素浮动到左侧;
margin-top: 5px; 表示该元素顶部与其上面的元素之间有5像素的间隔。
.login-center-img>img{width: 100%;}作用是将< img >标签的宽度设置为100%。也就是说,< img >标签将会填满其父元素的宽度,而不是保持其原有的宽度。这通常用于确保图像在不同的设备上保持适当的比例和大小以便显示。
6.
html,body{
	width:100%;
	height:100%;
}

#particles-js{
	width: 100%;
	height: 100%;
	position: relative;
	background-image: url(../images/bg.jpg);
	background-position: 50% 50%;
	background-size: cover;
	background-repeat: no-repeat;
	margin-left: auto;
	margin-right: auto;
}


.login{z-index: 2;position:absolute;width: 350px;border-radius: 5px;height: 500px;background: white;box-shadow: 0px 0px 5px #333333;top: 50%;left: 50%;margin-top: -250px;margin-left: -175px;transition: all 1s;-moz-transition: all 1s;	/* Firefox 4 */-webkit-transition: all 1s;	/* Safari 和 Chrome */-o-transition: all 1s;	/* Opera */}
.login-top{font-size: 24px;margin-top: 100px;padding-left: 40px;box-sizing: border-box;color: #333333;margin-bottom: 50px;}
.login-center{width: 100%;box-sizing: border-box;padding: 0 40px;margin-bottom: 30px;}
.login-center-img{width: 20px;height: 20px;float: left;margin-top: 5px;}
.login-center-img>img{width: 100%;}
.login-center-input{float: left;width: 230px;margin-left: 15px;height: 30px;position: relative;}
login-center-input input{z-index: 2;transition: all 0.5s;padding-left: 10px;color: #333333;width: 100%;height: 30px;border: 0;border-bottom: 1px solid #cccccc;border-top: 1px solid #ffffff;border-left: 1px solid #ffffff;border-right: 1px solid #ffffff;box-sizing: border-box;outline: none;position: relative;}
.login-center-input input:focus{border: 1px solid dodgerblue;}
.login-center-input{
float: left;
width: 230px;
margin-left: 15px;
height: 30px;
position: relative;}
login-center-input input{
z-index: 2;
transition: all 0.5s;
padding-left: 10px;
color: #333333;
width: 100%;
height: 30px;
border: 0;
border-bottom: 1px solid #cccccc;
border-top: 1px solid #ffffff;
border-left: 1px solid #ffffff;
border-right: 1px solid #ffffff;
box-sizing: border-box;
outline: none;position: relative;}
.login-center-input input:focus{border: 1px solid dodgerblue;}
此段代码对应
效果如下:
代码解析:
float: left意味着该元素应该向左浮动,允许其他元素在其右侧排列。
width: 230px指定该元素的宽度为230个像素。
margin-left: 15px将该元素的左侧外边距设置为15个像素,从而在其左侧留出一些空间。
height: 30px指定该元素的高度为30个像素。
position: relative将该元素的定位类型设置为相对定位,这意味着它将相对于其正常位置进行定位,而不是相对于上级元素进行定位。
z-index: 2 - 它决定该元素的堆叠顺序(在其它重叠的元素上下文中),具有更高的 z-index 值将位于具有更低值的元素的上方。
transition: all 0.5s - 它以动画效果过渡了所有样式属性的变化,使得它们更加平滑。
padding-left: 10px - 它设置了该元素的左侧填充。
color: #333333 - 它设置了该元素的文字颜色。
width: 100% - 它设置了该元素的宽度为父元素的宽度。
height: 30px - 它设置了该元素的高度。
border: 0 - 它移除了该元素的默认边框。
border-bottom: 1px solid #cccccc - 它设置了该元素的底部边框为 1 像素宽,颜色为 #cccccc。
border-top: 1px solid #ffffff - 它设置了该元素的上部边框为 1 像素宽,颜色为 #ffffff。
border-left: 1px solid #ffffff - 它设置了该元素的左侧边框为 1 像素宽,颜色为 #ffffff。
border-right: 1px solid #ffffff - 它设置了该元素的右侧边框为 1 像素宽,颜色为 #ffffff。
box-sizing: border-box - 它设置元素框大小包括边框和内边距,但不包括外边距。这意味着该元素的宽度和高度将是指定的内容大小加上边框和填充大小。
outline: none - 它移除了该元素在获得焦点时的默认描边效果。
position: relative - 它设置了该元素的位置方式为相对位置。
.login-center-input input:focus{border: 1px solid dodgerblue;}
其作用是在用户点击一个输入框时,给这个输入框加上一个蓝色的边框。
7.
html,body{
	width:100%;
	height:100%;
}

#particles-js{
	width: 100%;
	height: 100%;
	position: relative;
	background-image: url(../images/bg.jpg);
	background-position: 50% 50%;
	background-size: cover;
	background-repeat: no-repeat;
	margin-left: auto;
	margin-right: auto;
}


.login{z-index: 2;position:absolute;width: 350px;border-radius: 5px;height: 500px;background: white;box-shadow: 0px 0px 5px #333333;top: 50%;left: 50%;margin-top: -250px;margin-left: -175px;transition: all 1s;-moz-transition: all 1s;	/* Firefox 4 */-webkit-transition: all 1s;	/* Safari 和 Chrome */-o-transition: all 1s;	/* Opera */}
.login-top{font-size: 24px;margin-top: 100px;padding-left: 40px;box-sizing: border-box;color: #333333;margin-bottom: 50px;}
.login-center{width: 100%;box-sizing: border-box;padding: 0 40px;margin-bottom: 30px;}
.login-center-img{width: 20px;height: 20px;float: left;margin-top: 5px;}
.login-center-img>img{width: 100%;}
.login-center-input{float: left;width: 230px;margin-left: 15px;height: 30px;position: relative;}
login-center-input input{z-index: 2;transition: all 0.5s;padding-left: 10px;color: #333333;width: 100%;height: 30px;border: 0;border-bottom: 1px solid #cccccc;border-top: 1px solid #ffffff;border-left: 1px solid #ffffff;border-right: 1px solid #ffffff;box-sizing: border-box;outline: none;position: relative;}
.login-center-input input:focus{border: 1px solid dodgerblue;}
.login-center-input-text{background: white;padding: 0 5px;position: absolute;z-index: 0;opacity: 0;height: 20px;top: 50%;margin-top: -10px;font-size: 14px;left: 5px;color: dodgerblue;line-height: 20px;transition: all 0.5s;-moz-transition: all 0.5s;	/* Firefox 4 */-webkit-transition: all 0.5s;	/* Safari 和 Chrome */-o-transition: all 0.5s;	/* Opera */}
.login-center-input-text{background: white;
                        padding: 0 5px;
                        position: absolute;
                        z-index: 0;
                        opacity: 0;
                        height: 20px;
                        top: 50%;
                        margin-top: -10px;
                        font-size: 14px;
                       left: 5px;
                       color: dodgerblue;
                      line-height: 20px;
                      transition: all 0.5s;
                    -moz-transition: all 0.5s;
                  -webkit-transition: all 0.5s;
                   -o-transition: all 0.5s;}
此段代码作用如下
效果如下:
代码解析:
background:背景颜色为白色。
padding:输入框左右两侧内边距为5像素,上下内边距默认。
position:输入框的定位方式为绝对定位。
z-index:图层的层级为0,即在默认层级显示。
opacity:输入框的不透明度为0,即不可见。
height:输入框的高度为20像素。
top:输入框相对父元素(登录中心)垂直居中对齐。
margin-top:使输入框在垂直方向上以自身高度的一半偏移,来实现完全垂直居中。
font-size:输入框内文字的字号为14像素。
left:输入框距离左边的间距为5像素。
color:输入框内文字的颜色为dodgerblue。
line-height:输入框内文字的行高为20像素,与输入框高度相同。
transition:所有的属性变化都会有0.5秒的过渡动画效果。
-moz-transition:指定火狐浏览器里所有的属性变化都会有0.5秒的过渡动画效果。
-webkit-transition:指定谷歌浏览器里所有的属性变化都会有0.5秒的过渡动画效果。
-o-transition:指定欧朋浏览器里所有的属性变化都会有0.5秒的过渡动画效果。
8.
html,body{
	width:100%;
	height:100%;
}

#particles-js{
	width: 100%;
	height: 100%;
	position: relative;
	background-image: url(../images/bg.jpg);
	background-position: 50% 50%;
	background-size: cover;
	background-repeat: no-repeat;
	margin-left: auto;
	margin-right: auto;
}


.login{z-index: 2;position:absolute;width: 350px;border-radius: 5px;height: 500px;background: white;box-shadow: 0px 0px 5px #333333;top: 50%;left: 50%;margin-top: -250px;margin-left: -175px;transition: all 1s;-moz-transition: all 1s;	/* Firefox 4 */-webkit-transition: all 1s;	/* Safari 和 Chrome */-o-transition: all 1s;	/* Opera */}
.login-top{font-size: 24px;margin-top: 100px;padding-left: 40px;box-sizing: border-box;color: #333333;margin-bottom: 50px;}
.login-center{width: 100%;box-sizing: border-box;padding: 0 40px;margin-bottom: 30px;}
.login-center-img{width: 20px;height: 20px;float: left;margin-top: 5px;}
.login-center-img>img{width: 100%;}
.login-center-input{float: left;width: 230px;margin-left: 15px;height: 30px;position: relative;}
login-center-input input{z-index: 2;transition: all 0.5s;padding-left: 10px;color: #333333;width: 100%;height: 30px;border: 0;border-bottom: 1px solid #cccccc;border-top: 1px solid #ffffff;border-left: 1px solid #ffffff;border-right: 1px solid #ffffff;box-sizing: border-box;outline: none;position: relative;}
.login-center-input input:focus{border: 1px solid dodgerblue;}
.login-center-input-text{background: white;padding: 0 5px;position: absolute;z-index: 0;opacity: 0;height: 20px;top: 50%;margin-top: -10px;font-size: 14px;left: 5px;color: dodgerblue;line-height: 20px;transition: all 0.5s;-moz-transition: all 0.5s;	/* Firefox 4 */-webkit-transition: all 0.5s;	/* Safari 和 Chrome */-o-transition: all 0.5s;	/* Opera */}
.login-center-input input:focus~.login-center-input-text{top: 0;z-index: 3;opacity: 1;margin-top: -15px;}
.login-center-input input:focus~.login-center-input-text{top: 0;
z-index: 3;
opacity: 1;
margin-top: -15px;}
效果如下:
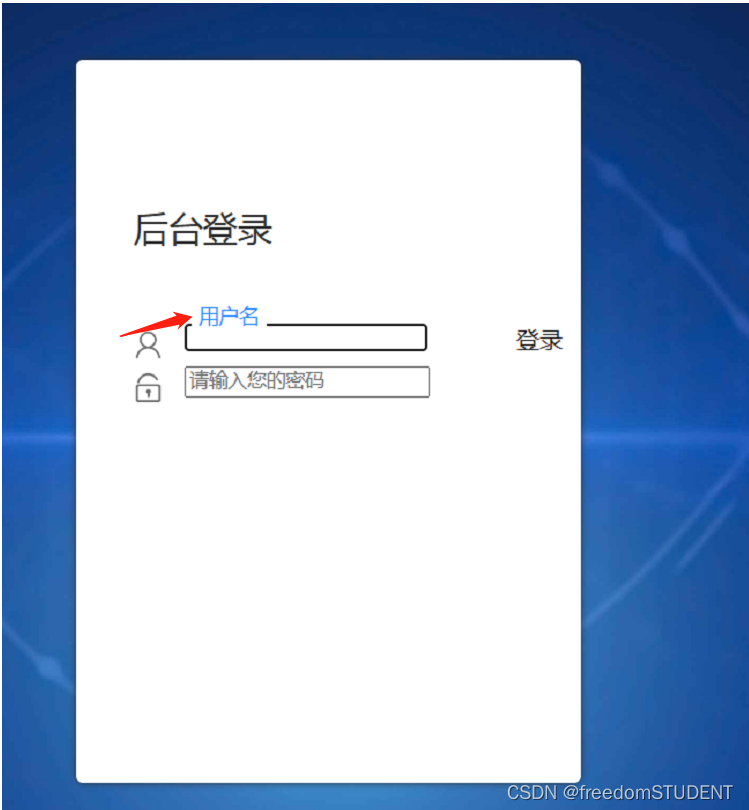
代码解析:
.login-center-input input:focus~.login-center-input-text{top: 0; z-index: 3; opacity: 1; margin-top: -15px;}当一个输入表单获得焦点时(例如,用户点击或按Tab键进入该表单),对于其相邻的类名为.login-center-input-text的元素,做以下操作:
把该元素的位置定位在输入框顶部(top: 0)。
在其他元素上方使其显示(z-index: 3)。
将其不透明度设置为1(opacity: 1),以便用户可以看到其内容。
将其上方的间距设置为-15像素(margin-top: -15px),以抵消文本移动而产生的留白。
9.
html,body{
width:100%;
height:100%;
}
#particles-js{
width: 100%;
height: 100%;
position: relative;
background-image: url(../images/bg.jpg);
background-position: 50% 50%;
background-size: cover;
background-repeat: no-repeat;
margin-left: auto;
margin-right: auto;
}
.login{z-index: 2;position:absolute;width: 350px;border-radius: 5px;height: 500px;background: white;box-shadow: 0px 0px 5px #333333;top: 50%;left: 50%;margin-top: -250px;margin-left: -175px;transition: all 1s;-moz-transition: all 1s; /* Firefox 4 */-webkit-transition: all 1s; /* Safari 和 Chrome */-o-transition: all 1s; /* Opera */}
.login-top{font-size: 24px;margin-top: 100px;padding-left: 40px;box-sizing: border-box;color: #333333;margin-bottom: 50px;}
.login-center{width: 100%;box-sizing: border-box;padding: 0 40px;margin-bottom: 30px;}
.login-center-img{width: 20px;height: 20px;float: left;margin-top: 5px;}
.login-center-img>img{width: 100%;}
.login-center-input{float: left;width: 230px;margin-left: 15px;height: 30px;position: relative;}
.login-center-input input{z-index: 2;transition: all 0.5s;padding-left: 10px;color: #333333;width: 100%;height: 30px;border: 0;border-bottom: 1px solid #cccccc;border-top: 1px solid #ffffff;border-left: 1px solid #ffffff;border-right: 1px solid #ffffff;box-sizing: border-box;outline: none;position: relative;}
.login-center-input input:focus{border: 1px solid dodgerblue;}
.login-center-input-text{background: white;padding: 0 5px;position: absolute;z-index: 0;opacity: 0;height: 20px;top: 50%;margin-top: -10px;font-size: 14px;left: 5px;color: dodgerblue;line-height: 20px;transition: all 0.5s;-moz-transition: all 0.5s; /* Firefox 4 */-webkit-transition: all 0.5s; /* Safari 和 Chrome */-o-transition: all 0.5s; /* Opera */}
.login-center-input input:focus~.login-center-input-text{top: 0;z-index: 3;opacity: 1;margin-top: -15px;}
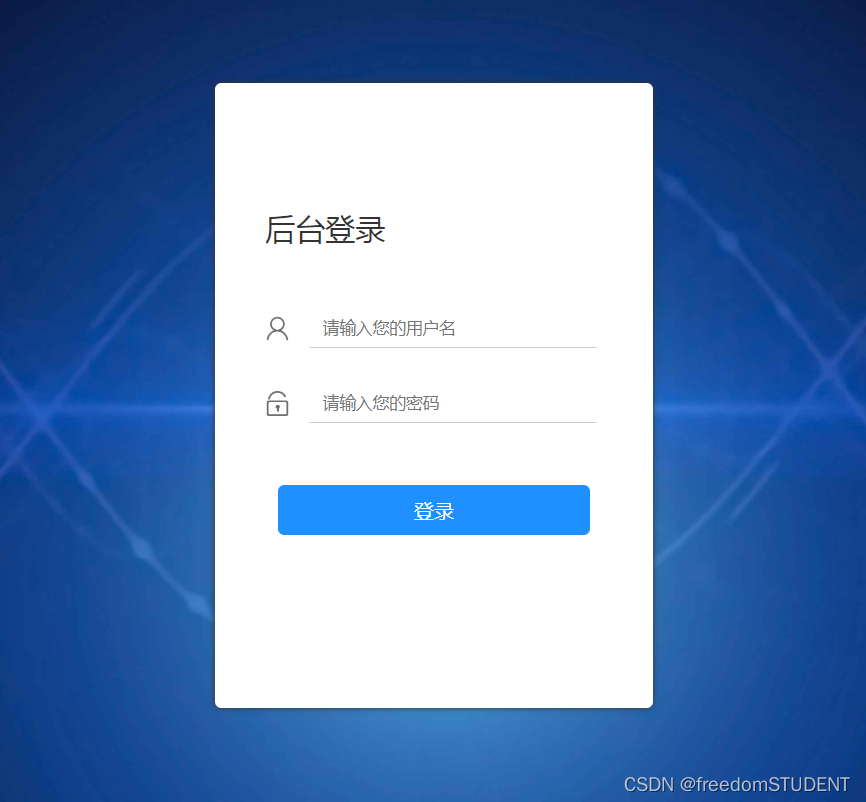
.login-button{cursor: pointer;width: 250px;text-align: center;height: 40px;line-height: 40px;background-color: dodgerblue;border-radius: 5px;margin: 0 auto;margin-top: 50px;color: white;}
.login-button{cursor: pointer;width: 250px;
              text-align: center;
              height: 40px;
              line-height: 40px;
              background-color: dodgerblue;border-radius: 5px;margin: 0 auto;margin-top: 50px;color: white;}
用于设置登录按钮的样式。其中,设置了按钮的宽度、高度、行高、背景颜色、圆角等属性,并将按钮居中显示在页面上方。使用了"cursor: pointer"属性,使得鼠标悬停在上按钮时会变成手型,增强用户体验。同时,设置了文字按钮的颜色为白色。

10.
html,body{
	width:100%;
	height:100%;
}


.js-count-particles{
  font-size: 1.1em;
}

#stats,
.count-particles{
  -webkit-user-select: none;
  margin-top: 5px;
  margin-left: 5px;
}

#stats{
  border-radius: 3px 3px 0 0;
  overflow: hidden;
}

.count-particles{
  border-radius: 0 0 3px 3px;
}


#particles-js{
	width: 100%;
	height: 100%;
	position: relative;
	background-image: url(../images/bg.jpg);
	background-position: 50% 50%;
	background-size: cover;
	background-repeat: no-repeat;
	margin-left: auto;
	margin-right: auto;
}

body{margin:0;padding:0;}

.login{z-index: 2;position:absolute;width: 350px;border-radius: 5px;height: 500px;background: white;box-shadow: 0px 0px 5px #333333;top: 50%;left: 50%;margin-top: -250px;margin-left: -175px;transition: all 1s;-moz-transition: all 1s;	/* Firefox 4 */-webkit-transition: all 1s;	/* Safari 和 Chrome */-o-transition: all 1s;	/* Opera */}
.login-top{font-size: 24px;margin-top: 100px;padding-left: 40px;box-sizing: border-box;color: #333333;margin-bottom: 50px;}
.login-center{width: 100%;box-sizing: border-box;padding: 0 40px;margin-bottom: 30px;}
.login-center-img{width: 20px;height: 20px;float: left;margin-top: 5px;}
.login-center-img>img{width: 100%;}
.login-center-input{float: left;width: 230px;margin-left: 15px;height: 30px;position: relative;}
.login-center-input input{z-index: 2;transition: all 0.5s;padding-left: 10px;color: #333333;width: 100%;height: 30px;border: 0;border-bottom: 1px solid #cccccc;border-top: 1px solid #ffffff;border-left: 1px solid #ffffff;border-right: 1px solid #ffffff;box-sizing: border-box;outline: none;position: relative;}
.login-center-input input:focus{border: 1px solid dodgerblue;}
.login-center-input-text{background: white;padding: 0 5px;position: absolute;z-index: 0;opacity: 0;height: 20px;top: 50%;margin-top: -10px;font-size: 14px;left: 5px;color: dodgerblue;line-height: 20px;transition: all 0.5s;-moz-transition: all 0.5s;	/* Firefox 4 */-webkit-transition: all 0.5s;	/* Safari 和 Chrome */-o-transition: all 0.5s;	/* Opera */}
.login-center-input input:focus~.login-center-input-text{top: 0;z-index: 3;opacity: 1;margin-top: -15px;}
.login-button{cursor: pointer;width: 250px;text-align: center;height: 40px;line-height: 40px;background-color: dodgerblue;border-radius: 5px;margin: 0 auto;margin-top: 50px;color: white;}
body{margin:0;padding:0;}
body中元素的边距和内边距为0。这样可以让整个页面的内容紧贴着浏览器窗口显示,不会有额外的空白区域
效果如下:
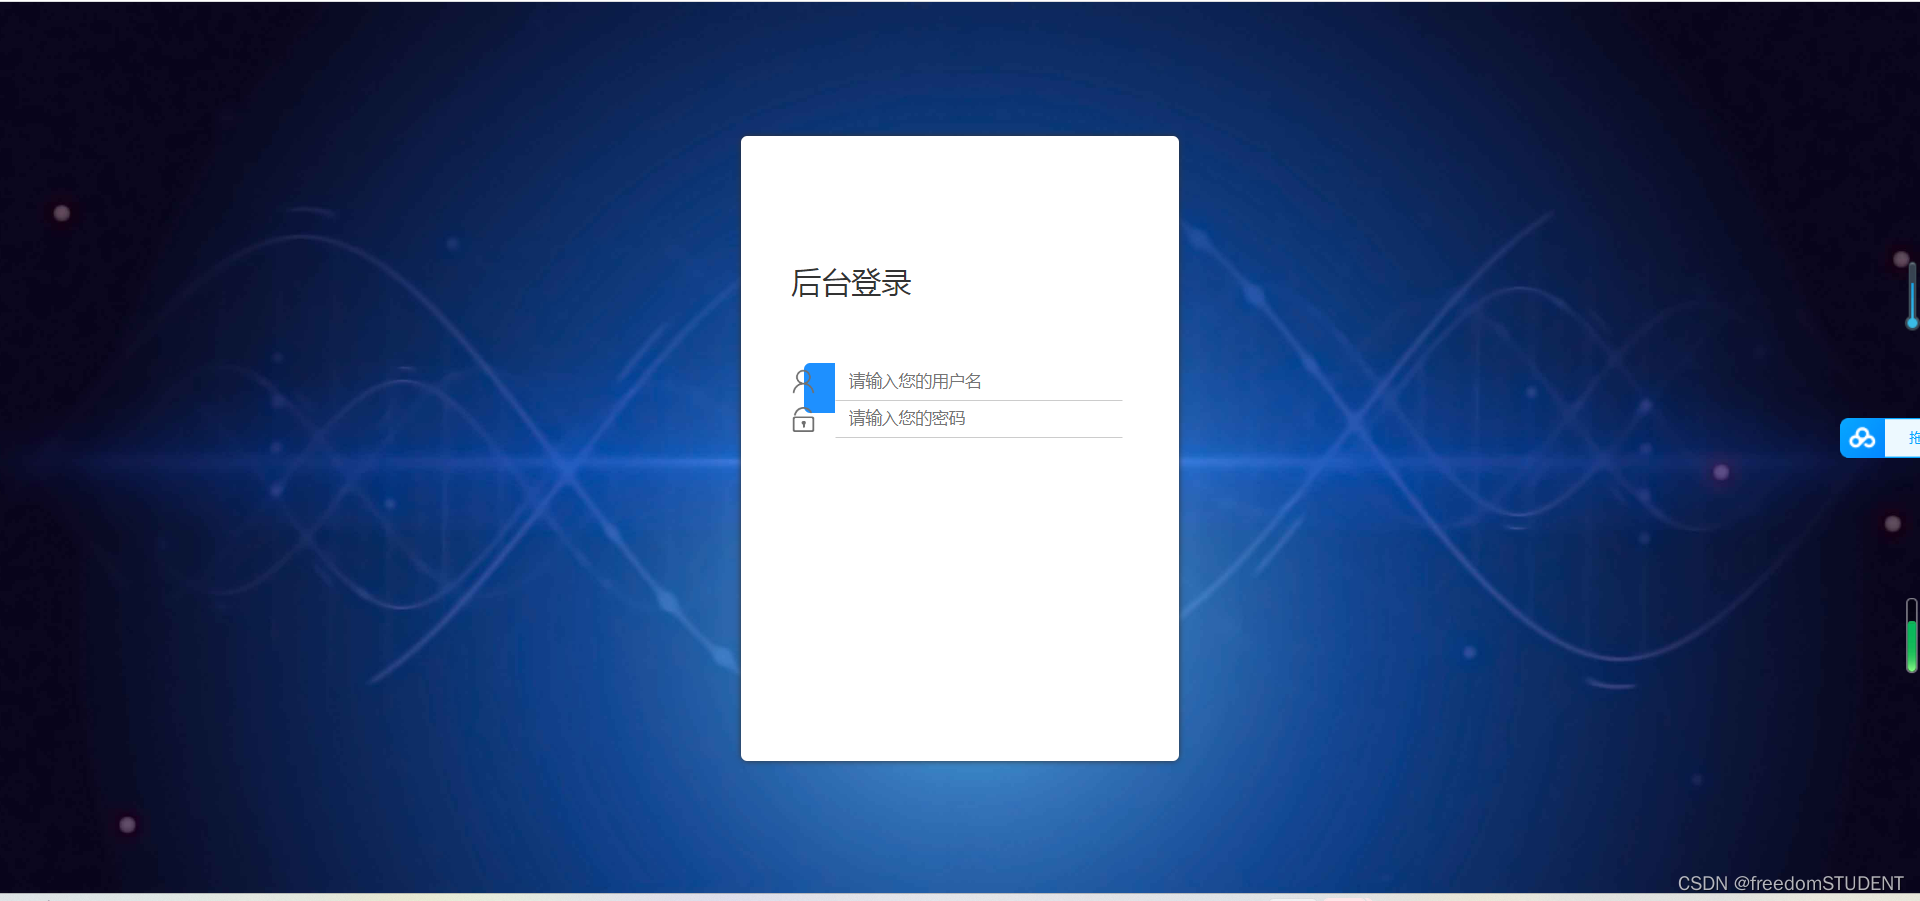
背景图像完全覆盖了网页页面
11.
html,body{
	width:100%;
	height:100%;
}


.js-count-particles{
  font-size: 1.1em;
}

#stats,
.count-particles{
  -webkit-user-select: none;
  margin-top: 5px;
  margin-left: 5px;
}

#stats{
  border-radius: 3px 3px 0 0;
  overflow: hidden;
}

.count-particles{
  border-radius: 0 0 3px 3px;
}


#particles-js{
	width: 100%;
	height: 100%;
	position: relative;
	background-image: url(../images/bg.jpg);
	background-position: 50% 50%;
	background-size: cover;
	background-repeat: no-repeat;
	margin-left: auto;
	margin-right: auto;
}

body{margin:0;padding:0;}
.clearfix:after{visibility:hidden;display: block;font-size:0;content:" ";clear:both;height:0;}

.login{z-index: 2;position:absolute;width: 350px;border-radius: 5px;height: 500px;background: white;box-shadow: 0px 0px 5px #333333;top: 50%;left: 50%;margin-top: -250px;margin-left: -175px;transition: all 1s;-moz-transition: all 1s;	/* Firefox 4 */-webkit-transition: all 1s;	/* Safari 和 Chrome */-o-transition: all 1s;	/* Opera */}
.login-top{font-size: 24px;margin-top: 100px;padding-left: 40px;box-sizing: border-box;color: #333333;margin-bottom: 50px;}
.login-center{width: 100%;box-sizing: border-box;padding: 0 40px;margin-bottom: 30px;}
.login-center-img{width: 20px;height: 20px;float: left;margin-top: 5px;}
.login-center-img>img{width: 100%;}
.login-center-input{float: left;width: 230px;margin-left: 15px;height: 30px;position: relative;}
.login-center-input input{z-index: 2;transition: all 0.5s;padding-left: 10px;color: #333333;width: 100%;height: 30px;border: 0;border-bottom: 1px solid #cccccc;border-top: 1px solid #ffffff;border-left: 1px solid #ffffff;border-right: 1px solid #ffffff;box-sizing: border-box;outline: none;position: relative;}
.login-center-input input:focus{border: 1px solid dodgerblue;}
.login-center-input-text{background: white;padding: 0 5px;position: absolute;z-index: 0;opacity: 0;height: 20px;top: 50%;margin-top: -10px;font-size: 14px;left: 5px;color: dodgerblue;line-height: 20px;transition: all 0.5s;-moz-transition: all 0.5s;	/* Firefox 4 */-webkit-transition: all 0.5s;	/* Safari 和 Chrome */-o-transition: all 0.5s;	/* Opera */}
.login-center-input input:focus~.login-center-input-text{top: 0;z-index: 3;opacity: 1;margin-top: -15px;}
.login.active{-webkit-animation: login-small 0.8s ; animation: login-small 0.8s ;animation-fill-mode:forwards;-webkit-animation-fill-mode:forwards}
.login-button{cursor: pointer;width: 250px;text-align: center;height: 40px;line-height: 40px;background-color: dodgerblue;border-radius: 5px;margin: 0 auto;margin-top: 50px;color: white;}
.clearfix:after{visibility:hidden;
                 display: block;
                 font-size:0;
                  content:" ";
                  clear:both;
                  height:0;}
用于一个创建清除浮动的类。通过在元素上添加这个类,可以清除元素的中浮动,防止对后续元素造成影响。其中,使用了伪元素":after"来插入一个空格,达到清除浮动的效果。
效果如下:
三.代码
相关文件,图像下载:
https://download.csdn.net/download/m0_67930426/87902949?spm=1001.2014.3001.5503
login.jsp
<%--
Created by IntelliJ IDEA.
User: 23502
Date: 2023/6/3
Time: 18:18
To change this template use File | Settings | File Templates.
--%>
<%@ page contentType="text/html;charset=UTF-8" language="java" %>
<html>
<head>
<link rel="stylesheet" media="screen" href="${pageContext.request.contextPath}/css1/style.css">
<title>Title</title>
</head>
<body>
<form action="${pageContext.request.contextPath}/2" name="myform" method="post">
<div id="particles-js">
<div class="login">
<div class="login-top">
后台登录
</div>
<div class="login-center clearfix">
<div class="login-center-img"><img src="${pageContext.request.contextPath}/images/name.png"/></div>
<div class="login-center-input">
<input type="text" id="username" name="username" placeholder="请输入您的用户名"
onfocus="this.placeholder=''" onblur="this.placeholder='请输入您的用户名'"/>
<div class="login-center-input-text">用户名</div>
</div>
</div>
<div class="login-center clearfix">
<div class="login-center-img"><img src="${pageContext.request.contextPath}/images/password.png"/></div>
<div class="login-center-input">
<input type="password" id="password" name="password" placeholder="请输入您的密码"
onfocus="this.placeholder=''" onblur="this.placeholder='请输入您的密码'"/>
<div class="login-center-input-text">密码</div>
</div>
</div>
<div class="login-button" onclick="check()">
登录
</div>
<span style="text-align: center;color: red;"><br>       ${msg}</span>
</div>
<div class="sk-rotating-plane"></div>
</div>
</form>
</body>
</html>style.css
html,body{
	width:100%;
	height:100%;
}


.js-count-particles{
  font-size: 1.1em;
}

#stats,
.count-particles{
  -webkit-user-select: none;
  margin-top: 5px;
  margin-left: 5px;
}

#stats{
  border-radius: 3px 3px 0 0;
  overflow: hidden;
}

.count-particles{
  border-radius: 0 0 3px 3px;
}


#particles-js{
	width: 100%;
	height: 100%;
	position: relative;
	background-image: url(../images/bg.jpg);
	background-position: 50% 50%;
	background-size: cover;
	background-repeat: no-repeat;
	margin-left: auto;
	margin-right: auto;
}

body{margin:0;padding:0;}
.clearfix:after{visibility:hidden;display: block;font-size:0;content:" ";clear:both;height:0;}

.login{z-index: 2;position:absolute;width: 350px;border-radius: 5px;height: 500px;background: white;box-shadow: 0px 0px 5px #333333;top: 50%;left: 50%;margin-top: -250px;margin-left: -175px;transition: all 1s;-moz-transition: all 1s;	/* Firefox 4 */-webkit-transition: all 1s;	/* Safari 和 Chrome */-o-transition: all 1s;	/* Opera */}
.login-top{font-size: 24px;margin-top: 100px;padding-left: 40px;box-sizing: border-box;color: #333333;margin-bottom: 50px;}
.login-center{width: 100%;box-sizing: border-box;padding: 0 40px;margin-bottom: 30px;}
.login-center-img{width: 20px;height: 20px;float: left;margin-top: 5px;}
.login-center-img>img{width: 100%;}
.login-center-input{float: left;width: 230px;margin-left: 15px;height: 30px;position: relative;}
.login-center-input input{z-index: 2;transition: all 0.5s;padding-left: 10px;color: #333333;width: 100%;height: 30px;border: 0;border-bottom: 1px solid #cccccc;border-top: 1px solid #ffffff;border-left: 1px solid #ffffff;border-right: 1px solid #ffffff;box-sizing: border-box;outline: none;position: relative;}
.login-center-input input:focus{border: 1px solid dodgerblue;}
.login-center-input-text{background: white;padding: 0 5px;position: absolute;z-index: 0;opacity: 0;height: 20px;top: 50%;margin-top: -10px;font-size: 14px;left: 5px;color: dodgerblue;line-height: 20px;transition: all 0.5s;-moz-transition: all 0.5s;	/* Firefox 4 */-webkit-transition: all 0.5s;	/* Safari 和 Chrome */-o-transition: all 0.5s;	/* Opera */}
.login-center-input input:focus~.login-center-input-text{top: 0;z-index: 3;opacity: 1;margin-top: -15px;}
.login.active{-webkit-animation: login-small 0.8s ; animation: login-small 0.8s ;animation-fill-mode:forwards;-webkit-animation-fill-mode:forwards}
.login-button{cursor: pointer;width: 250px;text-align: center;height: 40px;line-height: 40px;background-color: dodgerblue;border-radius: 5px;margin: 0 auto;margin-top: 50px;color: white;}