一、打胖包fat
打胖包采用的是spring的标准来执行,所以使用的是spring boot提供的打包插件
参考来源:打包Spring Boot应用 - 廖雪峰的官方网站
步骤
pom配置
<project ...>
    ...
    <build>
        <plugins>
            <plugin>
                <groupId>org.springframework.boot</groupId>
                <artifactId>spring-boot-maven-plugin</artifactId>
            </plugin>
        </plugins>
    </build>
</project>
打包命令
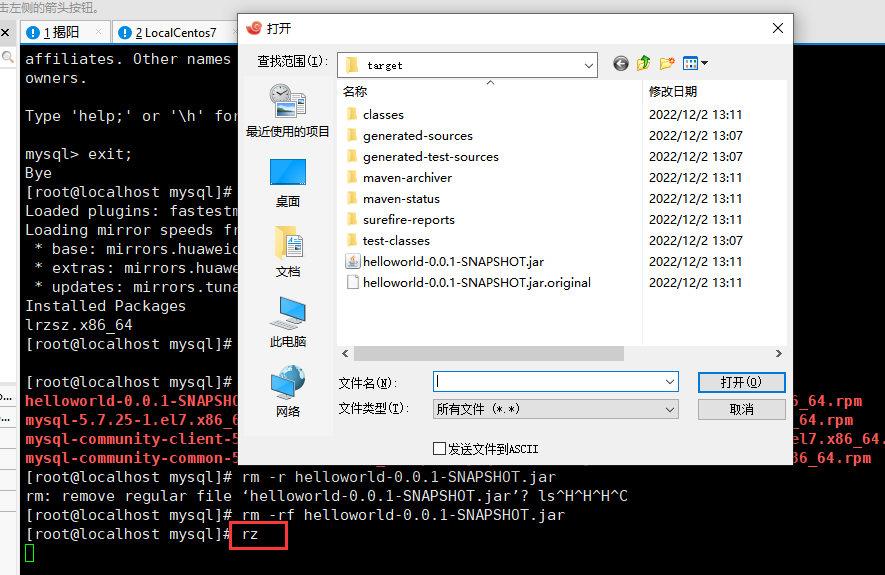
mvn clean packagetarget目录
$ ls
classes
generated-sources
maven-archiver
maven-status
springboot-exec-jar-1.0-SNAPSHOT.jar
springboot-exec-jar-1.0-SNAPSHOT.jar.original其中,springboot-exec-jar-1.0-SNAPSHOT.jar.original是Maven标准打包插件打的jar包,它只包含我们自己的Class,不包含依赖,而springboot-exec-jar-1.0-SNAPSHOT.jar是Spring Boot打包插件创建的包含依赖的jar,可以直接运行:
执行
java -jar springboot-exec-jar-1.0-SNAPSHOT.jar
举例
                         <plugin>
                            <groupId>org.springframework.boot</groupId>
                            <artifactId>spring-boot-maven-plugin</artifactId>
                            <version>${spring-boot-dependencies.version}</version>
                            <executions>
                                <execution>
                                    <goals>
                                        <goal>repackage</goal>
                                    </goals>
                                </execution>
                            </executions>
                        </plugin>
打包后的jar包解压后的文件目录
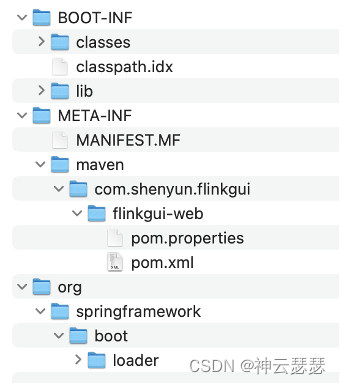
MANIFEST.MF文件
Manifest-Version: 1.0
Spring-Boot-Classpath-Index: BOOT-INF/classpath.idx
Archiver-Version: Plexus Archiver
Built-By: gymd
Start-Class: com.shenyun.flinkgui.Application
Spring-Boot-Classes: BOOT-INF/classes/
Spring-Boot-Lib: BOOT-INF/lib/
Spring-Boot-Version: 2.3.4.RELEASE
Created-By: Apache Maven 3.6.1
Build-Jdk: 1.8.0_321
Main-Class: org.springframework.boot.loader.JarLauncher
总结
打包后只有一个可以执行的jar文件,内部包含了配置,lib等(lib)
打包后使用``java -jar demo.jar``启动项目
demo.jar中有MF信息清单,有入口类的说明Main-class
spring boot项目的类入口Main-class为org.springframework.boot.loader.JarLauncher,这个是标准的java处理
另外有个Start-Class表示是项目上的入口类型,这个由spring boot来处理
二、打瘦包thin
使用plugin介绍
spring-boot-maven-plugin,得到主jar
maven-dependency-plugin,得到依赖包,lib/*.jar 文件
maven-assembly-plugin,组合主jar,lib/*.jar,config/,bin/* 文件 (如果不用assembly,也可以手动组装)
pom.xml打包插件的引入
<!--            打thin瘦包-->
            <plugin>
                <groupId>org.springframework.boot</groupId>
                <artifactId>spring-boot-maven-plugin</artifactId>
                <version>${spring-boot-dependencies.version}</version>
                <configuration>
                    <layout>ZIP</layout>
                </configuration>
            </plugin>
<!--打瘦包是将依赖的jar全部放到lib目录-->
            <plugin>
                <groupId>org.apache.maven.plugins</groupId>
                <artifactId>maven-dependency-plugin</artifactId>
                <version>3.3.0</version>
                <executions>
                    <execution>
                        <phase>prepare-package</phase>
                        <goals>
                            <goal>copy-dependencies</goal>
                        </goals>
                        <configuration>
                            <!-- 将依赖放到target/lib目录下 -->
                            <outputDirectory>target/lib</outputDirectory>
                        </configuration>
                    </execution>
                </executions>
            </plugin>
<!--            assembly 将lib目录,demo.jar, config,bin文件等组合成一个发布包-->
            <plugin>
                <groupId>org.apache.maven.plugins</groupId>
                <artifactId>maven-assembly-plugin</artifactId>
                <version>3.4.2</version>
                <configuration>
                    <!--   这个是assembly 所在位置;${basedir}是指项目的的根路径  -->
                    <descriptors>
                        <descriptor>${basedir}/assembly.xml
                        </descriptor>
                    </descriptors>
                    <!--打包解压后的目录名;${project.artifactId}是指:项目的artifactId-->
                    <finalName>${project.artifactId}</finalName>
                    <!-- zip包文件名不加上assembly.xml中配置的id属性值 -->
                    <appendAssemblyId>false</appendAssemblyId>
                    <!-- 打包压缩包位置-->
                    <outputDirectory>${project.build.directory}/release</outputDirectory>
                    <!-- 打包编码 -->
                    <encoding>UTF-8</encoding>
                </configuration>
                <executions>
                    <execution><!-- 配置执行器 -->
                        <id>make-assembly</id>
                        <phase>package</phase><!-- 绑定到package生命周期阶段上 -->
                        <goals>
                            <goal>single</goal><!-- 只运行一次 -->
                        </goals>
                    </execution>
                </executions>
            </plugin>
assembly文件
<?xml version="1.0" encoding="utf-8"?>
<assembly xmlns="http://maven.apache.org/ASSEMBLY/2.1.1"
          xmlns:xsi="http://www.w3.org/2001/XMLSchema-instance"
          xsi:schemaLocation="http://maven.apache.org/ASSEMBLY/2.1.1 http://maven.apache.org/xsd/assembly-2.1.1.xsd">
    <id>assembly</id>
    <formats>
        <!--zip/tar/tar.gz或tgz/tar.bz2或tbz2/tar.snappy/tar.xz或txz/jar/dir/war-->
<!--        <format>tgz</format>-->
        <format>dir</format>
    </formats>
    <includeBaseDirectory>false</includeBaseDirectory>

    <fileSets>
        <fileSet>
            <lineEnding>unix</lineEnding>
            <directory>${project.basedir}/src/main/resources</directory>
            <outputDirectory>./config</outputDirectory>
            <includes>
                <include>*.properties</include>
                <include>*.yml</include>
                <include>*.xml</include>
            </includes>
        </fileSet>
<!--        启动脚本-->
        <fileSet>
            <lineEnding>unix</lineEnding>
            <directory>${project.basedir}/build/bin</directory>
            <outputDirectory>./bin</outputDirectory>
            <!--打包文件权限-->
            <fileMode>0755</fileMode>
        </fileSet>
        <!-- 把项目自己编译出来的jar文件,打包进zip文件的根目录 -->
        <fileSet>
            <directory>${project.build.directory}/lib</directory>
            <outputDirectory>./lib</outputDirectory>
            <includes>
                <include>*.jar</include>
            </includes>
        </fileSet>

        <!-- 执行的主jar文件 -->
        <fileSet>
            <directory>${project.build.directory}</directory>
            <outputDirectory>./</outputDirectory>
            <includes>
                <include>*.jar</include>
            </includes>
        </fileSet>
    </fileSets>
<!--    <files>-->
<!--    处理单个文件-->
<!--        <file>-->
<!--        </file>-->
<!--    </files>-->

</assembly>
打包后文件目录
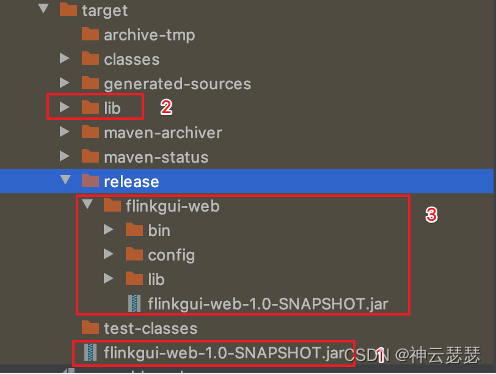
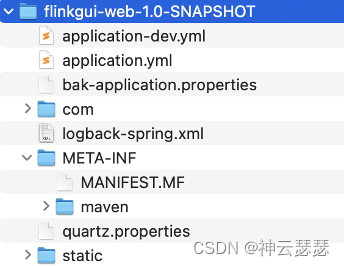
主jar包的内部结构
内部结构
主jar包的MANIFEST.MF文件
Manifest-Version: 1.0
Archiver-Version: Plexus Archiver
Built-By: shenyun
Created-By: Apache Maven 3.6.1
Build-Jdk: 1.8.0_321
1、内部结构是扁平的配置文件+编译class文件+META-INF文件
2、MANIFEST.MF不带有Main-class的指定,只有很简单的说明
启动命令
java -cp ".:\
/opt/flinkgui-web/lib/*:\
/opt/flinkgui-web/flinkgui-web-1.0-SNAPSHOT.jar" \
com.shenyun.flinkgui.Application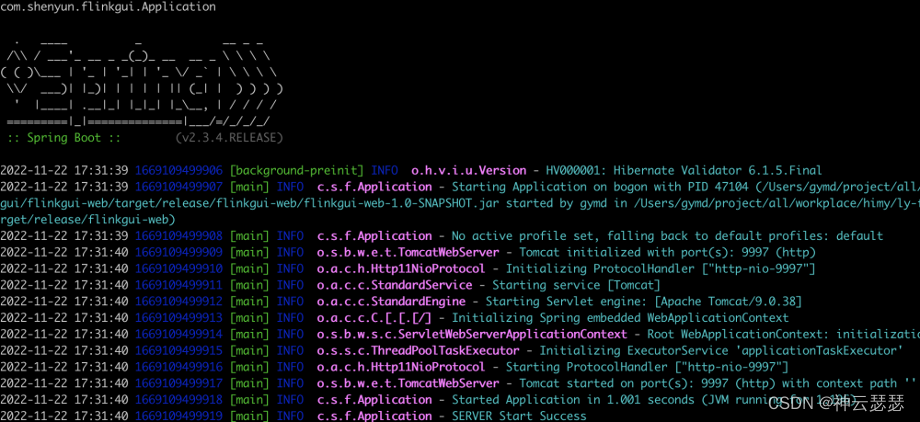
启动命令解释
java -cp ".:${path_1}:${path_2}" ${mainClassFullName}
1、-cp是java的标准参数,为jar的搜索路径
2、jar的搜索路径必须写全路径,不能使用相对路径
3、jar的搜索路径,jdk1.6以上,可以使用通配符 "/xxx/lib/*",但是不能写成"/xxx/lib/*.jar"
4、jar搜索路径有几个就要写完,linux使用冒号分割“:”,windows使用分号“;”分割
5、jar搜索路径需要使用引号包裹,
6、建议jar搜索路径前将点号 “.”加到最前面,这个将作为程序运行的classpath,日志文件目录默认在该路径下
7、spring boot的项目需要读取外部配置文件,可以在config文件夹中修改,文件夹名字config是spring的标准,非java的


