大家好,我是早九晚十二,目前是做运维相关的工作。写博客是为了积累,希望大家一起进步!
我的主页:早九晚十二
专栏名称:Ansible从入门到精通 立志成为ansible大佬

ansible-playbook企业级实战--handler
- handlers介绍
- hadnlers与notify结合使用触发的条件
- 举例验证
- 确认宿主机端口
- 第一次执行剧本
- 查看结果
- 修改httpd配置文件
- 第二次执行剧本
- 再次查看结果
- 解决方法
- tags介绍
- 举例验证
- ansible-playbook 变量的使用
- ansible setup 变量调用
- 举例验证
- 将安装的包设置为pkg变量
- 使用-e选项给变量赋值
- 多个变量赋值
- 测试验证
- playbook定义变量
- hosts变量设置
- 举例验证
- 查看结果
- 定义通用分组变量
- playbook示例
- 结果查看
- 变量文件的使用
- 定义一个变量文件
- 写一个playbook调用
- 查看执行结果
handlers介绍
是task列表,这些task与前述的task没有本质的不同,用于当关注的资源发生变化,才会采取一定的操作。
hadnlers与notify结合使用触发的条件
notify此action可用于在每个play的最后被触发。这样可以避免多次有改变发生时每次都执行的操作,仅在所有的变化发生完成后的一次性执行指定操作。在notify中列出的操作称为handler,也即notify中调用handler中定义的操作
比如,某个服务之前使用ansible的剧本进行了安装,后面服务配置变更,需要重启服务,之前的剧本只有启动服务,无法重启,这种情况就用到了handlers与notify
举例验证
[root@zhaoyj ansible]# cat test3.yml
- hosts: test
  remote_user: root

  tasks:
    - name: install pkg
      yum: name=httpd
    - name: copy conf
      copy: src=/etc/httpd/conf/httpd.conf dest=/etc/httpd/conf/ backup=yes
    - name: start service
      service: name=httpd state=started enabled=yes
确认宿主机端口
首先先确认宿主机的httpd配置端口是多少
[root@zhaoyj ansible]# grep -i ^listen /etc/httpd/conf/httpd.conf
Listen 8090
第一次执行剧本
[root@zhaoyj ansible]# ansible-playbook test3.yml
查看结果
发现已经启动了8090
[root@zhaoyj ansible]# ansible test -m shell -a "ss -nltup|grep httpd"
139.9.198.12 | CHANGED | rc=0 >>
tcp    LISTEN     0      511    [::]:8090               [::]:*                   users:(("httpd",pid=26206,fd=4),("httpd",pid=26205,fd=4),("httpd",pid=26204,fd=4),("httpd",pid=26203,fd=4),("httpd",pid=26202,fd=4),("httpd",pid=26201,fd=4))

修改httpd配置文件
接下来我们修改配置文件为8091
[root@zhaoyj ansible]# grep -i ^listen /etc/httpd/conf/httpd.conf
Listen 8091
第二次执行剧本
[root@zhaoyj ansible]# ansible-playbook test3.yml
再次查看结果
再次查看端口,可以发现端口没改变,所以配置文件改了并没有生效(因为没重启)
[root@zhaoyj ansible]# ansible test -m shell -a "ss -nltup|grep httpd"
139.9.198.12 | CHANGED | rc=0 >>
tcp    LISTEN     0      511    [::]:8090               [::]:*                   users:(("httpd",pid=26206,fd=4),("httpd",pid=26205,fd=4),("httpd",pid=26204,fd=4),("httpd",pid=26203,fd=4),("httpd",pid=26202,fd=4),("httpd",pid=26201,fd=4))

解决方法
那么,如何实现配置变更自动重启呢?这时候就可以借助handlers,下面继续看↓↓↓
[root@zhaoyj ansible]# cat test3.yml
- hosts: test
  remote_user: root

  tasks:
    - name: install pkg
      yum: name=httpd
    - name: copy conf
      copy: src=/etc/httpd/conf/httpd.conf dest=/etc/httpd/conf/ backup=yes
      notify: restart service
    - name: start service
      service: name=httpd state=started enabled=yes

  handlers:
    - name: restart service
      service: name=httpd state=restarted
注意:notify指定的名称需要和handlers的name相同
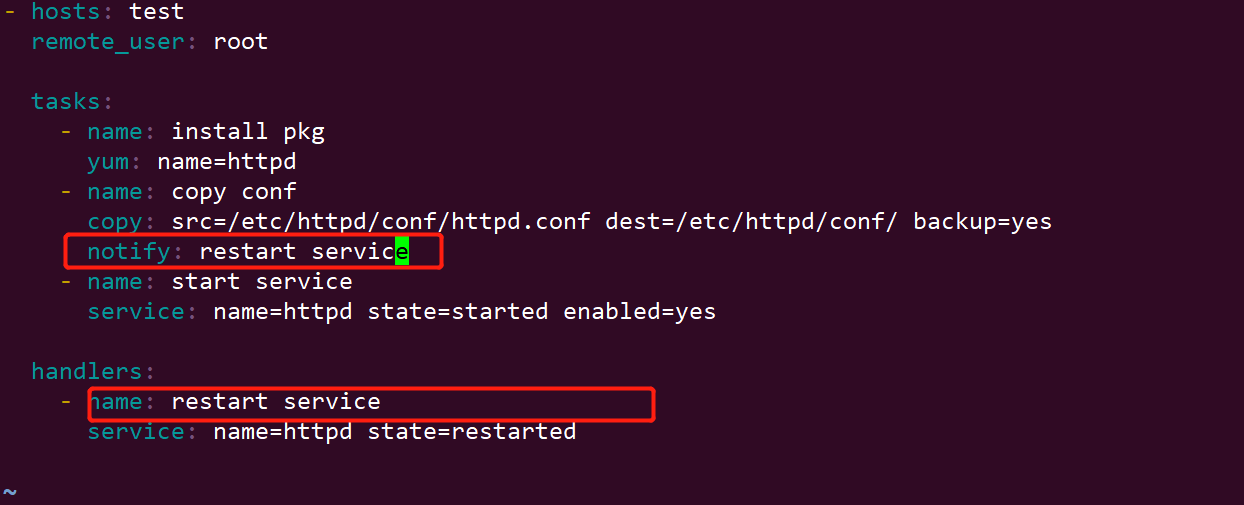
在修改一下http配置文件,与上面作区分
[root@zhaoyj ansible]# grep -i ^listen /etc/httpd/conf/httpd.conf
Listen 8092
再次执行ansible剧本,可以发现已经触发了handler
ansible-playbook test3.yml
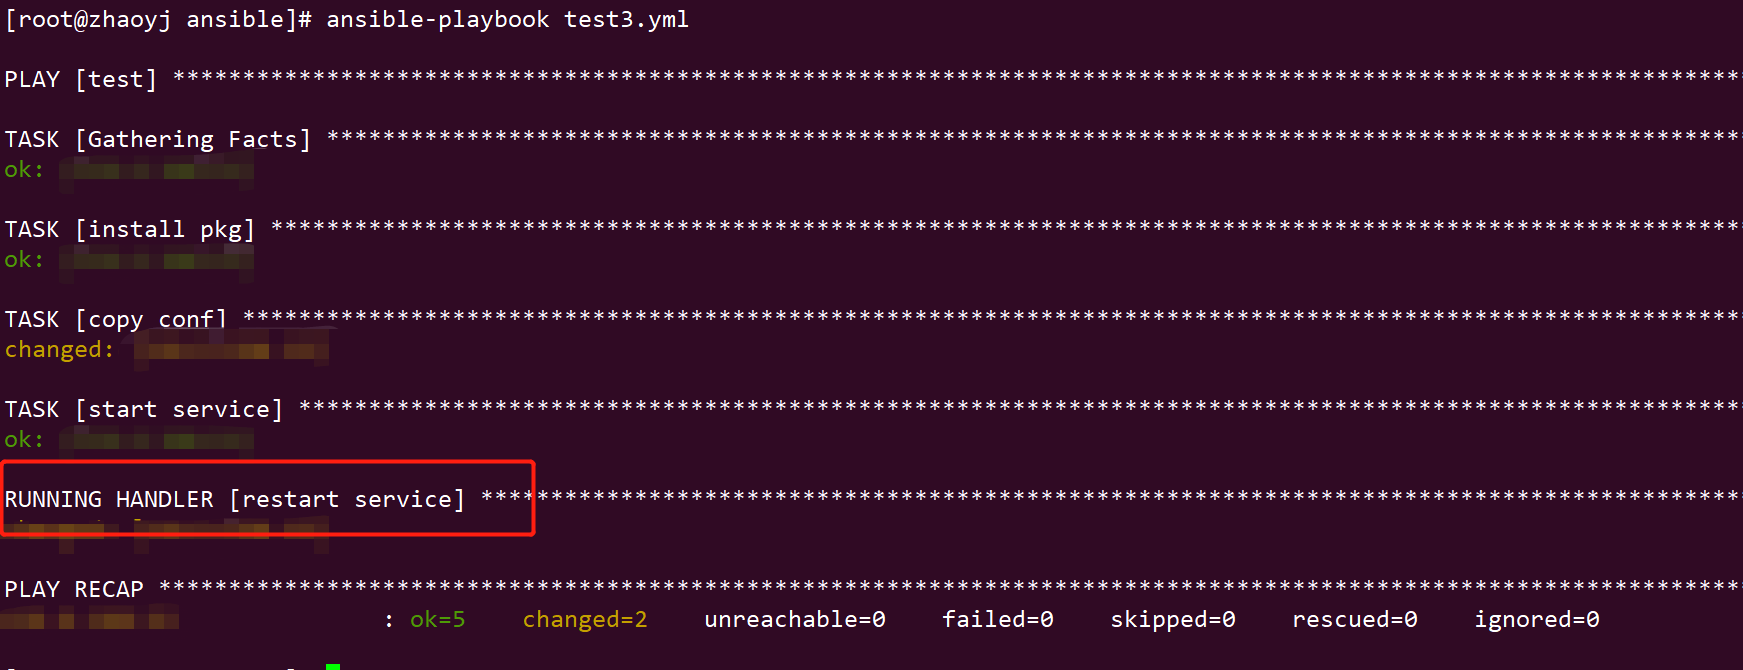
再次查看端口,可以发现httpd服务已经变成了8092端口
[root@zhaoyj ansible]# ansible test -m shell -a "ss -nltup|grep httpd"
139.9.198.12 | CHANGED | rc=0 >>
tcp    LISTEN     0      511    [::]:8092               [::]:*                   users:(("httpd",pid=9612,fd=4),("httpd",pid=9611,fd=4),("httpd",pid=9610,fd=4),("httpd",pid=9609,fd=4),("httpd",pid=9608,fd=4),("httpd",pid=9607,fd=4))

tags介绍
tags相当于给tasks加标签,可以通过标签调用tasks,后续我们可以通过标签调用对应的任务
举例验证
[root@zhaoyj ansible]# cat test3.yml
- hosts: test
  remote_user: root

  tasks:
    - name: install pkg
      yum: name=httpd
      tags: inshttpd
    - name: copy conf
      copy: src=/etc/httpd/conf/httpd.conf dest=/etc/httpd/conf/ backup=yes
      notify: restart service
    - name: start service
      service: name=httpd state=started enabled=yes
      tags: rshttpd

  handlers:
    - name: restart service
      service: name=httpd state=restarted
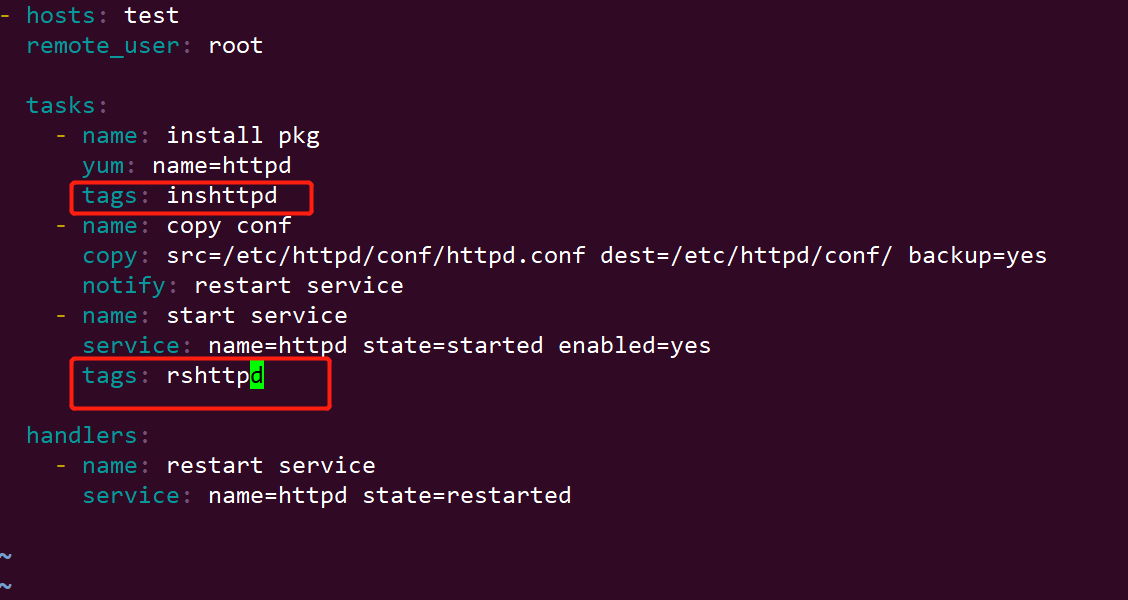
执行playbook的标签,查看效果
先将httpd服务停止
[root@zhaoyj ansible]# ansible test -m shell -a "systemctl stop httpd"
192.168.1.2 | CHANGED | rc=0 >>

[root@zhaoyj ansible]# ansible test -m shell -a "systemctl status httpd"
192.168.1.2 | FAILED | rc=3 >>
● httpd.service - The Apache HTTP Server
   Loaded: loaded (/usr/lib/systemd/system/httpd.service; enabled; vendor preset: disabled)
   Active: inactive (dead) since Wed 2023-06-07 15:11:07 CST; 9s ago
     Docs: man:httpd(8)
           man:apachectl(8)
  Process: 10891 ExecStop=/bin/kill -WINCH ${MAINPID} (code=exited, status=0/SUCCESS)
  Process: 9607 ExecStart=/usr/sbin/httpd $OPTIONS -DFOREGROUND (code=exited, status=0/SUCCESS)
 Main PID: 9607 (code=exited, status=0/SUCCESS)
   Status: "Total requests: 2; Current requests/sec: 0; Current traffic:   0 B/sec"

Jun 07 14:52:23 0033 systemd[1]: Starting The Apache HTTP Server...
Jun 07 14:52:23 0033 httpd[9607]: AH00558: httpd: Could not reliably determine the server's fully qualified domain name, using 0.0.0.27. Set the 'ServerName' directive globally to suppress this message
Jun 07 14:52:23 0033 systemd[1]: Started The Apache HTTP Server.
Jun 07 15:11:06 0033 systemd[1]: Stopping The Apache HTTP Server...
Jun 07 15:11:07 0033 systemd[1]: Stopped The Apache HTTP Server.non-zero return code
执行启动服务器的rshttpd标签(-t选项)
[root@zhaoyj ansible]# ansible-playbook -t rshttpd test3.yml

PLAY [test] **************************************************************************************************************************

TASK [Gathering Facts] ***************************************************************************************************************
ok: [192.168.1.2]

TASK [start service] *****************************************************************************************************************
changed: [192.168.1.2]]

PLAY RECAP ***************************************************************************************************************************
192.168.1.2               : ok=2    changed=1    unreachable=0    failed=0    skipped=0    rescued=0    ignored=0


[root@zhaoyj ansible]# ansible test -m shell -a "ss -nltup|grep httpd"
139.9.198.12 | CHANGED | rc=0 >>
tcp    LISTEN     0      511    [::]:8092               [::]:*                   users:(("httpd",pid=11313,fd=4),("httpd",pid=11312,fd=4),("httpd",pid=11311,fd=4),("httpd",pid=11310,fd=4),("httpd",pid=11309,fd=4),("httpd",pid=11308,fd=4))
卸载包后执行tags安装(多个tags以英文逗号分隔)
[root@zhaoyj ansible]# ansible test -m yum -a "name=httpd state=absent"
192.168.1.2 | CHANGED => {
    "ansible_facts": {
        "discovered_interpreter_python": "/usr/bin/python"
    },
    "changed": true,
    "changes": {
        "removed": [
            "httpd"
        ]
    },
    "msg": "",
    "rc": 0,
    "results": [
        "Loaded plugins: fastestmirror\nResolving Dependencies\n--> Running transaction check\n---> Package httpd.x86_64 0:2.4.6-99.el7.centos.1 will be erased\n--> Finished Dependency Resolution\n\nDependencies Resolved\n\n================================================================================\n Package      Arch          Version                       Repository       Size\n================================================================================\nRemoving:\n httpd        x86_64        2.4.6-99.el7.centos.1         @updates        9.4 M\n\nTransaction Summary\n================================================================================\nRemove  1 Package\n\nInstalled size: 9.4 M\nDownloading packages:\nRunning transaction check\nRunning transaction test\nTransaction test succeeded\nRunning transaction\n  Erasing    : httpd-2.4.6-99.el7.centos.1.x86_64                           1/1 \nwarning: /etc/httpd/conf/httpd.conf saved as /etc/httpd/conf/httpd.conf.rpmsave\n  Verifying  : httpd-2.4.6-99.el7.centos.1.x86_64                           1/1 \n\nRemoved:\n  httpd.x86_64 0:2.4.6-99.el7.centos.1                                          \n\nComplete!\n"
    ]
}


[root@zhaoyj ansible]# ansible test -m shell -a "rpm -q httpd"
[WARNING]: Consider using the yum, dnf or zypper module rather than running 'rpm'.  If you need to use command because yum, dnf or
zypper is insufficient you can add 'warn: false' to this command task or set 'command_warnings=False' in ansible.cfg to get rid of
this message.
192.168.1.2 | FAILED | rc=1 >>
package httpd is not installednon-zero return code


[root@zhaoyj ansible]# ansible-playbook -t inshttpd,rshttpd test3.yml

PLAY [test] **************************************************************************************************************************

TASK [Gathering Facts] ***************************************************************************************************************
ok: [192.168.1.2]

TASK [install pkg] *******************************************************************************************************************
changed: [192.168.1.2]

TASK [start service] *****************************************************************************************************************
changed: [192.168.1.2]

PLAY RECAP ***************************************************************************************************************************
192.168.1.2              : ok=3    changed=2    unreachable=0    failed=0    skipped=0    rescued=0    ignored=0

[root@zhaoyj ansible]# ansible test -m shell -a "ss -nltup|grep httpd"
192.168.1.2 | CHANGED | rc=0 >>
tcp    LISTEN     0      511    [::]:80                 [::]:*                   users:(("httpd",pid=13770,fd=4),("httpd",pid=13769,fd=4),("httpd",pid=13768,fd=4),("httpd",pid=13767,fd=4),("httpd",pid=13766,fd=4),("httpd",pid=13765,fd=4))
那么标签可以相同吗?答案是 可以。
修改剧本,将tags修改为统一的httpd
在[root@zhaoyj ansible]# cat test3.yml
- hosts: test
  remote_user: root

  tasks:
    - name: install pkg
      yum: name=httpd
      tags: httpd
    - name: copy conf
      copy: src=/etc/httpd/conf/httpd.conf dest=/etc/httpd/conf/ backup=yes
      notify: restart service
    - name: start service
      service: name=httpd state=started enabled=yes
      tags: httpd

  handlers:
    - name: restart service
      service: name=httpd state=restarted
卸载httpd
[root@zhaoyj ansible]# ansible test -m yum -a "name=httpd state=absent"
[root@zhaoyj ansible]# ansible test -m shell -a "rpm -q httpd"
[WARNING]: Consider using the yum, dnf or zypper module rather than running 'rpm'.  If you need to use command because yum, dnf or
zypper is insufficient you can add 'warn: false' to this command task or set 'command_warnings=False' in ansible.cfg to get rid of
this message.
192.168.1.2 | FAILED | rc=1 >>
package httpd is not installednon-zero return code
[root@zhaoyj ansible]# ansible-playbook -t httpd test3.yml

PLAY [test] **************************************************************************************************************************

TASK [Gathering Facts] ***************************************************************************************************************
ok: [192.168.1.2]

TASK [install pkg] *******************************************************************************************************************
changed: [192.168.1.2]

TASK [start service] *****************************************************************************************************************
changed: [192.168.1.2]

PLAY RECAP ***************************************************************************************************************************
192.168.1.2               : ok=3    changed=2    unreachable=0    failed=0    skipped=0    rescued=0    ignored=0

[root@zhaoyj ansible]# ansible test -m shell -a "ss -nltp|grep httpd"
192.168.1.2 | CHANGED | rc=0 >>
LISTEN     0      511       [::]:80                    [::]:*                   users:(("httpd",pid=14947,fd=4),("httpd",pid=14946,fd=4),("httpd",pid=14945,fd=4),("httpd",pid=14944,fd=4),("httpd",pid=14943,fd=4),("httpd",pid=14942,fd=4))
ansible-playbook 变量的使用
变量只能由字母,数字,下划线组成,且只能以字母开头、
变量来源:
- ansible setup facts远程主机的所有变量都可以直接调用
- 在/etc/ansible/hosts定义
普通变量:主机组中主机单独定义,优先级高于公共变量
公共(组)变量:针对主机组中所有主机定义统一变量 - 通过命令行指定变量,优先级最高
ansible-playbook -e varname=value
- 在play-book中定义
vars:
-var1:value1
-var2:value2 - 在role中定义
ansible setup 变量调用
查看主机的所有信息
ansible test -m setup |less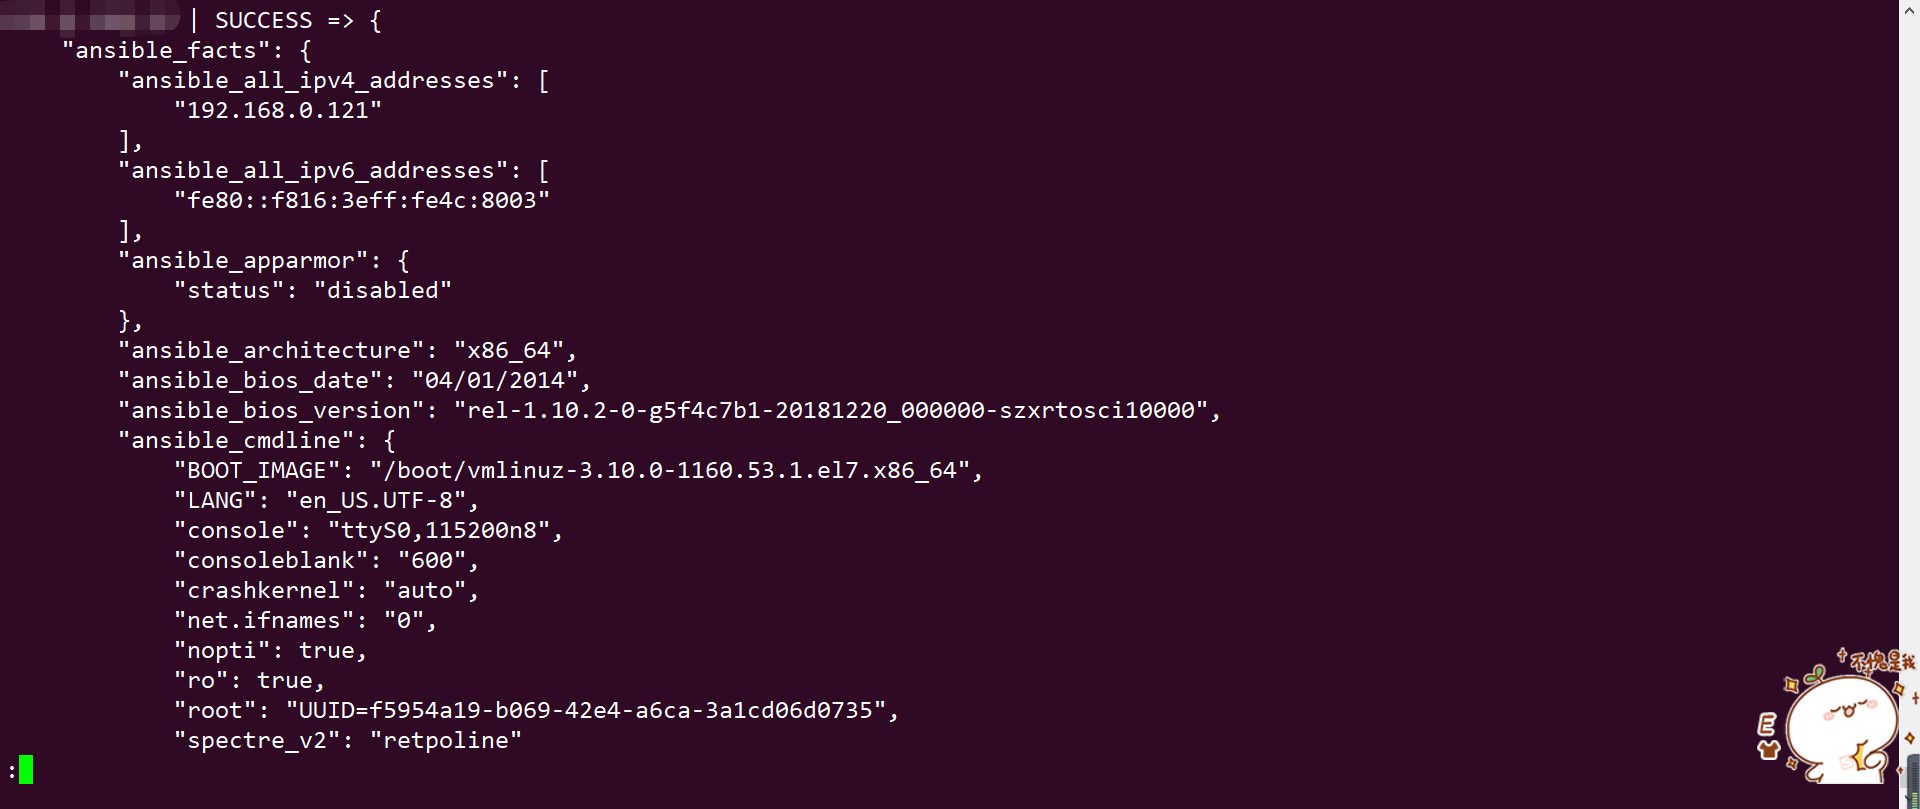
过滤hostname
[root@zhaoyj ansible]# ansible test -m setup -a 'filter=ansible_hostname'
192.168.1.2 | SUCCESS => {
    "ansible_facts": {
        "ansible_hostname": "0033",
        "discovered_interpreter_python": "/usr/bin/python"
    },
    "changed": false
}
也支持通配符
[root@zhaoyj ansible]# ansible test -m setup -a 'filter=*address*'
192.168.1.2 | SUCCESS => {
    "ansible_facts": {
        "ansible_all_ipv4_addresses": [
            "192.168.0.121"
        ],
        "ansible_all_ipv6_addresses": [
            "fe80::f816:3eff:fe4c:8003"
        ],
        "discovered_interpreter_python": "/usr/bin/python"
    },
    "changed": false
}
举例验证
将安装的包设置为pkg变量
[root@zhaoyj ansible]# cat test4.yml
---
- hosts: test
  remote_user: root

  tasks:
    - name: install pkg
      yum: name={{ pkg }}
    - name: start service
      service: name={{ pkg }} state=started enabled=yes
...
使用-e选项给变量赋值
[root@zhaoyj ansible]# ansible-playbook -e 'pkg=vsftpd' test4.yml

PLAY [test] **************************************************************************************************************************

TASK [Gathering Facts] ***************************************************************************************************************
ok: [192.168.1.2]

TASK [install pkg] *******************************************************************************************************************
changed: [192.168.1.2]

TASK [start service] *****************************************************************************************************************
changed: [192.168.1.2]

PLAY RECAP ***************************************************************************************************************************
192.168.1.2               : ok=3    changed=2    unreachable=0    failed=0    skipped=0    rescued=0    ignored=0

[root@zhaoyj ansible]# ansible test -m shell -a "systemctl status vsftpd"
192.168.1.2 | CHANGED | rc=0 >>
● vsftpd.service - Vsftpd ftp daemon
   Loaded: loaded (/usr/lib/systemd/system/vsftpd.service; enabled; vendor preset: disabled)
   Active: active (running) since Thu 2023-06-08 14:35:57 CST; 51s ago
  Process: 31936 ExecStart=/usr/sbin/vsftpd /etc/vsftpd/vsftpd.conf (code=exited, status=0/SUCCESS)
 Main PID: 31937 (vsftpd)
   CGroup: /system.slice/vsftpd.service
           └─31937 /usr/sbin/vsftpd /etc/vsftpd/vsftpd.conf

Jun 08 14:35:57 0033 systemd[1]: Starting Vsftpd ftp daemon...
Jun 08 14:35:57 0033 systemd[1]: Started Vsftpd ftp daemon.
多个变量赋值
定义两个变量pkg1 与 pkg2
[root@zhaoyj ansible]# cat test5.yml
---
- hosts: test
  remote_user: root

  tasks:
    - name: install pkg
      yum: name={{ pkg1 }}
    - name: install pkg
      yum: name={{ pkg2 }}
...
测试验证
[root@zhaoyj ansible]# ansible-playbook -e 'pkg1=redis pkg2=memcached' test5.yml

PLAY [test] **************************************************************************************************************************

TASK [Gathering Facts] ***************************************************************************************************************
ok: [192.168.1.2]

TASK [install pkg] *******************************************************************************************************************
changed: [192.168.1.2]

TASK [install pkg] *******************************************************************************************************************
changed: [192.168.1.2]

PLAY RECAP ***************************************************************************************************************************
192.168.1.2               : ok=3    changed=2    unreachable=0    failed=0    skipped=0    rescued=0    ignored=0


[root@zhaoyj ansible]# ansible test -m shell -a "rpm -q httpd memcached"
[WARNING]: Consider using the yum, dnf or zypper module rather than running 'rpm'.  If you need to use command because yum, dnf or
zypper is insufficient you can add 'warn: false' to this command task or set 'command_warnings=False' in ansible.cfg to get rid of
this message.
192.168.1.2 | CHANGED | rc=0 >>
httpd-2.4.6-99.el7.centos.1.x86_64
memcached-1.4.15-10.el7_3.1.x86_64
playbook定义变量
[root@zhaoyj ansible]# cat test6.yml
---
- hosts: test
  remote_user: root
  vars:
    - pkg1: redis
    - pkg2: memcached
  tasks:
    - name: install pkg
      yum: name={{ pkg1 }}
    - name: install pkg
      yum: name={{ pkg2 }}
...
[root@zhaoyj ansible]# ansible-playbook test6.yml

PLAY [test] **************************************************************************************************************************

TASK [Gathering Facts] ***************************************************************************************************************
ok: [192.168.1.2]

TASK [install pkg] *******************************************************************************************************************
changed: [192.168.1.2]

TASK [install pkg] *******************************************************************************************************************
changed: [192.168.1.2]

PLAY RECAP ***************************************************************************************************************************
192.168.1.2               : ok=3    changed=2    unreachable=0    failed=0    skipped=0    rescued=0    ignored=0

[root@zhaoyj ansible]# ansible test -m shell -a "rpm -q redis memcached"
[WARNING]: Consider using the yum, dnf or zypper module rather than running 'rpm'.  If you need to use command because yum, dnf or
zypper is insufficient you can add 'warn: false' to this command task or set 'command_warnings=False' in ansible.cfg to get rid of
this message.
192.168.1.2 | CHANGED | rc=0 >>
redis-3.2.12-2.el7.x86_64
memcached-1.4.15-10.el7_3.1.x86_64
hosts变量设置
举例验证
/etc/ansible/hosts配置
[test]
192.168.1.2:5522 http_port=82
playbook 书写
[root@zhaoyj ansible]# cat test7.yml
---
- hosts: test
  remote_user: root

  tasks:
    - name: set hostname
      hostname: name=www{{ http_port }}.cn
...
查看结果
[root@zhaoyj ansible]# ansible-playbook test7.yml

PLAY [test] *************************************************************************************************************************************************************

TASK [Gathering Facts] **************************************************************************************************************************************************
ok: [192.168.1.2]

TASK [set hostname] *****************************************************************************************************************************************************
changed: [192.168.1.2]

PLAY RECAP **************************************************************************************************************************************************************
192.168.1.2               : ok=2    changed=1    unreachable=0    failed=0    skipped=0    rescued=0    ignored=0


[root@zhaoyj ansible]# ansible test -m shell -a "hostname"
192.168.1.2 | CHANGED | rc=0 >>
www82.cn
定义通用分组变量
hosts文件定义(针对test组做通用变量)
[test]
192.168.1.1:5522 http_port=83

[test:vars]
nodename=test
domainname=.cn
playbook示例
[root@zhaoyj ansible]# cat test8.yml
---
- hosts: test
  remote_user: root

  tasks:
    - name: set hostname
      hostname: name={{ nodename }}{{ http_port }}{{ domainname }}
...
结果查看
[root@zhaoyj ansible]# ansible-playbook test8.yml

PLAY [test] **************************************************************************************************************************

TASK [Gathering Facts] ***************************************************************************************************************
ok: [192.168.1.2]

TASK [set hostname] ******************************************************************************************************************
changed: [192.168.1.2]

PLAY RECAP ***************************************************************************************************************************
192.168.1.2               : ok=2    changed=1    unreachable=0    failed=0    skipped=0    rescued=0    ignored=0

[root@zhaoyj ansible]# ansible test -m shell -a "hostname"
192.168.1.2 | CHANGED | rc=0 >>
test83.cn
如果命令中使用-e指定了变量,与配置文件变量名相等,优先读命令行。主机清单中,公共变量优先级也大于组变量。
变量文件的使用
定义一个变量文件
[root@zhaoyj ansible]# cat var.yml
var1: httpd
var2: vsftpd
var3: redis
写一个playbook调用
[root@zhaoyj ansible]# cat test.yml
---
- hosts: test
  remote_user: root

  vars_files:
    - var.yml

  task:
    - name: install pkg
      yum: name= {{ var1 }}
    - name: create file
      file: name=/root/{{ var2 }}.log state=touch
...
查看执行结果
[root@zhaoyj ansible]# ansible-playbook test.yml

PLAY [test] **************************************************************************************************************************

TASK [Gathering Facts] ***************************************************************************************************************
ok: [192.168.1.2]

TASK [install pkg] *******************************************************************************************************************
changed: [192.168.1.2]

TASK [create file] *******************************************************************************************************************
changed: [192.168.1.2]

PLAY RECAP ***************************************************************************************************************************
192.168.1.2               : ok=3    changed=2    unreachable=0    failed=0    skipped=0    rescued=0    ignored=0

[root@zhaoyj ansible]# ansible test -m shell -a "rpm -q httpd"
[WARNING]: Consider using the yum, dnf or zypper module rather than running 'rpm'.  If you need to use command because yum, dnf or
zypper is insufficient you can add 'warn: false' to this command task or set 'command_warnings=False' in ansible.cfg to get rid of
this message.
192.168.1.2 | CHANGED | rc=0 >>
httpd-2.4.6-99.el7.centos.1.x86_64

[root@zhaoyj ansible]# ansible test -m shell -a "ls -a /root/vsftpd.log"
192.168.1.2 | CHANGED | rc=0 >>
/root/vsftpd.log


