前面的几种文章分析了DataBinding单向数据绑定的原理,今天来看看双向数据绑定是怎么回事。
我们知道单向绑定是在数据发生变化的时候能够通知到UI,让数据的变化能够及时反应到UI上;而双向绑定则是不仅要让数据的变化能够反馈到UI上,而且还要让UI的变化也能够反馈到数据上,前面已经分析了数据的变化如何反馈到UI上,所以这篇文章就只分析UI的变化是如何反馈到数据上。
为了方便说明,我们使用如下的UI进行演示:
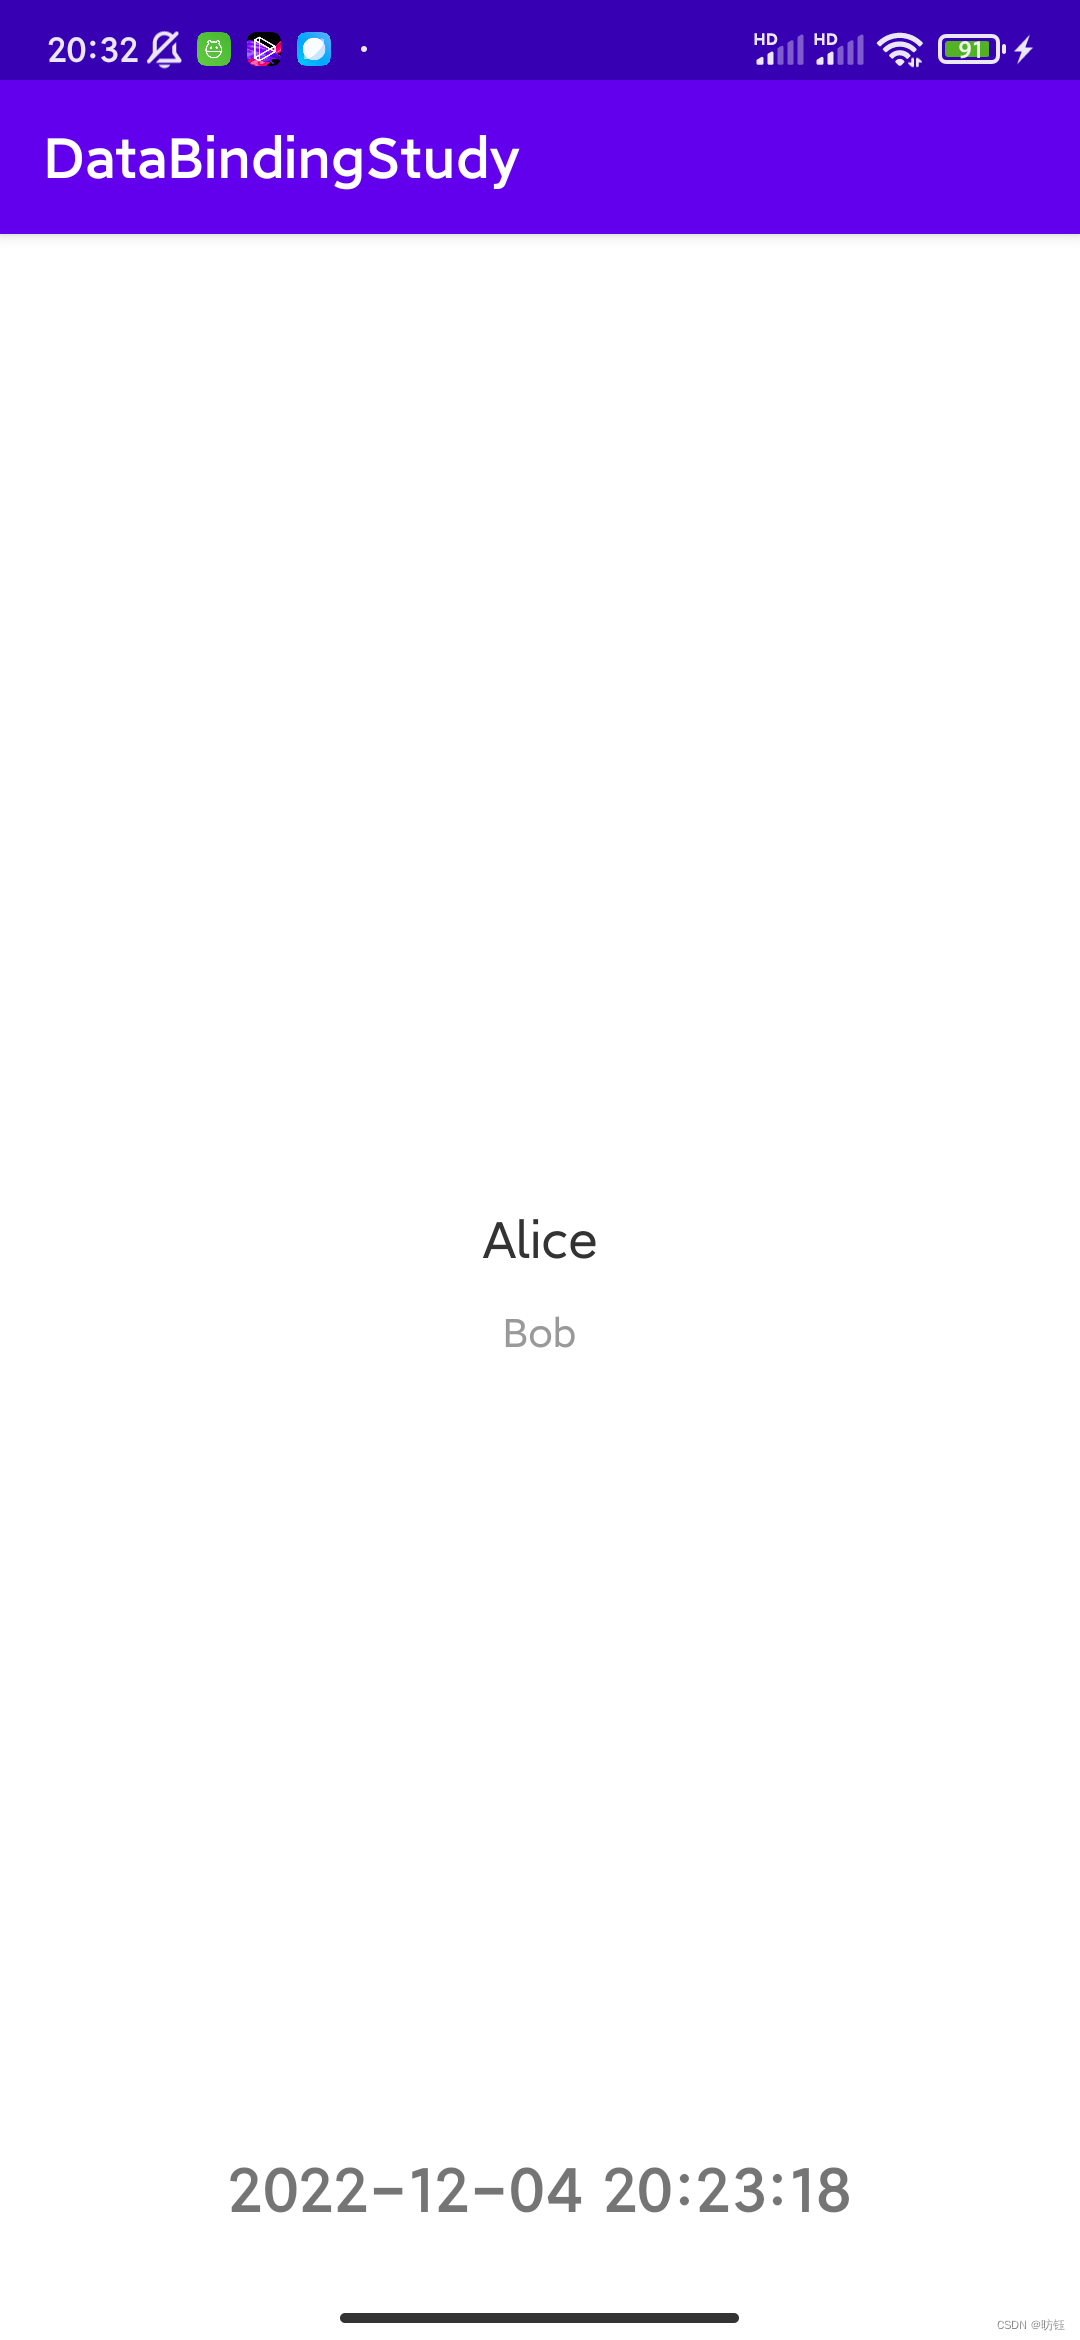
界面下方有个格式化时间,它是一个TextView,这里要做的就是在点击该控件的时候把显示内容更新为当前时间,这个操作就对应到UI变化,此时会把当前时间保存到相应的LiveData中(也就是UI变化反馈到数据中)。接下来主要分三步来说明如何实现该效果。
一、修改绑定表达式
在单向数据绑定中我们按如下方式使用:
        <TextView
            android:id="@+id/second"
            android:layout_width="wrap_content"
            android:layout_height="wrap_content"
            android:text="@{viewModel.second}"
            android:textColor="#999"
            android:textSize="14sp"
            app:layout_constraintBottom_toBottomOf="parent"
            app:layout_constraintEnd_toEndOf="parent"
            app:layout_constraintStart_toStartOf="parent"
            app:layout_constraintTop_toBottomOf="@id/first" />
单向绑定表达式为:@{viewModel.second},而在双向绑定中按如下方式使用:
        <com.zfang.databindingstudy.widget.MyAppText
            android:layout_width="wrap_content"
            android:layout_height="wrap_content"
            android:paddingHorizontal="12dp"
            android:paddingVertical="24dp"
            android:textSize="22sp"
            android:textStyle="bold"
            app:layout_constraintBottom_toBottomOf="parent"
            app:layout_constraintEnd_toEndOf="parent"
            app:layout_constraintStart_toStartOf="parent"
            app:time="@={viewModel.time}" />
双向绑定表达式为:@={viewModel.time},多了个“=”号,同时在生存的相关xml中也有所不同:
        <Target id="@+id/second" tag="binding_2" view="TextView">
            <Expressions>
                <Expression attribute="android:text" text="viewModel.second">
                    <Location endLine="35" endOffset="45" startLine="35" startOffset="12" />
                    <TwoWay>false</TwoWay>
                    <ValueLocation endLine="35" endOffset="43" startLine="35" startOffset="28" />
                </Expression>
            </Expressions>
            <location endLine="41" endOffset="61" startLine="31" startOffset="8" />
        </Target>
        <Target tag="binding_3" view="com.zfang.databindingstudy.widget.MyAppText">
            <Expressions>
                <Expression attribute="app:time" text="viewModel.time">
                    <Location endLine="53" endOffset="40" startLine="53" startOffset="12" />
                    <TwoWay>true</TwoWay>
                    <ValueLocation endLine="53" endOffset="38" startLine="53" startOffset="25" />
                </Expression>
            </Expressions>
            <location endLine="53" endOffset="43" startLine="43" startOffset="8" />
        </Target>
相应的<TwoWay>true</TwoWay>标签为true,而单向绑定中为false。
二、监听UI变化
单向绑定中数据变化会通知到UI,使用到的是观察者模式;以LiveData为例,就是在LiveData变化的时候会执行相应的绑定表达式。
而在双向绑定中,则需要监听UI变化,使用的则是事件或者控制提供的机制监听UI变化,以这里的TextView为例。
package com.zfang.databindingstudy.widget

import android.content.Context
import android.util.AttributeSet
import androidx.appcompat.widget.AppCompatTextView
import com.zfang.databindingstudy.binds.AppTextBinds
import java.text.SimpleDateFormat
import java.util.*

class MyAppText(ctx: Context, attr: AttributeSet): AppCompatTextView(ctx, attr) {

    private var timeDate: Date? = null
    fun timeChange(time: Date): Boolean {
        if (null == timeDate) {
            return true
        }
        return timeDate!! != time
    }

    private fun setTime(time: String) {
        text = time
    }
    fun setTime(timeDate: Date) {
        this.timeDate = timeDate
        setTime(AppTextBinds.formate(timeDate))
    }

    fun getTime() = timeDate!!
}
这是一个自定义TextView用于显示格式化时间,其中的timeChange方法用于判断时间是否有变化,如果有变化再更新显示时间(否则会引起无限循环)。
相应的BindAdapter如下:
package com.zfang.databindingstudy.binds

import android.util.Log
import androidx.databinding.*
import com.zfang.databindingstudy.widget.MyAppText
import java.text.SimpleDateFormat
import java.util.*
import kotlin.reflect.KClass
//@BindingMethods(
//    BindingMethod(type = MyAppText::class, attribute = "app:time", method = "setFormattedTime")
//)
class AppTextBinds {

    companion object {
        private val formatter = SimpleDateFormat("yyyy-MM-dd HH:mm:ss", Locale.getDefault())

        fun getDate(timeStr: String) = timeStr.apply {
            Log.e("zfang", "dateStr = ${this}")
            formatter.parse(this)
        }
        fun formate(date: Date) = formatter.format(date)

        @BindingAdapter("app:time")
        @JvmStatic fun setTime(view: MyAppText, newValue: Date) {
            Log.e("zfang", "setTime")
            // Important to break potential infinite loops.
            val timeStr = formatter.format(newValue)
            if (view.timeChange(newValue)) {
                view.setTime(newValue)
            }
        }

        /**
         * 双向绑定调用的方法(UI变化 -> 从UI获取数据)
         */
        @InverseBindingAdapter(attribute = "app:time")
        @JvmStatic fun getTime(view: MyAppText) : Date {
            Log.e("zfang", "getTime")
            return view.getTime()
        }

        /**
         * 设置双向绑定调用时机
         */
        @BindingAdapter("app:timeAttrChanged")
        @JvmStatic fun setListeners(view: MyAppText, attrChange: InverseBindingListener) {
            Log.e("zfang", "on UI change")
            view.apply {
                setOnClickListener {
                    text = formate(Date())
                    attrChange.onChange()
                }
            }
        }
    }
}
其中的setListeners用于建立双向绑定的监听,它是由DataBinding调用的,在该方法中设置了View的点击监听,同时更新了UI上的显示数据,接着调用InverseBindingListener的onChange,该方法会更新相应的LiveData数据。
相应的LiveData如下:
package com.zfang.databindingstudy.module

import androidx.lifecycle.LiveData
import androidx.lifecycle.MutableLiveData
import androidx.lifecycle.ViewModel
import java.util.*

class SimpleViewModel: ViewModel() {
    private val _first = MutableLiveData("Alice")
    private val _second = MutableLiveData("Bob")

    val first: LiveData<String> = _first
    val second: LiveData<String> = _second

    var time :MutableLiveData<Date> = MutableLiveData(Date())
        set(date) {
            if (field == date) {
                return
            }
            field = date
        }
}
数据流路径为:onClick -> InverseBindingListener.onChange -> 设置LiveData time的值,需要注意的是此时time的变化会导致requestRebind的调用,重而更新UI,此时需要判断数据是否发生变化再设置相应的LiveData数据,否则会产生死循环。
三、接收数据反馈
接着上面说到的InverseBindingListener.onChange调用,其实现如下:
    // Inverse Binding Event Handlers
    private InverseBindingListener mboundView3timeAttrChanged = new InverseBindingListener() {
        @Override
        public void onChange() {
            // Inverse of viewModel.time.getValue()
            // is viewModel.time.setValue((Date) callbackArg_0)
            //上面定义的方法,获取时间
            Date callbackArg_0 = AppTextBinds.getTime(mboundView3);
            // localize variables for thread safety
            // viewModel.time.getValue()
            Date viewModelTimeGetValue = null;
            // viewModel
            SimpleViewModel viewModel = mViewModel;
            // viewModel.time
            MutableLiveData<Date> viewModelTime = null;
            // viewModel != null
            boolean viewModelJavaLangObjectNull = false;
            // viewModel.time != null
            boolean viewModelTimeJavaLangObjectNull = false;

            viewModelJavaLangObjectNull = (viewModel) != (null);
            if (viewModelJavaLangObjectNull) {
                viewModelTime = viewModel.getTime();

                viewModelTimeJavaLangObjectNull = (viewModelTime) != (null);
                if (viewModelTimeJavaLangObjectNull) {
                    //设置UI数据到LiveData中
                    viewModelTime.setValue(((Date) (callbackArg_0)));
                }
            }
        }
    };
上面带注释的两处即是更新了相应数据中的值(数据是从UI中获取,在当前场景中也就是TextView)。当然这里的代码是DataBinding生存的,我们需要做的是实现AppTextBinds 中SetListener方法,监听UI的变化并回调InverseBindingListener.onChange,这样就实现UI的变化反馈到数据中。
需要了解单向绑定的可以点这里(DataBinding原理----单向数据绑定(3)),源代码在这里
