目录
1、初始化包
2、将代码推送到github远程仓库
3、为写好扩展包打上tag标签标记当前代码版本
4、将包发布到包管理平台
初始化包,生成
Creates a basic composer.json file in current directory
composer init
composer init 按照引导就可以生成了 , 详细的引导解释如下
This command will guide you through creating your composer.json config.

# 1. 输入项目命名空间,我是按github账号名/仓库名
# 注意<vendor>/<name> 必须要符合 [a-z0-9_.-]+/[a-z0-9_.-]+
Package name (<vendor>/<name>) [root/test_composer]:yourname/projectname

# 2. 项目描述
Description []:这是一个测试composer init 项目

# 3. 输入作者信息,直接回车可能出现如下提示,有的系统可以直接回车,具体为什么?这里不详细介绍
 Invalid author string.  Must be in the format: John Smith <john@example.com>
# 3.1. 注意必须要符合 John Smith <john@example.com>
Author [Alan.Liu <5425902+liuyuanshan11@user.noreply.gitee.com>, n to skip]: liuyuanshan

# 4. 输入最低稳定版本,stable, RC, beta, alpha, dev
Minimum Stability []:dev

# 5. 输入项目类型
Package Type (e.g. library, project, metapackage, composer-plugin) []:library

# 6. 输入授权类型,默认回车
License []:

Define your dependencies.

# 7. 输入依赖信息,默认回车
Would you like to define your dependencies (require) interactively [yes]?

# 7.1. 如果需要依赖,则输入要安装的依赖
Search for a package:php

# 7.2. 输入版本号
Enter the version constraint to require (or leave blank to use the latest version): >=7.0.0

#  如需多个依赖,则重复以上两个步骤(7.1/7.2),没有则默认回车
Search for a package:

# 8. 是否需要require-dev,
Would you like to define your dev dependencies (require-dev) interactively [yes]?

{
    "name": "liuyuanshan11/demo",
    "description": "this is test project",
    "type": "library",
    "require-dev": {
        "php": "7.0.0"
    },
    "autoload": {
        "psr-4": {
            "Liuyuanshan11\\Demo\\": "src/"
        }
    },
    "authors": [
        {
            "name": "liuyuanshan"
        }
    ],
    "minimum-stability": "dev",
    "require": {}
}
# 9. 是否生成composer.json
Do you confirm generation [yes]?

# 现在安装依赖项吗
Would you like to install dependencies now [yes]?
随后调整composer.json配置文件,内容示例如下:
{
    "name": "liuyuanshan11/demo",
    "description": "this is test project",
    "homepage":"https://github.com/liuyuanshan11/demo",
    "require": {
        "php":">=7.0",
        "ext-json": "*"
    },
    "type": "library",
    "autoload": {
        "psr-4": {
            "Liuyuanshan11\\Demo\\": "src/"
        }
    },
    "authors": [
        {
            "name": "liuyuanshan",
            "email": "1019213039@qq.com",
            "homepage":"https://github.com/liuyuanshan11/demo"
        }
    ],
    "minimum-stability": "dev"
}
生成vendor目录
composer update
编写测试代码
src/Test.php
<?php
namespace Liuyuanshan11\Demo;
class Test
{
    function index()
    {
        echo "test";
    }
}
后再根目录 创建一下 index.php 引入类
<?php
use Liuyuanshan11\Demo\Test;

include_once "./vendor/autoload.php";
$obj = new Test();
$obj->index();
执行自动加载命令,为创建的类文件指定自动加载命名空间
composer dump-autoload -o
将代码推送到github远程仓库
# 将代码推送到master远程仓库
 git push origin master
为写好扩展包打上tag标签标记当前代码版本
为当前版本打上tag标签,在发布包管理平台时会使用到,因为包的拉取是根据版本拉取的,默认拉取最新tag标签的版本包
# 创建标签
git tag v1.0.0

# 查看所有标签
git tag

# 远程推送到github仓库
git push origin master --tags
将包发布到包管理平台
先到包管理平台进行注册登录,这里我选择了github账号进行授权登录比较方标
https://packagist.org/
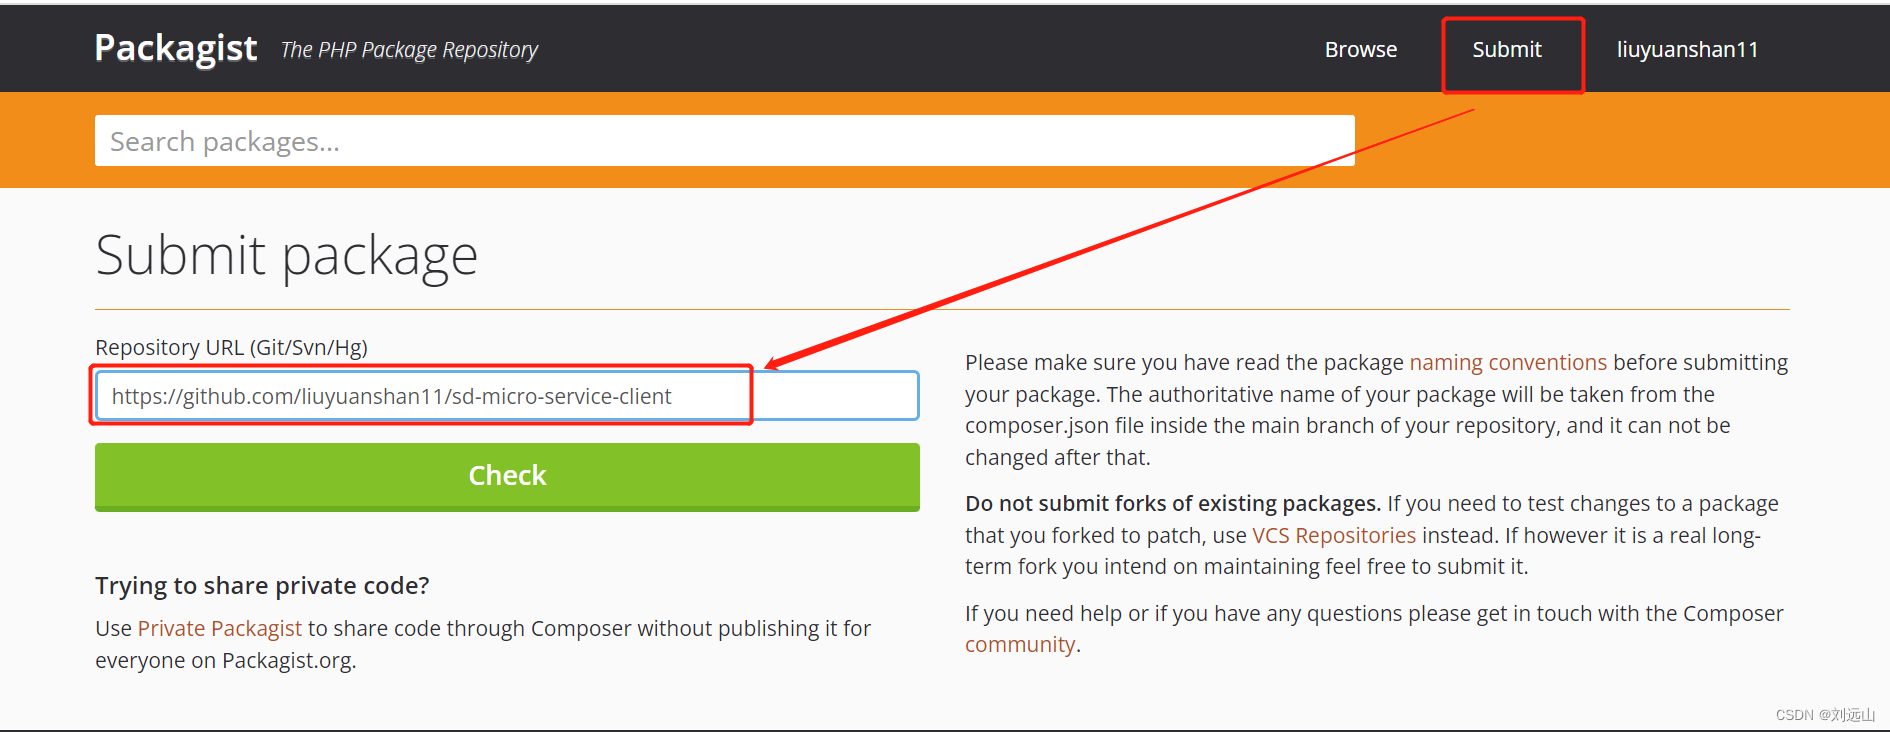
点击【Submit】按钮,将github仓库地址放入解析框,最后点击【Check】便可完成包的发布
查看发布的包与迭代中的包版本
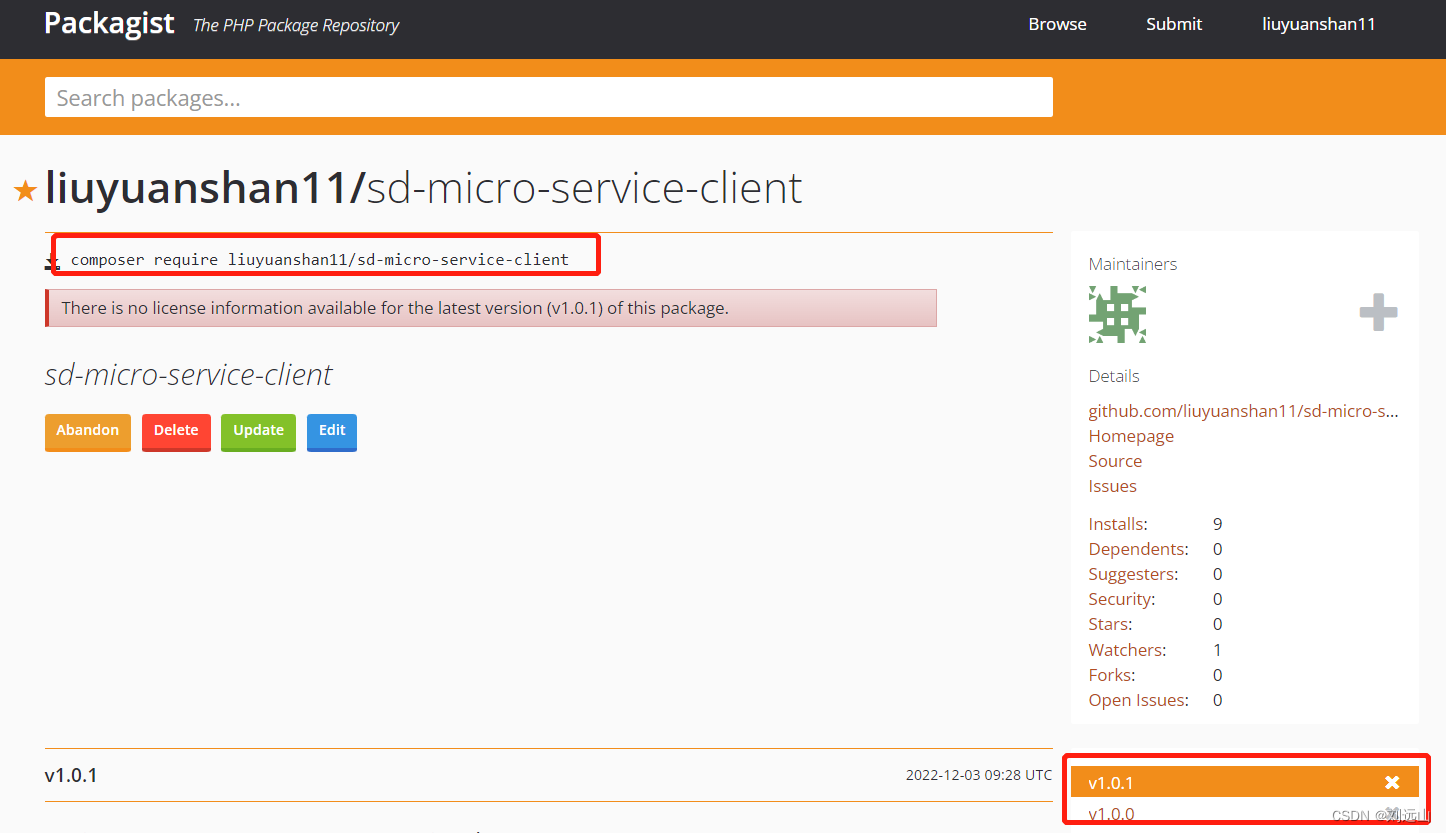
下载并使用包示例
下载包,默认拉取最新tag包
composer require liuyuanshan11/sd-micro-service-client
使用包
use liuyuanshan11\SdMicroServiceClient\MicroService;


$services = [
    'queue' => 'https://queue-service.sumian.com',
    'console' => 'https://console-service.sumian.com',
    'organization' => 'https://organization-service.sumian.com',
    'liu' => 'http://sdapi.test.top'
];

$obj = new MicroService('appId', 'appSecret', $services);
var_dump($obj->get('console')->act('controller', 'action', ["key01" => "value01"]));




![[深度学习] python基础支持汇总](https://img-blog.csdnimg.cn/21cd4086f0164b828643b3e9368c86fb.png)


![[附源码]JAVA毕业设计酒店订房系统(系统+LW)](https://img-blog.csdnimg.cn/bfec98a533cc436d9431542d36227148.png)