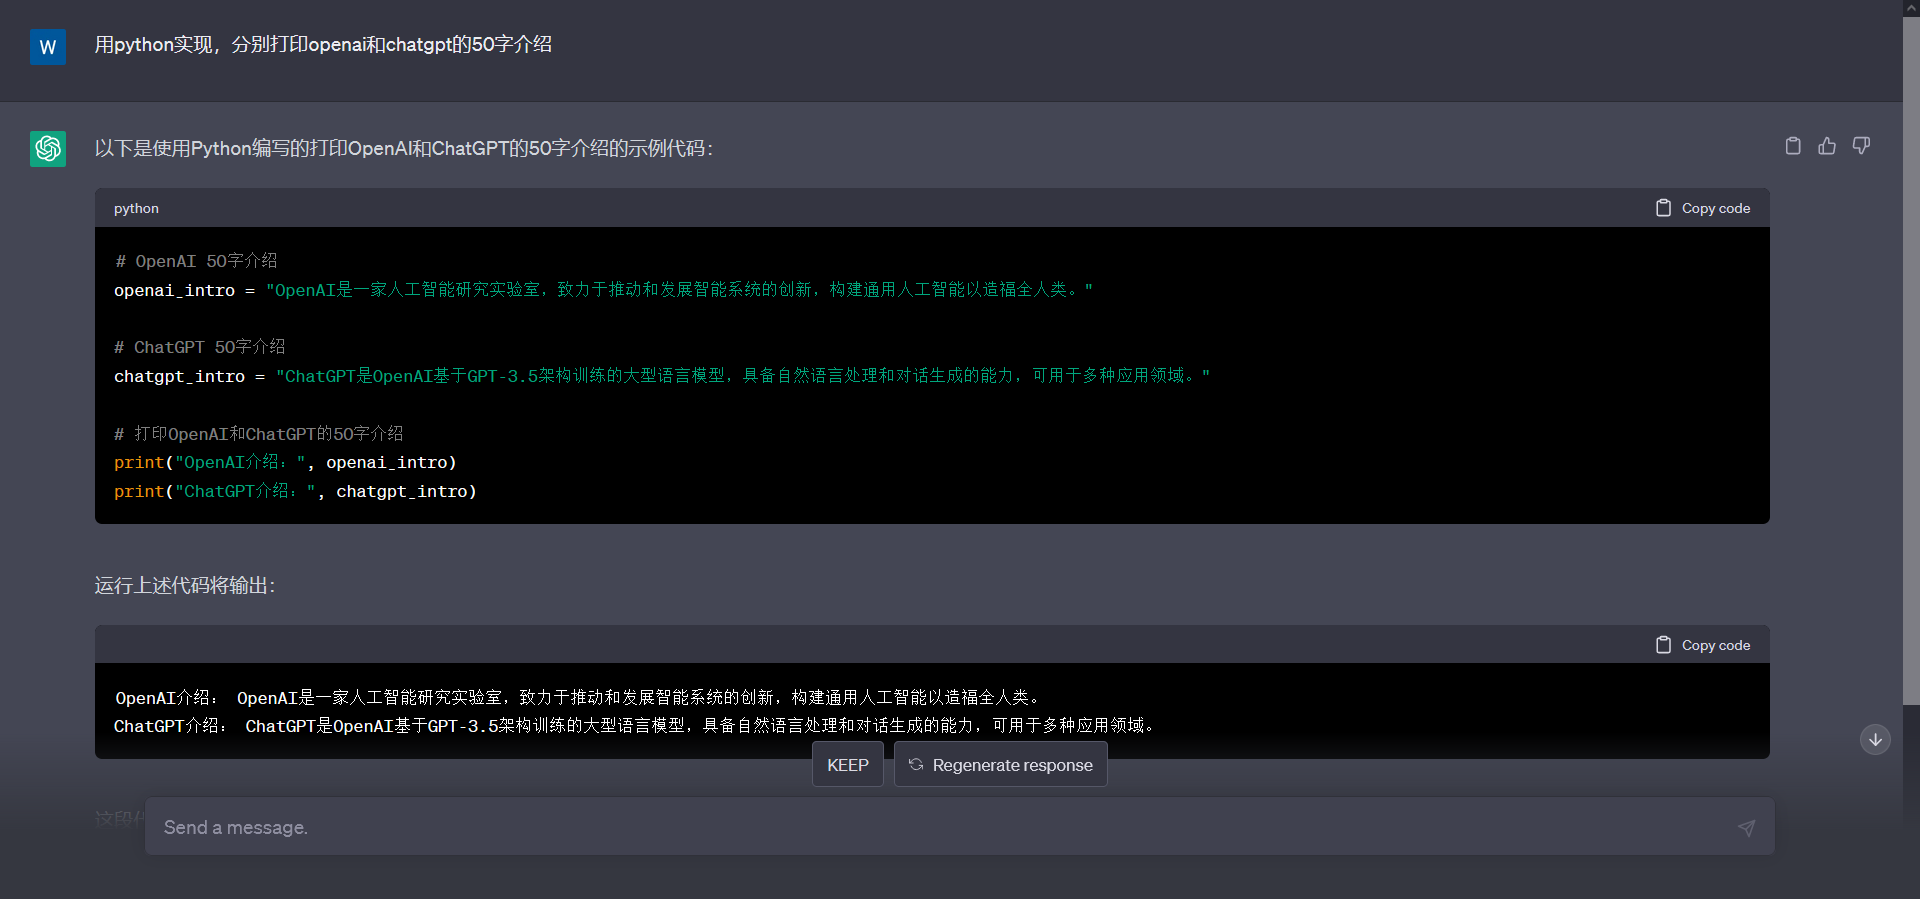
任何一个学过JAVA的人应该都对这段代码非常熟悉。空闲时间翻了下代码,看看它的底层是怎么实现的
public class HelloWorld {
    public static void main(String[] args) {
        System.out.print("Hello, World!");
    }
}
首先点开out,发现它是System类中的一个public static final变量,类型为PrintStream。为了找到它是怎么初始化的,一直往前翻到System类的构造函数
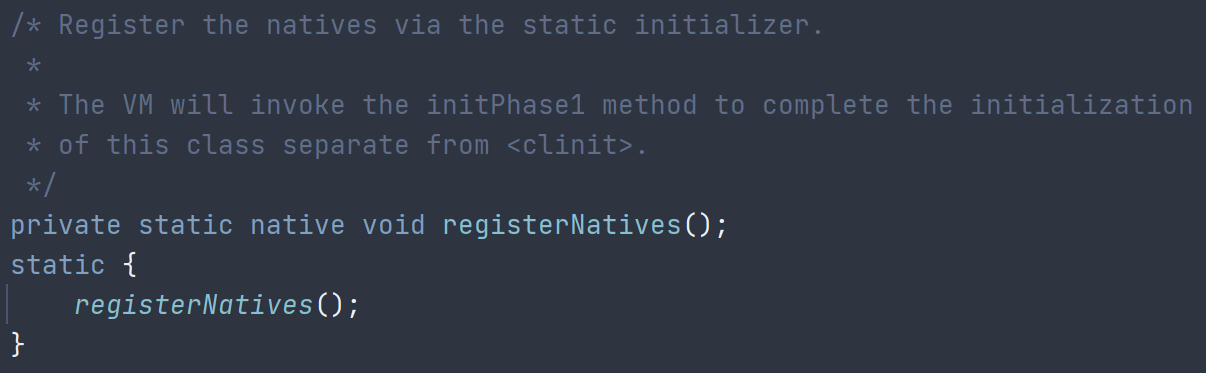
从System类的注释中发现,VM会调用initPhase1这个方法来初始化这个类。先不管VM,先看下initPhase1方法做了什么

发现它用FileDescriptor.out创建了FileOutputStream对象,再用这个对象创建了PrintStream对象,最后调用native的setOut0
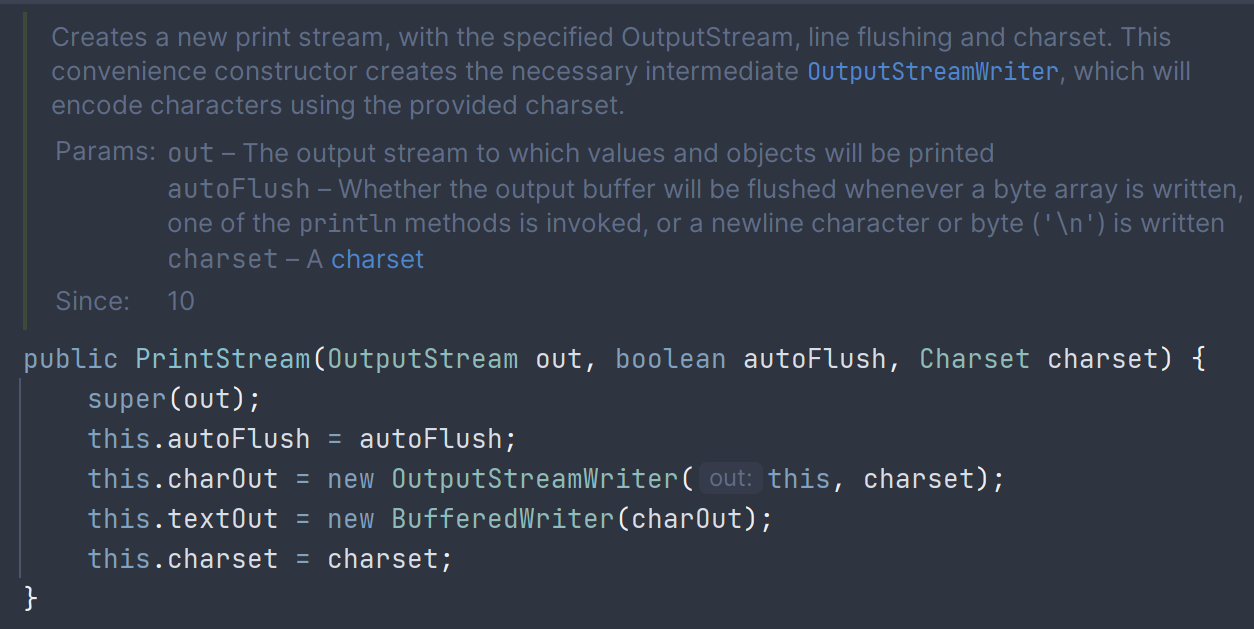
在创建PrintStream对象时,先将FileOutputStream封装成BufferedOutputStream,然后把BufferedOutputStream封装成OutputStreamWriter。这一步中会根据传入的字符集创建OutputStreamWriter中的编码器StreamEncoder
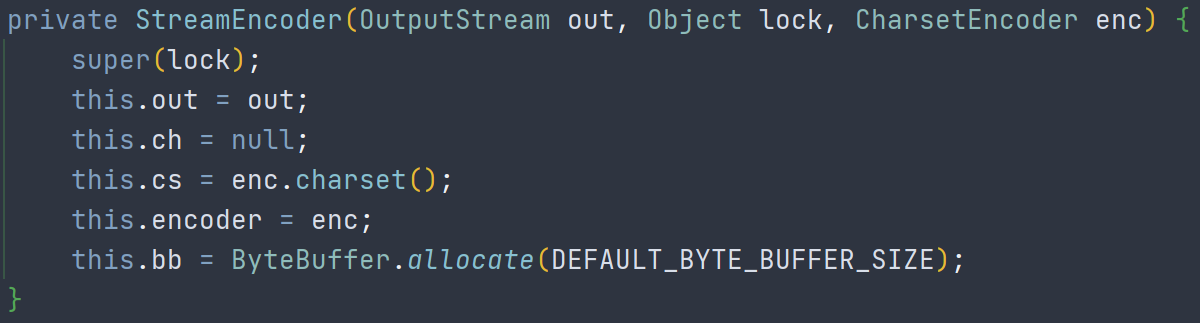
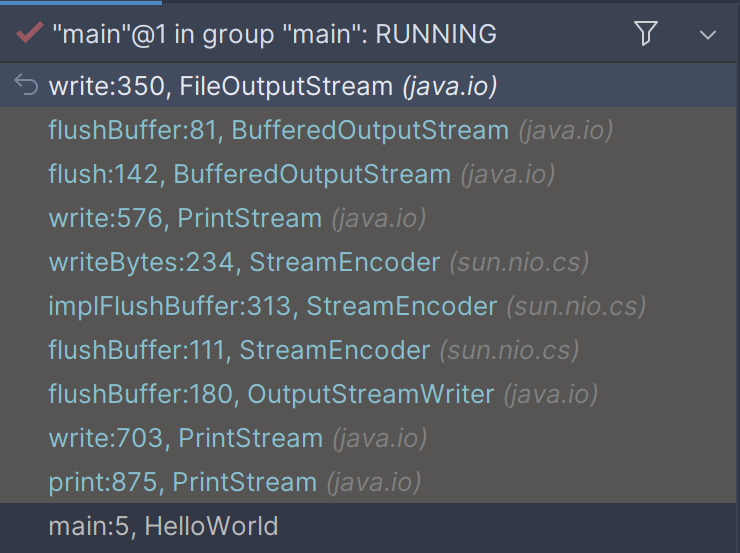
这样OutputStreamWriter就创建好了,在print的时候会调用这个类的方法,最后根据调用栈发现调用了FileOutputStream中的writeBytes方法

发现这个方法是native的,也就是说不在JAVA中实现,打开openjdk,checkout到tag jdk18

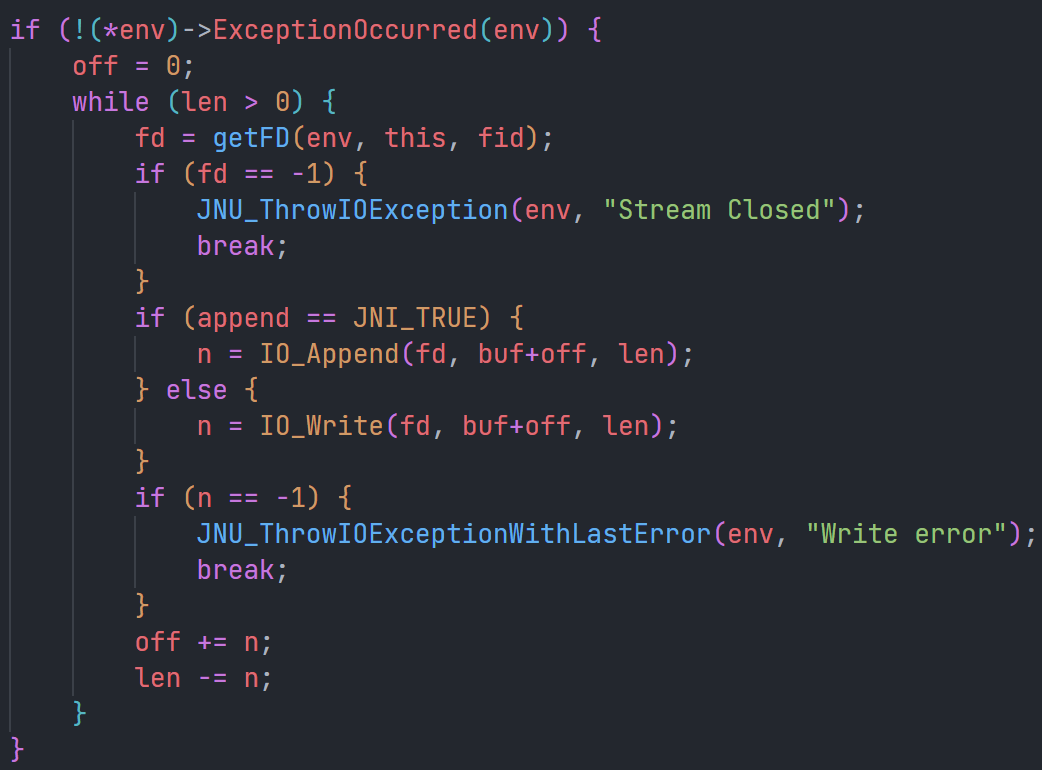
找到在jdk中的实现,发现调用了IO_Append和IO_Write,而这两个是宏定义,指向了handleWrite方法

在不同的平台下,这个方法有不同的实现
在windows下调用了WriteFile这个Win32 API

在linux下调用了unistd.h中定义的write方法

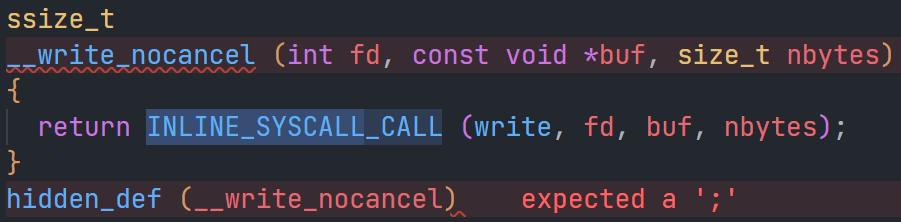
打开glibc,在write_nocancel.c下看到提供的write方法实现,通过一堆的宏定义最终是一个系统调用,调用了linux的write方法
在linux内核源代码中,找到write的SYSCALL,其中调用了ksys_write方法
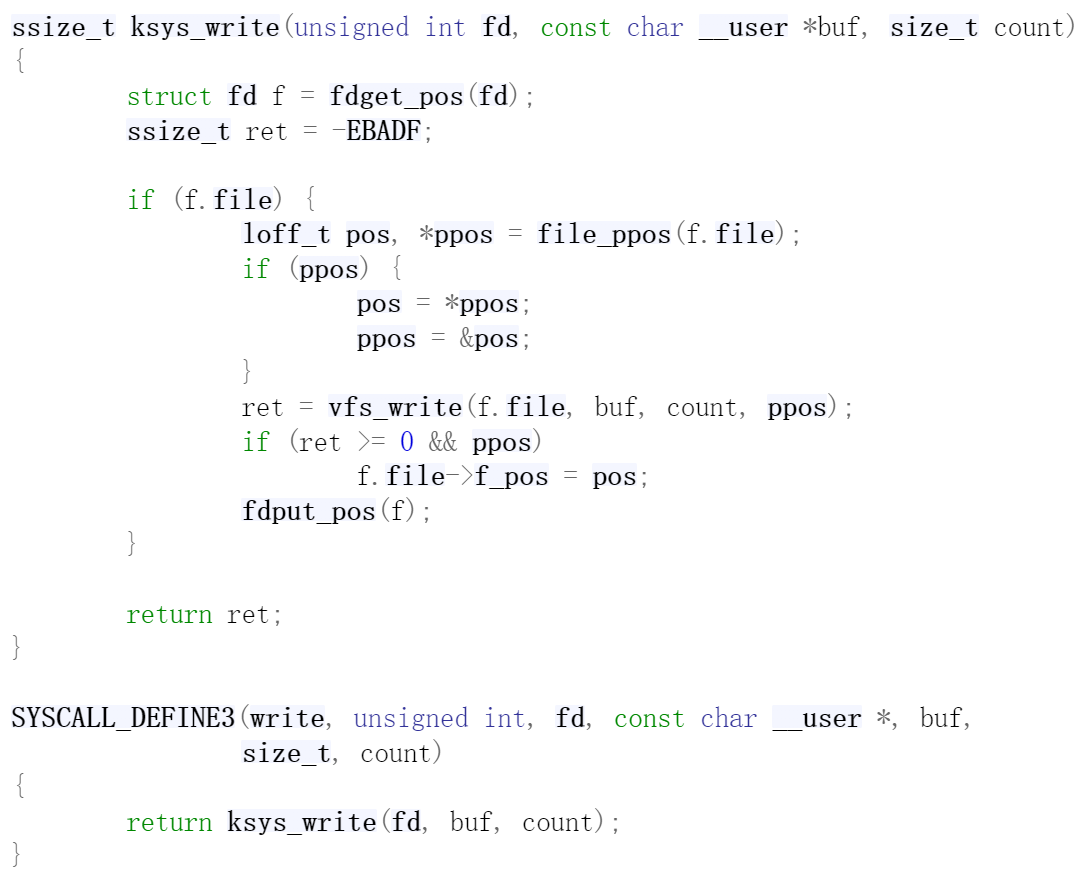
这个方法中会获取fd,然后再通过vfs_write写入,顺着调用链一路找到了下面这个write方法
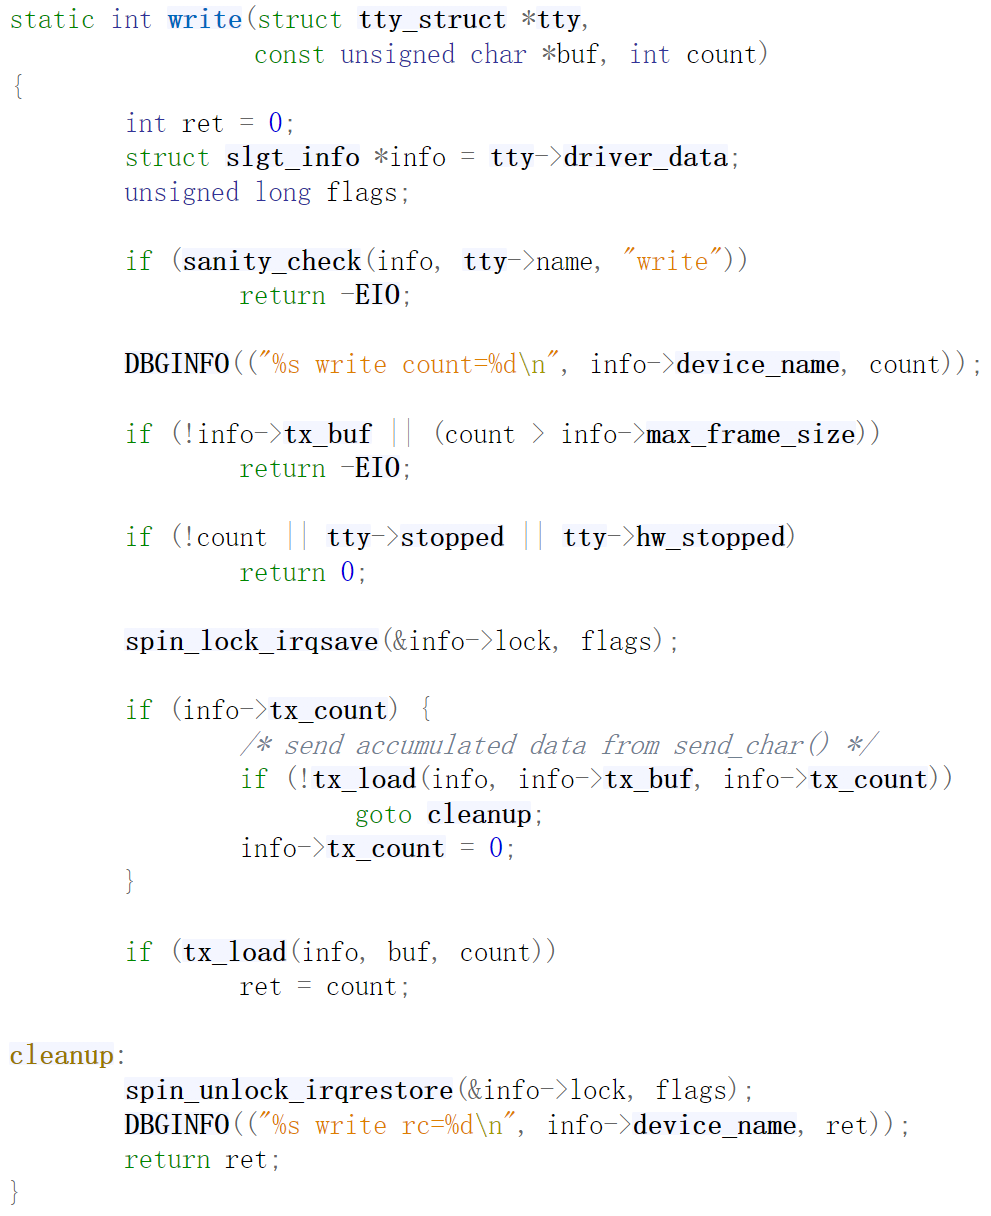
后面的两个参数很好理解,第一个tty_struct是什么?
In many computing contexts, “TTY” has become the name for any text terminal, such as an external console device, a user dialing into the system on a modem on a serial port device, a printing or graphical computer terminal on a computer’s serial port or the RS-232 port on a USB-to-RS-232 converter attached to a computer’s USB port, or even a terminal emulator application in the window system using a pseudoterminal device.
简单来说,就是一个文本终端。它也是一个虚拟文件系统,模拟了终端设备
回头看ksys_write方法的第一行,打开了一个文件描述符,其中调用了__fget_light方法
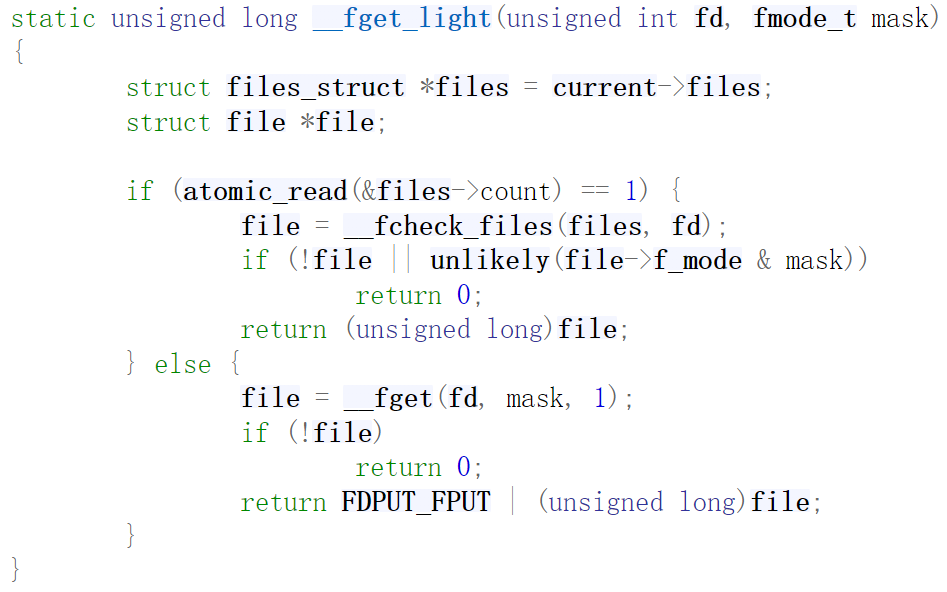
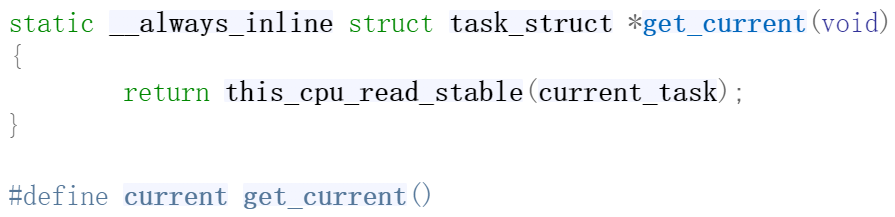
从第一行就能看到,从current中找到了files_struct。current是一个宏定义,获取当前正在运行的任务current_task,而current_task->files是这个当前正在运行的任务所打开的文件信息

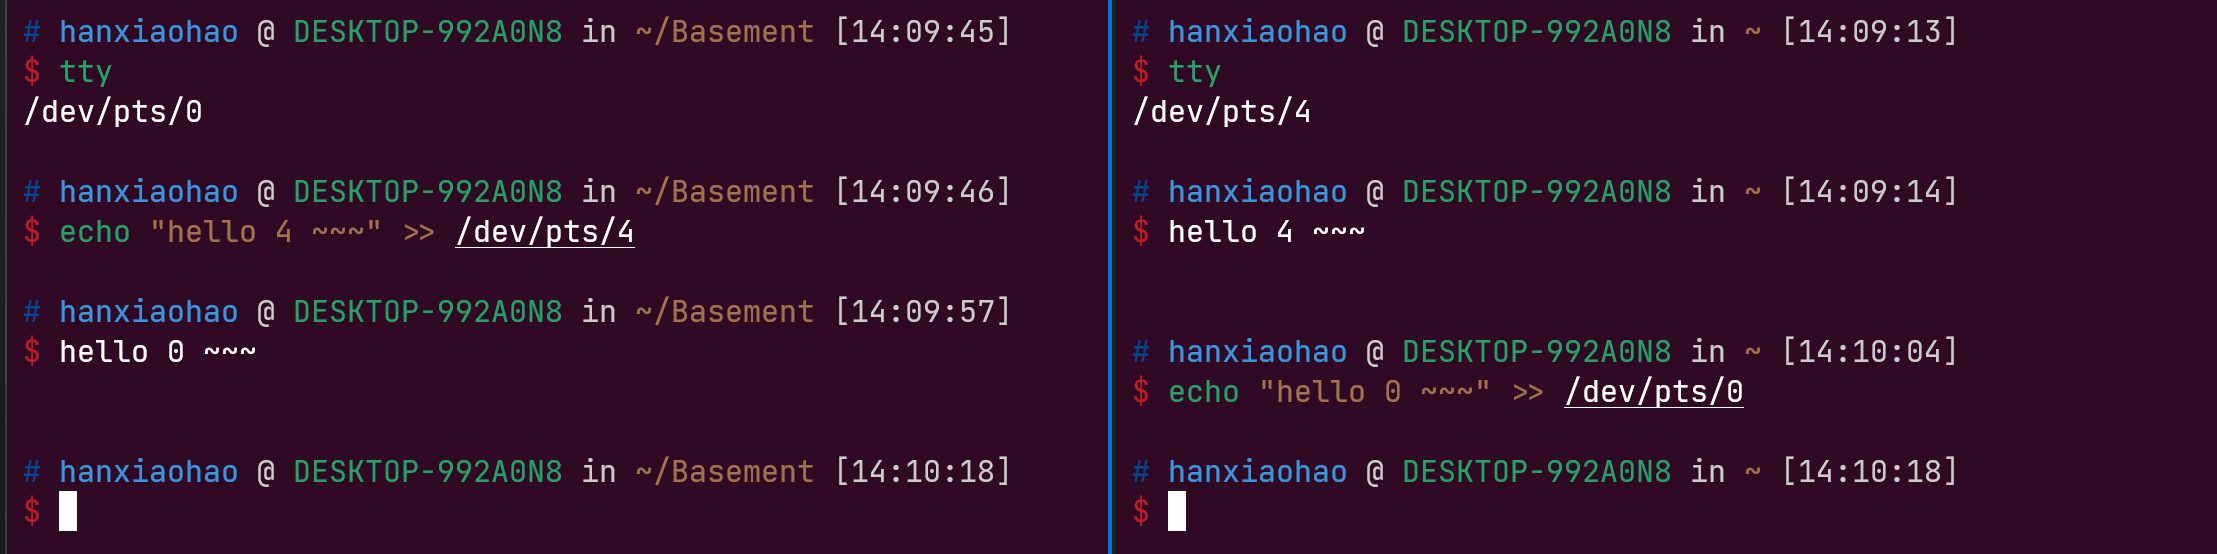
也就是说,进程打开了一个由虚拟文件系统管理的虚拟文件,它是一个伪终端PTY,然后向其中写入数据
在linux中输入tty,就可以看到对应的伪终端设备文件路径。往里写入数据,就可以实现向另一个终端中打印东西
参考:
- https://github.com/openjdk/jdk
- https://sourceware.org/git/glibc.git
- https://learn.microsoft.com/en-us/windows/win32/api/fileapi/nf-fileapi-writefile
- https://www.linusakesson.net/programming/tty/index.php
- https://en.wikipedia.org/wiki/Devpts
- https://man7.org/linux/man-pages/man7/pty.7.html
- https://github.com/GNOME/vte