环境
oVrit版本: 4.4.10
oVirt image: https://mirrors.aliyun.com/ovirt/ovirt-4.4/iso/ovirt-node-ng-installer/4.4.10-2022030308/el8/ovirt-node-ng-installer-4.4.10-2022030308.el8.iso?spm=a2c6h.25603864.0.0.46c8a3e6ELIYzK
oVirt engine appliance: https://mirrors.aliyun.com/ovirt/ovirt-4.4/rpm/el8/x86_64/ovirt-engine-appliance-4.4-20220308105414.1.el8.x86_64.rpm?spm=a2c6h.25603864.0.0.3bfc4453NnSFms
virt-viewer: https://releases.pagure.org/virt-viewer/virt-viewer-x64-11.0-1.0.msi
virtio-win<windows磁盘驱动>: https://fedorapeople.org/groups/virt/virtio-win/direct-downloads/archive-virtio/virtio-win-0.1.229-1/
参考文档: https://www.cnovirt.com/archives/2739
备注: 每个服务有2块硬盘,一块用于系统盘,一块用于glusterfs数据盘;生产环境建议系统盘做RAID 1, 两个固态硬盘做RAID 1用于GFS缓存,4块10K盘(15K SAS硬盘或SSD盘做RAID 10或RAID 5)做RAID 10;
网络环境建议最低两个1000M端口做绑定,有条件的可以上光口;注意需要先在oVirt engine管理页面做完端口绑定后再在交换机上配置物理接口端口绑定(LACP)
Node:
主机名: node100.com
IP: 192.168.5.100
子网掩码: 255.255.255.0
网关: 192.168.5.1
主机名: node101.com
IP: 192.168.5.101
子网掩码: 255.255.255.0
网关: 192.168.5.1
主机名: node102.com
IP: 192.168.0.102
子网掩码: 255.255.255.0
网关: 192.168.5.1
Engine<以虚拟机运行在node上>:
主机名: engine103.com
IP: 192.168.0.103
子网掩码: 255.255.255.0
网关: 192.168.5.1
操作步骤
- oVirt节点安装请参考https://www.cnovirt.com/archives/2739,注意不需要更新系统。
- 在3台node主机上设置hosts解析
[root@node100 yum.repos.d]# cat /etc/hosts
127.0.0.1   localhost localhost.localdomain localhost4 localhost4.localdomain4
::1         localhost localhost.localdomain localhost6 localhost6.localdomain6

192.168.5.100 node100.com
192.168.5.101 node101.com
192.168.5.102 node102.com
192.168.5.103 engine103.com
- 将3个node节点上的/etc/yum.repos.d/文件备份到backup目录下
备注: /etc/yum.repos.d目录下建议为空,否则后续安装gfs时容易报错或执行过程卡住
[root@node100 yum.repos.d]# cd /etc/yum.repos.d
[root@node100 yum.repos.d]# mkdir backup && mv *.repo backup
- 在其中一个node节点上设置到所有节点的ssh免密登录,此处在node100上操作
[root@node100 home]# ssh-keygen
Generating public/private rsa key pair.
Enter file in which to save the key (/root/.ssh/id_rsa):
Created directory '/root/.ssh'.
Enter passphrase (empty for no passphrase):
Enter same passphrase again:
Your identification has been saved in /root/.ssh/id_rsa.
Your public key has been saved in /root/.ssh/id_rsa.pub.
The key fingerprint is:
SHA256:zblxgJtmcmXSzb1UJDZfW1H5QzUCLiXH6/Z+L3zJMvM root@node100.com
The key's randomart image is:
+---[RSA 3072]----+
|         ..+..++%|
|         o=+ o.B=|
|        o.=.+ +.o|
|         O.+ . o.|
|      . S * . . .|
|       =   *     |
|          o ... .|
|             =o+.|
|            ..*Eo|
+----[SHA256]-----+
将公钥复制到3个node节点上
[root@node100 home]# ssh-copy-id -i node100.com
/usr/bin/ssh-copy-id: INFO: Source of key(s) to be installed: "/root/.ssh/id_rsa.pub"
The authenticity of host 'node210.com (192.168.5.100)' can't be established.
ECDSA key fingerprint is SHA256:guijB0PYTD0GEWvjAe2cIcQsFrgPqyz/RA9dBK47G0Q.
Are you sure you want to continue connecting (yes/no/[fingerprint])? yes
/usr/bin/ssh-copy-id: INFO: attempting to log in with the new key(s), to filter out any that are already installed
/usr/bin/ssh-copy-id: INFO: 1 key(s) remain to be installed -- if you are prompted now it is to install the new keys
root@node100.com's password:

Number of key(s) added: 1

Now try logging into the machine, with:   "ssh 'node100.com'"
and check to make sure that only the key(s) you wanted were added.

[root@node100 home]# ssh-copy-id -i node101.com
/usr/bin/ssh-copy-id: INFO: Source of key(s) to be installed: "/root/.ssh/id_rsa.pub"
The authenticity of host 'node211.com (192.168.5.101)' can't be established.
ECDSA key fingerprint is SHA256:+fF+ihZRIyOKRHRlxdp5W3Mjbv/GuOrhbL2Qx+TeY50.
Are you sure you want to continue connecting (yes/no/[fingerprint])? yes
/usr/bin/ssh-copy-id: INFO: attempting to log in with the new key(s), to filter out any that are already installed
/usr/bin/ssh-copy-id: INFO: 1 key(s) remain to be installed -- if you are prompted now it is to install the new keys
root@node101.com's password:

Number of key(s) added: 1

Now try logging into the machine, with:   "ssh 'node101.com'"
and check to make sure that only the key(s) you wanted were added.

[root@node100 home]# ssh-copy-id -i node102.com
/usr/bin/ssh-copy-id: INFO: Source of key(s) to be installed: "/root/.ssh/id_rsa.pub"
The authenticity of host 'node212.com (192.168.5.102)' can't be established.
ECDSA key fingerprint is SHA256:zLUCpZoeljM6hDMZJkLXs+RSBlh9O1wZ/p3ThNNPRhE.
Are you sure you want to continue connecting (yes/no/[fingerprint])? yes
/usr/bin/ssh-copy-id: INFO: attempting to log in with the new key(s), to filter out any that are already installed
/usr/bin/ssh-copy-id: INFO: 1 key(s) remain to be installed -- if you are prompted now it is to install the new keys
root@node102.com's password:

Number of key(s) added: 1

Now try logging into the machine, with:   "ssh 'node102.com'"
and check to make sure that only the key(s) you wanted were added.
- 下载ovirt-engine-appliance-4.4-20220308105414.1.el8.x86_64.rpm并安装
[root@node100 src]# pwd
/data/src
[root@node100 src]# ls
ovirt-engine-appliance-4.4-20220308105414.1.el8.x86_64.rpm
[root@node100 src]# rpm -ivh ovirt-engine-appliance-4.4-20220308105414.1.el8.x86_64.rpm
warning: ovirt-engine-appliance-4.4-20220308105414.1.el8.x86_64.rpm: Header V4 RSA/SHA256 Signature, key ID fe590cb7: NOKEY
Verifying...                          ################################# [100%]
Preparing...                          ################################# [100%]
Updating / installing...
   1:ovirt-engine-appliance-4.4-202203################################# [100%]
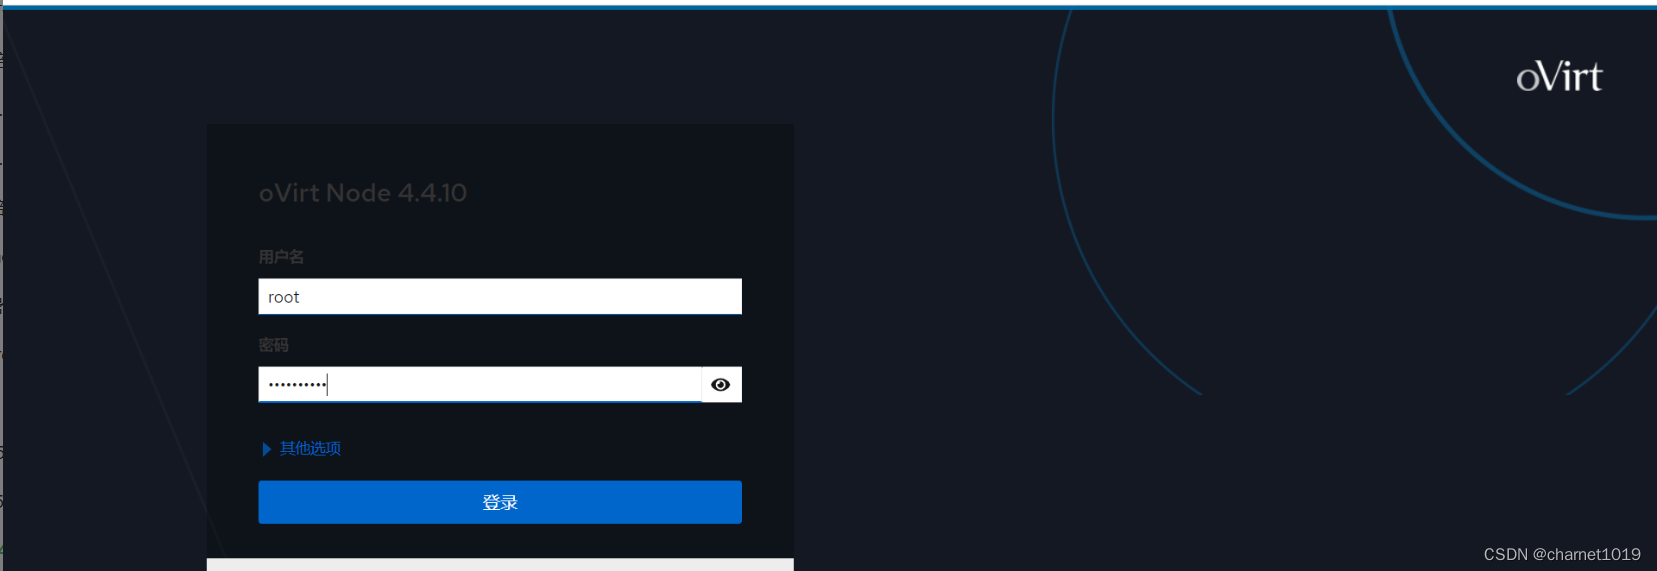
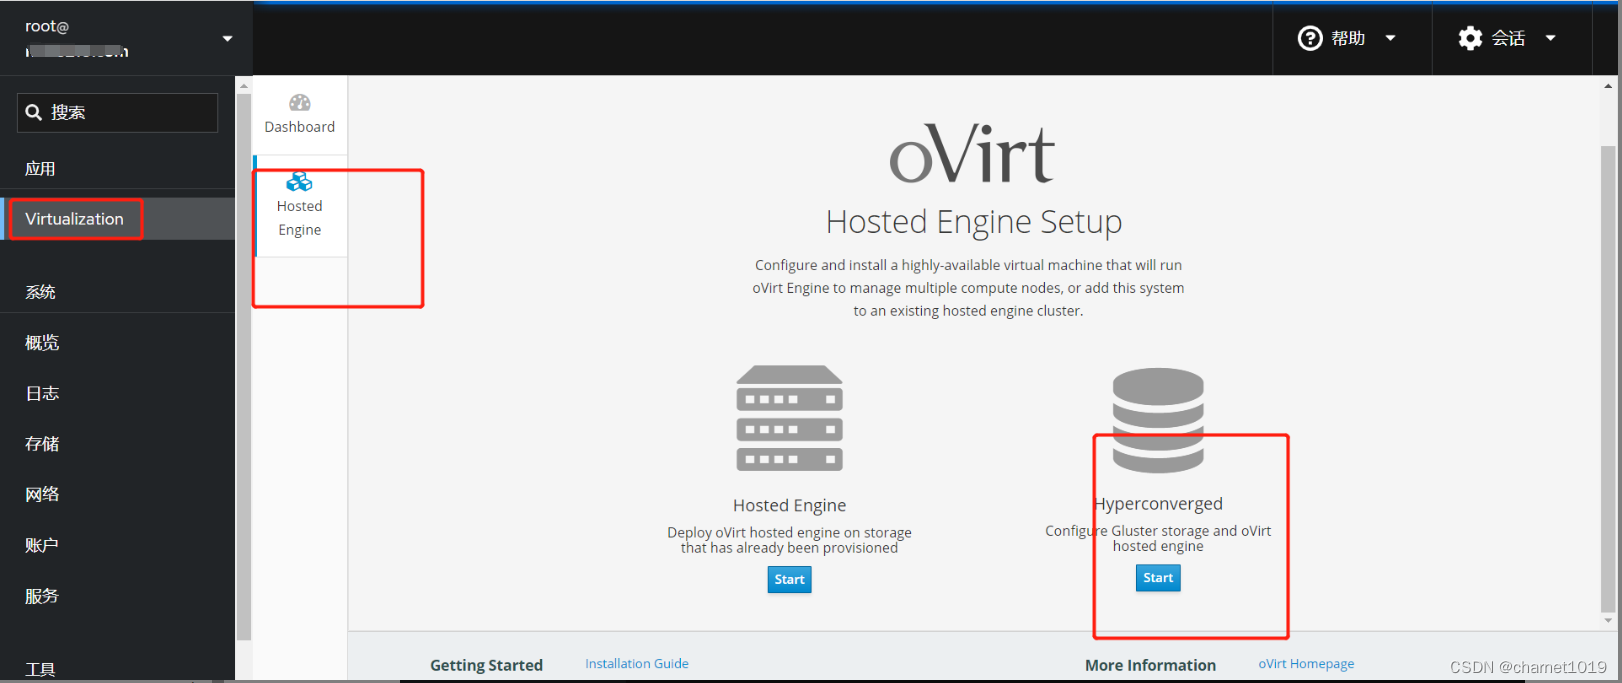
安装完成后,通过浏览器打开这台主机的Web控制台(即Cockpit),地址为:https://192.168.5.100:9090(注意IP地址替换成你实际环境的),使用root帐号登录,如下:
进入HostedEngine页面,点击“Hyperconverged”向导的“Start”按钮,开始部署过程,会先部署Gluster再部署HostedEngine,如下:
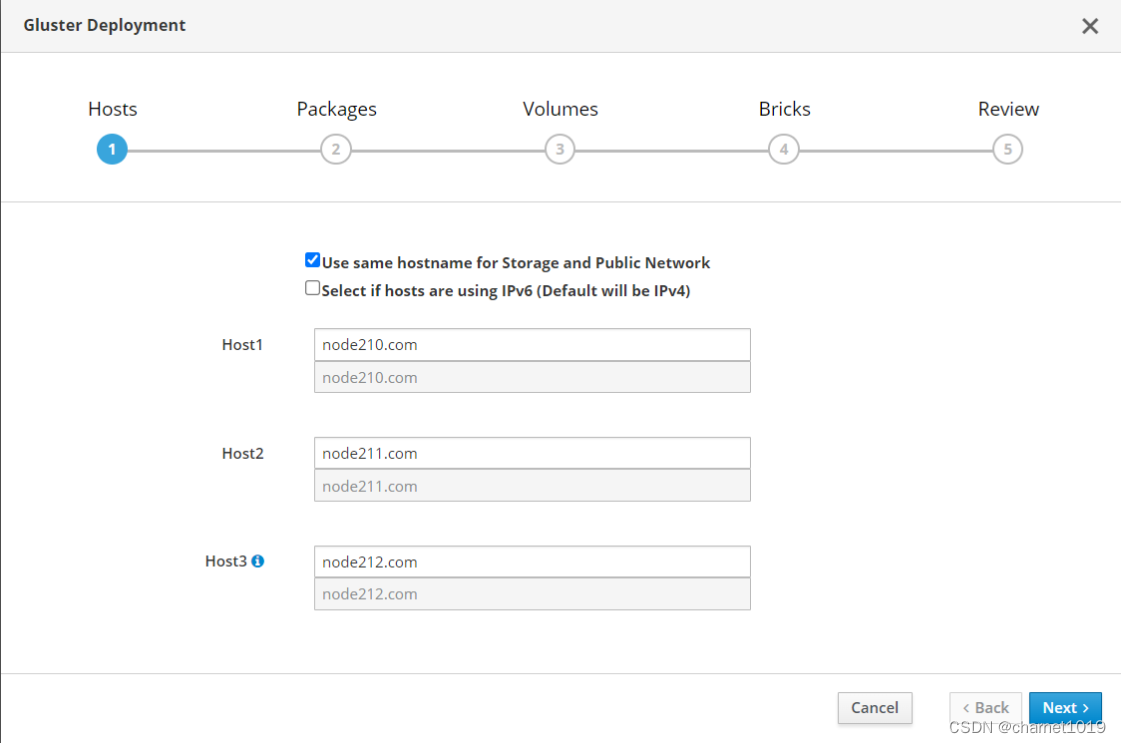
选择“Run Gluster Wizard”向导,如下:

选中“Use same hostname for Storage and Public Network”,表示为存储网和管理网使用同一个网络,因为测试环境只配置了一个网卡,然后下面分别输入Host1、Host2、Host3的域名,如下<此处根据实际情况填写,应该为node100.com, node101.com, node102.com>:
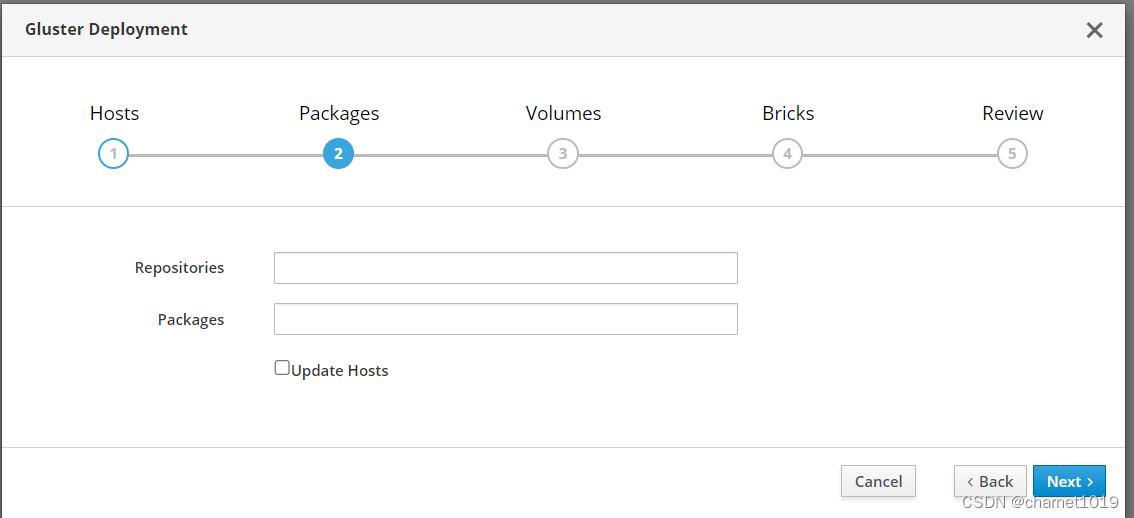
Packages这一步不用配置,直接下一步即可,如下:
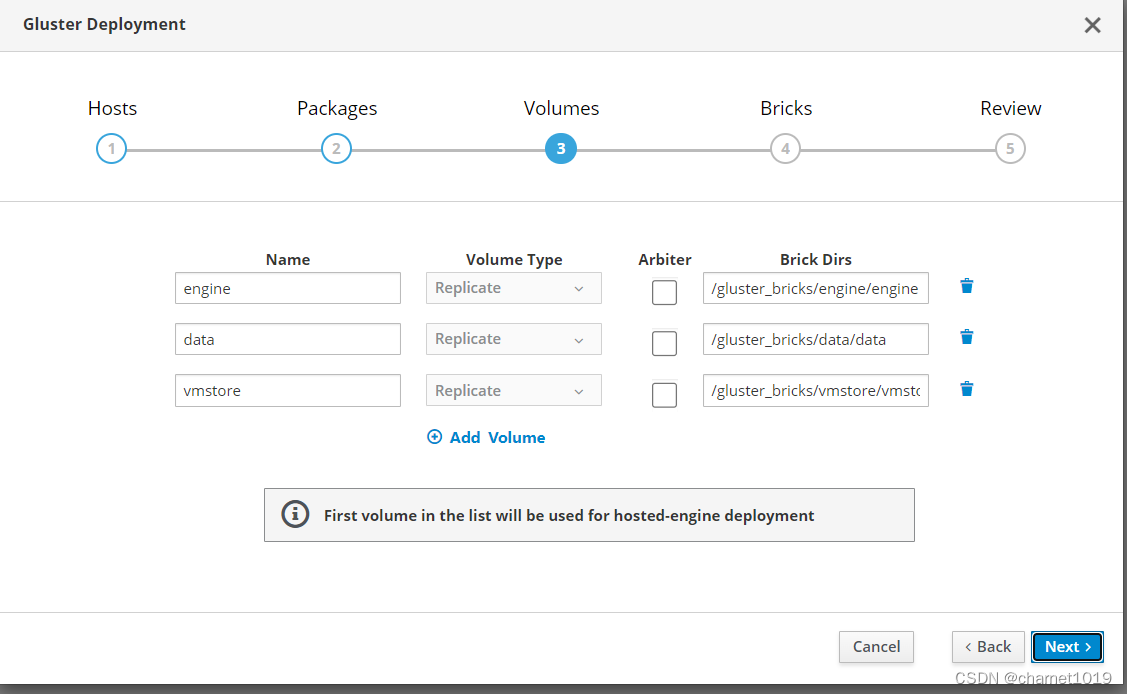
Volumes步骤保持默认,下一步,如下:
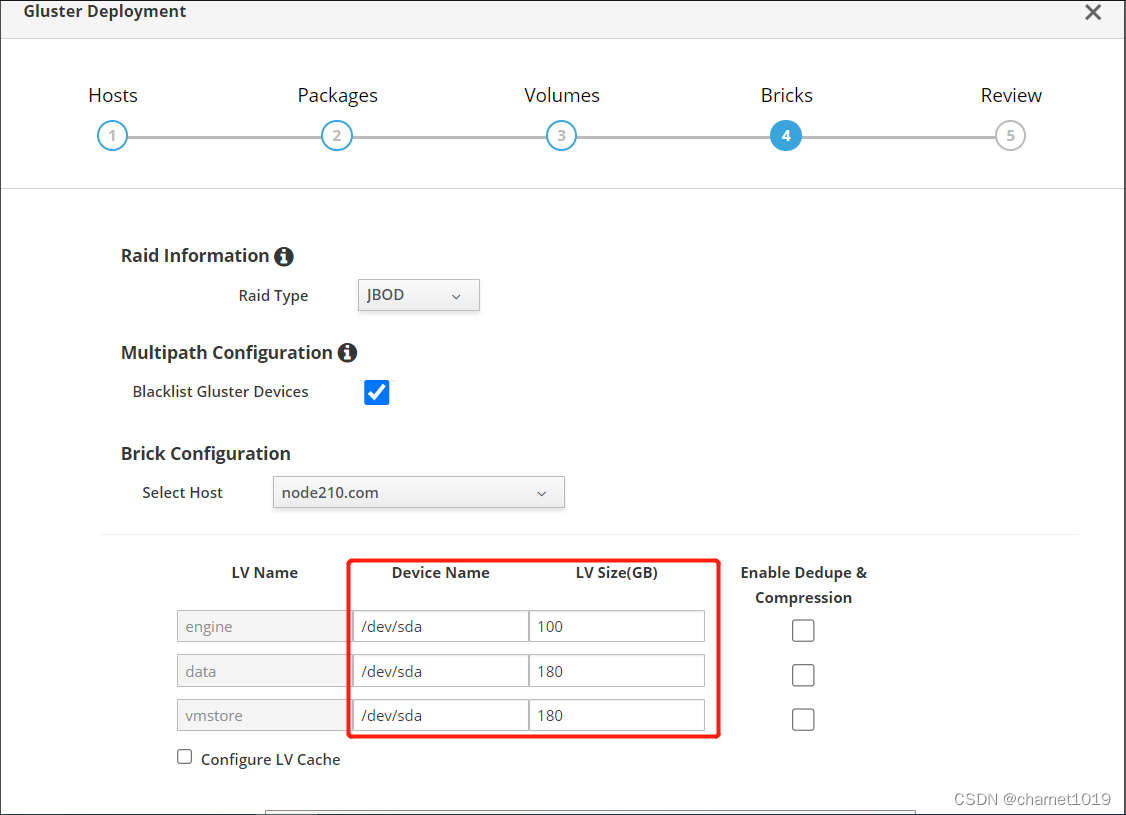
Bricks这一步中,Raid Type这里我们选择“JBOD”<即直通模式>,因为我们每台主机上的数据盘是单独的一块盘,如果实际环境中是多块盘做的Raid,那么就根据实际情况选择“Raid5或者Raid6”,Blacklist Gluster Devices这里默认选中即可,下面的Device Name注意要与你环境中的实际情况对应,这里默认是“/dev/sda”,和我们测试环境是对应的,sda是我们每台主机预留出来的一块用于部署Gluster的磁盘,后面的LV Size累加起来不能超过sda的实际大小,如果有SSD盘的话,可以使用下面的“Configuer LV Cache”配置缓存盘,本次测试环境中没有多余的SSD就不配置了,Device Name下的磁盘根据实际填写, LV Size按最小的磁盘总容量进行划分,如下:
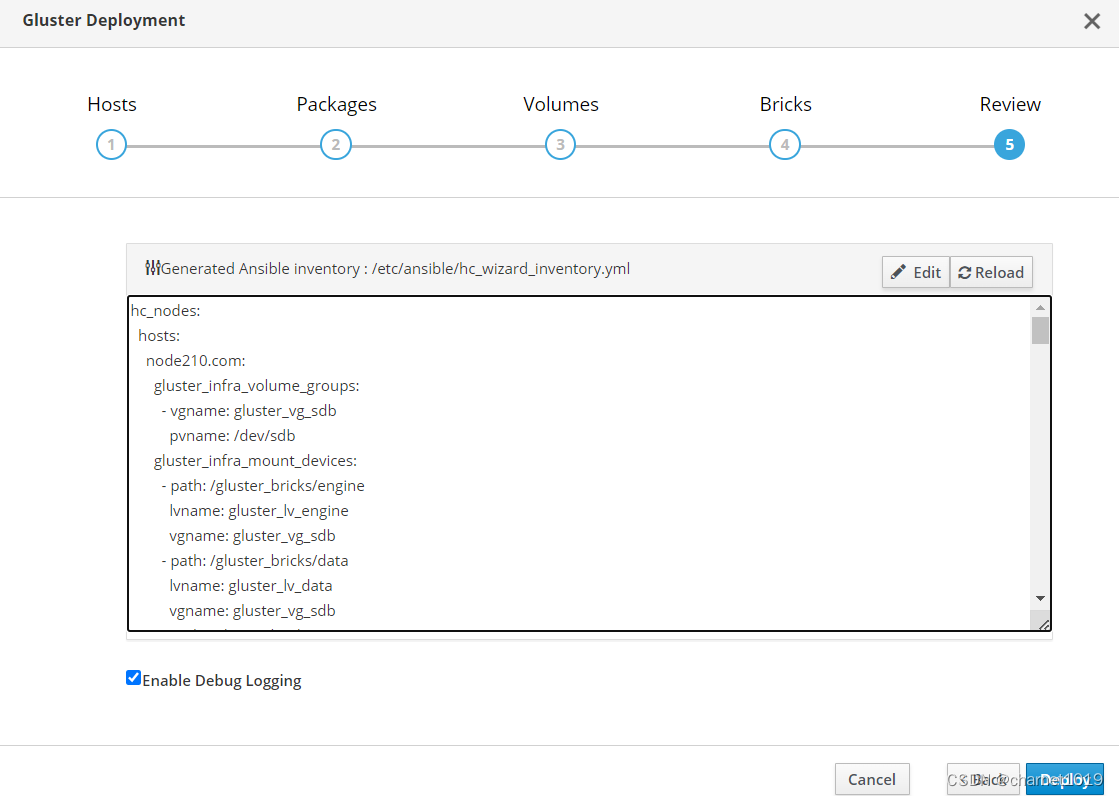
下面执行部署过程即可了,这里选中“Enable Debug Logging”,以方便部署失败时排查错误原因,如下:
注意 在执行安装前建议查看下3个节点上的/etc/lvm/lvm.conf,大概在390行左右将filter = [“a|^/dev/disk/by-id/lvm-pv-uuid-f91KVb-cmFk-41ty-JiUE-oB6I-Tbk1-J77Y1h$|”, “r|.*|”]注释了,如下所示:

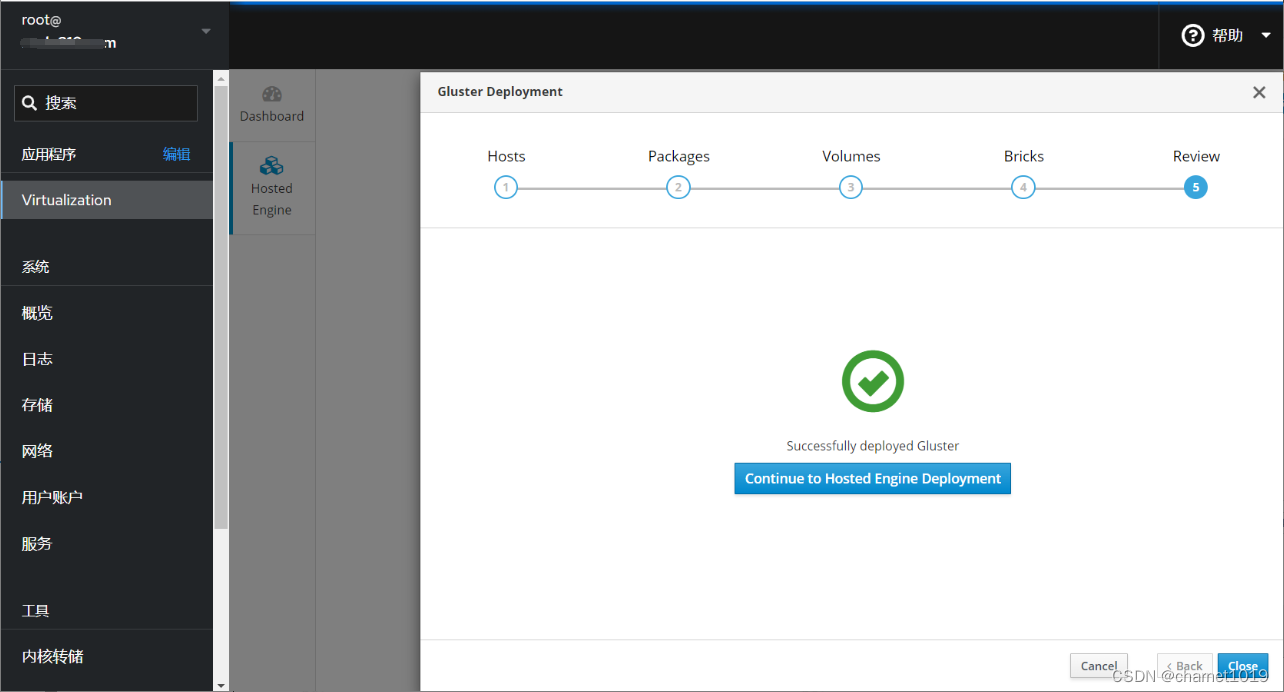
部署成功如下所示,点击”Continue to Hosted Engine Deployment”继续部署HostedEngine:
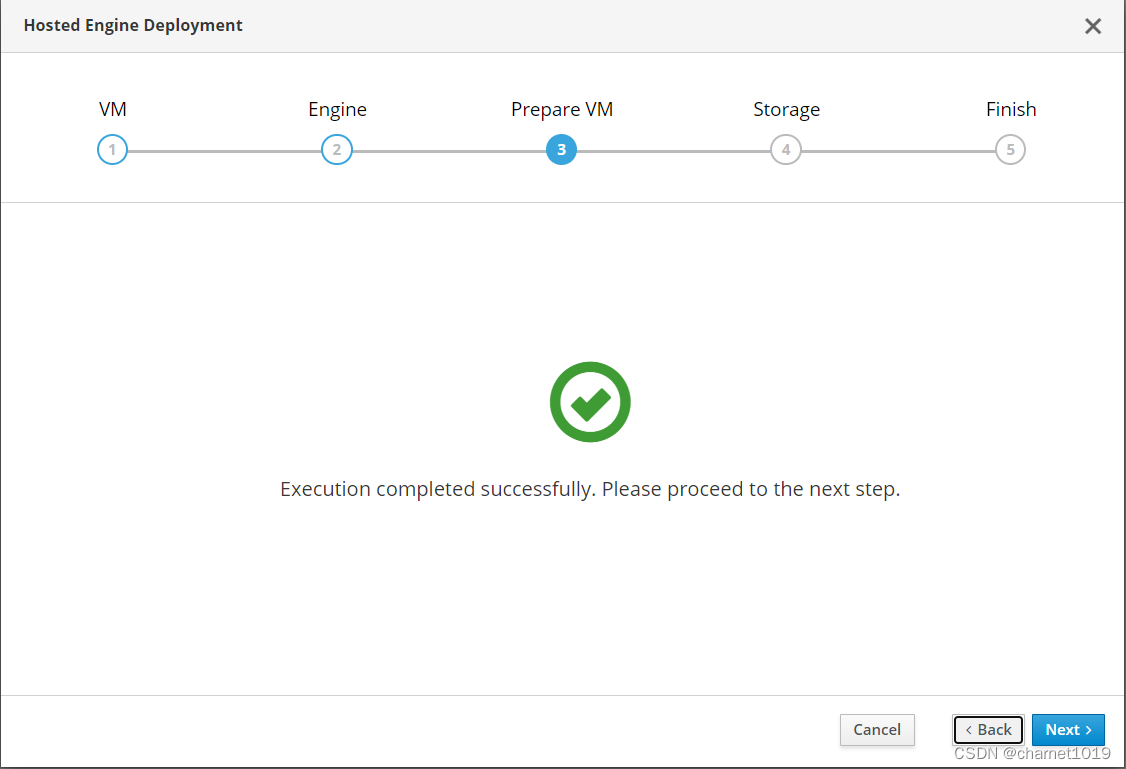
6. hosted engine部署如下,并点击下一步
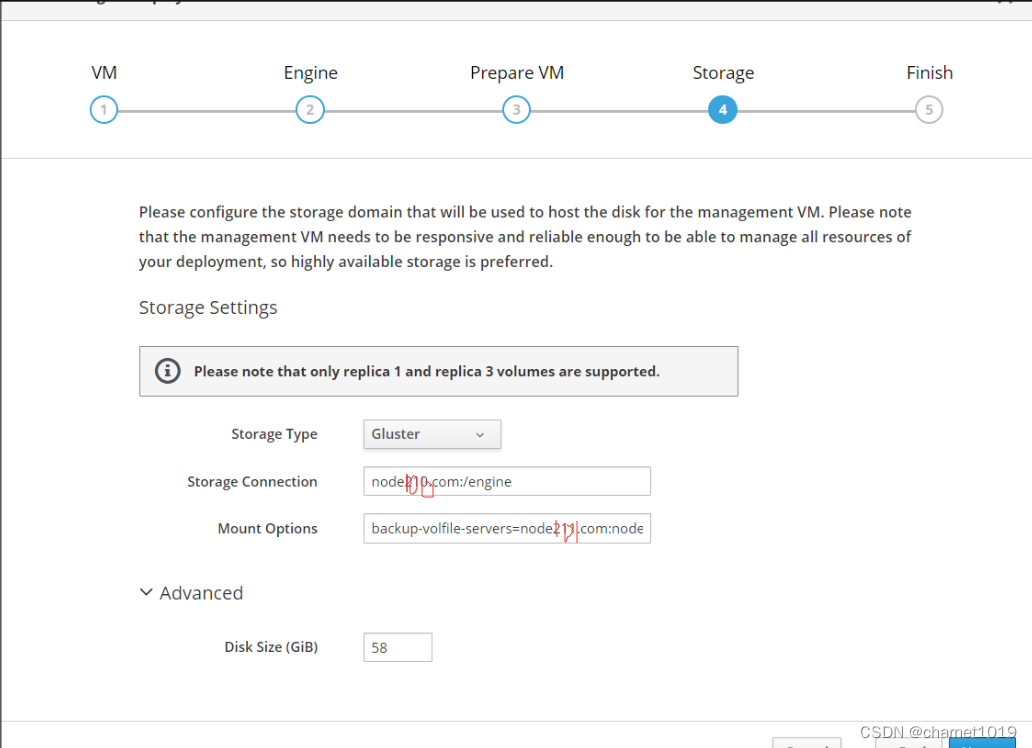
7. 配置glusterfs并点击下一步
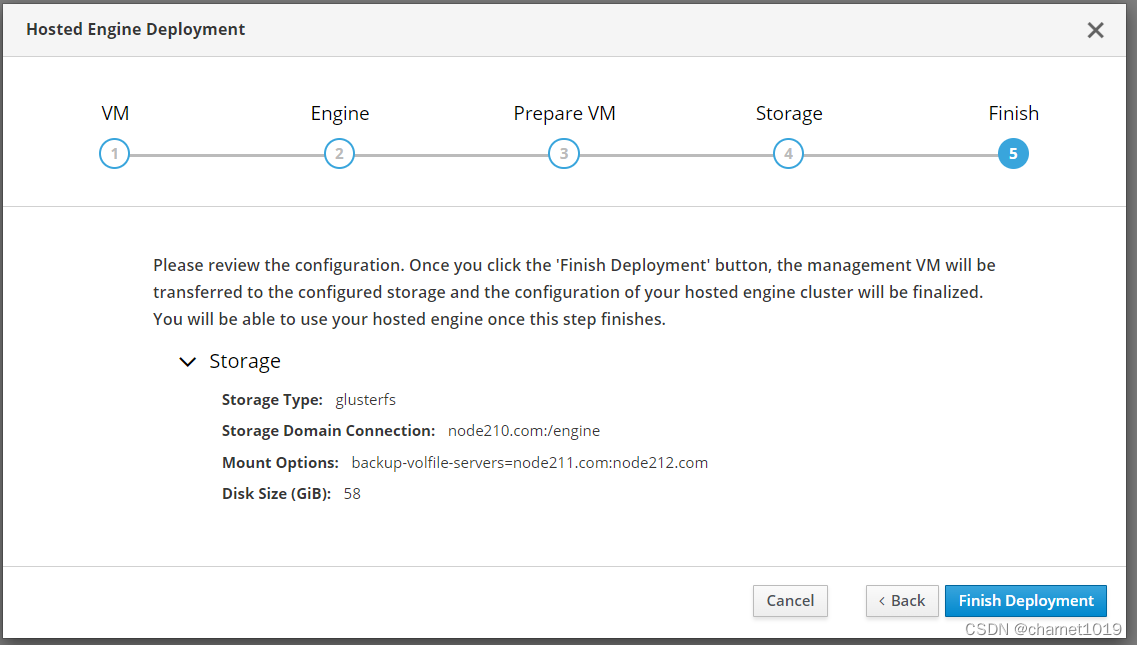
8. 点击”Finish Deployment”完成engine部署
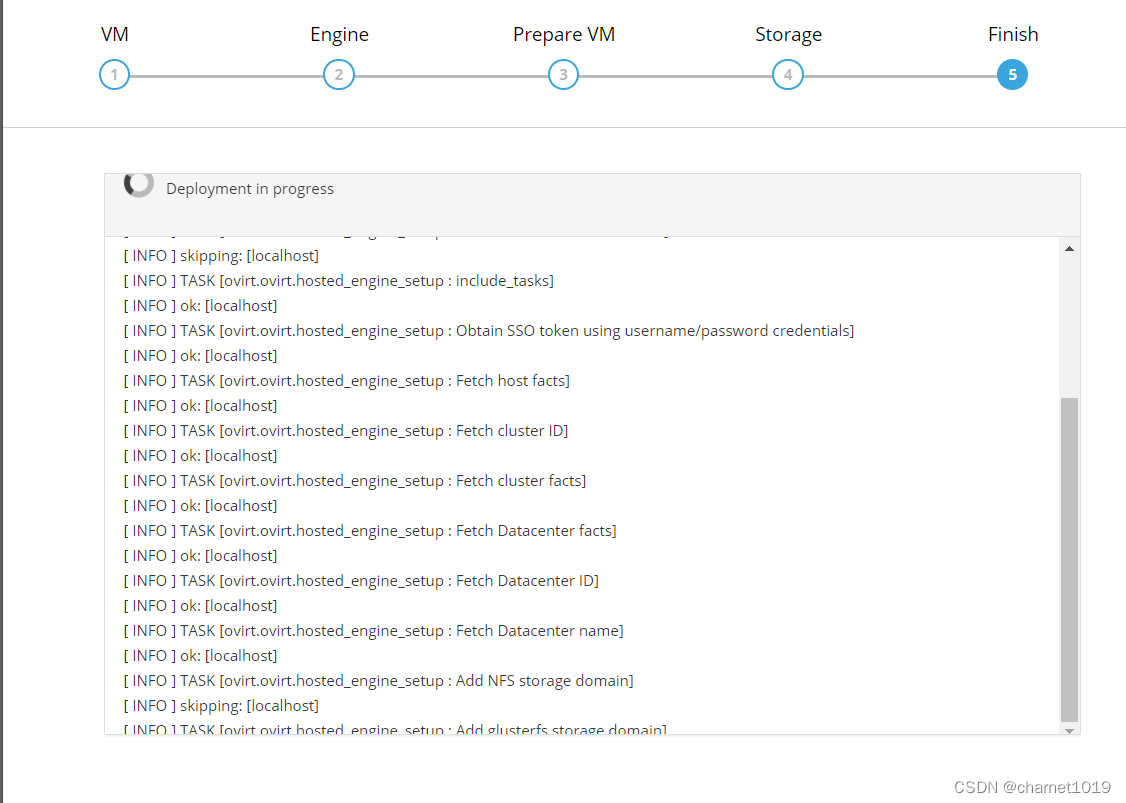
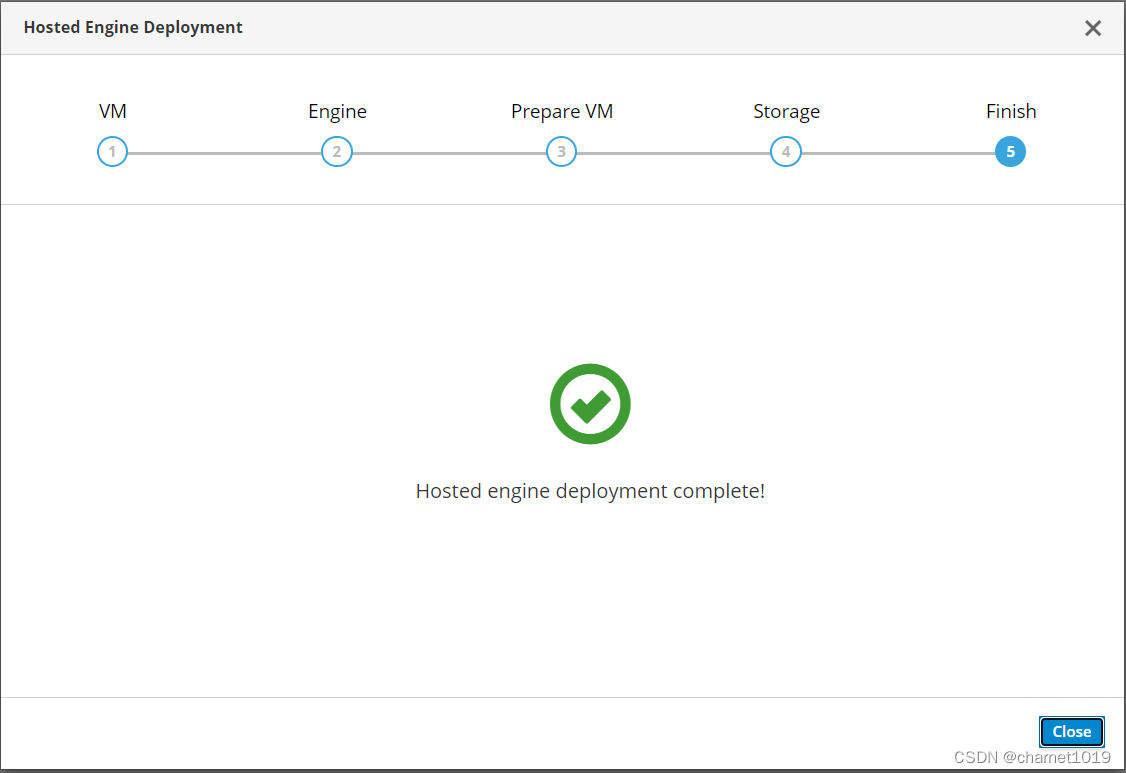
部署成功如下所示
通过SSH连接engine服务器设置主机解析
[root@engine103 ~]# cat /etc/hosts
127.0.0.1   localhost localhost.localdomain localhost4 localhost4.localdomain4
::1         localhost localhost.localdomain localhost6 localhost6.localdomain6
192.168.5.100 node100.com
192.168.5.101 node101.com
192.168.5.102 node102.com
192.168.5.103 engine103.com
- 在C:\Windows\System32\drivers\etc\hosts中添加engine主机名解析
192.168.5.100 node100.com
192.168.5.101 node101.com
192.168.5.102 node102.com
192.168.5.103 engine103.com
- 访问engine web管理页面,下载CA证书并导入为”受信任的根证书颁发机构”

点击”管理门户”

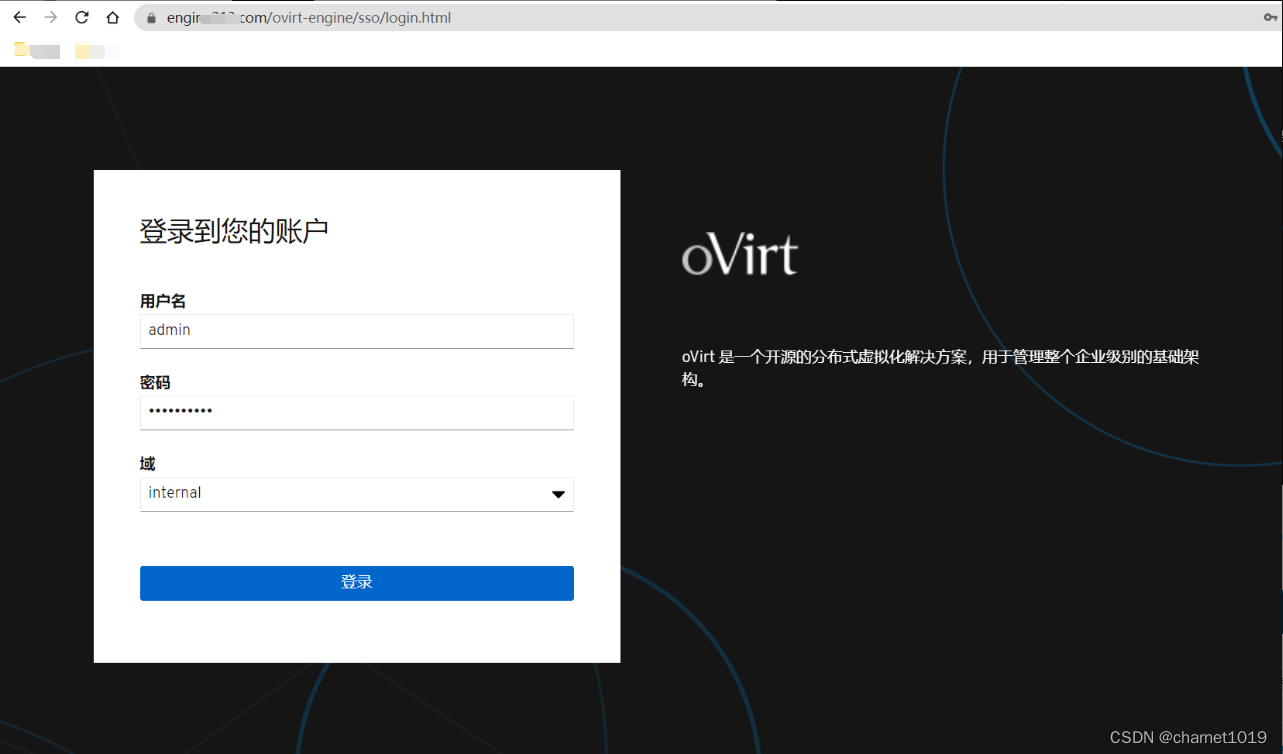
使用admin和部署engine过程设置的密码登录
- 在”计算”->”主机”添加主机节点
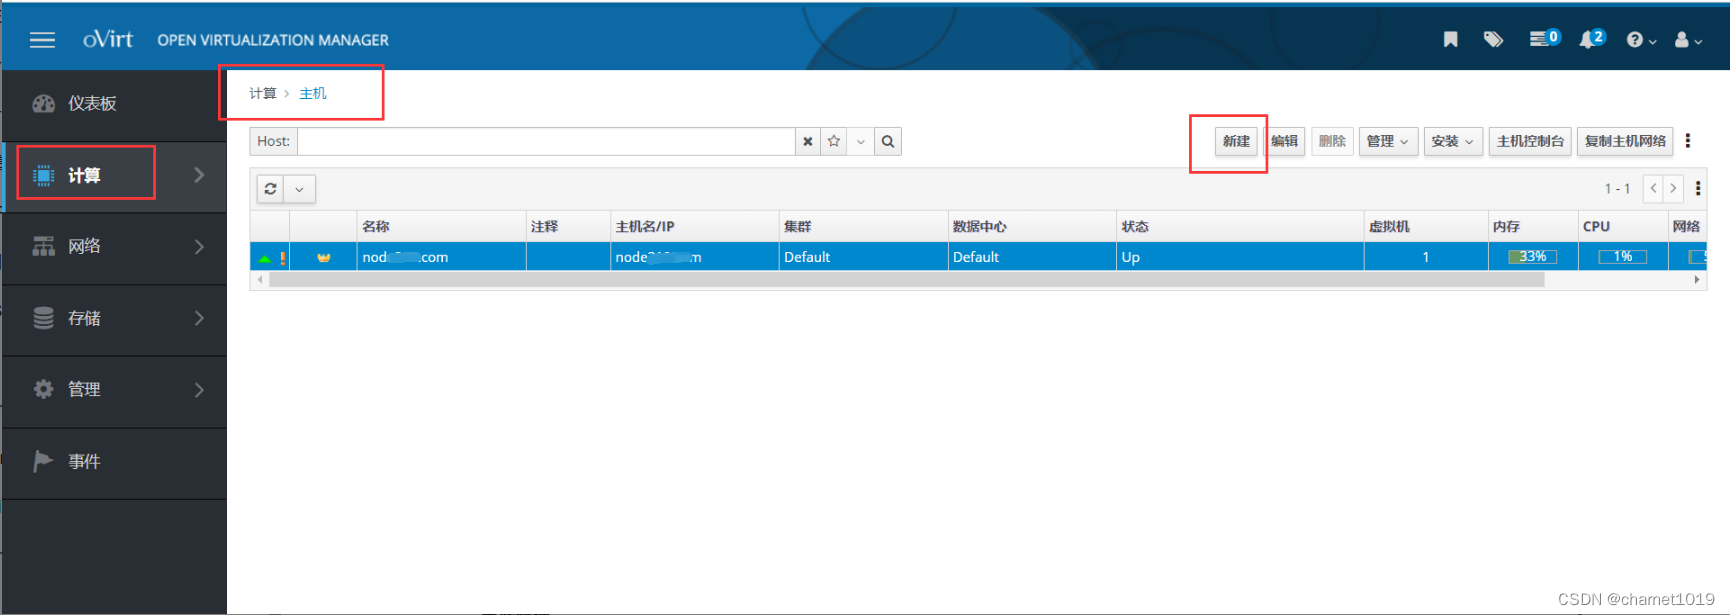
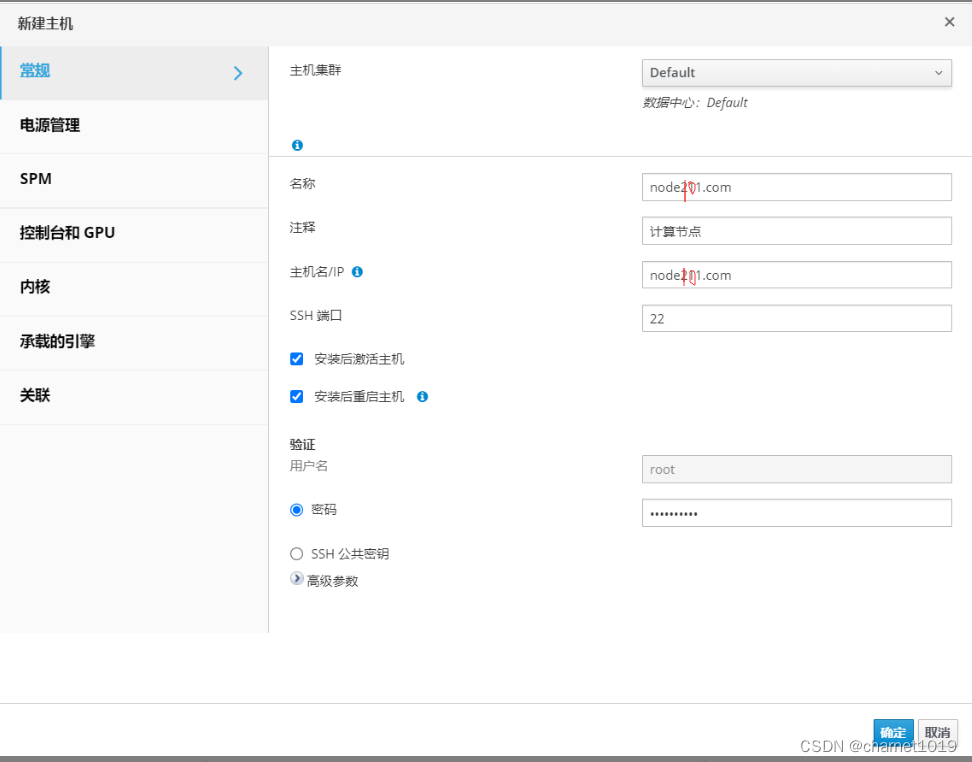
点击“新建”按钮,进入新建主机弹出窗,在“常规”标签页面,输入要添加的主机的名称、主机名和root密码,在“承载的引擎”标签页面,选择“部署”(注意这里一定要选,否则HostedEngine管理虚机无法实现迁移和高可用),如下:
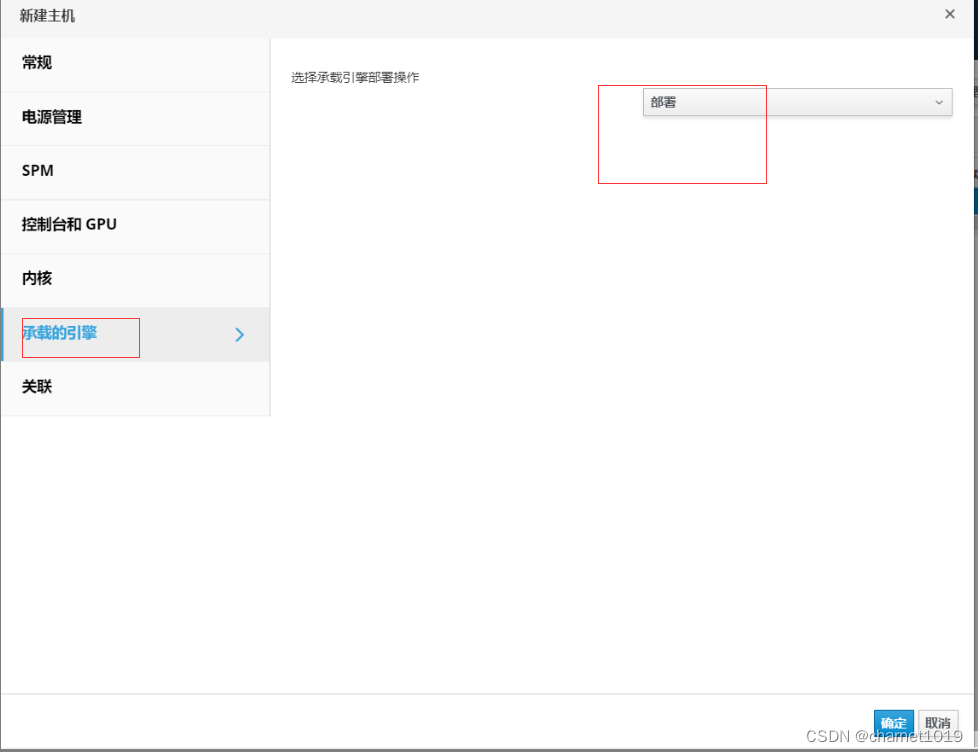
点确定时会弹出没有配置电源管理的提醒,这里先不配,直接点确定即可,生产环境中建议要配置电源管理,否则会影响高可用功能;使用同样的操作方法添加第三台主机;
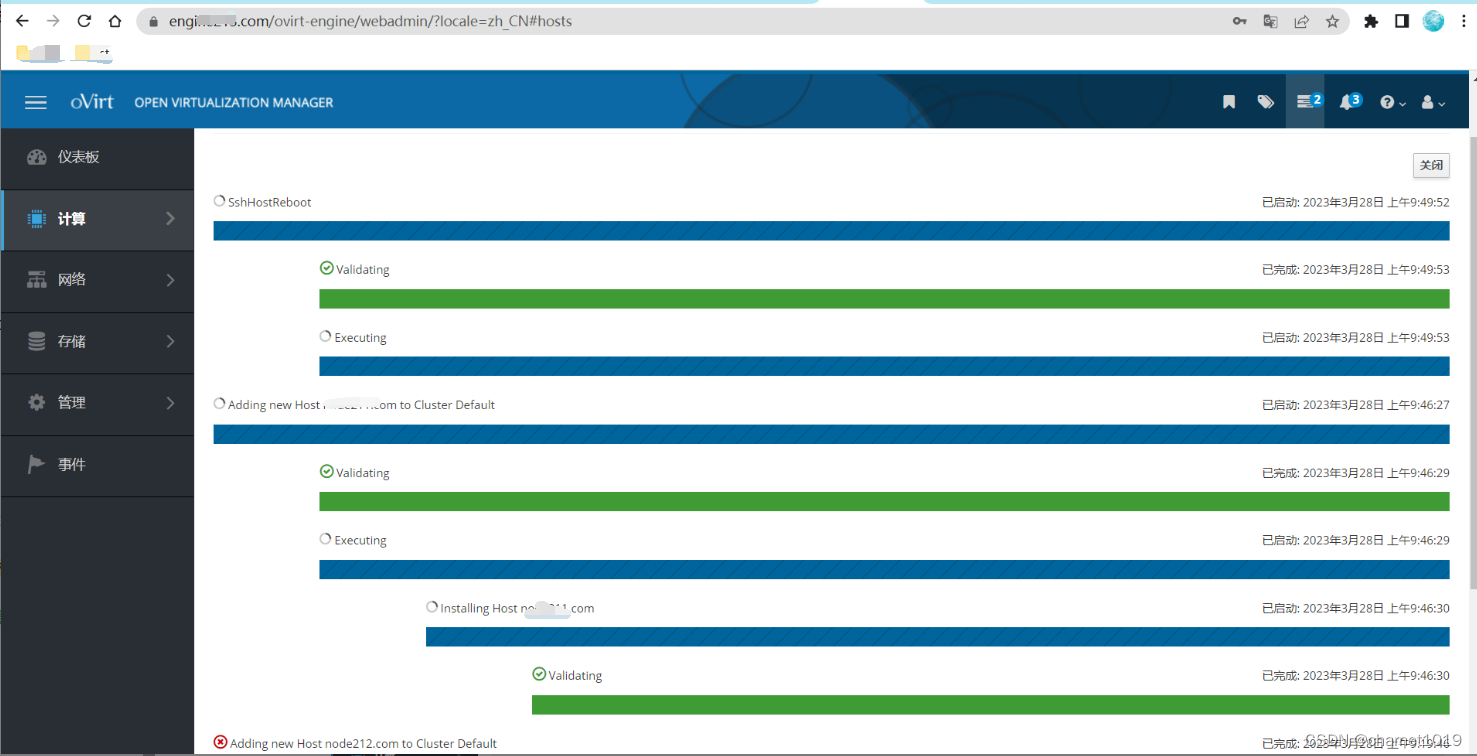
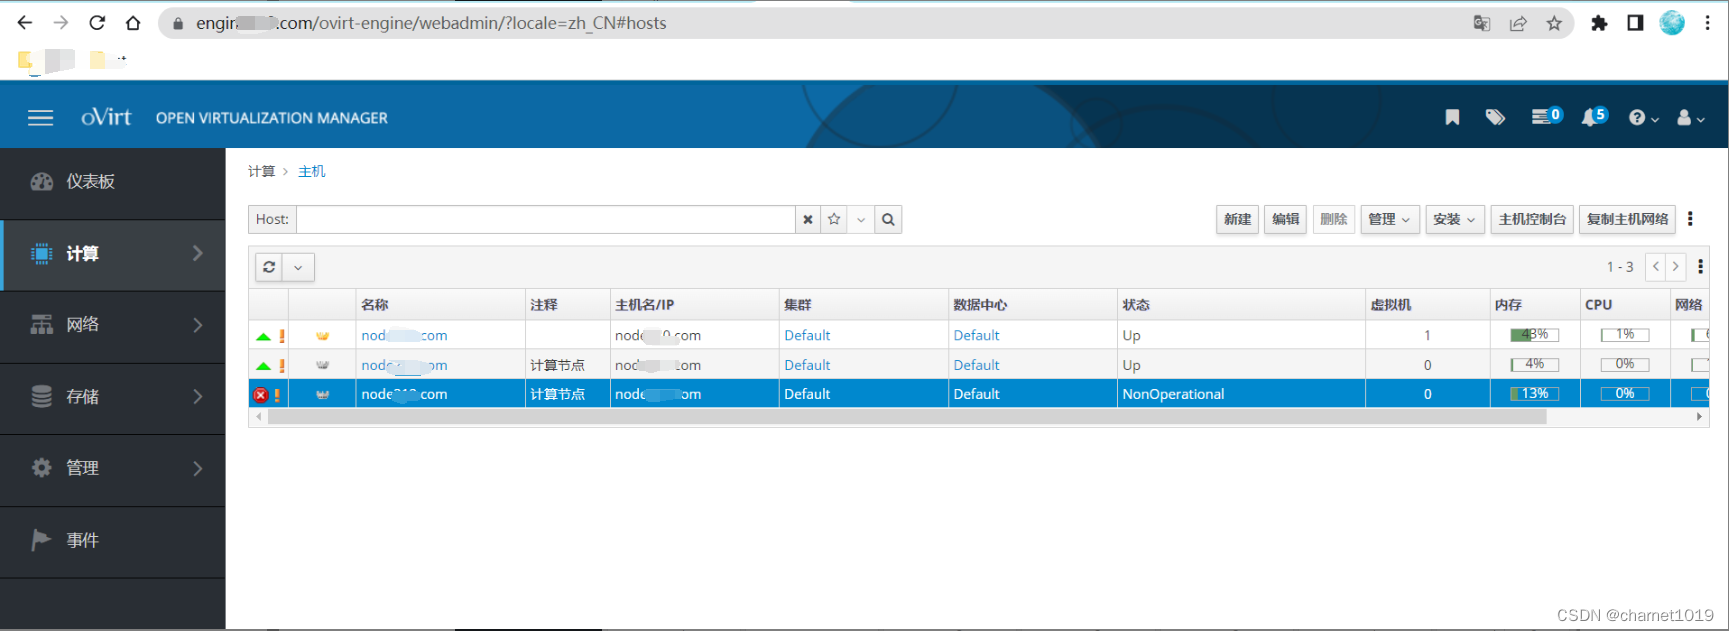
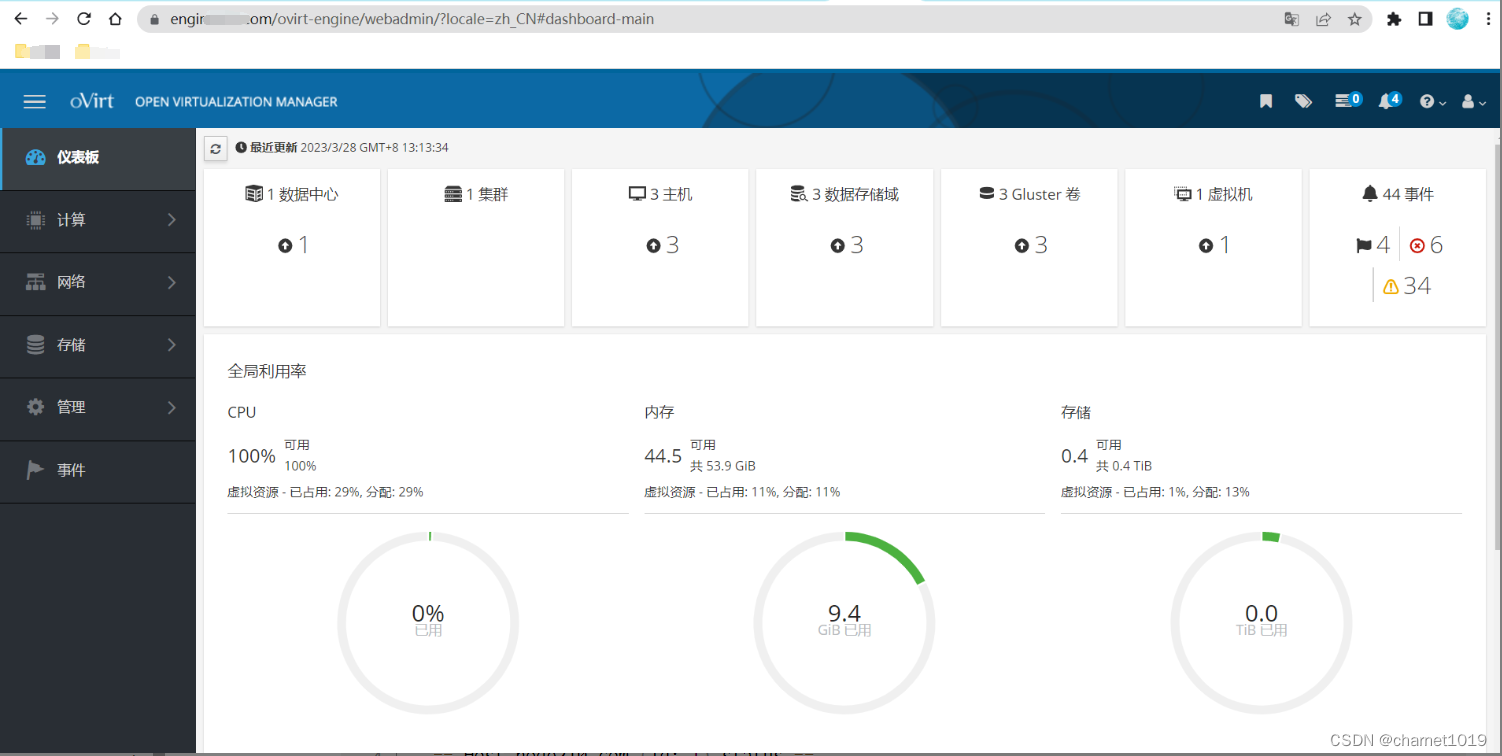
查看执行任务
- ssh连接node100查看hosted engine虚拟机状态
[root@node100 ~]# hosted-engine --vm-status


--== Host node100.com (id: 1) status ==--

Host ID                            : 1
Host timestamp                     : 93629
Score                              : 3400
Engine status                      : {"vm": "up", "health": "good", "detail": "Up"}
Hostname                           : node100.com
Local maintenance                  : False
stopped                            : False
crc32                              : 8a57c839
conf_on_shared_storage             : True
local_conf_timestamp               : 93629
Status up-to-date                  : True
Extra metadata (valid at timestamp):
    metadata_parse_version=1
    metadata_feature_version=1
    timestamp=93629 (Tue Mar 28 13:10:40 2023)
    host-id=1
    score=3400
    vm_conf_refresh_time=93629 (Tue Mar 28 13:10:40 2023)
    conf_on_shared_storage=True
    maintenance=False
    state=EngineUp
    stopped=False


--== Host node101.com (id: 2) status ==--

Host ID                            : 2
Host timestamp                     : 11987
Score                              : 3400
Engine status                      : {"vm": "down", "health": "bad", "detail": "unknown", "reason": "vm not running on this host"}
Hostname                           : node101.com
Local maintenance                  : False
stopped                            : False
crc32                              : 9a1bb88d
conf_on_shared_storage             : True
local_conf_timestamp               : 11987
Status up-to-date                  : True
Extra metadata (valid at timestamp):
    metadata_parse_version=1
    metadata_feature_version=1
    timestamp=11987 (Tue Mar 28 13:10:32 2023)
    host-id=2
    score=3400
    vm_conf_refresh_time=11987 (Tue Mar 28 13:10:32 2023)
    conf_on_shared_storage=True
    maintenance=False
    state=EngineDown
    stopped=False


--== Host node102.com (id: 3) status ==--

Host ID                            : 3
Host timestamp                     : 9503
Score                              : 3400
Engine status                      : {"vm": "down", "health": "bad", "detail": "unknown", "reason": "vm not running on this host"}
Hostname                           : node102.com
Local maintenance                  : False
stopped                            : False
crc32                              : 94bb3b22
conf_on_shared_storage             : True
local_conf_timestamp               : 9503
Status up-to-date                  : True
Extra metadata (valid at timestamp):
    metadata_parse_version=1
    metadata_feature_version=1
    timestamp=9503 (Tue Mar 28 13:10:34 2023)
    host-id=3
    score=3400
    vm_conf_refresh_time=9503 (Tue Mar 28 13:10:34 2023)
    conf_on_shared_storage=True
    maintenance=False
    state=EngineDown
    stopped=False
