本文为RNN做古诗生成的一个小demo,只要是为了完成课上的作业(由于训练比较慢,所以周期仅设置为3,大一点性能可能会更好),如有需要可以在这基础之上进行加工,数据集没办法上传,如有需要,可以私信我。
LSTM:

如上图所示LSTM神经元存在两个状态向量:h(t)和c(t)(可将h(t)视为短期状态,c(t)视为长期状态) 首先,将当前输入向量x(t)和先前的短期状态h(t-1)馈入四个不同的全连接层(FC)。它们都有不同的目的:
主要层是输出g(t)的层:它通常的作用是分析当前输入x(t)和先前(短期)状态 h(t-1),得到本时间步的信息。
遗忘门(由f(t)控制):控制长期状态的哪些部分应当被删除。
输入门(由i(t)控制):控制应将g(t)的哪些部分添加到长期状态。
输出门(由o(t)控制):控制应在此时间步长读取长期状态的哪些部分并输出 到h(t)和y(t)。
如图1,LSTM神经元运用了三个sigmoid激活函数和一个tanh激活函数,
Tanh 作用在于帮助调节流经网络的值,使得数值始终限制在 -1 和 1 之间。
Sigmoid 激活函数与 tanh 函数类似,不同之处在于 sigmoid 是把值压缩到0~1 这样的设置有助于更新或忘记信息,可将其理解为比例(任何数乘以 0 都得 0,这部分信息就会剔除掉;同样的,任何数乘以 1 都得到它本身,这部分信息就会完美地保存下来)因记忆能力有限,记住重要的,忘记不重要的。
例子:以输入门为例,首先输入x(t)和先前(短期)状态 h(t-1),得到本时间步的信息向量g(t) = (g1(t),g2(t),g3(t)……gn(t))(其中n个神经元的个数,g1(t)取值范围为(-1,1)),然后与向量i(t)=(i1(t),i2(t),i3(t)……in(t))(ii(t)取值范围为(0,1))对应元素相乘,得到向量(g1(t)*i1(t), g2(t)*i2(t)……gn(t)*in(t)),即本时间步有用信息,然后把他加上长期记忆c(t-1)中进行保存。
LSM关键的思想是网络可以学习长期状态下存储的内容、丢弃的内容以及从中读取的内容。当长期状态c(t-1)从左到右遍历网络时,可以看到它首先经过一个遗 忘门,丢掉了一些记忆,然后通过加法操作添加了一些新的记忆(由输入门选择的记忆)。结果c(t)直接送出来,无须任何进一步的转换。因此,在每个时间步长中,都会 丢掉一些记忆,并添加一些记忆。此外,在加法运算之后,长期状态被复制并通过tanh函数传输,然后结果被输出门滤波。这将产生短期状态h(t)(等于该时间步长的单元输出 y(t))。
原理:
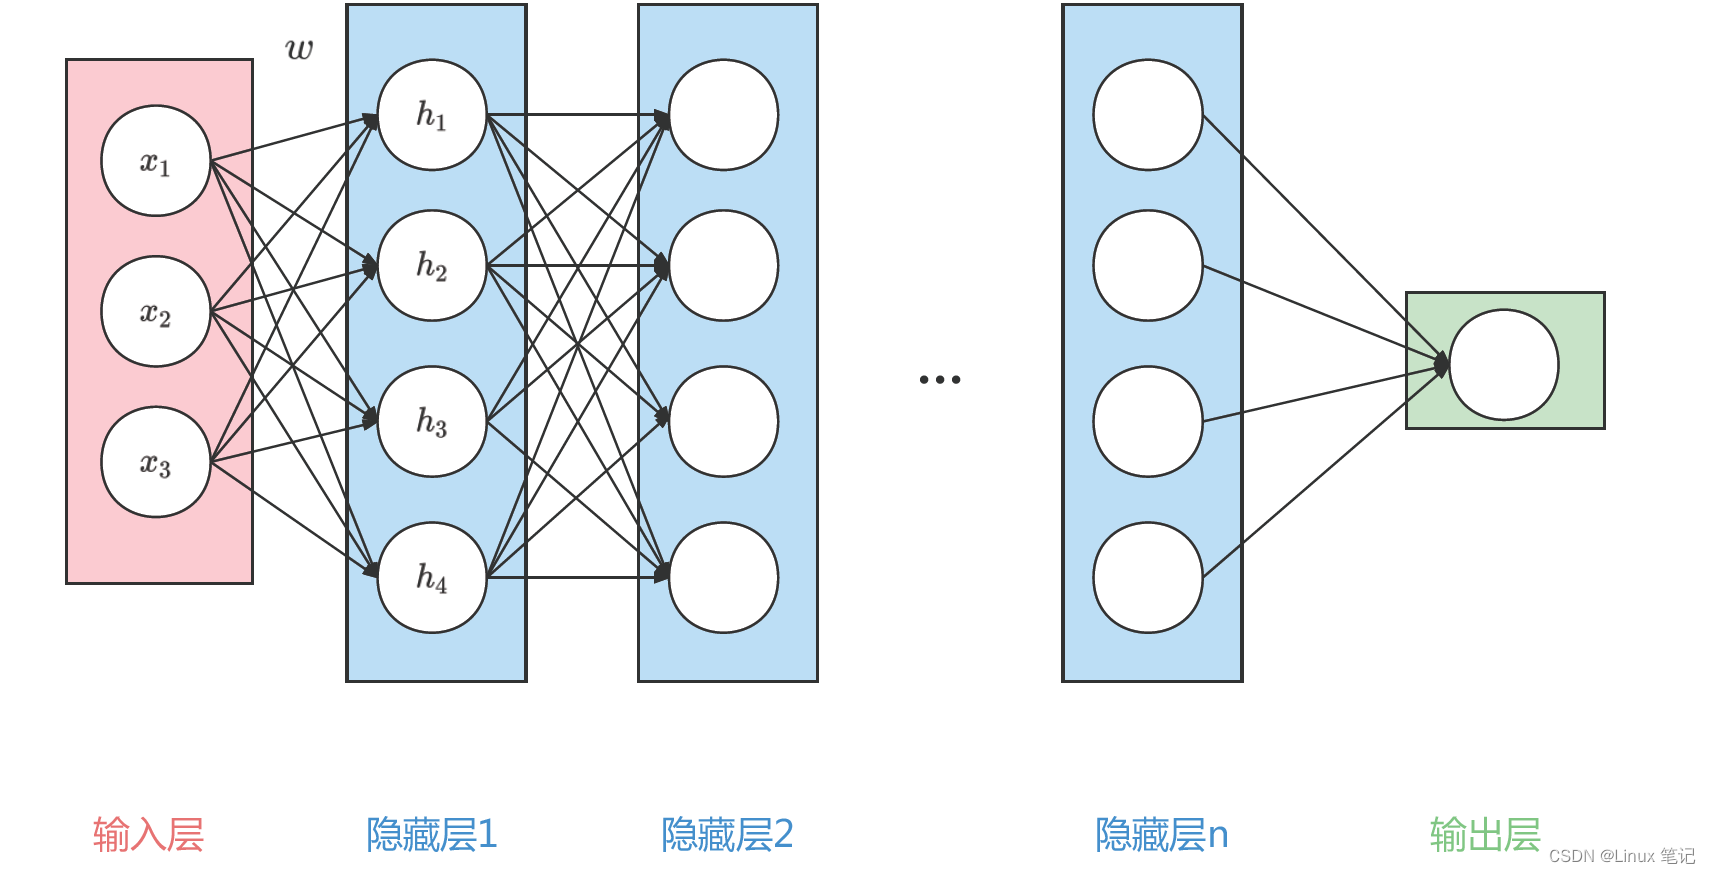
本文使用LSTM生成古诗,那么RNN是怎么用作我们的文本生成呢?话不多说,其实用RNN来生成的思想很简单, 就是将前一个字进行词嵌入,后一个字作为标签,将这个组合输入到RNN的网络里面等待训练拟合之后,再用一个引导词,训练出它的预测结果,再用其预测结果,来训练下一个词,循环往复,从而实现RNN生成文本的效果.
main.py
import numpy as np
import collections
import torch
from torch.autograd import Variable
import torch.optim as optim

import rnn

start_token = 'G'
end_token = 'E'
batch_size = 64

def process_poems1(file_name):
    """

    :param file_name:
    :return: poems_vector  have two dimmention ,first is the poem, the second is the word_index
    e.g. [[1,2,3,4,5,6,7,8,9,10],[9,6,3,8,5,2,7,4,1]]

    """
    poems = []
    i = 1
    with open(file_name, "r", encoding='utf-8', ) as f:
        for line in f.readlines():
            try:
                i = i+1

                title, content = line.strip().split(':')
                # content = content.replace(' ', '').replace(',','').replace('。','')
                content = content.replace(' ', '')
                if '_' in content or '(' in content or '(' in content or '《' in content or '[' in content or \
                                start_token in content or end_token in content:
                    continue
                if len(content) < 5 or len(content) > 80:
                    continue
                content = start_token + content + end_token
                poems.append(content)
            except ValueError as e:
                print(line)
                print(i)
                print("error")
                pass
    # 按诗的字数排序
    poems = sorted(poems, key=lambda line: len(line))
    # print(poems)
    # 统计每个字出现次数
    all_words = []
    j = 0
    for poem in poems:
        all_words += [word for word in poem]  # 数据连接
    counter = collections.Counter(all_words)  # 统计词和词频。

    count_pairs = sorted(counter.items(), key=lambda x: -x[1])  # d.items() 以列表的形式返回可遍历的元组数组 逆序排序
    words, _ = zip(*count_pairs) # zip(*) 可理解为解压,返回二维矩阵式

    words = words[:len(words)] + (' ',) #(‘ ’,) 为一个元素的元祖

    word_int_map = dict(zip(words, range(len(words))))
    poems_vector = [list(map(word_int_map.get, poem)) for poem in poems] # 第一位为一个函数,后一位为一个迭代器
    return poems_vector, word_int_map, words # 诗句的向量表示,单词映射表,单词表

def process_poems2(file_name):
    """
    :param file_name:
    :return: poems_vector  have tow dimmention ,first is the poem, the second is the word_index
    e.g. [[1,2,3,4,5,6,7,8,9,10],[9,6,3,8,5,2,7,4,1]]

    """
    poems = []
    with open(file_name, "r", encoding='utf-8', ) as f:
        # content = ''
        for line in f.readlines():
            try:
                line = line.strip()
                if line:
                    content = line.replace(' '' ', '').replace(',','').replace('。','')
                    if '_' in content or '(' in content or '(' in content or '《' in content or '[' in content or \
                                    start_token in content or end_token in content:
                        continue
                    if len(content) < 5 or len(content) > 80:
                        continue
                    # print(content)
                    content = start_token + content + end_token
                    poems.append(content)
                    # content = ''
            except ValueError as e:
                # print("error")
                pass
    # 按诗的字数排序
    poems = sorted(poems, key=lambda line: len(line))
    # print(poems)
    # 统计每个字出现次数
    all_words = []
    for poem in poems:
        all_words += [word for word in poem]
    counter = collections.Counter(all_words)  # 统计词和词频。
    count_pairs = sorted(counter.items(), key=lambda x: -x[1])  # 排序
    words, _ = zip(*count_pairs)
    words = words[:len(words)] + (' ',)
    word_int_map = dict(zip(words, range(len(words))))
    poems_vector = [list(map(word_int_map.get, poem)) for poem in poems]
    return poems_vector, word_int_map, words

def generate_batch(batch_size, poems_vec, word_to_int):
    #生成训练数据

    n_chunk = len(poems_vec) // batch_size  #34813/100 = 348 古诗的向量表示
    x_batches = []
    y_batches = []
    for i in range(n_chunk):
        start_index = i * batch_size
        end_index = start_index + batch_size
        x_data = poems_vec[start_index:end_index]
        y_data = []
        for row in x_data:
            y  = row[1:]
            y.append(row[-1])
            y_data.append(y)
        """
        x_data             y_data
        [6,2,4,6,9]       [2,4,6,9,9]  文本生成,所以用后面一位数据做label
        [1,4,2,8,5]       [4,2,8,5,5]
        """
        # print(x_data[0])
        # print(y_data[0])
        # exit(0)
        x_batches.append(x_data)
        y_batches.append(y_data)
    return x_batches, y_batches


def run_training():
    # 处理数据集
    # poems_vector, word_to_int, vocabularies = process_poems2('./tangshi.txt')
    poems_vector, word_to_int, vocabularies = process_poems1('./poems.txt')
    # 生成batch
    print("finish  loadding data")
    BATCH_SIZE = 100

    torch.manual_seed(5)
    word_embedding = rnn.word_embedding( vocab_length= len(word_to_int) + 1 , embedding_dim= 100) #6123 x 100
    #print(word_embedding.shape)

    rnn_model = rnn.RNN_model(batch_sz = BATCH_SIZE,vocab_len = len(word_to_int) + 1 ,word_embedding = word_embedding ,embedding_dim= 100, lstm_hidden_dim=128)
    # optimizer = optim.Adam(rnn_model.parameters(), lr= 0.001)
    optimizer=optim.RMSprop(rnn_model.parameters(), lr=0.01)

    loss_fun = torch.nn.NLLLoss()
    # rnn_model.load_state_dict(torch.load('./poem_generator_rnn'))  # if you have already trained your model you can load it by this line.

    for epoch in range(3):
        batches_inputs, batches_outputs = generate_batch(BATCH_SIZE, poems_vector, word_to_int) #生成训练数据 由batch组成的数组 348
        n_chunk = len(batches_inputs)
        for batch in range(n_chunk):
            batch_x = batches_inputs[batch]
            batch_y = batches_outputs[batch] # (batch , time_step)

            loss = 0
            for index in range(BATCH_SIZE):  #batch_size = 100
                x = np.array(batch_x[index], dtype = np.int64)
                y = np.array(batch_y[index], dtype = np.int64)

                x = Variable(torch.from_numpy(np.expand_dims(x,axis=1))) #将数组转换成张量 np.expand_dims扩展数据的形状 x.sahpe = 7x1,
                y = Variable(torch.from_numpy(y ))
                pre = rnn_model(x) # 7 x 6125
                loss += loss_fun(pre , y)
                if index == 0:
                    _, pre = torch.max(pre, dim=1)# pre为张量,tolist转换成列表
                    print('prediction', pre.data.tolist()) # the following  three line can print the output and the prediction
                    print('b_y       ', y.data.tolist())   # And you need to take a screenshot and then past is to your homework paper.
                    print('*' * 30)
            loss  = loss  / BATCH_SIZE
            print("epoch  ",epoch,'batch number',batch,"loss is: ", loss.data.tolist())
            optimizer.zero_grad()
            loss.backward()
            torch.nn.utils.clip_grad_norm(rnn_model.parameters(), 1)    # 梯度裁剪 可以预防梯度爆炸,参数的平方和
            optimizer.step()  #训练参数

            if batch % 20 ==0:
                torch.save(rnn_model.state_dict(), './poem_generator_rnn')
                print("finish  save model")


def to_word(predict, vocabs):  # 预测的结果转化成汉字
    sample = np.argmax(predict)

    if sample >= len(vocabs):
        sample = len(vocabs) - 1
    return vocabs[sample]


def pretty_print_poem(poem):  # 令打印的结果更工整
    shige=[]
    for w in poem:
        if w == start_token or w == end_token:
            break
        shige.append(w)
    poem_sentences = poem.split('。')
    for s in poem_sentences:
        if s != '' and len(s) > 2:
        #     print(s + '。')
            print(s + '。')


def gen_poem(begin_word):
    # poems_vector, word_int_map, vocabularies = process_poems2('./tangshi.txt')  #  use the other dataset to train the network
    poems_vector, word_int_map, vocabularies = process_poems1('./poems.txt')
    word_embedding = rnn.word_embedding(vocab_length=len(word_int_map) + 1, embedding_dim=100)
    rnn_model = rnn.RNN_model(batch_sz=64, vocab_len=len(word_int_map) + 1, word_embedding=word_embedding,
                                   embedding_dim=100, lstm_hidden_dim=128)

    rnn_model.load_state_dict(torch.load('./poem_generator_rnn'))
    # 指定开始的字

    poem = begin_word
    word = begin_word
    while word != end_token:
        input = np.array([word_int_map[w] for w in poem],dtype= np.int64)
        input = Variable(torch.from_numpy(input))
        output = rnn_model(input, is_test=True)
        word = to_word(output.data.tolist(), vocabularies)
        poem += word
        if len(poem) > 30:
            break
    return poem


#run_training()  # 如果不是训练阶段 ,请注销这一行 。 网络训练时间很长。


pretty_print_poem(gen_poem("日"))
pretty_print_poem(gen_poem("红"))
pretty_print_poem(gen_poem("山"))
pretty_print_poem(gen_poem("夜"))
pretty_print_poem(gen_poem("湖"))
pretty_print_poem(gen_poem("湖"))
pretty_print_poem(gen_poem("湖"))
pretty_print_poem(gen_poem("君"))
rnn.py
import torch.nn as nn
import torch
from torch.autograd import Variable
import torch.nn.functional as F

import numpy as np

def weights_init(m):
    classname = m.__class__.__name__  #   obtain the class name
    if classname.find('Linear') != -1:
        weight_shape = list(m.weight.data.size()) #6123 x 128
        fan_in = weight_shape[1]
        fan_out = weight_shape[0]
        w_bound = np.sqrt(6. / (fan_in + fan_out))
        m.weight.data.uniform_(-w_bound, w_bound)
        m.bias.data.fill_(0)
        print("inital  linear weight ")


class word_embedding(nn.Module):
    def __init__(self,vocab_length , embedding_dim):
        super(word_embedding, self).__init__()
        w_embeding_random_intial = np.random.uniform(-1,1,size=(vocab_length ,embedding_dim)) #生成服从均匀分布的随机数
        self.word_embedding = nn.Embedding(vocab_length,embedding_dim) #创建一个embedding层
        self.word_embedding.weight.data.copy_(torch.from_numpy(w_embeding_random_intial))
    def forward(self,input_sentence):
        """
        :param input_sentence:  a tensor ,contain several word index.
        :return: a tensor ,contain word embedding tensor
        """
        sen_embed = self.word_embedding(input_sentence)
        return sen_embed


class RNN_model(nn.Module):
    def __init__(self, batch_sz ,vocab_len ,word_embedding,embedding_dim, lstm_hidden_dim):
        super(RNN_model,self).__init__()

        self.word_embedding_lookup = word_embedding
        self.batch_size = batch_sz
        self.vocab_length = vocab_len
        self.word_embedding_dim = embedding_dim
        self.lstm_dim = lstm_hidden_dim
        #########################################
        # here you need to define the "self.rnn_lstm"  the input size is "embedding_dim" and the output size is "lstm_hidden_dim"
        # the lstm should have two layers, and the  input and output tensors are provided as (batch, seq, feature)
        # ???

        self.rnn_lstm = nn.LSTM(input_size=embedding_dim,hidden_size=lstm_hidden_dim, num_layers=2,batch_first=True)

        ##########################################
        self.fc = nn.Linear(lstm_hidden_dim, vocab_len )
        self.apply(weights_init) # call the weights initial function.
        self.softmax = nn.LogSoftmax() # the activation function.
        # self.tanh = nn.Tanh()
    def forward(self,sentence,is_test = False):
        batch_input = self.word_embedding_lookup(sentence).view(1,-1,self.word_embedding_dim)  # sentence=[7,1] [7x1x100] batch_input=[1,7,100])
        # print(batch_input.size()) # print the size of the input
        ################################################
        # here you need to put the "batch_input"  input the self.lstm which is defined before.
        # the hidden output should be named as output, the initial hidden state and cell state set to zero.
        # ???
        #print(batch_input.shape)
        output,_ = self.rnn_lstm(batch_input) # 1x7x128
        ################################################
        out = output.contiguous().view(-1,self.lstm_dim)  #1x128
        #print(out.shape)
        out =  F.relu(self.fc(out))
        out = self.softmax(out)

        if is_test:
            prediction = out[ -1, : ].view(1,-1) #[1,6125]
            #prediction = torch.max(out,0)
            output = prediction
        else:
           output = out

        # print(out)
        return output
