vue3组件通信方式有以下几种:porps,$emit, bus,v-model,useAttrs,$ref/$parent,provide/inject,pinia,slot。下面将逐一讲解。
目录
1.porps:实现父子组件通信,子组件接收的数据还是只读
2.$emit
3.全局事件总线 $bus,使用mitt
4.v-model传值
5. useAttrs:获取组件标签身上属性与事件
6.$ref/$parent
7.provide/inject
8.pinia :vuex:集中管理状态容器,可以实现任意组件之间的通信
9.slot 插槽分为默认插槽、具名插槽、作用域插槽(可以传递数据的插槽,子组件可以将数据回传给父组件的插槽)
1.porps:实现父子组件通信,子组件接收的数据还是只读
父组件中,引入子组件并给子组件绑定一个money参数
<template>
  <div id="app">
    <h1>父组件</h1>
    <h3>富一代资产{{ money }}元</h3>
    <index1 :money="money"></index1>
  </div>
</template>

<script lang="ts" setup>

  import index1 from './view/index.vue'
  import { ref } from 'vue'

  let money = ref(1000000000000)

</script>

<style scoped>
#app {
  width: 100vw;
  height: 100vh;
  color: #000;
  padding: 50px;
  box-sizing: border-box;
}
</style>
子组件中,使用defineProps接收,在template中,可以直接使用money,
<template>
  <div class="index1">
    <h1>子组件1</h1>
    <h3>儿子不知道父亲有{{ porps.money }}元</h3>
     <h3>
      儿子知道了会争这{{ money }}元(template中可以直接省略porps---script中无法省略!)
    </h3>
  </div>
</template>

<script setup lang="ts">
  import { ref } from 'vue'
  // porps:实现父子组件通信,props数据还是只读
  // 组合式api 使用 defineProps 接收父子组件传递过来的数据,可以是数组也可以是对象,
  //不需要引入  template中可直接使用
  const porps = defineProps(['money'])
  console.log(porps)

</script>

<style lang="scss" scoped>
.index1 {
  background-color: azure;
  padding: 12px;
}
</style>
示例
2.$emit
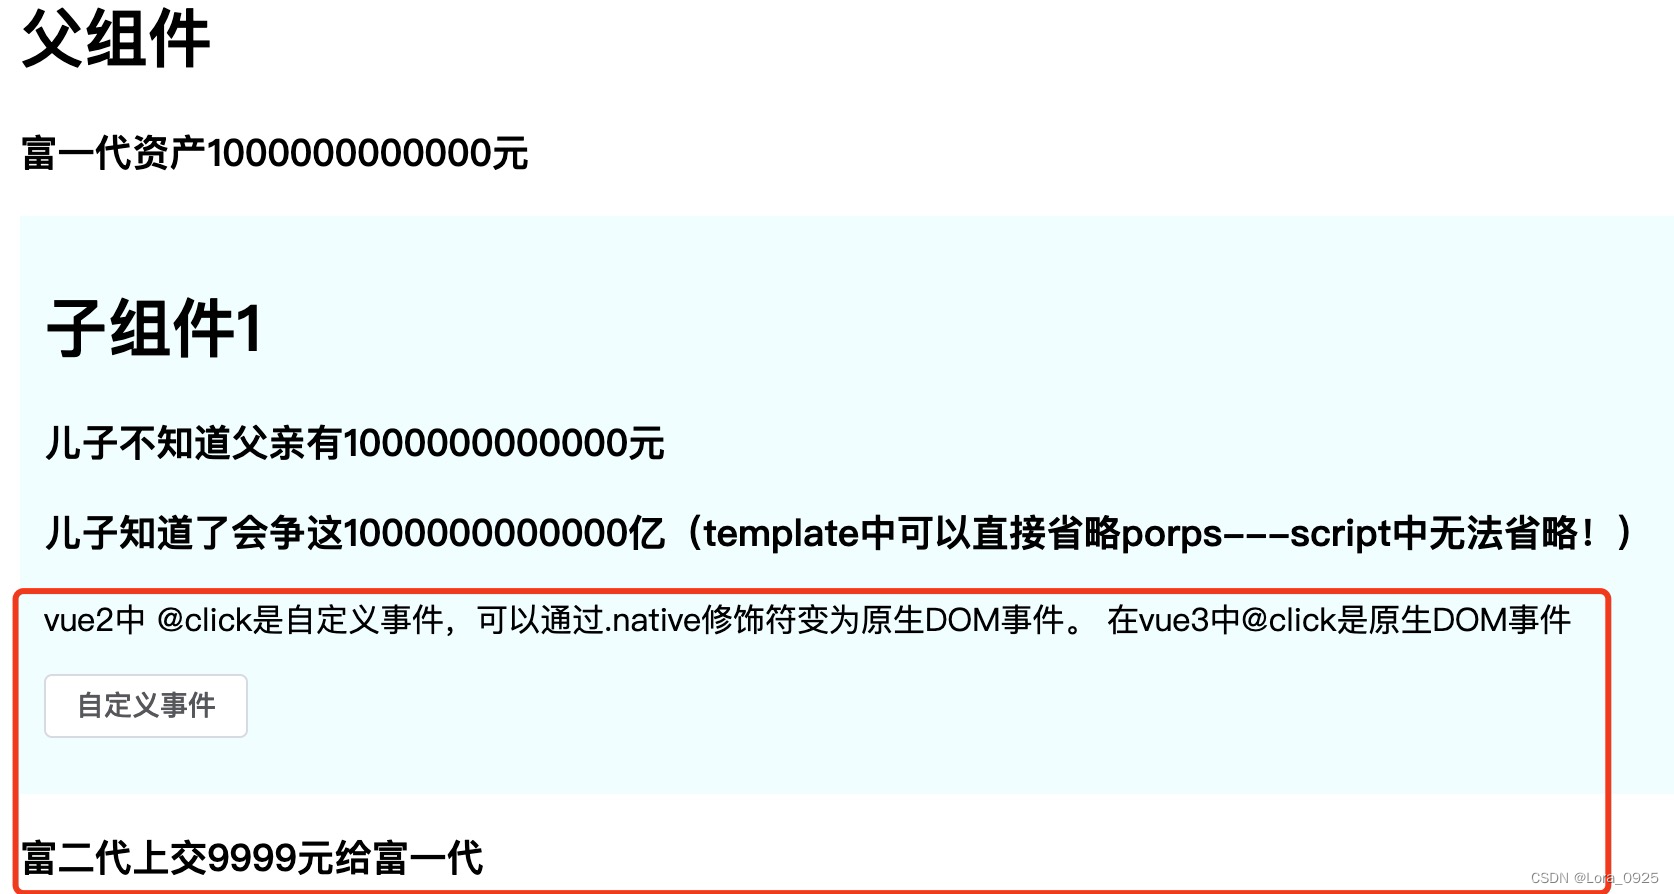
说到$emit就要说一下自定义事件,在vue框架中事件分为两种:一种是原生的DOM事件,另外一种自定义事件。原生DOM事件可以让用户与网页进行交互,比如click、dbdlick、change、mouseenter、mouseleave...自定义事件可以实现子组件给父组件传递数据。vue2中的@click绑定的是自定义事件 ,可以通过.native修饰符变为原生DOM事件 。vue3中绑定的是原生事件,利用defineEmits方法返回函数触发自定义事件,不需要引入,直接使用。
父组件
<template>
  <div id="app">
    <h1>父组件</h1>
    <h3>富一代资产{{ money }}元</h3>
    <index1 :money="money" @xxx="handlerXXX"></index1>
    <h3>{{ son }}</h3>
  </div>
</template>

<script lang="ts" setup>

  import index1 from './view/index.vue'
  import { ref } from 'vue'

  let money = ref(1000000000000)
  let son = ref('')
  const handlerXXX = (value: string) => {
    son.value = value
  }

</script>

<style scoped>
#app {
  width: 100vw;
  height: 100vh;
  color: #000;
  padding: 50px;
  box-sizing: border-box;
}
</style>
子组件
<template>
  <div class="index1">
    <h1>子组件1</h1>
    <h3>儿子不知道父亲有{{ porps.money }}元</h3>
     <h3>
      儿子知道了会争这{{ money }}元(template中可以直接省略porps---script中无法省略!)
    </h3>
    <p>
       vue2中 @click是自定义事件,可以通过.native修饰符变为原生DOM事件。
       在vue3中@click是原生DOM事件
     </p>
     <el-button @click="handlerClick">自定义事件</el-button>
  </div>
</template>

<script setup lang="ts">
  import { ref } from 'vue'
  //------porps-------
  // porps:实现父子组件通信,props数据还是只读
  // 组合式api 使用 defineProps 接收父子组件传递过来的数据,可以是数组也可以是对象,
  //不需要引入  template中可直接使用
  const porps = defineProps(['money'])
  console.log(porps)

  //------$emit-------
  //defineEmits方法返回函数出发自定义事件,不需要引入 直接使用
  const $emit = defineEmits(['xxx'])
  const handlerClick = () => {
    console.log('触发自定义事件')
    $emit('xxx', '富二代上交9999元给富一代')
  }

</script>

<style lang="scss" scoped>
.index1 {
  background-color: azure;
  padding: 12px;
}
</style>
示例:
3.全局事件总线 $bus,使用mitt
Mitt是一个小巧的JavaScript发布-订阅库,用于在应用程序中实现事件监听和触发。
安装:npm install mitt -S
在src目录下新建bus文件夹,bus文件夹下新建index.ts

// 引入mitt插件  index.ts
import mitt from "mitt"

const $bus = mitt();
export default $bus
接收组件:引入上面新建的bus,$bus.on 接收将来兄弟组件传递的数据
<template>
  <div class="index1">
    <h1>子组件1</h1>
     <p>收到{{ car }}</p>
  </div>
</template>

<script setup lang="ts">
  import { ref ,onMounted} from 'vue'

  // 事件总线 引入$bus
  import $bus from '@/bus'

  let car = ref('')
  // 组件挂载完毕后,当前组件绑定一个事件,接收将来兄弟组件传递的数据
  onMounted(() => {
    $bus.on('car', (value: string) => {
      car.value = value
    })
  })

</script>

<style lang="scss" scoped>
.index1 {
  background-color: azure;
  padding: 12px;
}
</style>
发送组件:$bus.emit 使用发送
<template>
  <div class="index2">
    <h1>子组件2</h1>
    <h3>富二代的亲弟钱包有999999元</h3>
    <el-button @click="handler">点击送富二代哥哥法拉利跑车一台</el-button>
  </div>
</template>
<script setup lang="ts">
import $bus from '@/bus'

const handler = () => {
  $bus.emit('car', '弟弟送哥哥的法拉利跑车一台')
}
</script>
<style lang="scss" scoped>
.index2 {
  background-color: antiquewhite;
  padding: 12px;
  margin: 12px 0;
}
</style>
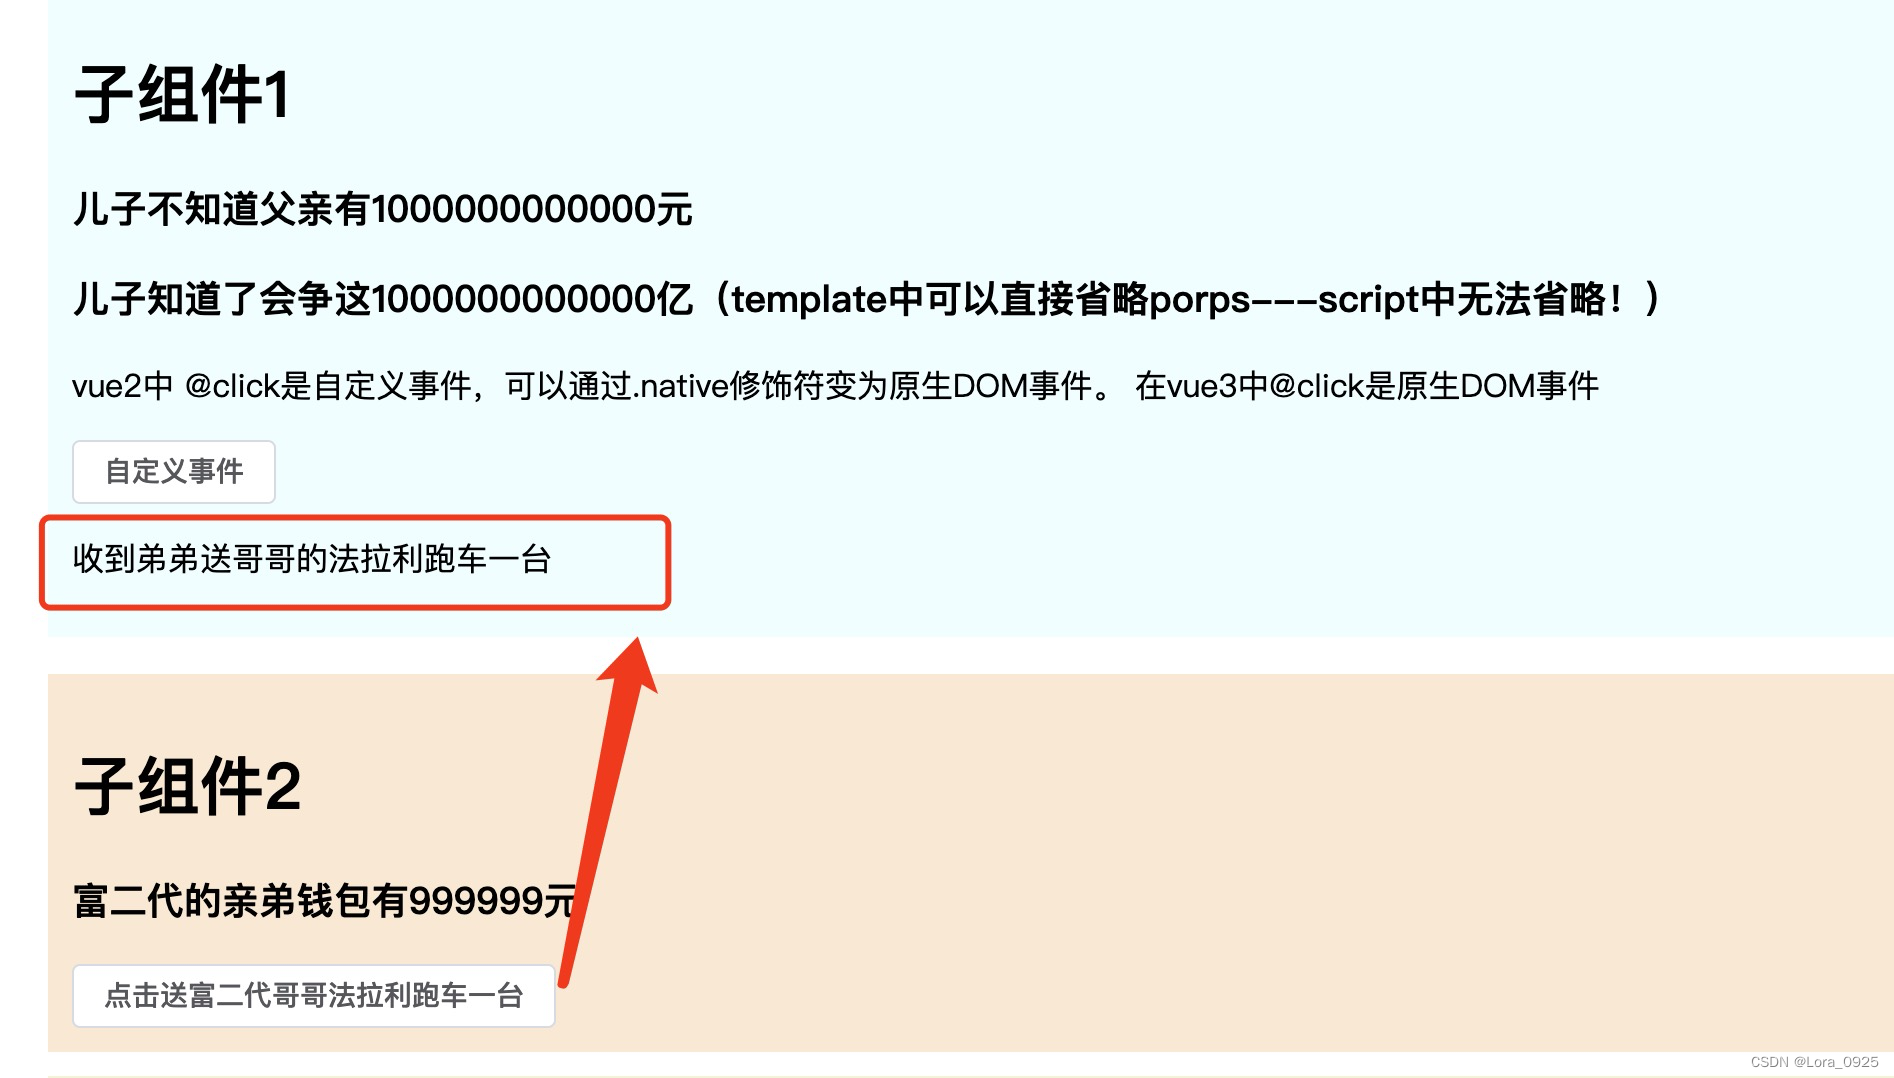
示例:
4.v-model传值
在vue2中v-model绑定了一个value值,和input事件,并且只能绑定一个v-model。
而在vue3中给子组件传递一个porps,并且绑定了一个自定义事件。
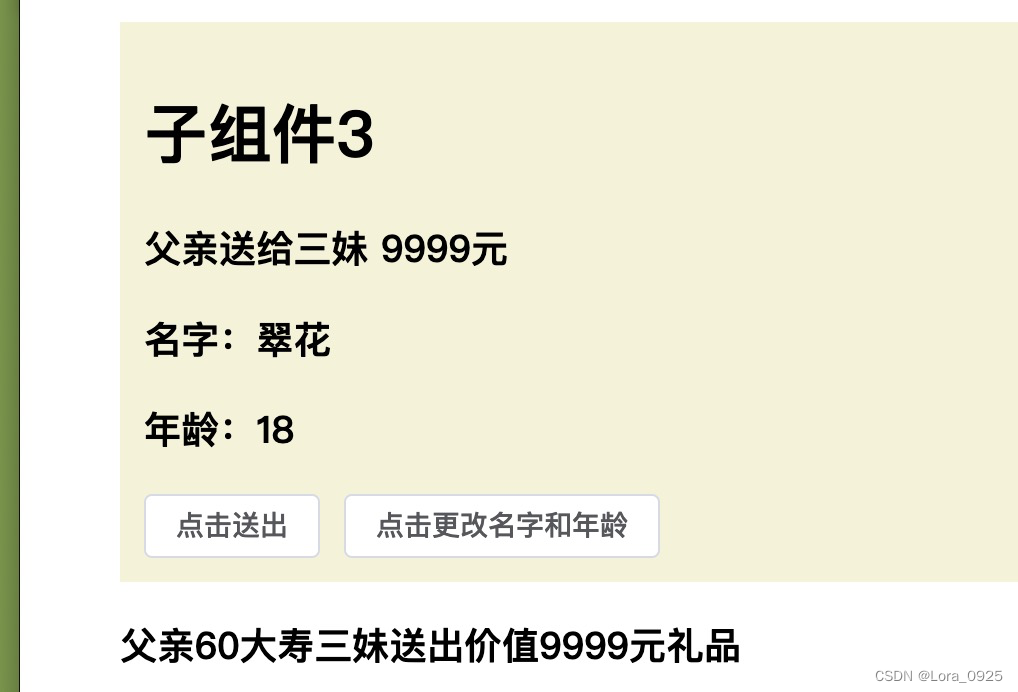
此处有两种用法,方法一
porps + @update:money 代表自定义事件。代码如下:
父组件代码:
<template>
  <div id="app">
    <h1>父组件</h1>
     <!--  porps @update:money代表自定义事件,也可以换成其他名字  -->
     <!-- v-model
      1.相当于子子组件传递props[modelValue]
      2.相当于给子组件绑定了自定义事件update:modelValue
     -->
    <index3 :modelValue="money" @update:modelValue="handleMoney"></index3>
    <h3>父亲60大寿三妹送出价值{{ money3 }}元礼品</h3>
 </div>
</template>
<script lang="ts" setup>
  import index3 from './view/index3.vue'
  import { ref } from 'vue'
  // 接收子组件传递的数据
  let money3 = ref(666666)
   const handleMoney = (value: number) => {
     console.log('接收改变的值:' + value)
     money3.value = value
   }
</script>

<style scoped>
#app {
  width: 100vw;
  height: 100vh;
  color: #000;
  padding: 50px;
  box-sizing: border-box;
}
</style>
子组件
<template>
  <div class="index3">
    <h1>子组件3</h1>
    <h3>父亲送给三妹 {{ modelValue }}元</h3>
    <el-button @click="send">点击送出</el-button>
  </div>
</template>
<script setup lang="ts">
  // v-module :收集表单数据,数据双向绑定,组件之间的通信去实现父子数据同步业务

  defineProps(['modelValue'])
  let $emit = defineEmits(['update:modelValue'])

  const send = () => {
    $emit('update:modelValue', 9999)
  }

</script>
<style lang="scss" scoped>
.index3 {
  background-color: beige;
  padding: 12px;
}
</style>

方法二
1.相当于给子组件传递一个porps[modelValue]=666666 (一定叫modelValue)
2.相当于给子组件绑定了一个自定义事件,事件名一定是 update:modelValue,父组件不用自己写自定义事件
父组件代码
<template>
  <div id="app">
    <h1>父组件</h1>
    <!-- v-model使用情况:1.相当于给子组件传递一个porps[modelValue]=100000 (一定叫modelValue)
      2.相当于给子组件绑定了一个自定义事件,事件名一定是 update:modelValue
    与vue2的v-model的区别在于,vue2的v-model绑定了一个value值,和input事件,👎 vue2中只能绑定一个v-model,而vue3 可以绑定多个v-model
    -->
     <index3 v-model="money3" v-model:name="name" v-model:age="age"></index3>
    <h3>父亲60大寿三妹送出价值{{ money3 }}元礼品</h3>
 </div>
</template>
<script lang="ts" setup>
  import index3 from './view/index3.vue'
  import { ref } from 'vue'
  let money3 = ref(666666)
  let name = ref('嘉达')
  let age = ref(20)

</script>

<style scoped>
#app {
  width: 100vw;
  height: 100vh;
  color: #000;
  padding: 50px;
  box-sizing: border-box;
}
</style>
子组件:
注意:以v-model="money3"的形式传递时,使用defineProps 接收名字只能叫modelValue,默认写法。
传多个值时,父组件 以v-model:参数名="参数名" 形式传递,defineProps 接收名字就是参数名。
更改数据使用defineEmits,默认方式更改值 事件名字只能叫 “update:modelValue”,
更改指定名字的值时 事件名字 是 “update:参数名”
<template>
  <div class="index3">
    <h1>子组件3</h1>
    <h3>父亲送给三妹 {{ modelValue }}元</h3>
    <h3>名字:{{ name }}</h3>
    <h3>年龄:{{ age }}</h3>
    <el-button @click="send">点击送出</el-button>
    <el-button @click="changeName">点击更改名字和年龄</el-button>
  </div>
</template>
<script setup lang="ts">
// v-module :收集表单数据,数据双向绑定,组件之间的通信去实现父子数据同步业务
defineProps(['modelValue', 'name', 'age'])
let $emit = defineEmits(['update:modelValue', 'update:name', 'update:age'])
const send = () => {
  $emit('update:modelValue', 9999)
}
const changeName = () => {
  $emit('update:name', '翠花')
  $emit('update:age', 18)
}
</script>
<style lang="scss" scoped>
.index3 {
  background-color: beige;
  padding: 12px;
}
</style>
5. useAttrs:获取组件标签身上属性与事件
父组件
<template>
  <div id="app">
    <h1>父组件</h1>
    <index4 type="primary" size="large" @click="handlerIndex4"></index4>

 </div>
</template>
<script lang="ts" setup>
  import index4 from './view/index4.vue'
  import { ref } from 'vue'
  // useAttrs
  let handlerIndex4Value = ref('')

  const handlerIndex4 = (value: string) => {
    handlerIndex4Value.value = value
  }

</script>

<style scoped>
#app {
  width: 100vw;
  height: 100vh;
  color: #000;
  padding: 50px;
  box-sizing: border-box;
}
</style>
子组件:
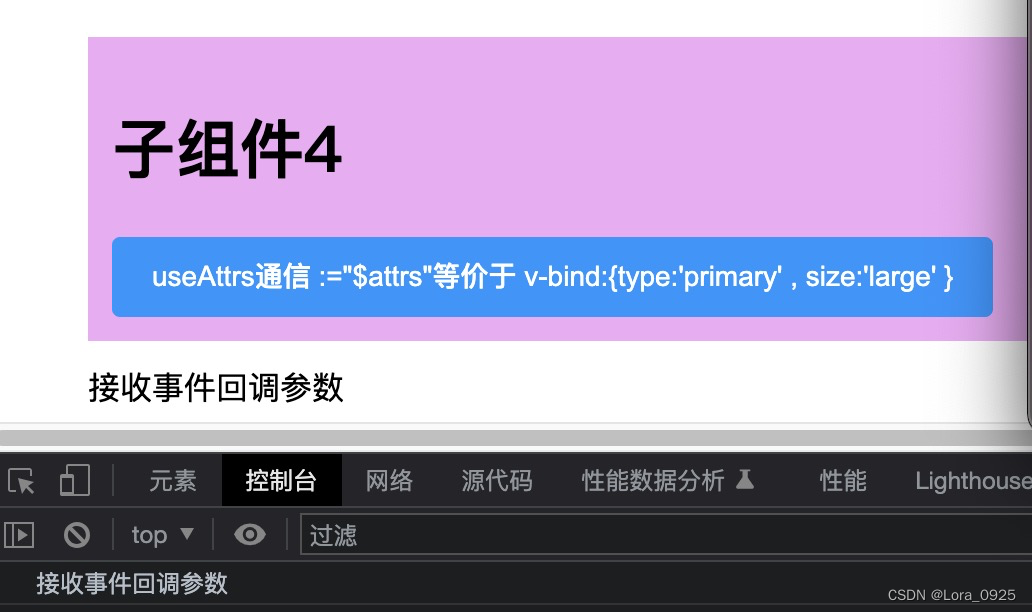
porps和useAttrs都可以接收来自父组件传递过来的属性与属性值, 如果同时用porps接收值 ,那么useAttrs方法就无法再次获取,porps优先级高与useAttrs。 useAttr同时可以接收事件
<template>
  <div class="index4">
    <h1>子组件4</h1>
    <el-button type="primary" :="$attrs">
      useAttrs通信 :="$attrs"等价于 v-bind:{type:'primary' , size:'large' }
    </el-button>
  </div>
</template>
<script setup lang="ts">
  // 引入useAttrs方法:获取组件标签身上属性与事件
  import { useAttrs } from 'vue'
  // 此方法会返回一个对象
  let $attrs:any = useAttrs()

  // console.log($attrs)

  // 获取身上的事件
  $attrs.onClick('接收事件回调参数')
</script>
<style lang="scss" scoped>
.index4 {
  background-color: rgb(240, 177, 246);
  padding: 12px;
  margin: 12px 0;
}
</style>
示例
6.$ref/$parent
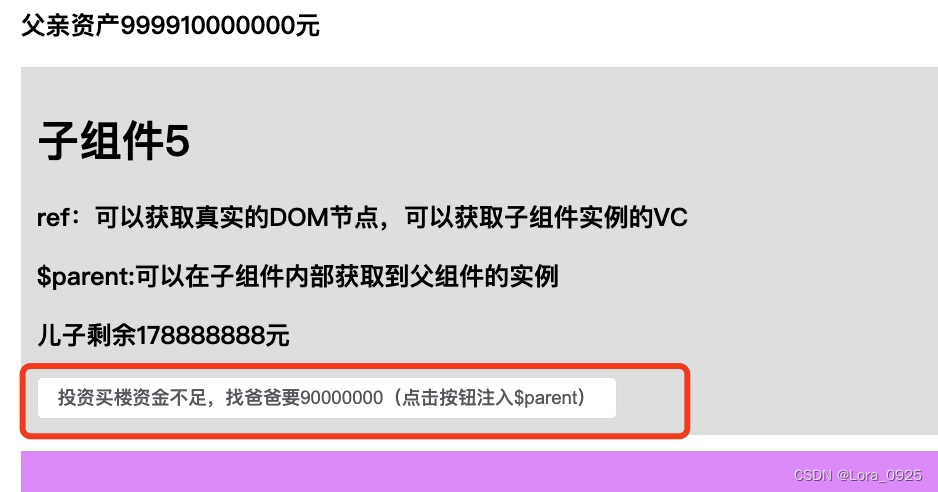
ref:可以获取真实的DOM节点,可以获取子组件实例的VC
$parent:可以在子组件内部获取到父组件的实例
组件内部的数据对外是关闭的,不能直接访问。需要使用defineExpose对外暴露
<template>
  <div id="app">
    <h1>父组件</h1>
    <el-button @click="borrow" style="margin: 12px 0">
      父亲找5儿子借1元
    </el-button>
    <h3>父亲资产{{ money }}元</h3>
    <index5 ref="son5"></index5>
 </div>
</template>
<script lang="ts" setup>
  import index5 from './view/index5.vue'
  import { ref } from 'vue'
  let money = ref(1000000000000)

  // $ref
  let son5 = ref() //此处必须与组件绑定的ref名字相同

  // 借钱方法=> 父亲找儿子借钱,儿子的钱变少,父亲的钱变多 使用$ref 获取子组件数据
  const borrow = () => {
    money.value++
    // 获取数据
    son5.value.money--
    // 随后5儿子买包送人 --调用方法
    son5.value.buy()
  }
  defineExpose({ money })
</script>

<style scoped>
#app {
  width: 100vw;
  height: 100vh;
  color: #000;
  padding: 50px;
  box-sizing: border-box;
}
</style>
子组件
<template>
  <div class="index5">
    <h1>子组件5</h1>
    <h3>ref:可以获取真实的DOM节点,可以获取子组件实例的VC</h3>
    <h3>$parent:可以在子组件内部获取到父组件的实例</h3>
    <h3>儿子剩余{{ money }}元</h3>

    <el-button @click="borrowMoney($parent)">
      投资买楼资金不足,找爸爸要90000000(点击按钮注入$parent)
    </el-button>
  </div>
</template>
<script setup lang="ts">
import { ref } from 'vue'
let money = ref(88888888)

// 买包
const buy = () => {
  money.value = money.value - 15862
}
// 找老爸要钱
const borrowMoney = ($parent: any) => {
  console.log($parent)
  // 获取父组件数据
  $parent.money = $parent.money - 90000000
  money.value = money.value + 90000000
}
// 组件内部的数据对外是关闭的,不能直接访问。需要使用defineExpose对外暴露
defineExpose({ money, buy })
</script>
<style lang="scss" scoped>
.index5 {
  background-color: rgb(226, 226, 226);
  padding: 12px;
}
</style>
示例

7.provide/inject
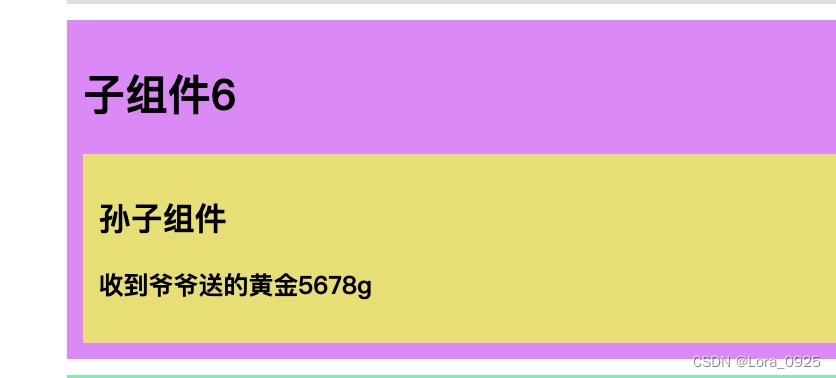
1. vue3提供 provide (提供)与 inject (注入),事件隔辈组件数据传递。
2. 父组件提供数据(provide)需要两个参数:
第一个参数就是提供数据的key
第二个参数是提供的数据
3. 注入祖先组件提供的数据:提供的key
4. inject获取的数据是指向同一个对象,可以进行修改
<template>
  <div id="app">
    <h1>父组件</h1>
     <index6></index6>
 </div>
</template>
<script lang="ts" setup>
 import index6 from './view/index6.vue'
 import { provide } from 'vue'
 // provide与inject
 provide('gold', 5678)
</script>

<style scoped>
#app {
  width: 100vw;
  height: 100vh;
  color: #000;
  padding: 50px;
  box-sizing: border-box;
}
</style>
子组件
<template>
  <div class="index6">
    <h1>子组件6</h1>
    <index6_1></index6_1>
  </div>
</template>
<script setup lang="ts">
import index6_1 from './index6_1.vue'
</script>
<style lang="scss" scoped>
.index6 {
  background-color: rgb(234, 139, 255);
  padding: 12px;
  margin: 12px 0;
}
</style>
孙子组件
<template>
  <div class="index6_1">
    <h2>孙子组件</h2>
    <h3>收到爷爷送的黄金{{ gold }}g</h3>
  </div>
</template>
<script setup lang="ts">
import { inject } from 'vue'
let gold = inject('gold')
console.log(gold)
</script>
<style lang="scss" scoped>
.index6_1 {
  background-color: rgb(233, 229, 114);
  padding: 12px;
}
</style>
示例
8.pinia :vuex:集中管理状态容器,可以实现任意组件之间的通信
Pinia | Pinia官网
核心概念 state mutations actions getters modules
pinia 核心概念 state actions getters
pinia分为两种写法,选择式api 写法=>类似与vuex 和组合式api写法
8.1.安装
yarn add pinia
# 或者使用 npm
npm install pinia
8.2.新建store文件夹,如下,分为两个模块讲解 选择式api写法 与 组合式api写法

8.3.index.ts
// 创建大仓库 index.ts
import { createPinia } from 'pinia'

// createPinia
let store =createPinia();
// 对外暴露
export default store
8.4.main.js : 引入 "./store"
import { createApp } from 'vue'
import App from "@/App.vue"
import "@/assets/style/common.scss"

import store from "./store"

const app = createApp(App)

app.use(store)

app.mount('#app')
8.5.user.ts 选择式api写法
// 定义user仓库  选择式api写法   user.ts
import { defineStore } from "pinia";

// defineStore传入两个参数 第一个是小仓库的名字,第二个是小仓库配置对象。
// defineStore方法执行会返回一个函数,函数作用就是让组件可以获取到仓库的数据
let userStore = defineStore("user", {
    //  存储数据:state
    state: () => {
        return {
            name: "梅赛德斯",
            arr: [12, 234, 23434, 34534]
        }
    },
    actions: {
        // 注意函数没有context上下文对象,没有commit 没有mutation去修改数据
        // 此处使用this就是小仓库对象--- 此处不能使用箭头函数
        updateName(value: string) {
            this.name = value
        }
    },
    getters: {
        totalMoney() {
            let M: any = this.arr.reduce((prev: number, next: number) => {
                return prev + next
            }, 0)
            return M
        }

    }
})

export default userStore
8.6.info.ts 组合式api写法
// 定义info仓库  组合式api写法 info.ts
import { defineStore } from "pinia";
import { ref, computed } from "vue"

let infoStore = defineStore("info", () => {
    // 此处的箭头函数务必返回一个对象,属性与方法提供给组件使用
    // 主要用到了vue3中的组合式API函数
    let num = ref(34233)
    const updateNum = (value: number) => {
        num.value = value
    }
    // 使用计算属性
    const newNum = computed(() => {
        return num.value * 1000
    })
    return {
        num,
        newNum,
        updateNum
    }
})
export default infoStore
使用:
<template>
  <div class="index7">
    <h1>子组件7</h1>
    <h3>名字:{{ userInfo.name }}</h3>
    <h3>{{ userInfo.totalMoney }}</h3>
    <h4>组合式api:{{ info.num }}</h4>
    <h4>组合式api使用计算属性:{{ info.newNum }}</h4>
    <el-button @click="changeName">点击改名字</el-button>
    <el-button @click="changeInfo">点击改num</el-button>
  </div>
</template>
<script setup lang="ts">
import userStore from '@/store/modules/user'
import infoStore from '@/store/modules/info'
//   vuex:集中管理状态容器,可以实现任意组件之间的通信
// 核心概念 state mutations actions getters modules
// pinia 核心概念 state actions getters
// pinia分为两种写法,选择式api 写法=>类似与vuex 和组合式api写法

let userInfo = userStore()

const changeName = () => {
  userInfo.updateName('库里南')
}

// 获取
let info = infoStore()
console.log(info)

const changeInfo = () => {
  info.updateNum(77777)
}
</script>
<style lang="scss" scoped>
.index7 {
  background-color: rgb(115, 244, 175);
  padding: 12px;
  margin: 12px 0;
}
</style>
示例

9.slot 插槽分为默认插槽、具名插槽、作用域插槽(可以传递数据的插槽,子组件可以将数据回传给父组件的插槽)
9.1 默认插槽 -父组件
<template>
  <div id="app">
    <h1>父组件</h1>
    <index8 >
      <div>1.我是默认插槽</div>
    </index8>
 </div>
</template>

<script lang="ts" setup>

import index8 from './view/index8.vue'

</script>
子组件
<template>
  <div class="index8">
    <h1>子组件8</h1>
    <!-- 默认插槽 -->
     <slot></slot>
  </div>
</template>
<script setup lang="ts">

</script>

</style>

9.2 具名插槽 -父组件
<template>
  <div id="app">
    <h1>父组件</h1>
    <index8 >
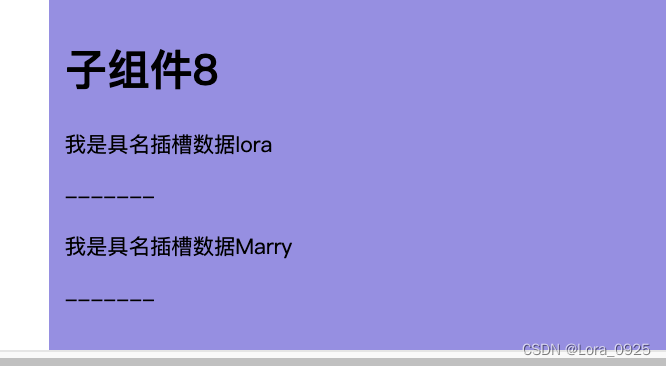
      <template v-slot:lora>
        <div> 我是具名插槽数据lora</div>
      </template>
      <!-- 具名插槽可简化为# -->
      <template #Marry>
        <div> 我是具名插槽数据Marry</div>
      </template>
    </index8>
 </div>
</template>

<script lang="ts" setup>

import index8 from './view/index8.vue'

</script>
子组件
<template>
  <div class="index8">
    <h1>子组件8</h1>
    <!-- 默认插槽 -->
    <slot name="lora"></slot>
    <p>-------</p>
    <slot name="Marry"></slot>
    <p>-------</p>
  </div>
</template>
<script setup lang="ts">

</script>

</style>
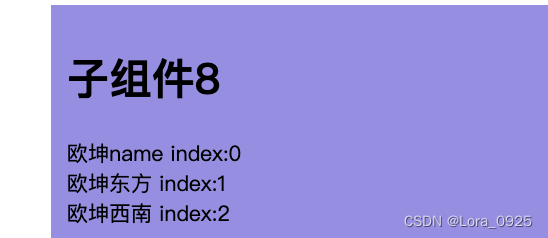
9.3 作用域插槽 -父组件
<template>
  <div id="app">
    <h1>父组件</h1>
    <index8 :slotList="slotList">
      <template v-slot="{ $row, $index }">
        <span>
          {{ $row.type === 1 ? $row.name : $row.lable }}
          index:{{ $index }}
        </span>
      </template>
    </index8>
 </div>
</template>

<script lang="ts" setup>

import index8 from './view/index8.vue'

let slotList = [
  {
    id: 1,
    lable: '欧坤',
    name: '欧坤name',
    type: 1,
  },
  {
    id: 2,
    lable: '欧坤东方',
    type: 0,
  },
  {
    id: 4,
    lable: '欧坤西南',
    type: 0,
  },
]

</script>
子组件
<template>
  <div class="index8">
    <h1>子组件8</h1>
    <div>
      <div v-for="(item, index) in slotList" :key="item.id">
        <slot :$row="item" :$index="index"></slot>
      </div>
    </div>
  </div>
</template>
<script setup lang="ts">
 defineProps(['slotList'])
</script>

</style>
示例
以上是总结的所有通信方式





![基于OpenCV [c++]——形态学操作(分析和应用)](https://img-blog.csdnimg.cn/c00451600d5d46f2b5005b409ad64b74.png)
