目录
项目搭建
实现网页简单布局
初始化three.js基础代码
创建环境背景
加载飞船模型
实现滚轮滑动切换3D场景
设置星光流动特效
今天简单实现一个three.js的小Demo,加强自己对three知识的掌握与学习,只有在项目中才能灵活将所学知识运用起来,话不多说直接开始。
项目搭建
本案例还是借助框架书写three项目,借用vite构建工具搭建vue项目,vite这个构建工具如果有不了解的朋友,可以参考我之前对其讲解的文章:vite脚手架的搭建与使用 。搭建完成之后,用编辑器打开该项目,在终端执行 npm i 安装一下依赖,安装完成之后终端在安装 npm i three 即可。
因为我搭建的是vue3项目,为了便于代码的可读性,所以我将three.js代码单独抽离放在一个组件当中,在App根组件中进入引入该组件。具体如下:
<template>
  <!-- 3D网页 -->
  <WebPage></WebPage>
</template>

<script setup>
import WebPage from './components/WebPage.vue';
</script>

<style lang="less">
  *{
    margin: 0;
    padding: 0;
  }
</style>
实现网页简单布局
<template>
  <div class="home">
    <div class="canvas-container" ref="screenDom"></div>
    <div class="header">
      <div class="menu">
        <a href="#" class="menuItem">首页</a>
        <a href="#" class="menuItem">详情</a>
        <a href="#" class="menuItem">关于</a>
      </div>
    </div>
    <div class="pages" ref="pages">
      <div class="page">
        <h2 class="title">前端技术</h2>
        <p>轻松、好玩、有趣掌握前沿硬核前端技术</p>
      </div>
      <div class="page">
        <h2 class="title">WEB 3D可视化</h2>
        <p>领略WEB 3D的魅力,让页面无比酷炫</p>
      </div>
      <div class="page">
        <h2 class="title">ThreeJS框架</h2>
        <p>让前端开发3D效果更方便</p>
      </div>
    </div>
  </div>
</template>

<style>
* {
  margin: 0;
  padding: 0;
}
body {
  background-color: #000;
}
.canvas-container {
  width: 100vw;
  height: 100vh;
}
.home {
  width: 100vw;
  height: 100vh;
  transform-origin: 0 0;
}
.header {
  position: fixed;
  top: 0;
  left: 0;
  width: 100vw;
  height: 100px;
  display: flex;
  justify-content: space-between;
  align-items: center;
}
.canvas-container {
  width: 100%;
  height: 100%;
}
.menu {
  display: flex;
  justify-content: space-between;
  align-items: center;
  margin-right: 50px;
}
.menuItem {
  padding: 0 15px;
  text-decoration: none;
  color: #fff;
  font-weight: 900;
  font-size: 15px;
}
.progress {
  position: fixed;
  top: 0;
  left: 0;
  width: 100vw;
  height: 100vh;
  z-index: 101;
  display: flex;
  justify-content: center;
  align-items: center;
  font-size: 20px;
  color: #fff;
}
.progress > img {
  padding: 0 15px;
}
.pages {
  display: flex;
  flex-direction: column;
  position: fixed;
  top: 0;
  left: 0;
}
.pages .page {
  width: 100vw;
  height: 100vh;
  display: flex;
  flex-direction: column;
  justify-content: center;
  align-items: flex-start;
  color: #fff;
  padding: 15%;
  box-sizing: border-box;
}
.pages .page .title {
  font-size: 50px;
  font-weight: 900;
  margin-bottom: 20px;
}
.pages .page p {
  font-size: 25px;
}
</style>
初始化three.js基础代码
three.js开启必须用到的基础代码如下:
导入three库:
import * as THREE from 'three'初始化场景:
const scene = new THREE.Scene()初始化相机:
let camera = new THREE.PerspectiveCamera(45,window.innerWidth / window.innerHeight,0.1,100000);
camera.position.set(0, 0, 10);初始化渲染器:
let renderer = new THREE.WebGLRenderer({ antialias: true });
renderer.setSize(window.innerWidth, window.innerHeight);监听屏幕大小的改变,修改渲染器的宽高和相机的比例:
window.addEventListener("resize",()=>{
  renderer.setSize(window.innerWidth,window.innerHeight)
  camera.aspect = window.innerWidth/window.innerHeight
  camera.updateProjectionMatrix()
})设置渲染函数:
// 创建渲染函数
const render = () => {
  requestAnimationFrame(render);
  renderer.render(scene, camera);
}
render();进行挂载:
onMounted(() => {
  // 将画布添加到页面中
  screenDom.value.appendChild(renderer.domElement);
  render()
});
ok,写完基础代码之后,接下来开始具体的Demo实操。
创建环境背景
这里通过TextureLoader加载各种类型的纹理图像,包括JPEG、PNG、GIF等。通过TextureLoader,开发人员可以轻松地将纹理加载到自己的Three.js场景中,从而为场景增加更多的细节和视觉效果。
// 创建星空的背景
let url = "src/assets/imgs/25s.jpg";
let envTexture = new THREE.TextureLoader().load(url);
envTexture.mapping = THREE.EquirectangularReflectionMapping;
scene.background = envTexture;
scene.environment = envTexture;
加载飞船模型
经过前几篇对three.js小demo的训练,相信大家对加载模型可谓是得心应手了吧,无非就四步嘛,这里有个情况就是我还额外使用了动画库进行处理,所以步骤稍微要复杂一点。
第一步引入加载GLTF模型和压缩模型以及gsap的第三方库:
// 加载GLTF模型
import { GLTFLoader } from 'three/examples/jsm/loaders/GLTFLoader';
// 解压GLTF模型
import { DRACOLoader } from 'three/examples/jsm/loaders/DRACOLoader';
// 动画库
import { gsap } from "gsap";第二步初始化loader:
let dracoLoader = new DRACOLoader();
dracoLoader.setDecoderPath("./draco/gltf/");
dracoLoader.setDecoderConfig({ type: "js" });
let loader = new GLTFLoader();
loader.setDRACOLoader(dracoLoader);第三步就是加载gltf模型,这里使用了鼠标监听函数,然后获取相关对应的坐标,然后通过gsap进行实现动画效果,如下:
loader.load("./model/xz.glb", (gltf) => {
  gltf.scene.scale.set(0.1, 0.1, 0.1);
  gltf.scene.position.set(3, 0, 0);
  scene.add(gltf.scene);
  window.addEventListener("mousemove", (e) => {
    let x = (e.clientX / window.innerWidth) * 2 - 1;
    let y = (e.clientY / window.innerHeight) * 2 - 1;

    let timeline = gsap.timeline();
    timeline.to(gltf.scene.rotation, {
      duration: 0.5,
      x: y,
      y: x,
      duration: 1,
    });
  });
});第四步就是根据具体情况添加光源:
// 添加灯光
let light = new THREE.DirectionalLight(0xffffff, 0.7);
light.position.set(0, 0, 1);
scene.add(light);
let light2 = new THREE.DirectionalLight(0xffffff, 0.3);
light2.position.set(0, 0, -1);
scene.add(light2);
let light3 = new THREE.AmbientLight(0xffffff, 0.3);
light3.position.set(-1, 1, 1);
scene.add(light3);
实现滚轮滑动切换3D场景
因为我在html设置了三个div进行页面切换如下:
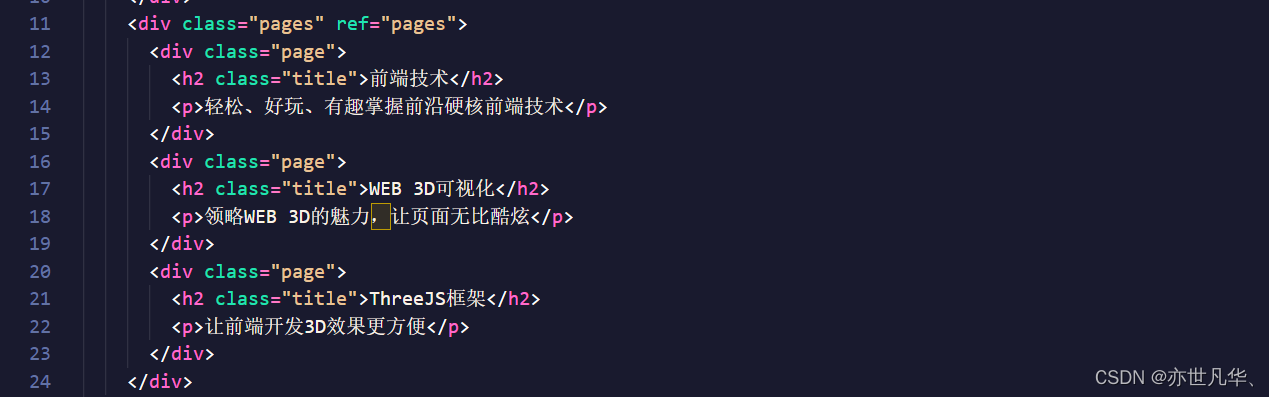
所以我们需要引入3个glb模型,和上面引入模型的方式一样:
loader.load("./model/xq6.glb", (gltf) => {
  gltf.scene.scale.set(0.05, 0.05, 0.05);
  gltf.scene.position.set(3, -8, 0);
  scene.add(gltf.scene);
  window.addEventListener("mousemove", (e) => {
    let x = (e.clientX / window.innerWidth) * 2 - 1;
    let y = (e.clientY / window.innerHeight) * 2 - 1;
    let timeline = gsap.timeline();
    timeline.to(gltf.scene.rotation, {
      duration: 0.5,
      x: y,
      y: x,
      duration: 1,
    });
  });
});

loader.load("./model/gr75.glb", (gltf) => {
  gltf.scene.scale.set(0.8, 0.8, 0.8);
  gltf.scene.position.set(3, -16, 0);
  scene.add(gltf.scene);
  window.addEventListener("mousemove", (e) => {
    let x = (e.clientX / window.innerWidth) * 2 - 1;
    let y = (e.clientY / window.innerHeight) * 2 - 1;
    let timeline = gsap.timeline();
    timeline.to(gltf.scene.rotation, {
      duration: 0.5,
      x: y,
      y: x,
      duration: 1,
    });
  });
});
接下来通过监听鼠标滚轮事件来实现page的动态改变:
let page = 0;
let timeline2 = gsap.timeline();
window.addEventListener("mousewheel", (e) => {
  if (e.wheelDelta < 0) {
    page++;
    if (page > 2) {
      page = 2;
    }
  }
  if (e.wheelDelta > 0) {
    page--;
    if (page < 0) {
      page = 0;
    }
  }
  if (!timeline2.isActive()) {
    timeline2.to(camera.position, {
      duration: 0.5,
      y: page * -8,
      duration: 1,
    });
    gsap.to(pages.value, {
      duration: 1,
      y: -page * window.innerHeight,
      duration: 1,
    });
  }
});
设置星光流动特效
这里通过加载月球模型,实现星光流动的效果,InstancedMesh是一种在Three.js等WebGL引擎中使用的渲染技术,它允许我们高效地创建具有重复几何体的场景。通常在场景中有很多相同的对象,例如草丛,树木或者敌人等,而这些对象实际上是几何体和材质的组合。
loader.load("./model/moon.glb", (gltf) => {
  let moon = gltf.scene.children[0];
  for (let j = 0; j < 10; j++) {
    let moonInstance = new THREE.InstancedMesh(
      moon.geometry,
      moon.material,
      100
    );
    for (let i = 0; i < 100; i++) {
      let x = Math.random() * 1000 - 500;
      let y = Math.random() * 1000 - 500;
      let z = Math.random() * 1000 - 500;

      let matrix = new THREE.Matrix4();
      let size = Math.random() * 20 - 8;
      matrix.makeScale(size, size, size);
      matrix.makeTranslation(x, y, z);
      moonInstance.setMatrixAt(i, matrix);
    }

    gsap.to(moonInstance.position, {
      duration: Math.random() * 10 + 2,
      z: -1000,
      ease: "linear",
      repeat: -1,
    });
    scene.add(moonInstance);
  }
});
demo做完,给出本案例的完整代码:(获取素材也可以私信博主)
<template>
  <div class="home">
    <div class="canvas-container" ref="screenDom"></div>
    <div class="header">
      <div class="menu">
        <a href="#" class="menuItem">首页</a>
        <a href="#" class="menuItem">详情</a>
        <a href="#" class="menuItem">关于</a>
      </div>
    </div>
    <div class="pages" ref="pages">
      <div class="page">
        <h2 class="title">前端技术</h2>
        <p>轻松、好玩、有趣掌握前沿硬核前端技术</p>
      </div>
      <div class="page">
        <h2 class="title">WEB 3D可视化</h2>
        <p>领略WEB 3D的魅力,让页面无比酷炫</p>
      </div>
      <div class="page">
        <h2 class="title">ThreeJS框架</h2>
        <p>让前端开发3D效果更方便</p>
      </div>
    </div>
  </div>
</template>

<script setup>
import * as THREE from "three";
import { ref, onMounted } from "vue";
import { GLTFLoader } from "three/examples/jsm/loaders/GLTFLoader";
import { DRACOLoader } from "three/examples/jsm/loaders/DRACOLoader";
import { gsap } from "gsap";
let screenDom = ref(null);
let pages = ref(null);

// 创建场景
let scene = new THREE.Scene();
// 创建相机
let camera = new THREE.PerspectiveCamera(45,window.innerWidth / window.innerHeight,0.1,100000);
camera.position.set(0, 0, 10);

// 创建渲染器
let renderer = new THREE.WebGLRenderer({ antialias: true });
renderer.setSize(window.innerWidth, window.innerHeight);

window.addEventListener("resize",()=>{
  renderer.setSize(window.innerWidth,window.innerHeight)
  camera.aspect = window.innerWidth/window.innerHeight
  camera.updateProjectionMatrix()
})

// 创建渲染函数
const render = () => {
  requestAnimationFrame(render);
  renderer.render(scene, camera);
}
render();

onMounted(() => {
  // 将画布添加到页面中
  screenDom.value.appendChild(renderer.domElement);
  render()
});

// 创建星空的背景
let url = "src/assets/imgs/25s.jpg";
let envTexture = new THREE.TextureLoader().load(url);
envTexture.mapping = THREE.EquirectangularReflectionMapping;
scene.background = envTexture;
scene.environment = envTexture;

// 设置解压缩的加载器
let dracoLoader = new DRACOLoader();
dracoLoader.setDecoderPath("./draco/gltf/");
dracoLoader.setDecoderConfig({ type: "js" });
let loader = new GLTFLoader();
loader.setDRACOLoader(dracoLoader);
loader.load("./model/xz.glb", (gltf) => {
  gltf.scene.scale.set(0.1, 0.1, 0.1);
  gltf.scene.position.set(3, 0, 0);
  scene.add(gltf.scene);
  window.addEventListener("mousemove", (e) => {
    let x = (e.clientX / window.innerWidth) * 2 - 1;
    let y = (e.clientY / window.innerHeight) * 2 - 1;

    let timeline = gsap.timeline();
    timeline.to(gltf.scene.rotation, {
      duration: 0.5,
      x: y,
      y: x,
      duration: 1,
    });
  });
});

// 添加灯光
let light = new THREE.DirectionalLight(0xffffff, 0.7);
light.position.set(0, 0, 1);
scene.add(light);
let light2 = new THREE.DirectionalLight(0xffffff, 0.3);
light2.position.set(0, 0, -1);
scene.add(light2);
let light3 = new THREE.AmbientLight(0xffffff, 0.3);
light3.position.set(-1, 1, 1);
scene.add(light3);

loader.load("./model/xq6.glb", (gltf) => {
  gltf.scene.scale.set(0.05, 0.05, 0.05);
  gltf.scene.position.set(3, -8, 0);
  scene.add(gltf.scene);
  window.addEventListener("mousemove", (e) => {
    let x = (e.clientX / window.innerWidth) * 2 - 1;
    let y = (e.clientY / window.innerHeight) * 2 - 1;
    let timeline = gsap.timeline();
    timeline.to(gltf.scene.rotation, {
      duration: 0.5,
      x: y,
      y: x,
      duration: 1,
    });
  });
});

loader.load("./model/gr75.glb", (gltf) => {
  gltf.scene.scale.set(0.8, 0.8, 0.8);
  gltf.scene.position.set(3, -16, 0);
  scene.add(gltf.scene);
  window.addEventListener("mousemove", (e) => {
    let x = (e.clientX / window.innerWidth) * 2 - 1;
    let y = (e.clientY / window.innerHeight) * 2 - 1;
    let timeline = gsap.timeline();
    timeline.to(gltf.scene.rotation, {
      duration: 0.5,
      x: y,
      y: x,
      duration: 1,
    });
  });
});

let page = 0;
let timeline2 = gsap.timeline();
window.addEventListener("mousewheel", (e) => {
  if (e.wheelDelta < 0) {
    page++;
    if (page > 2) {
      page = 2;
    }
  }
  if (e.wheelDelta > 0) {
    page--;
    if (page < 0) {
      page = 0;
    }
  }
  if (!timeline2.isActive()) {
    timeline2.to(camera.position, {
      duration: 0.5,
      y: page * -8,
      duration: 1,
    });
    gsap.to(pages.value, {
      duration: 1,
      y: -page * window.innerHeight,
      duration: 1,
    });
  }
});

loader.load("./model/moon.glb", (gltf) => {
  let moon = gltf.scene.children[0];
  for (let j = 0; j < 10; j++) {
    let moonInstance = new THREE.InstancedMesh(
      moon.geometry,
      moon.material,
      100
    );
    for (let i = 0; i < 100; i++) {
      let x = Math.random() * 1000 - 500;
      let y = Math.random() * 1000 - 500;
      let z = Math.random() * 1000 - 500;

      let matrix = new THREE.Matrix4();
      let size = Math.random() * 20 - 8;
      matrix.makeScale(size, size, size);
      matrix.makeTranslation(x, y, z);
      moonInstance.setMatrixAt(i, matrix);
    }

    gsap.to(moonInstance.position, {
      duration: Math.random() * 10 + 2,
      z: -1000,
      ease: "linear",
      repeat: -1,
    });
    scene.add(moonInstance);
  }
});

</script>

<style>
* {
  margin: 0;
  padding: 0;
}
body {
  background-color: #000;
}
.canvas-container {
  width: 100vw;
  height: 100vh;
}
.home {
  width: 100vw;
  height: 100vh;
  transform-origin: 0 0;
}
.header {
  position: fixed;
  top: 0;
  left: 0;
  width: 100vw;
  height: 100px;
  display: flex;
  justify-content: space-between;
  align-items: center;
}
.canvas-container {
  width: 100%;
  height: 100%;
}
.menu {
  display: flex;
  justify-content: space-between;
  align-items: center;
  margin-right: 50px;
}
.menuItem {
  padding: 0 15px;
  text-decoration: none;
  color: #fff;
  font-weight: 900;
  font-size: 15px;
}
.progress {
  position: fixed;
  top: 0;
  left: 0;
  width: 100vw;
  height: 100vh;
  z-index: 101;
  display: flex;
  justify-content: center;
  align-items: center;
  font-size: 20px;
  color: #fff;
}
.progress > img {
  padding: 0 15px;
}
.pages {
  display: flex;
  flex-direction: column;
  position: fixed;
  top: 0;
  left: 0;
}
.pages .page {
  width: 100vw;
  height: 100vh;
  display: flex;
  flex-direction: column;
  justify-content: center;
  align-items: flex-start;
  color: #fff;
  padding: 15%;
  box-sizing: border-box;
}
.pages .page .title {
  font-size: 50px;
  font-weight: 900;
  margin-bottom: 20px;
}
.pages .page p {
  font-size: 25px;
}
</style>