Kotlin高仿微信-项目实践58篇详细讲解了各个功能点,包括:注册、登录、主页、单聊(文本、表情、语音、图片、小视频、视频通话、语音通话、红包、转账)、群聊、个人信息、朋友圈、支付服务、扫一扫、搜索好友、添加好友、开通VIP等众多功能。
Kotlin高仿微信-项目实践58篇,点击查看详情
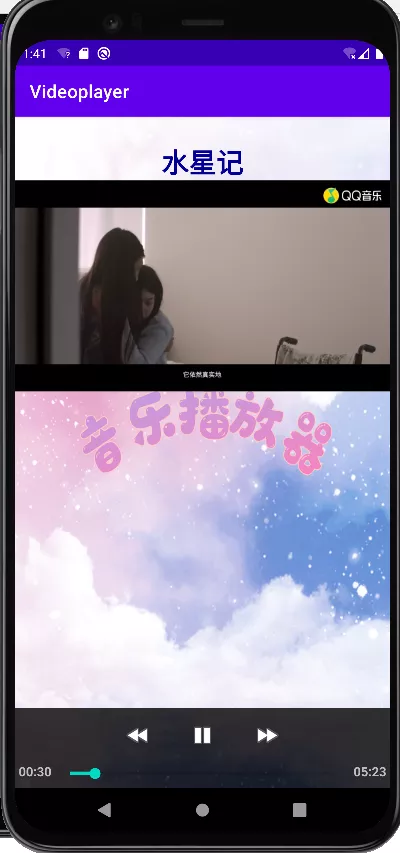
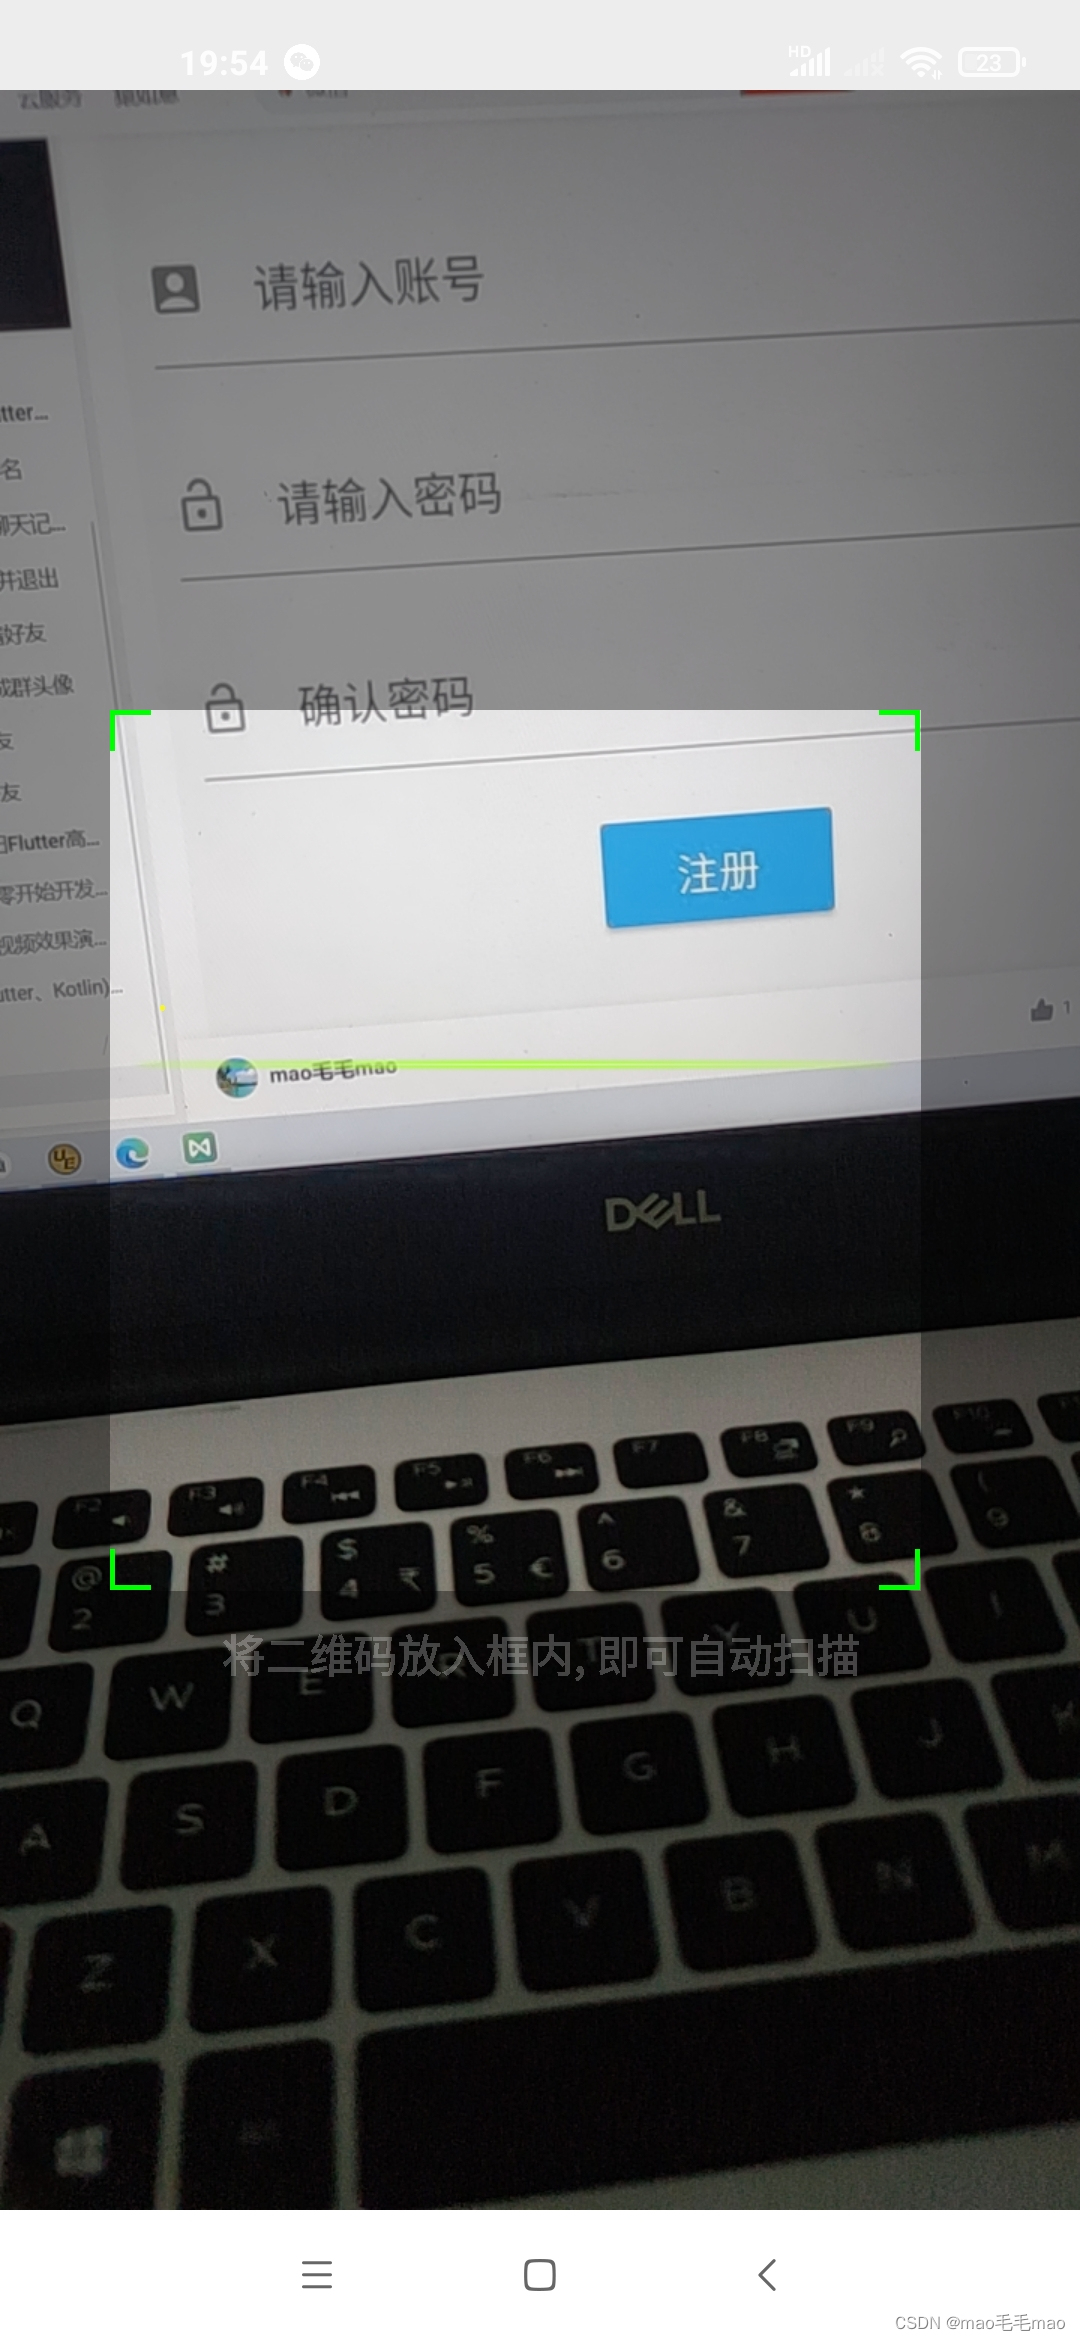
效果图:
实现代码:
<?xml version="1.0" encoding="utf-8"?>
<layout xmlns:app="http://schemas.android.com/apk/res-auto">
<RelativeLayout
    xmlns:android="http://schemas.android.com/apk/res/android"
    android:layout_width="fill_parent"
    android:layout_height="fill_parent">

    <SurfaceView
        android:id="@+id/preview_view"
        android:layout_width="fill_parent"
        android:layout_height="fill_parent"
        android:layout_gravity="center"/>

    <com.wn.wechatclientdemo.qrcodescan.ViewfinderView
        android:id="@+id/viewfinder_view"
        android:layout_width="wrap_content"
        android:layout_height="wrap_content"/>
</RelativeLayout>
</layout>
/**
 * Author : wangning
 * Email : maoning20080809@163.com
 * Date : 2022/5/19 18:01
 * Description :
 */
class ViewfinderView : View {

    /**
     * 刷新界面的时间
     */
    private val ANIMATION_DELAY = 10L
    private val OPAQUE = 0xFF

    /**
     * 四个绿色边角对应的长度
     */
    private var ScreenRate = 0

    /**
     * 四个绿色边角对应的宽度
     */
    private val CORNER_WIDTH = 5

    /**
     * 扫描框中的中间线的宽度
     */
    private val MIDDLE_LINE_WIDTH = 6

    /**
     * 扫描框中的中间线的与扫描框左右的间隙
     */
    private val MIDDLE_LINE_PADDING = 5

    /**
     * 中间那条线每次刷新移动的距离
     */
    private val SPEEN_DISTANCE = 5

    /**
     * 手机的屏幕密度
     */
    private var density = 0f

    /**
     * 字体大小
     */
    private val TEXT_SIZE = 16

    /**
     * 字体距离扫描框下面的距离
     */
    private val TEXT_PADDING_TOP = 30

    /**
     * 画笔对象的引用
     */
    private var paint: Paint? = null

    /**
     * 中间滑动线的最顶端位置
     */
    private var slideTop = 0

    /**
     * 中间滑动线的最底端位置
     */
    private var slideBottom = 0

    /**
     * 将扫描的二维码拍下来,这里没有这个功能,暂时不考虑
     */
    private var resultBitmap: Bitmap? = null
    private var maskColor = 0
    private var resultColor = 0

    private var resultPointColor = 0
    private var possibleResultPoints: MutableCollection<ResultPoint>? = null
    private var lastPossibleResultPoints: Collection<ResultPoint>? = null

    var isFirst = false

    constructor(context: Context, attrs: AttributeSet?) : super(context, attrs){
        density = context.resources.displayMetrics.density
        //将像素转换成dp
        ScreenRate = (15 * density).toInt()
        paint = Paint()
        val resources = resources
        maskColor = resources.getColor(R.color.viewfinder_mask)
        resultColor = resources.getColor(R.color.result_view)
        resultPointColor = resources.getColor(R.color.possible_result_points)
        possibleResultPoints = HashSet(5)
    }

    override fun onDraw(canvas: Canvas) {
        //中间的扫描框,你要修改扫描框的大小,去CameraManager里面修改
        val frame: Rect = CameraManager.get()?.getFramingRect() ?: return

        //初始化中间线滑动的最上边和最下边
        if (!isFirst) {
            isFirst = true
            slideTop = frame.top
            slideBottom = frame.bottom
        }

        //获取屏幕的宽和高
        val width = canvas.width
        val height = canvas.height
        paint!!.color = if (resultBitmap != null) resultColor else maskColor

        //画出扫描框外面的阴影部分,共四个部分,扫描框的上面到屏幕上面,扫描框的下面到屏幕下面
        //扫描框的左边面到屏幕左边,扫描框的右边到屏幕右边
        canvas.drawRect(0f, 0f, width.toFloat(), frame.top.toFloat(), paint!!)
        canvas.drawRect(
            0f, frame.top.toFloat(), frame.left.toFloat(), (frame.bottom + 1).toFloat(),
            paint!!
        )
        canvas.drawRect(
            (frame.right + 1).toFloat(),
            frame.top.toFloat(),
            width.toFloat(),
            (frame.bottom + 1).toFloat(),
            paint!!
        )
        canvas.drawRect(
            0f,
            (frame.bottom + 1).toFloat(),
            width.toFloat(),
            height.toFloat(),
            paint!!
        )
        if (resultBitmap != null) {
            // Draw the opaque result bitmap over the scanning rectangle
            paint!!.alpha = OPAQUE
            canvas.drawBitmap(resultBitmap!!, frame.left.toFloat(), frame.top.toFloat(), paint)
        } else {

            //画扫描框边上的角,总共8个部分
            paint!!.color = Color.GREEN
            canvas.drawRect(
                frame.left.toFloat(), frame.top.toFloat(), (frame.left + ScreenRate).toFloat(), (
                        frame.top + CORNER_WIDTH).toFloat(),
                paint!!
            )
            canvas.drawRect(
                frame.left.toFloat(),
                frame.top.toFloat(),
                (frame.left + CORNER_WIDTH).toFloat(),
                (frame.top
                        + ScreenRate).toFloat(),
                paint!!
            )
            canvas.drawRect(
                (frame.right - ScreenRate).toFloat(), frame.top.toFloat(), frame.right.toFloat(), (
                        frame.top + CORNER_WIDTH).toFloat(),
                paint!!
            )
            canvas.drawRect(
                (frame.right - CORNER_WIDTH).toFloat(),
                frame.top.toFloat(),
                frame.right.toFloat(),
                (frame.top
                        + ScreenRate).toFloat(),
                paint!!
            )
            canvas.drawRect(
                frame.left.toFloat(), (frame.bottom - CORNER_WIDTH).toFloat(), (frame.left
                        + ScreenRate).toFloat(), frame.bottom.toFloat(), paint!!
            )
            canvas.drawRect(
                frame.left.toFloat(), (frame.bottom - ScreenRate).toFloat(), (
                        frame.left + CORNER_WIDTH).toFloat(), frame.bottom.toFloat(), paint!!
            )
            canvas.drawRect(
                (frame.right - ScreenRate).toFloat(), (frame.bottom - CORNER_WIDTH).toFloat(),
                frame.right.toFloat(), frame.bottom.toFloat(), paint!!
            )
            canvas.drawRect(
                (frame.right - CORNER_WIDTH).toFloat(), (frame.bottom - ScreenRate).toFloat(),
                frame.right.toFloat(), frame.bottom.toFloat(), paint!!
            )


            //绘制中间的线,每次刷新界面,中间的线往下移动SPEEN_DISTANCE
            slideTop += SPEEN_DISTANCE
            if (slideTop >= frame.bottom) {
                slideTop = frame.top
            }
            val lineRect = Rect()
            lineRect.left = frame.left
            lineRect.right = frame.right
            lineRect.top = slideTop
            lineRect.bottom = slideTop + 18
            canvas.drawBitmap(
                (resources.getDrawable(R.drawable.qrcode_scan_line) as BitmapDrawable).bitmap,
                null,
                lineRect,
                paint
            )

            //画扫描框下面的字
            paint!!.color = Color.WHITE
            paint!!.textSize = TEXT_SIZE * density
            paint!!.alpha = 0x40
            paint!!.typeface = Typeface.create("System", Typeface.BOLD)
            val text = resources.getString(R.string.scan_text)
            val textWidth = paint!!.measureText(text)
            canvas.drawText(
                text, (width - textWidth) / 2, frame.bottom + TEXT_PADDING_TOP.toFloat() * density,
                paint!!
            )
            val currentPossible: Collection<ResultPoint>? = possibleResultPoints
            val currentLast = lastPossibleResultPoints
            if (currentPossible!!.isEmpty()) {
                lastPossibleResultPoints = null
            } else {
                possibleResultPoints = HashSet(5)
                lastPossibleResultPoints = currentPossible
                paint!!.alpha = OPAQUE
                paint!!.color = resultPointColor
                for (point in currentPossible) {
                    canvas.drawCircle(
                        frame.left + point.x, frame.top
                                + point.y, 6.0f, paint!!
                    )
                }
            }
            if (currentLast != null) {
                paint!!.alpha = OPAQUE / 2
                paint!!.color = resultPointColor
                for (point in currentLast) {
                    canvas.drawCircle(
                        frame.left + point.x, frame.top
                                + point.y, 3.0f, paint!!
                    )
                }
            }

            //只刷新扫描框的内容,其他地方不刷新
            postInvalidateDelayed(
                ANIMATION_DELAY, frame.left, frame.top,
                frame.right, frame.bottom
            )
        }
    }

    fun drawViewfinder() {
        resultBitmap = null
        invalidate()
    }

    /**
     * Draw a bitmap with the result points highlighted instead of the live
     * scanning display.
     *
     * @param barcode
     * An image of the decoded barcode.
     */
    fun drawResultBitmap(barcode: Bitmap?) {
        resultBitmap = barcode
        invalidate()
    }

    fun addPossibleResultPoint(point: ResultPoint) {
        possibleResultPoints!!.add(point)
    }

}
/**
 * Author : wangning
 * Email : maoning20080809@163.com
 * Date : 2022/5/19 18:10
 * Description : 扫一扫
 */
class QRCodeScanFragment : BaseDataBindingFragment<QrcodeActivityCaptureBinding>(), Callback{

    private var handler: CaptureActivityHandler? = null
    private var viewfinderView: ViewfinderView? = null
    private var hasPermission = false
    private var hasSurface = false
    private var decodeFormats: Vector<BarcodeFormat>? = null
    private var characterSet: String? = null
    private var inactivityTimer: InactivityTimer? = null
    private var mediaPlayer: MediaPlayer? = null
    private var playBeep = false
    private val BEEP_VOLUME = 0.10f
    private var vibrate = false

    private val REQUEST_CODE = 100
    private val REQUEST_CAMERA_CODE = 101
    private val PARSE_BARCODE_SUC = 300
    private val PARSE_BARCODE_FAIL = 303
    private var mProgress: ProgressDialog? = null
    private var photo_path: String? = null
    private var scanBitmap: Bitmap? = null
    private var navCollection : NavController? = null

    override fun getLayoutRes() = R.layout.qrcode_activity_capture

    override fun onViewCreated(view: View, savedInstanceState: Bundle?) {
        super.onViewCreated(view, savedInstanceState)
        TagUtils.d("扫描 onViewCreated ")
        navCollection = findNavController()
        handlePermission()
    }

    fun init() {
        TagUtils.d("扫描 init ")
        CameraManager.init(requireActivity())
        viewfinderView = viewfinder_view
        hasSurface = false
        inactivityTimer = InactivityTimer(requireActivity())
    }

    companion object {
        fun onOpen(activity: Activity){
            var intent = Intent(activity, QRCodeScanFragment::class.java)
            intent.addFlags(Intent.FLAG_ACTIVITY_NEW_TASK)
            WcApp.getContext().startActivity(intent)
        }
    }

    private fun handlePermission() {
        if(ContextCompat.checkSelfPermission(requireActivity(), Manifest.permission.CAMERA) != PackageManager.PERMISSION_GRANTED){
            requestPermissions(arrayOf(Manifest.permission.CAMERA), REQUEST_CAMERA_CODE)
        } else {
            hasPermission = true
            init()
        }
    }

    override fun onRequestPermissionsResult( requestCode: Int, permissions: Array<out String>, grantResults: IntArray ) {
        super.onRequestPermissionsResult(requestCode, permissions, grantResults)

        if(requestCode == REQUEST_CAMERA_CODE && grantResults != null && grantResults.size > 0){
            if(grantResults[0] == PackageManager.PERMISSION_GRANTED){
                TagUtils.d("扫描 onRequestPermissionsResult ")
                hasPermission = true
                init()
                val surfaceHolder = preview_view.holder
                initCamera(surfaceHolder)
            }
        }
    }

//    override fun onCreateOptionsMenu(menu: Menu?): Boolean {
//        /**
//         * 此方法用于初始化菜单,其中menu参数就是即将要显示的Menu实例。 返回true则显示该menu,false 则不显示;
//         * (只会在第一次初始化菜单时调用) Inflate the menu; this adds items to the action bar
//         * if it is present.
//         */
//        menuInflater.inflate(R.menu.qrcode_activity_main, menu)
//        return true
//    }

//    override fun onOptionsItemSelected(item: MenuItem): Boolean {
//        /**
//         * 菜单项被点击时调用,也就是菜单项的监听方法。
//         * 通过这几个方法,可以得知,对于Activity,同一时间只能显示和监听一个Menu 对象。 TODO Auto-generated
//         * method stub
//         */
//        when (item.itemId) {
//            R.id.menu_settings -> {
//                //打开手机中的相册
//                val innerIntent =
//                    Intent(Intent.ACTION_GET_CONTENT) //"android.intent.action.GET_CONTENT"
//                innerIntent.type = "image/*"
//                val wrapperIntent = Intent.createChooser(innerIntent, "选择二维码图片")
//                this.startActivityForResult(wrapperIntent, REQUEST_CODE)
//            }
//        }
//        return super.onOptionsItemSelected(item)
//    }

    private val mHandler: Handler = MyHandler(this)

    inner class MyHandler(activity: QRCodeScanFragment) : Handler() {
        private val activityReference: WeakReference<QRCodeScanFragment>
        override fun handleMessage(msg: Message) {
            val activity = activityReference.get()
            activity!!.mProgress!!.dismiss()
            when (msg.what) {
                PARSE_BARCODE_SUC -> activity.onResultHandler(
                    msg.obj as String,
                    activity.scanBitmap
                )
                PARSE_BARCODE_FAIL -> Toast.makeText(requireActivity(),msg.obj as String,Toast.LENGTH_LONG).show()
            }
            super.handleMessage(msg)
        }

        init {
            activityReference = WeakReference(activity)
        }
    }

    /*override fun onActivityResult(requestCode: Int, resultCode: Int, data: Intent) {
        super.onActivityResult(requestCode, resultCode, data)
        if (resultCode == RESULT_OK) {
            when (requestCode) {
                REQUEST_CODE -> {
                    //获取选中图片的路径
                    val cursor = contentResolver.query(data.data!!, null, null, null, null)
                    if (cursor!!.moveToFirst()) {
                        photo_path =
                            cursor.getString(cursor.getColumnIndexOrThrow(MediaStore.Images.Media.DATA))
                    }
                    cursor.close()
                    mProgress = ProgressDialog(this@MipcaActivityCapture)
                    mProgress!!.setMessage("正在扫描...")
                    mProgress!!.setCancelable(false)
                    mProgress!!.show()
                    Thread {
                        val result = scanningImage(photo_path)
                        if (result != null) {
                            val m = mHandler.obtainMessage()
                            m.what = PARSE_BARCODE_SUC
                            m.obj = result.text
                            mHandler.sendMessage(m)
                        } else {
                            val m = mHandler.obtainMessage()
                            m.what = PARSE_BARCODE_FAIL
                            m.obj = "Scan failed!"
                            mHandler.sendMessage(m)
                        }
                    }.start()
                }
            }
        }
    }*/

    /**
     * 扫描二维码图片的方法
     * @param path
     * @return
     */
    fun scanningImage(path: String?): Result? {
        if (TextUtils.isEmpty(path)) {
            return null
        }
        val hints = Hashtable<DecodeHintType, String?>()
        hints[DecodeHintType.CHARACTER_SET] = "UTF8" //设置二维码内容的编码
        val options = BitmapFactory.Options()
        options.inJustDecodeBounds = true // 先获取原大小
        scanBitmap = BitmapFactory.decodeFile(path, options)
        options.inJustDecodeBounds = false // 获取新的大小
        var sampleSize = (options.outHeight / 200f).toInt()
        if (sampleSize <= 0) sampleSize = 1
        options.inSampleSize = sampleSize
        scanBitmap = BitmapFactory.decodeFile(path, options)
        val source = RGBLuminanceSource(scanBitmap!!)
        val bitmap1 = BinaryBitmap(HybridBinarizer(source))
        val reader = QRCodeReader()
        try {
            return reader.decode(bitmap1, hints)
        } catch (e: NotFoundException) {
            e.printStackTrace()
        } catch (e: ChecksumException) {
            e.printStackTrace()
        } catch (e: FormatException) {
            e.printStackTrace()
        }
        return null
    }


    override fun onResume() {
        super.onResume()
        TagUtils.d("扫描 onResume ${hasSurface} , ${hasPermission}")
        //没有权限直接返回
        if(!hasPermission){
            return
        }
        //val surfaceView = findViewById<View>(R.id.preview_view) as SurfaceView
        val surfaceView = preview_view
        val surfaceHolder = surfaceView.holder
        if (hasSurface) {
            initCamera(surfaceHolder)
        } else {
            surfaceHolder.addCallback(this)
            surfaceHolder.setType(SurfaceHolder.SURFACE_TYPE_PUSH_BUFFERS)
        }
        decodeFormats = null
        characterSet = null
        playBeep = true
        val audioService = requireActivity().getSystemService(AUDIO_SERVICE) as AudioManager
        if (audioService.ringerMode != AudioManager.RINGER_MODE_NORMAL) {
            playBeep = false
        }
        initBeepSound()
        vibrate = true
    }

    override fun onPause() {
        super.onPause()
        TagUtils.d("扫描 onPause ${hasPermission}")
        if(!hasPermission){
            return
        }
        handler?.quitSynchronously()
        handler = null
        CameraManager.get()?.closeDriver()
    }

    override fun onDestroy() {
        TagUtils.d("扫描 onDestroy ")
        inactivityTimer?.shutdown()
        super.onDestroy()
    }

    /**
     * 处理扫描结果
     * @param result
     * @param barcode
     */
    fun handleDecode(result: Result, barcode: Bitmap?) {
        inactivityTimer!!.onActivity()
        playBeepSoundAndVibrate()
        val resultString = result.text
        onResultHandler(resultString, barcode)
    }

    /**
     * 跳转到上一个页面
     * @param resultString
     * @param bitmap
     */
    private fun onResultHandler(resultString: String, bitmap: Bitmap?) {
        if (TextUtils.isEmpty(resultString)) {
            Toast.makeText(requireActivity(), "Scan failed!", Toast.LENGTH_SHORT).show()
            return
        }
        TagUtils.d("二维码返回字符串:${resultString}")
        Navigation.findNavController(preview_view).popBackStack()
        if(resultString.startsWith(CommonUtils.QRCommon.QR_RECEIVE_CODE)){
            //向个人付款
            TagUtils.d("跳转向个人付款 ")
            var tempResult = resultString.substring(CommonUtils.QRCommon.QR_RECEIVE_CODE.length, resultString.length)
            var toUser = tempResult.split(":")[1]
            var balance = tempResult.split(":")[0]
            var bundle = bundleOf(CommonUtils.QRCommon.BALANCE to balance.toFloat(), CommonUtils.QRCommon.TO_USER to toUser)
            navCollection?.navigate(R.id.action_personal_payment, bundle)
        } else if(resultString.startsWith(CommonUtils.QRCommon.QR_PAYMENT_CODE)){
            //向商家付款
            var toUser = resultString.substring(CommonUtils.QRCommon.QR_PAYMENT_CODE.length, resultString.length)
            TagUtils.d("跳转向商家付款 ${toUser}")
            var bundle = bundleOf(CommonUtils.QRCommon.TO_USER to toUser)
            navCollection?.navigate(R.id.action_merchant_payment, bundle)
        } else if(resultString.startsWith("http") || resultString.startsWith("https")){
            //跳转到网站
            CommonUtils.Base.goWebsite(resultString)
        } else if(resultString.startsWith(CommonUtils.QRCommon.QR_ADD_FRIEND)){
            var userInfo = resultString.substring(CommonUtils.QRCommon.QR_ADD_FRIEND.length, resultString.length)
            //account+"###"+it.nickName+"###"+it.avatar
            var userInfos = userInfo.split("###")
            var toUser = userInfos[0]
            var nickName = userInfos[1]
            var avatar = userInfos[2]

            var contactsBean = ContactsRepository.getContactsLocalAsync(toUser)
            if(contactsBean != null){
                //如果是好友,直接打开聊天
                var bundle = bundleOf(ChatFragment.USER_ID to toUser)
                navCollection?.navigate(R.id.nav_chat, bundle)
            } else {
                var userBean = UserBean(toUser)
                userBean.avatar = avatar
                userBean.nickName = nickName
                //跳转到添加好友页面
                val bundle = bundleOf("userbean" to userBean)
                navCollection?.navigate(R.id.action_contacts_search_friends_details, bundle)
            }
        } else {
            TagUtils.d("跳转空")
        }
    }

    private fun initCamera(surfaceHolder: SurfaceHolder) {
        TagUtils.d("扫描 initCamera ")

        try {
            CameraManager.get()?.openDriver(surfaceHolder)
        } catch (ioe: IOException) {
            return
        } catch (e: RuntimeException) {
            return
        }
        if (handler == null) {
            handler = CaptureActivityHandler( this, decodeFormats, characterSet )
        }
    }

    override fun surfaceChanged(holder: SurfaceHolder, format: Int, width: Int,height: Int) {
    }

    override fun surfaceCreated(holder: SurfaceHolder) {
        TagUtils.d("扫描 surfaceCreated ")
        if (!hasSurface) {
            hasSurface = true
            initCamera(holder)
        }
    }

    override fun surfaceDestroyed(holder: SurfaceHolder) {
        hasSurface = false
    }

    fun getViewfinderView(): ViewfinderView? {
        return viewfinderView
    }

    fun getHandler(): Handler? {
        return handler
    }

    fun drawViewfinder() {
        viewfinderView!!.drawViewfinder()
    }

    private fun initBeepSound() {
        if (playBeep && mediaPlayer == null) {
            // The volume on STREAM_SYSTEM is not adjustable, and users found it
            // too loud,
            // so we now play on the music stream.
            requireActivity().volumeControlStream = AudioManager.STREAM_MUSIC
            mediaPlayer = MediaPlayer()
            mediaPlayer!!.setAudioStreamType(AudioManager.STREAM_MUSIC)
            mediaPlayer!!.setOnCompletionListener(beepListener)
            val file = resources.openRawResourceFd(R.raw.beep)
            try {
                mediaPlayer!!.setDataSource(
                    file.fileDescriptor,
                    file.startOffset, file.length
                )
                file.close()
                mediaPlayer!!.setVolume(BEEP_VOLUME, BEEP_VOLUME)
                mediaPlayer!!.prepare()
            } catch (e: IOException) {
                mediaPlayer = null
            }
        }
    }

    private val VIBRATE_DURATION = 200L

    private fun playBeepSoundAndVibrate() {
        if (playBeep && mediaPlayer != null) {
            mediaPlayer!!.start()
        }
        if (vibrate) {
            val vibrator = requireActivity().getSystemService(VIBRATOR_SERVICE) as Vibrator
            vibrator.vibrate(VIBRATE_DURATION)
        }
    }

    /**
     * When the beep has finished playing, rewind to queue up another one.
     */
    private val beepListener =
        OnCompletionListener { mediaPlayer -> mediaPlayer.seekTo(0) }

}