概念
自定义域名后缀
假设,Mastodon 主节点域名 domain1.com,我在该域名下拥有一个用户 user1@domain1.com。
配置自定义域名后缀支持后,也可以通过 user1@domain2.com 搜索到。该配置需要在主节点中设置 ALTERNATE_DOMAINS。
自定义账号别名
假设,Mastodon 主节点域名 domain1.com,我在该域名下拥有一个用户 user1@domain1.com。
配置自定义账号别名支持后,可以通过 user2@domain2.com 搜索到(即用户名和域名均可自定义)。
如果您想要一个属于自己的账号别名,但没有服务器的话,可以参考一下我的发电计划: https://afdian.net/a/willin
配置自定义域名后缀
1. 配置环境变量
首先检查 .env.production 环境变量中的 ALTERNATE_DOMAINS,配置正确,示例值:
LOCAL_DOMAIN=example1.com
ALTERNATE_DOMAINS=example2.com,example3.com
配置好重启 Mastodon 服务。
2.配置域名
以自定义域名 example2.com 为例,需要做 3 个 301 跳转的配置:
/.well-known/host-meta跳转到https://example1.com/.well-known/host-meta/.well-known/webfinger跳转到https://example1.com/.well-known/webfinger/.well-known/nodeinfo跳转到https://example1.com/.well-known/nodeinfo
传统配置
可以通过 Apache 或者 Nginx 的配置直接进行跳转。配置文件自行编写一下即可。
Serverless 配置
如果是 Serverless 服务,以 Cloudflare Pages 为例,为 example2.com 的应用创建 _redirects 文件:
/.well-known/host-meta* https://example1.com/.well-known/host-meta:splat 301
/.well-known/webfinger* https://example1.com/.well-known/webfinger:splat 301
/.well-known/nodeinfo* https://example1.com/.well-known/nodeinfo:splat 301
Cloudflare Redirect 跳转
可以在 Cloudflare Redirect Rules 中直接创建规则跳转。
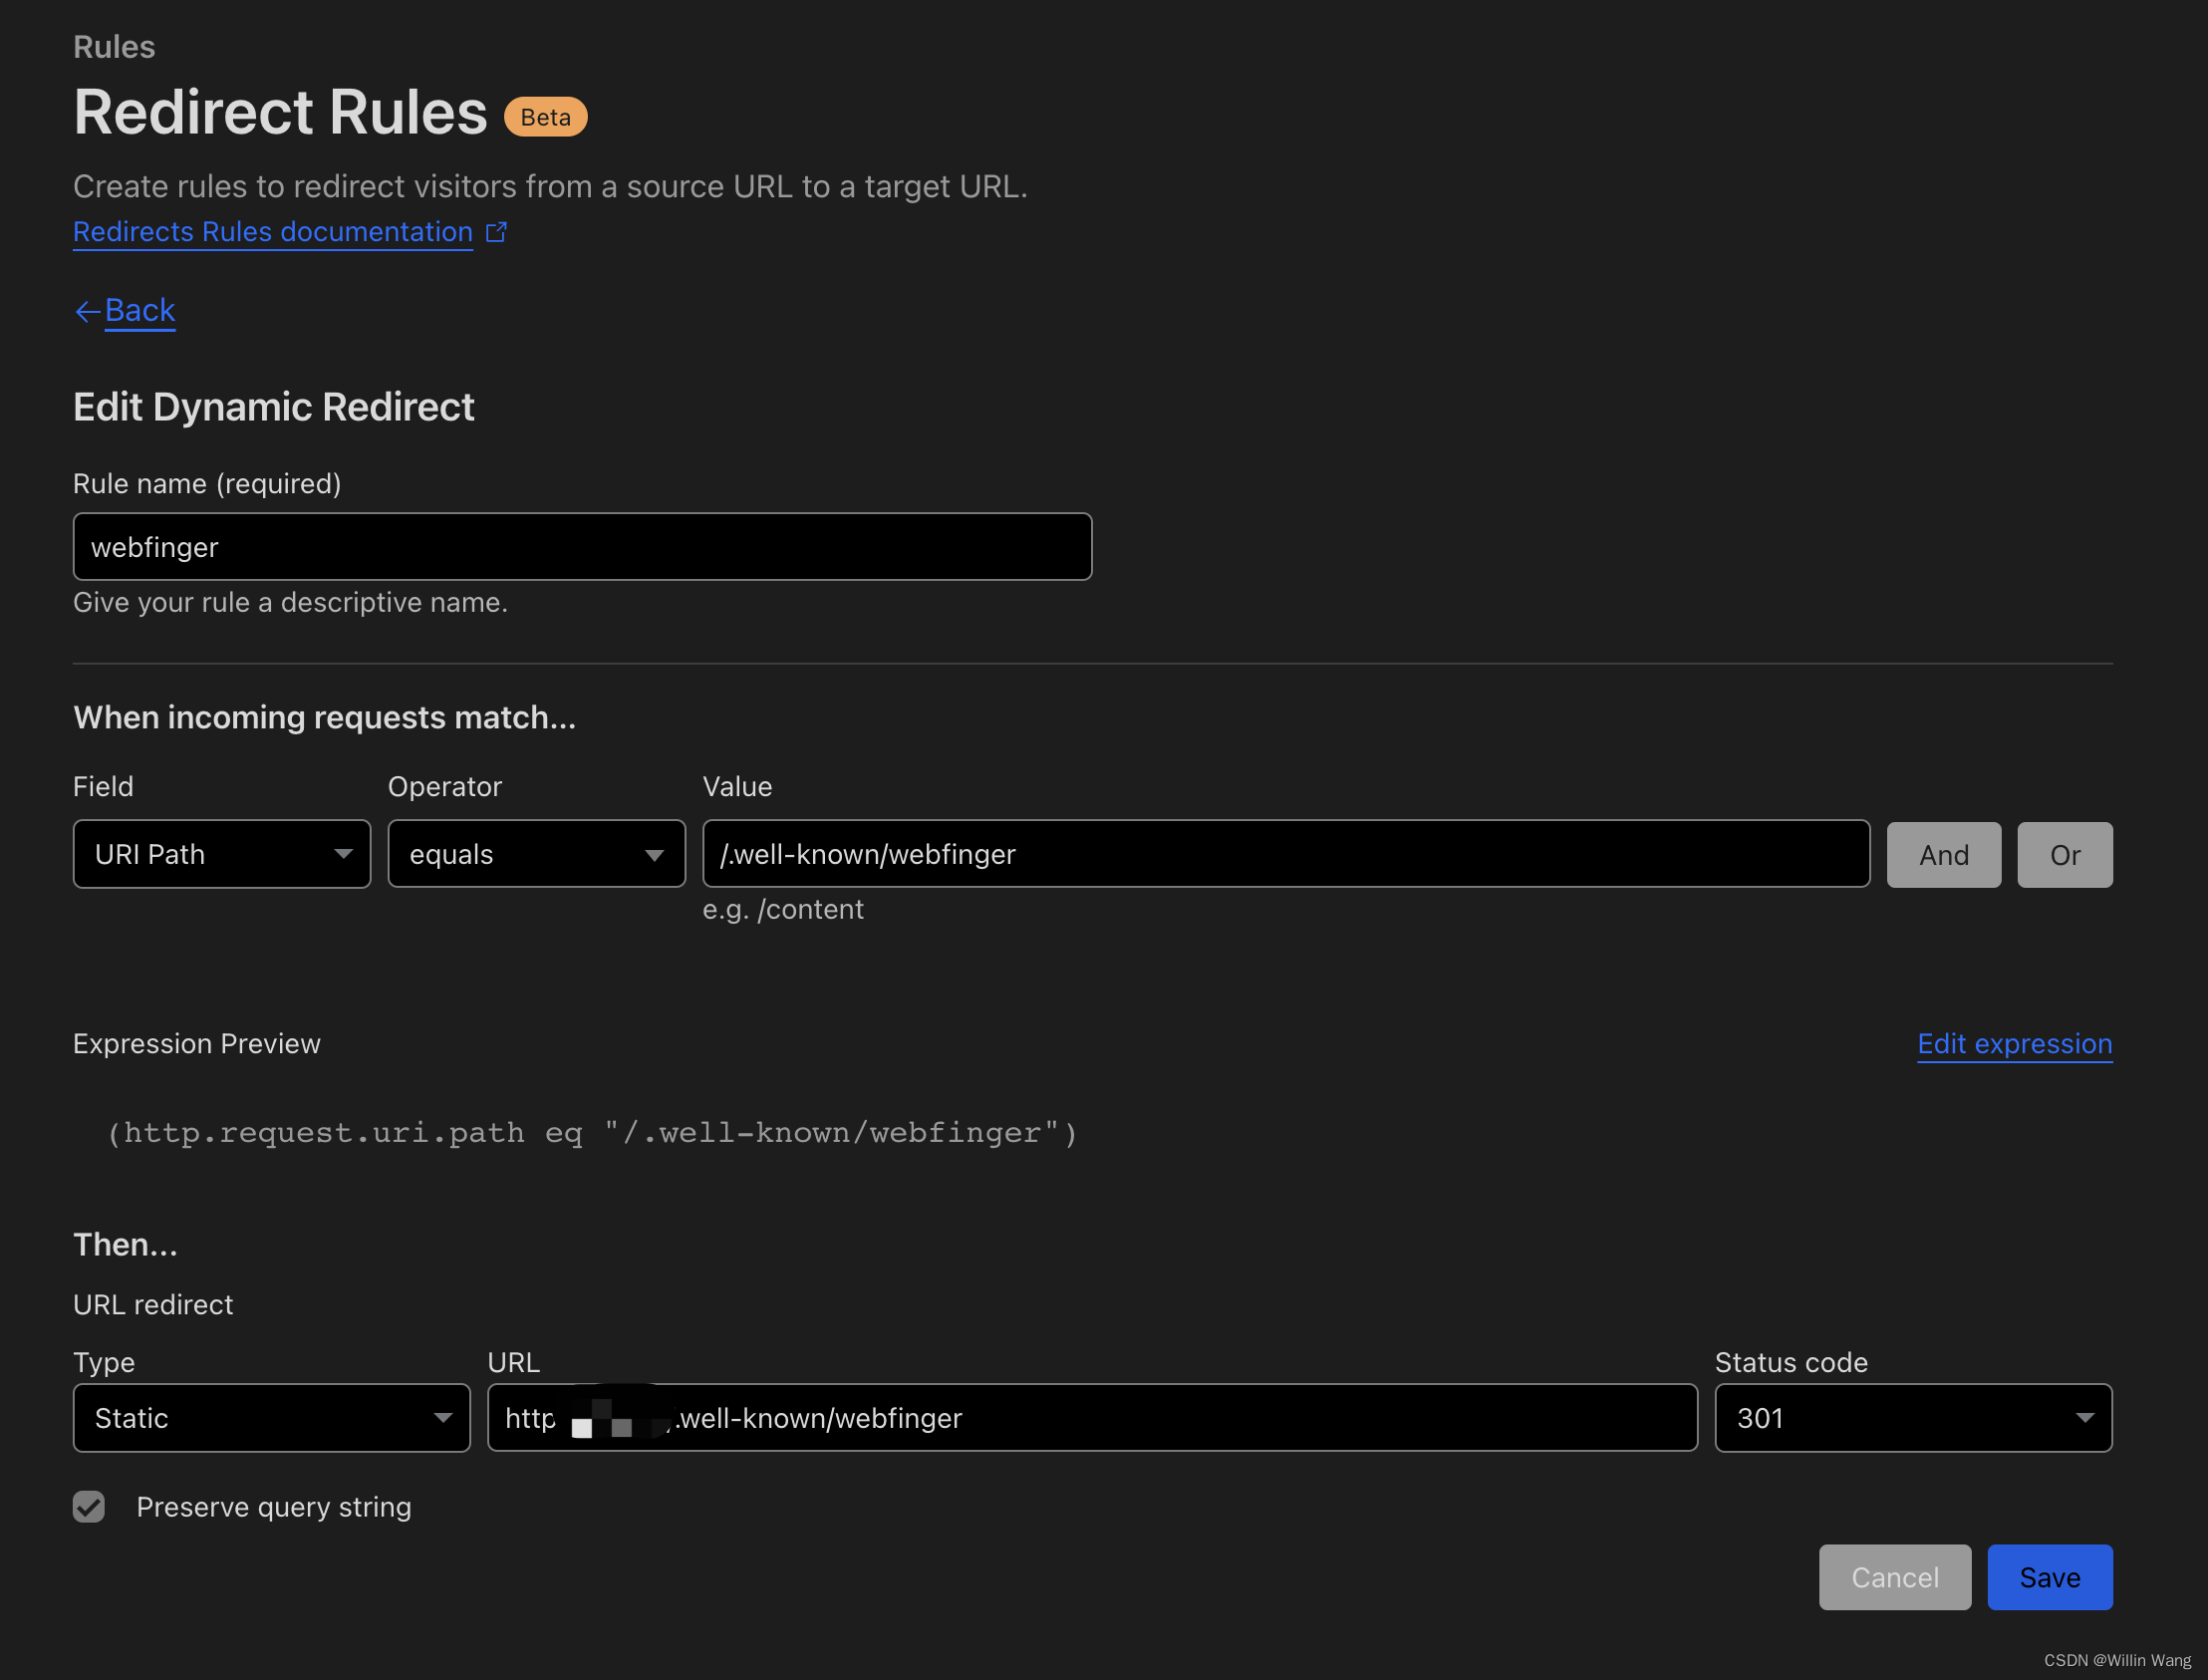
免费有 10 条配额,照着上图创建 3 次即可。
设置自定义账号别名
如果您想要一个属于自己的账号别名,但没有服务器的话,可以参考一下我的发电计划: https://afdian.net/a/willin
该方法理论上来说并不需要在 example1.com 主站域名上进行额外配置。只需要自定义三个静态文件即可。
/.well-known/webfinger
{
  "subject": "acct:user1@example1.com",
  "aliases": [
    "https://example1.com/user1",
    "https://example1.com/users/user1"
  ],
  "links": [
     {
      "rel": "http://webfinger.net/rel/profile-page",
      "type": "text/html",
      "href": "https://example1.com/@user1"
    },
    {
      "rel": "self",
      "type": "application/activity+json",
      "href": "https://example1.com/users/user1"
    },
    {
      "rel": "http://ostatus.org/schema/1.0/subscribe",
      "template": "https://example1.com/authorize_interaction?uri={uri}"
    }
  ]
}
/.well-known/host-meta
<?xml version="1.0" encoding="UTF-8"?>
<XRD xmlns="http://docs.oasis-open.org/ns/xri/xrd-1.0">
  <Link rel="lrdd" template="https://example1.com/.well-known/webfinger?resource=acct:user1@example1.com" />
</XRD>
/.well-known/nodeinfo
{
    "links": [
        {
            "rel": "http://nodeinfo.diaspora.software/ns/schema/2.0",
            "href": "https://example1.com/nodeinfo/2.0"
        }
    ]
}
进阶使用
使用该方法进写死了一个域名下的一个账号,如果需要多账号自定义域名的话。则需要使用动态接口来实现类似以上格式的响应。参考资料:
- 主站讨论: https://github.com/mastodon/mastodon/issues/2668
- 旧文档: https://guide.toot.as/guide/use-your-own-domain/


