前言:什么是后处理?(详见:ThreeJS 后处理 - 掘金 (juejin.cn))
后处理就是对WebGLRenderer.render(scene, camera)的渲染2D图片进行处理。可以把多个后处理进行组合,按照顺序执行,每个处理过程,被称为Pass。
(详见:Three.js post-processing(后处理))
常见方法:详见ThreeJS 后处理 - 掘金
小程序用法:(详见:后处理)
1.后处理可以用两种方式实现:
1).xr-asset-post-process标签,后处理的参数在data属性传入:
<xr-asset-post-process asset-id="blur" type="blur" is-hdr data="radius:10" />2).代码创建,后处理的参数在data中传入:
2.在相机的post-process属性中关联id:
<xr-camera
  ......
  post-process="blur vignette"
/>
可以传入多个后处理
3.后处理目前只开放了内置的几种效果:(详见:微信开放文档)
scene.assets.addAsset('post-process', 'vignette', scene.createPostProcess({
  type: 'vignette',
  isHDR: false,
  data: {
    intensity: 0,
    smoothness: 2,
    color: [0 0 0 1]
  }
}));- blur:高斯模糊,效果好但是在
radius较大时性能开销较高,快速近似方法见fastblur。
| 参数 | 类型 | 默认值 | 说明 | 效果 |
| radius | number | 5 | 模糊半径 |
|
- fastblur:也是高斯模糊,但是更快速的近似版本
| 参数 | 类型 | 默认值 | 说明 | 效果 |
| radius | number | 5 | 模糊半径 | 时间稳定性高,但效果没有blur好,适用于需要不断变更radius的场景 |
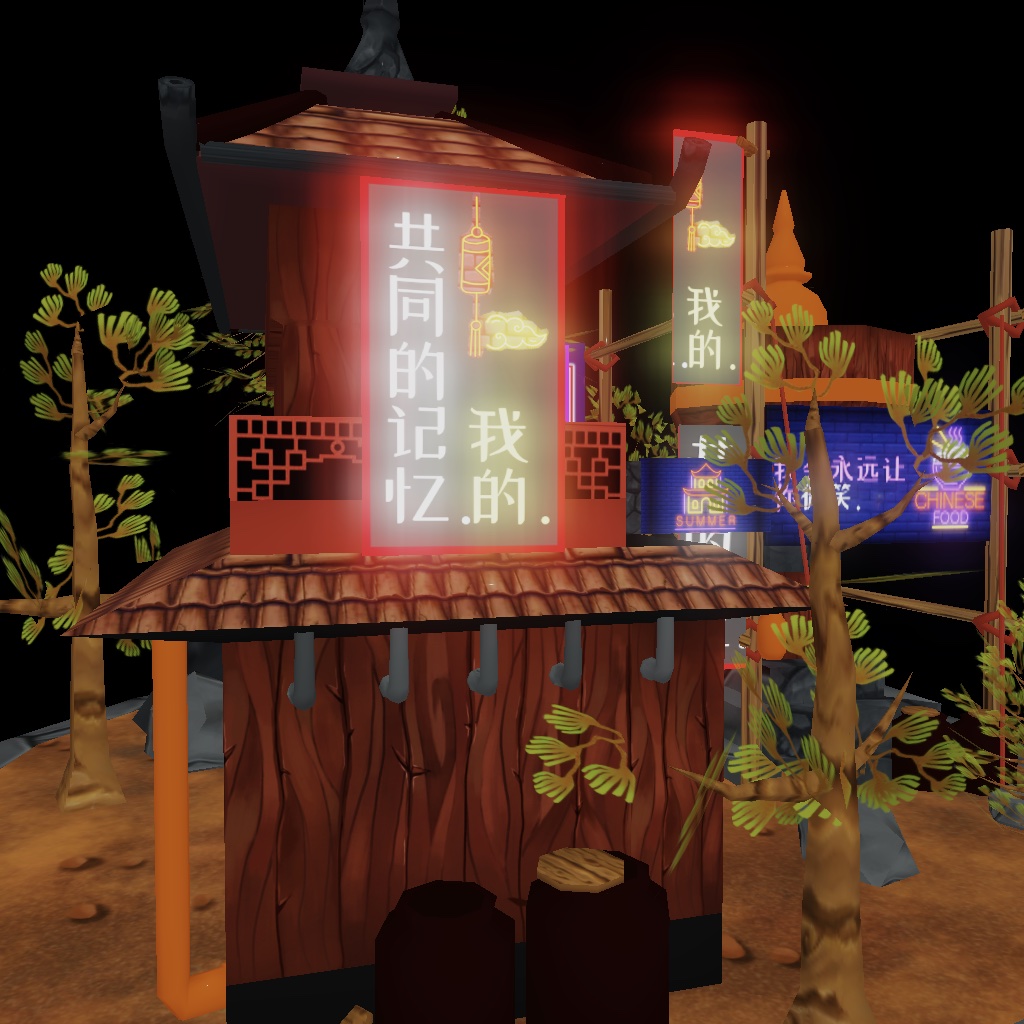
- bloom:泛光,建议开启
is-hdr使用。
| 参数 | 类型 | 默认值 | 说明 | 效果 |
| threshold | number | 0.5 | 阈值 |
|
| softThreshold | number | 0 | 软阈值 | |
| radius | number | 20 | 半径 | |
| intensity | number | 2 | 亮度 |
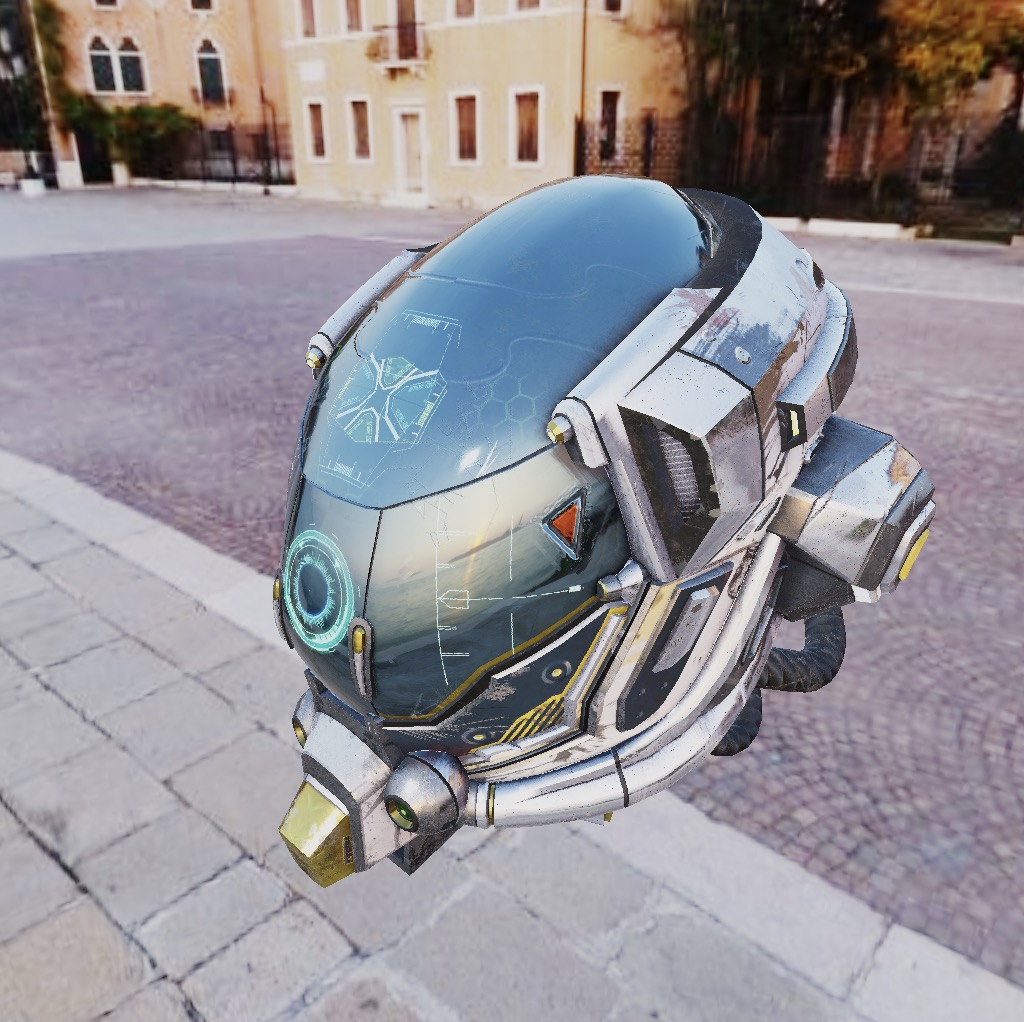
- tone:色调映射,ACES曲线,一般配合
hdr使用。
1)效果:
| 效果 |
 |
- vignette:渐晕。
| 参数 | 类型 | 默认值 | 说明 | 效果 |
| center | number[] | [0.5,0.5] | 半径 |

|
| color | number[] | [0,0,0,1] | 颜色 | |
| intensity | number | 1 | 亮度 | |
| smoothness | number | 1 | 边缘柔化 | |
| roundness | number | 1 | 圆度 | |
| rounded | number | 0/1 | 强制为圆形 |
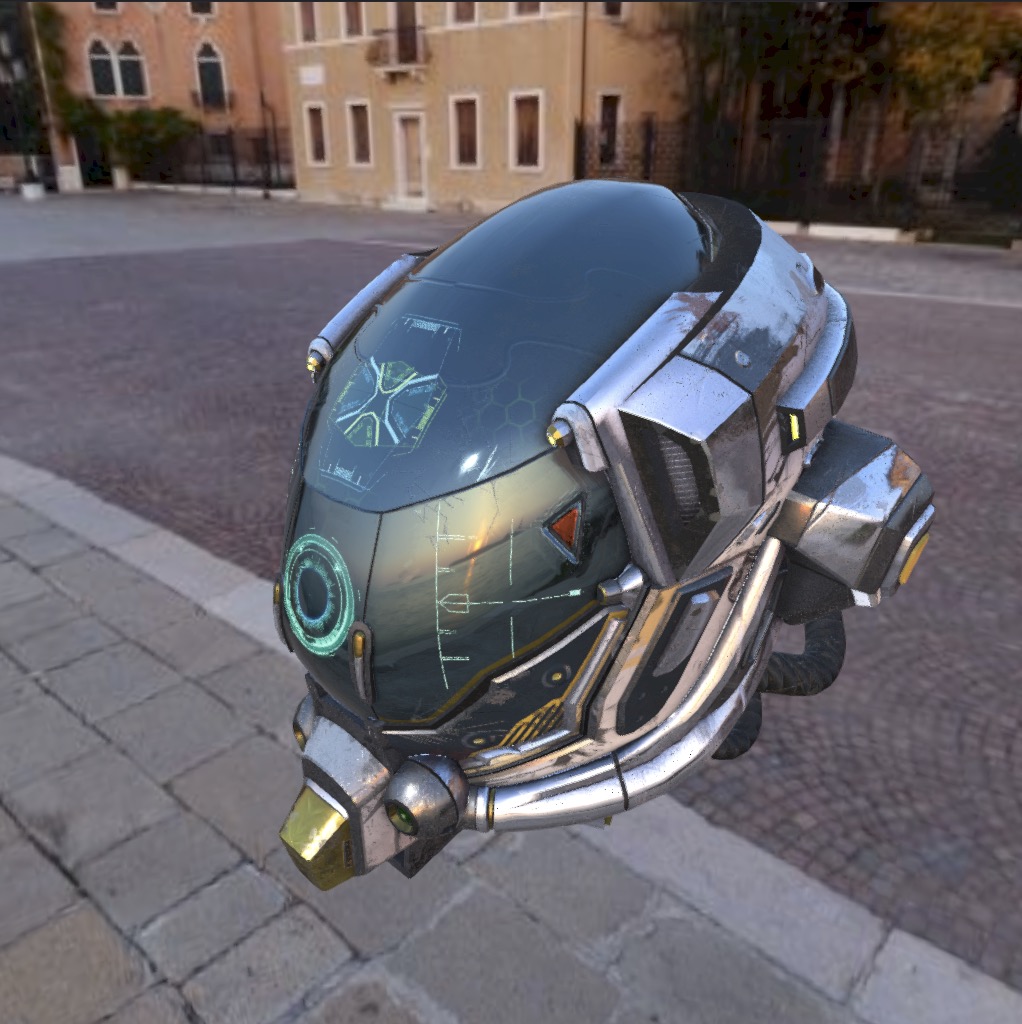
- fxaa:快速抗锯齿。
1)效果:
| 效果 |
 |
修改参数:
有时候我们想修改后处理资源的参数来调整效果,有两种方式可以实现:一个最常用的方法就是在代码中拿到资源引用后修改:
1)在代码中修改
const blur = scene.assets.getAssets('post-process', 'blur');
blur.data.radius = 20;
2)帧动画
另一种方法是使用帧动画,指定某帧的属性为后处理资源:
qu
{
  "keyframe": {
    "blur": {
      "0": {
        "asset-post-process.assetData.radius": 10
      },
      "100": {
        "asset-post-process.assetData.radius": 64
      }
    }
  },
  "animation": {
    "parent": {
      "keyframe": "blur",
      "duration": 4,
      "ease": "linear",
      "loop": -1
    }
  }
}
整体代码以及效果(来源:微信开放文档)
- 父组件wxml部分
  <xr-gltf-postprocessing
    disable-scroll
    id="main-frame"
    width="{{renderWidth}}"
    height="{{renderHeight}}"
    style="width:{{width}}px;height:{{height}}px;top:{{top}}px;left:{{left}}px;display:block;"

    type="{{type}}"
    blurRadius="{{blurRadius}}"
    bloomRadius="{{bloomRadius}}"
    bloomIntensity="{{bloomIntensity}}"
    bloomThreshold="{{bloomThreshold}}"
    vignetteIntensity="{{vignetteIntensity}}"
    vignetteSmoothness="{{vignetteSmoothness}}"
    vignetteRoundness="{{vignetteRoundness}}"
    fxaaEnabled="{{fxaaEnabled}}"
    bind:assetsProgress="handleProgress"
    bind:assetsLoaded="handleLoaded"
    loaded="{{loaded}}"
  />
  <view wx:if="{{!loaded}}" style="position: absolute;display: flex; justify-content: center; align-items: center; left: 0;top: 0;width: {{width}}px;height: {{height}}px;background-color: #6aa; text-align: center;line-height: 24px;">
    <text style="color: white;font-size: 18px;">{{progressInfo}}</text>
  </view>
  <view class="form-entry">
    <view class="form-entry-title">后处理类型</view>
    <radio-group name="pp-type" bindchange="changeType">
      <label class="radio-item"><radio value="blur" checked/>模糊</label>
      <label class="radio-item"><radio value="vignette"/>渐晕</label>
      <label class="radio-item"><radio value="bloom"/>泛光</label>
      <label class="radio-item"><radio value="fxaa"/>抗锯齿</label>
    </radio-group>
  </view>
  <!-- <view class="divider"></view> -->
  <view wx:if="{{type == 0}}" class="form-entry">
    <view class="form-entry-title">模糊半径</view>
    <slider bindchange="changeBlurRadius" value="{{blurRadius}}"></slider>
  </view>
  <view wx:if="{{type == 2}}" class="form-entry">
    <view class="form-entry-title">渐晕强度</view>
    <slider bindchange="changeVignetteIntensity" value="{{vignetteIntensity}}" min="{{0}}" max="{{8}}" step="{{0.1}}"></slider>
  </view>
  <view wx:if="{{type == 2}}" class="form-entry">
    <view class="form-entry-title">渐晕平滑</view>
    <slider bindchange="changeVignetteSmoothness" value="{{vignetteSmoothness}}" min="{{0}}" max="{{8}}" step="{{0.1}}"></slider>
  </view>
  <view wx:if="{{type == 2}}" class="form-entry">
    <view class="form-entry-title">渐晕圆度</view>
    <slider bindchange="changeVignetteRoundness" value="{{vignetteRoundness}}"  min="{{0}}" max="{{1}}" step="{{0.1}}"></slider>
  </view>
  <view wx:if="{{type == 1}}" class="form-entry">
    <view class="form-entry-title">泛光半径</view>
    <slider bindchange="changeBloomRadius" value="{{bloomRadius}}"></slider>
  </view>
  <view wx:if="{{type == 1}}" class="form-entry">
    <view class="form-entry-title">泛光强度</view>
    <slider bindchange="changeBloomIntensity" max="5" value="2" step="0.1" value="{{bloomIntensity}}"></slider>
  </view>
  <view wx:if="{{type == 1}}" class="form-entry">
    <view class="form-entry-title">泛光阈值</view>
    <slider bindchange="changeBloomThreshold" max="2" value="0.5" step="0.1" value="{{bloomThreshold}}"></slider>
  </view>
  <view wx:if="{{type == 3}}" class="form-entry">
    <view class="form-entry-title">开启FXAA</view>
    <switch checked="{{fxaaEnabled}}" bindchange="switchFXAA"/>
  </view>
父组件js部分
Page({
  data: {
    xmlCode: '',
    type: 0,

    blurRadius: 16,
    bloomRadius: 16,
    bloomIntensity: 2,
    bloomThreshold: 0.5,
    vignetteIntensity: 1,
    vignetteSmoothness: 2,
    vignetteRoundness: 1,
    fxaaEnabled: false
  },
  handleProgress: function({detail}) {
    this.setData({progressInfo: `${~~(detail.progress * 100)} %\n\n${detail.asset.assetId}(${detail.asset.type}): ${detail.asset.src}`});
  },
  handleLoaded: function({detail}) {
    this.setData({loaded: true});
  },
  changeType(e) {
    const type = e.detail.value;
    if (type === "blur") {
      this.setData({
        type: 0
      });
    } else if (type === "bloom") {
      this.setData({
        type: 1
      });
    } else if (type === "vignette") {
      this.setData({
        type: 2
      });
    } else if (type === "fxaa") {
      this.setData({
        type: 3
      });
    }
  },
  changeBlurRadius(e) {
    this.setData({
      blurRadius: e.detail.value
    });
  },
  changeBloomRadius(e) {
    this.setData({
      bloomRadius: e.detail.value
    });
  },
  changeBloomIntensity(e) {
    this.setData({
      bloomIntensity: e.detail.value
    });
  },
  changeBloomThreshold(e) {
    this.setData({
      bloomThreshold: e.detail.value
    });
  },
  changeVignetteIntensity(e) {
    this.setData({
      vignetteIntensity: e.detail.value
    });
  },
  changeVignetteSmoothness(e) {
    this.setData({
      vignetteSmoothness: e.detail.value
    });
  },
  changeVignetteRoundness(e) {
    this.setData({
      vignetteRoundness: e.detail.value
    });
  },
  switchFXAA(e) {
    this.setData({
      fxaaEnabled: !this.data.fxaaEnabled
    });
  }
});
- 父组件json部分
{
  "usingComponents": {
    "xr-gltf-postprocessing": "../../../components/xr-basic-postprocessing/index"
  },
  "disableScroll": true
}
子组件wxml部分
<xr-scene id="xr-scene" bind:ready="handleReady" bind:tick="handleTick">
  <xr-assets bind:progress="handleAssetsProgress" bind:loaded="handleAssetsLoaded">
    <xr-asset-load
      type="env-data" asset-id="env1" src="https://mmbizwxaminiprogram-1258344707.cos.ap-guangzhou.myqcloud.com/xr-frame/demo/env-test.bin"
    />
    <xr-asset-load type="gltf" asset-id="night_car_landscape" src="https://mmbizwxaminiprogram-1258344707.cos.ap-guangzhou.myqcloud.com/xr-frame/demo/night_car_landscape.glb" />
    <xr-asset-load type="gltf" asset-id="bedroom" src="https://mmbizwxaminiprogram-1258344707.cos.ap-guangzhou.myqcloud.com/xr-frame/demo/bedroom.glb" />
  </xr-assets>
  <xr-env env-data="{{env}}" />
  <xr-node>
    <xr-node node-id="camera-target" position="0 0 0"></xr-node>
    <xr-node layer="1">
      <xr-asset-post-process asset-id="bloom1" type="bloom" is-hdr data="radius: {{bloomRadius_0}}, intensity: {{bloomIntensity}}, threshold: {{bloomThreshold}}, softThreshold: 0.8"/>
      <xr-asset-post-process asset-id="bloom2" type="bloom" is-hdr data="radius: {{bloomRadius_1}}, intensity: {{bloomIntensity}}, threshold: {{bloomThreshold}}, softThreshold: 0.8"/>
      <xr-gltf node-id="gltf_1" position="0 0 0" rotation="0 0 0" scale="0.01 0.01 0.01" model="night_car_landscape"></xr-gltf>
    </xr-node>
    <xr-node layer="2">
      <xr-asset-post-process asset-id="blur" type="blur" data="radius: {{blurRadius}}"/>
      <xr-asset-post-process asset-id="vignette" type="vignette" data="color:1 0 0 1,intensity:{{vignetteIntensity}},smoothness:{{vignetteSmoothness}},roundness:{{vignetteRoundness}}"/>
      <xr-gltf node-id="gltf_2" position="0.5 -1 -2" rotation="0 0 0" scale="1 1 1" model="bedroom"></xr-gltf>
    </xr-node>
    <xr-node layer="3">
      <!-- xr-basic -->
      <xr-asset-post-process asset-id="fxaa" type="fxaa"/>
      <xr-asset-material asset-id="standard-mat" effect="standard" />
      <xr-mesh node-id="mesh-plane" position="0 -0.02 -4" rotation="0 0 0" scale="5 1 5" geometry="plane" material="standard-mat" uniforms="u_baseColorFactor:0.48 0.78 0.64 1" receive-shadow></xr-mesh>
      <xr-mesh id="cube" node-id="mesh-cube" position="-1 0.5 -3.5" scale="1 1 1" rotation="0 45 0" geometry="cube" material="standard-mat" uniforms="u_baseColorFactor:0.298 0.764 0.85 1" cast-shadow></xr-mesh>
      <xr-mesh node-id="mesh-sphere" position="0 1.25 -5" scale="1.25 1.25 1.25" geometry="sphere" material="standard-mat" uniforms="u_baseColorFactor:0.937 0.176 0.368 1" cast-shadow></xr-mesh>
      <xr-mesh node-id="mesh-cylinder" position="1 0.7 -3.5" scale="1 0.7 1" geometry="cylinder" material="standard-mat" uniforms="u_baseColorFactor:1 0.776 0.364 1" cast-shadow></xr-mesh>
    </xr-node>
    <xr-camera
      id="camera" node-id="camera" position="0 0 {{cameraPosition}}" clear-color="{{clearColor}}"
      near="0.1"
      far="2000"
      target="{{cameraTarget}}" background="{{background}}" camera-orbit-control=""
      cull-mask="{{cullMask}}"
      post-process="{{pp}}"
    ></xr-camera>
  </xr-node>
  <xr-node node-id="lights">
    <xr-light type="ambient" color="1 1 1" intensity="{{aIntensity}}" />
    <xr-light type="directional" rotation="40 180 0" color="1 1 1" intensity="{{dIntensity}}" />
  </xr-node>
</xr-scene>
子组件js部分
const blurData = {
  cullMask: 0b101,
  aIntensity: 1,
  dIntensity: 2,
  env: "",
  background: "default",
  cameraPosition: 1.3,
  clearColor: "0 0 0 1",
  cameraTarget: "camera-target",

  pp: "blur",
  // blurRadius: 0
};

const bloomData = {
  cullMask: 0b11,
  aIntensity: 0,
  dIntensity: 0,
  env: "",
  background: "default",
  cameraPosition: 10,
  clearColor: "0 0 0 1",
  cameraTarget: "camera-target",

  pp: "bloom2",
  // bloomRadius_0: 0,
  // bloomRadius_1: 0
};

const fxaaData = {
  cullMask: 0b1001,
  aIntensity: 1,
  dIntensity: 3,
  env: "",
  background: "default",
  cameraPosition: 1,
  clearColor: "0.925 0.925 0.925 1",
  cameraTarget: "mesh-sphere"
};

const vignetteData = {
  cullMask: 0b101,
  aIntensity: 1,
  dIntensity: 2,
  env: "",
  background: "default",
  cameraPosition: 1.3,
  clearColor: "0 0 0 1",
  cameraTarget: "camera-target",
  pp: "vignette",
};

Component({
  properties: {
    type: {
      type: Number,
      value: 0,
      observer: function (newVal, oldVal) {
        if (newVal !== oldVal) {
          if (newVal === 0) {
            this.activeBlur();
          } else if (newVal === 1) {
            this.activeBloom();
          } else if (newVal === 2) {
            this.activeVignette();
          } else if (newVal === 3) {
            this.activeFXAA();
          }
        }
      }
    },
    blurRadius: {
      type: Number,
      value: 0
    },
    bloomRadius: {
      type: Number,
      value: 0,
      observer(newVal, oldVal) {
        this.setData({
          bloomRadius_0: newVal * 0.2,
          bloomRadius_1: newVal * 0.8
        });
      }
    },
    bloomIntensity: {
      type: Number,
      value: 1,
    },
    bloomThreshold: {
      type: Number,
      value: 0.5,
    },
    vignetteIntensity: {
      type: Number,
      value: 1,
    },
    vignetteSmoothness: {
      type: Number,
      value: 2,
    },
    vignetteRoundness: {
      type: Number,
      value: 1,
    },
    fxaaEnabled: {
      type: Boolean,
      value: false,
      observer(newVal, oldVal) {
        this.setData({
          fxaaEnabled: newVal
        });
        if (this.data.type === 3) {
          this.activeFXAA();
        }
      }
    }
  },
  data: {
    loaded: false,
    env: "",
    cullMask: 0,
    background: "default",
    aIntensity: 0,
    dIntensity: 0,
    pp: "",
    cameraPosition: 1,
    cameraTarget: "camera-target",

    //---bloom---
    bloomRadius_0: 0,
    bloomRadius_1: 1,

    //---fxaa---
    fxaaEnabled: false
  },
  lifetimes: {
    attached() {
      console.log('data.a', this.data.a) // expected 123
    }
  },
  methods: {
    handleReady: function({detail}) {
      this.scene = detail.value;
      console.log('scene', detail.value);
      this.activeBlur();
    },
    handleTick: function() {
      // const camera = this.scene.getNodeById("camera");
      // const transform = camera.el._components.transform;
      // if (transform.rotation.y > Math.PI * 0.25) {
      //   transform.rotation.y = Math.PI * 0.25;
      // } else if  (transform.rotation.y < -Math.PI * 0.25) {
      //   transform.rotation.y = -Math.PI * 0.25;
      // }
    },
    handleAssetsProgress: function({detail}) {
      this.triggerEvent('assetsProgress', detail.value);
    },
    handleAssetsLoaded: function({detail}) {
      this.triggerEvent('assetsLoaded', detail.value);
      this.setData({loaded: true});
    },
    activeBlur() {
      this.setData(blurData);
    },
    activeBloom() {
      this.setData(bloomData);
    },
    activeVignette() {
      this.setData(vignetteData);
    },
    activeFXAA() {
      this.setData(fxaaData);
      this.setData({
        pp: this.data.fxaaEnabled ? "fxaa" : ""
      });
    }
  }
})- 效果如下:
微信小程序xr-frame后处理
