目录
一、前言
二、Lua基础语法
hello world
保留关键字
注释
变量
字符串
空值
布尔类型
作用域
控制语句
if-else
for循环
函数
赋值
返回值
Table
数组
遍历
成员函数
三、openresty的安装
(一)预编译安装
(二)源码编译安装
(三)服务命令
(四)测试lua脚本以文件的形式
代码热部署
获取nginx请求头信息
获取post请求参数
Http协议版本
请求方法
原始的请求头内容
body内容体
(五)Nginx缓存
Nginx全局内存缓存
lua-resty-lrucache
lua-resty-redis访问redis
lua-resty-mysql
一、前言
Lua 是由巴西里约热内卢天主教大学(Pontifical Catholic University of Rio de Janeiro)里的一个研究小组于1993年开发的一种轻量、小巧的脚本语言,用标准 C 语言编写,其设计目的是为了嵌入应用程序中,从而为应用程序提供灵活的扩展和定制功能。
官网:The Programming Language Lua
学习lua语言之前需要先安装lua版本,并在ideal下载插件,具体的可以看下面这篇文章
Lua环境安装+Idea配置_idea配置lua_xiaowu714的博客-CSDN博客![]() https://blog.csdn.net/xiaowu714/article/details/127763087?spm=1001.2014.3001.5506
https://blog.csdn.net/xiaowu714/article/details/127763087?spm=1001.2014.3001.5506
二、Lua基础语法
hello world
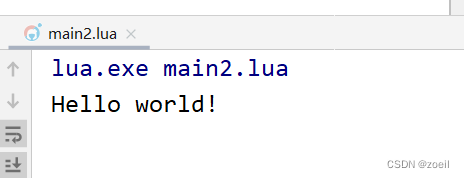
在ideal新建lua项目并创建lua文件后输入以下内容
local function main()
    print("Hello world!")
end

main()
运行结果
保留关键字
and break do else elseif end false for function
if in local nil not or repeat return then true
until while
注释
-- 两个减号是行注释

--[[

 这是块注释

 这是块注释.

 --]]
变量
数字类型
Lua的数字只有double型,64bits
你可以以如下的方式表示数字
num = 1024
num = 3.0
num = 3.1416
num = 314.16e-2
num = 0.31416E1
num = 0xff
num = 0x56字符串
可以用单引号,也可以用双引号
也可以使用转义字符‘\n’ (换行), ‘\r’ (回车), ‘\t’ (横向制表), ‘\v’ (纵向制表), ‘\’ (反斜杠), ‘\”‘ (双引号), 以及 ‘\” (单引号)等等
下面的四种方式定义了完全相同的字符串(其中的两个中括号可以用于定义有换行的字符串)
a = 'alo\n123"'

a = "alo\n123\""

a = '\97lo\10\04923"'

a = [[alo

123"]]
空值
C语言中的NULL在Lua中是nil,比如你访问一个没有声明过的变量,就是nil
布尔类型
只有nil和false是 false
数字0,‘’空字符串(’\0’)都是true
作用域
lua中的变量如果没有特殊说明,全是全局变量,那怕是语句块或是函数里。
变量前加local关键字的是局部变量。
控制语句
while循环
local function main()

    local i = 0
    local max = 10
    while i <= max do
        print(i)
        i = i + 1
    end
end

main()
运行结果

if-else
local function main()

    local age = 30

    local sex = 'Malee'

    if age <= 40 and sex == "Male" then
        print("男人四十一枝花")
    elseif age > 40 and sex ~= "Female" then -- ~=  等于 !=
        io.write("old man")
    elseif age < 20 then
        print("too young too simple")
    else
        print("Your age is "..age)   --Lua中字符串的连接用..

    end

end

main()
for循环
local function main()

    for i = 10, 1 , -1 do   -- i<=1, i--
        print(i)
    end
    for i = 1, 10 , 1 do    -- i<=10, i++
        print(i)
    end

end

main()
函数
local function main()

    function myPower(x,y) -- 定义函数

        return      y+x

    end

    power2 = myPower(2,3)  -- 调用

    print(power2)
end

main()
local function main()
function newCounter()
local i = 0
return function() -- anonymous function(匿名函数)
i = i + 1
return i
end
end
c1 = newCounter()
print(c1()) --> 1
print(c1()) --> 2
print(c1())
end
main()赋值
local function main()
    name, age,bGay = "yiming", 37, false, "yimingl@hotmail.com" -- 多出来的舍弃

    print(name,age,bGay)
end

main()
返回值
local function main()
    function isMyGirl(name)
        return name == 'xiao6' , name
    end

    local bol,name = isMyGirl('xiao6')

    print(name,bol)
end

main() 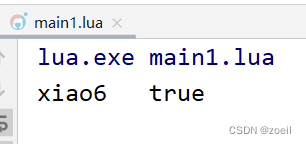
Table
KV形式,类似map
local function main()
    dog = {name='111',age=18,height=165.5}

    dog.age=35

    print(dog.name,dog.age,dog.height)

    print(dog)

end

main()
数组
local function main()
    local function main()
        arr = {"string", 100, "dog",function() print("wangwang!") return 1 end}

        print(arr[4]())
    end
    main()
end

main()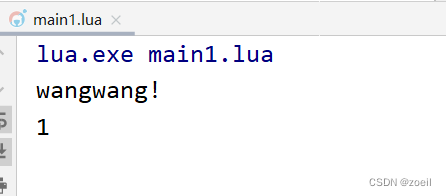
遍历
local function main()
    arr = {"string", 100, "dog",function() print("wangwang!") return 1 end}

    for k, v in pairs(arr) do

        print(k, v)
    end
end

main()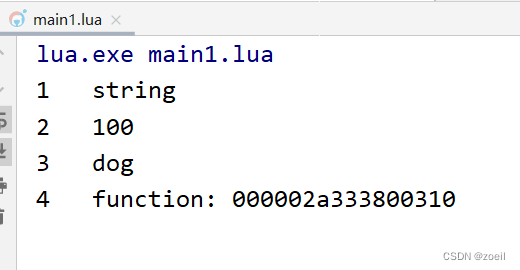
成员函数
local function main()

person = {name='旺财',age = 18}

  function  person.eat(food)

    print(person.name .." eating "..food)

  end
person.eat("骨头")
end
main()
三、openresty的安装
(一)预编译安装
以CentOS举例 其他系统参照:OpenResty - OpenResty® Linux 包
你可以在你的 CentOS 系统中添加 openresty 仓库,这样就可以便于未来安装或更新我们的软件包(通过 yum update 命令)。运行下面的命令就可以添加我们的仓库:
yum install yum-utils
yum-config-manager --add-repo https://openresty.org/package/centos/openresty.repo
然后就可以像下面这样安装软件包,比如 openresty:
yum install openresty
如果你想安装命令行工具 resty,那么可以像下面这样安装 openresty-resty 包:
sudo yum install openresty-resty
(二)源码编译安装
官网下载tar.gz包
OpenResty - 下载
最小版本基于nginx1.21
./configure
然后在进入 openresty-VERSION/目录, 然后输入以下命令配置:
./configure
默认, --prefix=/usr/local/openresty 程序会被安装到/usr/local/openresty目录。
依赖 gcc openssl-devel pcre-devel zlib-devel
安装:yum install gcc openssl-devel pcre-devel zlib-devel postgresql-devel
您可以指定各种选项,比如
./configure --prefix=/opt/openresty \

            --with-luajit \

            --without-http_redis2_module \

            --with-http_iconv_module \

            --with-http_postgres_module
试着使用 ./configure --help 查看更多的选项。
make && make install
查看openresty的目录

(三)服务命令
启动
Service openresty start
停止
Service openresty stop
检查配置文件是否正确
Nginx -t
重新加载配置文件
Service openresty reload
查看已安装模块和版本号
Nginx -V
测试Lua脚本
在Nginx.conf 中写入
   location /lua {

        default_type text/html;
        content_by_lua '
           ngx.say("<p>Hello, World!</p>")
         ';
      }
启动nginx
./nginx -c /usr/local/openresty/nginx/conf/nginx.conf

(四)测试lua脚本以文件的形式
       location /lua {

        default_type text/html;
        content_by_lua_file lua/hello.lua;
      }
在nginx目录下创建lua目录并写入hello.lua文件,文件内容
ngx.say("<p>hello world!!!</p>")
代码热部署
hello.lua脚本每次修改都需要重启nginx,很繁琐,因此可以通过配置开启热部署
lua_code_cache off;
会提示开启该功能可能影响nginx的性能

获取nginx请求头信息
local headers = ngx.req.get_headers()

ngx.say("Host : ", headers["Host"], "<br/>")

ngx.say("user-agent : ", headers["user-agent"], "<br/>")

ngx.say("user-agent : ", headers.user_agent, "<br/>")

for k,v in pairs(headers) do

    if type(v) == "table" then

        ngx.say(k, " : ", table.concat(v, ","), "<br/>")

    else

        ngx.say(k, " : ", v, "<br/>")

    end

end 
获取post请求参数
ngx.req.read_body()

ngx.say("post args begin", "<br/>")

local post_args = ngx.req.get_post_args()

for k, v in pairs(post_args) do

    if type(v) == "table" then

        ngx.say(k, " : ", table.concat(v, ", "), "<br/>")

    else

        ngx.say(k, ": ", v, "<br/>")

    end
end 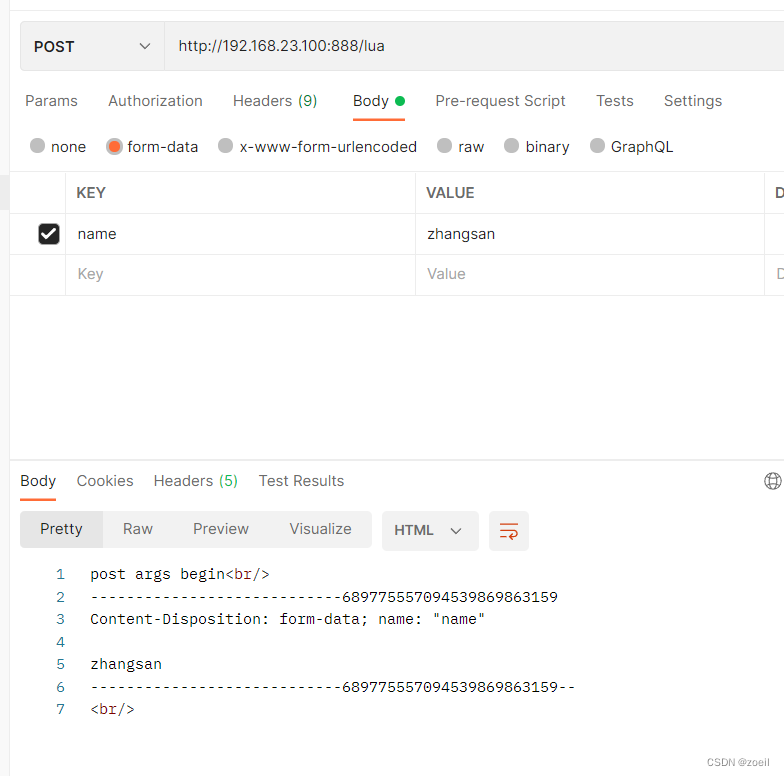
Http协议版本
ngx.say("ngx.req.http_version : ", ngx.req.http_version(), "<br/>")请求方法
ngx.say("ngx.req.get_method : ", ngx.req.get_method(), "<br/>") 原始的请求头内容
ngx.say("ngx.req.raw_header : ", ngx.req.raw_header(), "<br/>") body内容体
ngx.say("ngx.req.get_body_data() : ", ngx.req.get_body_data(), "<br/>")(五)Nginx缓存
Nginx全局内存缓存
nginx配置文件的http块中添加
lua_shared_dict shared_data 1m; # 申请一兆内存作为内存缓存,该内存可以被所有的进程进行共享的且可以保持原子性
hello.lua脚本内容
local shared_data = ngx.shared.shared_data


local i = shared_data:get("i")

if not i then

    i = 1

    shared_data:set("i", i)

    ngx.say("lazy set i ", i, "<br/>")
end


i = shared_data:incr("i", 1)

ngx.say("i=", i, "<br/>")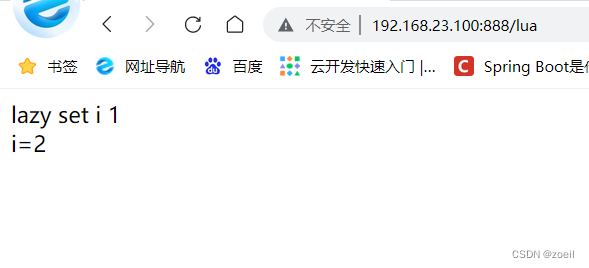
接下来每次都会从访问ii都会+1

lua-resty-lrucache
Lua 实现的一个简单的 LRU 缓存,适合在 Lua 空间里直接缓存较为复杂的 Lua 数据结构:它相比 ngx_lua 共享内存字典可以省去较昂贵的序列化操作,相比 memcached 这样的外部服务又能省去较昂贵的 socket 操作
https://github.com/openresty/lua-resty-lrucache
引用lua文件
       location /lua {

        default_type text/html;
#        content_by_lua_file lua/hello.lua;

            content_by_lua_block {
                require("my/cache").go()
            }
      }
当不知道nginx是在哪个文件下查找时可以先重启nginx,然后访问报错试一下,然后在error.log文件中可以看到默认在哪些文件下查找
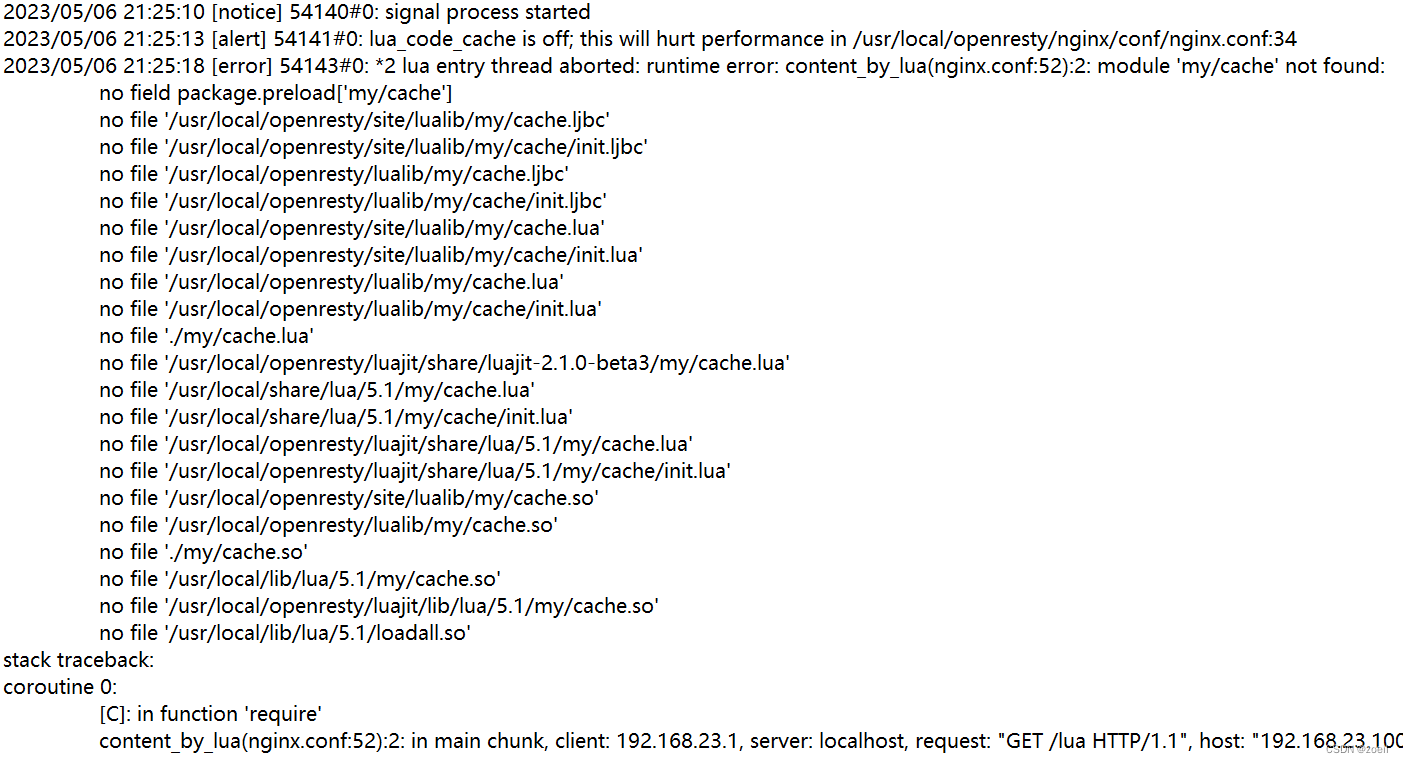
我们在lualib下创建my目录,并在my目录下创建cache.lua脚本,脚本内容如下:
local _M = {}


lrucache = require "resty.lrucache"

c, err = lrucache.new(200)  -- allow up to 200 items in the cache
ngx.say("count=init")


if not c then
    error("failed to create the cache: " .. (err or "unknown"))
end

function _M.go()

count = c:get("count")


c:set("count",100)
ngx.say("count=", count, " --<br/>")


if not count then


    c:set("count",1)

    ngx.say("lazy set count ", c:get("count"), "<br/>")

else


c:set("count",count+1)


ngx.say("count=", count, "<br/>")
end


end
return _M
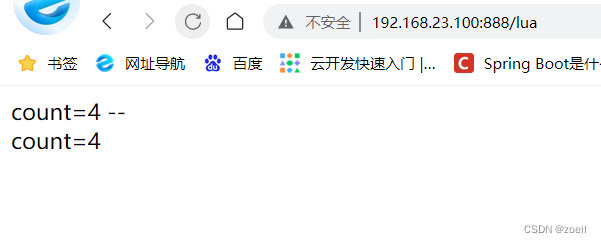
记得开启lua_code_cache,即代码缓存,不然每次代码都会重复执行,永远都拿不到count的值

lua-resty-redis访问redis
官网:GitHub - openresty/lua-resty-redis: Lua redis client driver for the ngx_lua based on the cosocket API
常用方法
local res, err = red:get("key")

local res, err = red:lrange("nokey", 0, 1)

ngx.say("res:",cjson.encode(res))
创建连接
red, err = redis:new()

ok, err = red:connect(host, port, options_table?)
timeout
red:set_timeout(time)keepalive
red:set_keepalive(max_idle_timeout, pool_size)close
ok, err = red:close()pipeline
red:init_pipeline()

results, err = red:commit_pipeline()
认证
    local res, err = red:auth("foobared")

    if not res then

        ngx.say("failed to authenticate: ", err)

        return
end
nginx的配置
http {
    include       mime.types;
    default_type  application/octet-stream;

    sendfile        on;

    keepalive_timeout  65;

    lua_code_cache off;
    lua_shared_dict shared_data 1m;
    server {
        listen       888;
        server_name  localhost;

       location /lua {

        default_type text/html;
        content_by_lua_file lua/redis.lua;

        }
        location / {
            root   html;
            index  index.html index.htm;
        }


        error_page   500 502 503 504  /50x.html;
        location = /50x.html {
            root   html;
        }
    }
}
redis.lua脚本
  local redis = require "resty.redis"
                local red = redis:new()

                red:set_timeouts(1000, 1000, 1000) -- 1 sec

  local ok, err = red:connect("127.0.0.1", 6379)
  local res, err = red:auth("zjy123...000")

    if not res then

        ngx.say("failed to authenticate: ", err)

        return
  end
 if not ok then
                    ngx.say("failed to connect: ", err)
                    return
                end

                ok, err = red:set("dog", "an animal")
                if not ok then
                    ngx.say("failed to set dog: ", err)
                    return
                end

                ngx.say("set result: ", ok)

                local res, err = red:get("dog")
                if not res then
                    ngx.say("failed to get dog: ", err)
                    return
                end

                if res == ngx.null then
                    ngx.say("dog not found.")
                    return
                end


              ngx.say("dog: ", res)
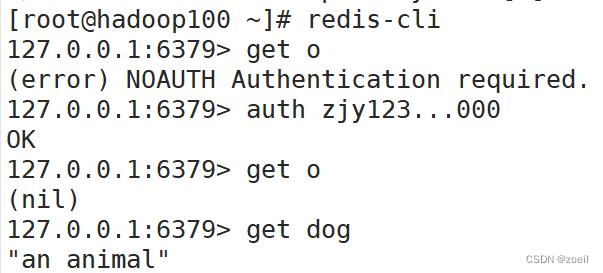
访问结果

验证
总结:
lua-resty-redis直接访问redis可以节省原本的一些步骤,比如:
客户端请求--nginx--tomcat--redis--tomcat--nginx--客户端
优化为:
客户端请求--nginx--redis--nginx--客户端
对于一些不常更新的放在redis的资源可以使用该方式,节省了不必要的步骤
lua-resty-mysql
官网: GitHub - openresty/lua-resty-mysql: Nonblocking Lua MySQL driver library for ngx_lua or OpenResty
配置文件
    charset utf-8;
    lua_code_cache off;
    lua_shared_dict shared_data 1m;
    server {
        listen       888;
        server_name  localhost;

        #charset koi8-r;

        #access_log  logs/host.access.log  main;


       location /lua {

        default_type text/html;
        content_by_lua_file lua/mysql.lua;

       }
    }
mysql.lua
local mysql = require "resty.mysql"
                local db, err = mysql:new()
                if not db then
                    ngx.say("failed to instantiate mysql: ", err)
                    return
                end

                db:set_timeout(1000) -- 1 sec


                local ok, err, errcode, sqlstate = db:connect{
                    host = "192.168.102.100",
                    port = 3306,
                    database = "atguigudb1",
                    user = "root",
                    password = "123456",
                    charset = "utf8",
                    max_packet_size = 1024 * 1024,
                }


                ngx.say("connected to mysql.<br>")


                local res, err, errcode, sqlstate = db:query("drop table if exists cats")
                if not res then
                    ngx.say("bad result: ", err, ": ", errcode, ": ", sqlstate, ".")
                    return
                end


                res, err, errcode, sqlstate =
                    db:query("create table cats "
                             .. "(id serial primary key, "
                             .. "name varchar(5))")
                if not res then
                    ngx.say("bad result: ", err, ": ", errcode, ": ", sqlstate, ".")
                    return
                end

                ngx.say("table cats created.")


                res, err, errcode, sqlstate =
                    db:query("select * from student")
                if not res then
                    ngx.say("bad result: ", err, ": ", errcode, ": ", sqlstate, ".")
                    return
                end

                local cjson = require "cjson"
                ngx.say("result: ", cjson.encode(res))


                local ok, err = db:set_keepalive(10000, 100)
                if not ok then
                    ngx.say("failed to set keepalive: ", err)
                    return
                end

![PMP项目管理-[第十二章]采购管理](https://img-blog.csdnimg.cn/01abcb8b975b44e694335e3e1745c33c.png)



![心法利器[84] | 最近面试小结](https://img-blog.csdnimg.cn/img_convert/90a5f9e6bbc1e3a556ef065f1394a837.png)


