前言
本篇文章主要介绍本人在自己项目中和开源项目中策略模式的实现方式
基于spring实现策略模式
-
最近在使用nacos-sync同步工具时发现其使用了策略模式,下面主要介绍它是如何使用的
-
实现步骤
2.1 定义接口:SyncServicepublic interface SyncService { boolean sync(TaskDO taskDO); }2.2 多个SyncService接口实现类,下面举例一个ZookeeperSyncToNacosServiceImpl
// @NacosSyncService注解包含@Component
@NacosSyncService(sourceCluster = ClusterTypeEnum.ZK, destinationCluster = ClusterTypeEnum.NACOS)
public class ZookeeperSyncToNacosServiceImpl implements SyncService {
	 @Override
    public boolean sync(TaskDO taskDO) {
    	// 同步代码忽略
        return true;
    }
}
2.3 在SyncManagerService类中进行策略分发
@Service
public class SyncManagerService implements InitializingBean, ApplicationContextAware {
	private ConcurrentHashMap<String, SyncService> syncServiceMap = new ConcurrentHashMap<String, SyncService>();
	private ApplicationContext applicationContext;

	// 通过来源和去向为key在syncServiceMap查看对应SyncService进行同步
	public boolean sync(TaskDO taskDO) {
        return getSyncService(taskDO.getSourceClusterId(), taskDO.getDestClusterId()).sync(taskDO);
    }

	// 从spring容器中查找带NacosSyncService注解的类并放入syncServiceMap中
	@Override
    public void afterPropertiesSet() {
        this.applicationContext.getBeansOfType(SyncService.class).forEach((key, value) -> {
            NacosSyncService nacosSyncService = value.getClass().getAnnotation(NacosSyncService.class);
            ClusterTypeEnum sourceCluster = nacosSyncService.sourceCluster();
            ClusterTypeEnum destinationCluster = nacosSyncService.destinationCluster();
            syncServiceMap.put(generateSyncKey(sourceCluster, destinationCluster), value);
        });
    }

    @Override
    public void setApplicationContext(ApplicationContext applicationContext) throws BeansException {
        this.applicationContext = applicationContext;
    }

	public SyncService getSyncService(String sourceClusterId, String destClusterId) {
        ClusterTypeEnum sourceClusterType = this.skyWalkerCacheServices.getClusterType(sourceClusterId);
        ClusterTypeEnum destClusterType = this.skyWalkerCacheServices.getClusterType(destClusterId);

        return syncServiceMap.get(generateSyncKey(sourceClusterType, destClusterType));
    }
}
基于Lambda方式实现
- 上面实现需要写很多实现类,如果不想写很多实现类可以考虑用lambda方式实现
- 下面展示重要策略分发类:AcoChildCompServiceDispatcher
@Service
public class AcoChildCompServiceDispatcher {

    private Map<String,BiConsumer<ProjectInfo,ProCode>> handlers = new ConcurrentHashMap<>();

    @Resource
    private AcoChildCompService acoChildCompService;

	// 在初始化将策略方法添加到handlers中
    @PostConstruct
    public void init(){
        handlers.put(ComTypeEnum.FRONT.getValue(), acoChildCompService::saveAcoChildInfoByParseWebpackCommon);
        handlers.put(ComTypeEnum.SERVER.getValue(),acoChildCompService::saveAcoChildInfoByParsePom);
    }

	// 策略分发
    public void dispatcher(ProjectInfo projectInfo, ProCode proCode){
        String comType = proCode.getComType();
        BiConsumer<ProjectInfo,ProCode> consumer = handlers.get(comType);
        consumer.accept(projectInfo,proCode);
    }
}
基于SPI的插件机制
-
上面都是要在项目中增加策略实现类,那能不能加载外面策略实现类呢?最近在看nacos的插件机制,下面把其中重要步骤抽取出来
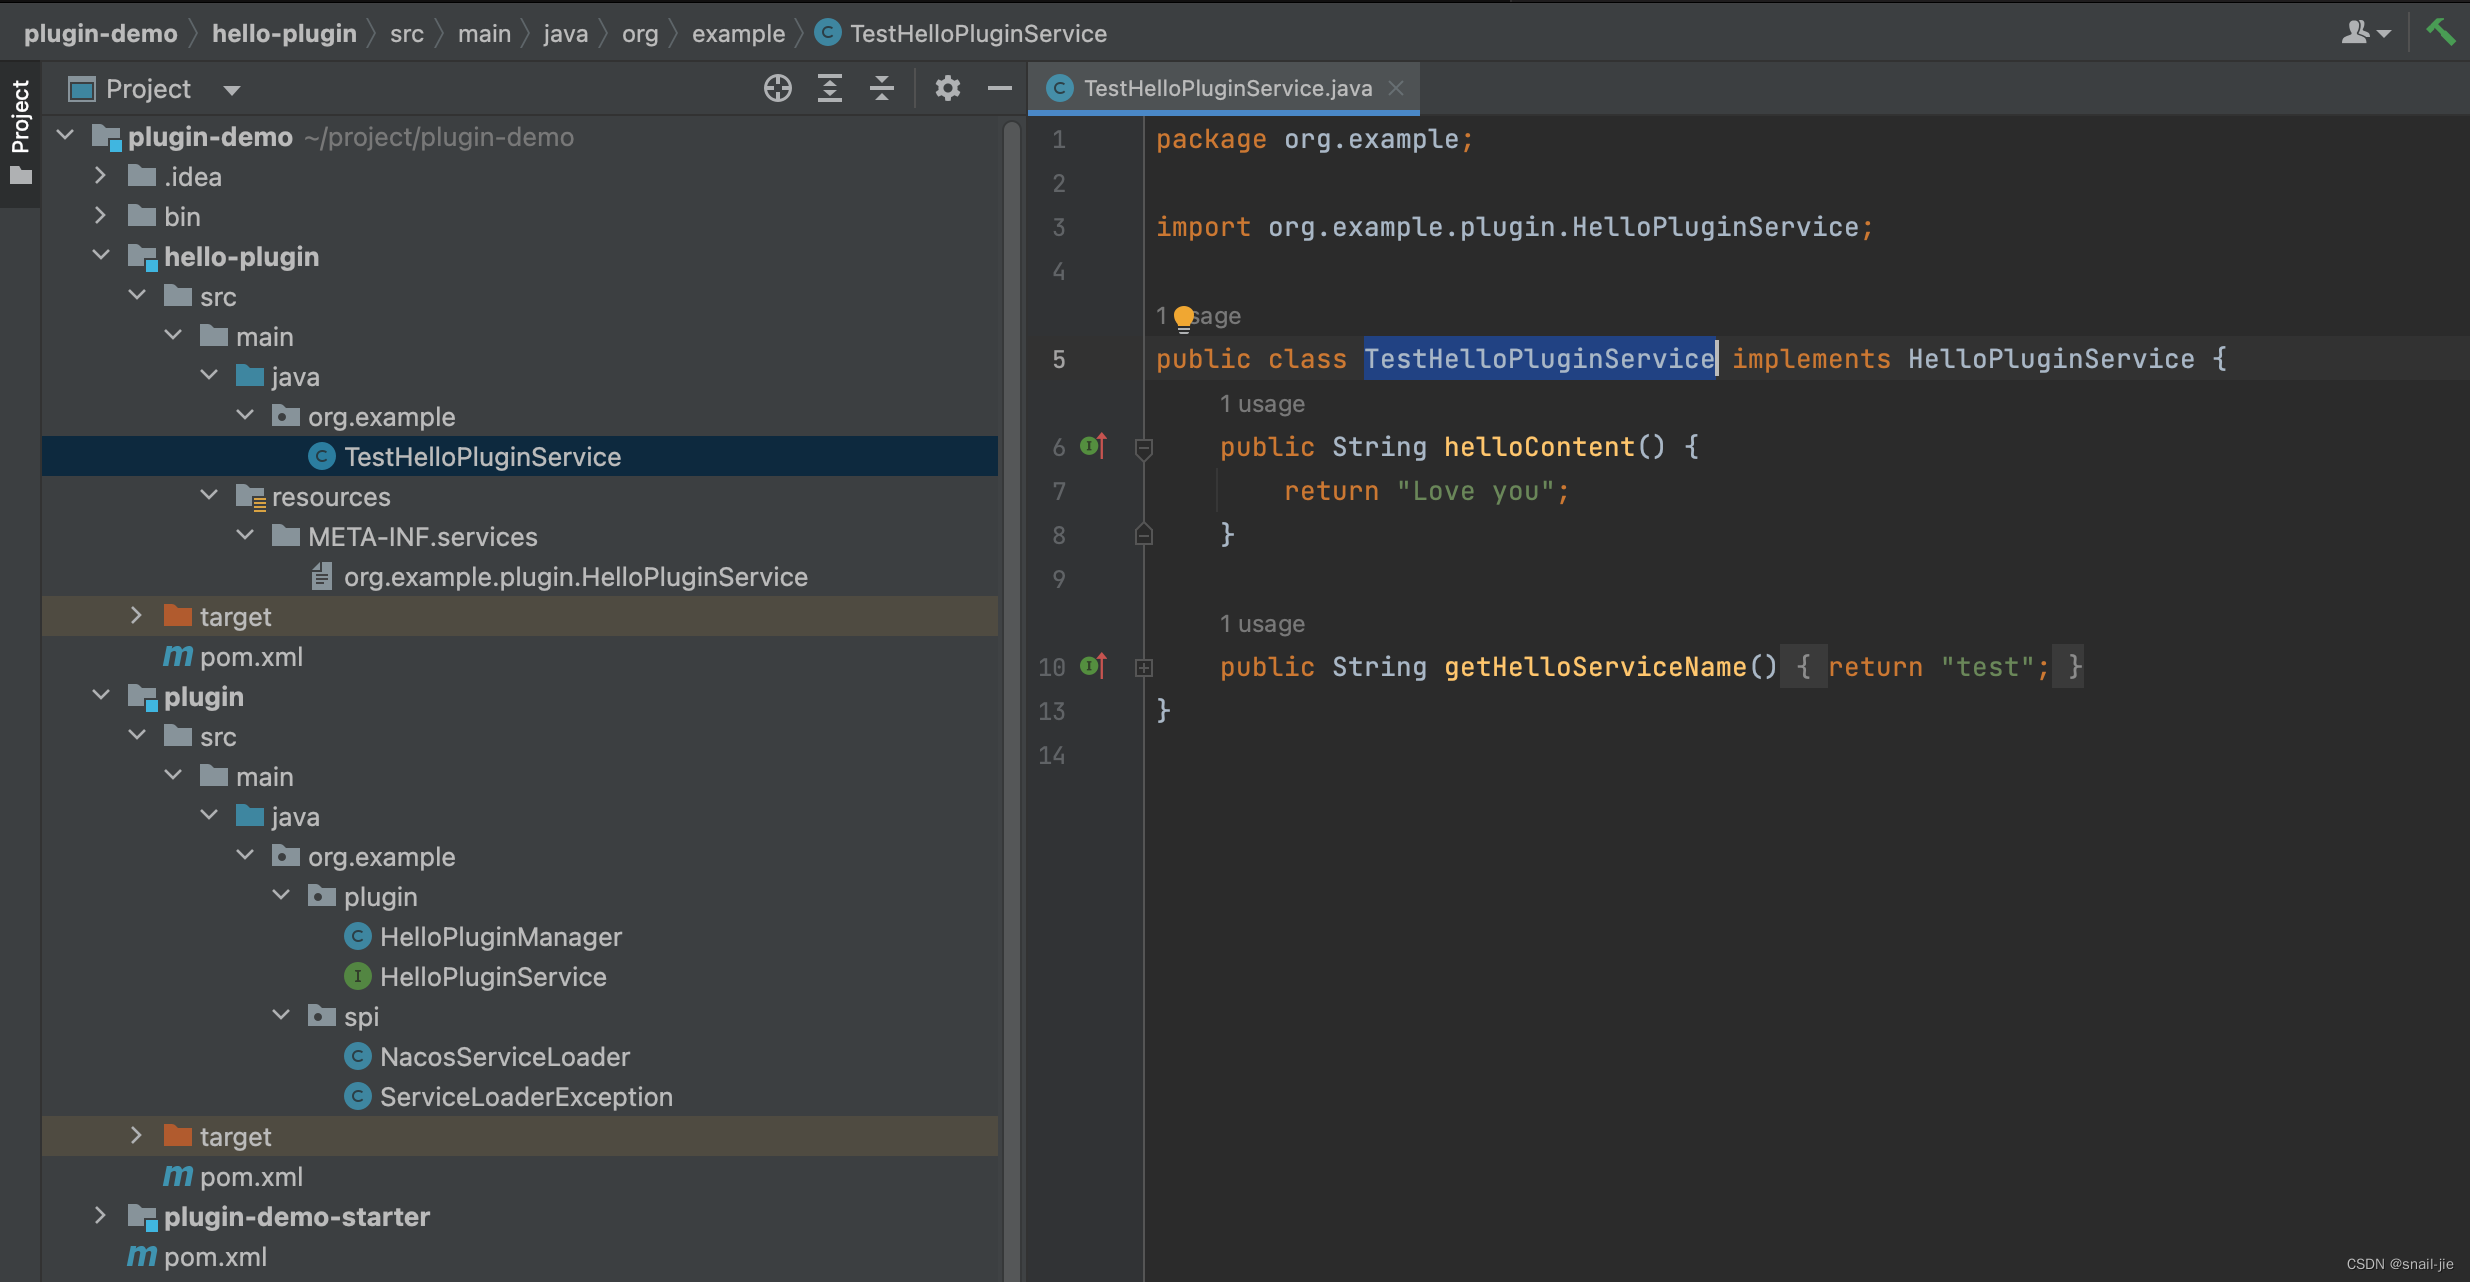
1.1 整体项目结构如下
(1)plugin模块定义插件规则
(2)自定义插件(例如下图的hello-plugin模块)必须实现HelloPluginService接口,然后META-INF/services下插件接口文件中定义对应的实现类
(3)在plugin-demo-starter模块中通过SPI加载HelloPluginService接口的实现类
1.2 将自定义插件hello-plugin的jar包放在项目的plugin目录下,然后通过-Dloader.path指定其插件包的位置

(1)注意:plugin-demo-starter模块的pom文件,layout为ZIP配置很重要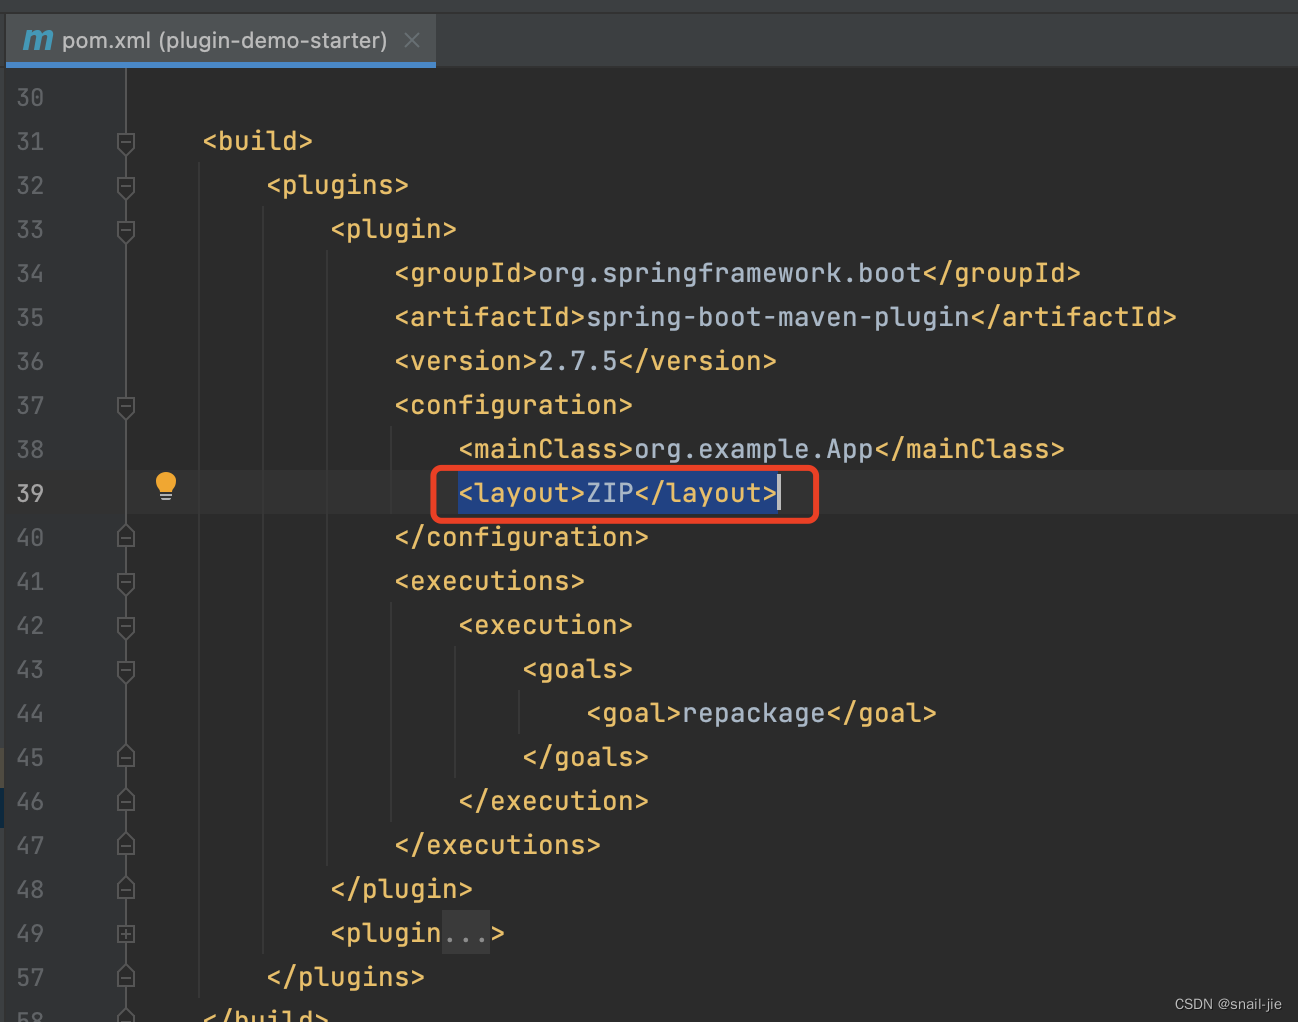
-
实现步骤
2.1 定义一个插件模块,定义插件接口(自定义插件必须引入插件包,实现其接口)public interface HelloPluginService { String helloContent(); String getHelloServiceName(); }2.2 自定义插件实现插件接口HelloPluginService,并通过META-INF/services下插件接口文件中定义对应的实现类
public class TestHelloPluginService implements HelloPluginService {
    public String helloContent() {
        return "Love you";
    }

    public String getHelloServiceName() {
        return "test";
    }
}
2.3 在应用模块通过SPI加载HelloPluginService实现类@RestController @RequestMapping("/demo") public class DemoController { @RequestMapping("/hello") public String hello(String name,String helloServiceName){ Optional<HelloPluginService> helloPluginService = HelloPluginManager.getInstance().findHelloServiceSpiImpl(helloServiceName); if(helloPluginService.isPresent()){ String content = helloPluginService.get().helloContent(); return "hello "+name+", "+content; } return "hello "+name; } }

