确保ambari server节点启动,Httpd 服务安装并启动,可参考:
Ambari 2.7.5+HDP3.1.5离线安装详细教程(附安装包)![]() https://blog.csdn.net/QYmufeng/article/details/122827261
https://blog.csdn.net/QYmufeng/article/details/122827261
1.安装ambari agent
在需要添加的主机上安装ambari agent服务
yum -y install ambari-agent2.修改配置文件
vim /etc/ambari-agent/conf/ambari-agent.ini

# 修改hostname为ambari server所在节点,大概位置16行
hostname=crpuathd01

# 在[security]下面添加https协议,大概位置46行
force_https_protocol=PROTOCOL_TLSv1_2
修改后文件:
[hap@crpuathd01]$ cat /etc/ambari-agent/conf/ambari-agent.ini
# Licensed to the Apache Software Foundation (ASF) under one or more
# contributor license agreements.  See the NOTICE file distributed with
# this work for additional information regarding copyright ownership.
# The ASF licenses this file to You under the Apache License, Version 2.0
# (the "License"); you may not use this file except in compliance with
# the License.  You may obtain a copy of the License at
#
#     http://www.apache.org/licenses/LICENSE-2.0
#
# Unless required by applicable law or agreed to in writing, software
# distributed under the License is distributed on an "AS IS" BASIS,
# WITHOUT WARRANTIES OR CONDITIONS OF ANY KIND, either express or implied.
# See the License for the specific

[server]
hostname=crpuathd01
url_port=8440
secured_url_port=8441
connect_retry_delay=10
max_reconnect_retry_delay=30


[agent]
logdir=/var/log/ambari-agent
piddir=/var/run/ambari-agent
prefix=/var/lib/ambari-agent/data
;loglevel=(DEBUG/INFO)
loglevel=DEBUG
data_cleanup_interval=86400
data_cleanup_max_age=2592000
data_cleanup_max_size_MB = 100
ping_port=8670
cache_dir=/var/lib/ambari-agent/cache
tolerate_download_failures=true
run_as_user=root
parallel_execution=0
alert_grace_period=5
status_command_timeout=5
alert_kinit_timeout=14400000
system_resource_overrides=/etc/resource_overrides
; memory_threshold_soft_mb=400
; memory_threshold_hard_mb=1000
; ignore_mount_points=/mnt/custom1,/mnt/custom2

[security]
force_https_protocol=PROTOCOL_TLSv1_2
keysdir=/var/lib/ambari-agent/keys
server_crt=ca.crt
passphrase_env_var_name=AMBARI_PASSPHRASE
ssl_verify_cert=0
credential_lib_dir=/var/lib/ambari-agent/cred/lib
credential_conf_dir=/var/lib/ambari-agent/cred/conf
credential_shell_cmd=org.apache.hadoop.security.alias.CredentialShell
force_https_protocol=PROTOCOL_TLSv1_2

[network]
; this option apply only for Agent communication
use_system_proxy_settings=true

[services]
pidLookupPath=/var/run/

[heartbeat]
state_interval_seconds=60
dirs=/etc/hadoop,/etc/hadoop/conf,/etc/hbase,/etc/hcatalog,/etc/hive,/etc/oozie,
  /etc/sqoop,
  /var/run/hadoop,/var/run/zookeeper,/var/run/hbase,/var/run/templeton,/var/run/oozie,
  /var/log/hadoop,/var/log/zookeeper,/var/log/hbase,/var/run/templeton,/var/log/hive
; 0 - unlimited
log_lines_count=300
idle_interval_min=1
idle_interval_max=10


[logging]
syslog_enabled=0
[hap@crpuathd01]$
3.重启ambari agent服务
# 重启服务
systemctl restart ambari-agent

# 查看状态
systemctl status ambari-agent
查看启动日志,日志文件:/var/log/ambari-agent/ambari-agent.log 常见报错:
2.ERROR 2019-09-17 18:29:56,558 NetUtil.py:97 - SSLError: Failed to connect. Please check openssl library versions.
vi /etc/python/cert-verification.cfg

[https]
verify=disable
解决方案:检查自己python和ssl版本
rpm -qa |grep ssl
python -V
注意ssl版本必须高于15,python版本必须高于2.6,最好为linux自带python
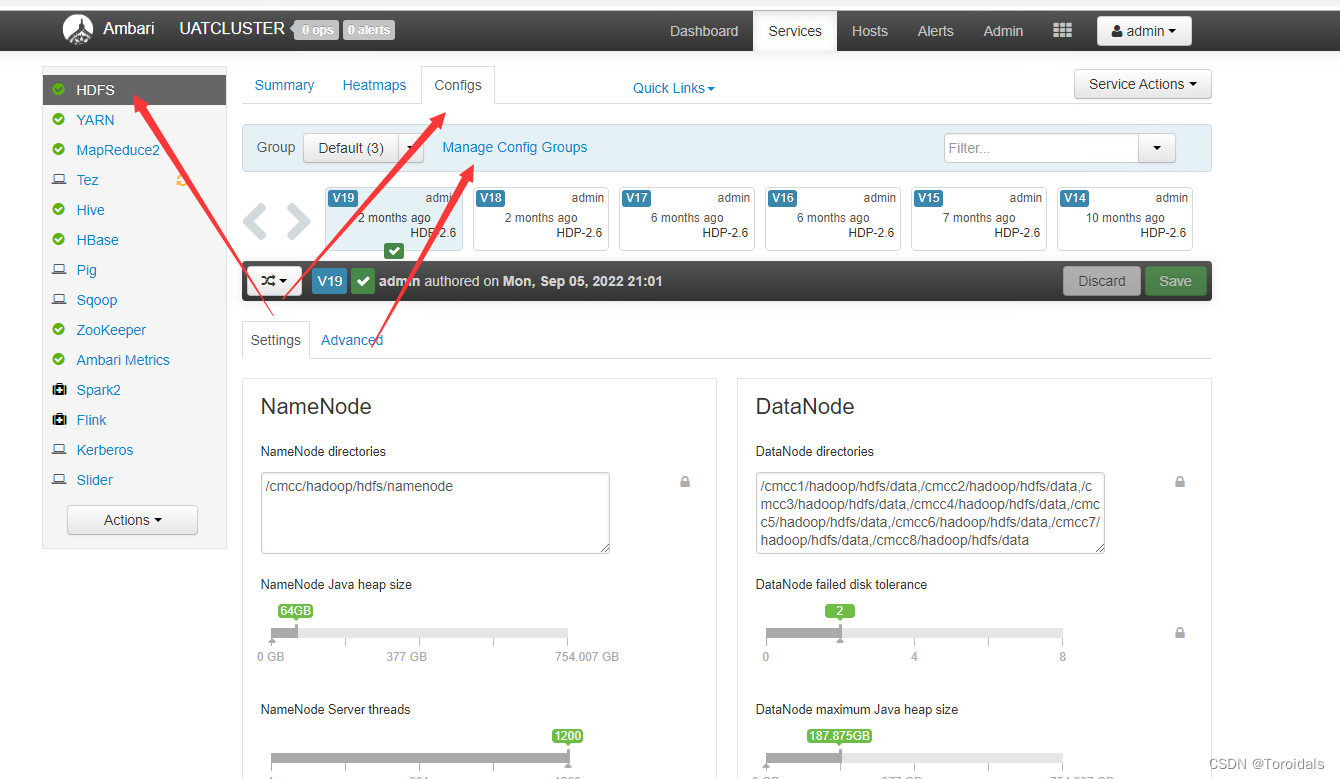
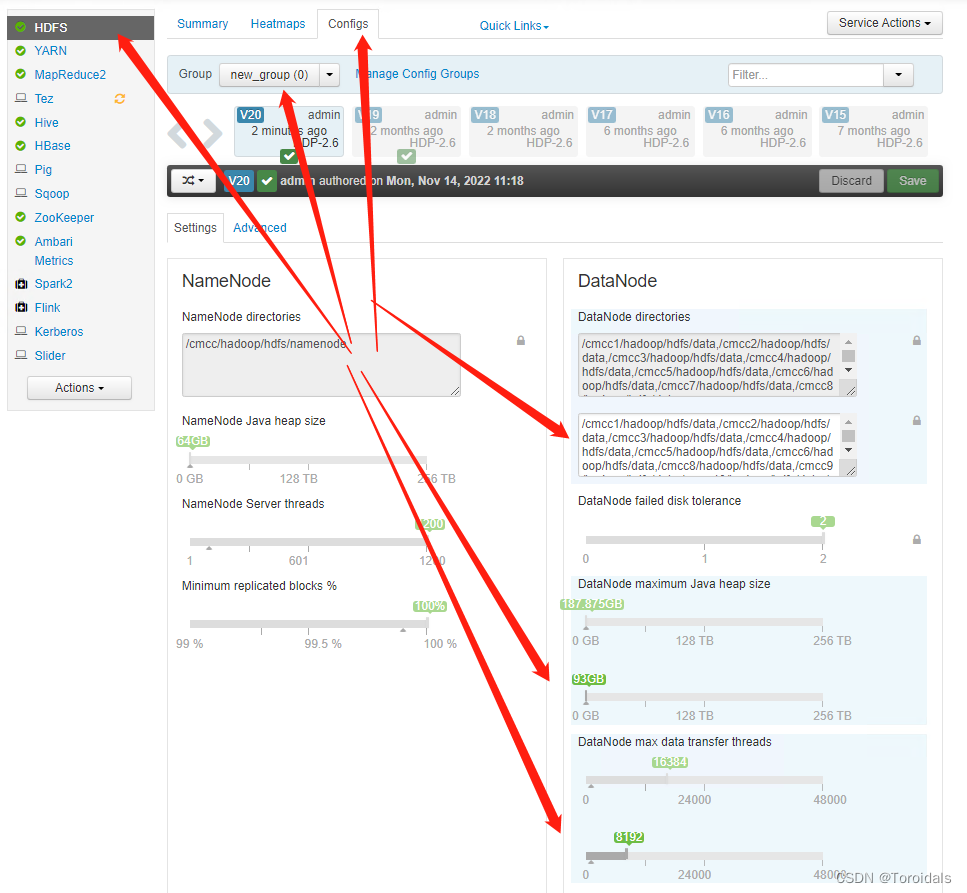
4.添加HDFS配置组
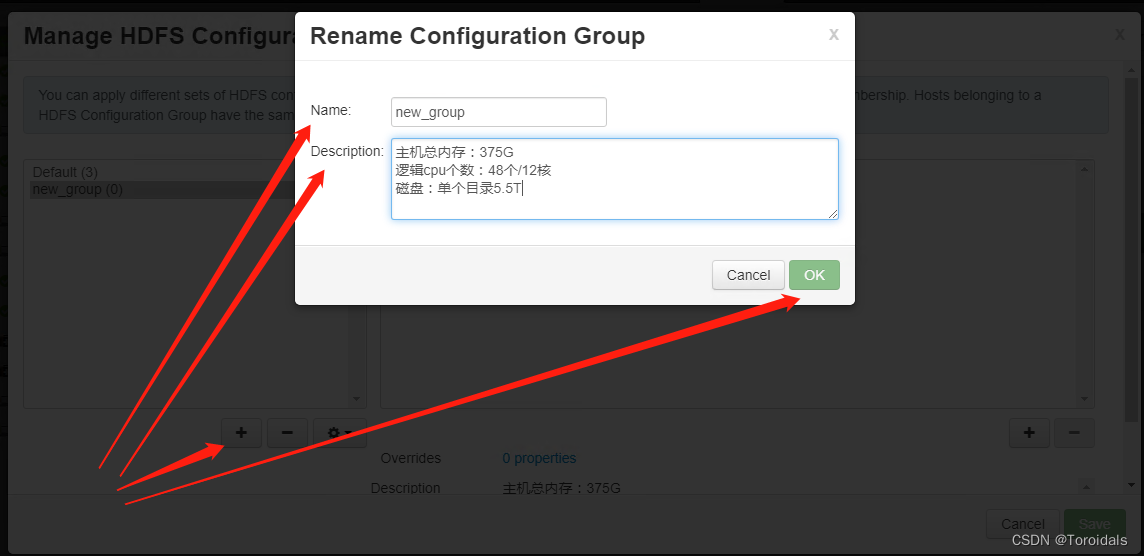
根据实际情况调整配置信息
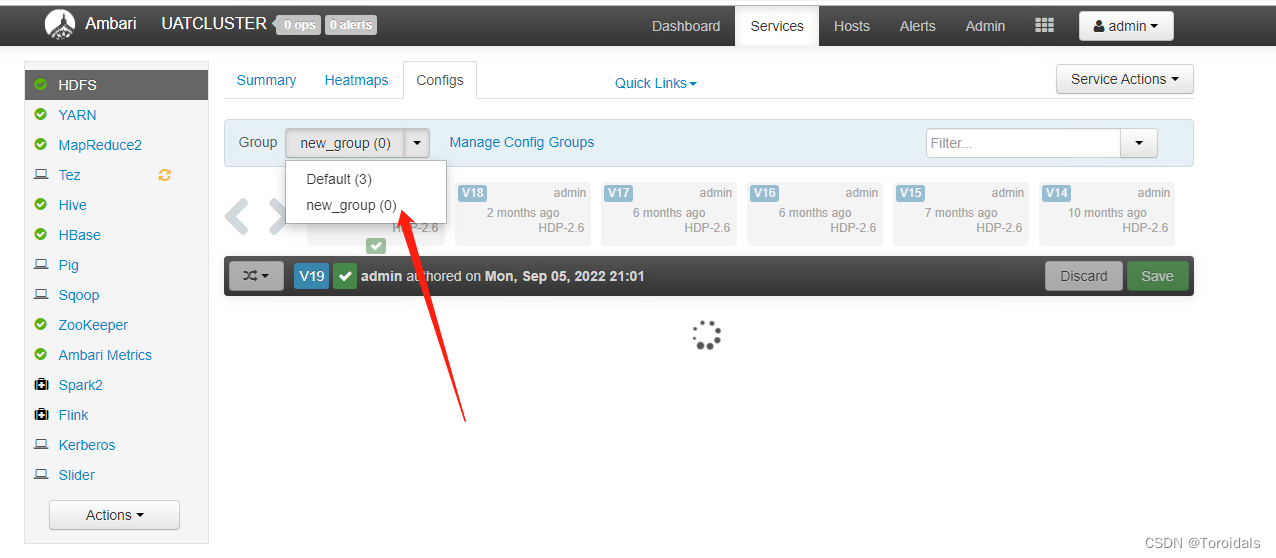
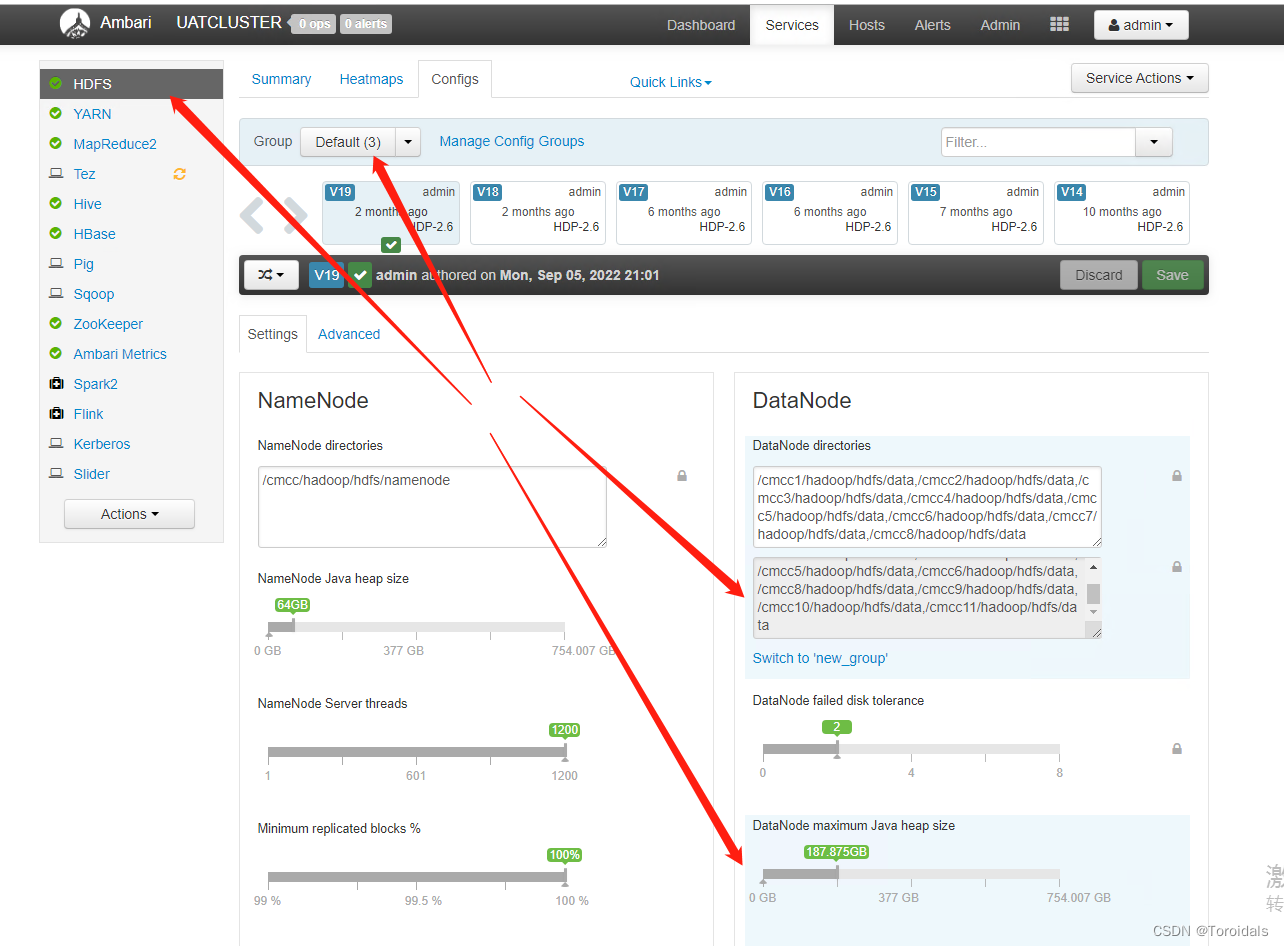
4.添加YARN配置组
按照同样的方式配置
5.添加主机
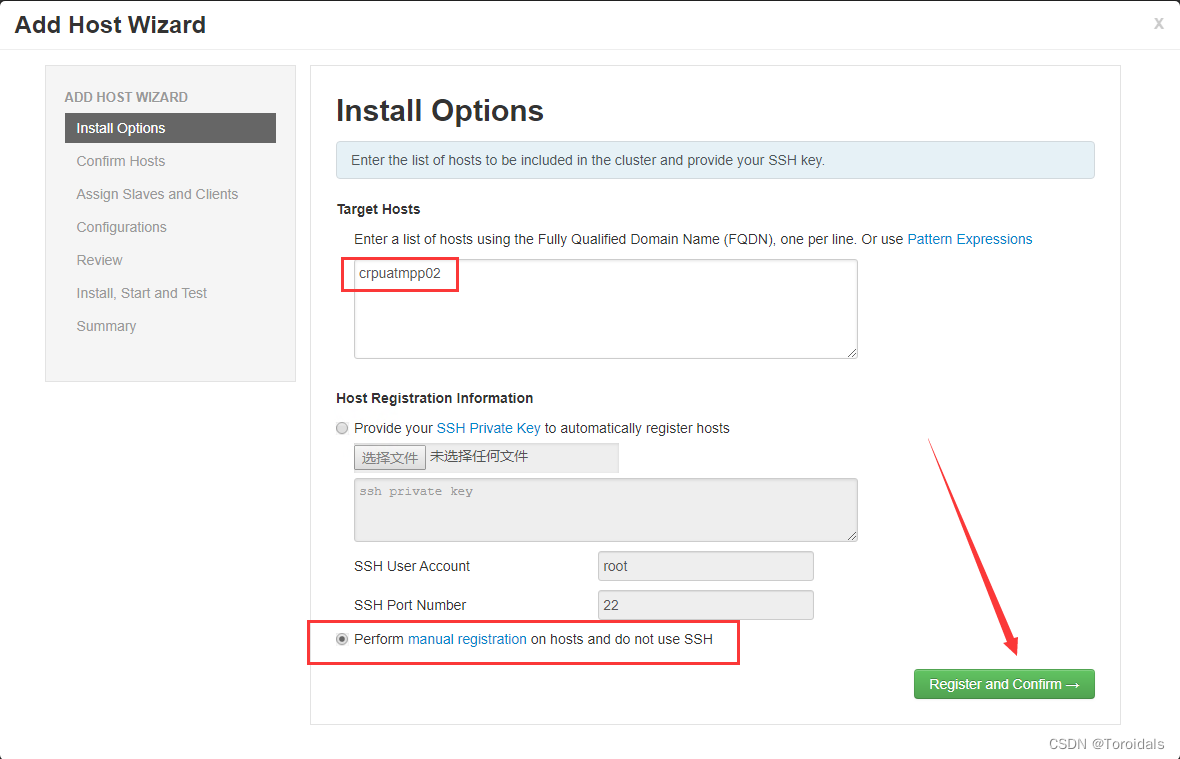
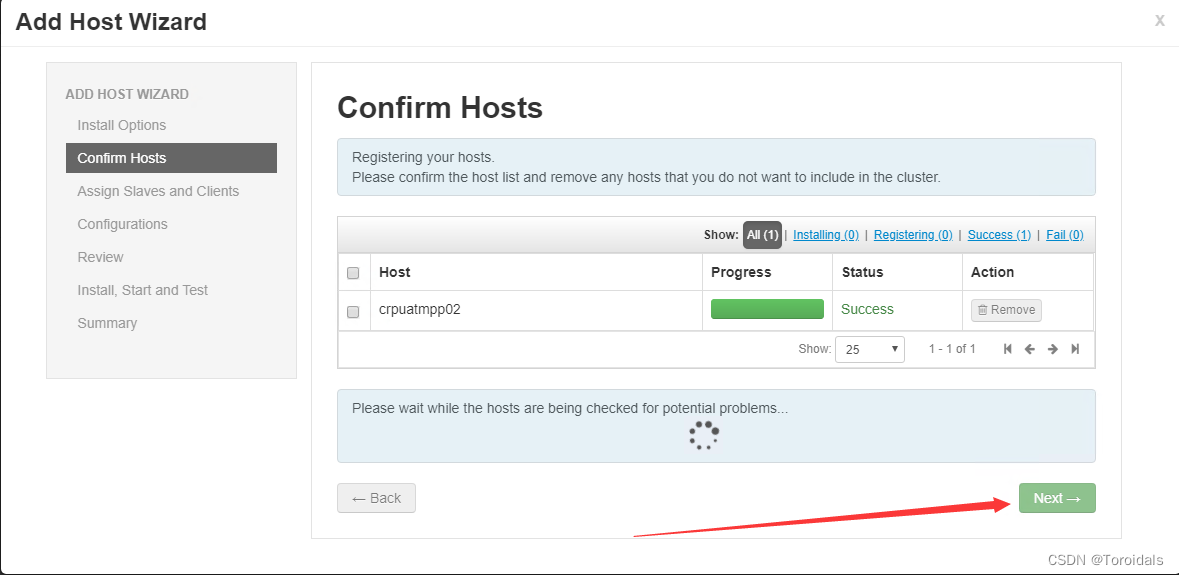
如果注册时报错,查看ambari agent的具体日志解决问题:
日志文件:/var/log/ambari-agent/ambari-agent.log
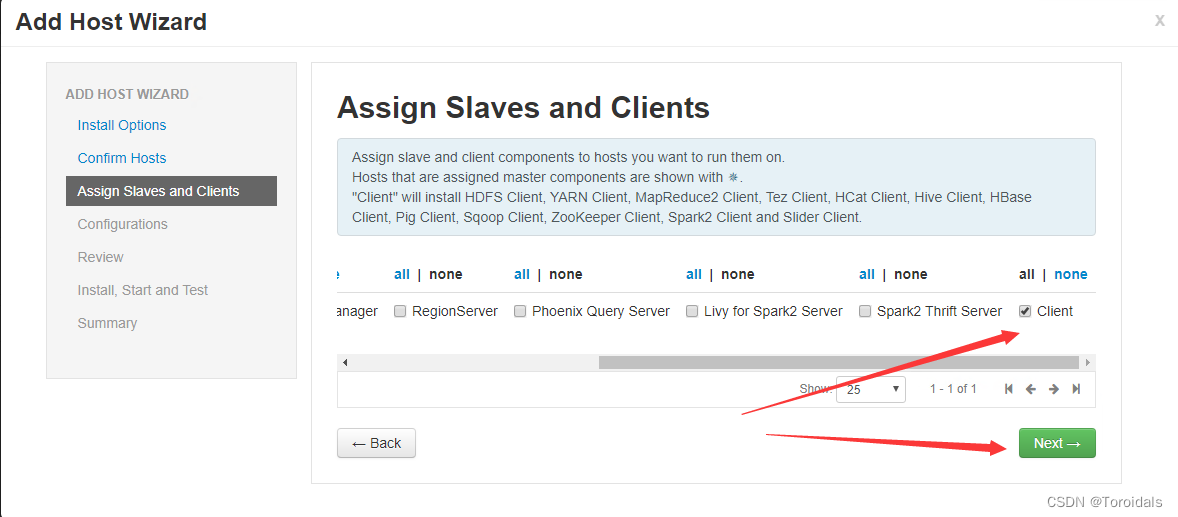
组件新扩容的机器只安装HDFS和Yarn,以及所有客户端 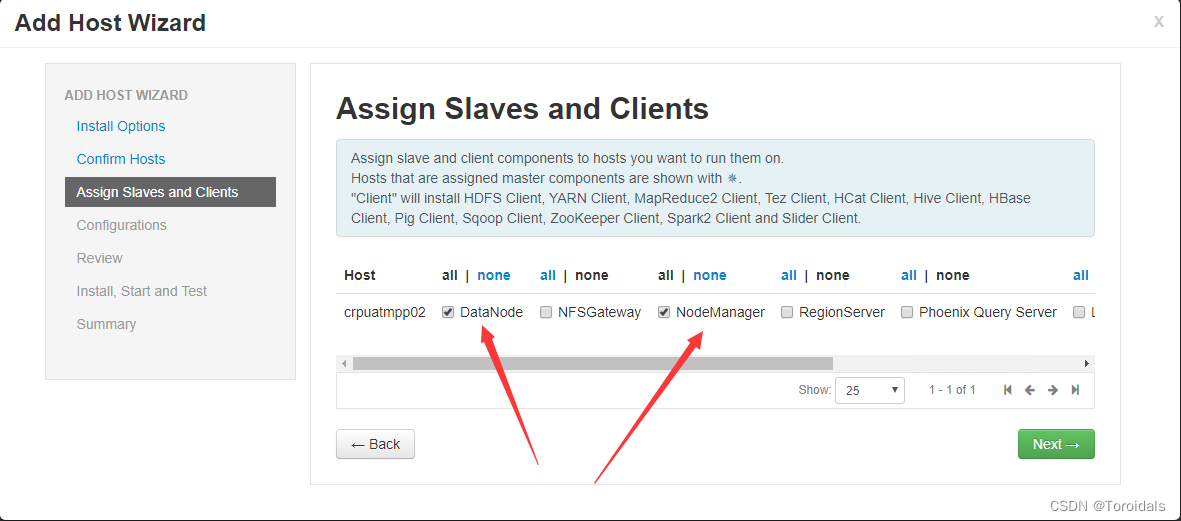
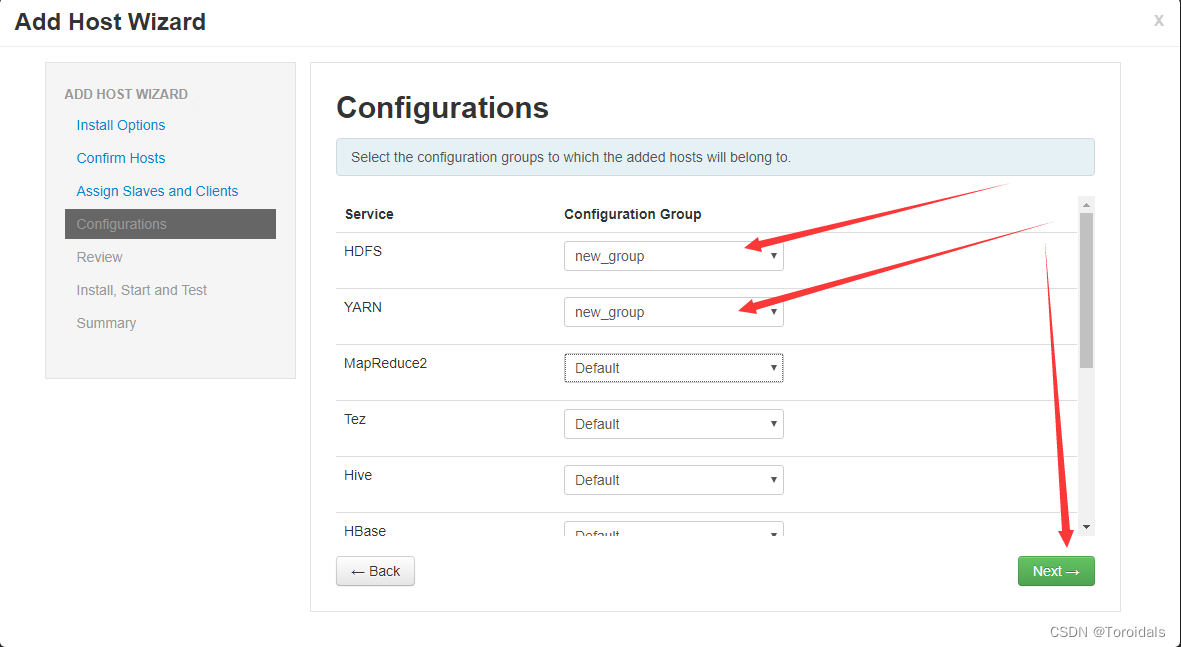
hdfs和yarn使用新加的配置组
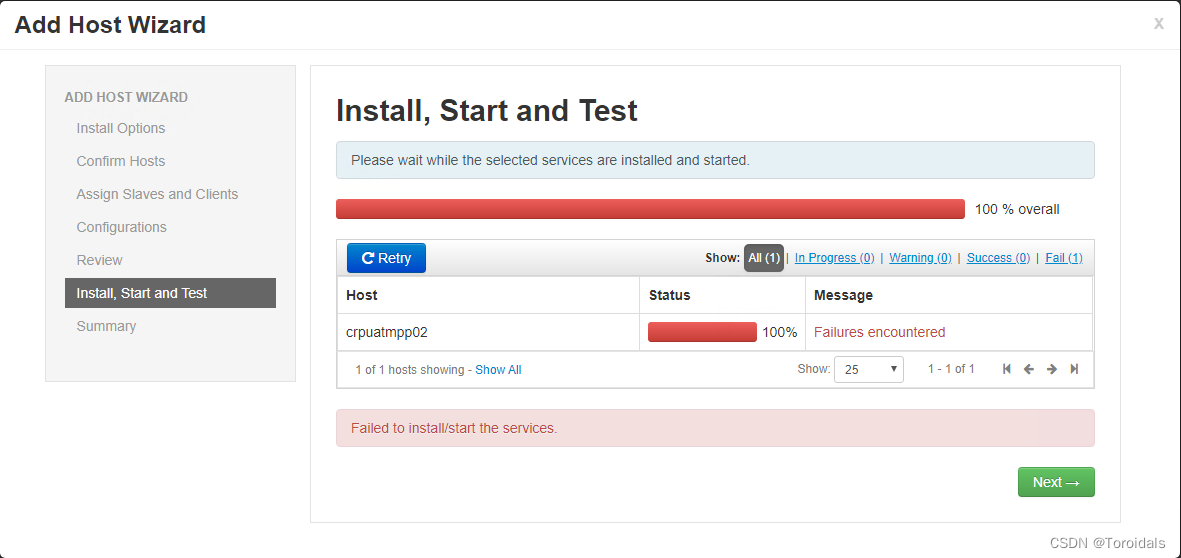
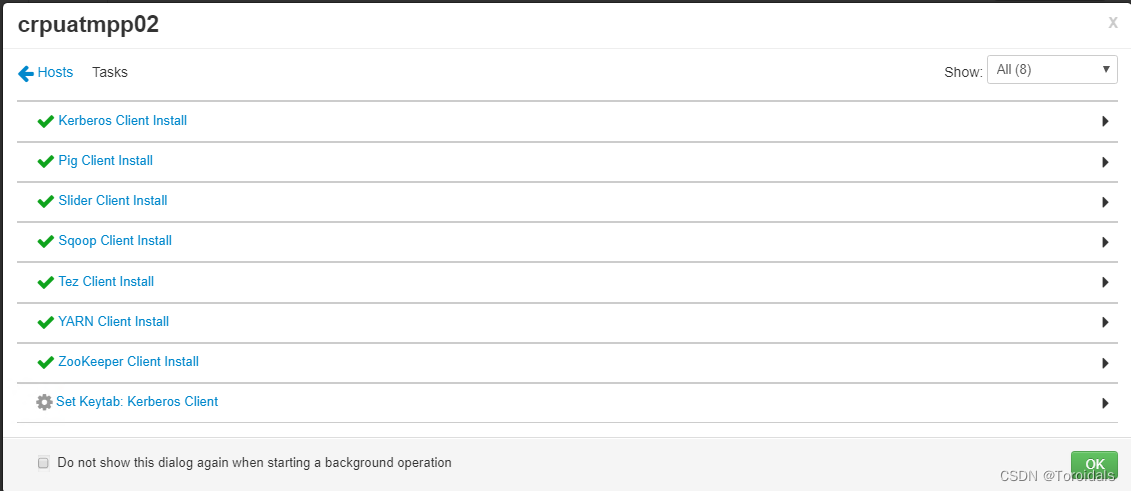
安装客户端报错:

后台执行报错一样,下载指定版本的rpm包
下载教程:linux离线安装各种依赖![]() https://blog.csdn.net/QYmufeng/article/details/106901374?ops_request_misc=%257B%2522request%255Fid%2522%253A%2522166847399316782388035439%2522%252C%2522scm%2522%253A%252220140713.130102334.pc%255Fblog.%2522%257D&request_id=166847399316782388035439&biz_id=0&utm_medium=distribute.pc_search_result.none-task-blog-2~blog~first_rank_ecpm_v1~rank_v31_ecpm-1-106901374-null-null.nonecase&utm_term=%E7%A6%BB%E7%BA%BF&spm=1018.2226.3001.4450
https://blog.csdn.net/QYmufeng/article/details/106901374?ops_request_misc=%257B%2522request%255Fid%2522%253A%2522166847399316782388035439%2522%252C%2522scm%2522%253A%252220140713.130102334.pc%255Fblog.%2522%257D&request_id=166847399316782388035439&biz_id=0&utm_medium=distribute.pc_search_result.none-task-blog-2~blog~first_rank_ecpm_v1~rank_v31_ecpm-1-106901374-null-null.nonecase&utm_term=%E7%A6%BB%E7%BA%BF&spm=1018.2226.3001.4450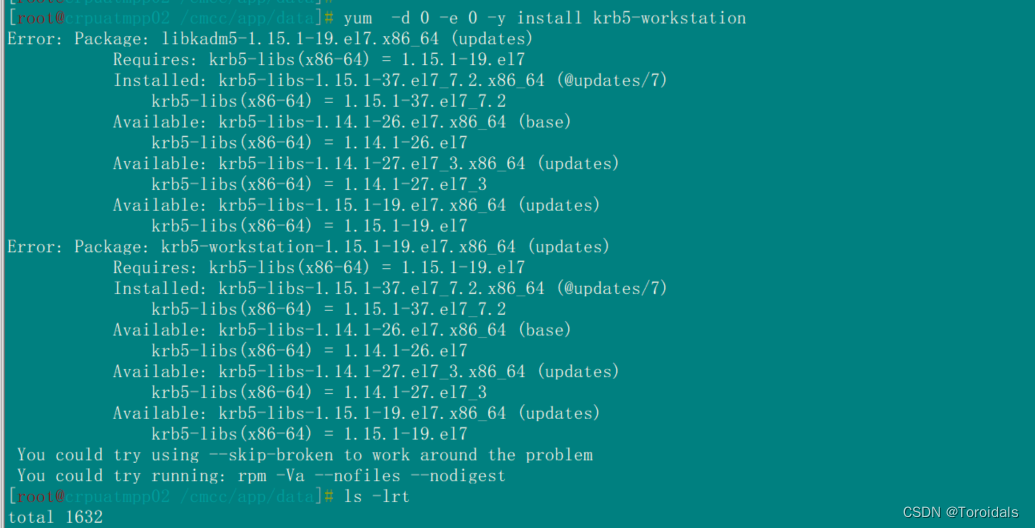
安装完成

重新在ambari上面安装客户端直至所有组件安装完成
6.安装 ambari-metrics-monitor 报错

原因:缺少/etc/yum.repos.d/ambari.repo源文件,添加文件
# 清除 yum 缓存
yum clean all

# 重新生成缓存
yum makecache
重启安装成功

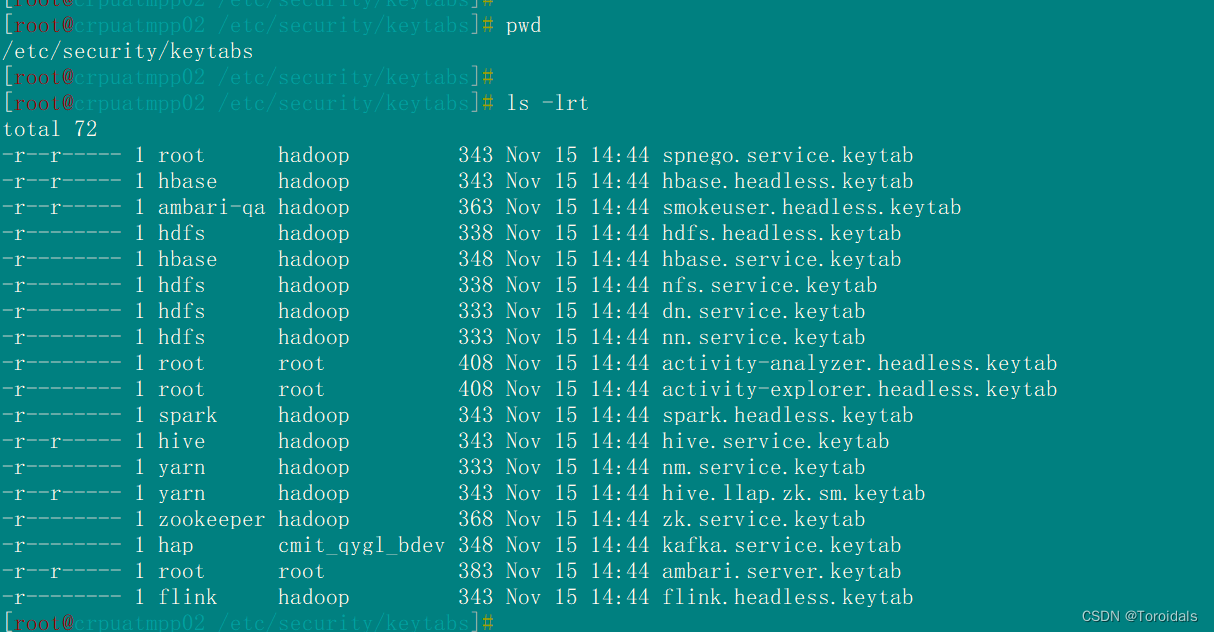
7.启动服务报错,查看日志没有对应的kerberos文件
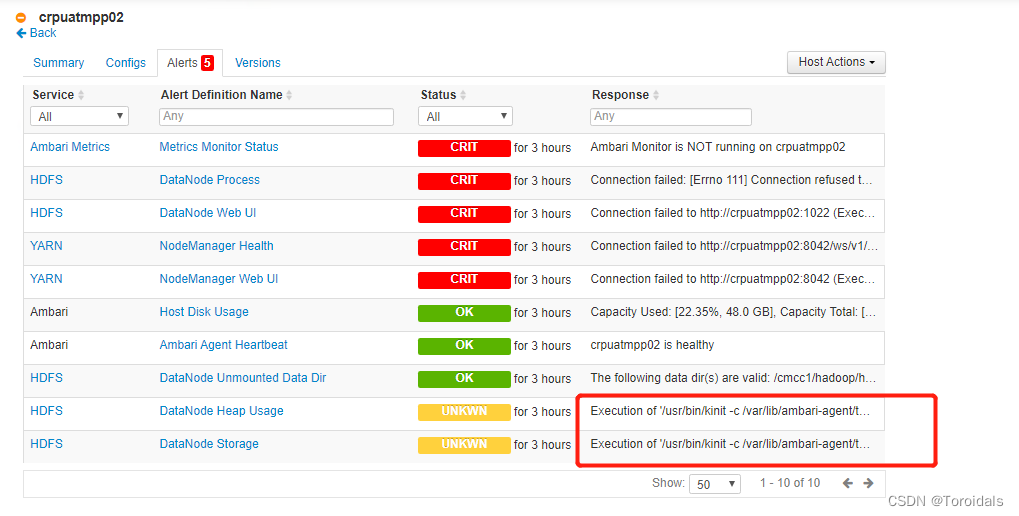
从其他节点复制kerberos认证文件到该节点 /etc/security/keytabs 目录下,注意文件的所属用户及权限
chown hdfs:hadoop nfs.service.keytab
chown root:root activity-analyzer.headless.keytab
chown root:root activity-explorer.headless.keytab
chown kafka:hadoop kafka.service.keytab
chown root:root ambari.server.keytab
chown root:hadoop spnego.service.keytab
chown ambari-qa:hadoop smokeuser.headless.keytab
chown flink:hadoop flink.headless.keytab
chown hbase:hadoop hbase.headless.keytab
chown hdfs:hadoop hdfs.headless.keytab
chown hbase:hadoop hbase.service.keytab
chown hdfs:hadoop dn.service.keytab
chown hdfs:hadoop nn.service.keytab
chown spark:hadoop spark.headless.keytab
chown hive:hadoop hive.service.keytab
chown yarn:hadoop nm.service.keytab
chown yarn:hadoop hive.llap.zk.sm.keytab
chown zookeeper:hadoop zk.service.keytab