有个设备需要远程控制开关,最简单的方式就是通过一直在线运行的 Pi,进行命令行控制智能开关。
1、材料准备
找个最便宜的智能开关,话说易微联的做的真是便宜,销售量也很大。
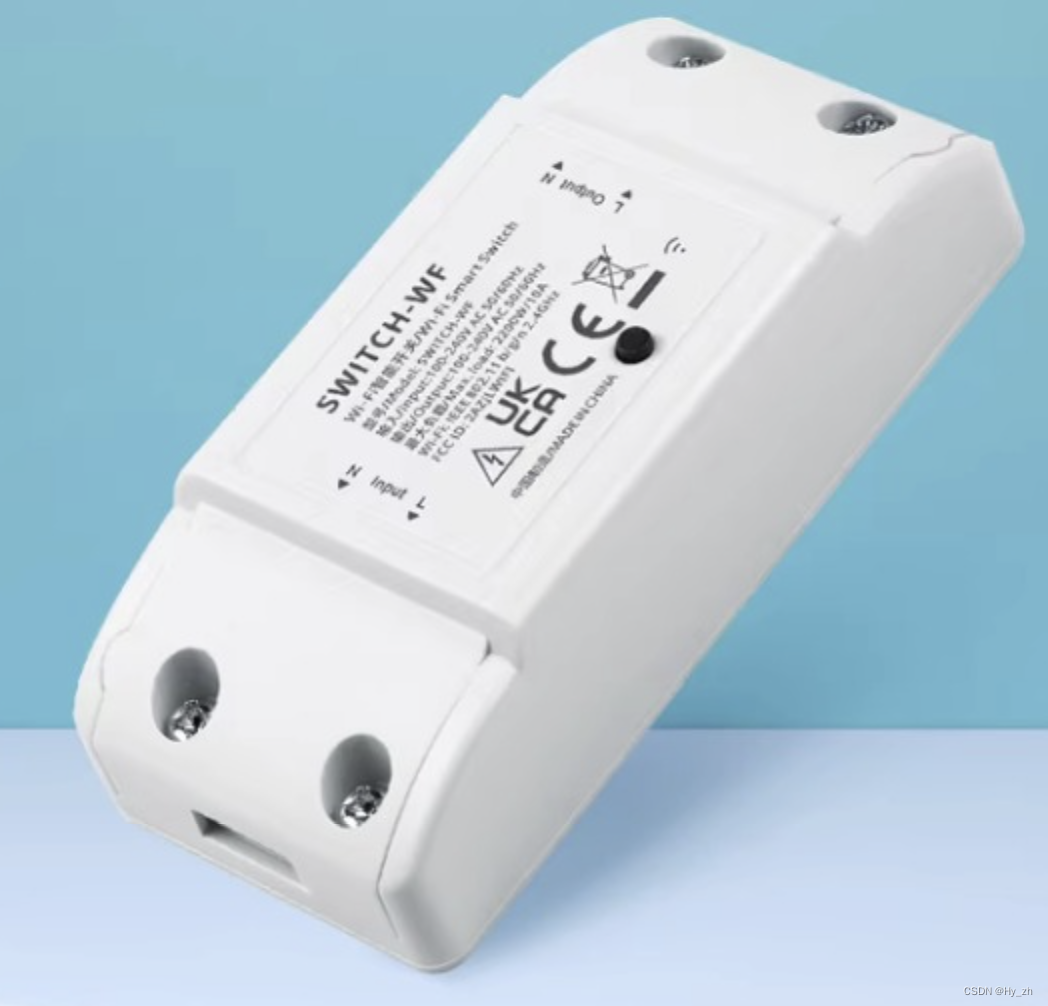 这种 网上叫 Wifi通断器,或者智能开关,十几块钱就可以买到。
自己接入插头和插线板,效果如下:
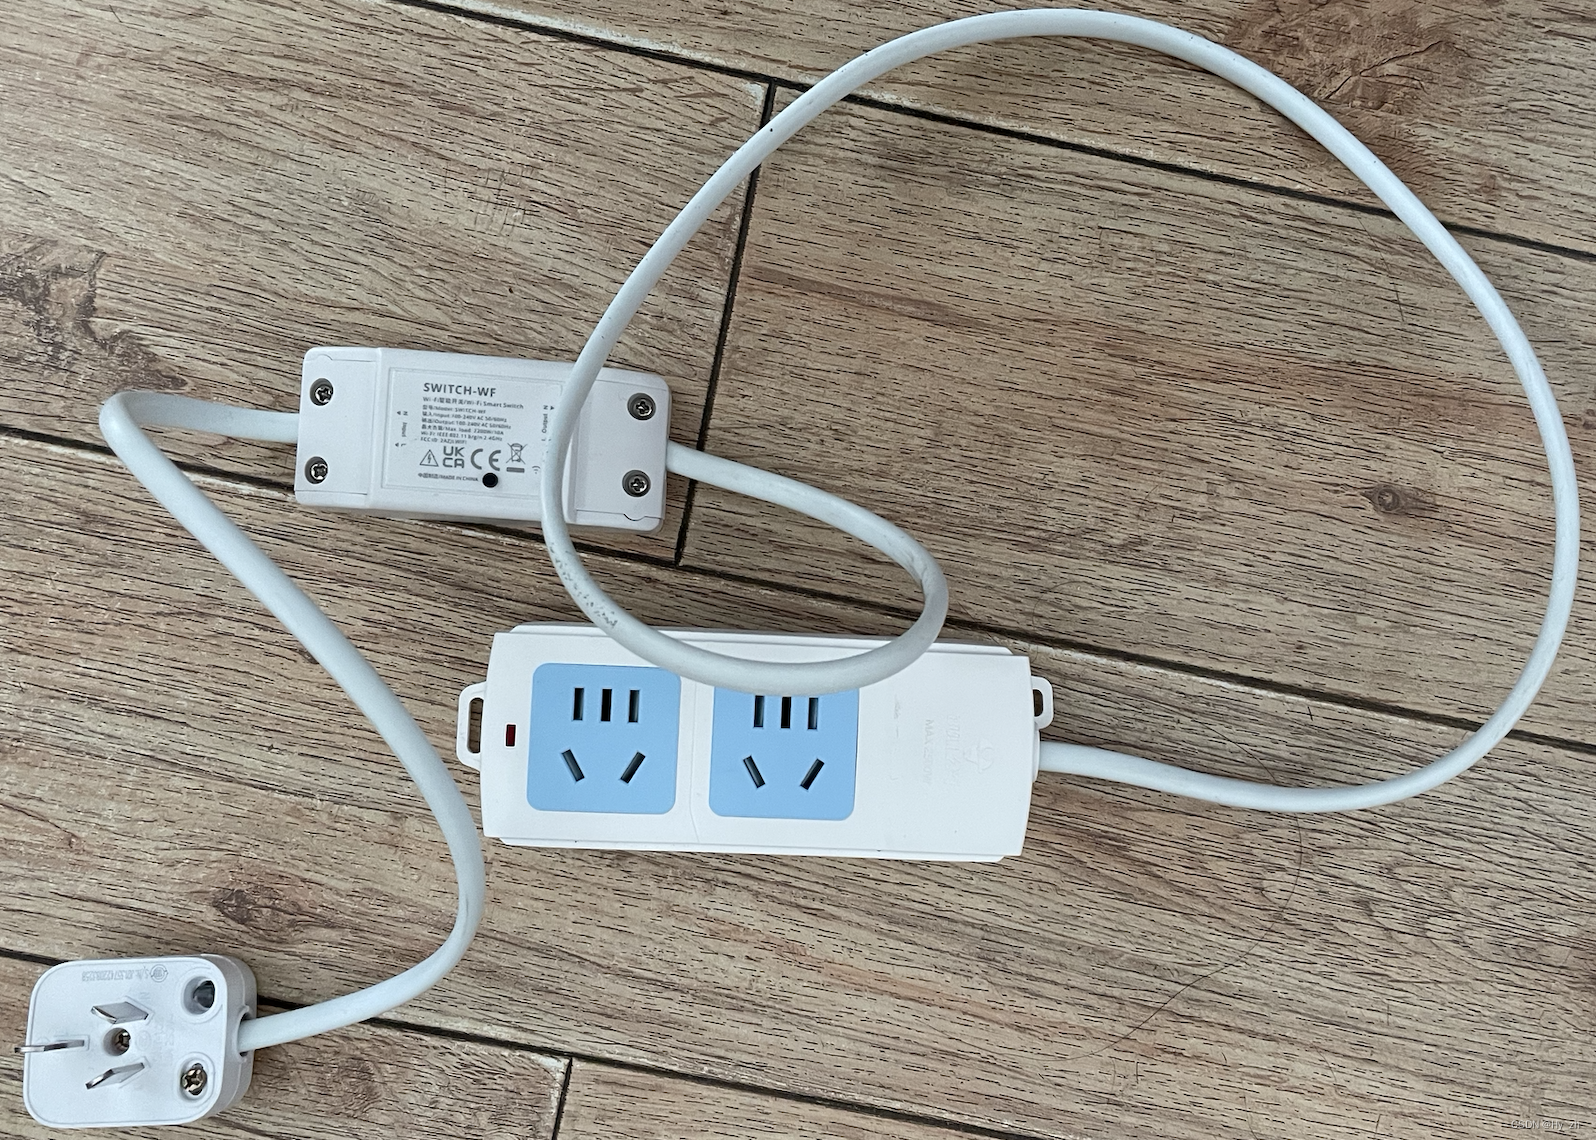
线是两芯的,后期如果对接地有要求只有再换线。
2、配置2.4Gwifi用户密码
插上电后,通断器有个指示灯,在黑色小按钮的旁边。
按照说明书所说:
通电后,设备首次使用,默认进入快速配网模式(Touch)。Wi-Fi指示灯呈“两短一⻓闪烁”。
三分钟内没有进行配网,设备将退出快速模式。如需再次进入,⻓按配对按钮5秒直到Wi-Fi 指示灯呈两短一⻓闪烁即可。
此为蓝牙配对并配置模式。兼容配网模式
如使用快速添加模式配网失败,请使用“兼容模式”进行配对。
1 长按配对按钮5秒直到Wi-Fi指示灯呈“两短一长闪烁”状态,松开。再次长按配对按钮
5秒直到Wi-Fi指示灯呈“快闪”状态,此时设备进入兼容模式。 2 在app界面,点击“+”,选择“兼容模式”。
先把移动设备连接上Wi-Fi账号为:ITEAD-******,密码为:12345678 *****就是设备id
此为wifi模式连接上以后,设备地址为 10.10.7.1
蓝牙方式,安卓手机可以发现和配对,但是iphone和macbook无法发现,最简单就用兼容配网模式。
长按5秒,进入两短一长闪烁,再长按5秒,进入快闪。
此时,用浏览器访问 http://10.10.7.1/ 可以出现 sonoff的wifi配置界面,由于这个通断器只支持2.4GWifi,因此要配置2.4G无线网的用户密码。
同时可以查询设备id,浏览器访问 http://10.10.7.1/device,会返回
{"deviceid":"10013*****","apikey":"b6*-*-*-*7a","chipid":"B4E8*6AEC","accept":"post"}
其中 chipid,就是该设备网络的mac地址,deviceid很重要,需要复制下来待用。
3、命令行操作
环境为 zsh,其他shell类似。
首先找到该设备ip地址,通过路由器或者扫描等,方法很多。我找到的地址是192.168.1.12,就以此为例,下文不做修改了。
3.1获取设备信息
curl -X POST "http://192.168.1.12:8081/"返回的json字符串不好看,可以在其他工具里格式化一下,下文都是格式化过的。
{
	"id": "urn:dev:ops:eWeLink_",
	"title": "eWeLink_",
	"@context": "https://iot.mozilla.org/schemas",
	"properties": {
		"dispUrl": {
			"type": "string",
			"title": "Dispatch Server",
			"description": "The address of the dispatch server",
			"links": [
			{
				"rel": "property",
				"href": "/properties/dispUrl"
			}
			]
			},
			"apikey": {
				"type": "string",
				"title": "apikey",
				"description": "The apikey of the device",
				"readOnly": "true",
				"links": [
				{
					"rel": "property",
					"href": "/properties/apikey"
				}
				]
			}
			},
			"description": "A wifi gate",
			"base": "http://eWeLink_.local:8081/",
			"securityDefinitions": {
				"nosec_sc": {
					"scheme": "nosec"
				}
				},
				"security": "nosec_sc"
			}
		}
	}
}
3.2获取设备状态
curl -H "Content-Type: application/json" -X POST -d '{"deviceid":"10013***","data":{}}' http://192.168.1.12:8081/zeroconf/info
返回的json结果有4个开关,尽管物理上只有一个开关接线桩,但是软件兼容4个的。
{
	"seq": 2,
	"error": 0,
	-"data": {
		-"switches": [
		-{
			"switch": "off",
			"outlet": 0
		},
		-{
			"switch": "off",
			"outlet": 1
		},
		-{
			"switch": "off",
			"outlet": 2
		},
		-{
			"switch": "off",
			"outlet": 3
		}
		],
		-"configure": [
		-{
			"startup": "off",
			"outlet": 0
		},
		-{
			"startup": "off",
			"outlet": 1
		},
		-{
			"startup": "off",
			"outlet": 2
		},
		-{
			"startup": "off",
			"outlet": 3
		}
		],
		-"pulses": [
		-{
			"pulse": "off",
			"switch": "on",
			"outlet": 0,
			"width": 0
		},
		-{
			"pulse": "off",
			"switch": "on",
			"outlet": 1,
			"width": 0
		},
		-{
			"pulse": "off",
			"switch": "on",
			"outlet": 2,
			"width": 0
		},
		-{
			"pulse": "off",
			"switch": "on",
			"outlet": 3,
			"width": 0
		}
		],
		"sledOnline": "on",
		"fwVersion": "1.0.0",
		"rssi": -42,
		"bssid": "cc:29:bd:6:d9:30"
	}
}
3.3 设置开关
curl -H "Content-Type: application/json" -X POST -d '{"deviceid":"10013***","data": {"switches": [{"switch": "on", "outlet": 0 }, {"switch": "off", "outlet": 1 }, {"switch": "off", "outlet": 2 }, {"switch": "off", "outlet": 3 } ] } }' http://192.168.1.12:8081/zeroconf/switches

curl -H "Content-Type: application/json" -X POST -d '{"deviceid":"10013**","data": {"switches": [{"switch": "off", "outlet": 0 }, {"switch": "off", "outlet": 1 }, {"switch": "off", "outlet": 2 }, {"switch": "off", "outlet": 3 } ] } }' http://192.168.1.12:8081/zeroconf/switches


或者数组中只写1个开关的控制,单个开关也可以
curl -H "Content-Type: application/json" -X POST -d '{"deviceid":"10013**","data": {"switches": [{"switch": "on", "outlet": 0 } ] } }' http://192.168.1.12:8081/zeroconf/switches

curl -H "Content-Type: application/json" -X POST -d '{"deviceid":"10013**","data": {"switches": [{"switch": "off", "outlet": 0 } ] } }' http://192.168.1.12:8081/zeroconf/switches
返回的json结果中,只要"error":0 即表示执行成功,也可以直接查看插线板的指示灯,开关控制的时候,会有继电器开合的声音,指示灯会根据on/off 切换 亮/灭。
其他还有一些命令,参照上文执行即可。
