背景
我们项目使用springcloud、redis(缓存)、rocketMQ(消息中间件)、tinyid(分布式id)、minio(文件存储)、nacos(配置注册中心)这些组件开发了一个mes系统,但是有些工厂体量小,没有很大并发,所以考虑使用一台服务器,启动项目。
方案
- 所有模块的war放在tomcat的webapps下(这种不解释了,直接放进去就行);
- 分模块,分端口,把war放在通一个tomcat的不同webapps下,具体实现如下:
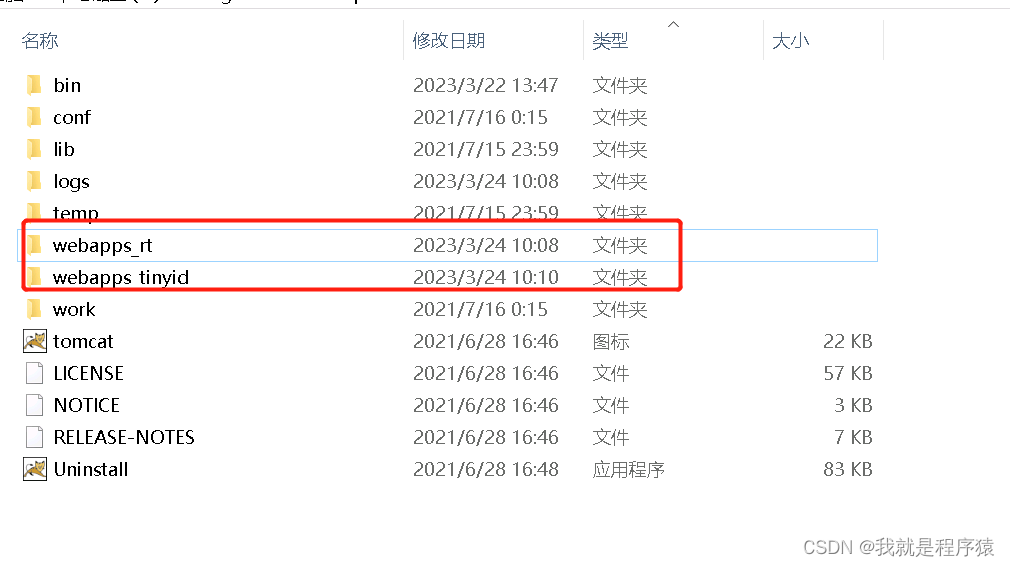
1、新建几个webapps,改成有代表意义的名称,例如你的模块名称;
2、配置Tomcat 9.0\conf\server.xml(新建几个webapps就增加几个Service 的模块)
<?xml version="1.0" encoding="UTF-8"?>
<!--
Licensed to the Apache Software Foundation (ASF) under one or more
contributor license agreements. See the NOTICE file distributed with
this work for additional information regarding copyright ownership.
The ASF licenses this file to You under the Apache License, Version 2.0
(the "License"); you may not use this file except in compliance with
the License. You may obtain a copy of the License at
http://www.apache.org/licenses/LICENSE-2.0
Unless required by applicable law or agreed to in writing, software
distributed under the License is distributed on an "AS IS" BASIS,
WITHOUT WARRANTIES OR CONDITIONS OF ANY KIND, either express or implied.
See the License for the specific language governing permissions and
limitations under the License.
-->
<!-- Note: A "Server" is not itself a "Container", so you may not
define subcomponents such as "Valves" at this level.
Documentation at /docs/config/server.html
-->
<Server port="-1" shutdown="SHUTDOWN">
<Listener className="org.apache.catalina.startup.VersionLoggerListener" />
<!-- Security listener. Documentation at /docs/config/listeners.html
<Listener className="org.apache.catalina.security.SecurityListener" />
-->
<!-- APR library loader. Documentation at /docs/apr.html -->
<Listener className="org.apache.catalina.core.AprLifecycleListener" SSLEngine="on" />
<!-- Prevent memory leaks due to use of particular java/javax APIs-->
<Listener className="org.apache.catalina.core.JreMemoryLeakPreventionListener" />
<Listener className="org.apache.catalina.mbeans.GlobalResourcesLifecycleListener" />
<Listener className="org.apache.catalina.core.ThreadLocalLeakPreventionListener" />
<!-- Global JNDI resources
Documentation at /docs/jndi-resources-howto.html
-->
<GlobalNamingResources>
<!-- Editable user database that can also be used by
UserDatabaseRealm to authenticate users
-->
<Resource name="UserDatabase" auth="Container"
type="org.apache.catalina.UserDatabase"
description="User database that can be updated and saved"
factory="org.apache.catalina.users.MemoryUserDatabaseFactory"
pathname="conf/tomcat-users.xml" />
</GlobalNamingResources>
<!-- mes -->
<Service name="Catalina">
<Connector port="8084" protocol="HTTP/1.1"
connectionTimeout="20000"
redirectPort="8443" />
<!-- Define an AJP 1.3 Connector on port 8009 -->
<Connector port="8009" protocol="AJP/1.3" redirectPort="8443" secretRequired="false"/>
<Engine name="Catalina" defaultHost="localhost">
<Realm className="org.apache.catalina.realm.LockOutRealm">
<Realm className="org.apache.catalina.realm.UserDatabaseRealm"
resourceName="UserDatabase"/>
</Realm>
<Host name="localhost" appBase="webapps_rt"
unpackWARs="true" autoDeploy="true">
<Valve className="org.apache.catalina.valves.AccessLogValve" directory="logs"
prefix="localhost_access_log" suffix=".txt"
pattern="%h %l %u %t "%r" %s %b" />
</Host>
</Engine>
</Service>
<!-- user -->
<Service name="Catalina">
<Connector port="8011" protocol="HTTP/1.1"
connectionTimeout="20000"
redirectPort="8443" />
<!-- Define an AJP 1.3 Connector on port 8009 -->
<Connector port="8012" protocol="AJP/1.3" redirectPort="8443" secretRequired="false"/>
<Engine name="Catalina" defaultHost="localhost">
<Realm className="org.apache.catalina.realm.LockOutRealm">
<Realm className="org.apache.catalina.realm.UserDatabaseRealm"
resourceName="UserDatabase"/>
</Realm>
<Host name="localhost" appBase="webapps_tinyid"
unpackWARs="true" autoDeploy="true">
<Valve className="org.apache.catalina.valves.AccessLogValve" directory="logs"
prefix="localhost_access_log" suffix=".txt"
pattern="%h %l %u %t "%r" %s %b" />
</Host>
</Engine>
</Service>
</Server>
注意:
- 更改appbase为自己新建的名称(保持一致):< Host name=“localhost” appBase=“webapps_tinyid”
unpackWARs=“true” autoDeploy=“true”> - 更改端口号,防止端口被占用:< Connector port=“8011” protocol=“HTTP/1.1”
connectionTimeout=“20000”
redirectPort=“8443” />
< Connector port=“8012” protocol=“AJP/1.3” redirectPort=“8443” secretRequired=“false”/>
步骤
- 把所有的模块都打成war包
在pom中增加如下配置:
     <!-- 这里指定打war包的时不再需要tomcat相关的包 -->
     <dependency>
            <groupId>org.springframework.boot</groupId>
            <artifactId>spring-boot-starter-web</artifactId>
            <exclusions>
                <exclusion>
                    <artifactId>spring-boot-starter-tomcat</artifactId>
                    <groupId>org.springframework.boot</groupId>
                </exclusion>
            </exclusions>
      </dependency>
      <dependency>
           <groupId>org.springframework.boot</groupId>
           <artifactId>spring-boot-starter-tomcat</artifactId>
           <scope>provide</scope>
       </dependency>
    <build>
        <finalName>mes</finalName>
        <plugins>
            <plugin>
                <groupId>org.springframework.boot</groupId>
                <artifactId>spring-boot-maven-plugin</artifactId>
            </plugin>
        </plugins>
    </build>
在pom上添加打包后的名称和使用springboot的插件打包:
 <build>
         <!--打包名称-->
        <finalName>mes</finalName>
        <plugins>
            <plugin>
                <groupId>org.springframework.boot</groupId>
                <artifactId>spring-boot-maven-plugin</artifactId>
            </plugin>
        </plugins>
    </build>
*注意:一定要添加上方pom配置,不然是项目在tomcat中会重启两次。
在启动类上添加,并且继承 SpringBootServletInitializer:
public class Application extends SpringBootServletInitializer {
    public static void main(String[] args) {
        SpringApplication.run(Application.class, args);
    }

    protected SpringApplicationBuilder configure(SpringApplicationBuilder builder) {
        // 注意这里要指向原先用main方法执行的Application启动类
        return builder.sources(Application.class);
    }
}
- 启动后在nacos不能注册,是因为springboot启动后开放端口,但是使用war包启动后,不能开放,需要添加如下的配置类:
@Component
public class NacosConfig implements ApplicationRunner {

    @Autowired(required = false)
    private NacosAutoServiceRegistration registration;

    @Value("${server.port}")
    Integer port;

    @Override
    public void run(ApplicationArguments args) {
        if (registration != null && port != null) {
            Integer tomcatPort = port;
            try {
                tomcatPort = new Integer(getTomcatPort());
            } catch (Exception e) {
                e.printStackTrace();
            }

            registration.setPort(tomcatPort);
            registration.start();
        }
    }

    /**
     * 获取外部tomcat端口
     */
    public String getTomcatPort() throws Exception {
        MBeanServer beanServer = ManagementFactory.getPlatformMBeanServer();
        Set<ObjectName> objectNames = beanServer.queryNames(new ObjectName("*:type=Connector,*"), Query.match(Query.attr("protocol"), Query.value("HTTP/1.1")));
        String port = objectNames.iterator().next().getKeyProperty("port");
        return port;
    }
}
3、MQ的处理;
- 在pom中配置MQ
 <dependency>
      <groupId>org.apache.rocketmq</groupId>
      <artifactId>rocketmq-client</artifactId>
      <scope>provided</scope>
  </dependency>
- 去除MQProducerConfig(根据自己的类名)的@Configuration的注解;
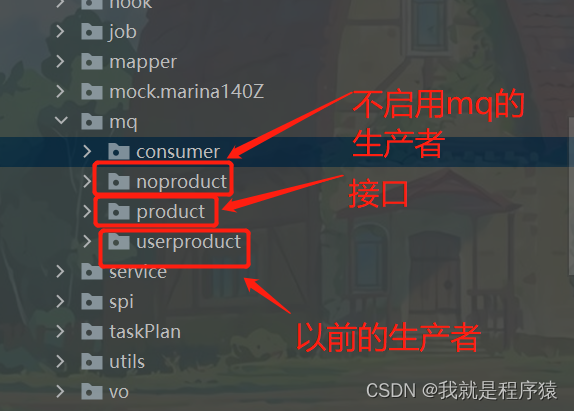
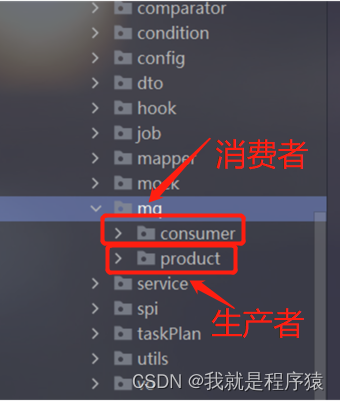
- 处理生产者的代码
1、新建包和原来生产者包名一致,新建接口和原来生产者类名一致;
2、新建包和类,实现以前生产者的接口;
3、新建包和类,实现以前生产者的接口,但是实现方法体为空。
如果做完这些,你的springcloud的项目就可以在一个tomcat下面部署了,并且可以去除MQ。