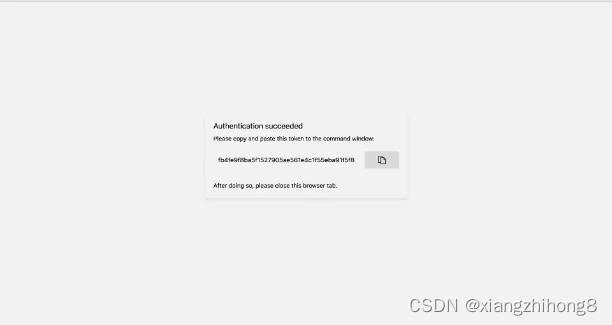
代码地址
git@ssh.dev.azure.com:v3/linearx/PowerDDS/PowerDDS
LinearX-5G Wifi pwd: 50186058
Windows报错可以搜索错误代码找官方给出的解决方案
最新版本cmake:ubuntu 20.04安装(升级)cmake - 知乎 (zhihu.com)
gtest:gtest的安装_liuzubing的博客-CSDN博客
fastdds 1.1. What is DDS? — Fast DDS 2.9.1 documentation (eprosima.com)
换源
#Ubuntu apt
https://blog.csdn.net/c417469898/article/details/106412160
cp /etc/apt/sources.list /etc/apt/sources.list.bak
sudo gedit /etc/apt/sources.list

    # 默认注释了源码镜像以提高 apt update 速度,如有需要可自行取消注释
    deb https://mirrors.tuna.tsinghua.edu.cn/ubuntu/ bionic main restricted universe multiverse
    # deb-src https://mirrors.tuna.tsinghua.edu.cn/ubuntu/ bionic main restricted universe multiverse
    deb https://mirrors.tuna.tsinghua.edu.cn/ubuntu/ bionic-updates main restricted universe multiverse
    # deb-src https://mirrors.tuna.tsinghua.edu.cn/ubuntu/ bionic-updates main restricted universe multiverse
    deb https://mirrors.tuna.tsinghua.edu.cn/ubuntu/ bionic-backports main restricted universe multiverse
    # deb-src https://mirrors.tuna.tsinghua.edu.cn/ubuntu/ bionic-backports main restricted universe multiverse
    deb https://mirrors.tuna.tsinghua.edu.cn/ubuntu/ bionic-security main restricted universe multiverse
    # deb-src https://mirrors.tuna.tsinghua.edu.cn/ubuntu/ bionic-security main restricted universe multiverse

    # 预发布软件源,不建议启用
    # deb https://mirrors.tuna.tsinghua.edu.cn/ubuntu/ bionic-proposed main restricted universe multiverse
    # deb-src https://mirrors.tuna.tsinghua.edu.cn/ubuntu/ bionic-proposed main restricted universe multiverse

 sudo apt-get update
 sudo apt-get upgrade


#pip
pip config set global.index-url https://pypi.tuna.tsinghua.edu.cn/simple

#conda
conda config --add channels https://mirrors.sjtug.sjtu.edu.cn/anaconda/pkgs/main/
conda config --add channels https://mirrors.sjtug.sjtu.edu.cn/anaconda/pkgs/free/
conda config --add channels https://mirrors.sjtug.sjtu.edu.cn/anaconda/cloud/conda-forge/

#测速
https://lework.github.io/2020/03/18/test-speed.repo/

#恢复默认源
conda config --remove-key channels
查看系统镜像配置文件
vim ~/.condarcSSH配置步骤:
注:虚拟机使用ssh时不能切换网络,会使DNS改变
.ssh文件夹在特定用户的用户文件夹下,其中id_rsa是私钥,id_rsa.pub是公钥。在ssh协议中,只要对方有己方公钥,即可完成加密解密。
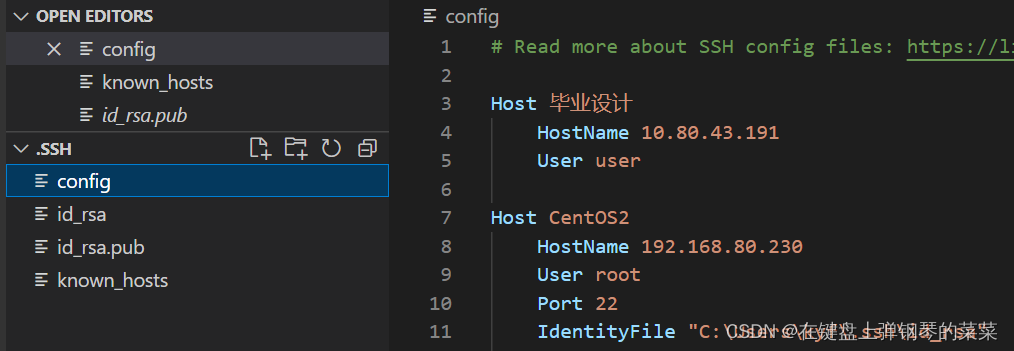
ssh的公钥和私钥与账号密码是两套机制,配置良好的ssh不再需要用户每次输入密码。
生成ssh key:
git config --global user.name "xxx"
git config --global user.email "xxx"
ssh-keygen确保是server是server:第一次连接时,为了确保安全的服务器,客户端要比对服务端的指纹,随后将服务端公钥存储在known_hosts里
确保client是client:不想每次都输入密码,则将客户端(我们)的ssh public key存储到服务器上,如Github。在每次建立SSH连接时,client会将公钥发送给server,server验证是否和存储值相同。
除此之外,server会向client发送一个(client生成的)会话密钥和client 的pubkey双重加密的质询,这一步同事验证了client和server双方。
(3条消息) ssh登陆认证过程详解_lihang656的博客-CSDN博客
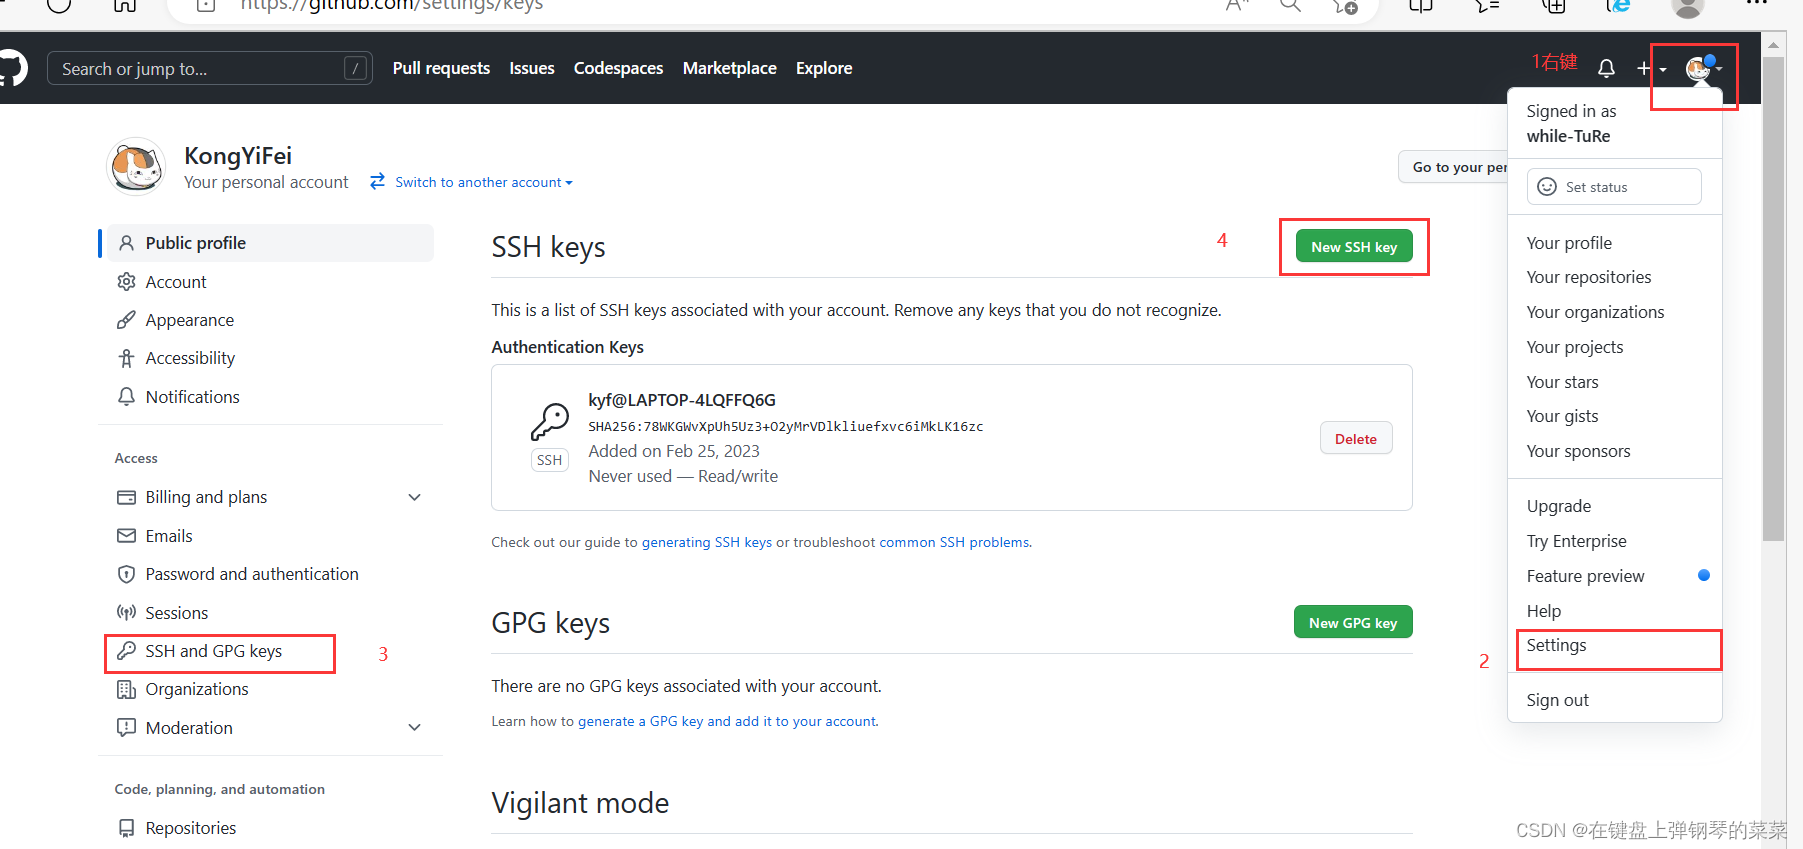
验证Github SSH配置是否成功
ssh -T git@github.com配置Linux环境:虚拟机或子系统
- vscode打开或clone代码都需要ssh,需确保sshd打开
- 用vscode看代码:虚拟机需要用桥接网卡的IP地址,用户名,密码连接;子系统在ubuntu软件下或wsl终端输入code. 即可打开(需要WSL插件),其IP默认=localhost
- 从azure或github上clone代码:ssh-gen命令生成id_rsa.pub,将这个公钥添加到Azure或github上(id_rsa是私钥)
VScode轻松使用
- 设置失焦自动保存:ctrl+,打开设置-》搜索save-》auto save 选择
- 正则匹配:模糊匹配【(.*)】【$1】引用
- 文件排除:不需要./ 直接写文件夹名
Linux轻松使用
- ubuntu需要换源,这样apt-get才能顺利下载
- 设置复制粘贴
- vim i插入 q退出 wq写入 /cmake构建项目
WSL轻松使用
WSL查看windows文件:在/mnt/c/Users/99396目录下,可以通过mv cp操作文件

通过Ubuntu软件打开VScode: 【code .】
Windows查看WSL里的文件【\\wsl.localhost\】【\\wsl$】
在WSL命令行打开文件资源管理器 【explorer.exe .】
编译项目
//在第三方库的build里
cmake .. -DCMAKE_INSTALL_PREFIX=~/workspace/bin/Power-DDS -DBUILD_SHARED_LIBS=ON
cmake --build . --target install -j12

//在PoweDDS下的build里
cmake ..  -DCMAKE_INSTALL_PREFIX=~/workspace/bin/Power-DDS
cmake --build . --target install -j12

//生成的install文件在根目录下
//https://blog.csdn.net/u012739527/article/details/124687387?spm=1001.2014.3001.5502
除了按以上方法build install thirdparty以外,还要按GTest下载方法将googletest下载到thirdparty内,并同样build install。此时PowerDDS下的build文件夹可以build了
// /home/kong/workspace/PowerDDS/src/cpp/utils/ipc/channel.h
// /home/kong/workspace/PowerDDS/src/cpp/utils/ipc/posix/mutex.hpp
// /home/kong/workspace/PowerDDS/src/cpp/utils/ipc/shared_memdata.h
// /home/kong/workspace/PowerDDS/src/cpp/utils/ipc/shared_memdata.cpp
#include<memory>
// /home/kong/workspace/PowerDDS/src/cpp/rtps/transport/common/system_comm_ops.cpp
#include<stdexcept>


//添加stub
https://github.com/coolxv/cpp-stub/tree/master/src
只需要将stub.h放入到/usr/include的目录中即可
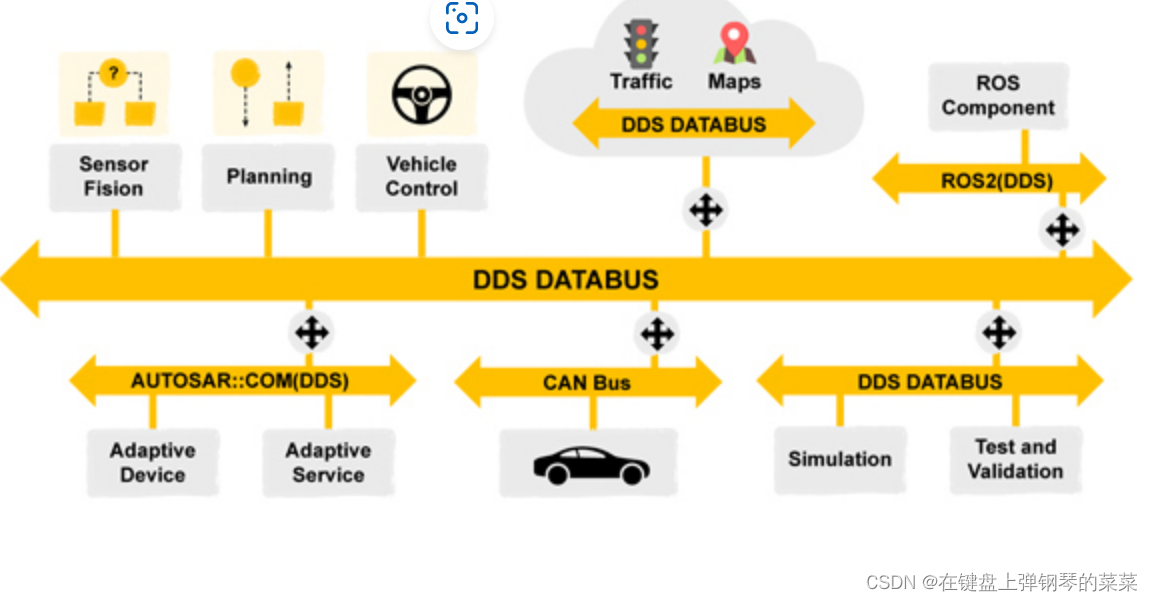
自动驾驶汽车是复杂的分布式系统,它结合了视觉、雷达、GPS、导航、规划和控制等组件。这些模块必须组合成安全可靠的系统,实时分析复杂的环境并对其做出正确反应。小鹏汽车、奥迪HIL平台等均采用DDS集成多种复杂异构传感器收集的信息,以支撑其作出及时正确的控制决策。

IPC核间通信
现在很多的芯片都会几个core核,有的用的是Cortex M0+、M4、M7、A53、A73等等,有的是2核、3核、4核甚至6核8核,不同的核的主频支持度不一样,适用的具体应用场景也不同。那么核间通信Inter-processor communication即IPC,一般作为核间通信使用。 核间通信(IPC)的主要目标是:充分利用硬件提供的机制,实现高效的CORE间通信;给需要CORE间通信的应用程序提供简洁高效的编程接口。 根据所使用的硬件特性,核间通信的实现机制有: Mailbox中断 基于共享内存的消息队列
