demo 模拟springboot
pom.xml
<?xml version="1.0" encoding="UTF-8"?>
<project xmlns="http://maven.apache.org/POM/4.0.0" xmlns:xsi="http://www.w3.org/2001/XMLSchema-instance"
         xsi:schemaLocation="http://maven.apache.org/POM/4.0.0 https://maven.apache.org/xsd/maven-4.0.0.xsd">
    <modelVersion>4.0.0</modelVersion>

    <groupId>com.example</groupId>
    <artifactId>demo</artifactId>
    <version>0.0.1-SNAPSHOT</version>
    <name>demo</name>
    <description>Demo project for Spring Boot</description>

    <dependencies>

        <dependency>
            <groupId>org.springframework</groupId>
            <artifactId>spring-context</artifactId>
            <version>5.3.18</version>
        </dependency>

        <dependency>
            <groupId>org.springframework</groupId>
            <artifactId>spring-web</artifactId>
            <version>5.3.18</version>
        </dependency>

        <dependency>
            <groupId>org.springframework</groupId>
            <artifactId>spring-aop</artifactId>
            <version>5.3.18</version>
        </dependency>

        <dependency>
            <groupId>org.springframework</groupId>
            <artifactId>spring-webmvc</artifactId>
            <version>5.3.18</version>
        </dependency>

        <dependency>
            <groupId>javax.servlet</groupId>
            <artifactId>javax.servlet-api</artifactId>
            <version>4.0.1</version>
        </dependency>

        <dependency>
            <groupId>org.apache.tomcat.embed</groupId>
            <artifactId>tomcat-embed-core</artifactId>
            <version>9.0.6</version>
        </dependency>
    </dependencies>

</project>
userdemo 依赖 demo
pom.xml
<?xml version="1.0" encoding="UTF-8"?>
<project xmlns="http://maven.apache.org/POM/4.0.0" xmlns:xsi="http://www.w3.org/2001/XMLSchema-instance"
         xsi:schemaLocation="http://maven.apache.org/POM/4.0.0 https://maven.apache.org/xsd/maven-4.0.0.xsd">
    <modelVersion>4.0.0</modelVersion>

    <groupId>com.example</groupId>
    <artifactId>userdemo</artifactId>
    <version>0.0.1-SNAPSHOT</version>
    <name>userdemo</name>

    <dependencies>
        <dependency>
            <groupId>com.example</groupId>
            <artifactId>demo</artifactId>
            <version>0.0.1-SNAPSHOT</version>
        </dependency>

    </dependencies>

</project>
demo 自定义注解 MySpringBootApplication
package org.springframework.boot.autoconfigure;

import java.lang.annotation.*;

@Target({ElementType.TYPE})
@Retention(RetentionPolicy.RUNTIME)
@Documented
@Inherited
public @interface MySpringBootApplication {
}
userdemo 使用 demo 自定义注解 MySpringBootApplication
package com.example.userdemo;


import org.springframework.boot.autoconfigure.MySpringBootApplication;

@MySpringBootApplication
public class UserdemoApplication {

    public static void main(String[] args) {

    }

}
demo run 方法
package org.springframework.boot;

public class MySpringApplication {

    public static void run(Class clazz){

    }
}
userdemo 使用
package com.example.userdemo;


import org.springframework.boot.MySpringApplication;
import org.springframework.boot.autoconfigure.MySpringBootApplication;

@MySpringBootApplication
public class UserdemoApplication {

    public static void main(String[] args) {
        MySpringApplication.run(UserdemoApplication.class);
    }

}
demo 启动 tomcat
package org.springframework.boot;

import org.apache.catalina.*;
import org.apache.catalina.connector.Connector;
import org.apache.catalina.core.StandardContext;
import org.apache.catalina.core.StandardEngine;
import org.apache.catalina.core.StandardHost;
import org.apache.catalina.startup.Tomcat;

import org.springframework.web.context.WebApplicationContext;
import org.springframework.web.context.support.AnnotationConfigWebApplicationContext;
import org.springframework.web.servlet.DispatcherServlet;

public class MySpringApplication {

    public static void run(Class clazz) {

        /*
        创建spring容器
         */
        AnnotationConfigWebApplicationContext applicationContext = new AnnotationConfigWebApplicationContext();
        /*
        解析配置类,创建 bean 交由spring容器管理
         */
        applicationContext.register(clazz);

        /*
        刷新整个Spring 上下文信息,确保使用最新的 bean
         */
        applicationContext.refresh();
        //启动 tomcat
        startTomcat(applicationContext);
    }

    //启动 tomcat
    public static void startTomcat(WebApplicationContext applicationContext){

        Tomcat tomcat = new Tomcat();

        Server server = tomcat.getServer();
        Service service = server.findService("Tomcat");

        Connector connector = new Connector();
        connector.setPort(8081);

        Engine engine = new StandardEngine();
        engine.setDefaultHost("localhost");

        Host host = new StandardHost();
        host.setName("localhost");

        String contextPath = "";
        Context context = new StandardContext();
        context.setPath(contextPath);
        context.addLifecycleListener(new Tomcat.FixContextListener());

        host.addChild(context);
        engine.addChild(host);

        service.setContainer(engine);
        service.addConnector(connector);

        /*
        new DispatcherServlet(applicationContext)
        需要spring容器中的controller bean,根据不同的请求调用不同的controller bean
        */
        tomcat.addServlet(contextPath, "dispatcher", new DispatcherServlet(applicationContext));
        /*
        所有的请求都调用 DispatcherServlet ,再由dispatcherServlet 根据不同的请求调用不同的controller bean
        * */
        context.addServletMappingDecoded("/*", "dispatcher");

        try {
            tomcat.start();
            // 进入监听状态,如果不进入监听状态,启动tomat后就会关闭tomcat
            tomcat.getServer().await();

        } catch (LifecycleException e) {
            e.printStackTrace();
        }

    }
}
@MySpringBootApplication 之上添加 @ComponentScan
@ComponentScan 未指定basePackages 将默认扫描与包含该注解的类相同的包及其子孙包中的所有组件。
package org.springframework.boot.autoconfigure;

import org.springframework.context.annotation.ComponentScan;

import java.lang.annotation.*;

@Target({ElementType.TYPE})
@Retention(RetentionPolicy.RUNTIME)
@Documented
@Inherited
@ComponentScan
public @interface MySpringBootApplication {
}
userdemo 使用
package com.example.userdemo;


import org.springframework.boot.MySpringApplication;
import org.springframework.boot.autoconfigure.MySpringBootApplication;

@MySpringBootApplication
public class UserdemoApplication {

    public static void main(String[] args) {
        MySpringApplication.run(UserdemoApplication.class);
    }

}
package com.example.userdemo.controller;
import org.springframework.web.bind.annotation.RequestMapping;
import org.springframework.web.bind.annotation.RestController;
@RestController
@RequestMapping("/test")
public class TestController {
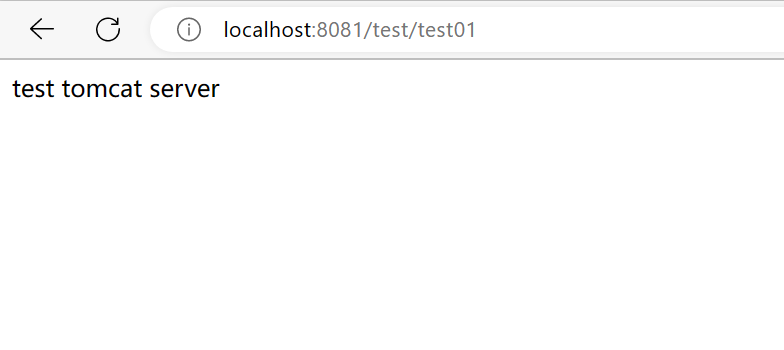
@RequestMapping("/test01")
public String test01(){
return "test tomcat server";
}
}

动态选择启动 tomcat 还是jetty服务器
demo 定义 WebServer 接口
package org.springframework.boot;

import org.springframework.web.context.support.AnnotationConfigWebApplicationContext;

public interface WebServer {
    //启动 服务器
    public void start(AnnotationConfigWebApplicationContext applicationContext);
}
实现类 TomcatWebServer
启动 tomcat
package org.springframework.boot;

import org.apache.catalina.*;
import org.apache.catalina.connector.Connector;
import org.apache.catalina.core.StandardContext;
import org.apache.catalina.core.StandardEngine;
import org.apache.catalina.core.StandardHost;
import org.apache.catalina.startup.Tomcat;
import org.springframework.web.context.WebApplicationContext;
import org.springframework.web.context.support.AnnotationConfigWebApplicationContext;
import org.springframework.web.servlet.DispatcherServlet;

public class TomcatWebServer implements WebServer {
    //启动 tomcat
    @Override
    public void start(AnnotationConfigWebApplicationContext applicationContext) {

        startTomcat(applicationContext);
    }

    //启动 tomcat
    public static void startTomcat(WebApplicationContext applicationContext){

        Tomcat tomcat = new Tomcat();

        Server server = tomcat.getServer();
        Service service = server.findService("Tomcat");

        Connector connector = new Connector();
        connector.setPort(8081);

        Engine engine = new StandardEngine();
        engine.setDefaultHost("localhost");

        Host host = new StandardHost();
        host.setName("localhost");

        String contextPath = "";
        Context context = new StandardContext();
        context.setPath(contextPath);
        context.addLifecycleListener(new Tomcat.FixContextListener());

        host.addChild(context);
        engine.addChild(host);

        service.setContainer(engine);
        service.addConnector(connector);

        /*
        new DispatcherServlet(applicationContext)
        需要spring容器中的controller bean,根据不同的请求调用不同的controller bean
        */
        tomcat.addServlet(contextPath, "dispatcher", new DispatcherServlet(applicationContext));
        /*
        所有的请求都调用 DispatcherServlet ,再由dispatcherServlet 根据不同的请求调用不同的controller bean
        * */
        context.addServletMappingDecoded("/*", "dispatcher");

        try {
            tomcat.start();
            // 进入监听状态,如果不进入监听状态,启动tomat后就会关闭tomcat
            tomcat.getServer().await();

        } catch (LifecycleException e) {
            e.printStackTrace();
        }

    }


}
实现类 JettyWebServer
启动 Jetty 服务器
依赖
<dependency>
            <groupId>org.eclipse.jetty</groupId>
            <artifactId>jetty-server</artifactId>
            <version>9.4.48.v20220622</version>
</dependency>
package org.springframework.boot;
import org.springframework.web.context.support.AnnotationConfigWebApplicationContext;
public class JettyWebServer implements WebServer{
@Override
public void start(AnnotationConfigWebApplicationContext applicationContext) {
System.out.println("启动jetty 服务器");
}
}
demo MySpringApplication
package org.springframework.boot;

import org.springframework.web.context.support.AnnotationConfigWebApplicationContext;

import java.util.Map;


public class MySpringApplication {

    public static void run(Class clazz) {

        /*
        创建spring容器
         */
        AnnotationConfigWebApplicationContext applicationContext = new AnnotationConfigWebApplicationContext();
        /*
        解析配置类,创建 bean 交由spring容器管理
         */
        applicationContext.register(clazz);

        /*
        刷新整个Spring 上下文信息,确保使用最新的 bean
         */
        applicationContext.refresh();

        //获取某个实现类的对象,调用其 start 方法,启动对应服务器
        WebServer webServer = getWebServer(applicationContext);
        webServer.start(applicationContext);

    }

    private static WebServer getWebServer(AnnotationConfigWebApplicationContext applicationContext){
        //从 spring 容器获取 WebServer 类型的 bean
        Map<String,WebServer> beansOfType = applicationContext.getBeansOfType(WebServer.class);
        //有且仅有一个 bean 对象,返回该对象 否则抛异常
        if(beansOfType.size() == 0){
            throw new NullPointerException();
        }else if( beansOfType.size() > 1){
            throw new IllegalStateException();
        }else {
            /*
            * .values获取map 中的所有 value 组成集合
            * .stream() 将集合转换为一个流并进行各种操作
            * stream().findFirst() 是一个方法链,stream()将集合转换为流(Stream),而findFirst()返回流的第一个元素
            * get() 方法返回该Bean实例
            * */
            return beansOfType.values().stream().findFirst().get();
        }


    }

}
userdemo 使用
配置类中
@Bean
public JettyWebServer jettyWebServer(){
    return new JettyWebServer();
}
使spring容器中有JettyWebServer 的bean
getWebServer 获取的就是JettyWebServer bean
调用其 start ,启动的就是 jetty 服务器
如果创建 tomcatWebServer 对象给spring对象,那么就回启动tomcat 服务器
package com.example.userdemo;


import org.springframework.boot.JettyWebServer;
import org.springframework.boot.MySpringApplication;
import org.springframework.boot.autoconfigure.MySpringBootApplication;
import org.springframework.context.annotation.Bean;

@MySpringBootApplication
public class UserdemoApplication {

   @Bean
   public JettyWebServer jettyWebServer(){
       return new JettyWebServer();
   }

    public static void main(String[] args) {
        MySpringApplication.run(UserdemoApplication.class);
    }

}

demo 自动配置 WebServer
package org.springframework.boot.autoconfigure;

import org.springframework.boot.JettyWebServer;
import org.springframework.boot.TomcatWebServer;
import org.springframework.context.annotation.Bean;
import org.springframework.context.annotation.Configuration;

//配置类
@Configuration
public class WebServerAutoConfiguration {

    @Bean
    public TomcatWebServer tomcatWebServer(){
        return new TomcatWebServer();
    }


    @Bean
    public JettyWebServer jettyWebServer(){
        return new JettyWebServer();
    }
}
但是不能2个bean都有,只能有一个
加 @Conditional() 条件注解 当条件成立被注解的内容才生效
@Conditional() 注解 有一个属性value,该属性类型是Class数组
Class 泛型要求必须继承 Condition
//
// Source code recreated from a .class file by IntelliJ IDEA
// (powered by Fernflower decompiler)
//

package org.springframework.context.annotation;

import java.lang.annotation.Documented;
import java.lang.annotation.ElementType;
import java.lang.annotation.Retention;
import java.lang.annotation.RetentionPolicy;
import java.lang.annotation.Target;

@Target({ElementType.TYPE, ElementType.METHOD})
@Retention(RetentionPolicy.RUNTIME)
@Documented
public @interface Conditional {
    Class<? extends Condition>[] value();
}
Condition接口有一个 matches 方法,实现该方法,扫描注解@Conditional时会调用该方法,返回true则条件成立
//
// Source code recreated from a .class file by IntelliJ IDEA
// (powered by Fernflower decompiler)
//

package org.springframework.context.annotation;

import org.springframework.core.type.AnnotatedTypeMetadata;

@FunctionalInterface
public interface Condition {
    boolean matches(ConditionContext context, AnnotatedTypeMetadata metadata);
}
TomcatCondition implements Condition
当有tomcat依赖时,条件成立
package org.springframework.boot.autoconfigure;

import org.springframework.context.annotation.Condition;
import org.springframework.context.annotation.ConditionContext;
import org.springframework.core.type.AnnotatedTypeMetadata;

public class TomcatCondition implements Condition {
    @Override
    public boolean matches(ConditionContext context, AnnotatedTypeMetadata metadata) {
        //条件
        try {
            //有 org.apache.catalina.startup.Tomcat 这个类,返会true,条件成立
            context.getClassLoader().loadClass("org.apache.catalina.startup.Tomcat");
            return true;
        }catch (ClassNotFoundException e){
            return false;
        }

    }
}
JettyCondition implements Condition
当有jetty依赖时,条件成立
package org.springframework.boot.autoconfigure;

import org.springframework.context.annotation.Condition;
import org.springframework.context.annotation.ConditionContext;
import org.springframework.core.type.AnnotatedTypeMetadata;

public class JettyCondition implements Condition {
    @Override
    public boolean matches(ConditionContext context, AnnotatedTypeMetadata metadata) {
        //条件
        try {
            //有 org.eclipse.jetty.server 这个类,返会true,条件成立
            context.getClassLoader().loadClass("org.eclipse.jetty.server.Server");
            return true;
        }catch (ClassNotFoundException e){
            return false;
        }

    }
}
package org.springframework.boot.autoconfigure;

import org.springframework.boot.JettyWebServer;
import org.springframework.boot.TomcatWebServer;
import org.springframework.context.annotation.Bean;
import org.springframework.context.annotation.Conditional;
import org.springframework.context.annotation.Configuration;

//配置类
@Configuration
public class WebServerAutoConfiguration {

    @Conditional(TomcatCondition.class)
    @Bean
    public TomcatWebServer tomcatWebServer(){
        return new TomcatWebServer();
    }

    @Conditional(JettyCondition.class)
    @Bean
    public JettyWebServer jettyWebServer(){
        return new JettyWebServer();
    }
}
demo 中 既有 启动tomcat的代码,需要tomcat依赖,
又有启动jetty的代码,需要jetty依赖,
但在userdemo 中如果两个依赖都有,那么2个@Conditional 都条件成立,
两个@Bean 都生效,会在spring容器中创建2个bean(只有一个才能启动服务器,不然抛异常)
userdemo
package com.example.userdemo;


import org.springframework.boot.JettyWebServer;
import org.springframework.boot.MySpringApplication;
import org.springframework.boot.autoconfigure.MySpringBootApplication;
import org.springframework.context.annotation.Bean;
import org.springframework.context.annotation.Import;

//导入配置类WebServerAutoConfiguration,使之被解析,创建 bean 对象交由spring容器管理
@Import(org.springframework.boot.autoconfigure.WebServerAutoConfiguration.class)
@MySpringBootApplication
public class UserdemoApplication {

    public static void main(String[] args) {
        MySpringApplication.run(UserdemoApplication.class);
    }

}
因为2个bean,都有,所以抛异常

demo 依赖jetty ,userdemo依赖demo,由于依赖传递,userdemo也就依赖了jetty
阻止依赖传递 <optional>true</optional>
demo pom.xml
<?xml version="1.0" encoding="UTF-8"?>
<project xmlns="http://maven.apache.org/POM/4.0.0" xmlns:xsi="http://www.w3.org/2001/XMLSchema-instance"
         xsi:schemaLocation="http://maven.apache.org/POM/4.0.0 https://maven.apache.org/xsd/maven-4.0.0.xsd">
    <modelVersion>4.0.0</modelVersion>

    <groupId>com.example</groupId>
    <artifactId>demo</artifactId>
    <version>0.0.1-SNAPSHOT</version>
    <name>demo</name>
    <description>Demo project for Spring Boot</description>

    <dependencies>

        <dependency>
            <groupId>org.springframework</groupId>
            <artifactId>spring-context</artifactId>
            <version>5.3.18</version>
        </dependency>

        <dependency>
            <groupId>org.springframework</groupId>
            <artifactId>spring-web</artifactId>
            <version>5.3.18</version>
        </dependency>

        <dependency>
            <groupId>org.springframework</groupId>
            <artifactId>spring-aop</artifactId>
            <version>5.3.18</version>
        </dependency>

        <dependency>
            <groupId>org.springframework</groupId>
            <artifactId>spring-webmvc</artifactId>
            <version>5.3.18</version>
        </dependency>

        <dependency>
            <groupId>javax.servlet</groupId>
            <artifactId>javax.servlet-api</artifactId>
            <version>4.0.1</version>
        </dependency>

        <dependency>
            <groupId>org.apache.tomcat.embed</groupId>
            <artifactId>tomcat-embed-core</artifactId>
            <version>9.0.6</version>
        </dependency>

        <dependency>
            <groupId>org.eclipse.jetty</groupId>
            <artifactId>jetty-server</artifactId>
            <version>9.4.48.v20220622</version>
            <optional>true</optional>
        </dependency>

    </dependencies>

</project>
如此 userdemo 就没有依赖 jetty,只依赖了tomcat
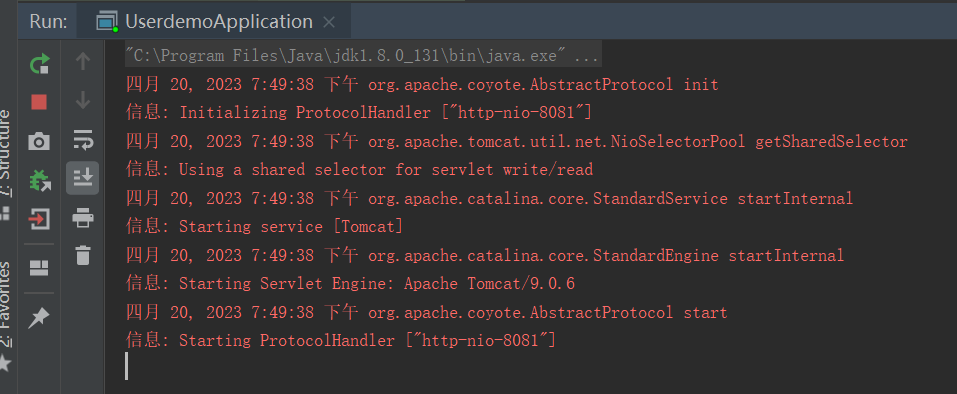
成功启动tomcat
如果想要改为使用jetty,就在userdemo pom.xml 中引入jetty的依赖并且排除 tomcat的依赖
模拟@ConditioalOnClass
当value属性指定的类存在,则条件成立
package org.springframework.boot.autoconfigure;

import org.springframework.context.annotation.Conditional;

import java.lang.annotation.ElementType;
import java.lang.annotation.Retention;
import java.lang.annotation.RetentionPolicy;
import java.lang.annotation.Target;

@Target({ElementType.TYPE,ElementType.METHOD})
@Retention(RetentionPolicy.RUNTIME)
@Conditional(WebServerCondition.class)
public @interface MyConditionalOnClass {
    String value();
}
WebServerCondition
package org.springframework.boot.autoconfigure;

import org.springframework.context.annotation.Condition;
import org.springframework.context.annotation.ConditionContext;
import org.springframework.core.type.AnnotatedTypeMetadata;

import java.util.Map;

public class WebServerCondition implements Condition {
    @Override
    public boolean matches(ConditionContext context, AnnotatedTypeMetadata metadata) {

        //从metadata 中获取 MyConditionalOnClass 注解的属性
        Map<String,Object>  annotationAttributes = metadata.getAnnotationAttributes(MyConditionalOnClass.class.getName());
        //获取value属性的值
        String value = (String) annotationAttributes.get("value");
        try{
            //加载 value 属性指定的类,成功加载则条件成立
            context.getClassLoader().loadClass(value);
            return true;
        }catch(ClassNotFoundException e){
            return false;
        }


    }
}
package org.springframework.boot.autoconfigure;

import org.springframework.boot.JettyWebServer;
import org.springframework.boot.TomcatWebServer;
import org.springframework.context.annotation.Bean;
import org.springframework.context.annotation.Conditional;
import org.springframework.context.annotation.Configuration;

//配置类
@Configuration
public class WebServerAutoConfiguration {


    @MyConditionalOnClass("org.apache.catalina.startup.Tomcat")
    @Bean
    public TomcatWebServer tomcatWebServer(){
        return new TomcatWebServer();
    }

    @MyConditionalOnClass("org.eclipse.jetty.server.Server")
    @Bean
    public JettyWebServer jettyWebServer(){
        return new JettyWebServer();
    }
}
userdemo 使用
package com.example.userdemo;


import org.springframework.boot.JettyWebServer;
import org.springframework.boot.MySpringApplication;
import org.springframework.boot.autoconfigure.MySpringBootApplication;
import org.springframework.context.annotation.Bean;
import org.springframework.context.annotation.Import;

//导入配置类WebServerAutoConfiguration,使之被解析,创建 bean 对象交由spring容器管理
@Import(org.springframework.boot.autoconfigure.WebServerAutoConfiguration.class)
@MySpringBootApplication
public class UserdemoApplication {

    public static void main(String[] args) {
        MySpringApplication.run(UserdemoApplication.class);
    }

}
成功启动 tomcat

添加@Import(MyAutoConfigurationImportSelector.class)
AutoConfigurationImportSelector implements DeferredImportSelector
package org.springframework.boot.autoconfigure;

import org.springframework.context.annotation.ComponentScan;
import org.springframework.context.annotation.Import;

import java.lang.annotation.*;

@Target({ElementType.TYPE})
@Retention(RetentionPolicy.RUNTIME)
@Documented
@Inherited
@ComponentScan
@Import(MyAutoConfigurationImportSelector.class)
public @interface MySpringBootApplication {
}
org/springframework/boot/spring-boot/2.7.9/spring-boot-2.7.9.jar!/META-INF/spring.factories
springboot jar包中 spring.factories 记录了配置类的类名
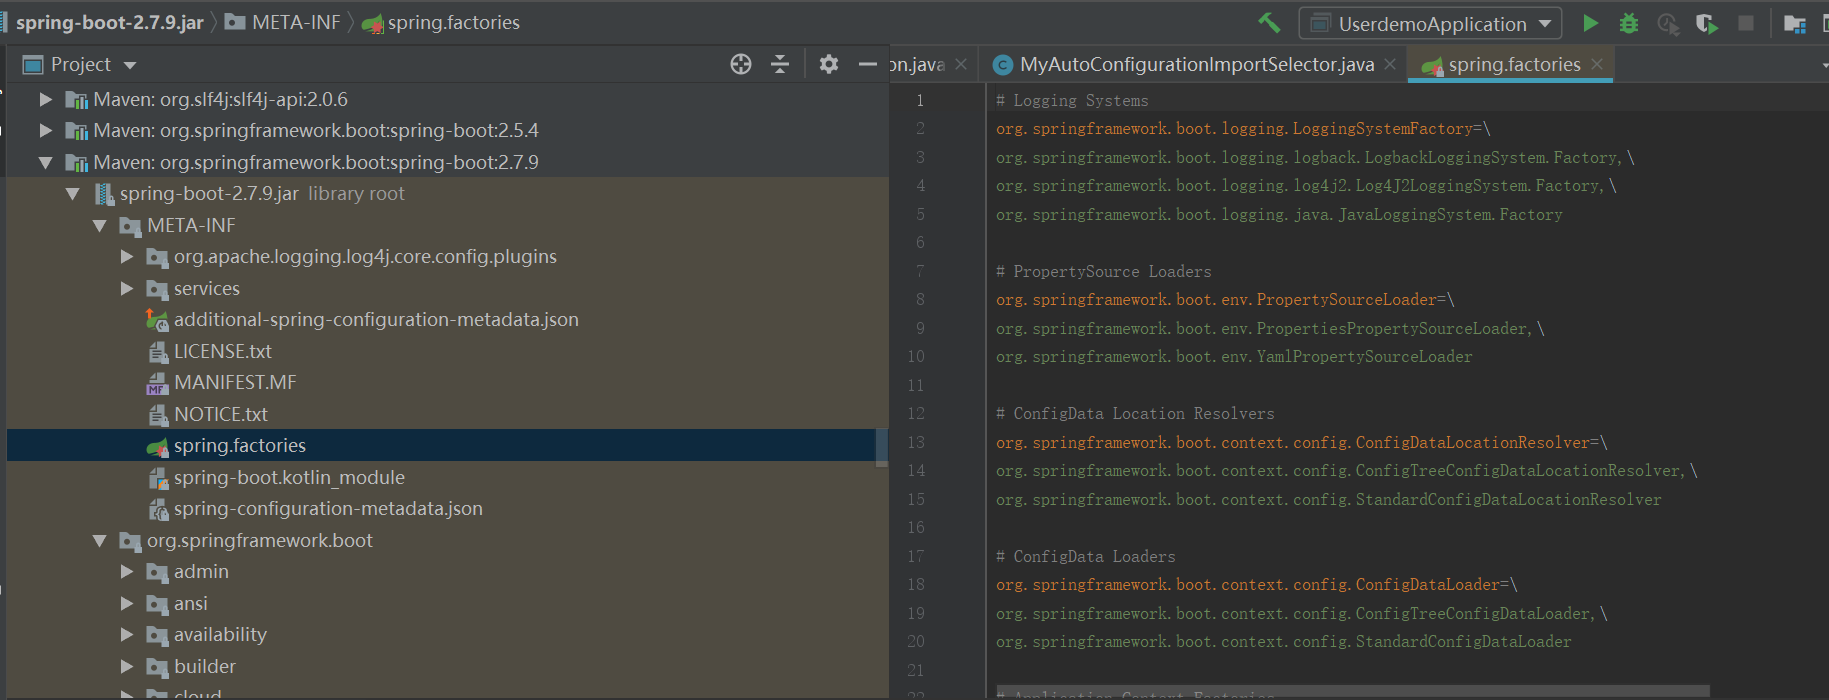
读取各个jar包中的spring.factories 文件,获取配置类的类名
package org.springframework.boot.autoconfigure;

import org.springframework.context.annotation.DeferredImportSelector;
import org.springframework.core.type.AnnotationMetadata;

public class MyAutoConfigurationImportSelector implements DeferredImportSelector {
    @Override
    public String[] selectImports(AnnotationMetadata importingClassMetadata) {
        /*读取各个jar包中的spring.factories 文件,获取配置类的类名
        返回需要解析的配置类的类名*/
        return new String[0];
    }
}
package org.springframework.boot.autoconfigure;

import org.springframework.context.annotation.ComponentScan;
import org.springframework.context.annotation.Import;

import java.lang.annotation.*;

@Target({ElementType.TYPE})
@Retention(RetentionPolicy.RUNTIME)
@Documented
@Inherited
@ComponentScan
@Import(MyAutoConfigurationImportSelector.class)
public @interface MySpringBootApplication {
}
不再需要在 启动类上使用@Import 导入配置类(因为需要导入的配置类很多,也不清楚到底有那些)@MySpringBootApplication 中的
@Import(MyAutoConfigurationImportSelector.class)
实现导入所有的配置类
package com.example.userdemo;


import org.springframework.boot.JettyWebServer;
import org.springframework.boot.MySpringApplication;
import org.springframework.boot.autoconfigure.MySpringBootApplication;
import org.springframework.context.annotation.Bean;
import org.springframework.context.annotation.Import;

//导入配置类WebServerAutoConfiguration,使之被解析,创建 bean 对象交由spring容器管理
//@Import(org.springframework.boot.autoconfigure.WebServerAutoConfiguration.class)
@MySpringBootApplication
public class UserdemoApplication {

    public static void main(String[] args) {
        MySpringApplication.run(UserdemoApplication.class);
    }

}