目录
- 1.简介
- 2.环境安装
- 2.1安装torch相关库
- 2.2 获取yolov8最新版本,并安装依赖
- 3. 如何使用模型用于各种CV任务
- 3.1 目标检测任务实现
- 检测图片代码
- 检测视频代码
- 3.2 分割任务实现
- 分割图片代码
- 分割视频代码
- 3.3 追踪任务
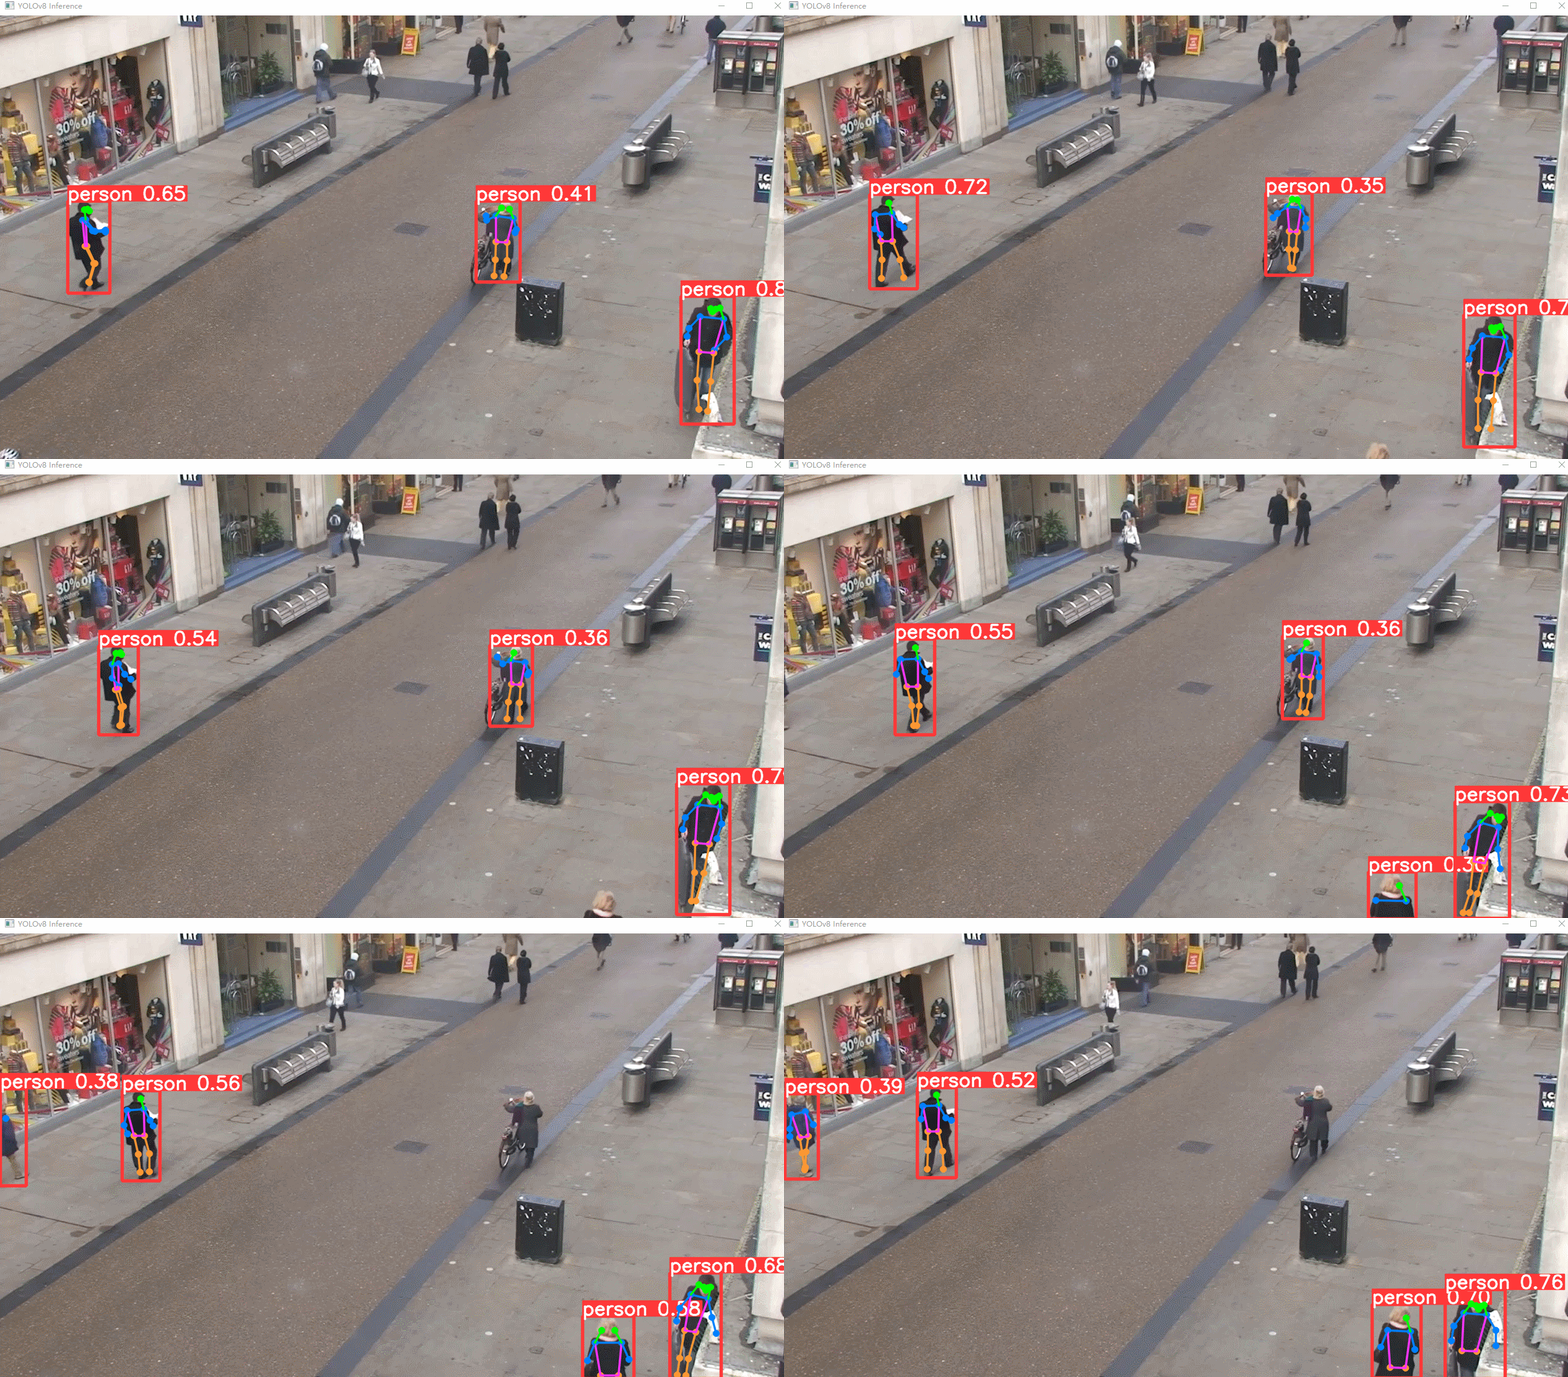
- 3.4 姿态检测任务
- 姿态检测(图片)代码
- 姿态检测(视频)代码
- 4. 模型中相关参数及结果说明
- 4.1模型预测可以设置的参数
- 4.2 results[0].plot()图形展示可以设置的参数说明
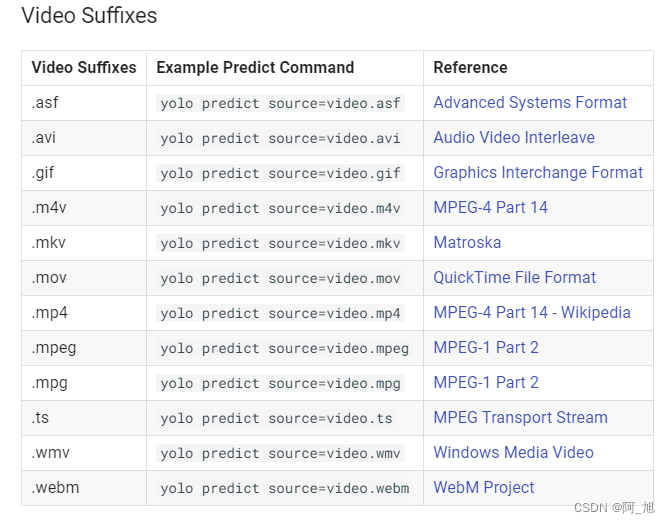
- 4.3 模型支持的图片与视频格式
- 4.4 各任务检测结果results信息说明
- 总结
1.简介
YOLOv8是Ultralytics的最新版本YOLO。作为最先进的 SOTA 模型,YOLOv8 建立在以前版本成功的基础上,引入了新功能和改进,以增强性能、灵活性和效率。YOLOv8 支持全方位的视觉 AI 任务,包括检测、分割、姿势估计、跟踪和分类。这种多功能性使用户能够在不同的应用程序和域中利用YOLOv8的功能。模型中只需要设定不同的训练模型,就可以得到不同的检测结果。
本文主要介绍如何使用该模型框架进行CV中各种任务的推理使用,包含检测、分割、姿势估计、跟踪,关于模型的训练等相关内容,后续有空再进行更新,感兴趣的小伙伴,可以点赞关注我~谢谢
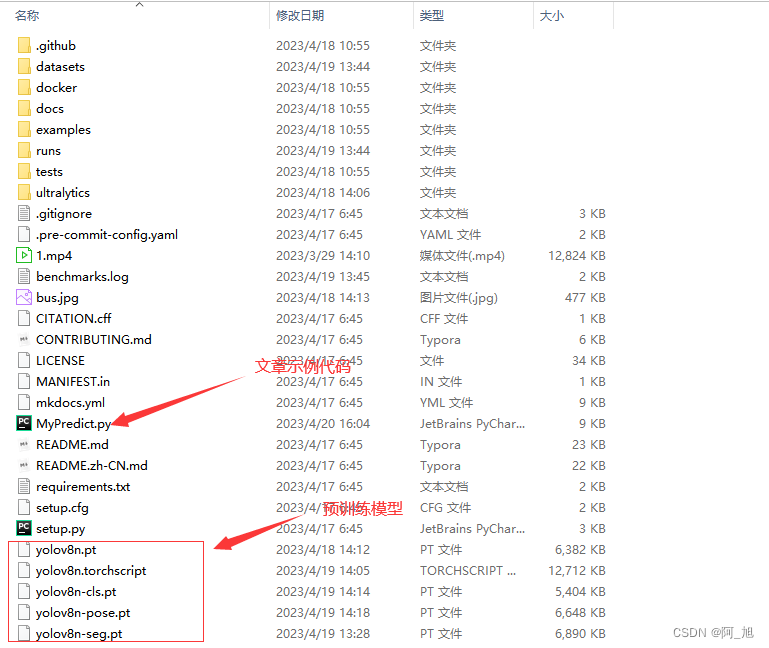
为了方便小伙伴们学习,我已将本文的所有源码、相关预训练模型及视频等打包好,需要的小伙伴可以通过以下方式获取:
关注GZH【阿旭算法与机器学习】,回复【YOLOV8】可获取本文所有源码、预训练模型及示例图片视频数据
2.环境安装
2.1安装torch相关库
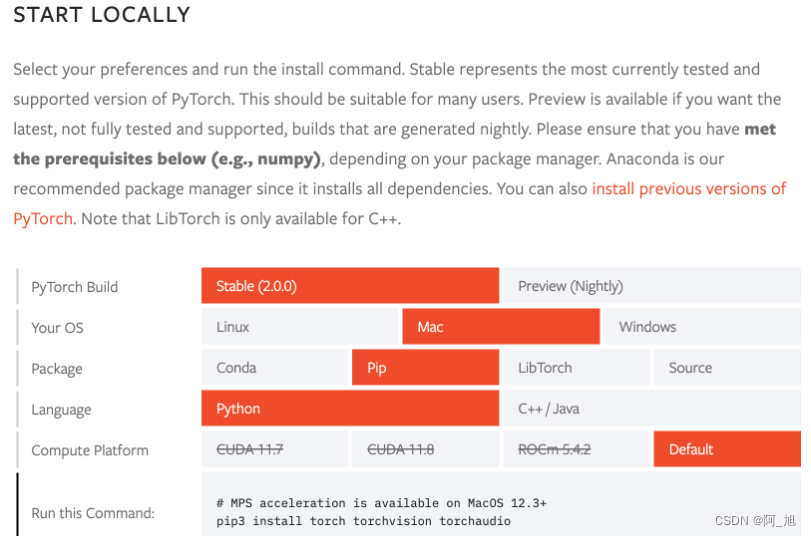
官网地址:https://pytorch.org/get-started/locally
安装命令:
pip install torch torchvision torchaudio
2.2 获取yolov8最新版本,并安装依赖
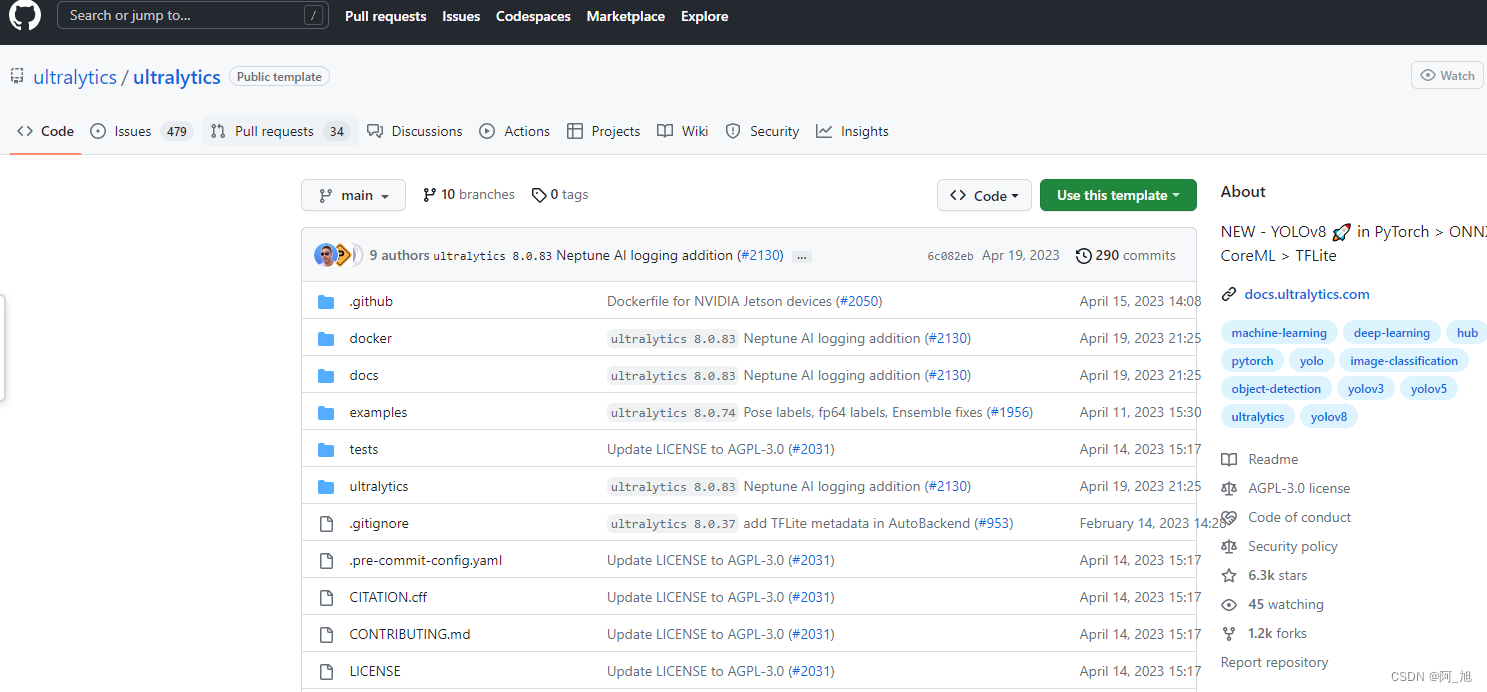
github地址: https://github.com/ultralytics/ultralytics
通过克隆仓库到本地来获得yolov8最新版本。
安装依赖环境:
pip install ultralytics
3. 如何使用模型用于各种CV任务
安装好yolov8需要的运行环境之后,就可以直接使用模型了,目前,该模型可以直接用于检测、分割、姿势估计、跟踪和分类这5类检测任务。
支持两种运行方式:
方式一:命令行形式示例
yolo TASK MODE ARGS

举例: yolo detect predict model=yolov8n.pt source='1.jpg'
表示对图片1.jpg进行目标检测
参数说明:
TASK (optional) 表示模型任务类型,可以从列表 [detect, segment, classify, pose]选一个. 分别代表检测、分割、分类、姿态检测任务
MODE (required) 表示模型需要执行的操作,可以从列表 [train, val, predict, export, track, benchmark]选一个,分别代表训练、验证、预测、模型转换、追踪、基准模型评估
ARGS (optional) 表示其他的一些参数设置,后面详细说明
方式二:python代码形式示例
from ultralytics import YOLO

# 加载预训练模型,
model = YOLO('yolov8n.pt',task='detect')
# yolov8n.pt表示预训练模型
# task代表需要执行的任务:detect, segment, classify, pose
# 使用模型进行指定任务
results = model(ARGS)
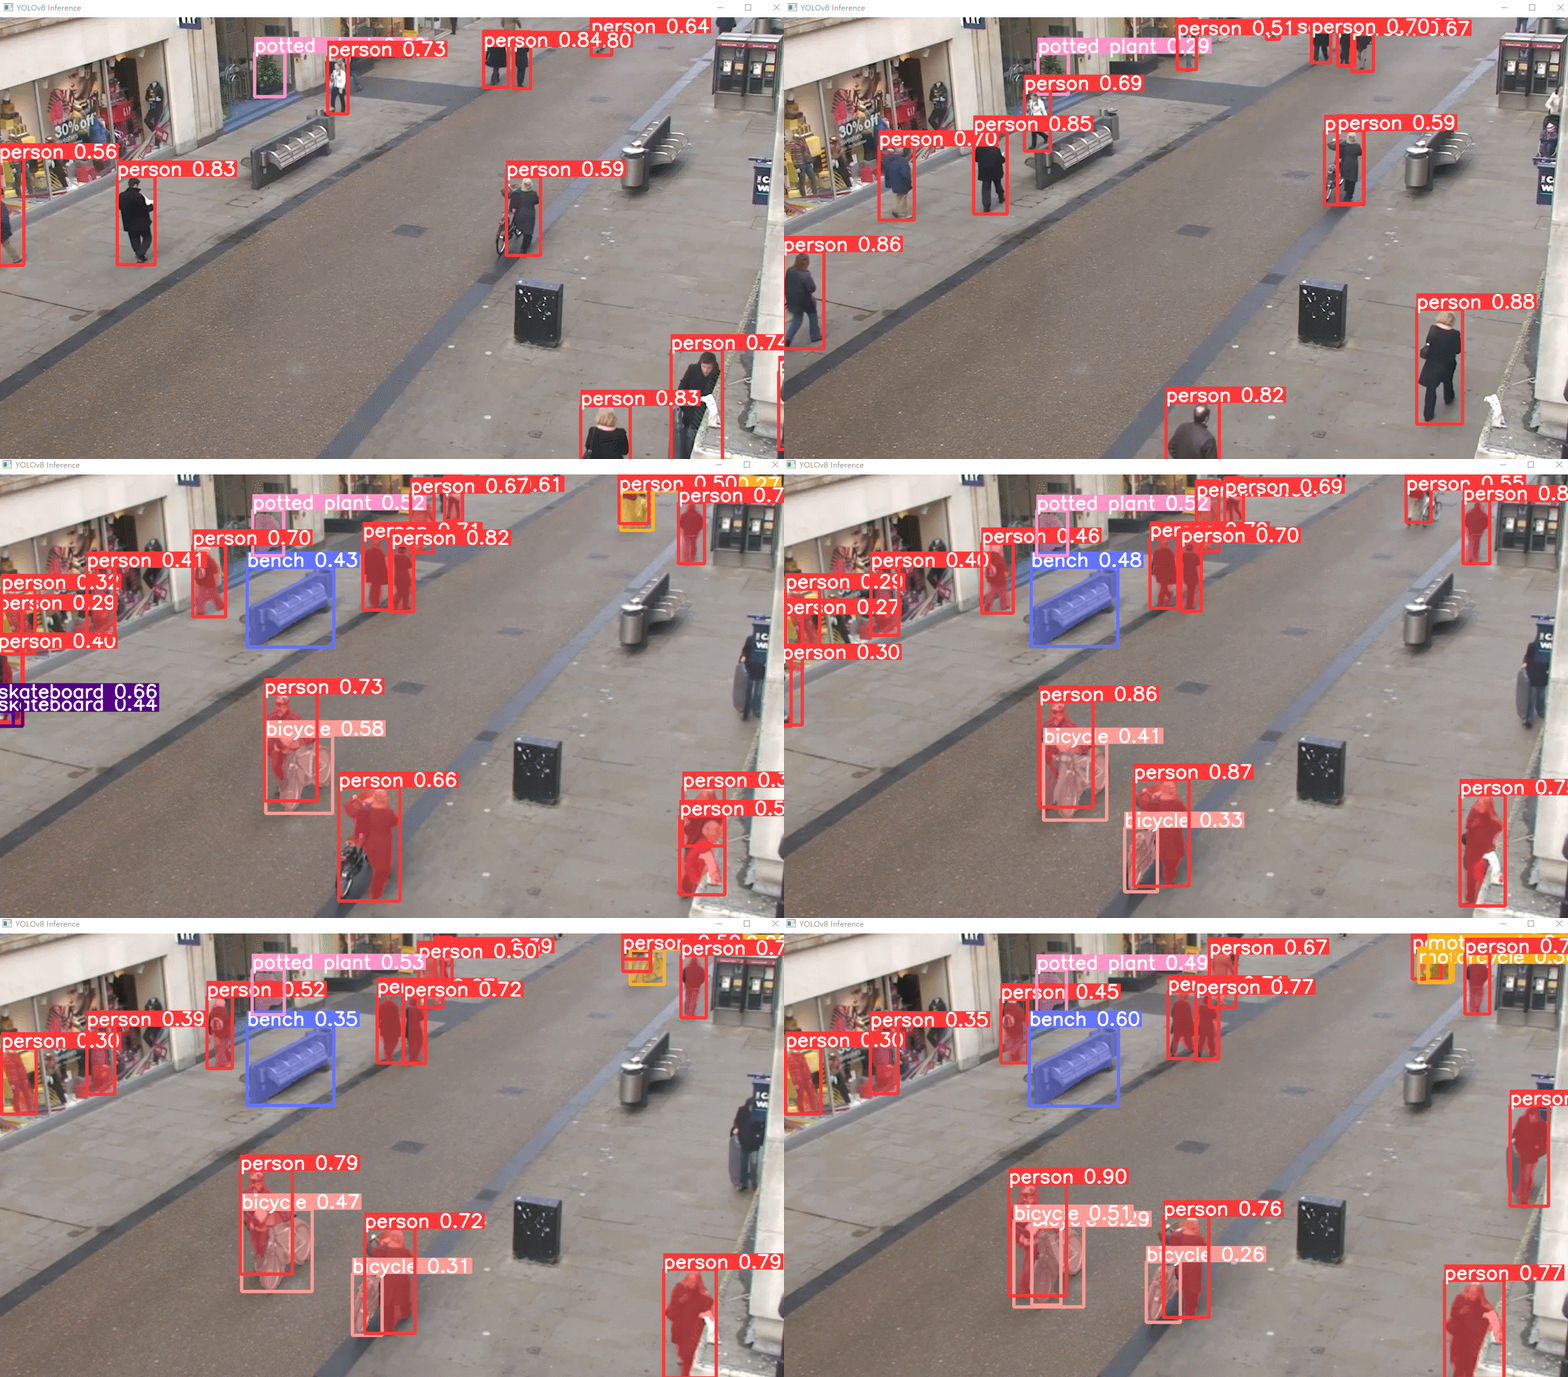
3.1 目标检测任务实现
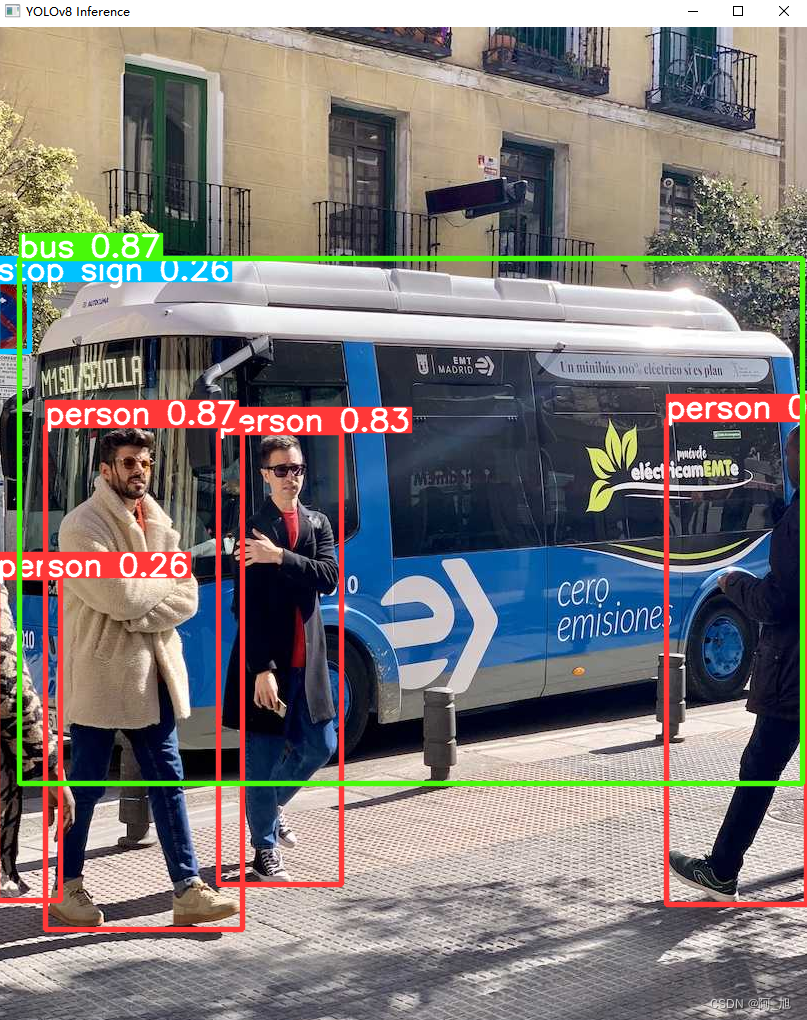
检测图片代码
from ultralytics import YOLO
import cv2
# 加载预训练模型
model = YOLO("yolov8n.pt", task='detect')
# model = YOLO("yolov8n.pt") task参数也可以不填写,它会根据模型去识别相应任务类别
# 检测图片
results = model("./ultralytics/assets/bus.jpg")
res = results[0].plot()
cv2.imshow("YOLOv8 Inference", res)
cv2.waitKey(0)
检测视频代码
import cv2
from ultralytics import YOLO

# Load the YOLOv8 model
model = YOLO('yolov8n.pt')
print('111')
# Open the video file
video_path = "1.mp4"
cap = cv2.VideoCapture(video_path)

# Loop through the video frames
while cap.isOpened():
    # Read a frame from the video
    success, frame = cap.read()

    if success:
        # Run YOLOv8 inference on the frame
        results = model(frame)

        # Visualize the results on the frame
        annotated_frame = results[0].plot()

        # Display the annotated frame
        cv2.imshow("YOLOv8 Inference", annotated_frame)

        # Break the loop if 'q' is pressed
        if cv2.waitKey(1) & 0xFF == ord("q"):
            break
    else:
        # Break the loop if the end of the video is reached
        break

# Release the video capture object and close the display window
cap.release()
cv2.destroyAllWindows()
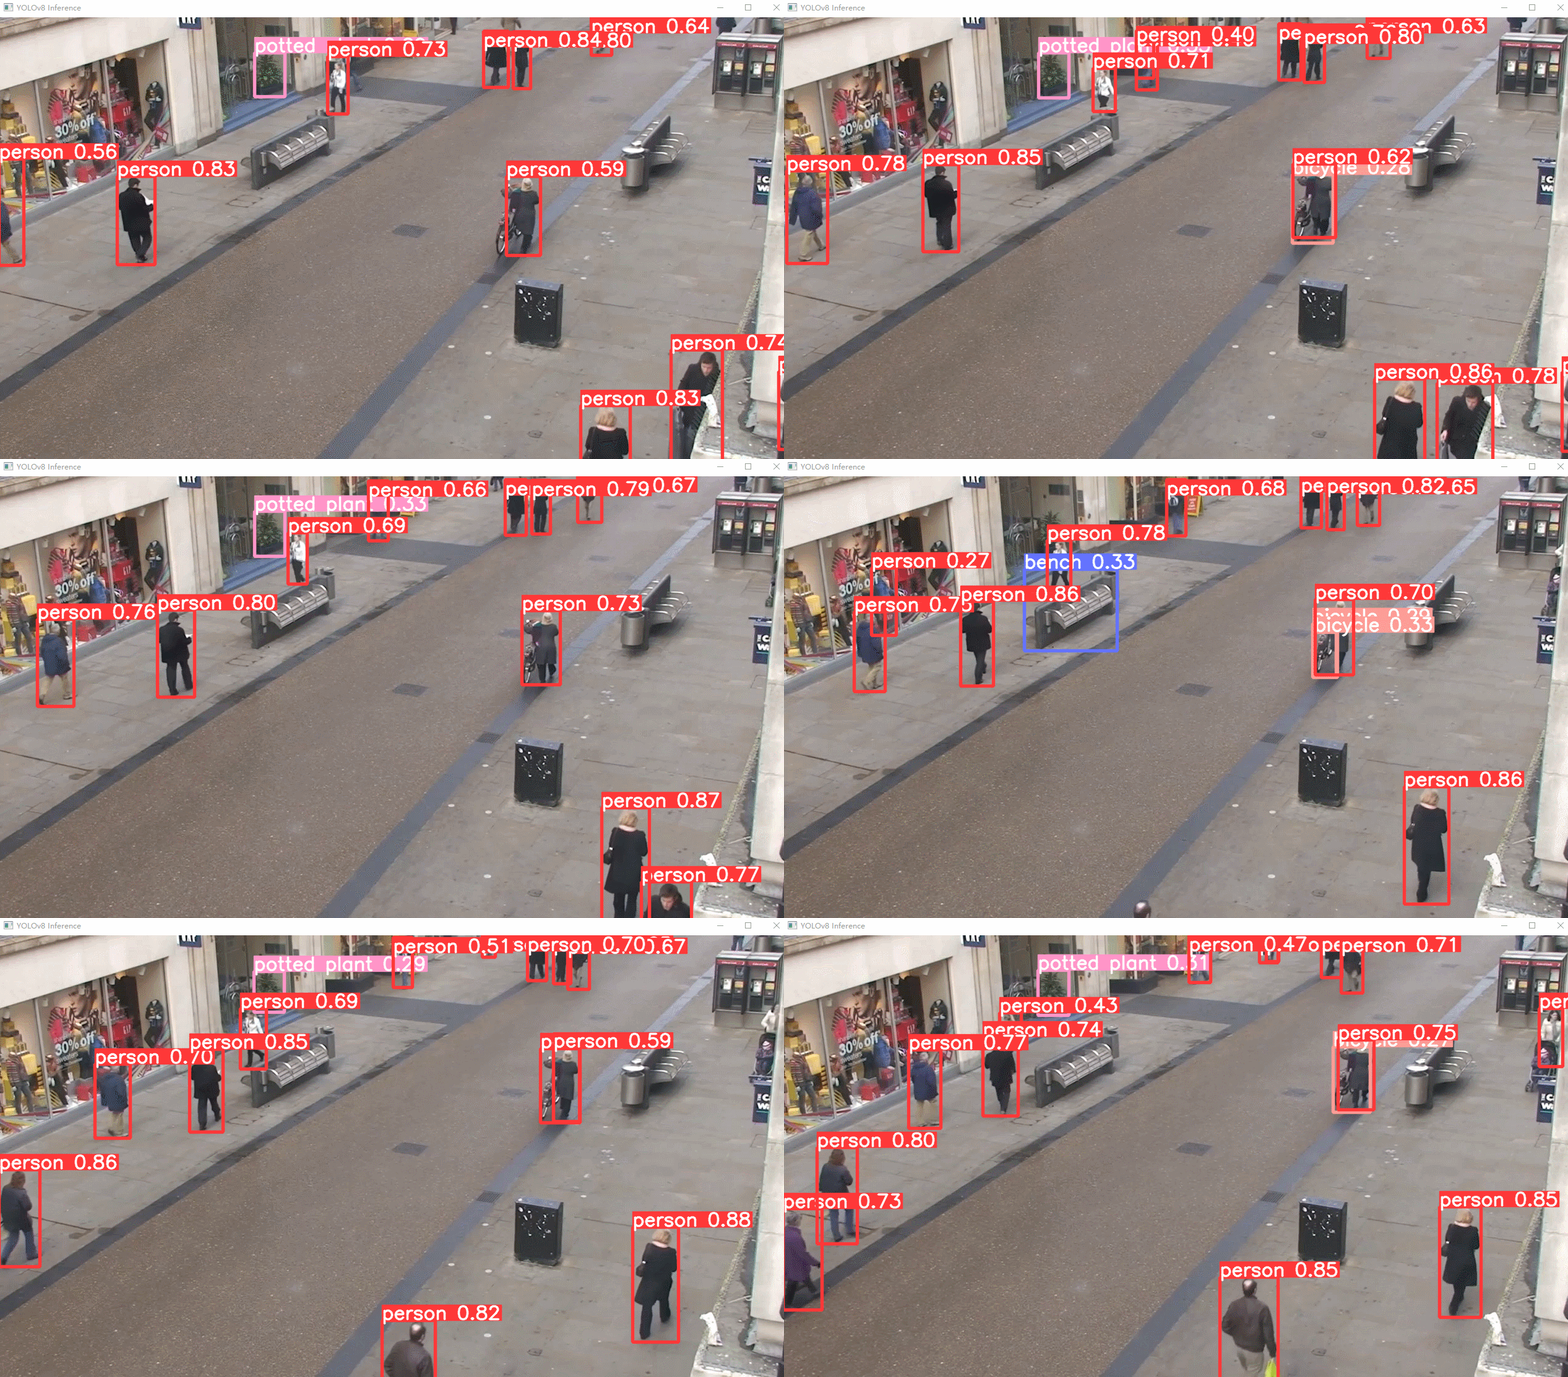
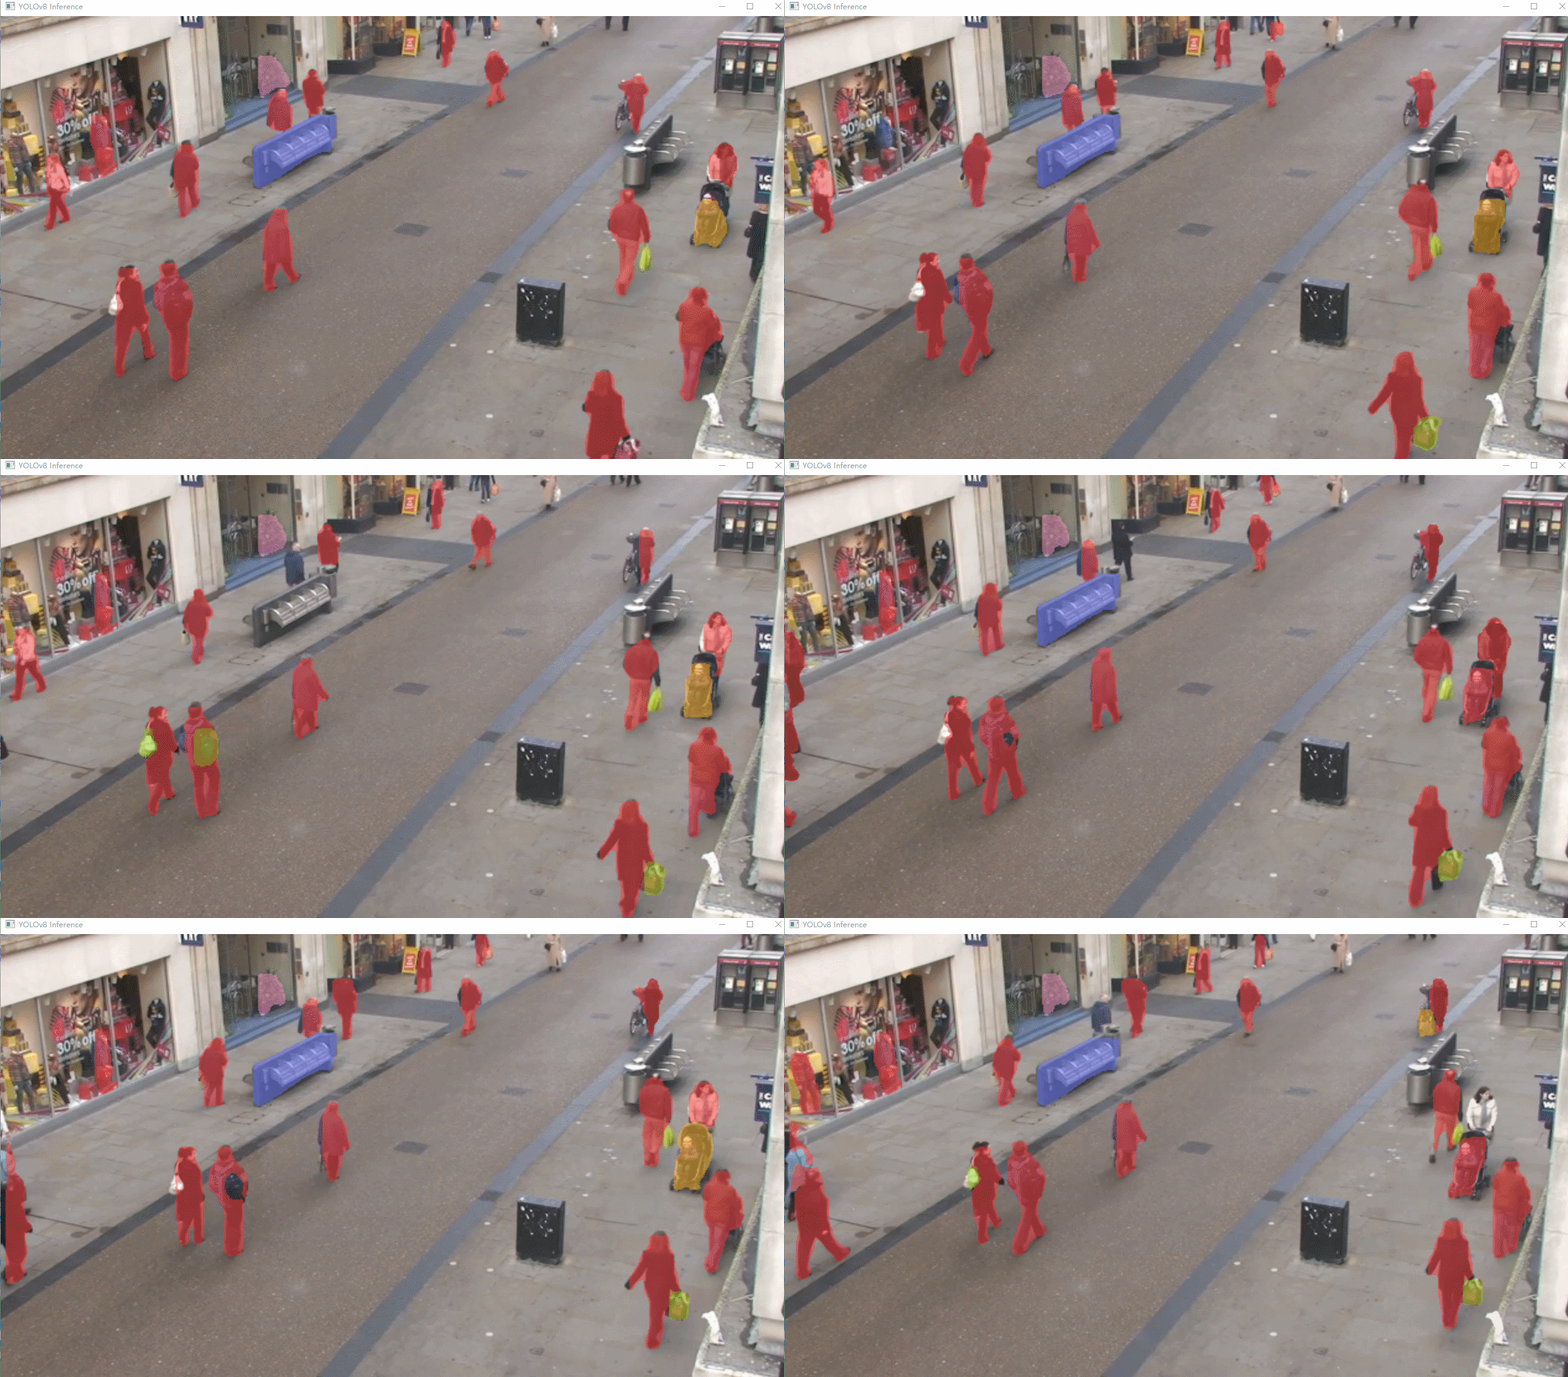
3.2 分割任务实现
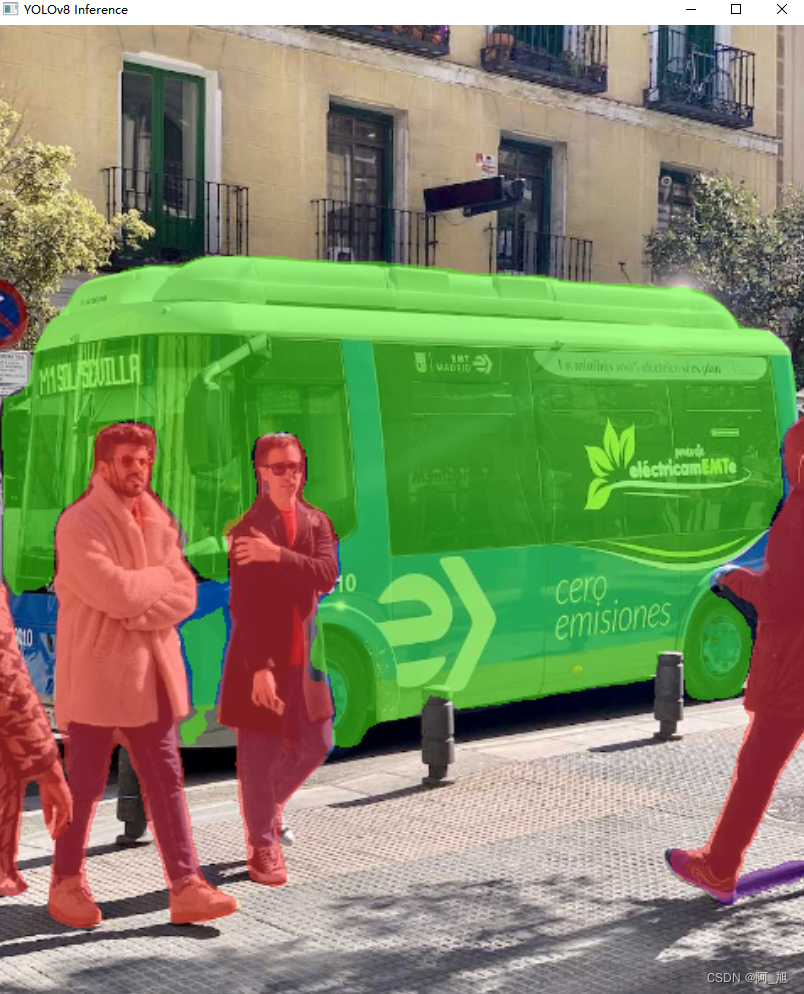
分割图片代码
from ultralytics import YOLO
import cv2
# Load a model
model = YOLO('yolov8n-seg.pt')
# Predict with the model
results = model('./ultralytics/assets/bus.jpg')  # predict on an image
res = results[0].plot(boxes=False) #boxes=False表示不展示预测框,True表示同时展示预测框
# Display the annotated frame
cv2.imshow("YOLOv8 Inference", res)
cv2.waitKey(0)
分割视频代码
import cv2
from ultralytics import YOLO

# Load the YOLOv8 model
model = YOLO('yolov8n-seg.pt', task='segment')
# Open the video file
video_path = "1.mp4"
cap = cv2.VideoCapture(video_path)

# Loop through the video frames
while cap.isOpened():
    # Read a frame from the video
    success, frame = cap.read()

    if success:
        # Run YOLOv8 inference on the frame
        results = model(frame)

        # Visualize the results on the frame
        annotated_frame = results[0].plot()
        # annotated_frame = results[0].plot(boxes=False)不显示预测框

        # Display the annotated frame
        cv2.imshow("YOLOv8 Inference", annotated_frame)

        # Break the loop if 'q' is pressed
        if cv2.waitKey(1) & 0xFF == ord("q"):
            break
    else:
        # Break the loop if the end of the video is reached
        break

# Release the video capture object and close the display window
cap.release()
cv2.destroyAllWindows()
显示预测框结果
不显示预测框结果
将代码中的boxes设为False即可:
annotated_frame = results[0].plot(boxes=False)
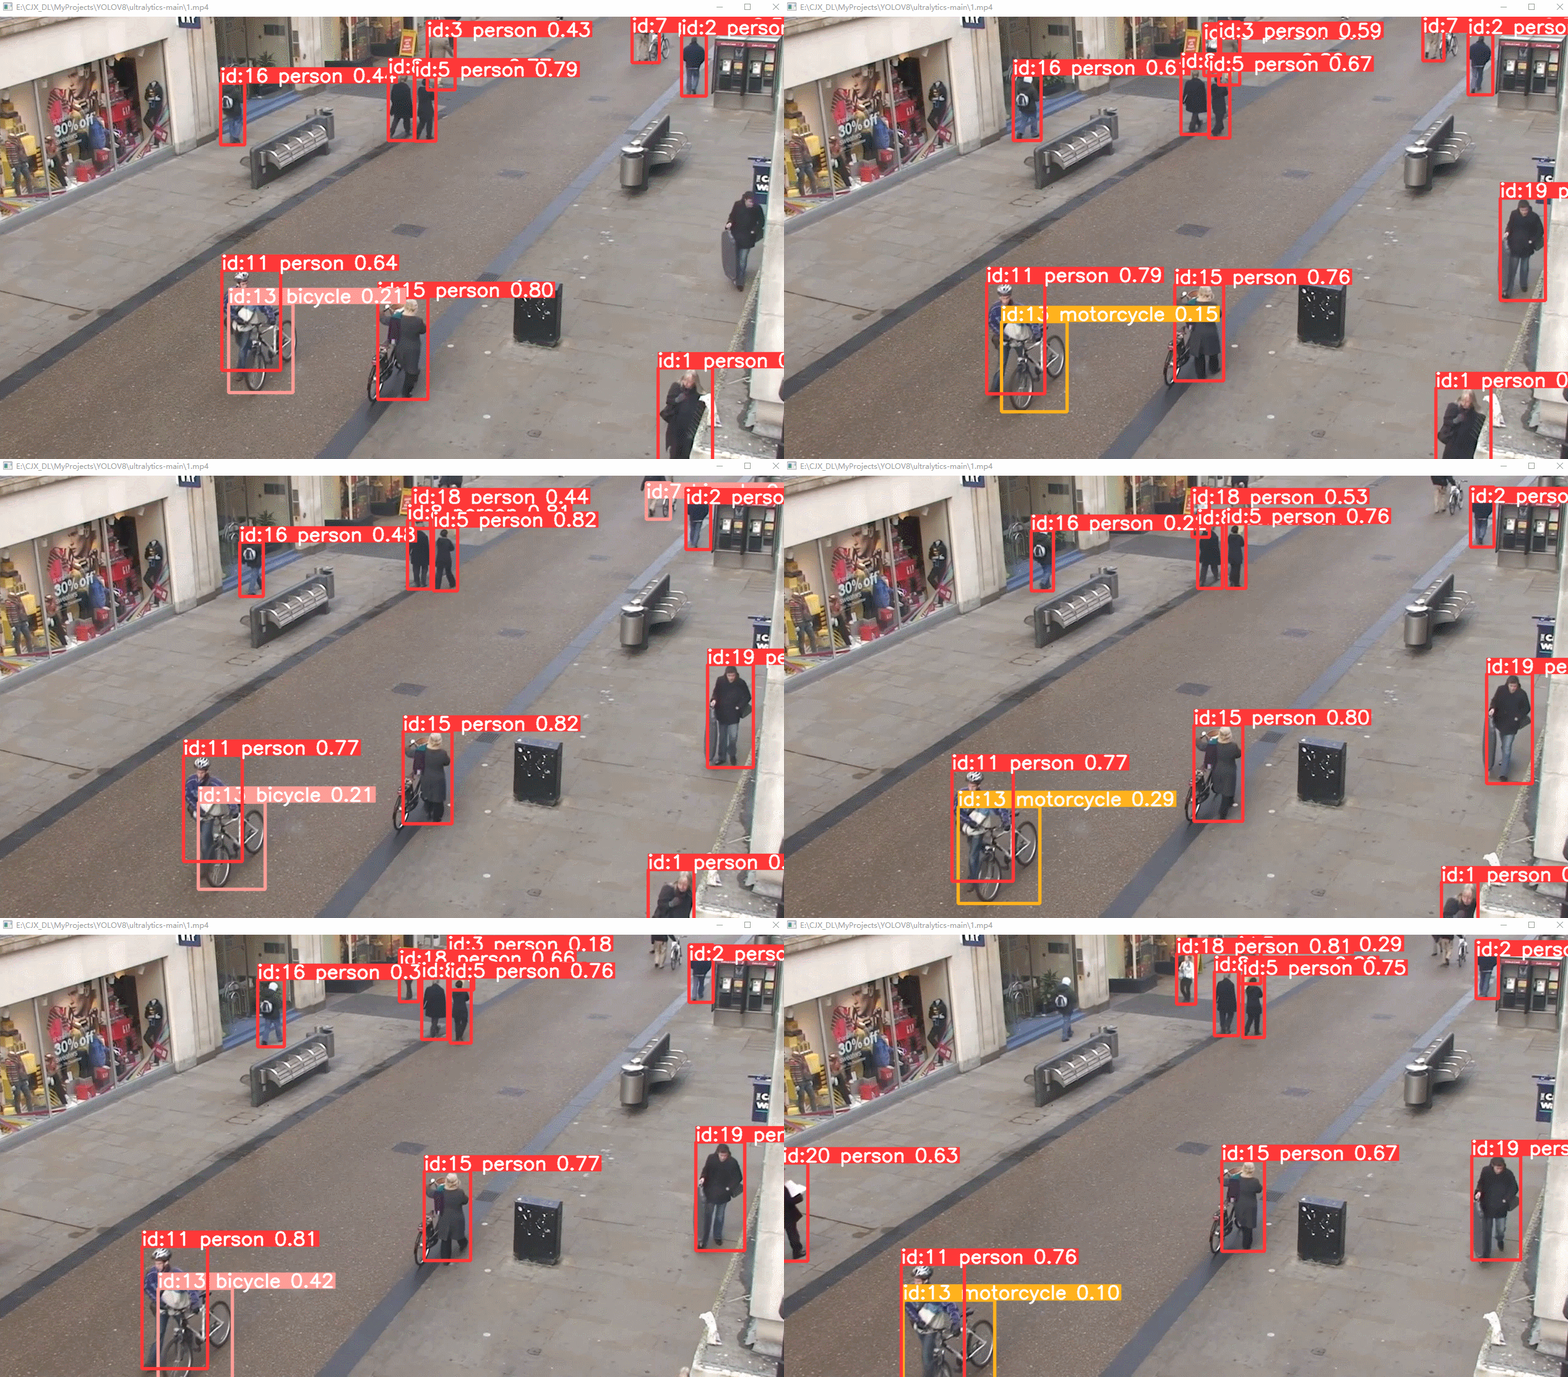
3.3 追踪任务
代码如下:【与目标检测不同的是,每个物体有一个ID。】
from ultralytics import YOLO

# Load a model
model = YOLO('yolov8n.pt',task='detect')
# model = YOLO('yolov8n-seg.pt')

# Track with the model
results = model.track(source="1.mp4", show=True)
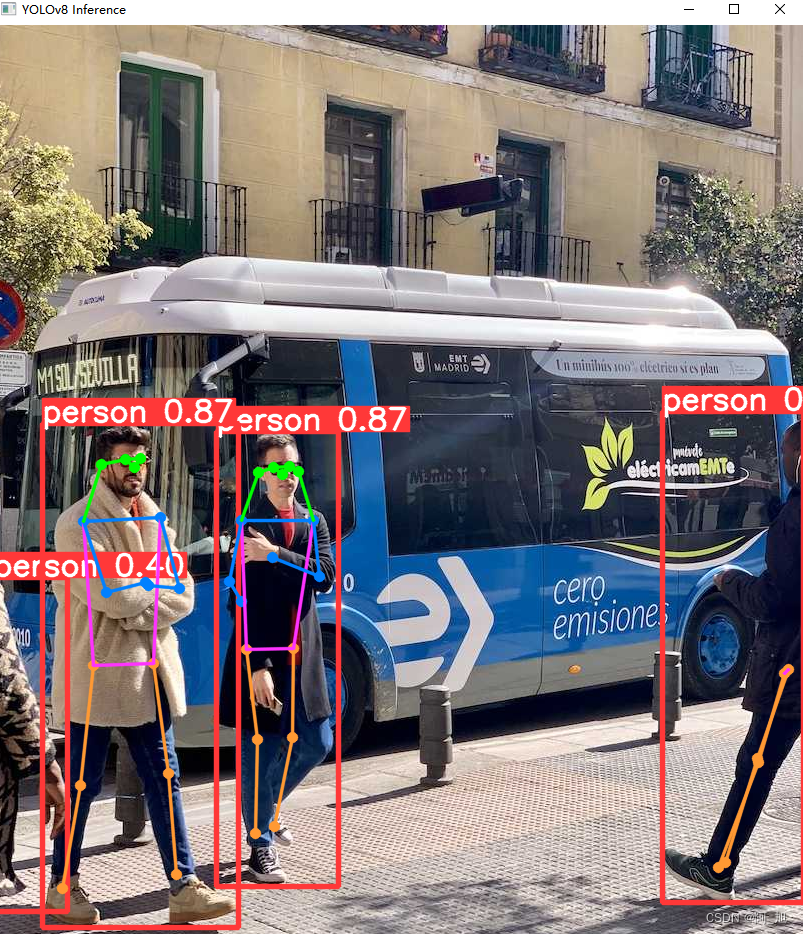
3.4 姿态检测任务
姿态检测(图片)代码
from ultralytics import YOLO
import cv2
# Load a model
model = YOLO('yolov8n-pose.pt')  # load a pretrained model (recommended for training)
results = model('./ultralytics/assets/bus.jpg')
res = results[0].plot()
cv2.imshow("YOLOv8 Inference", res)
cv2.waitKey(0)
姿态检测(视频)代码
import cv2
from ultralytics import YOLO

# Load the YOLOv8 model
model = YOLO('yolov8n-pose.pt', task='pose')
# Open the video file
video_path = "1.mp4"
cap = cv2.VideoCapture(video_path)

# Loop through the video frames
while cap.isOpened():
    # Read a frame from the video
    success, frame = cap.read()

    if success:
        # Run YOLOv8 inference on the frame
        results = model(frame)

        # Visualize the results on the frame
        annotated_frame = results[0].plot()

        # Display the annotated frame
        cv2.imshow("YOLOv8 Inference", annotated_frame)

        # Break the loop if 'q' is pressed
        if cv2.waitKey(1) & 0xFF == ord("q"):
            break
    else:
        # Break the loop if the end of the video is reached
        break

# Release the video capture object and close the display window
cap.release()
cv2.destroyAllWindows()
4. 模型中相关参数及结果说明
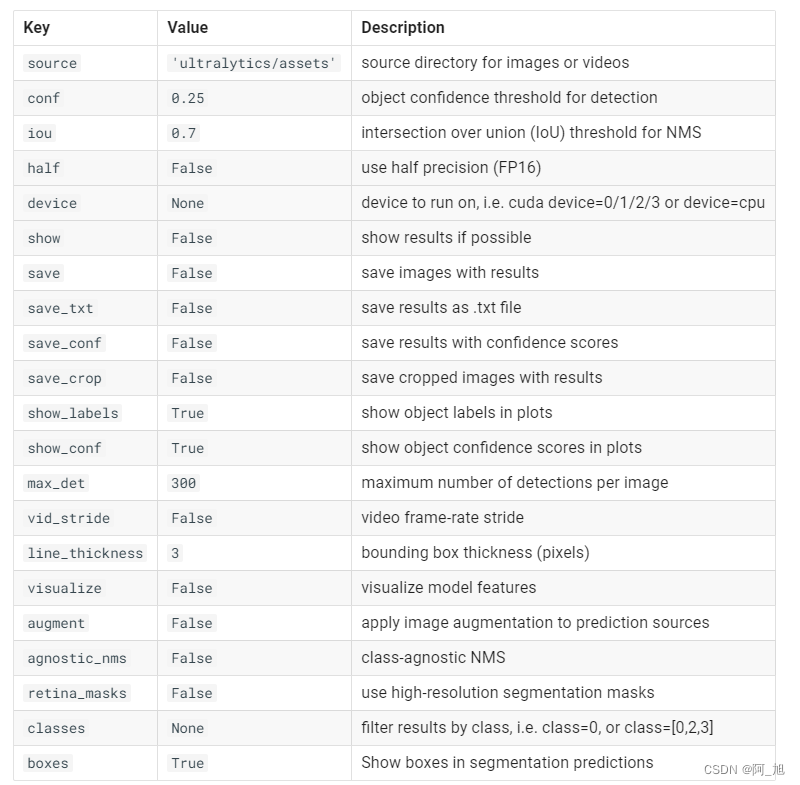
4.1模型预测可以设置的参数
results = model(source= ‘./ultralytics/assets/bus.jpg’)
此处可以设置许多不同的参数,参数说明如下:
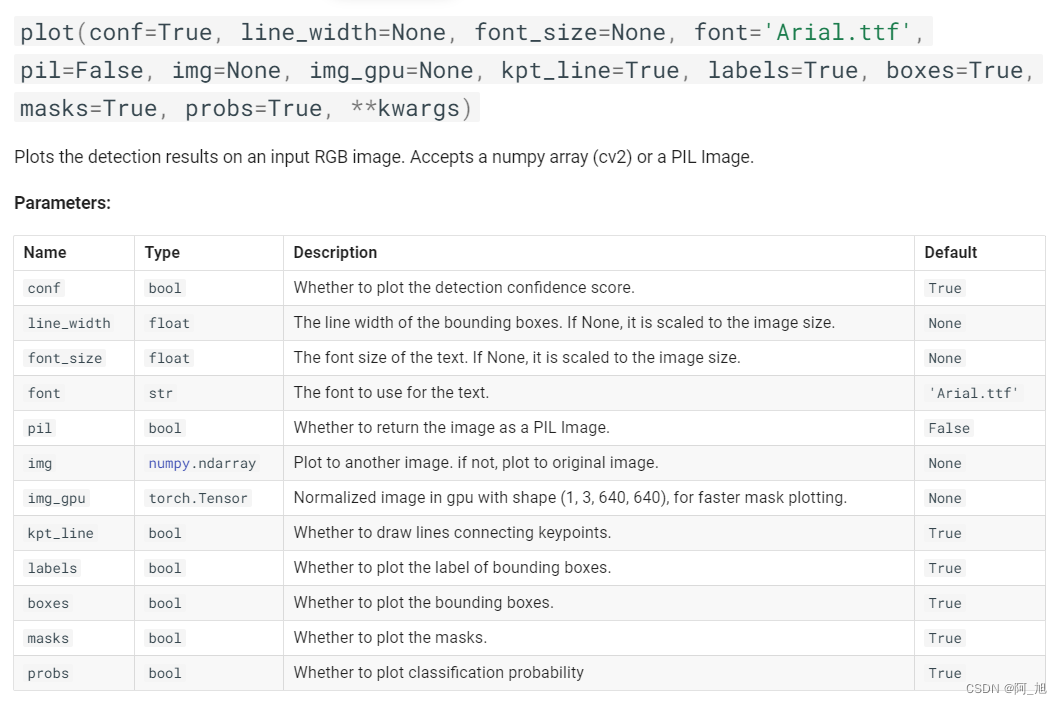
4.2 results[0].plot()图形展示可以设置的参数说明
results= model(img)
res_plotted = results[0].plot()
cv2.imshow("result", res_plotted)
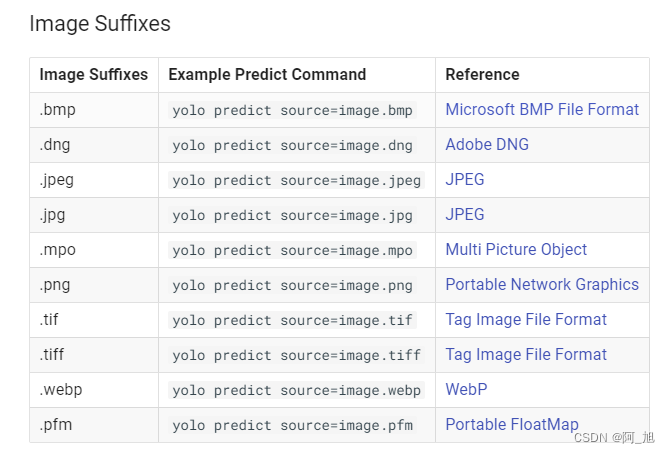
4.3 模型支持的图片与视频格式
图片格式:
视频格式:
4.4 各任务检测结果results信息说明
上述各任务中的检测结果results均为一个列表,每一个元素为result对象,包含以下属性,不同任务中使用的属性不相同。详细说明如下:
Results.boxes:表示Boxs对象,具有属性和操作边界框的方法
Results.masks:用于获取分割相关信息
Results.probs:表示预测各类别的概率
Results.orig_img:表示内存中加载的原始图像
Results.path:表示输入图像路径的路径
results = model("./ultralytics/assets/bus.jpg")
for result in results:
    **# Detection 目标检测**
    result.boxes.xyxy   # box with xyxy format, (N, 4)
    result.boxes.xywh   # box with xywh format, (N, 4)
    result.boxes.xyxyn  # box with xyxy format but normalized, (N, 4)
    result.boxes.xywhn  # box with xywh format but normalized, (N, 4)
    result.boxes.conf   # confidence score, (N, 1)
    result.boxes.cls    # cls, (N, 1)
    **# Segmentation  分割**
    result.masks.data      # masks, (N, H, W)
    result.masks.xy        # x,y segments (pixels), List[segment] * N
    result.masks.xyn       # x,y segments (normalized), List[segment] * N
    **# Classification  分类**
    result.probs     # cls prob, (num_class, )
总结
由于篇幅原因,本文只是介绍了如何使用预训练模型进行相关的任务检测,关于模型的训练及其他相关内容,后续有时间再进行更新,感兴趣的小伙伴,可以点赞关注我~谢谢。
个人觉得这套YOLOv8框架还是十分强大的,一套框架几乎可以解决大部分CV领域的检测任务,只需更换不同的训练模型就行,文章如果对你有帮助,感谢小伙伴们的一键3连哦~我们下次再见。
为了方便小伙伴们学习,我已将本文的所有源码、相关预训练模型及视频等打包好,需要的小伙伴可以通过以下方式获取:
关注下方名片【阿旭算法与机器学习】,回复【YOLOV8】可获取本文所有源码、预训练模型及示例图片视频数据

参考:https://docs.ultralytics.co









![[操作系统安全]缓冲区溢出](https://img-blog.csdnimg.cn/7464e87a2e4d4072b52e78f13449893a.png)
