项目代码发布案例Argocd+Gitlab-Runner
1. 项目文件
demo项目放在gitee上需要自取
git clone https://gitee.com/qqmiller/godemo.git
1.1 项目代码
apidemo.go
package main

import (
	"github.com/gin-gonic/gin"
	"net/http"
)

func main() {
	r := gin.Default()
	r.GET("/info", Info)
	r.Run(":10088")
}

func Info(c *gin.Context) {
	c.JSON(http.StatusOK, gin.H{
		"version": "1.1.1",
	})
}
1.2 Dockerfile
FROM centos:centos7	# 基础镜像
ADD ./apidemo /root # 将编译后的可执行文件添加至/root目录下
EXPOSE 10088 # 服务暴露端口
CMD ["/root/apidemo"] #容器运行命令
1.3 项目部署文件
1.3.1 deployment
apiVersion: apps/v1
kind: Deployment
metadata:
  namespace: apidemo
  name: apidemo
  labels:
    app: apidemo
spec:
  replicas: 4
  selector:
    matchLabels:
      app: apidemo
  template:
    metadata:
      name: apidemo
      labels:
        app: apidemo
    spec:
      containers:
        - name: apidemo
          image: 192.168.31.104/apidemo/apidemo:v1.1.1
          imagePullPolicy: Always
          ports:
            - containerPort: 10088
1.3.2 service
apiVersion: v1
kind: Service
metadata:
  namespace: apidemo
  name: apidemo
  labels:
    app: apidemo
spec:
  type: NodePort
  ports:
    - name: apidemoport
      port: 10088
      targetPort: 10088
      nodePort: 30080
  selector:
    app: apidemo
1.3.3 ingress
apiVersion: networking.k8s.io/v1
kind: Ingress
metadata:
  name: ingress-apidemo                    #自定义ingress名称
  namespace: apidemo
  annotations:
    ingressclass.kubernetes.io/is-default-class: "true"
    kubernetes.io/ingress.class: nginx
spec:
  rules:
    - host: apidemo.intra.com                   # 自定义域名
      http:
        paths:
          - pathType: Prefix
            path: "/"
            backend:
              service:
                name: apidemo     # 对应上面创建的service名称
                port:
                  number: 10088
1.3.4 kustomization
定义项目依赖文件
resources:
- apidemo-deployment.yaml
- apidemo-service.yaml
- apidemo-ingress.yaml
apiVersion: kustomize.config.k8s.io/v1beta1
kind: Kustomization
1.3.5 gitlab-ci
workflow:  #设置工作流
  rules:
    - if: $CI_COMMIT_BRANCH == 'master'  #如果代码分支为master则使用以下环境变量
      variables:
        registry: $ci_registry  #镜像仓库地址,gitlab配置全局变量
        registry_name: $ci_registry_name #镜像仓库登录用户,gitlab配置全局变量
        registry_passwd: $ci_registry_passwd #镜像仓库登录密码,gitlab配置全局变量

variables:  #
  app_name: $CI_PROJECT_NAME #项目名,gitlab项目仓库名,gitlab内置变量
  app_version: $CI_COMMIT_SHORT_SHA #app版本号,每次push项目的编号,后面会作为镜像版本,gitlab内置变量
  namespace: $CI_PROJECT_NAMESPACE #项目所在组,gitlab内置变量
  GIT_CLONE_PATH: '$CI_BUILDS_DIR/$CI_JOB_ID/$CI_PROJECT_NAME' #定义gitlab-runner,clone代码的位置

stages: #定义流水线有几个阶段
  - build #编译阶段
  - deploy #部署阶段

build code: #自定义的步骤名称
  stage: build #此步骤为build阶段
  script:
    - go build #具体执行的命令,此处为编译go项目,编译完成会产生apidemo可执行文件
  artifacts: #gitlab流水线文件内置关键字,作用为保留制品
    paths: #保留制品所在位置
      - apidemo #当前步骤需要保留的制品文件,提供个下一步骤使用

docker build:
  stage: build
  script:
    - docker build -t $app_name:$app_version .  #此步骤通过项目源码内的Dockerfile文件编译docker镜像
  needs: #gitlab流水线文件内置关键字,作用为此步骤所依赖的步骤,只有当被依赖的步骤完成后,此步骤才会执行
    - build code #此步骤被依赖的步骤

docker tag:
  stage: build
  script:
    - docker tag $app_name:$app_version $registry/$app_name/$app_name:$app_version #此步骤为上一步骤生成的镜像打上仓库标签
  needs:
    - docker build

docker push:
  stage: build
  script:
    - docker login -u $ci_registry_name -p $ci_registry_passwd $ci_registry #登录镜像仓库
    - docker push $registry/$app_name/$app_name:$app_version #推送镜像至镜像仓库
    - docker logout #登出镜像仓库
  needs:
    - docker tag

deploy dev:
  stage: deploy
  before_script: #gitlab流水线内置关键字,作用为在该步骤执行流水线操作前所依赖步骤。这里需要runner通过修改kustomization.yaml文件,来修改镜像版本信息
    #所以需要在修改镜像版本信息后,重新push代码
    - git remote set-url origin http://${CI_USERNAME}:${CI_PASSWORD}@192.168.31.14/apidemo/apidemo.git #设置远程仓库地址,CI_USERNAME为代码仓库登录用户名,需要在gitlab自定义全局变量,CI_PASSWORD为代码仓库登录密码,需要在gitlab自定义全局变量
    - git config --global user.name "Administrator" #配置本地仓库用户名信息
    - git config --global user.email "admin@example.com" #配置本地仓库邮箱信息
  script:
    - git checkout -B master #切换项目分支
    - cd base #进入资源清单文件目录
    - kustomize edit set image $registry/$app_name/$app_name:$app_version #runner通过kustomize客户端工具修改镜像版本信息
    - cat kustomization.yaml
    - git commit -am '[skip ci] DEV image update'  #git 本地提交,注意“skip ci”为gitlab流水线文件内置关键字,作用为跳过ci流水线操作,未设置可能导致流水线进入死循环
    - git push origin master #重新提交修改镜像版本后的代码
  needs:
    - docker push
1.4 将代码推送到gitlab
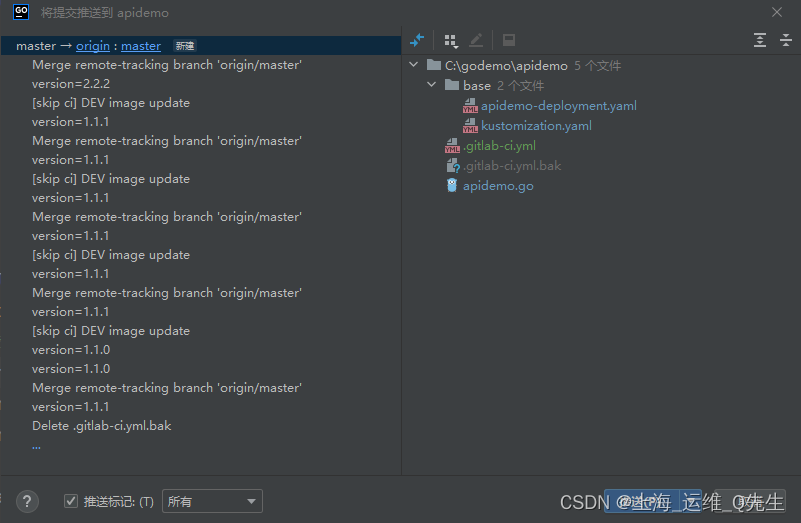
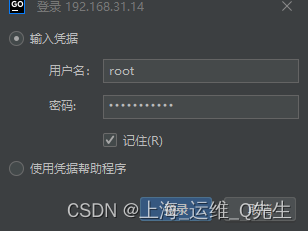
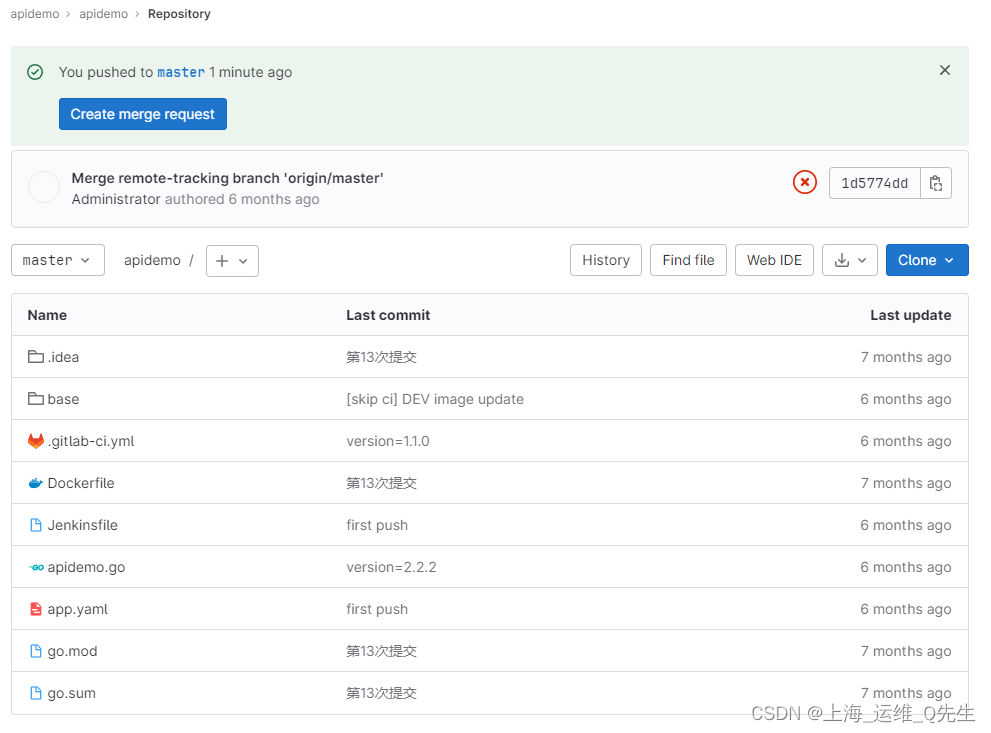
推送完成后在gitlab的master分支就能看到文件了
2. Gitlab设置变量
依次添加五个变量
| 变量 | 值 | 作用 |
|---|---|---|
| ci_registry | 192.168.31.104 | Harbor仓库地址 |
| ci_registry_name | admin | Harbor仓库用户名 |
| ci_registry_passwd | root123 | Harbor仓库密码 |
| CI_USERNAME | root | Gitlab用户名 |
| CI_PASSWORD | P@ssw0rd | Gitlab密码 |
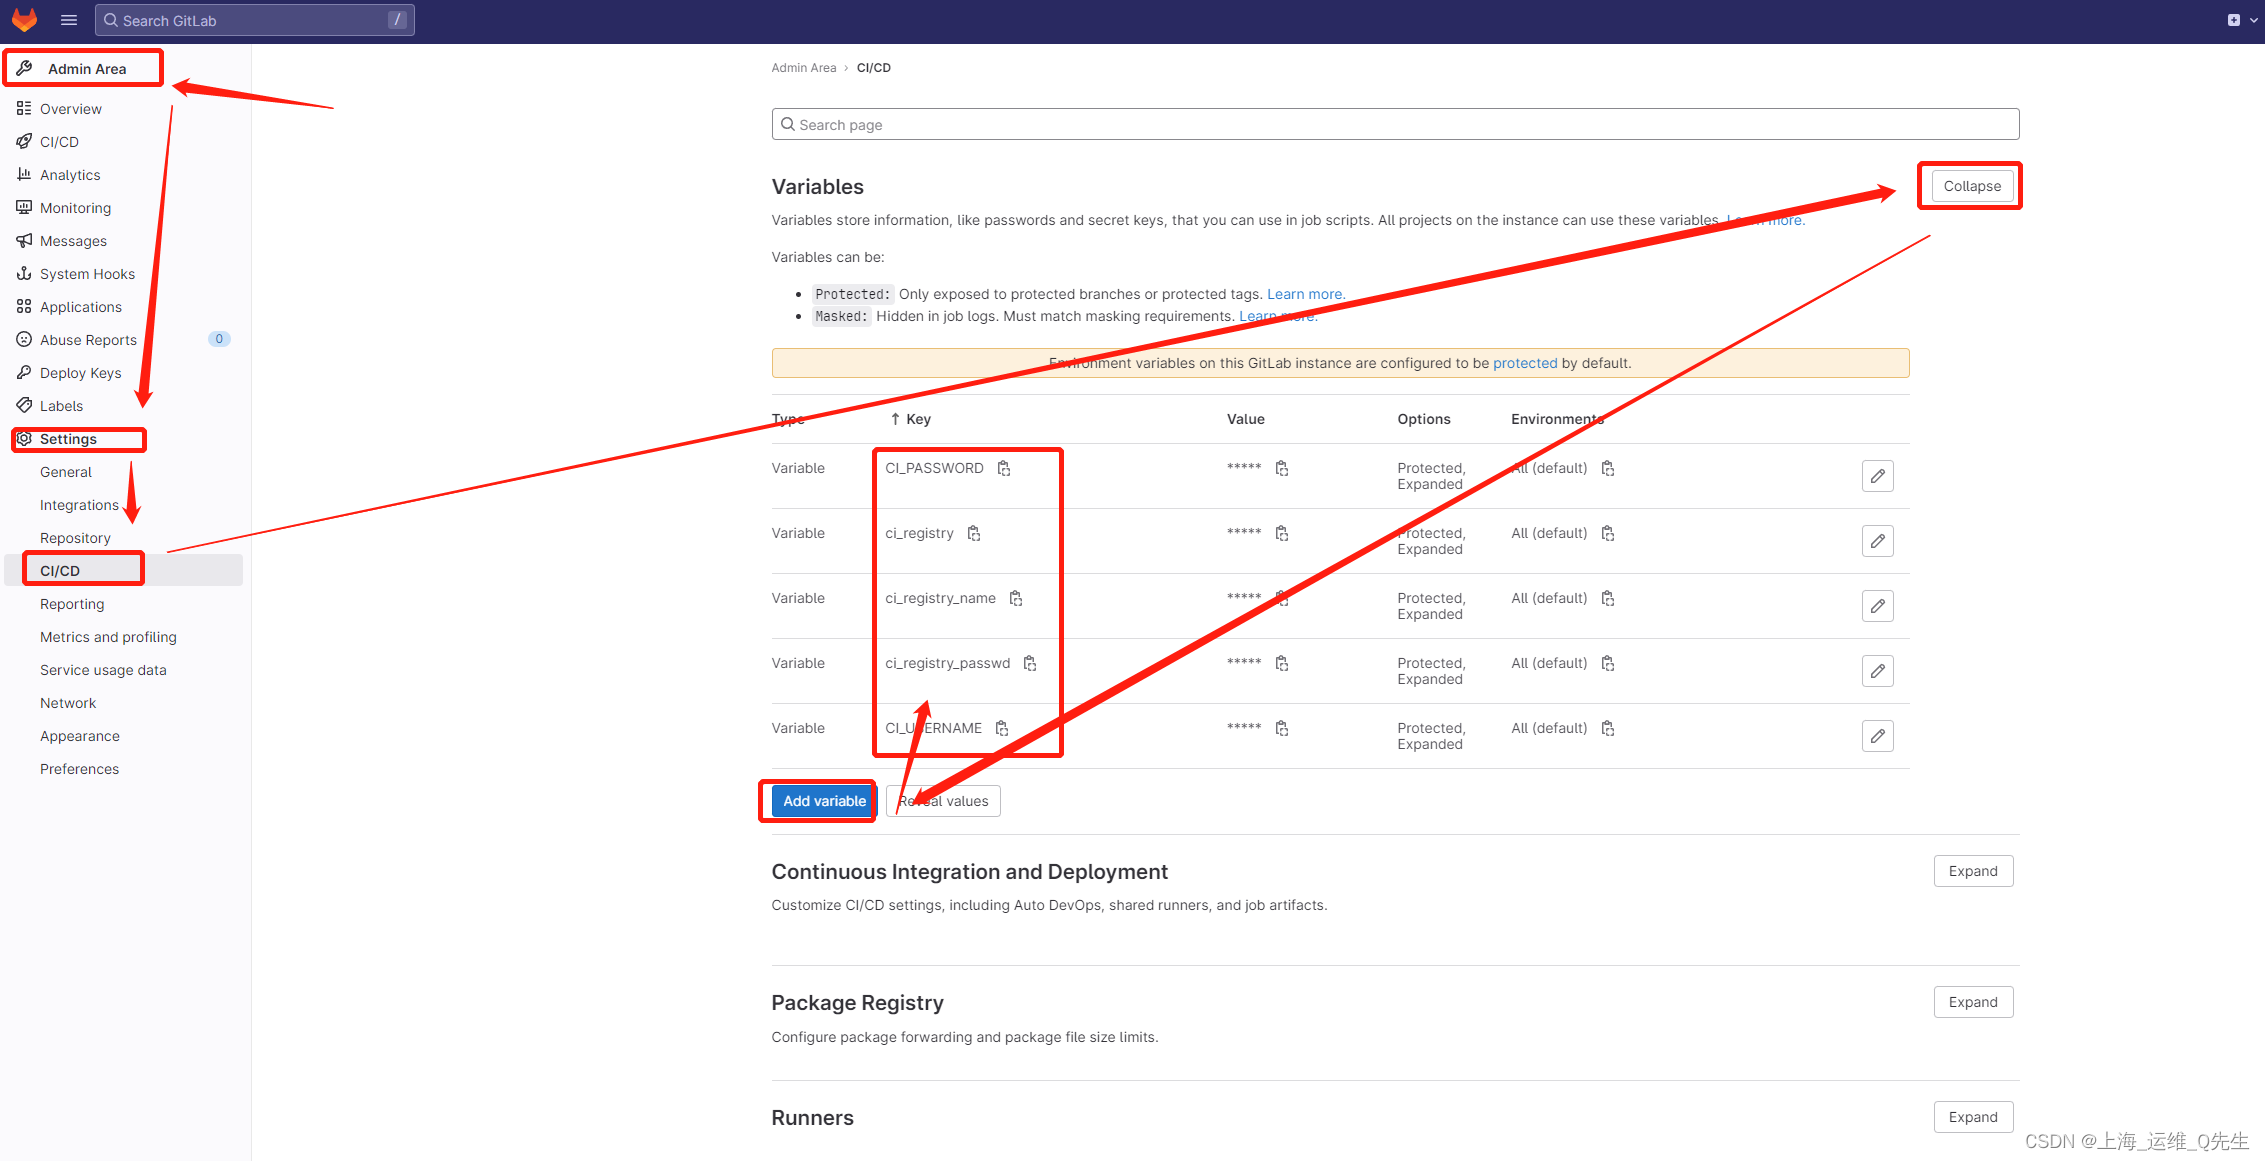
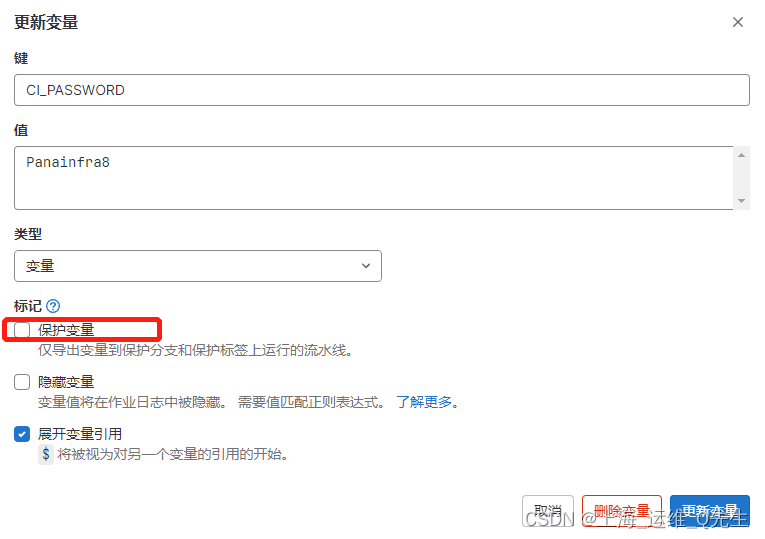
这里注意:保护变量不要勾选
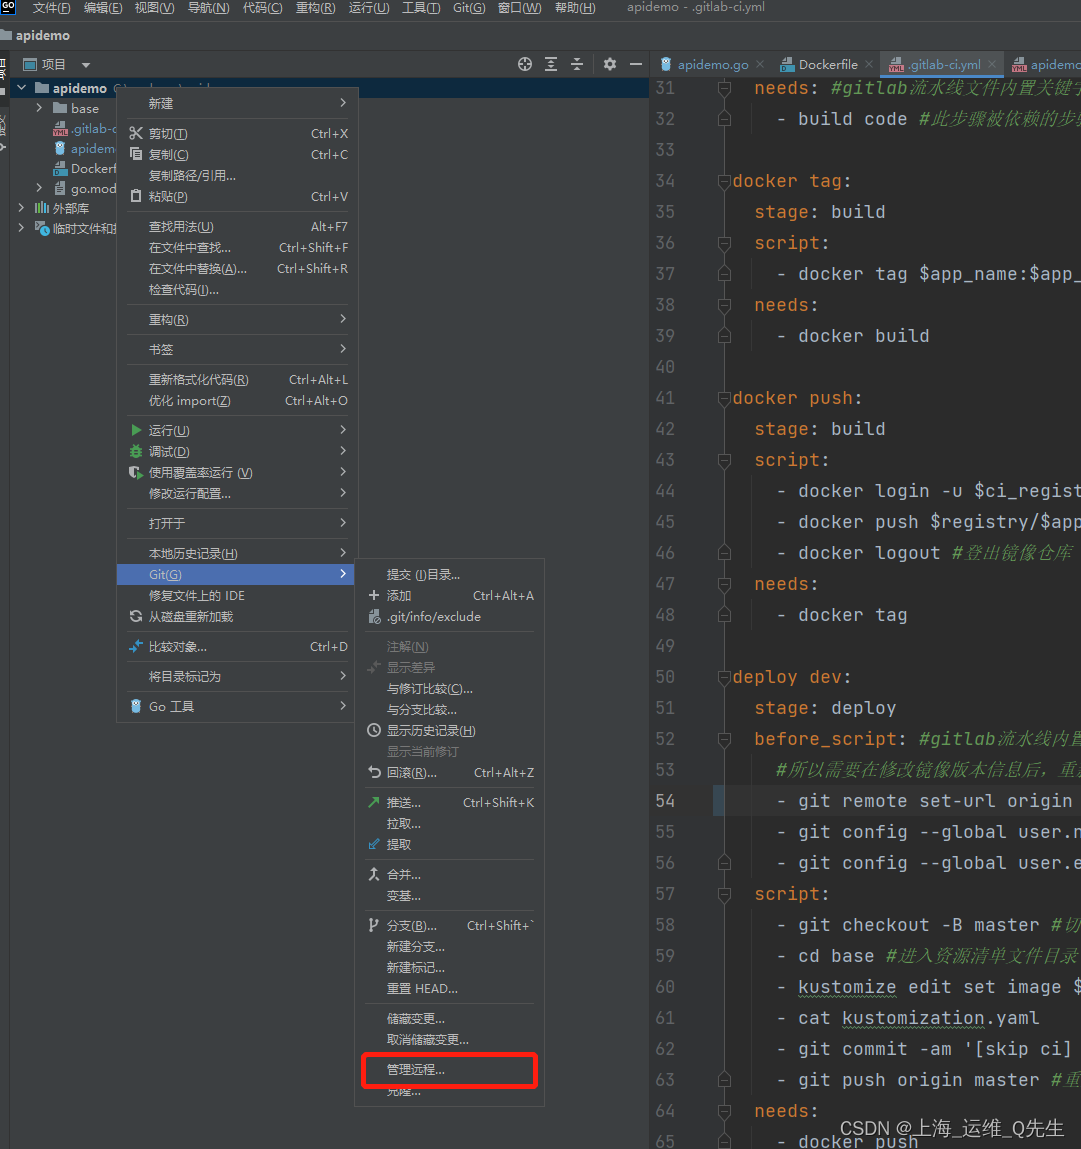
3. 提交项目代码
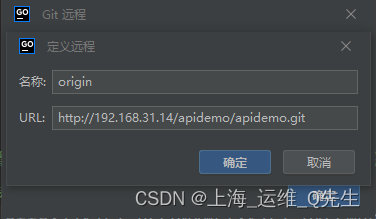
添加远程仓库
http://192.168.31.14/apidemo/apidemo.git
4. ArgoCd配置
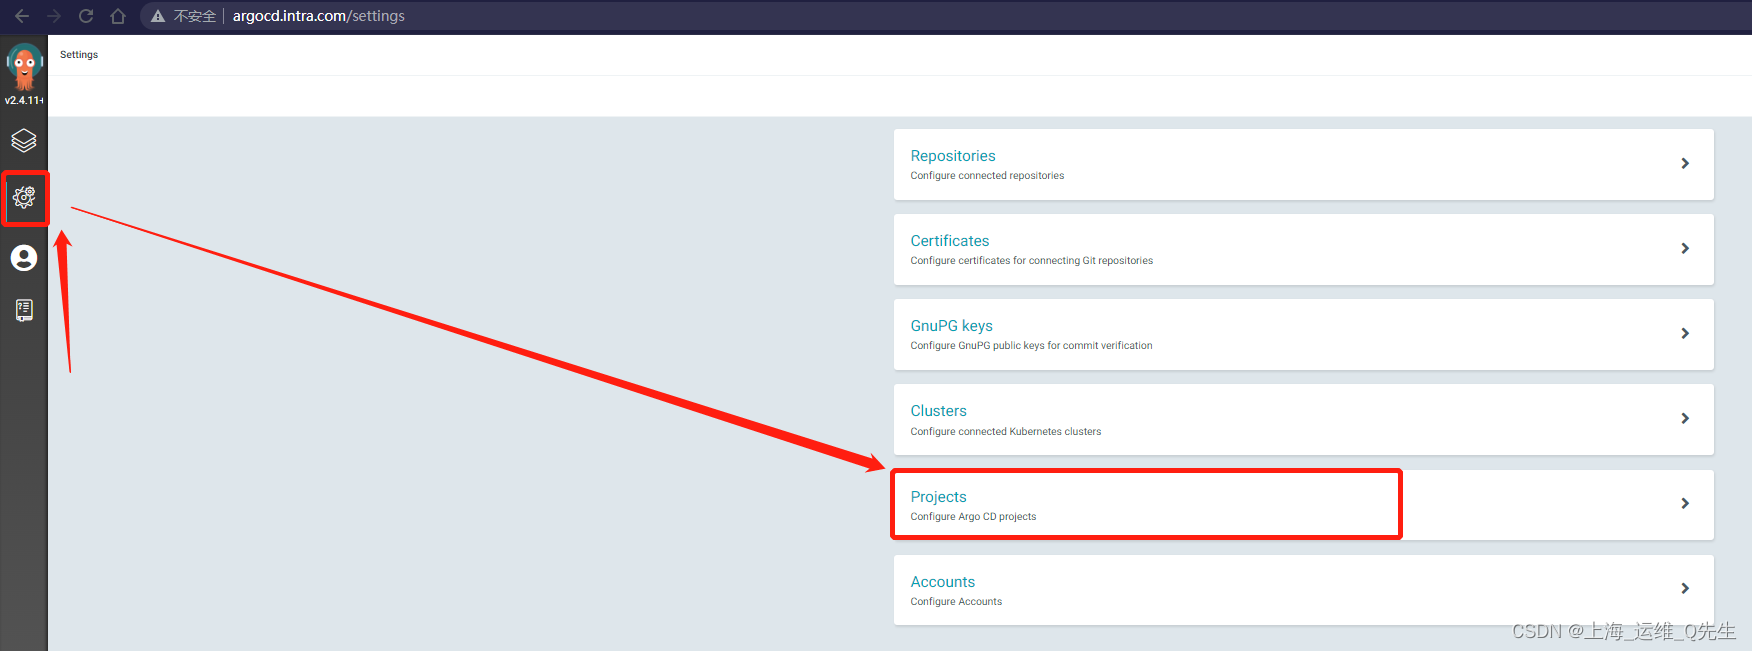
4.1 创建项目

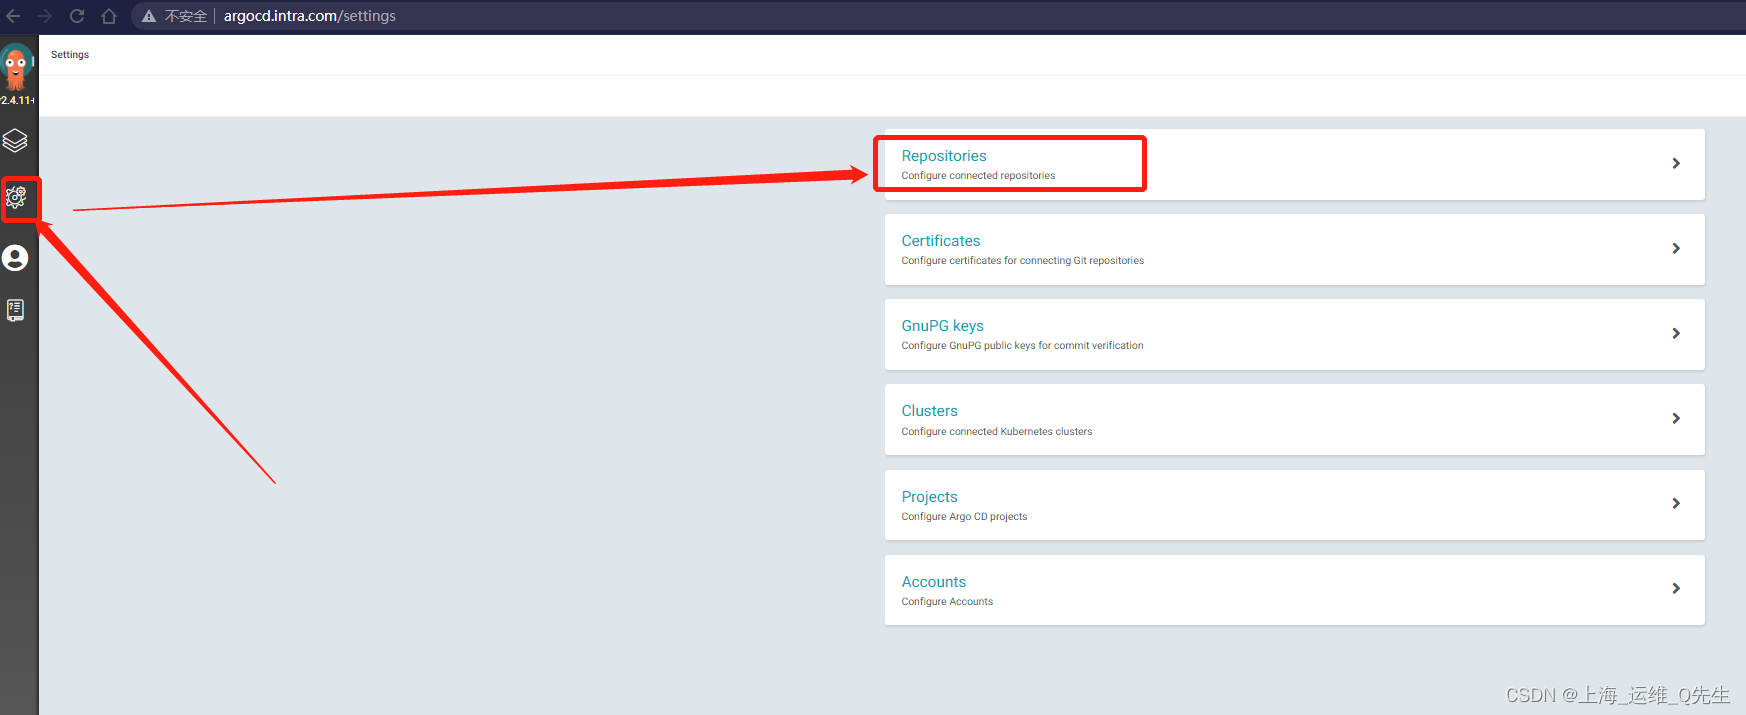
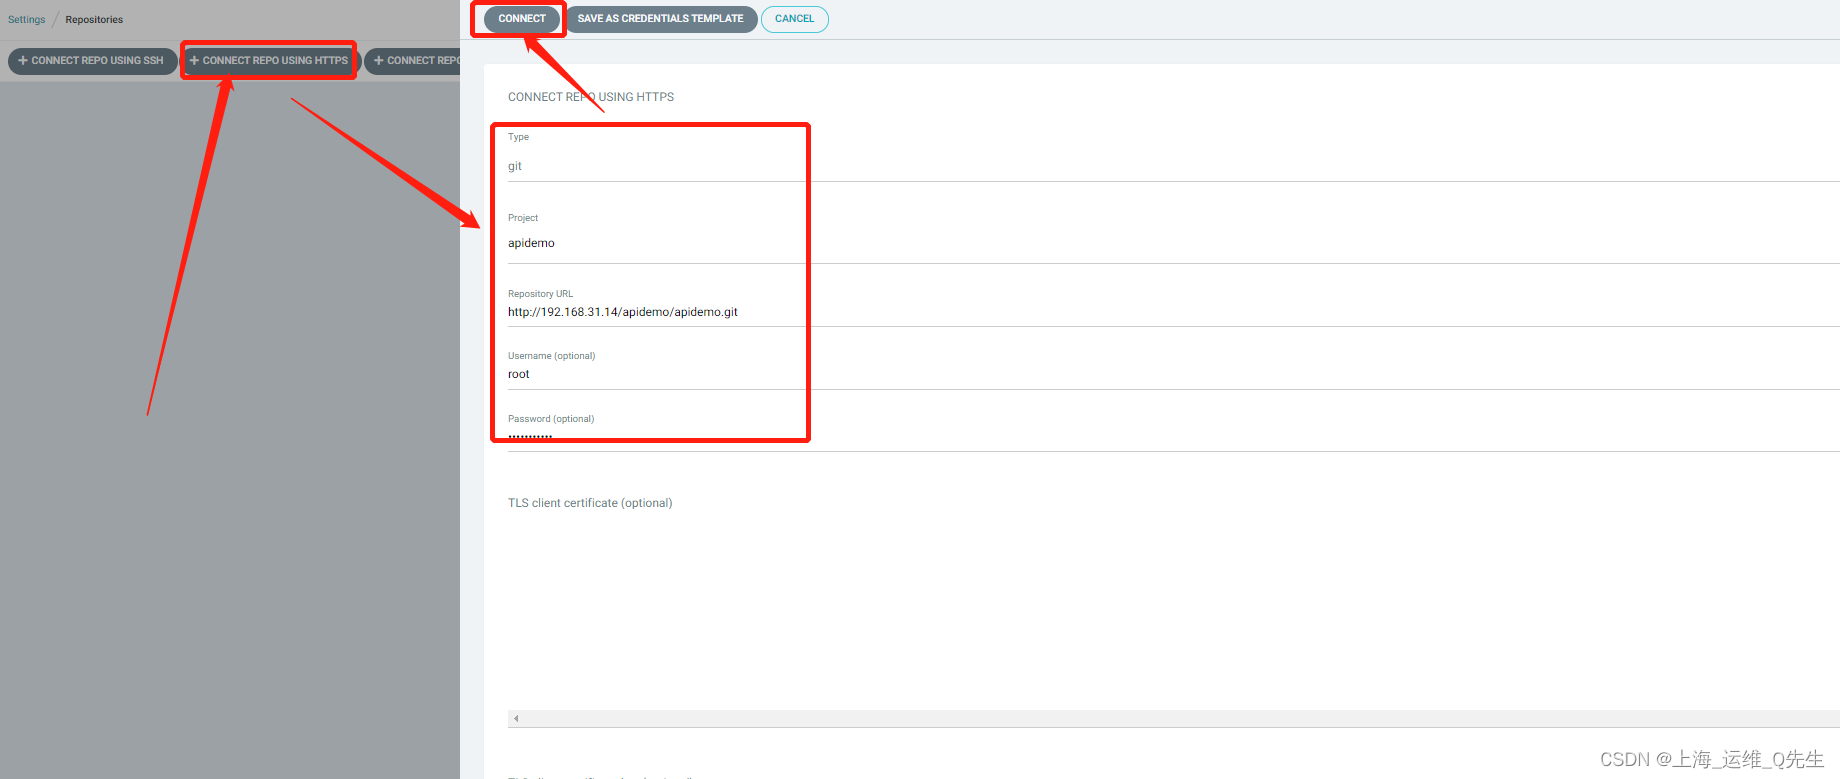
4.2 创建仓库配置

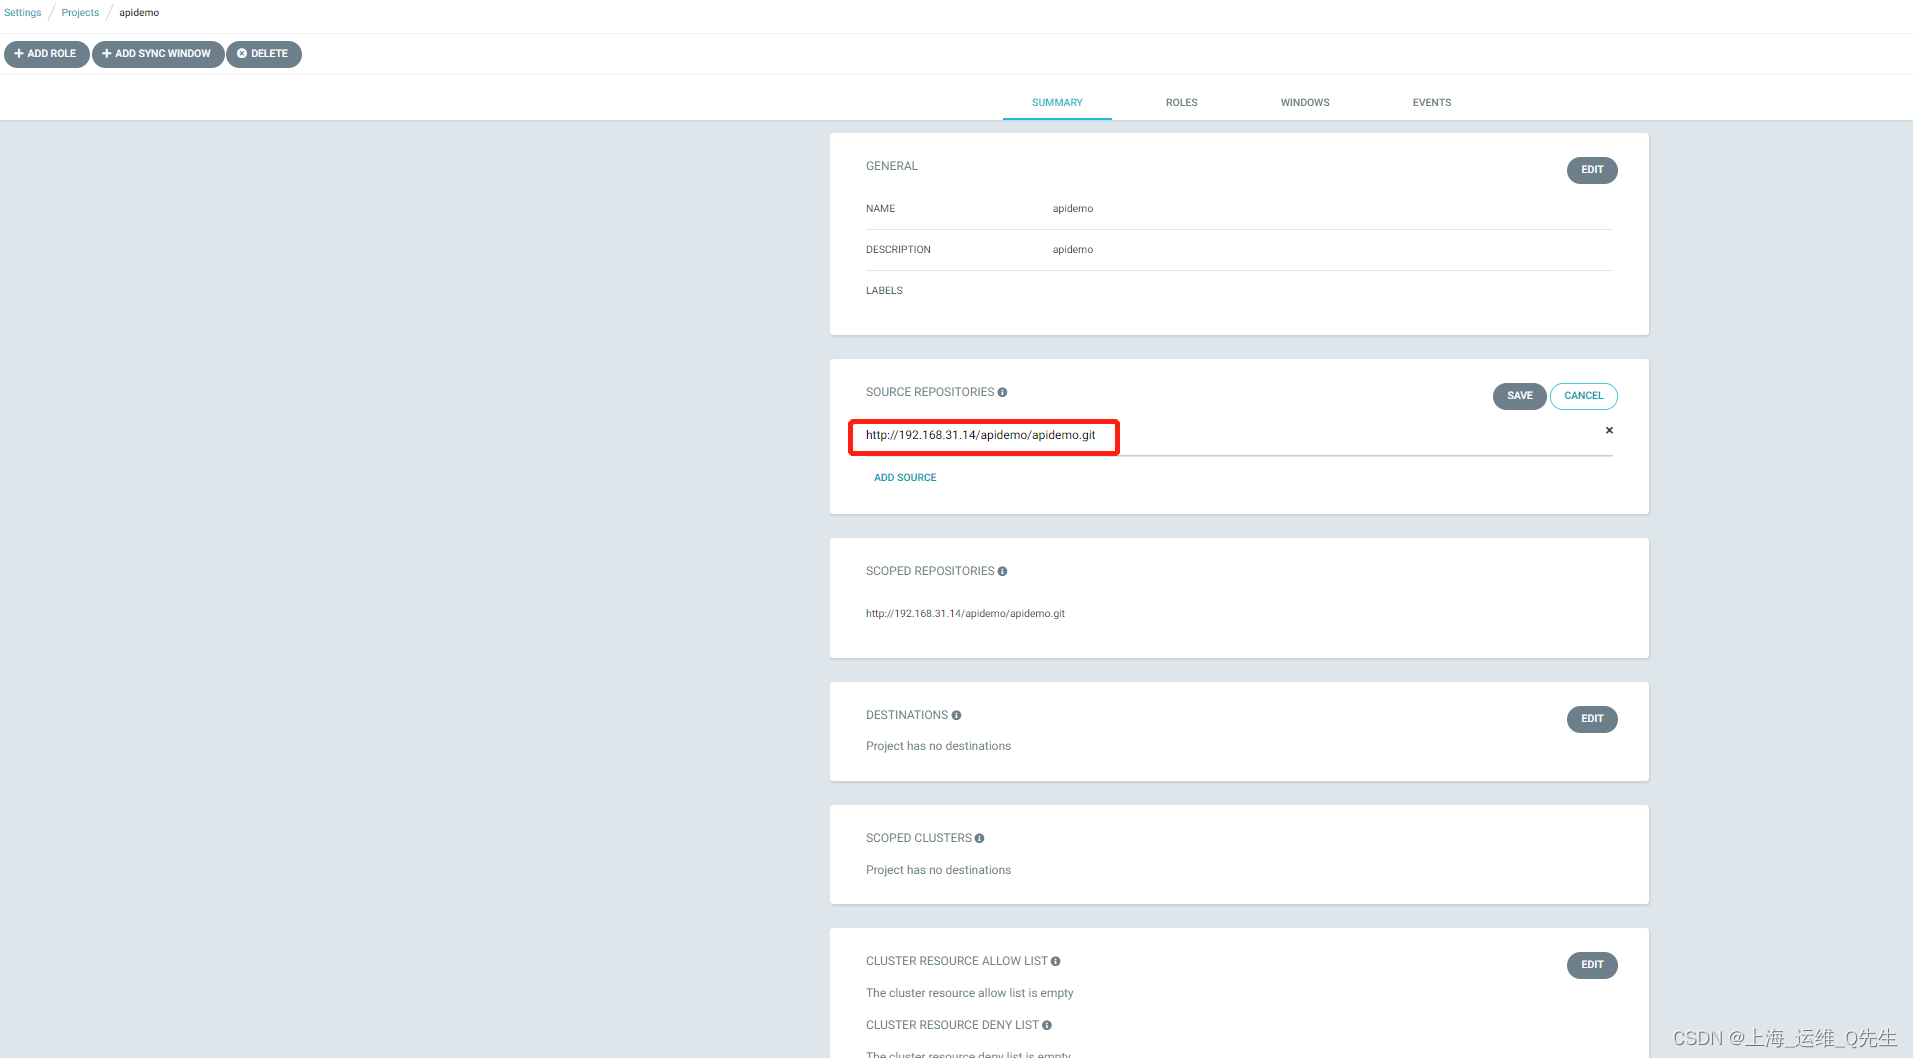
4.3 配置项目
SOURCE REPOSITORIES
DESTINATIONS

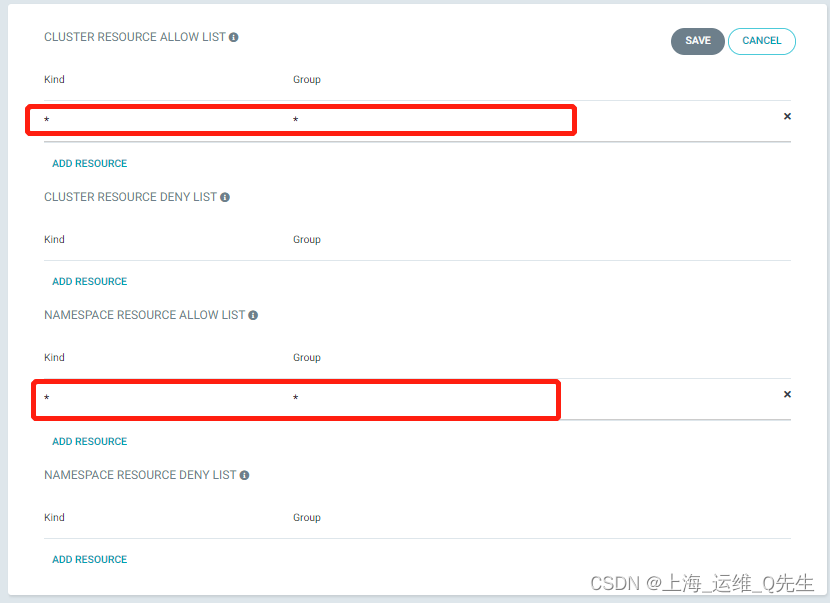
CLUSTER RESOURCE ALLOW LIST
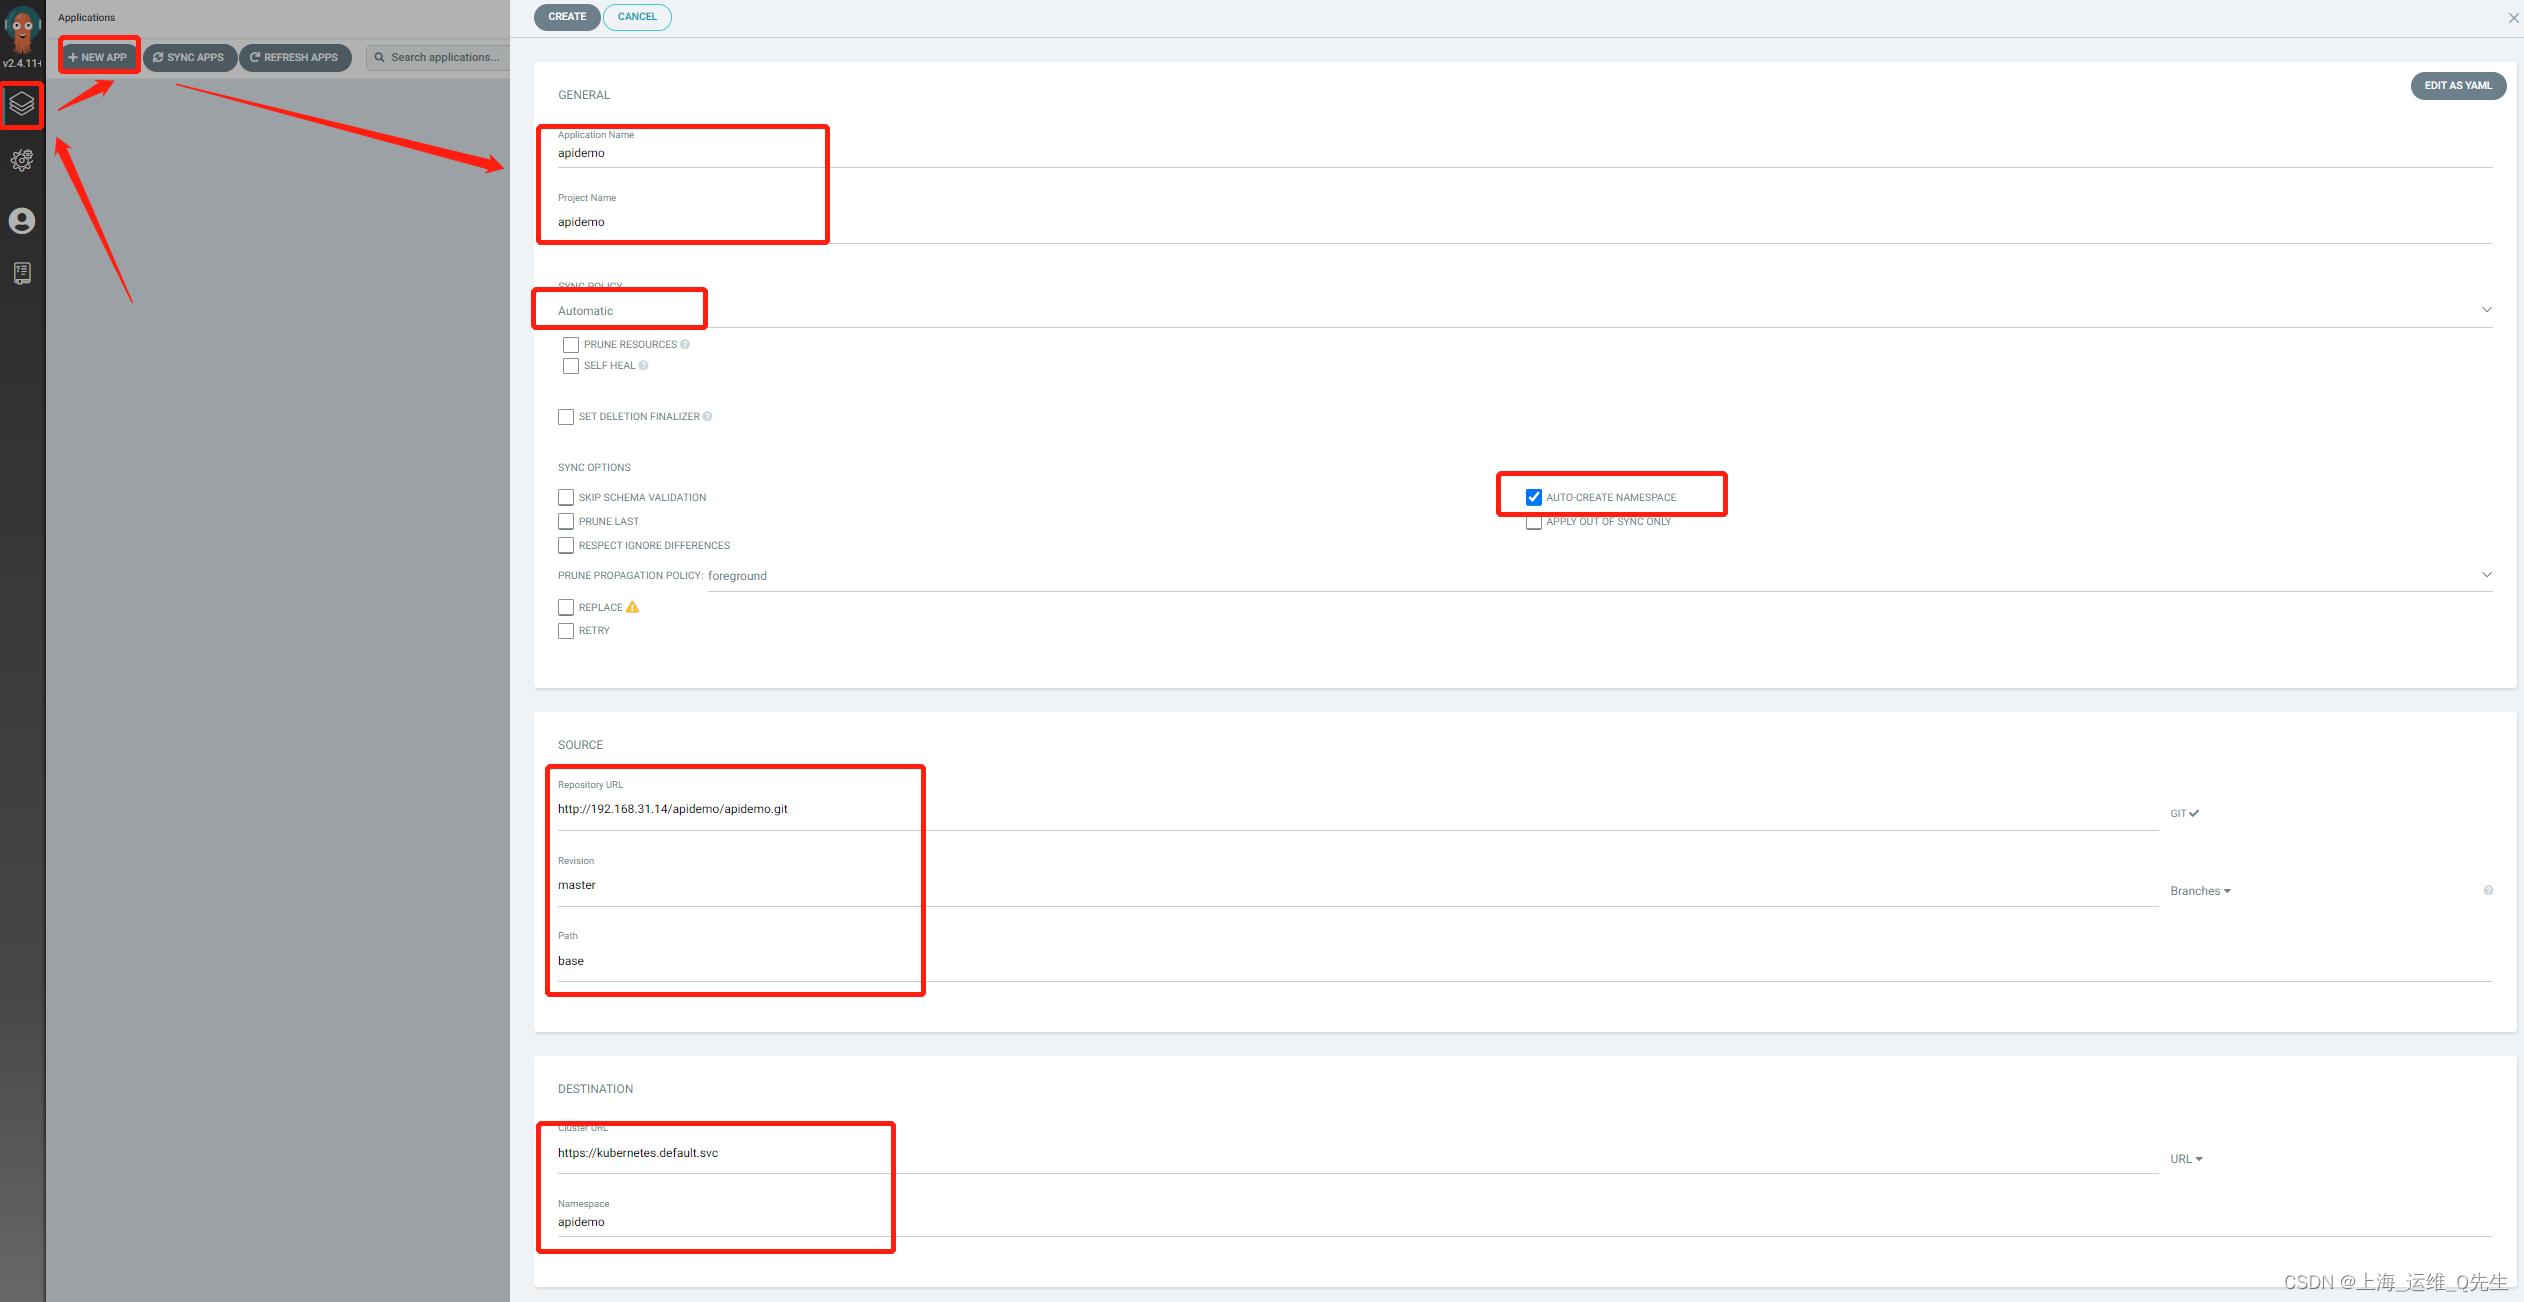
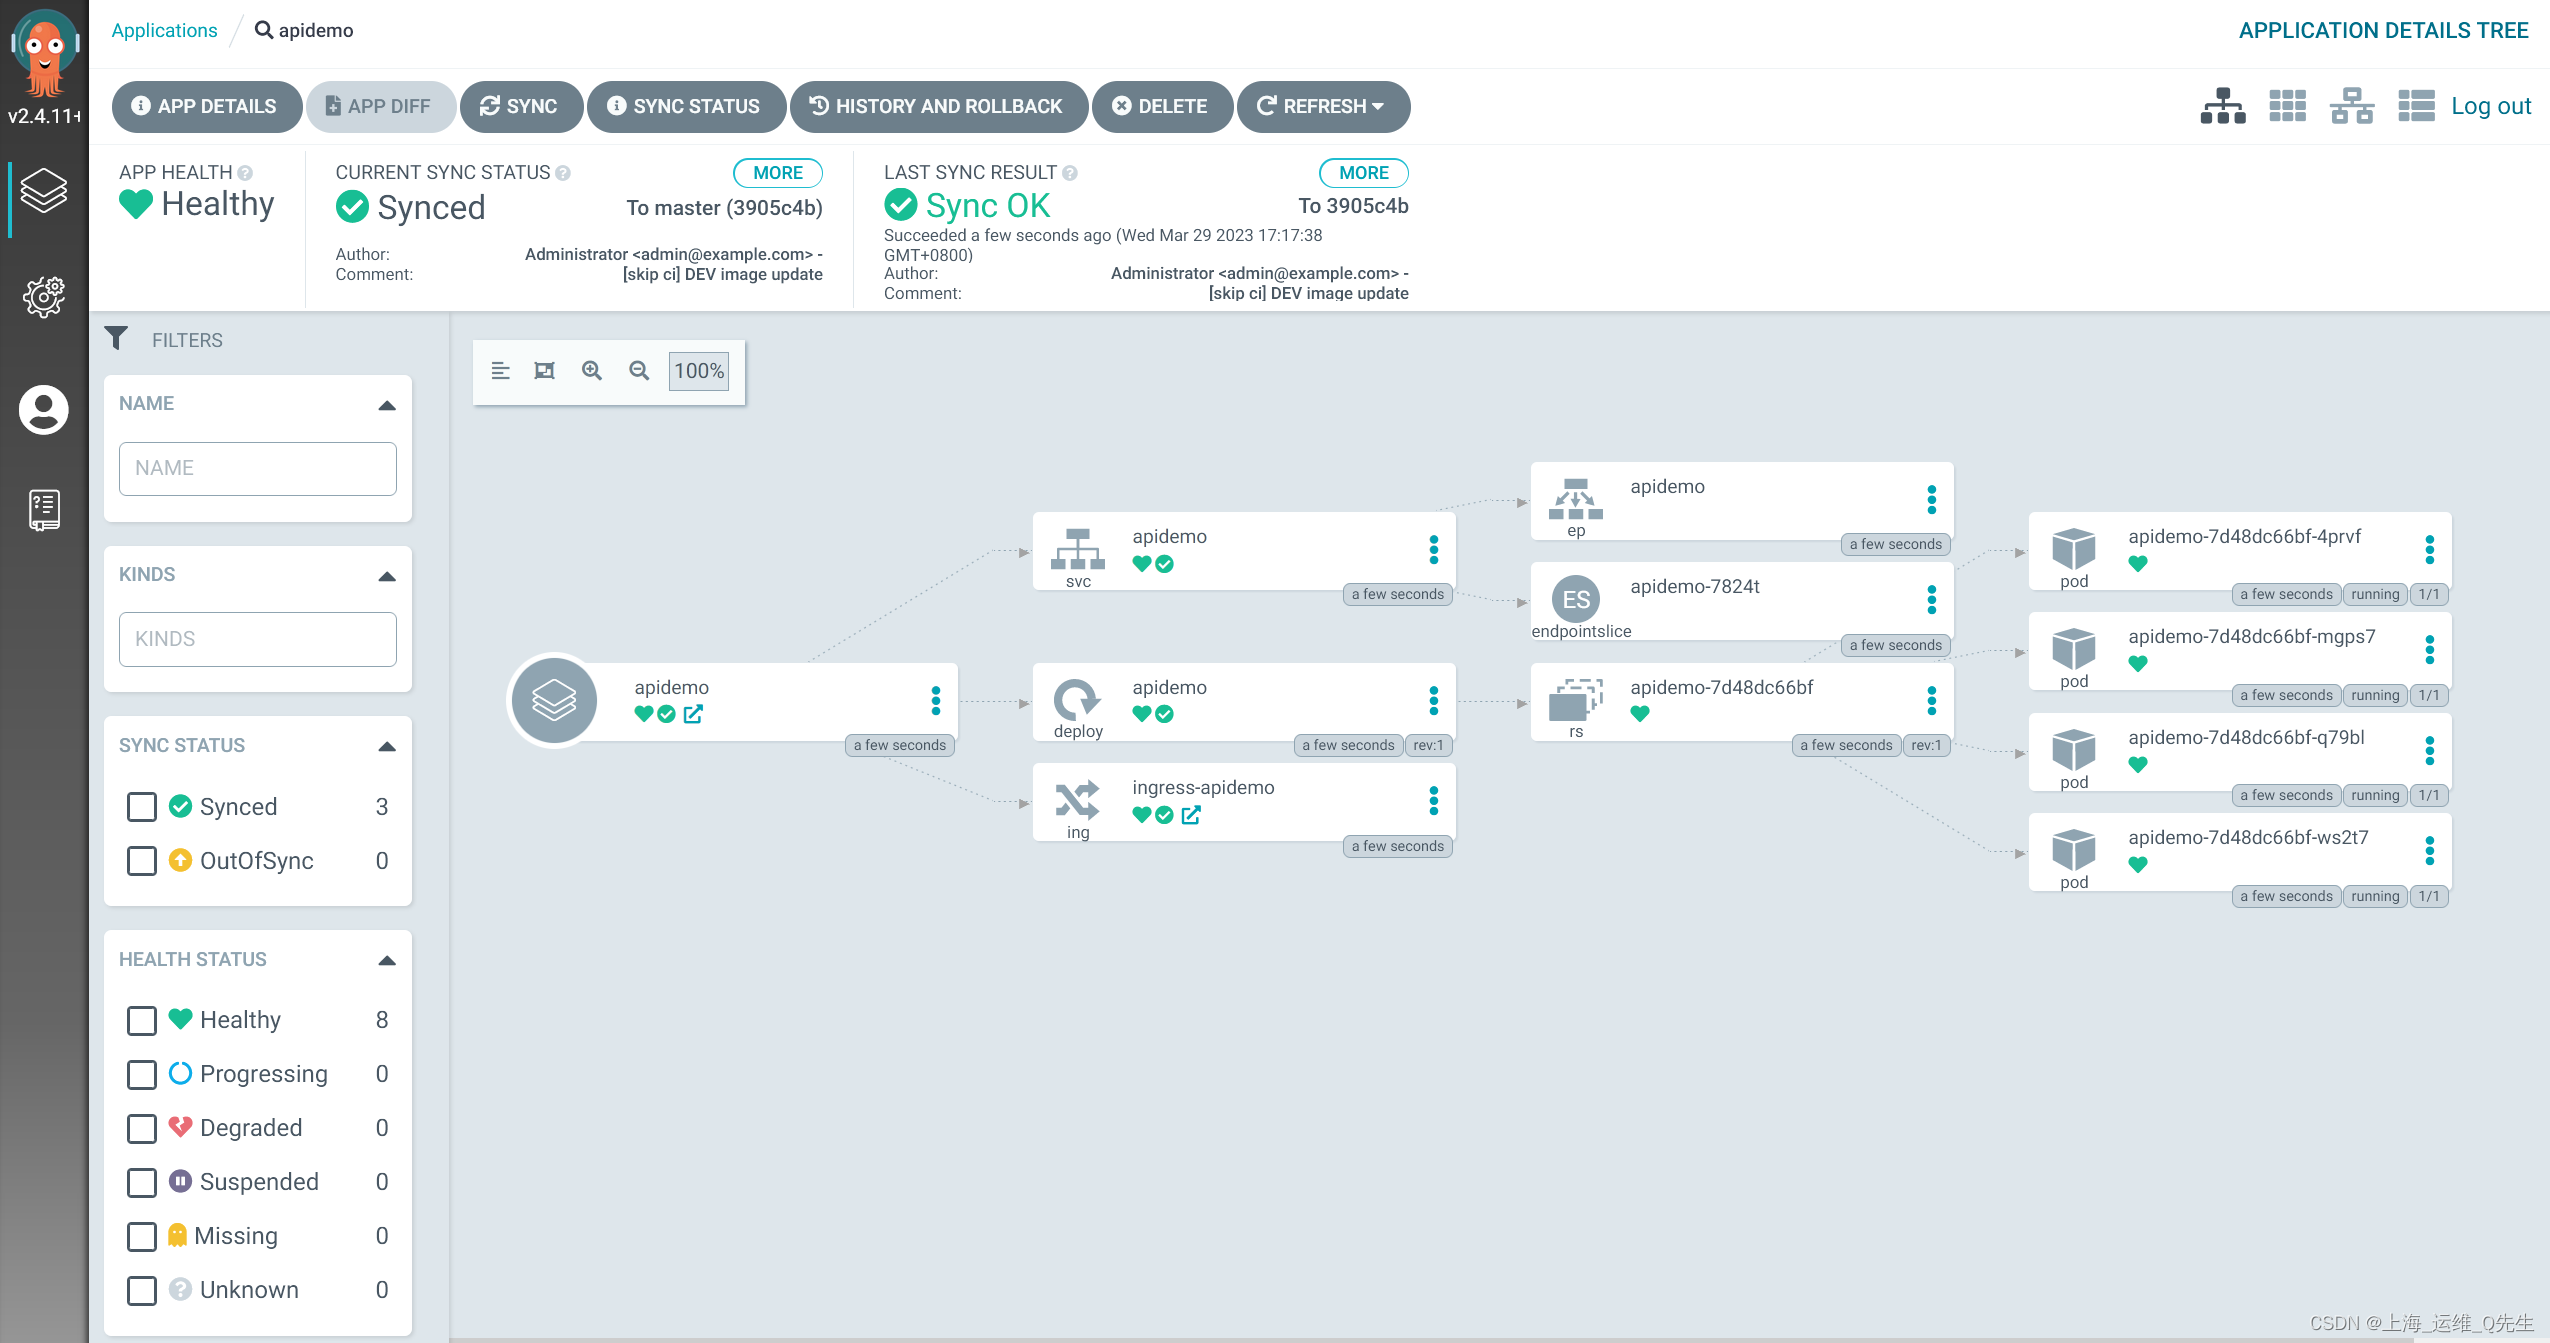
4.4 添加应用


更新版本
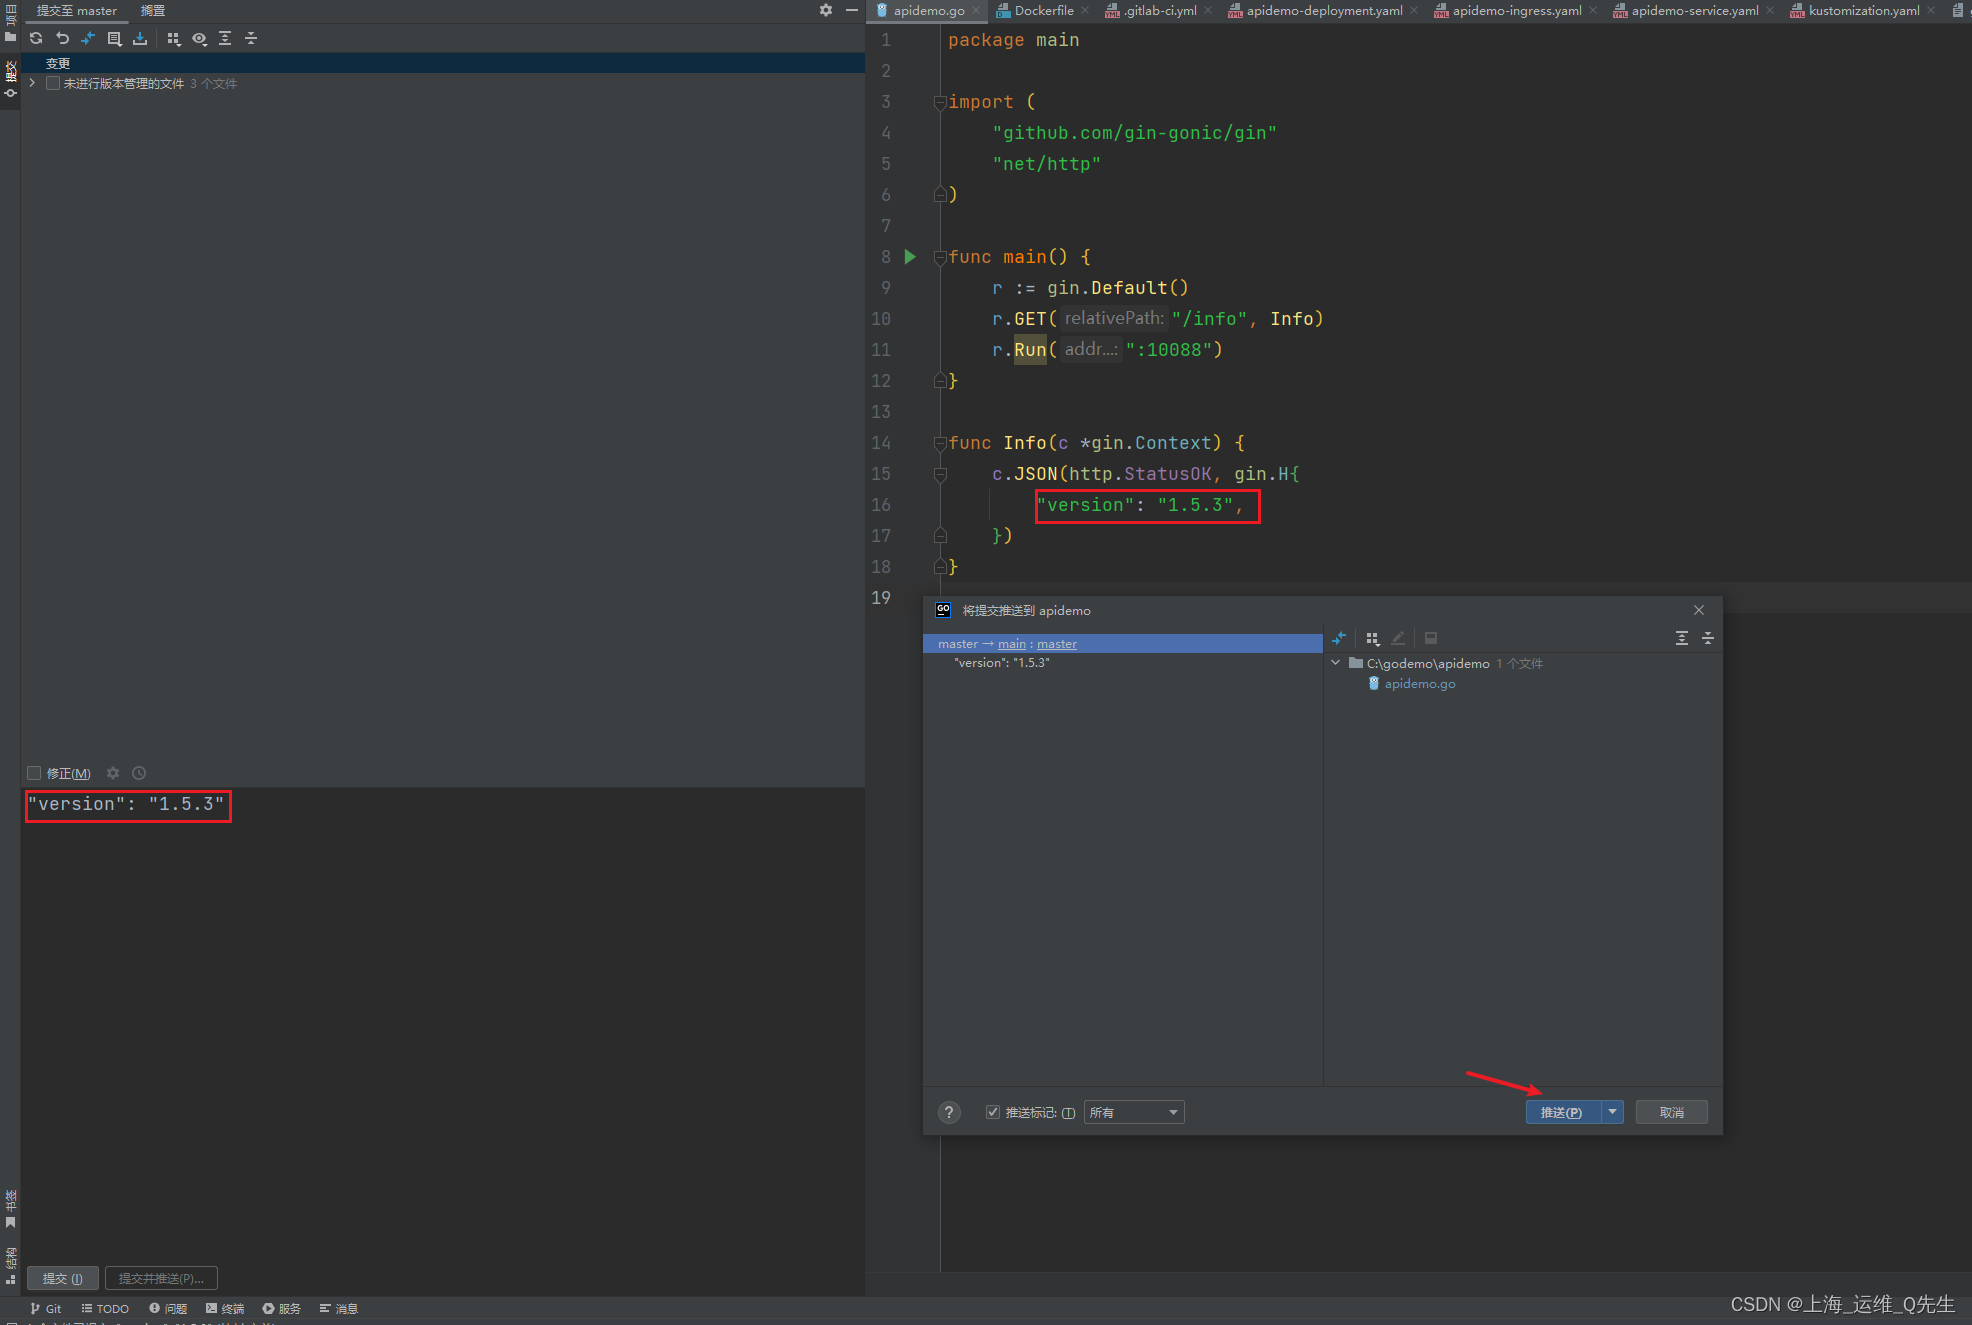
此时gitlab收到了更新,触发cicd

构建完成后镜像自动上传到harbor

随之触发argocd的发布
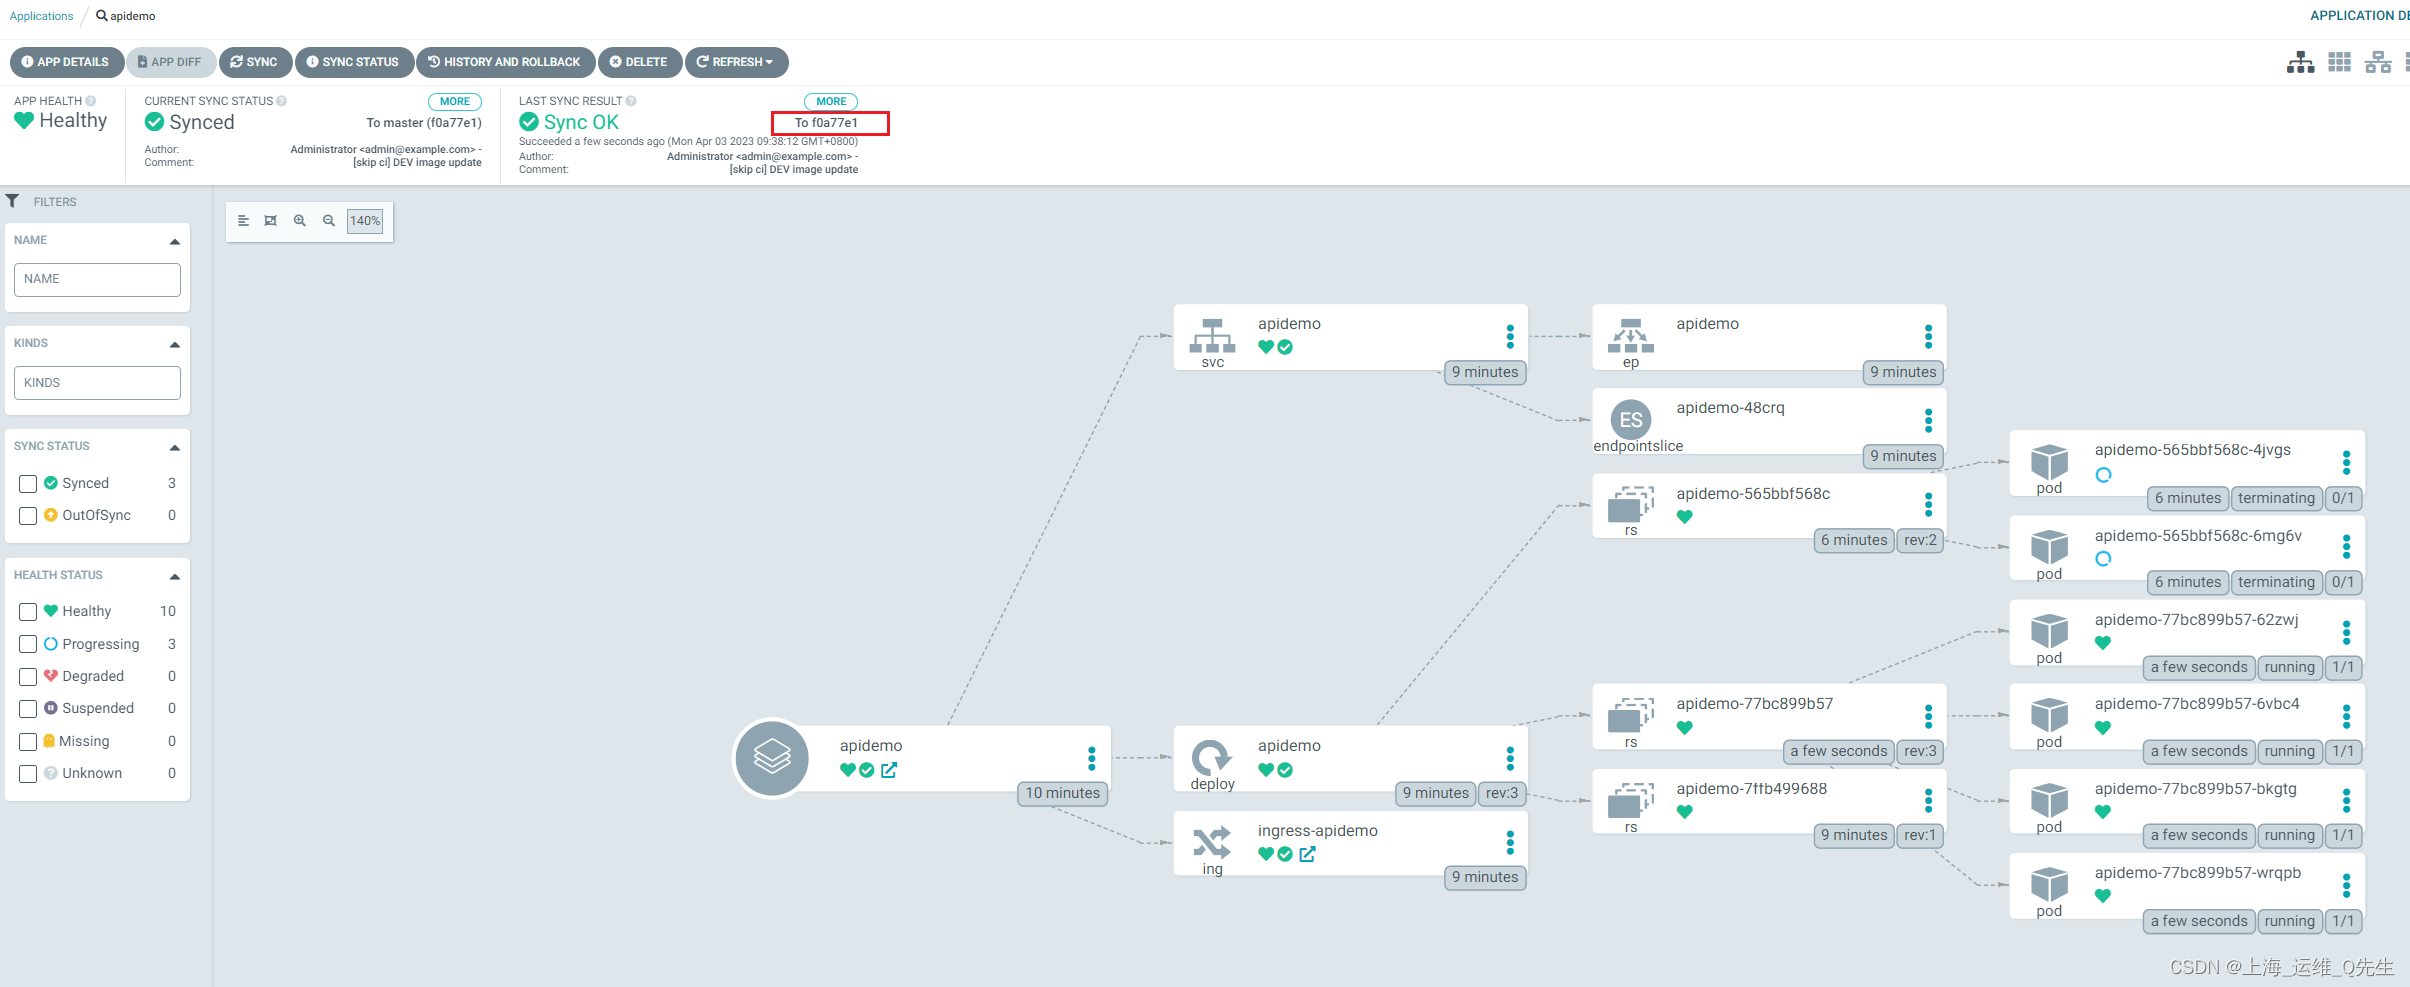
当发布完成后刷新/info页面.就获取到了之前提交的最新版本内容 v1.5.3

