Ubuntu20.04 个人配置和i3美化
本文是基于个人习惯和审美,快速配置一个新ubuntu的步骤。脚本在资源里给出,但仍有部分配置文件需在脚本执行后手动修改,文中已用红色字体标出
更新apt源
- 备份原来的源
- 更换阿里源
# 备份
sudo mv /etc/apt/sources.list /etc/apt/sources.list.bak
# 阿里源
sudo echo "deb http://mirrors.aliyun.com/ubuntu/ focal main restricted universe multiverse
deb-src http://mirrors.aliyun.com/ubuntu/ focal main restricted universe multiverse

deb http://mirrors.aliyun.com/ubuntu/ focal-security main restricted universe multiverse
deb-src http://mirrors.aliyun.com/ubuntu/ focal-security main restricted universe multiverse

deb http://mirrors.aliyun.com/ubuntu/ focal-updates main restricted universe multiverse
deb-src http://mirrors.aliyun.com/ubuntu/ focal-updates main restricted universe multiverse

deb http://mirrors.aliyun.com/ubuntu/ focal-proposed main restricted universe multiverse
deb-src http://mirrors.aliyun.com/ubuntu/ focal-proposed main restricted universe multiverse

deb http://mirrors.aliyun.com/ubuntu/ focal-backports main restricted universe multiverse
deb-src http://mirrors.aliyun.com/ubuntu/ focal-backports main restricted universe multiverse
" > /etc/apt/sources.list
更新apt
sudo apt update
sudo apt upgrade -y
这个时间比较长
安装vim
sudo apt install -y vim
安装mysql8.0
sudo apt install -y mysql-client-8.0
安装jdk8
sudo apt install -y openjdk-8-jdk
安装git
sudo apt install -y git
安装python3,python
sudo apt install -y python3
sudo apt install -y python
安装typora
sudo snap install typora
安装搜狗输入法
访问搜狗输入法 for linux并下载自己需要的版本(一般都是X86-64)
下载完成后得到一个deb包,双击他安装或者按如下命令安装(deb包名字可能不一样)
cd ~/Downloads/
sudo dpkg -i sogoupinyin_2.1.0.0082_amd64.deb
安装网页的提示操作即可
安装VSCode
sudo snap install code --classics
终端美化-安装zsh,oh-my-zsh
sudo apt install -y zsh
cp ~/.oh-my-zsh/templates/zshrc.zsh-template ~/.zshrc
chsh -s /bin/zsh
cd ~/.oh-my-zsh/plugins/
git clone https://github.com/zsh-users/zsh-autosuggestions
git clone https://github.com/wting/autojump.git ~/.oh-my-zsh/plugins/autojump
cd autojump
./install.py
autojump使用:在终端输入 j a,或者jump a,会自动进入与a最匹配的你最可能想要进的最近进入过的目录
zsh-autosuggestions使用:在终端输入命令时,可以看到灰色的自动补全语句,按up down键可切换,,键可直接自动补全
需手动修改配置文件,打开~/.zshrc,找到ZSH_THEME="robbyrussell",修改为ZSH_THEME="ys"
找到plugins,修改为
plugins=(
  git
  zsh-autosuggestions
  autojump
  extract
  vi-mode
  wd
)
在末尾加上[[ -s ~/.autojump/etc/profile.d/autojump.sh ]] && . ~/.autojump/etc/profile.d/autojump.sh
或者可以直接把下面我的.zshrc内容来替换你的.zshrc,内容有多但没有错
# If you come from bash you might have to change your $PATH.
# export PATH=$HOME/bin:/usr/local/bin:$PATH

export PATH=$PATH
# Path to your oh-my-zsh installation.
export ZSH=$HOME/.oh-my-zsh

# Set name of the theme to load --- if set to "random", it will
# load a random theme each time oh-my-zsh is loaded, in which case,
# to know which specific one was loaded, run: echo $RANDOM_THEME
# See https://github.com/robbyrussell/oh-my-zsh/wiki/Themes
# 主题
#ZSH_THEME="agnoster"
ZSH_THEME="ys"
#ZSH_THEME="random" # (...please let it be pie... please be some pie..)

# Set list of themes to pick from when loading at random
# Setting this variable when ZSH_THEME=random will cause zsh to load
# a theme from this variable instead of looking in ~/.oh-my-zsh/themes/
# If set to an empty array, this variable will have no effect.
# ZSH_THEME_RANDOM_CANDIDATES=( "robbyrussell" "agnoster" )

# Uncomment the following line to use case-sensitive completion.
# CASE_SENSITIVE="true"

# Uncomment the following line to use hyphen-insensitive completion.
# Case-sensitive completion must be off. _ and - will be interchangeable.
# HYPHEN_INSENSITIVE="true"

# Uncomment the following line to disable bi-weekly auto-update checks.
#DISABLE_AUTO_UPDATE="true"

# Uncomment the following line to change how often to auto-update (in days).
# export UPDATE_ZSH_DAYS=13

# Uncomment the following line to disable colors in ls.
# DISABLE_LS_COLORS="true"

# Uncomment the following line to disable auto-setting terminal title.
# DISABLE_AUTO_TITLE="true"

# Uncomment the following line to enable command auto-correction.
# ENABLE_CORRECTION="true"

# Uncomment the following line to display red dots whilst waiting for completion.
# COMPLETION_WAITING_DOTS="true"

# Uncomment the following line if you want to disable marking untracked files
# under VCS as dirty. This makes repository status check for large repositories
# much, much faster.
# DISABLE_UNTRACKED_FILES_DIRTY="true"

# Uncomment the following line if you want to change the command execution time
# stamp shown in the history command output.
# You can set one of the optional three formats:
# "mm/dd/yyyy"|"dd.mm.yyyy"|"yyyy-mm-dd"
# or set a custom format using the strftime function format specifications,
# see 'man strftime' for details.
# HIST_STAMPS="mm/dd/yyyy"

# Would you like to use another custom folder than $ZSH/custom?
# ZSH_CUSTOM=/path/to/new-custom-folder

# Which plugins would you like to load?
# Standard plugins can be found in ~/.oh-my-zsh/plugins/*
# Custom plugins may be added to ~/.oh-my-zsh/custom/plugins/
# Example format: plugins=(rails git textmate ruby lighthouse)
# Add wisely, as too many plugins slow down shell startup.
plugins=(
  git
  rake
  ruby
  bundler
  extract
  web-search
  vi-mode
  wd
  zsh-autosuggestions
  catimg
)

source $ZSH/oh-my-zsh.sh

# User configuration

# export MANPATH="/usr/local/man:$MANPATH"

# You may need to manually set your language environment
export LANG=en_US.UTF-8

# Preferred editor for local and remote sessions
# if [[ -n $SSH_CONNECTION ]]; then
   export EDITOR='vim'
# else
#   export EDITOR='mvim'
# fi

# Compilation flags
# export ARCHFLAGS="-arch x86_64"

# ssh
# export SSH_KEY_PATH="~/.ssh/rsa_id"

# Set personal aliases, overriding those provided by oh-my-zsh libs,
# plugins, and themes. Aliases can be placed here, though oh-my-zsh
# users are encouraged to define aliases within the ZSH_CUSTOM folder.
# For a full list of active aliases, run `alias`.
#
# Example aliases
# alias zshconfig="mate ~/.zshrc"
 alias ohmyzsh="mate ~/.oh-my-zsh"
 alias cls='clear'
 alias zshrc="vim ~/.zshrc"
 alias vi='gvim'
 alias ff='firefox'
 alias -s txt=vi
 alias -s cpp=vi
 alias -s pdf=evince
 alias -s md=typora
 alias -s c=vi
 alias -s gz='tar -xzvf'
 alias -s tgz='tar -xzvf'
 alias -s zip='unzip'
 alias -s bz2='tar -xjvf'
 alias -s h
 alias fy='sdcv -u 朗道英汉字典5.0'
 alias Fy='sdcv -u 朗道汉英字典5.0'
 alias unrar="rar"
 bindkey ',' autosuggest-accept
 # 后台运行程序 : nohup a.sh &
 #hash
[[ -s ~/.autojump/etc/profile.d/autojump.sh ]] && . ~/.autojump/etc/profile.d/autojump.sh

GTK_MODULES=unity-gtk-module
美化-安装终端仿真器tilix
下面那条命令用来替换默认终端
sudo apt install -y tilix
gsettings set org.gnome.desktop.default-applications.terminal exec 'tilix'
需手动配置
打开tilix后右键上面的那一栏找到preference,在appearance里找到Theme variant,设置为dark,同在这里找到Window style,设置为Disable CSD,hide toolbar
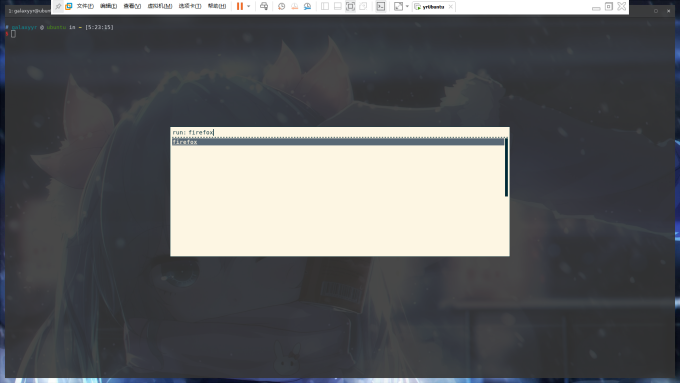
快速打开软件-rofi
sudo apt install -y rofi
终端中使用:rofi -show run
图片查看feh
sudo apt install -y feh
使用以下命令可以设置随机桌面图片
feh --randomize --bg-fill ~/picture # 后面为你放图片的路径,每运行一次随机替换一次
安装i3wm
sudo apt install -y i3
sudo apt install -y i3lock
sudo add-apt-repository ppa:regolith-linux/stable
sudo apt-get update
sudo apt-get install i3-gaps
重启后在登录前的右下角选择i3,进入后一路enter键,之后请找网络资源进行学习使用和配置,学好后可以不使用鼠标。
配置文件在~/.config/i3/config,以下为我的config
# This file has been auto-generated by i3-config-wizard(1).
# It will not be overwritten, so edit it as you like.
#
# Should you change your keyboard layout some time, delete
# this file and re-run i3-config-wizard(1).
#

# i3 config file (v4)
#
# Please see https://i3wm.org/docs/userguide.html for a complete reference!

set $mod Mod4

# Font for window titles. Will also be used by the bar unless a different font
# is used in the bar {} block below.
font pango:monospace 8

# This font is widely installed, provides lots of unicode glyphs, right-to-left
# text rendering and scalability on retina/hidpi displays (thanks to pango).
#font pango:DejaVu Sans Mono 8

# Before i3 v4.8, we used to recommend this one as the default:
# font -misc-fixed-medium-r-normal--13-120-75-75-C-70-iso10646-1
# The font above is very space-efficient, that is, it looks good, sharp and
# clear in small sizes. However, its unicode glyph coverage is limited, the old
# X core fonts rendering does not support right-to-left and this being a bitmap
# font, it doesn’t scale on retina/hidpi displays.

# Use Mouse+$mod to drag floating windows to their wanted position
floating_modifier $mod

bindsym $mod+Alt+l exec i3lock-fancy

# start a terminal
bindsym $mod+Return exec tilix

# kill focused window
bindsym $mod+Shift+q kill

# start dmenu (a program launcher)
bindsym $mod+d exec "rofi -show run"
# There also is the (new) i3-dmenu-desktop which only displays applications
# shipping a .desktop file. It is a wrapper around dmenu, so you need that
# installed.
# bindsym $mod+d exec --no-startup-id i3-dmenu-desktop

# change focus
bindsym $mod+h focus left
bindsym $mod+j focus down
bindsym $mod+k focus up
bindsym $mod+l focus right

# alternatively, you can use the cursor keys:
bindsym $mod+Left focus left
bindsym $mod+Down focus down
bindsym $mod+Up focus up
bindsym $mod+Right focus right

# move focused window
bindsym $mod+Shift+h move left
bindsym $mod+Shift+j move down
bindsym $mod+Shift+k move up
bindsym $mod+Shift+l move right


# alternatively, you can use the cursor keys:
bindsym $mod+Shift+Left move left
bindsym $mod+Shift+Down move down
bindsym $mod+Shift+Up move up
bindsym $mod+Shift+Right move right

# split in horizontal orientation
bindsym $mod+b split h

# split in vertical orientation
bindsym $mod+v split v

# enter fullscreen mode for the focused container
bindsym $mod+f fullscreen toggle

# change container layout (stacked, tabbed, toggle split)
bindsym $mod+s layout stacking
bindsym $mod+w layout tabbed
bindsym $mod+e layout toggle split

# toggle tiling / floating
bindsym $mod+Shift+space floating toggle

# change focus between tiling / floating windows
bindsym $mod+space focus mode_toggle

# focus the parent container
bindsym $mod+a focus parent

# focus the child container
#bindsym $mod+d focus child

# switch to workspace
bindsym $mod+1 workspace 1
bindsym $mod+2 workspace 2
bindsym $mod+3 workspace 3
bindsym $mod+4 workspace 4
bindsym $mod+5 workspace 5
bindsym $mod+6 workspace 6
bindsym $mod+7 workspace 7
bindsym $mod+8 workspace 8
bindsym $mod+9 workspace 9
bindsym $mod+0 workspace 10

# move focused container to workspace
bindsym $mod+Shift+1 move container to workspace 1
bindsym $mod+Shift+2 move container to workspace 2
bindsym $mod+Shift+3 move container to workspace 3
bindsym $mod+Shift+4 move container to workspace 4
bindsym $mod+Shift+5 move container to workspace 5
bindsym $mod+Shift+6 move container to workspace 6
bindsym $mod+Shift+7 move container to workspace 7
bindsym $mod+Shift+8 move container to workspace 8
bindsym $mod+Shift+9 move container to workspace 9
bindsym $mod+Shift+0 move container to workspace 10

# reload the configuration file
bindsym $mod+Shift+c reload
# restart i3 inplace (preserves your layout/session, can be used to upgrade i3)
bindsym $mod+Shift+r restart
# exit i3 (logs you out of your X session)
bindsym $mod+Shift+e exec "i3-nagbar -t warning -m 'You pressed the exit shortcut. Do you really want to exit i3? This will end your X session.' -b 'Yes, exit i3' 'i3-msg exit'"

# resize window (you can also use the mouse for that)
mode "resize" {
        # These bindings trigger as soon as you enter the resize mode

        # Pressing left will shrink the window’s width.
        # Pressing right will grow the window’s width.
        # Pressing up will shrink the window’s height.
        # Pressing down will grow the window’s height.
        bindsym h resize shrink width 10 px or 10 ppt
        bindsym j resize grow height 10 px or 10 ppt
        bindsym k resize shrink height 10 px or 10 ppt
        bindsym l resize grow width 10 px or 10 ppt

        # same bindings, but for the arrow keys
        bindsym Left resize shrink width 10 px or 10 ppt
        bindsym Down resize grow height 10 px or 10 ppt
        bindsym Up resize shrink height 10 px or 10 ppt
        bindsym Right resize grow width 10 px or 10 ppt

        # back to normal: Enter or Escape
        bindsym Return mode "default"
        bindsym Escape mode "default"
}

bindsym $mod+r mode "resize"

# Start i3bar to display a workspace bar (plus the system information i3status
# finds out, if available)
#bar {
        #status_command i3status
#}
exec --no-startup-id compton -b
exec --no-startup-id feh --randomize --bg-scale ~/Pictures/

#********************************************i3-gaps*********************************
for_window [class="^.*"] border pixel 0
gaps inner 8
gaps outer 6
set $mode_gaps Gaps: (o) outer, (i) inner
set $mode_gaps_outer Outer Gaps: +|-|0 (local), Shift + +|-|0 (global)
set $mode_gaps_inner Inner Gaps: +|-|0 (local), Shift + +|-|0 (global)
bindsym $mod+Shift+g mode "$mode_gaps"

mode "$mode_gaps" {
        bindsym o      mode "$mode_gaps_outer"
        bindsym i      mode "$mode_gaps_inner"
        bindsym Return mode "default"
        bindsym Escape mode "default"
}

mode "$mode_gaps_inner" {
        bindsym plus  gaps inner current plus 5
        bindsym minus gaps inner current minus 5
        bindsym 0     gaps inner current set 0

        bindsym Shift+plus  gaps inner all plus 5
        bindsym Shift+minus gaps inner all minus 5
        bindsym Shift+0     gaps inner all set 0

        bindsym Return mode "default"
        bindsym Escape mode "default"
}
mode "$mode_gaps_outer" {
        bindsym plus  gaps outer current plus 5
        bindsym minus gaps outer current minus 5
        bindsym 0     gaps outer current set 0

        bindsym Shift+plus  gaps outer all plus 5
        bindsym Shift+minus gaps outer all minus 5
        bindsym Shift+0     gaps outer all set 0

        bindsym Return mode "default"
        bindsym Escape mode "default"
}
【可选】安装keynav
sudo apt install -y keynav
设置快捷键后可用来通过键盘使用鼠标操作,在启动keynav后,使用c+;激活,移动方法同VIM
以下为.keynavrc,可不进行配置,使用默认的即可
clear
ctrl+semicolon start
Escape end
ctrl+bracketleft end
w warp
space warp,click 1,end
Return warp,click 1,end
semicolon warp,end

q record ~/.keynav_macros
shift+at playback
a history-back
t windowzoom
c cursorzoom 300 300

1 warp,click 1
2 warp,click 2
3 warp,click 3
4 warp,click 4
5 warp,click 5
6 warp,click 6
7 warp,click 7

h cut-left
j cut-down
k cut-up
l cut-right
y cut-left,cut-up
u cut-right,cut-up
b cut-left,cut-down
n cut-right,cut-down

ctrl+h move-left
ctrl+j move-down
ctrl+k move-up
ctrl+l move-right
ctrl+y move-left,move-up
ctrl+u move-right,move-up
ctrl+b move-left,move-down
ctrl+n move-right,move-down

shift+h move-left
shift+j move-down
shift+k move-up
shift+l move-right
shift+y move-left,move-up
shift+u move-right,move-up
shift+b move-left,move-down
shift+n move-right,move-down

i warp,click 5
o warp,click 4

d drag 1
shift+d drag 1 ctrl+shift
大功告成!
