作者: 沈阳盛京征信有限公司 原文来源: https://tidb.net/blog/5fa1612a
本文档的主要内容为:
- TiDB v6.1.0 在 Rocky Linux 8.7 中的离线部署
- TiDB v6.1.0 -> TiDB v6.5.1 升级
- TiFlash 扩缩容
- Haproxy 部署
- br 物理备份与恢复
- 基于时间点的恢复(PITR)初体验
1. 服务器准备
1.1. 拓扑规划
| 实例 | 实例数量 | 推荐配置 | OS | IP | 说明 |
|---|---|---|---|---|---|
| Monitoring&Grafana&TiUniManager | 1 | 32C/64G/SAS/千兆网卡 | Rocky Linux 8.7 | 192.168.3.200 | 中控机,用于部署 TiUP、br 等生态工具。 |
| TiDB/PD | 3/3 | 64C/256G/SSD/万兆网卡*2 | Rocky Linux 8.7 | 192.168.3.201/202/203 | TiDB Server 与 PD 混合部署,启用 NUMA 绑核,以避免资源争用。 |
| TiKV | 3 | 64C/256G/SSD/万兆网卡*2 | Rocky Linux 8.7 | 192.168.3.204/205/206 |
1.2. 目录规划
针对 PD 及 TiKV 实例,建议为数据目录分配高性能的磁盘。
| IP | 目录 | 用途 | 建议磁盘类型 |
|---|---|---|---|
| 192.168.3.200 | /tidb-deploy | 监控组件程序目录 | 无限制 |
| /tidb-data | 监控组件数据目录 | 无限制 | |
| 192.168.3.201/202/203 | /tidb-deploy | TiDB Server、PD组件程序目录 | 无限制 |
| /tidb-data | TiDB Server、PD组件数据目录 | TiDB Server 无限制、PD 组件建议 SSD | |
| 192.168.3.204/205/206 | /tidb-deploy | TiKV 组件程序目录 | 无限制 |
| /tidb-data | TiKV组件数据目录 | 建议 SSD |
1.3. 系统安装
以下选项使用所有主机
- 为提高内存性能,禁用
SWAP分区 - 软件选择:
Minimal Install->Standard - 根据官方建议,生产环境部署使用 EXT4 类型文件系统的 NVME 类型的 SSD 磁盘存储 TiKV 数据文件,且为挂载选项增加
nodelalloc,noatime。
[root@h200 ~]# mkfs.ext4 /dev/sdb
[root@h200 ~]# lsblk -f /dev/sdb
NAME FSTYPE LABEL UUID                                 MOUNTPOINT
sdb  ext4         5170c3f9-fe17-47a6-9b3a-28dbd08b24a7

[root@h200 ~]# mkdir -p /{tidb-deploy,tidb-data}
[root@h200 ~]# echo "UUID=5170c3f9-fe17-47a6-9b3a-28dbd08b24a7 /tidb-data ext4 defaults,nodelalloc,noatime 0 2" >> /etc/fstab
[root@h200 ~]# mount /dev/sdb
1.4. 主机配置
1.4.1. 网卡绑定
- 绑定模式简介
| 模式 | bond 支持 | team 支持 | 负载均衡 | 容错 | 是否需要交换机额外配置 | 描述 | | ---------------------- | ------- | ------- | ----- | -- | ----------------- | ------------------------------------------------------------------------------------------------------------------------------- | | mode=0(balance-rr) | √ | √ | √ | √ | 需要(聚合强制不协商) | 采用 Round Robin 方式,每块 slave 网卡轮流进行工作。若其中一个 slave 网卡失效,整机网络可正常运转。 | | mode=1(active-backup) | √ | √ | × | √ | 不需要 | 即“主备模式”,同一时刻只有一个网卡在工作,其他的网卡不工作。当主网卡失效,备用网卡开始工作。 | | mode=2(balance-xor) | √ | × | √ | √ | 需要(聚合强制不协商) | | | mode=3(broadcast) | √ | √ | × | √ | 需要(聚合强制不协商) | 所有 slave 网卡都会收、发相同数据包,任一张 slave 网卡故障失效,整机的网络通信仍可正常运转。 | | mode=4(802.3ad,即 LACP) | √ | √ | √ | √ | 需支持 802.3ad(LACP) | 802.3ad 是正式的交换机连接聚合技术。 需要交换机支持802.3ad,而服务器网卡也需要支持 ethtool。 | | mode=5(balance-tlb) | √ | √ | √(发送) | √ | 不需要 | 根据网卡负载情况,选择网卡发送数据,接收时使用当前轮询到的网卡。 该模式要求 slave 接口的网络设备驱动有某种 ethtool 支持;而且 ARP 监控不可用。 如果正在接收数据的 slave 出故障了,另一个 slave 网卡会接管 MAC 地址。 | | mode=6(balance-alb) | √ | × | √ | √ | 不需要 | 在 mode=5 的 tlb 基础上增加了 rlb(接收负载均衡 receiveload balance)。接收负载均衡是通过 ARP 协商实现的。 |
聚合强制不协商,即静态聚合。
- team 绑定(mode=4)及 IP 设置
[root@h200 ~]# systemctl status NetworkManager1.5.
## 查看网络设备状态
[root@h200 ~]# nmcli device status
DEVICE  TYPE      STATE         CONNECTION
ens18   ethernet  disconnected  --
ens19   ethernet  disconnected  --
lo      loopback  unmanaged     --

## 添加 team0 连接
[root@h200 ~]# nmcli con add type team con-name team0 ifname team0 config "{\"runner\": {\"name\": \"loadbalance\", \"tx_hash\": [\"ip\"]}, \"link_watch\": {\"name\": \"ethtool\"}}"
Connection 'team0' (e6d6f7d7-64ff-48f2-8285-e48e84649a14) successfully added.

## 设置 team0 连接的网络参数
[root@h200 ~]# nmcli con mod team0 ipv4.addr 192.168.3.200/24 ipv4.dns 223.5.5.5 ipv4.gateway 192.168.3.1 ipv4.method manual connection.autoconnect yes

nmcli con mod team0 ipv4.addresses 192.168.3.200/24
nmcli con mod team0 ipv4.gateway 192.168.3.1
nmcli con mod team0 ipv4.dns 223.5.5.5
nmcli con mod team0 ipv4.method manual
nmcli con mod team0 connection.autoconnect yes

## 为 team0 连接分配网卡 ens18、ens19
[root@h200 ~]# nmcli con add type team-slave con-name team0-slave01 ifname ens18 master team0
Connection 'team0-slave01' (ae59e7b7-1554-4311-baca-202ace400f51) successfully added.
[root@h200 ~]# nmcli con add type team-slave con-name team0-slave02 ifname ens19 master team0
Connection 'team0-slave02' (175dc3cc-7426-4ac8-9b15-8b49d962c92f) successfully added.

## 重载连接配置
[root@h200 ~]# nmcli con reload

## 激活 team0 网卡
[root@h200 ~]# nmcli con up team0
Connection successfully activated (master waiting for slaves) (D-Bus active path: /org/freedesktop/NetworkManager/ActiveConnection/6)

## 查看设备状态
[root@h200 ~]# nmcli device status
DEVICE  TYPE      STATE      CONNECTION
team0   team      connected  team0
ens18   ethernet  connected  team0-slave01
ens19   ethernet  connected  team0-slave02
lo      loopback  unmanaged  --

## 查看 IP 地址
[root@h200 ~]# ip -4 a
1: lo: <LOOPBACK,UP,LOWER_UP> mtu 65536 qdisc noqueue state UNKNOWN group default qlen 1000
    inet 127.0.0.1/8 scope host lo
       valid_lft forever preferred_lft forever
4: team0: <BROADCAST,MULTICAST,UP,LOWER_UP> mtu 1500 qdisc noqueue state UP group default qlen 1000
    inet 192.168.3.200/24 brd 192.168.3.255 scope global noprefixroute team0
       valid_lft forever preferred_lft forever

[root@h200 ~]# ip addr show dev team0
[root@h200 ~]# teamdctl team0 state
setup:
  runner: loadbalance
ports:
  ens18
    link watches:
      link summary: up
      instance[link_watch_0]:
        name: ethtool
        link: up
        down count: 0
  ens19
    link watches:
      link summary: up
      instance[link_watch_0]:
        name: ethtool
        link: up
        down count: 0
1.4.2. 配置本地源
Rocky 8.7 镜像下载地址: https://mirrors.ustc.edu.cn/rocky/8.7/isos/x86_64/Rocky-8.7-x86_64-dvd1.iso
## 挂载光盘
~]# mkdir -p /mnt/yum
~]# mount /dev/sr0 /mnt/yum
~]# vi /etc/yum.repos.d/Rocky-Local.repo

## 配置 repo 文件
~]# cat > /etc/yum.repos.d/local.repo << EOF
[rocky-local-base]
name=Rocky Linux 8.7 - Local Base
baseurl=file:///mnt/yum/BaseOS
enabled=1
gpgcheck=0

[rocky-local-appstream]
name=Rocky Linux 8.7 - Local AppStream
baseurl=file:///mnt/yum/AppStream
enabled=1
gpgcheck=0
EOF

## 更新缓存
~]# yum clean all
~]# yum makecache
1.4.3. ssh 互信及免密登录
中控机(192.168.3.200)设置 ront 用户互信,免密登录各节点。
- 中控机生成私钥
~]# ssh-keygen -t rsa
- 分发私钥
for NODE_IP in 192.168.3.200 192.168.3.201 192.168.3.202 192.168.3.203 192.168.3.204 192.168.3.205 192.168.3.206
  do
    echo ">>> ${NODE_IP}"
    ssh-copy-id root@${NODE_IP}
  done
- 免密验证
for NODE_IP in 192.168.3.200 192.168.3.201 192.168.3.202 192.168.3.203 192.168.3.204 192.168.3.205 192.168.3.206
  do
    echo ">>> ${NODE_IP}"
    ssh root@${NODE_IP} "date"
  done

>>> 192.168.3.200
Mon Apr 10 14:12:35 CST 2023
>>> 192.168.3.201
Mon Apr 10 14:12:36 CST 2023
>>> 192.168.3.202
Mon Apr 10 14:12:36 CST 2023
>>> 192.168.3.203
Mon Apr 10 14:12:36 CST 2023
>>> 192.168.3.204
Mon Apr 10 14:12:36 CST 2023
>>> 192.168.3.205
Mon Apr 10 14:12:36 CST 2023
>>> 192.168.3.206
Mon Apr 10 14:12:36 CST 2023
1.4.4. 关闭 Swap、内核优化、SELinux、防火墙
for NODE_IP in 192.168.3.200 192.168.3.201 192.168.3.202 192.168.3.203 192.168.3.204 192.168.3.205 192.168.3.206
  do
    echo ">>> ${NODE_IP}"
    ssh root@${NODE_IP} "echo \"vm.swappiness = 0\">> /etc/sysctl.conf"
    ssh root@${NODE_IP} "sed -i '/swap/ s/^/#/' /etc/fstab"
    ssh root@${NODE_IP} "swapoff -a"
    ssh root@${NODE_IP} "echo \"fs.file-max = 1000000\"       >> /etc/sysctl.conf"
    ssh root@${NODE_IP} "echo \"net.core.somaxconn = 32768\"  >> /etc/sysctl.conf"
    ssh root@${NODE_IP} "echo \"net.ipv4.tcp_syncookies = 0\" >> /etc/sysctl.conf"
    ssh root@${NODE_IP} "echo \"vm.overcommit_memory = 1\"    >> /etc/sysctl.conf"
    ssh root@${NODE_IP} "sysctl -p"
    ssh root@${NODE_IP} "setenforce 0"
    ssh root@${NODE_IP} "sed -i 's#SELINUX=enforcing#SELINUX=disabled#g' /etc/selinux/config"
    ssh root@${NODE_IP} "sed -i 's/^SELINUX=.*/SELINUX=disabled/' /etc/selinux/config"
    ssh root@${NODE_IP} "systemctl disable --now firewalld.service"
  done
1.4.5. 软件包安装
for NODE_IP in 192.168.3.200 192.168.3.201 192.168.3.202 192.168.3.203 192.168.3.204 192.168.3.205 192.168.3.206
  do
    echo ">>> ${NODE_IP}"
    ssh root@${NODE_IP} "dnf -y install numactl tar chrony"
  done
1.4.6. 时间同步
Rocky Linux 8 弃用了 ntpdate,而改用了自带的 Chrony 来同步时间。
for NODE_IP in 192.168.3.200 192.168.3.201 192.168.3.202 192.168.3.203 192.168.3.204 192.168.3.205 192.168.3.206
  do
    echo ">>> ${NODE_IP}"
    ssh root@${NODE_IP} "cp /usr/share/zoneinfo/Asia/Shanghai /etc/localtime"
    ssh root@${NODE_IP} "dnf install chrony -y"
    ssh root@${NODE_IP} "echo \"server pool.ntp.org iburst\" >> /etc/chrony.conf"
    ssh root@${NODE_IP} "systemctl enable --now chronyd.service"
    ssh root@${NODE_IP} "chronyc tracking"
  done
TiDB 是一套分布式数据库系统,需要节点间保证时间的同步,从而确保 ACID 模型的事务线性一致性。可以通过互联网中的 pool.ntp.org 授时服务来保证节点的时间同步,离线环境将其替换为自建的 NTP 服务来解决授时。
1.4.7. 系统优化
- 通过 tuned 优化系统
需要在每个节点中执行如下优化动作。
## 1.获取磁盘 ID_SERIAL
[root@h200 ~]# udevadm info --name=/dev/sdb | grep ID_SERIAL
E: ID_SERIAL=0QEMU_QEMU_HARDDISK_drive-scsi1
E: ID_SERIAL_SHORT=drive-scsi1

## 2.创建 tuned 策略,根据磁盘类型选择调度算法。
~]# mkdir /etc/tuned/balanced-tidb-optimal/
~]# cat > /etc/tuned/balanced-tidb-optimal/tuned.conf <<EOF
[main]
include=balanced
[cpu]
governor=performance
[vm]
transparent_hugepages=never
[disk]
devices_udev_regex=(ID_SERIAL=0QEMU_QEMU_HARDDISK_drive-scsi1)
elevator=none
EOF

## 3.应用 tuned 策略
~]# tuned-adm profile balanced-tidb-optimal

## 4.验证优化结果
~]# cat /sys/kernel/mm/transparent_hugepage/enabled && cat /sys/kernel/mm/transparent_hugepage/defrag
~]# cat /sys/block/sdb/queue/scheduler
~]# cpupower frequency-info --policy
多个磁盘的 ID_SERIAL 用竖线分割,如:
[disk]
devices_udev_regex=(ID_SERIAL=0QEMU_QEMU_HARDDISK_drive-scsi1)|(ID_SERIAL=36d0946606d79f90025f3e09a0c1f9e81)
elevator=none
- 若 THP 禁用失败,可通过如下方式禁用。
# Define the commands to disable THP
thp_cmd="if test -f /sys/kernel/mm/transparent_hugepage/enabled; then
             echo never > /sys/kernel/mm/transparent_hugepage/enabled
         fi
         if test -f /sys/kernel/mm/transparent_hugepage/defrag; then
             echo never > /sys/kernel/mm/transparent_hugepage/defrag
         fi"

for NODE_IP in 192.168.3.200 192.168.3.201 192.168.3.202 192.168.3.203 192.168.3.204 192.168.3.205 192.168.3.206
do
    echo ">>> ${NODE_IP}"
    echo "Disabling THP on $server..."
    ssh root@"${NODE_IP}" "echo \"$thp_cmd\" >> /etc/rc.local"
    ssh root@"${NODE_IP}" "chmod +x /etc/rc.local"
    ssh root@"${NODE_IP}" "source /etc/rc.local"
done
验证禁用 THP 结果
for NODE_IP in 192.168.3.200 192.168.3.201 192.168.3.202 192.168.3.203 192.168.3.204 192.168.3.205 192.168.3.206
do
    echo ">>> ${NODE_IP}"
    ssh root@"${NODE_IP}" "cat /sys/kernel/mm/transparent_hugepage/enabled"
    ssh root@"${NODE_IP}" "cat /sys/kernel/mm/transparent_hugepage/defrag"
done

>>> 192.168.3.200
always madvise [never]
always defer defer+madvise madvise [never]
>>> 192.168.3.201
always madvise [never]
always defer defer+madvise madvise [never]
>>> 192.168.3.202
always madvise [never]
always defer defer+madvise madvise [never]
>>> 192.168.3.203
always madvise [never]
always defer defer+madvise madvise [never]
>>> 192.168.3.204
always madvise [never]
always defer defer+madvise madvise [never]
>>> 192.168.3.205
always madvise [never]
always defer defer+madvise madvise [never]
>>> 192.168.3.206
always madvise [never]
always defer defer+madvise madvise [never]
[root@h200 ~]#
- Rocky Linux 8.7 中的磁盘调度策略
Rocky Linux 内核在 blk 层加入了多队列功能,可尽情发挥 SSD 的性能。开启多对列之后单队列就无法使用了,相应的单队列算法都看不见了。
[root@localhost ~]# cat /sys/block/sdb/queue/scheduler
[none] mq-deadline kyber bfq
单队列与多队列调度算法的对应关系如下表所示:
| 单队列 | 多队列 |
|---|---|
| deadline | mq-deadline |
| cfq | bfq |
| noop | none |
| kyber |
1.4.8. 用户创建及资源限制
1.4.8.1. 创建用户、授权及资源限制
for NODE_IP in 192.168.3.200 192.168.3.201 192.168.3.202 192.168.3.203 192.168.3.204 192.168.3.205 192.168.3.206
  do
    echo ">>> ${NODE_IP}"
    ssh root@${NODE_IP} "useradd -u 1001 tidb -G wheel && echo tidb123 |passwd --stdin tidb"
    ssh root@${NODE_IP} "echo \"tidb ALL=(ALL) NOPASSWD: ALL\" >> /etc/sudoers"
    ssh root@${NODE_IP} "echo \"tidb  soft nofile  1000000\" >> /etc/security/limits.conf"
    ssh root@${NODE_IP} "echo \"tidb  hard nofile  1000000\" >> /etc/security/limits.conf"
    ssh root@${NODE_IP} "echo \"tidb  soft stack   32768\"   >> /etc/security/limits.conf"
    ssh root@${NODE_IP} "echo \"tidb  hard stack   32768\"   >> /etc/security/limits.conf"
  done
- tidb 用户密码
tidb123; - 【非必须】将用户 tidb 添加到 wheel 组,以使 tidb 用户可执行 su 命令切换用户。
- tidb 用户登录各目标节点,确认执行
sudo - root无需输入密码,即表示添加成功。
1.4.8.2. 免密登录
tidb 用户登录中控机(192.168.3.200)执行:
~]# su - tidb
~]$ id
uid=1001(tidb) gid=1001(tidb) groups=1001(tidb),10(wheel) context=unconfined_u:unconfined_r:unconfined_t:s0-s0:c0.c1023
~]$ ssh-keygen -t rsa
## 1.分发密钥
for NODE_IP in 192.168.3.200 192.168.3.201 192.168.3.202 192.168.3.203 192.168.3.204 192.168.3.205 192.168.3.206
  do
    echo ">>> ${NODE_IP}"
    ssh-copy-id tidb@${NODE_IP}
  done

## 2.验证免密登录
for NODE_IP in 192.168.3.200 192.168.3.201 192.168.3.202 192.168.3.203 192.168.3.204 192.168.3.205 192.168.3.206
  do
    echo ">>> ${NODE_IP}"
    ssh tidb@${NODE_IP} "date"
  done
1.5. 离线部署 TiDB
1.5.1. 部署 TiUP 组件
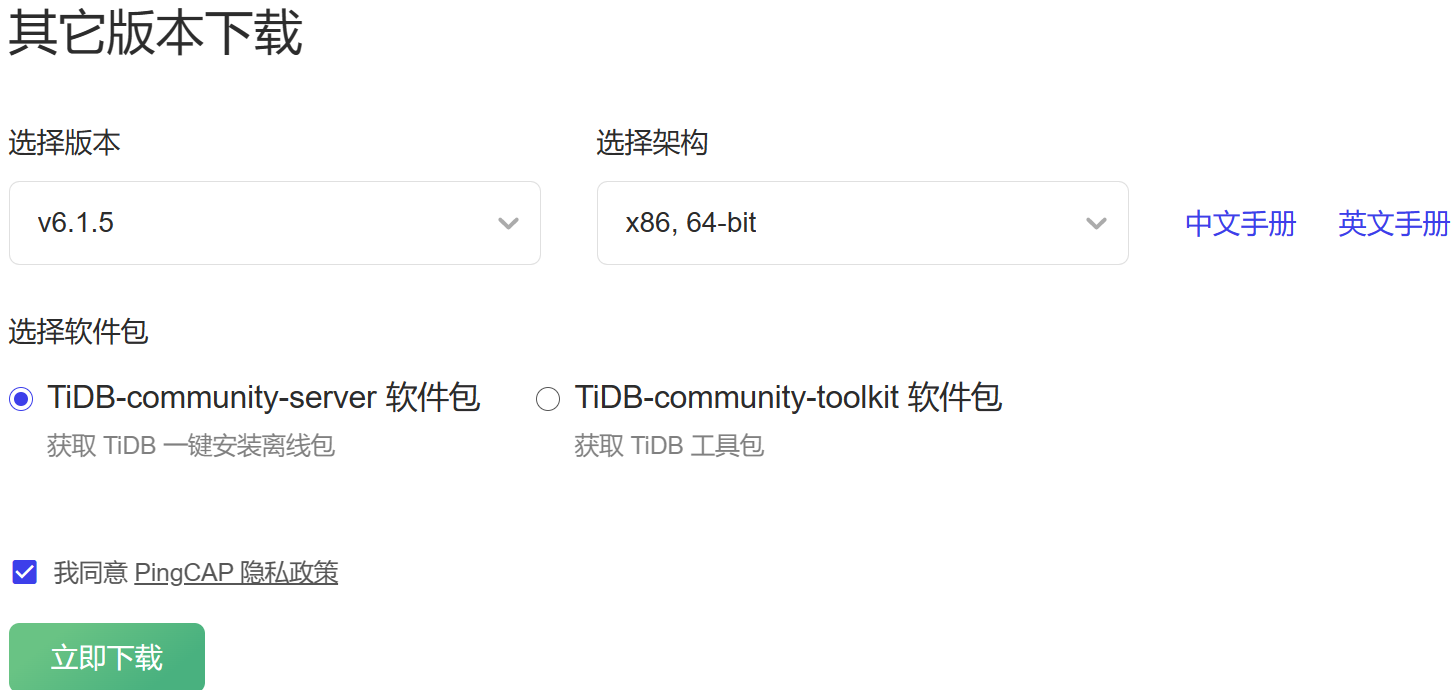
可直接在 tidb 官网下载 TiDB 软件包,该软件包中包含 TiUP 组件。将 TiDB 软件包上传至中控机(192.168.3.200)。
https://pingcap.com/zh/product#SelectProduct
## 1. 下载 TiDB 离线镜像包
~]$ id
uid=1001(tidb) gid=1001(tidb) groups=1001(tidb),10(wheel) context=unconfined_u:unconfined_r:unconfined_t:s0-s0:c0.c1023

~]$ export version=v6.1.5 && wget https://download.pingcap.org/tidb-community-server-${version}-linux-amd64.tar.gz
~]$ wget https://download.pingcap.org/tidb-community-toolkit-${version}-linux-amd64.tar.gz

~]$ chown tidb:tidb tidb-community-*-${version}-linux-amd64.tar.gz

## 2. 部署 TiUP 组件
~]$ tar -xzvf tidb-community-server-${version}-linux-amd64.tar.gz
~]$ tar -xzvf tidb-community-toolkit-${version}-linux-amd64.tar.gz

~]$ sh tidb-community-server-${version}-linux-amd64/local_install.sh
~]$ source /home/tidb/.bash_profile

## 3. 合并 server 与 toolkit 镜像
~]$ cd tidb-community-server-${version}-linux-amd64/
~]$ cp -rp keys ~/.tiup/
~]$ tiup mirror merge ../tidb-community-toolkit-${version}-linux-amd64

## 4. 查看离线镜像
~]$ tiup mirror show
/home/tidb/tidb-community-server-v6.1.5-linux-amd64

## 5. 查看离线镜像中的组件
~]$ tiup list
Available components:
Name               Owner    Description
----               -----    -----------
PCC                pingcap  A tool used to capture plan changes among different versions of TiDB
alertmanager       pingcap  Prometheus alertmanager
bench              pingcap  Benchmark database with different workloads
blackbox_exporter  pingcap  Blackbox prober exporter
br                 pingcap  TiDB/TiKV cluster backup restore tool
cdc                pingcap  CDC is a change data capture tool for TiDB
cluster            pingcap  Deploy a TiDB cluster for production
ctl                pingcap  TiDB controller suite
dba                pingcap  dbatoolset
diag               pingcap  Clinic client for data collection and quick health check
dm                 pingcap  Data Migration Platform manager
dm-master          pingcap  dm-master component of Data Migration Platform
dm-worker          pingcap  dm-worker component of Data Migration Platform
dmctl              pingcap  dmctl component of Data Migration Platform
drainer            pingcap  The drainer componet of TiDB binlog service
dumpling           pingcap  Dumpling is a CLI tool that helps you dump MySQL/TiDB data
errdoc             pingcap  Document about TiDB errors
grafana            pingcap  Grafana is the open source analytics & monitoring solution for every database
influxdb           pingcap  InfluxDB
insight            pingcap  TiDB-Insight collector
node_exporter      pingcap  Exporter for machine metrics
package            pingcap  A toolbox to package tiup component
pd                 pingcap  PD is the abbreviation for Placement Driver. It is used to manage and schedule the TiKV cluster
pd-recover         pingcap  PD Recover is a disaster recovery tool of PD, used to recover the PD cluster which cannot start or provide services normally
playground         pingcap  Bootstrap a local TiDB cluster for fun
prometheus         pingcap  The Prometheus monitoring system and time series database
pump               pingcap  The pump componet of TiDB binlog service
server             pingcap  TiUP publish/cache server
spark              pingcap  Spark is a fast and general cluster computing system for Big Data
tidb               pingcap  TiDB is an open source distributed HTAP database compatible with the MySQL protocol
tidb-lightning     pingcap  TiDB Lightning is a tool used for fast full import of large amounts of data into a TiDB cluster
tiflash            pingcap  The TiFlash Columnar Storage Engine
tikv               pingcap  Distributed transactional key-value database, originally created to complement TiDB
tikv-importer      pingcap
tispark            pingcap  tispark
tiup               pingcap  TiUP is a command-line component management tool that can help to download and install TiDB platform components to the local system
local_install.sh 脚本会自动执行 tiup mirror set 命令将镜像源设置为本地文件夹 tidb-community-server-${version}-linux-amd64 。若需切换到在线环境,可执行 tiup mirror set https://tiup-mirrors.pingcap.com 。
1.5.2. 拓扑准备
~]$ tiup cluster template |grep -Ev '^\s*#|^$' > topology.yaml
生成的默认拓扑配置,根据实际环境修改如下:
global:
  user: "tidb"
  ssh_port: 22
  deploy_dir: "/tidb-deploy"
  data_dir: "/tidb-data"
  arch: "amd64"
server_configs:
  tidb:
    new_collations_enabled_on_first_bootstrap: true    # 若要支持 utf8mb4_bin 之外的排序规则,必须在部署集群时设置此配置项。后期无法修改
    collation_server: utf8mb4_general_ci               # 指定服务器默认排序规则
    log:
      enable-slow-log: true
      slow-threshold: 300
monitored:
  node_exporter_port: 9100
  blackbox_exporter_port: 9115
pd_servers:
  - host: 192.168.3.201
    numa_node: "1"                                     # numa 绑核,配置项将写入 /tidb-deploy/pd-2379/scripts/run_pd.sh 脚本中
  - host: 192.168.3.202
    numa_node: "1"
  - host: 192.168.3.203
    numa_node: "1"
tidb_servers:
  - host: 192.168.3.201
    numa_node: "0"
  - host: 192.168.3.202
    numa_node: "0"
  - host: 192.168.3.203
    numa_node: "0"
tikv_servers:
  - host: 192.168.3.204
  - host: 192.168.3.205
  - host: 192.168.3.206
monitoring_servers:
  - host: 192.168.3.200
grafana_servers:
  - host: 192.168.3.200
alertmanager_servers:
  - host: 192.168.3.200
TiDB 集群初始化完成后,以上拓扑配置内容会由 tiup 工具自动保存至 /home/tidb/.tiup/storage/cluster/clusters/<集群名>/meta.yaml 文件中。
-
new_collations_enabled_on_first_bootstrap
从 TiDB v4.0 开始,引入了 TiDB 配置项 new_collations_enabled_on_first_bootstrap ,用于启用新的排序框架。该配置项只能在TiDB集群初始化时设置,后期修改无效。
在 v4.x-v5.x 中,该配置项默认为 false,即不启用新排序框架,仅支持 utf8mb4_bin (大小写敏感)排序规则,无法更改。
从 TiDB v6.0.0 版本开始,该配置项的默认值变更为 true ,即在新的排序规则框架下,TiDB 能够支持 utf8_general_ci 、 utf8mb4_general_ci 、 utf8_unicode_ci 、 utf8mb4_unicode_ci 、 gbk_chinese_ci 和 gbk_bin 这几种排序规则,与 MySQL 兼容。
- 混合部署的 numa 绑核
当前环境 TiDB 与 PD 组件为混合部署,因此为避免资源争用,对其启用 NUMA 绑核。
## 查看 numa 信息
~]# numactl --hardware
available: 2 nodes (0-1)
node 0 cpus: 0 1 2 3
node 0 size: 2013 MB
node 0 free: 1710 MB
node 1 cpus: 4 5 6 7
node 1 size: 1716 MB
node 1 free: 1418 MB
node distances:
node   0   1
  0:  10  20
  1:  20  10
numa 绑核配置,不能设置在全局配置 server_configs 中,否则无法识别。
1.5.3. 环境校验
生产环境,需确保所有检查项都为 pass
## 环境检查
~]$ tiup cluster check ./topology.yaml --user tidb
...
Node           Check       Result  Message
----           -----       ------  -------
192.168.3.223  os-version  Pass    OS is CentOS Linux 7 (Core) 7.9.2009
192.168.3.223  cpu-cores   Pass    number of CPU cores / threads: 4
192.168.3.223  memory      Pass    memory size is 4096MB
... 省略部分内容 ...
192.168.3.222  command     Pass    numactl: policy: default

## 自动修复
~]$ tiup cluster check ./topology.yaml --apply --user root
【注意】因
Rocky Linux不在官方的 OS 支持列表中,因此会有os-version Fail os vendor rocky not supported的报错提示,可忽略。
1.5.4. 集群部署
~]$ id
uid=1000(tidb) gid=1000(tidb) groups=1000(tidb)

## 部署集群
~]$ export version=v6.1.5
~]$ tiup cluster deploy demodb ${version} ./topology.yaml --user tidb

tiup is checking updates for component cluster ...
Starting component `cluster`: /home/tidb/.tiup/components/cluster/v1.11.3/tiup-cluster deploy demodb v6.1.5 ./topology.yaml --user tidb
... 省略部分日志内容 ...
Please confirm your topology:
Cluster type:    tidb
Cluster name:    demodb
Cluster version: v6.1.5
Role          Host           Ports        OS/Arch       Directories
----          ----           -----        -------       -----------
pd            192.168.3.201  2379/2380    linux/x86_64  /tidb-deploy/pd-2379,/tidb-data/pd-2379
pd            192.168.3.202  2379/2380    linux/x86_64  /tidb-deploy/pd-2379,/tidb-data/pd-2379
pd            192.168.3.203  2379/2380    linux/x86_64  /tidb-deploy/pd-2379,/tidb-data/pd-2379
tikv          192.168.3.204  20160/20180  linux/x86_64  /tidb-deploy/tikv-20160,/tidb-data/tikv-20160
tikv          192.168.3.205  20160/20180  linux/x86_64  /tidb-deploy/tikv-20160,/tidb-data/tikv-20160
tikv          192.168.3.206  20160/20180  linux/x86_64  /tidb-deploy/tikv-20160,/tidb-data/tikv-20160
tidb          192.168.3.201  4000/10080   linux/x86_64  /tidb-deploy/tidb-4000
tidb          192.168.3.202  4000/10080   linux/x86_64  /tidb-deploy/tidb-4000
tidb          192.168.3.203  4000/10080   linux/x86_64  /tidb-deploy/tidb-4000
prometheus    192.168.3.200  9090/12020   linux/x86_64  /tidb-deploy/prometheus-9090,/tidb-data/prometheus-9090
grafana       192.168.3.200  3000         linux/x86_64  /tidb-deploy/grafana-3000
alertmanager  192.168.3.200  9093/9094    linux/x86_64  /tidb-deploy/alertmanager-9093,/tidb-data/alertmanager-9093
Attention:
    1. If the topology is not what you expected, check your yaml file.
    2. Please confirm there is no port/directory conflicts in same host.
Do you want to continue? [y/N]: (default=N) y
+ Generate SSH keys ... Done
  ... 省略部分日志内容 ...
Enabling component node_exporter
        Enabling instance 192.168.3.200
        Enabling instance 192.168.3.201
        ... 省略部分日志内容 ...
        Enable 192.168.3.201 success
Cluster `demodb` deployed successfully, you can start it with command: `tiup cluster start demodb --init`
## 初始化集群
~]$ tiup cluster start demodb --init
... 省略部分日志内容 ...
Started cluster `demodb` successfully
The root password of TiDB database has been changed.
The new password is: 'ah897mj5P-t43R=#$v'.
Copy and record it to somewhere safe, it is only displayed once, and will not be stored.
The generated password can NOT be get and shown again.
可通过 tiup cluster start kruidb --init 在初始化集群时,为 root 用户生成随机密码(只显示一次)。省略 --init 参数,则为 root 用户密码为空。
1.5.5. 修改默认密码
## 中控机安装 MySQL CLI 客户端
~]$ sudo dnf install mysql -y

## 默认密码登录 TiDB 并修改密码
~]$ mysql -uroot -P4000 -h192.168.3.201 -p'ah897mj5P-t43R=#$v'
mysql> select user,host from mysql.user;
+------+------+
| user | host |
+------+------+
| root | %    |
+------+------+
1 row in set (0.01 sec)

mysql> alter user root identified with mysql_native_password by "root";
Query OK, 0 rows affected (0.07 sec)

mysql> flush privileges;
Query OK, 0 rows affected (0.03 sec)

## 用新密码登录 TiDB 数据库
~]$ mysql -uroot -P4000 -h192.168.3.201 -p'root'
1.6. 检查、启停 TiDB 集群
1.6.1. 查看集群
~]$ tiup cluster list
tiup is checking updates for component cluster ...
Starting component `cluster`: /home/tidb/.tiup/components/cluster/v1.11.3/tiup-cluster list
Name    User  Version  Path                                              PrivateKey
----    ----  -------  ----                                              ----------
demodb  tidb  v6.1.5   /home/tidb/.tiup/storage/cluster/clusters/demodb  /home/tidb/.tiup/storage/cluster/clusters/demodb/ssh/id_rsa
~]$ tiup cluster display demodb
tiup is checking updates for component cluster ...
Starting component `cluster`: /home/tidb/.tiup/components/cluster/v1.11.3/tiup-cluster display demodb
Cluster type:       tidb
Cluster name:       demodb
Cluster version:    v6.1.5
Deploy user:        tidb
SSH type:           builtin
Dashboard URL:      http://192.168.3.201:2379/dashboard
Grafana URL:        http://192.168.3.200:3000
ID                   Role          Host           Ports        OS/Arch       Status  Data Dir                      Deploy Dir
--                   ----          ----           -----        -------       ------  --------                      ----------
192.168.3.200:9093   alertmanager  192.168.3.200  9093/9094    linux/x86_64  Up      /tidb-data/alertmanager-9093  /tidb-deploy/alertmanager-9093
192.168.3.200:3000   grafana       192.168.3.200  3000         linux/x86_64  Up      -                             /tidb-deploy/grafana-3000
192.168.3.201:2379   pd            192.168.3.201  2379/2380    linux/x86_64  Up|UI   /tidb-data/pd-2379            /tidb-deploy/pd-2379
192.168.3.202:2379   pd            192.168.3.202  2379/2380    linux/x86_64  Up|L    /tidb-data/pd-2379            /tidb-deploy/pd-2379
192.168.3.203:2379   pd            192.168.3.203  2379/2380    linux/x86_64  Up      /tidb-data/pd-2379            /tidb-deploy/pd-2379
192.168.3.200:9090   prometheus    192.168.3.200  9090/12020   linux/x86_64  Up      /tidb-data/prometheus-9090    /tidb-deploy/prometheus-9090
192.168.3.201:4000   tidb          192.168.3.201  4000/10080   linux/x86_64  Up      -                             /tidb-deploy/tidb-4000
192.168.3.202:4000   tidb          192.168.3.202  4000/10080   linux/x86_64  Up      -                             /tidb-deploy/tidb-4000
192.168.3.203:4000   tidb          192.168.3.203  4000/10080   linux/x86_64  Up      -                             /tidb-deploy/tidb-4000
192.168.3.204:20160  tikv          192.168.3.204  20160/20180  linux/x86_64  Up      /tidb-data/tikv-20160         /tidb-deploy/tikv-20160
192.168.3.205:20160  tikv          192.168.3.205  20160/20180  linux/x86_64  Up      /tidb-data/tikv-20160         /tidb-deploy/tikv-20160
192.168.3.206:20160  tikv          192.168.3.206  20160/20180  linux/x86_64  Up      /tidb-data/tikv-20160         /tidb-deploy/tikv-20160
1.6.2. 查看配置
可通过 tiup cluster show-config <集群名> 查看集群配置,该命令会读取 /home/tidb/.tiup/storage/cluster/clusters/<集群名称>/meta.yaml 内容;
可通过 tiup cluster edit-config <集群名> 修改集群运行的配置信息,该命令会编辑 /home/tidb/.tiup/storage/cluster/clusters/<集群名称>/meta.yaml 内容,保存后会下发至各节点。
~]$ tiup cluster show-config demodb

tiup is checking updates for component cluster ...
Starting component `cluster`: /home/tidb/.tiup/components/cluster/v1.11.3/tiup-cluster show-config demodb
global:
  user: tidb
  ssh_port: 22
  ssh_type: builtin
  deploy_dir: /tidb-deploy
  data_dir: /tidb-data
  os: linux
  arch: amd64
monitored:
  node_exporter_port: 9100
  blackbox_exporter_port: 9115
  deploy_dir: /tidb-deploy/monitor-9100
  data_dir: /tidb-data/monitor-9100
  log_dir: /tidb-deploy/monitor-9100/log
server_configs:
  tidb:
    collation_server: utf8mb4_general_ci
    log:
      enable-slow-log: true
      slow-threshold: 300
    new_collations_enabled_on_first_bootstrap: true
  tikv: {}
  ... 省略部分内容 ...
tidb_servers:
- host: 192.168.3.201
  ssh_port: 22
  port: 4000
  status_port: 10080
  deploy_dir: /tidb-deploy/tidb-4000
  log_dir: /tidb-deploy/tidb-4000/log
  numa_node: "0"
  arch: amd64
  os: linux
- host: 192.168.3.202
  ... 省略部分内容 ...
- host: 192.168.3.203
  ... 省略部分内容 ...
tikv_servers:
- host: 192.168.3.204
  ssh_port: 22
  port: 20160
  status_port: 20180
  deploy_dir: /tidb-deploy/tikv-20160
  data_dir: /tidb-data/tikv-20160
  log_dir: /tidb-deploy/tikv-20160/log
  arch: amd64
  os: linux
- host: 192.168.3.205
  ... 省略部分内容 ...
- host: 192.168.3.206
  ... 省略部分内容 ...
tiflash_servers: []
pd_servers:
- host: 192.168.3.201
  ssh_port: 22
  name: pd-192.168.3.201-2379
  client_port: 2379
  peer_port: 2380
  deploy_dir: /tidb-deploy/pd-2379
  data_dir: /tidb-data/pd-2379
  log_dir: /tidb-deploy/pd-2379/log
  numa_node: "1"
  arch: amd64
  os: linux
- host: 192.168.3.202
  ... 省略部分内容 ...
- host: 192.168.3.203
  ... 省略部分内容 ...
monitoring_servers:
- host: 192.168.3.200
  ssh_port: 22
  port: 9090
  ng_port: 12020
  deploy_dir: /tidb-deploy/prometheus-9090
  data_dir: /tidb-data/prometheus-9090
  log_dir: /tidb-deploy/prometheus-9090/log
  external_alertmanagers: []
  arch: amd64
  os: linux
grafana_servers:
- host: 192.168.3.200
  ssh_port: 22
  port: 3000
  deploy_dir: /tidb-deploy/grafana-3000
  arch: amd64
  os: linux
  username: admin
  password: admin
  anonymous_enable: false
  root_url: ""
  domain: ""
alertmanager_servers:
- host: 192.168.3.200
  ssh_port: 22
  web_port: 9093
  cluster_port: 9094
  deploy_dir: /tidb-deploy/alertmanager-9093
  data_dir: /tidb-data/alertmanager-9093
  log_dir: /tidb-deploy/alertmanager-9093/log
  arch: amd64
  os: linux
1.6.3. 重载配置
~]$ tiup cluster reload kruidb
tiup reload 命令会将 /home/tidb/.tiup/storage/cluster/clusters/<集群名称>/meta.yaml 中的配置项重新载入到 TiDB 集群,并持久化到 TiKV 中。因此,同名的全局系统变量值将被 tiup reload 覆盖。而启停集群并不会重新载入 meta.yaml 配置文件内容。
举例如下:
# 1. 通过 set 在线修改系统变量
mysql> SET GLOBAL tidb_slow_log_threshold = 200;

# 2. tiup edit-config 中的配置
server_configs:
  tidb:
    new_collations_enabled_on_first_bootstrap: true    # 配置项将写入 /tidb-deploy/tidb-4000/conf/tidb.toml 文件中
    collation_server: utf8mb4_general_ci               # 指定服务器默认排序规则
    log:
      enable-slow-log: true
      slow-threshold: 300

# 3. tiup reload 后,tidb_slow_log_threshold 被覆盖为 300
mysql> show variables like 'tidb_slow_log_threshold';
+-------------------------+-------+
| Variable_name           | Value |
+-------------------------+-------+
| tidb_slow_log_threshold | 300   |
+-------------------------+-------+
1 row in set (0.00 sec)
1.6.4. 启停集群
# 1. 启动集群(顺序:PD->TiKV->TiDB->TiFlash)
tiup cluster start demodb

# 2. 停机顺序(顺序:TiFlash->TiDB->TiKV->PD)
tiup cluster stop demodb
1.7. 扩缩容 TiFlash
参考 1.4 主机配置 章节,完成主机配置及优化相关任务。从 v6.3.0 开始,在 Linux AMD64 平台部署 TiFlash ,需确保 cat /proc/cpuinfo | grep avx2 有输出。在 Linux ARM64 平台部署 TiFlash ,需确保 cat /proc/cpuinfo | grep 'crc32' | grep 'asimd' 有输出。
1.7.1. 扩容 TiFlash
- 开启 Placement Rules(TiDB v5.0+ 默认已开启)
# 1. 检查是否已开启 Placement Rules
[tidb@h200 ~]$ tiup ctl:v6.1.5 pd -u http://192.168.3.201:2379 config show replication

{
  "max-replicas": 3,
  "location-labels": "",
  "strictly-match-label": "false",
  "enable-placement-rules": "true",            # 已开启
  "enable-placement-rules-cache": "false",
  "isolation-level": ""
}

# 2. 可通过如下命令开启
[tidb@h200 ~]$ tiup ctl:v6.1.5 pd -u http://192.168.3.201:2379 config set enable-placement-rules true
- 编辑 TiFlash 配置文件
tiflash-out.yaml
[tidb@h200 ~]$ cat > tiflash-out.yaml << EOF
tiflash_servers:
  - host: 192.168.3.207
EOF
- 扩容检查及修复
# 1. 环境检查
[tidb@h200 ~]$ tiup cluster check demodb tiflash-out.yaml --cluster
# 2. 环境修复
[tidb@h200 ~]$ tiup cluster check demodb tiflash-out.yaml --cluster --apply --user root -p
- 执行扩容
[tidb@h200 ~]$ tiup cluster scale-out demodb tiflash-out.yaml
- 验证扩容
[tidb@h200 ~]$ tiup cluster display demodb
tiup is checking updates for component cluster ...
Starting component `cluster`: /home/tidb/.tiup/components/cluster/v1.11.3/tiup-cluster display demodb
Cluster type:       tidb
Cluster name:       demodb
Cluster version:    v6.1.5
Deploy user:        tidb
SSH type:           builtin
Dashboard URL:      http://192.168.3.201:2379/dashboard
Grafana URL:        http://192.168.3.200:3000
ID                   Role          Host           Ports                            OS/Arch       Status  Data Dir                      Deploy Dir
--                   ----          ----           -----                            -------       ------  --------                      ----------
192.168.3.200:9093   alertmanager  192.168.3.200  9093/9094                        linux/x86_64  Up      /tidb-data/alertmanager-9093  /tidb-deploy/alertmanager-9093
192.168.3.200:3000   grafana       192.168.3.200  3000                             linux/x86_64  Up      -                             /tidb-deploy/grafana-3000
192.168.3.201:2379   pd            192.168.3.201  2379/2380                        linux/x86_64  Up|UI   /tidb-data/pd-2379            /tidb-deploy/pd-2379
192.168.3.202:2379   pd            192.168.3.202  2379/2380                        linux/x86_64  Up|L    /tidb-data/pd-2379            /tidb-deploy/pd-2379
192.168.3.203:2379   pd            192.168.3.203  2379/2380                        linux/x86_64  Up      /tidb-data/pd-2379            /tidb-deploy/pd-2379
192.168.3.200:9090   prometheus    192.168.3.200  9090/12020                       linux/x86_64  Up      /tidb-data/prometheus-9090    /tidb-deploy/prometheus-9090
192.168.3.201:4000   tidb          192.168.3.201  4000/10080                       linux/x86_64  Up      -                             /tidb-deploy/tidb-4000
192.168.3.202:4000   tidb          192.168.3.202  4000/10080                       linux/x86_64  Up      -                             /tidb-deploy/tidb-4000
192.168.3.203:4000   tidb          192.168.3.203  4000/10080                       linux/x86_64  Up      -                             /tidb-deploy/tidb-4000
192.168.3.207:9000   tiflash       192.168.3.207  9000/8123/3930/20170/20292/8234  linux/x86_64  Up      /tidb-data/tiflash-9000       /tidb-deploy/tiflash-9000
192.168.3.204:20160  tikv          192.168.3.204  20160/20180                      linux/x86_64  Up      /tidb-data/tikv-20160         /tidb-deploy/tikv-20160
192.168.3.205:20160  tikv          192.168.3.205  20160/20180                      linux/x86_64  Up      /tidb-data/tikv-20160         /tidb-deploy/tikv-20160
192.168.3.206:20160  tikv          192.168.3.206  20160/20180                      linux/x86_64  Up      /tidb-data/tikv-20160         /tidb-deploy/tikv-20160
1.7.2. 缩容 TiFlash
- 确认已无列存副本
# 1. 查看是否存在列存副本
mysql> SELECT * FROM information_schema.tiflash_replica;
Empty set (0.00 sec)

# 2. 按表设置 TiFlash 副本
ALTER TABLE <Table_Name> SET TIFLASH REPLICA <Count>;

# 3. 按库设置 TiFlash 副本
ALTER TABLE <DB Name> SET TIFLASH REPLICA <Count>;
- 确认 TiFlash 节点 ID
[tidb@h200 ~]$ tiup cluster display demodb -R tiflash
tiup is checking updates for component cluster ...
Starting component `cluster`: /home/tidb/.tiup/components/cluster/v1.11.3/tiup-cluster display demodb -R tiflash
Cluster type:       tidb
Cluster name:       demodb
Cluster version:    v6.1.5
Deploy user:        tidb
SSH type:           builtin
ID                  Role     Host           Ports                            OS/Arch       Status  Data Dir                 Deploy Dir
--                  ----     ----           -----                            -------       ------  --------                 ----------
192.168.3.207:9000  tiflash  192.168.3.207  9000/8123/3930/20170/20292/8234  linux/x86_64  Up      /tidb-data/tiflash-9000  /tidb-deploy/tiflash-9000
Total nodes: 1
- 执行缩容
# 1. 缩容 TiFlash 节点
~]$ tiup cluster scale-in demodb --node 192.168.3.207:9000

# 2. 清理 TiFlash 信息
~]$ tiup cluster prune demodb
1.8. 常见问题处理
1.8.1. 清理环境
若部署失败,需要清理环境以便重新部署。
for NODE_IP in 200 201 202 203 204 205 206 207
do
    echo ">>> 192.168.3.${NODE_IP} <<<"
    ssh root@192.168.3.${NODE_IP} "rm -rf /tidb-data/*"
    ssh root@192.168.3.${NODE_IP} "rm -rf /tidb-deploy"
    ssh root@192.168.3.${NODE_IP} "find /etc/systemd/system -name "tidb-*" -o -name "tikv-*" -o -name "pd-*" -o -name "tiflash-*" |xargs rm -rf { };"
    ssh root@192.168.3.${NODE_IP} "find /etc/systemd/system -name "alertmanager-*" -o -name "grafana-*" -o -name "prometheus-*" |xargs rm -rf { };"
    ssh root@192.168.3.${NODE_IP} "find /etc/systemd/system -name "blackbox_exporter-*" -o -name "node_exporter-*" |xargs rm -rf { };"
done
1.8.2. 忘记密码
登陆一台 TiDB 节点(以 192.168.3.201 为例),修改 TiDB 配置文件,在 security 部分添加 skip-grant-table :
- TiDB 服务重启
## 1. 修改配置文件
~]# cat >> /tidb-deploy/tidb-4000/conf/tidb.toml << EOF
[security]
skip-grant-table = true
EOF

## 2. 停止该节点 TiDB 服务
systemctl daemon-reload
systemctl stop tidb-4000.service

## 3. root 用户用脚本启动 TiDB 服务
/tidb-deploy/tidb-4000/scripts/run_tidb.sh &
设置 skip-grant-table 之后,启动 TiDB 进程会增加操作系统用户检查,只有操作系统的 root 用户才能启动 TiDB 进程。
- 使用 root 登录后修改密码:
~]$ mysql -uroot -h192.168.3.201 -P4000
mysql> alter user root identified with mysql_native_password by "root";
mysql> flush privileges;
- 删除
skip-grant-table = true的设置
~]# cat /tidb-deploy/tidb-4000/conf/tidb.toml
new_collations_enabled_on_first_bootstrap = true
- 重启 TiDB 服务
## TiDB 节点 192.168.3.201 重启 TiDB 服务
~]# ps -aux | grep "tidb-server" |grep -v grep |cut -c 5-18 |xargs kill -9
~]# systemctl daemon-reload && systemctl start tidb-4000.service

## 中控机 192.168.3.200 查看集群状态
~]$ tiup cluster display kruidb
2. 部署Haproxy
将 haproxy 部署于 192.168.3.200 节点
2.1. 安装 Haproxy
## 1. 下载解压 Haproxy 软件包
~]# export version=2.7.6
~]# wget https://www.haproxy.org/download/2.7/src/haproxy-${version}.tar.gz
~]# tar -xzvf haproxy-${version}.tar.gz

## 2. 编译安装 Haproxy
~]# cd haproxy-${version}
~]# dnf install make -y
~]# make clean
~]# make -j 8 TARGET=linux-glibc USE_THREAD=1
~]# make PREFIX=/usr/local/haproxy_${version} SBINDIR=/usr/local/haproxy_${version}/bin install

## 3. 安装后配置 Haproxy
~]# ln -s /usr/local/haproxy_${version} /usr/local/haproxy
~]# echo 'export PATH=/usr/local/haproxy/bin:$PATH' >> /etc/profile
~]# source /etc/profile
~]# which haproxy
/usr/local/haproxy/bin/haproxy
2.2. 配置 Haproxy
通过 YUM 安装,会生成配置模板,也可根据实际场景自定义如下配置项:
## 1. 环境准备
~]# mkdir -p /etc/haproxy
~]# mkdir -p /var/lib/haproxy
~]# useradd haproxy

## 2. 新建 haproxy.cfg 配置文件
~]# vi /etc/haproxy/haproxy.cfg
global                                     # 全局配置。
   log         127.0.0.1 local2            # 定义全局的 syslog 服务器,最多可以定义两个。
   chroot      /var/lib/haproxy            # 更改当前目录并为启动进程设置超级用户权限,从而提高安全性。
   pidfile     /var/run/haproxy.pid        # 将 HAProxy 进程的 PID 写入 pidfile。
   maxconn     4096                        # 单个 HAProxy 进程可接受的最大并发连接数,等价于命令行参数 "-n"。
   nbthread    48                          # 最大线程数。线程数的上限与 CPU 数量相同。
   user        haproxy                     # 同 UID 参数。
   group       haproxy                     # 同 GID 参数,建议使用专用用户组。
   daemon                                  # 让 HAProxy 以守护进程的方式工作于后台,等同于命令行参数“-D”的功能。当然,也可以在命令行中用“-db”参数将其禁用。
   stats socket /var/run/haproxy-svc1.sock level admin mode 600 user haproxy expose-fd listeners
defaults                                   # 默认配置。
   log global                              # 日志继承全局配置段的设置。
   retries 2                               # 向上游服务器尝试连接的最大次数,超过此值便认为后端服务器不可用。
   timeout connect  2s                     # HAProxy 与后端服务器连接超时时间。如果在同一个局域网内,可设置成较短的时间。
   timeout client 30000s                   # 客户端非活动连接的超时时间。
   timeout server 30000s                   # 服务器端非活动连接的超时时间。

listen admin_stats                         # frontend 和 backend 的组合体,此监控组的名称可按需进行自定义。
   bind 0.0.0.0:8080                       # 监听端口。
   mode http                               # 监控运行的模式,此处为 `http` 模式。
   option httplog                          # 开始启用记录 HTTP 请求的日志功能。
   maxconn 10                              # 最大并发连接数。
   stats refresh 30s                       # 每隔 30 秒自动刷新监控页面。
   stats uri /haproxy                      # 监控页面的 URL。
   stats realm HAProxy                     # 监控页面的提示信息。
   stats auth admin:pingcap123             # 监控页面的用户和密码,可设置多个用户名。
   stats hide-version                      # 隐藏监控页面上的 HAProxy 版本信息。
   stats  admin if TRUE                    # 手工启用或禁用后端服务器(HAProxy 1.4.9 及之后版本开始支持)。

listen tidb-cluster                        # 配置 database 负载均衡。
   bind 0.0.0.0:13390                      # 浮动 IP 和 监听端口,修改默认端口3390为13390
   mode tcp                                # HAProxy 要使用第 4 层的传输层。
   balance leastconn                       # 优先连接到连接数少的 TiDB 实例。`leastconn` 适用于长会话服务,如 LDAP、SQL、TSE 等;不适用于短会话协议,如 HTTP。该算法是动态的,对于启动慢的服务器,服务器权重会在运行中作调整。
   server tidb-1 192.168.3.201:4000 check inter 2000 rise 2 fall 3      # 监听 4000 端口,频率为 2000ms/次。若 2 次成功,则认为服务可用;若 3 次失败,则认为服务不可用。
   server tidb-2 192.168.3.202:4000 check inter 2000 rise 2 fall 3      # 若为 TiDB 透传客户端真实 IP,需在 check 前增加选项 `send-proxy`,详见 "2.4 透传 IP"
   server tidb-3 192.168.3.203:4000 check inter 2000 rise 2 fall 3
将配置文件保存为 /etc/haproxy/haproxy.cfg ,验证配置文件正确性。
~]# chown -R haproxy:haproxy /etc/haproxy/*
~]# chmod -R 644 /etc/haproxy/*
~]# /usr/local/haproxy/bin/haproxy -f /etc/haproxy/haproxy.cfg -c
Configuration file is valid
2.3. 启停 Haproxy
~]# cp /root/haproxy-${version}/examples/haproxy.init /etc/init.d/haproxy
~]# chmod +x /etc/init.d/haproxy
~]# ln -s /usr/local/haproxy/bin/haproxy /usr/sbin/
~]# chkconfig --add haproxy
~]# chkconfig haproxy on
~]# systemctl enable haproxy
haproxy.service is not a native service, redirecting to systemd-sysv-install.
Executing: /usr/lib/systemd/systemd-sysv-install enable haproxy
~]# systemctl restart haproxy
~]# systemctl status  haproxy
~]# systemctl start   haproxy
~]# systemctl stop    haproxy
2.4. 透传 IP
通常情况下(如 “2.2 配置 Haproxy” 中的配置示例),通过 Haproxy 反向代理使用 TiDB 时,TiDB 会将 Haproxy 的 IP 地址(本例为 192.168.3.200)视为客户端 IP 地址。即在 TiDB 中执行 show processlist 显示的 Host 为 Haproxy 的地址,而非真实客户端的地址。若为 TiDB 透传真实的客户端地址,需要为 Haproxy 增加 send-proxy 选项,同时为 TiDB Server 增加配置。
- 为 haproxy.cfg 增加 send-proxy 选项
... 省略部分配置内容 ...
listen tidb-cluster                        # 配置 database 负载均衡。
   bind 0.0.0.0:13390                      # 浮动 IP 和 监听端口,修改默认端口3390为13390
   mode tcp                                # HAProxy 要使用第 4 层的传输层。
   balance leastconn                       # 优先连接到连接数少的 TiDB 实例。`leastconn` 适用于长会话服务,如 LDAP、SQL、TSE 等;不适用于短会话协议,如 HTTP。该算法是动态的,对于启动慢的服务器,服务器权重会在运行中作调整。
   server tidb-1 192.168.3.201:4000 send-proxy check inter 2000 rise 2 fall 3      # 为 TiDB 透传客户端真实 IP,在 check 前增加选项 `send-proxy`
   server tidb-2 192.168.3.202:4000 send-proxy check inter 2000 rise 2 fall 3
   server tidb-3 192.168.3.203:4000 send-proxy check inter 2000 rise 2 fall 3
- 为 TiDB Server 增加
proxy-protocol.networks配置 Haproxy 服务器的地址
~]$ tiup cluster edit-config kruidb
# ... 省略部分配置内容 ...
server_configs:
  tidb:
    new_collations_enabled_on_first_bootstrap: true    # 配置项将写入 /tidb-deploy/tidb-4000/conf/tidb.toml 文件中
    proxy-protocol.networks: 192.168.3.0/24            # 为 TiDB 启用透传客户端 IP,地址范围为 192.168.3.0/24 网段
#... 省略部分配置内容 ...
proxy-protocol.networks 的地址可使用 IP 格式 (192.168.3.50) 或 CIDR 格式 (192.168.3.0/24),并可用逗号“,” 分隔多个地址,或用星号 “*” 代表所有 IP。
2.5. 连接测试
[tidb@h200 ~]$ mysql -P13390 -h192.168.3.200 -uroot -proot
-P 指定连接端口 13390,即 Haproxy 的代理端口 -h 指定连接地址,即 Haproxy 的 IP 地址
3. 物理备份与恢复
3.1. 存储挂载
本文档以将 TiDB 备份至 192.168.3.231:/volume4/data1/tidbbak NFS 共享目录中为例。
- TiKV 节点挂载外部存储
首先,在 NFS 服务器创建 tidbbak 共享目录,并分别挂载至每个 TiKV 节点及中控机的 /tidbbak 中。首次,批量挂载脚本如下:
## 挂载 NFS 共享目录 tidbbak 至 /tidbbak
for NODE_IP in 200 204 205 206
do
    echo ">>> 192.168.3.${NODE_IP} <<<"
    ssh root@192.168.3.${NODE_IP} "dnf install -y nfs-utils"
    ssh root@192.168.3.${NODE_IP} "mkdir /tidbbak && chown -R tidb:tidb /tidbbak"
    ssh root@192.168.3.${NODE_IP} "chmod -R 755 /tidbbak"
    ssh root@192.168.3.${NODE_IP} "mount -t nfs 192.168.3.231:/volume4/data1/tidbbak /tidbbak"
    ssh root@192.168.3.${NODE_IP} "mount -t nfs"
    ssh root@192.168.3.${NODE_IP} "echo \"mount -t nfs 192.168.3.231:/volume4/data1/tidbbak /tidbbak\" >> /etc/rc.local"
    ssh root@192.168.3.${NODE_IP} "cat /etc/rc.local|grep mount"
done
因备份时,自动根据日期创建文件夹,因此执行 br 的节点也需挂载存储,并且挂载点与 TiKV 一致。将挂载脚本添加至 /etc/rc.local ,即可开机自动挂载。
- 验证挂载结果
for NODE_IP in 200 204 205 206
do
    echo ">>> 192.168.3.${NODE_IP} <<<"
    ssh root@192.168.3.${NODE_IP} "df |grep tidbbak"
done

>>> 192.168.3.200 <<<
192.168.3.231:/volume4/data1/tidbbak 9676941312 753940352 8922882176   8% /tidbbak
>>> 192.168.3.204 <<<
192.168.3.231:/volume4/data1/tidbbak 9676941312 753940352 8922882176   8% /tidbbak
>>> 192.168.3.205 <<<
192.168.3.231:/volume4/data1/tidbbak 9676941312 753940352 8922882176   8% /tidbbak
>>> 192.168.3.206 <<<
192.168.3.231:/volume4/data1/tidbbak 9676941312 753940352 8922882176   8% /tidbbak
[root@h200 ~]#
3.2. br 工具
br 为 TiDB 分布式数据库的物理备份恢复工具,包含在 TiDB TookKit 工具包中。可下载该工具包,将其独立部署至可访问 PD 及 TiKV 节点的主机。也可在中控机执行 tiup br 直接调用 br 组件,首次执行会检查是否已安装 br 组件。若未安装,则会自动安装 br 组件。
3.2.1. 独立部署 br
官方下载页面 下载 TookKit 工具包 tidb-community-toolkit-v6.1.5-linux-amd64.tar.gz ,按如下方式将 BR 部署任意可访问 PD、TiKV 节点的主机。
## 1. 部署 br 工具
~]$ export version=v6.1.5
~]$ sudo chown -R tidb:tidb tidb-community-toolkit-${version}-linux-amd64.tar.gz
~]$ tar -xzvf tidb-community-toolkit-${version}-linux-amd64.tar.gz
~]$ sudo tar -xzvf tidb-community-toolkit-${version}-linux-amd64/br-${version}-linux-amd64.tar.gz -C /usr/local/bin/
~]$ whereis br
br: /usr/local/bin/br

## 2. 查看 br 帮助
~]$ br --help
br is a TiDB/TiKV cluster backup restore tool.

Usage:
  br [command]

Available Commands:
  backup      backup a TiDB/TiKV cluster
  completion  Generate the autocompletion script for the specified shell
  help        Help about any command
  restore     restore a TiDB/TiKV cluster
  ... 省略部分帮助内容 ...
3.2.2. 通过 tiup 调用 br
[tidb@h200 ~]$ tiup br
tiup is checking updates for component br ...
A new version of br is available:
   The latest version:         v6.1.5
   Local installed version:
   Update current component:   tiup update br
   Update all components:      tiup update --all

The component `br` version  is not installed; downloading from repository.
Starting component `br`: /home/tidb/.tiup/components/br/v6.1.5/br
br is a TiDB/TiKV cluster backup restore tool.

Usage:
  br [command]

Available Commands:
  backup      backup a TiDB/TiKV cluster
  completion  Generate the autocompletion script for the specified shell
  help        Help about any command
  restore     restore a TiDB/TiKV cluster
  ...(省略部分内容)...
3.3. 快照备份与恢复
使用 br backup full 可以备份 TiDB 最新的或者通过 --backupts '2023-04-11 15:42:23' 备份指定时间点的快照数据。
3.3.1. 手动备份
## 1. 创建存放备份的目录
~]$ mkdir -p /tidbbak/db/`date +%Y%m%d`

## 2. 执行全库备份
~]$ tiup br backup full --pd "192.168.3.201:2379" --storage "local:///tidbbak/db/`date +%Y%m%d`" --log-file /tidbbak/db/fullbak_`date +%Y%m%d`/fullbak_`date +%Y%m%d`.log
**【注意】**存放备份文件的目录必须是在执行备份之前已创建的空目录。
3.3.2. 自动备份
- 准备备份脚本
~/scripts/fulldbbak.sh内容如下:
#!/bin/bash
export DATEDIR=`date +%Y%m%d`
export BASEDIR=/tidbbak/db

mkdir -p $BASEDIR/$DATEDIR

/home/tidb/.tiup/bin/tiup br backup full --pd "192.168.3.201:2379" --storage "local://$BASEDIR/$DATEDIR" --log-file $BASEDIR/$DATEDIR/fullbackup_`date +%Y%m%d`.log

sync
sleep 10

find ${BASEDIR} -type f -mtime +31 -exec rm {} \;
find ${BASEDIR} -type d -empty -delete
- 添加定时任务
~]# echo tidb >> /etc/cron.allow
~]$ chmod +x /home/tidb/scripts/fulldbbak.sh
~]$ crontab -l
30 22 * * * /home/tidb/scripts/fulldbbak.sh > /home/tidb/scripts/fulldb_bak_$(date +\%Y\%m\%d).log 2>&1
3.3.3. tiup 组件备份
- 创建备份目录
~]$ mkdir -p /tidbbak/tiup
#!/bin/bash
echo "Begin to tar the tiup component"
tar -czvf /tidbbak/tiup/tiupbak_`date +%Y%m%d`.tar.gz /home/tidb/.tiup
sleep 5

echo "Delete the backup files before 7 days"
find /tidbbak/tiup -type f -mtime +7 -exec rm {} \;
echo "End to backup the tiup component"
- 添加定时任务
~]$ crontab -l
0 22 * * * /home/tidb/scripts/tiupbak.sh > /home/tidb/scripts/tiup_bak_$(date +\%Y\%m\%d).logc 2>&1
3.3.4. 全量恢复
备份文件(sst)文件保存在 /tidbbak/db/20230411/ 中为例。
- 删除内置 test 数据库
[tidb@h200 ~]$ mysql -P13390 -h192.168.3.200 -uroot -proot

mysql> drop database test;
mysql> show databases;
+--------------------+
| Database           |
+--------------------+
| INFORMATION_SCHEMA |
| METRICS_SCHEMA     |
| PERFORMANCE_SCHEMA |
| mysql              |
+--------------------+
5 rows in set (0.00 sec)
- 执行数据库快照恢复
~]$ export PD_ADDR="192.168.3.201:2379" && export BAKDIR="/tidbbak/db/20230411/"
~]$ tiup br restore full --pd "${PD_ADDR}" --storage "local://${BAKDIR}" --log-file restorefull_`date +%Y%m%d`.log

tiup is checking updates for component br ...
Starting component `br`: /home/tidb/.tiup/components/br/v6.1.5/br restore full --pd 192.168.3.201:2379 --storage local:///tidbbak/db/20230411/ --ratelimit 128 --log-file restorefull_20230411.log
Detail BR log in restorefull_20230411.log
Full Restore <---------------------------------------------|.................................................................> 45.45%
- 验证恢复结果
mysql> show databases;
+--------------------+
| Database           |
+--------------------+
| INFORMATION_SCHEMA |
| METRICS_SCHEMA     |
| PERFORMANCE_SCHEMA |
| mysql              |
| test               |
+--------------------+
5 rows in set (0.00 sec)
4. Point-in-time recovery (PITR)
TiDB 6.2 在基于 变更日志 和 快照数据 的备份恢复,实现了 PITR (point-in-time recovery) 功能。使用 PITR 功能,需要将 TiDB 集群及 br 工具均升级至 6.2.0 以上(关于 TiDB 集群与 br 工具升级,可参考 第 4 章 版本升级 )。
4.1. PITR 注意事项
- 执行
SET CONFIG tikv log-backup.enable=true启用日志备份功能。 - 为集群启动
日志备份任务,单个集群只支持启动一个日志备份任务。 - 仅支持恢复到
空集群。 - 仅支持
集群粒度的 PITR。不支持对单个database或table执行PITR,不支持恢复用户表和权限表的数据。 - 如果备份集群包含 TiFlash,执行 PITR 后恢复集群的数据不包含 TiFlash 副本,需要手动恢复 TiFlash 副本。
- 使用
TiDB Lightning Physical方式导入的数据,无法以数据库日志的方式备份下来。 - 备份过程中不支持分区交换 (
Exchange Partition)。 - 不支持在恢复中重复恢复某段时间区间的日志,如果多次重复恢复 [ts1=10, ts2=20) 区间的日志备份数据,可能会造成恢复后的数据不一致。
- 建议恢复的日志区间不超过 2 天,最长不超过 7 天。否则可能引起 br OOM 问题。
- TiDB v6.5.0 中 Fast Online DDL 与 PITR 未完全兼容,需停止 PITR 备份任务,以 Fast Online DDL 完成索引添加,在启动 PITR 备份任务。
4.2. PITR 备份
为了实现 PITR,需要执行以下备份任务:
- KV 变更日志备份
将 TiKV 配置项 log-backup.enable 设为 true ,并运行 br log start 命令,在后台启动 数据库日志 备份任务。该任务持续运行,及时跟踪 KV storage 的变更日志,并保存到备份存储中。可通过 br log status 查看日志备份任务的当前状态。
- 数据库全量(快照)备份
定期运行 br backup full 命令,来备份集群快照到备份存储。建议每隔 2 天,执行一次数据库全量备份。以将恢复的 KV 变更日志区间控制在 2 天内,从而最大限度避免因恢复大量 KV 日志,而导致的 br OOM 问题。
4.2.1. 启动日志备份
-
log-backup.enable=true
log-backup.enable 为 TiDB 6.2.0 版本引入的 TiKV 配置参数,默认值为 false 。自 TiDB 6.3.0 开始,默认值变为 true 。
mysql> SHOW CONFIG where name ='log-backup.enable';
+------+---------------------+-------------------+-------+
| Type | Instance            | Name              | Value |
+------+---------------------+-------------------+-------+
| tikv | 192.168.3.206:20160 | log-backup.enable | false |
| tikv | 192.168.3.204:20160 | log-backup.enable | false |
| tikv | 192.168.3.205:20160 | log-backup.enable | false |
+------+---------------------+-------------------+-------+
3 rows in set (0.02 sec)
截至 TiDB 6.5.1 为止,该参数为配置文件参数,需通过 tiup cluster edit-config <Cluster_Name> 方式修改。
...(省略部分内容)...
server_configs:
  tidb:
    collation_server: utf8mb4_general_ci
    log:
      enable-slow-log: true
      slow-threshold: 300
    new_collations_enabled_on_first_bootstrap: true
  tikv:
    log-backup:
      enable: true
  pd: {}
...(省略部分内容)...
[tidb@h200 ~]$ tiup cluster edit-config demodb
[tidb@h200 ~]$ tiup cluster reload demodb -R tikv
- 启动数据库日志备份任务
将数据库日志备份至目录 /tidbbak/log/
~]$ mkdir -p /tidbbak/log

~]$ tiup br log start --task-name=pitr --pd=192.168.3.201:2379 --storage="local:///tidbbak/log"

~]$ tiup br log status --task-name=pitr --pd=192.168.3.201:2379

● Total 1 Tasks.
> #1 <
              name: pitr
            status: ● NORMAL
             start: 2023-04-12 09:11:44.665 +0800
               end: 2090-11-18 22:07:45.624 +0800
           storage: local:///tidbbak/log
       speed(est.): 0.00 ops/s
checkpoint[global]: 2023-04-12 09:11:44.665 +0800; gap=1m18s
- 数据库日志相关命令
## 查询日志备份任务状态
~]$ tiup br log status --task-name=pitr --pd=192.168.3.201:2379

## 暂停日志备份任务
~]$ tiup br log pause --task-name=pitr --pd=192.168.3.201:2379

## 重启暂停的备份任务
~]$ tiup br log resume --task-name=pitr --pd=192.168.3.201:2379

## 查询备份存储中备份数据的元信息
~]$ tiup br log metadata --storage="local:///tidbbak/log"

## 停止备份任务,并删除任务元信息
~]$ tiup br log stop --task-name=pitr --pd=192.168.3.201:2379

## 从备份存储中清理日志备份数据
~]$ tiup br log truncate --task-name=pitr --pd=192.168.3.201:2379
4.2.2. 执行快照备份
在 2023/04/12 09:20:00 执行一次快照备份
~]$ mkdir -p /tidbbak/db/fullbak_`date +%Y%m%d`
~]$ tiup br backup full --pd "192.168.3.201:2379" --storage "local:///tidbbak/db/fullbak_`date +%Y%m%d`" --log-file /tidbbak/db/fullbak_`date +%Y%m%d`/fullbak_`date +%Y%m%d`.log --backupts='2023/04/12 10:55:00'
4.3. PITR 恢复示例
运行 br restore point 命令, br 根据指定的 恢复时间点 ,读取最近的 快照备份 和 日志备份 的数据,将新集群恢复到指定时间点。
-
场景描述
-
2023/04/12 10:55:00执行快照备份; -
2023/04/12 10:57:00为 test 数据库增加测试表 test01 并插入数据; -
2023/04/12 11:04:00删除业务数据库 tpcc; -
2023/04/12 11:10:00利用快照备份与日志备份,将 TiDB 集群恢复至2023/04/12 11:02:00。即利用快照备份恢复 tpcc 数据库,利用日志备份恢复测试表 test01 中 uid 为1、2、3的数据。
-
4.3.1. 实验过程
- 准备测试数据
mysql> create table test.test01(uid int,udate datetime);

mysql> insert into test.test01(uid,udate)values(1,now());
mysql> insert into test.test01(uid,udate)values(2,now());
mysql> insert into test.test01(uid,udate)values(3,now());
mysql> insert into test.test01(uid,udate)values(4,now());

mysql> select * from test.test01;
+------+---------------------+
| uid  | udate               |
+------+---------------------+
|    1 | 2023-04-12 10:57:03 |
|    2 | 2023-04-12 11:00:05 |
|    3 | 2023-04-12 11:01:56 |
|    4 | 2023-04-12 11:03:31 |
+------+---------------------+

mysql> select now();
+---------------------+
| now()               |
+---------------------+
| 2023-04-12 11:04:41 |
+---------------------+
1 row in set (0.00 sec)

mysql> drop database test;
[tidb@h200 ~]$ tiup br log status --task-name=pitr --pd=192.168.3.201:2379
tiup is checking updates for component br ...
Starting component `br`: /home/tidb/.tiup/components/br/v6.5.1/br log status --task-name=pitr --pd=192.168.3.201:2379
Detail BR log in /tmp/br.log.2023-04-12T11.05.24+0800
● Total 1 Tasks.
> #1 <
              name: pitr
            status: ● NORMAL
             start: 2023-04-12 10:52:39.772 +0800
               end: 2090-11-18 22:07:45.624 +0800
           storage: local:///tidbbak/log
       speed(est.): 0.00 ops/s
checkpoint[global]: 2023-04-12 11:04:48.822 +0800; gap=37s
checkpoint 值为 2023-04-12 11:04:48.822 ,说明集群中早于该时刻的数据均已备份到日志备份存储中,也是备份数据可 PITR 恢复的最近时间点。
- 准备空集群
这里为了演示目的,直接销毁并重建 TiDB 集群以准备 TiDB 空集群。
~]$ tiup cluster destroy demodb
~]$ tiup cluster deploy demodb v6.5.1 ./topology.yaml --user tidb
- PITR 恢复
~]$ tiup br restore point --pd="192.168.3.201:2379" \
--storage="local:///tidbbak/log" \
--full-backup-storage="local:///tidbbak/db/fullbak_`date +%Y%m%d`" \
--restored-ts '2023-04-12 11:02:00+0800'

tiup is checking updates for component br ...
Starting component `br`: /home/tidb/.tiup/components/br/v6.5.1/br restore point --pd=192.168.3.201:2379 --storage=local:///tidbbak/log --full-backup-storage=local:///tidbbak/db/fullbak_20230412 --restored-ts 2023-04-12 11:02:00+0800
Detail BR log in /tmp/br.log.2023-04-12T11.09.41+0800
Full Restore <-----------------------------------------------------------------------------------------------------------------------------------> 100.00%
Restore Meta Files <-----------------------------------------------------------------------------------------------------------------------------> 100.00%
Restore KV Files <-------------------------------------------------------------------------------------------------------------------------------> 100.00%
报错信息显示,最新的数据库日志时间戳为 2023-04-12 09:33:30.715 +0800 CST 。因此,调整恢复命令的时间戳为 2023-04-12 09:33:00+0800 。
- 验证恢复结果
因执行 PITR 恢复时,指定时间戳 --restored-ts '2023-04-12 11:02:00+0800' 。因此,测试表 test01 中 uid=4 的记录不会被恢复(该数据生成时间为 2023-04-12 11:03:31 )。
mysql> show databases;
+--------------------+
| Database           |
+--------------------+
| INFORMATION_SCHEMA |
| METRICS_SCHEMA     |
| PERFORMANCE_SCHEMA |
| mysql              |
| test               |
+--------------------+
5 rows in set (0.00 sec)

mysql> select * from test.test01;
+------+---------------------+
| uid  | udate               |
+------+---------------------+
|    1 | 2023-04-12 10:57:03 |
|    2 | 2023-04-12 11:00:05 |
|    3 | 2023-04-12 11:01:56 |
+------+---------------------+
3 rows in set (0.00 sec)
4.4. PITR 备份策略
- 快照备份
可参照章节 3.4.2. 自动备份 的定时备份任务。准备快照备份脚本 fulldbbak.sh ,内容如下。
#!/bin/bash
export DATEDIR=`date +%Y%m%d`
export BASEDIR=/tidbbak/db

mkdir -p $BASEDIR/$DATEDIR

/home/tidb/.tiup/bin/tiup br backup full --pd "192.168.3.201:2379" --storage "local://$BASEDIR/$DATEDIR" --ratelimit 120 --log-file $BASEDIR/$DATEDIR/fullbackup_`date +%Y%m%d`.log

sync
sleep 5

find ${BASEDIR} -type f -mtime +31 -exec rm {} \;
find ${BASEDIR} -type d -empty -delete
将以上快照备份脚本 ``
~]# echo tidb >> /etc/cron.allow
~]$ crontab -l
30 22 * * * /home/tidb/scripts/fulldbbak.sh > /home/tidb/scripts/fulldb_bak_$(date +\%Y\%m\%d).log 2>&1
- 日志备份
可参照章节 3.5.2.1. 启动日志备份 启动日志备份任务。因日志备份自动在后台持续运行,因此直接执行 tiup br log start 命令即可。如下所示。
## 创建日志备份存储目录
~]$ mkdir -p /tidbbak/log

## 启动日志备份任务
~]$ tiup br log start --task-name=pitr --pd=192.168.3.201:2379 --storage="local:///tidbbak/log"

## 查看日志备份状态
~]$ tiup br log status --task-name=pitr --pd=192.168.3.201:2379

● Total 1 Tasks.
> #1 <
              name: pitr
            status: ● NORMAL
             start: 2023-04-12 09:11:44.665 +0800
               end: 2090-11-18 22:07:45.624 +0800
           storage: local:///tidbbak/log
       speed(est.): 0.00 ops/s
checkpoint[global]: 2023-04-12 09:11:44.665 +0800; gap=1m18s
- 备份日志清理
可根据需要,定期清理不需要的日志备份。本例配合快照备份策略,清理 31 天之前的日志备份。编辑脚本 purge_kvlog.sh 内容如下。
#!/bin/bash

# 获取 31 天之前的时间戳
BEFORE=$(date --date="31 days ago" +"%Y-%m-%d %H:%M:%S %z")

# 清理 BEFORE 时间戳之前的数据库日志备份
tiup br log truncate --until=${BEFORE} --storage='local:///tidbbak/log'
添加定时任务
~]$ chmod +x /home/tidb/scripts/purge_kvlog.sh
~]$ crontab -l
30 22 * * * /home/tidb/scripts/fulldbbak.sh   > /home/tidb/scripts/fulldb_bak_$(date +\%Y\%m\%d).log 2>&1
30 23 * * * /home/tidb/scripts/purge_kvlog.sh > /home/tidb/scripts/purge_kvlog_$(date +\%Y\%m\%d).log 2>&1
5. 版本升级
5.1. TiDB 离线升级
社区内见过诸多因 TiFlash 导致升级失败的案例。因此,为安全起见建议先将 TiFlash 节点缩容后再升级 TiDB 集群。待升级成功后,再扩容 TiFlash 节点。
关于 TiFlash 升级的更多注意事项,可参考官方链接: https://docs.pingcap.com/zh/tidb/stable/tiflash-620-upgrade-guide
5.1.1. 离线镜像准备
## 1. 下载 6.5.1 离线包
~]$ export version=v6.5.1 && wget https://download.pingcap.org/tidb-community-server-${version}-linux-amd64.tar.gz
~]$ wget https://download.pingcap.org/tidb-community-toolkit-${version}-linux-amd64.tar.gz

~]$ chown tidb:tidb tidb-community-*-${version}-linux-amd64.tar.gz

## 2. 部署 TiUP 组件
~]$ tar -xzvf tidb-community-server-${version}-linux-amd64.tar.gz
~]$ tar -xzvf tidb-community-toolkit-${version}-linux-amd64.tar.gz

~]$ sh tidb-community-server-${version}-linux-amd64/local_install.sh
~]$ source /home/tidb/.bash_profile

## 3. 合并 server 与 toolkit 镜像
~]$ cd tidb-community-server-${version}-linux-amd64/
~]$ cp -rp keys ~/.tiup/
~]$ tiup mirror merge ../tidb-community-toolkit-${version}-linux-amd64

## 4. 查看离线镜像
~]$ tiup mirror show
/home/tidb/tidb-community-server-v6.5.1-linux-amd64
5.1.2. 升级检查
- 确认或修改配置
执行升级操作前,需要检查官方的 TiDB 版本 release note,检查兼容性。根据实际配置项做相应修改。
~]$ tiup cluster edit-config demodb

  tikv:
    log-backup:
      enable: true
- 检查集群
[tidb@h200 ~]$ tiup cluster check demodb --cluster
[tidb@h200 ~]$ [tidb@h200 ~]$ mysql -P13390 -h192.168.3.200 -uroot -proot
mysql> ADMIN SHOW DDL
确保集群环境检查通过,并没有正在执行的 ddl 操作。
5.1.3. 停机升级
- 停止集群
[tidb@h200 ~]$ tiup cluster stop demodb
- 执行离线升级
[tidb@h200 ~]$ tiup cluster upgrade demodb v6.5.1 --offline
tiup is checking updates for component cluster ...
Starting component `cluster`: /home/tidb/.tiup/components/cluster/v1.11.3/tiup-cluster upgrade demodb v6.5.1 --offline
Before the upgrade, it is recommended to read the upgrade guide at https://docs.pingcap.com/tidb/stable/upgrade-tidb-using-tiup and finish the preparation steps.
This operation will upgrade tidb v6.1.5 cluster demodb to v6.5.1.
Do you want to continue? [y/N]:(default=N) y
...(省略部分内容)...
+ [ Serial ] - UpgradeCluster
Upgraded cluster `demodb` successfully
- 启动并检查集群
[tidb@h200 ~]$ tiup cluster start demodb
[tidb@h200 ~]$ tiup cluster display demodb
5.2. 生态工具升级
因在 5.1 TiDB 离线升级 章节中,已将 TiDB Server 与 TiDB ToolKit 工具包进行镜像合并。因此,再首次执行 tiup 组件时,会自动检查版本并升级。
[tidb@h200 ~]$ tiup br
tiup is checking updates for component br ...
A new version of br is available:
   The latest version:         v6.5.1
   Local installed version:
   Update current component:   tiup update br
   Update all components:      tiup update --all

The component `br` version  is not installed; downloading from repository.
Starting component `br`: /home/tidb/.tiup/components/br/v6.5.1/br
br is a TiDB/TiKV cluster backup restore tool.


