小学生python游戏编程arcade----精灵调用图片的两种类
- 前言
- 精灵调用图片的两种类
- 1、第一种类的定义
- 1.1 以文件名及缩放比例做初始参数
- 1.2 利用变换图片的颜色更换角色的使用
- 1.3 代码分析
- 转换文件来不及调用,时间问题??????
- 2、第二种方法,通过sprite的texture直接赋值
- 2.1精灵的两种加载图片方式
- 2.2 两种方式,上述类是一种以文件形赋值的 # 添加角色.
- 2.3 修改类
- 2.4 调用第二种类的代码实现
- 源码获取
前言
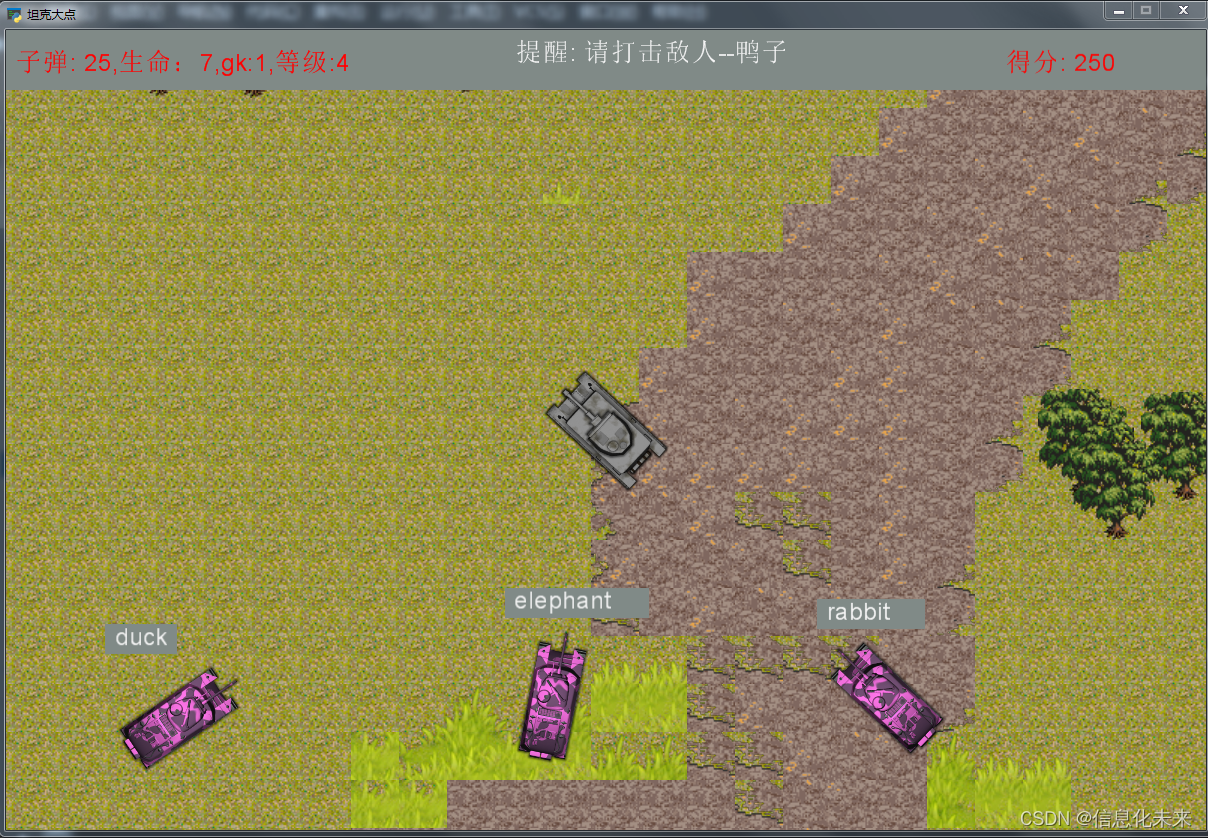
接上篇文章继续解绍arcade游戏编程的基本知识。精灵调用图片纹理的两种类的实现,一种直接引用图片文件,一种利用arcade.load_texture的过度,直接给精灵赋值。如上次写的,游戏升级时,通过程序换精灵的颜色,用后种方法定义的类较好。
精灵调用图片的两种类
1、第一种类的定义
1.1 以文件名及缩放比例做初始参数
class Enemy_tank(arcade.Sprite):
    def __init__(self, filename, scale, x, y, speed_to_player=0.2):
        super().__init__(filename, scale)
        self.center_x = x
        self.center_y = y
        self.word = 'book'
        self.hz = '书'
        self.life = 1  # 生命条数,即挨几颗子弹消失
        self.speed_to_player = speed_to_player  # 面向角色移动的速度

    def draw_word(self, x, y, fcolor=arcade.csscolor.WHITE_SMOKE, fsize=18, text=None):
        xs=fsize
        if text:
            arcade.draw_rectangle_filled(x+len(self.word)*xs//2-10,y+5,len(text)*xs,30,(128,138,135))
            arcade.draw_text(text, x, y, fcolor, fsize)

        else:
            arcade.draw_rectangle_filled(x+len(self.word)*xs//2-10,y+5,len(self.word)*xs, 30,(128,138,135))
            arcade.draw_text(self.word, x, y, fcolor, fsize)

    def update(self):
        super().update()
        if self.speed_to_player:
            # 敌人向角色移动变量
            self.change_x = math.cos(self.angle) * 0.2
            self.change_y = math.sin(self.angle) * 0.2
1.2 利用变换图片的颜色更换角色的使用
    def setup_enemy(self):
        # pass
        self.scene.add_sprite_list_after(LAYER_tanks, 'wj')
        if len(self.word_keys) == 0:
            if self.danyuan==len(self.gk[self.year]):
                self.level += 1
                self.year =self.years[self.level]
            else:
                self.danyuan += 1
                self.setup_word(self.danyuan, self.year)

        if len(self.word_keys) > 0:
            self.key = self.word_dict[self.word_keys[0]]  # 朋友
            # print('key',self.key)
            xsword = {}
            xsword[self.word_keys[0]] = self.word_dict[self.word_keys[0]]
            # 随机取3
            sankey = random.sample(self.word_dict.keys(), 3)
            if self.word_keys[0] in sankey:
                sankey.remove(self.word_keys[0])
            # 增加两个敌人
            xsword[sankey[0]] = self.word_dict[sankey[0]]
            xsword[sankey[1]] = self.word_dict[sankey[1]]

            # 增加随机坦克
            posx=[]
            random_x= random.random()*SCREEN_width/3
            for jj in range(3):
                tempx=random_x+400*jj
                if tempx>self.end_of_map:
                    tempx=random.random()*SCREEN_width/2
                posx.append(tempx)
            random_y = random.random() * self.top_of_map / 3
            random.shuffle(posx)  # 打乱顺序
            # print(posx)
            j=0

            # 转换文件来不及调用,时间问题??????
            tempcolorh = random.random()
            # print('color',tempcolorh)
            tempic = change_color_tmpic(Image.open("images/坦克2.png"), tempcolorh)
            tempfile = 'images/temp'+str(tempcolorh)+'.png'
            tempic.save(tempfile)
            for x in xsword:
                tank = Enemy_tank(tempfile, 0.5, posx[j], random_y)
                tank.word = x
                tank.hz = xsword[x]
                self.scene.add_sprite(LAYER_tanks, tank)
                j +=1
            if (os.path.exists(tempfile)):
                # 存在,则删除文件
                os.remove(tempfile)
            # 去掉已显示单词
            self.word_keys.remove(self.word_keys[0])


        # 增加子弹层
        self.scene.add_sprite_list_after(LAYER_bullet, 'wj')
        # 增加爆炸粒子列表
        self.scene.add_sprite_list_after(LAYER_explosions, 'wj')
1.3 代码分析
转换文件来不及调用,时间问题??????
        tempcolorh = random.random()
        # print('color',tempcolorh)
        tempic = change_color_tmpic(Image.open("images/坦克2.png"), tempcolorh)
        tempfile = 'images/temp'+str(tempcolorh)+'.png'
        tempic.save(tempfile)
        for x in xsword:
            tank = Enemy_tank(tempfile, 0.5, posx[j], random_y)
            tank.word = x
            tank.hz = xsword[x]
            self.scene.add_sprite(LAYER_tanks, tank)
            j +=1
        if (os.path.exists(tempfile)):
            # 存在,则删除文件
            os.remove(tempfile)
        # 去掉已显示单词
        self.word_keys.remove(self.word_keys[0])
        此用需要借助临时文件,再生成精灵,中间还遇到个问题,使用tempfile做为过度赋值,结果游戏敌人坦克不变色,最后通过每次生成文件名不同,可以实现效果。
2、第二种方法,通过sprite的texture直接赋值
2.1精灵的两种加载图片方式
通过查看sprite的类的定义原码,如下
class Sprite:
    """
    Class that represents a 'sprite' on-screen. Most games center around sprites.
    For examples on how to use this class, see:
    https://api.arcade.academy/en/latest/examples/index.html#sprites

    :param str filename: Filename of an image that represents the sprite.
    :param float scale: Scale the image up or down. Scale of 1.0 is none.
    :param float image_x: X offset to sprite within sprite sheet.
    :param float image_y: Y offset to sprite within sprite sheet.
    :param float image_width: Width of the sprite
    :param float image_height: Height of the sprite
    :param float center_x: Location of the sprite
    :param float center_y: Location of the sprite
    :param bool flipped_horizontally: Mirror the sprite image. Flip left/right across vertical axis.
    :param bool flipped_vertically: Flip the image up/down across the horizontal axis.
    :param bool flipped_diagonally: Transpose the image, flip it across the diagonal.
    :param str hit_box_algorithm: One of None, 'None', 'Simple' or 'Detailed'.
          Defaults to 'Simple'. Use 'Simple' for the :data:`PhysicsEngineSimple`,
          :data:`PhysicsEnginePlatformer`
          and 'Detailed' for the :data:`PymunkPhysicsEngine`.
    :param Texture texture: Specify the texture directly. 直接指定纹理
    :param float angle: The initial rotation of the sprite in degrees

    This will ignore all hit box and image size arguments.

        .. figure:: ../images/hit_box_algorithm_none.png
           :width: 40%

           hit_box_algorithm = "None"

        .. figure:: ../images/hit_box_algorithm_simple.png
           :width: 55%

           hit_box_algorithm = "Simple"

        .. figure:: ../images/hit_box_algorithm_detailed.png
           :width: 75%

           hit_box_algorithm = "Detailed"

    :param float hit_box_detail: Float, defaults to 4.5. Used with 'Detailed' to hit box

    Attributes:
        :alpha: Transparency of sprite. 0 is invisible, 255 is opaque.
        :angle: Rotation angle in degrees. Sprites rotate counter-clock-wise.
        :radians: Rotation angle in radians. Sprites rotate counter-clock-wise.
        :bottom: Set/query the sprite location by using the bottom coordinate. \
        This will be the 'y' of the bottom of the sprite.
        :boundary_left: Used in movement. Left boundary of moving sprite.
        :boundary_right: Used in movement. Right boundary of moving sprite.
        :boundary_top: Used in movement. Top boundary of moving sprite.
        :boundary_bottom: Used in movement. Bottom boundary of moving sprite.
        :center_x: X location of the center of the sprite
        :center_y: Y location of the center of the sprite
        :change_x: Movement vector, in the x direction.
        :change_y: Movement vector, in the y direction.
        :change_angle: Change in rotation.
        :color: Color tint the sprite
        :collision_radius: Used as a fast-check to see if this item is close \
        enough to another item. If this check works, we do a slower more accurate check. \
        You probably don't want to use this field. Instead, set points in the \
        hit box.
        :cur_texture_index: Index of current texture being used.
        :guid: Unique identifier for the sprite. Useful when debugging.
        :height: Height of the sprite.
        :force: Force being applied to the sprite. Useful when used with Pymunk \
        for physics.
        :hit_box: Points, in relation to the center of the sprite, that are used \
        for collision detection. Arcade defaults to creating a hit box via the \
        'simple' hit box algorithm \
        that encompass the image. If you are creating a ramp or making better \
        hit-boxes, you can custom-set these.
        :left: Set/query the sprite location by using the left coordinate. This \
        will be the 'x' of the left of the sprite.
        :position: A list with the (x, y) of where the sprite is.
        :right: Set/query the sprite location by using the right coordinate. \
        This will be the 'y=x' of the right of the sprite.
        :sprite_lists: List of all the sprite lists this sprite is part of.
        :texture: :class:`arcade.Texture` class with the current texture. Setting a new texture does \
        **not** update the hit box of the sprite. This can be done with \
        ``my_sprite.hit_box = my_sprite.texture.hit_box_points``. New textures will be centered \
        on the current center_x/center_y.
        :textures: List of textures associated with this sprite.
        :top: Set/query the sprite location by using the top coordinate. This \
        will be the 'y' of the top of the sprite.
        :scale: Scale the image up or down. Scale of 1.0 is original size, 0.5 \
        is 1/2 height and width.
        :velocity: Change in x, y expressed as a list. (0, 0) would be not moving.
        :width: Width of the sprite

    It is common to over-ride the `update` method and provide mechanics on
    movement or other sprite updates.
    """

    def __init__(
        self,
        filename: str = None,
        scale: float = 1,
        image_x: float = 0,
        image_y: float = 0,
        image_width: float = 0,
        image_height: float = 0,
        center_x: float = 0,
        center_y: float = 0,
        repeat_count_x: int = 1,  # Unused
        repeat_count_y: int = 1,  # Unused
        flipped_horizontally: bool = False,
        flipped_vertically: bool = False,
        flipped_diagonally: bool = False,
        hit_box_algorithm: Optional[str] = "Simple",
        hit_box_detail: float = 4.5,
        texture: Texture = None,
        angle: float = 0,
    ):
        """ Constructor """
        # Position, size and orientation properties
        self._width: float = 0.0
        self._height: float = 0.0
        self._scale: float = scale
        self._position: Point = (center_x, center_y)
        self._angle = angle
        self.velocity = [0.0, 0.0]
        self.change_angle: float = 0.0

        # Hit box and collision property
        self._points: Optional[PointList] = None
        self._point_list_cache: Optional[PointList] = None
        self._hit_box_shape: Optional[ShapeElementList] = None
        self._hit_box_algorithm = hit_box_algorithm
        self._hit_box_detail = hit_box_detail
        self._collision_radius: Optional[float] = None

        # Color
        self._color: RGB = (255, 255, 255)
        self._alpha: int = 255

        # Custom sprite properties
        self._properties: Optional[Dict[str, Any]] = None

        # Boundaries for moving platforms in tilemaps
        self.boundary_left: Optional[float] = None
        self.boundary_right: Optional[float] = None
        self.boundary_top: Optional[float] = None
        self.boundary_bottom: Optional[float] = None

        # Texture properties
        self._texture: Optional[Texture] = None
        self.textures: List[Texture] = []
        self.cur_texture_index: int = 0

        self.sprite_lists: List["SpriteList"] = []
        self.physics_engines: List[Any] = []
        self._sprite_list: Optional["SpriteList"] = None  # Used for Sprite.draw()

        # Pymunk specific properties
        self._pymunk: Optional[PyMunk] = None
        self.force = [0, 0]

        # Debug properties
        self.guid: Optional[str] = None

        # Sanity check values
        if image_width < 0:
            raise ValueError("Width of image can't be less than zero.")

        if image_height < 0:
            raise ValueError(
                "Height entered is less than zero. Height must be a positive float."
            )

        if image_width == 0 and image_height != 0:
            raise ValueError("Width can't be zero.")

        if image_height == 0 and image_width != 0:
            raise ValueError("Height can't be zero.")

        if hit_box_algorithm not in ["Simple", "Detailed", "None", None]:
            raise ValueError(
                "hit_box_algorithm must be 'Simple', 'Detailed', 'None' or None"
            )

        if texture:
            self._texture = texture
            self._textures = [texture]
            self._width = self._texture.width * scale
            self._height = self._texture.height * scale
        elif filename is not None:
            self._texture = load_texture(
                filename,
                image_x,
                image_y,
                image_width,
                image_height,
                flipped_horizontally=flipped_horizontally,
                flipped_vertically=flipped_vertically,
                flipped_diagonally=flipped_diagonally,
                hit_box_algorithm=hit_box_algorithm,
                hit_box_detail=hit_box_detail,
            )
            self.textures = [self._texture]
            # Ignore the texture's scale and use ours
            self._width = self._texture.width * scale
            self._height = self._texture.height * scale

        if self._texture and not self._points:
            self._points = self._texture.hit_box_points
2.2 两种方式,上述类是一种以文件形赋值的 # 添加角色.
一以文件引用
image_source = “images/bird.png”
self.player_sprite = arcade.Sprite(image_source, CHARACTER_SCALING)
self.player_sprite.center_x = 64
self.player_sprite.center_y = 128
self.player_list.append(self.player_sprite)
二 以texture引用
# 添加角色.
# image_source = “images/bird.png”
texture = arcade.load_texture(f"images/bird.png")
# self.player_sprite = arcade.Sprite(image_source, CHARACTER_SCALING)
self.player_sprite = arcade.Sprite(texture=texture, scale=CHARACTER_SCALING)
self.player_sprite.center_x = 64
self.player_sprite.center_y = 128
self.player_list.append(self.player_sprite)
2.3 修改类
# 不调用文件,直接给texture给值
class Enemy_tank_pic(arcade.Sprite):
    def __init__(self, texture, scale, x, y, speed_to_player=0.2):
        super().__init__(texture=texture, scale=scale)
        self.center_x = x
        self.center_y = y
        self.word = 'book'
        self.hz = '书'
        self.life = 1  # 生命条数,即挨几颗子弹消失
        self.speed_to_player = speed_to_player  # 面向角色移动的速度

    def draw_word(self, x, y, fcolor=arcade.csscolor.WHITE_SMOKE, fsize=18, text=None):
        xs=fsize
        if text:
            arcade.draw_rectangle_filled(x+len(self.word)*xs//2-10,y+5,len(text)*xs,30,(128,138,135))
            arcade.draw_text(text, x, y, fcolor, fsize)

        else:
            arcade.draw_rectangle_filled(x+len(self.word)*xs//2-10,y+5,len(self.word)*xs, 30,(128,138,135))
            arcade.draw_text(self.word, x, y, fcolor, fsize)

    def update(self):
        super().update()
        if self.speed_to_player:
            # 敌人向角色移动变量
            self.change_x = math.cos(self.angle) * 0.2
            self.change_y = math.sin(self.angle) * 0.2
2.4 调用第二种类的代码实现
            # 转换文件来不及调用,时间问题??????
            tempcolorh = random.random()
            tempic = change_color_tmpic(Image.open("images/坦克2.png"), tempcolorh)
            tempfile = 'images/temp.png'
            tempic.save(tempfile)
            texture = arcade.load_texture(tempfile)
            for x in xsword:
                tank = Enemy_tank_pic(texture, 0.5, posx[j], random_y)
                tank.word = x
                tank.hz = xsword[x]
                self.scene.add_sprite(LAYER_tanks, tank)
                j +=1
            # 去掉已显示单词
            self.word_keys.remove(self.word_keys[0])
问题一样存在
调整如下
            # 转换文件来不及调用,时间问题??????
            tempcolorh = random.random()
            tempic = change_color_tmpic(Image.open("images/坦克2.png"), tempcolorh)
            # tempfile = 'images/temp.png'
            # tempic.save(tempfile)
            # texture = arcade.load_texture(tempfile)
            for x in xsword:
                tank = Enemy_tank_pic(tempic, 0.5, posx[j], random_y)
                tank.word = x
                tank.hz = xsword[x]
                self.scene.add_sprite(LAYER_tanks, tank)
                j +=1
            # 去掉已显示单词
            self.word_keys.remove(self.word_keys[0])
出现问题:
  File "E:\pgame\arcadegame\tank.py", line 135, in __init__
    super().__init__(texture=texture, scale=scale)
  File "E:\pgame\venv\lib\site-packages\arcade\sprite.py", line 274, in __init__
    self._points = self._texture.hit_box_points
  File "E:\pgame\venv\lib\site-packages\PIL\Image.py", line 548, in __getattr__
    raise AttributeError(name)
AttributeError: hit_box_points
源码获取
可关注博主后,私聊博主免费获取
需要技术指导,育娃新思考,企业软件合作等更多服务请联系博主
今天是以此模板持续更新此育儿专栏的第35/50次。
可以关注我,点赞我、评论我、收藏我啦。


![[附源码]SSM计算机毕业设计文章管理系统查重PPTJAVA](https://img-blog.csdnimg.cn/a519236f455340098be0904ada9ff5dd.png)

![[附源码]SSM计算机毕业设计鲜花销售管理系统JAVA](https://img-blog.csdnimg.cn/17c41ce230b743b993d1a1e349bd81a6.png)
