四个小案例手把手教你Vue2基础轻松入门_学习笔记
本文将通过四个小案例介绍Vue2学习
根据 黑马程序员vue前端基础教程-4个小时带你快速入门vue 教程。
因教程中的网络项目和综合项目难度不高,且内容仅为综合使用,本笔记不另介绍。
* 源自教程,但不局限于教程。有笔者自己的想法和思考。希望能对你有所帮助。
本地项目:
vue的导入包:
<script src="https://cdn.jsdelivr.net/npm/vue@2/dist/vue.js"></script>
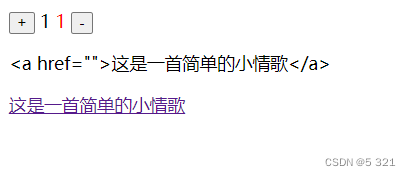
1、计数器案例
这里以一个计数器为例,分别讲解:
- 挂载点、函数使用、数据和复杂数据
- v-text
- v-html
- v-on:click、@click
<body>
    <div id="app">
        <!--
            事件一般为@click="函数名称"或v-on:click="函数名称"
        -->
        <input type="button" value="+" @click="add">
        <!--
            值的引用由两个大括号括起来,如{{变量}}或v-text="变量":
            {{num}}、{{}}
         -->
        <span>{{num}}</span>
        <span v-text="num" style="color: red;"></span>
        <input type="button" value="-" @click="sub">
        <!--
            v-text原样输出内容
         -->
        <p v-text="tip_text"></p>
        <!--
            v-html 输出html解析过的内容
         -->
        <p v-html="tip_text"></p>

    </div>
</body>
<script>
    var App = new Vue({
        // el为寻找dom节点,其值类型可以为id、class、标签名等。写法与css差不多。
        el: "#app",
        // data为数据值,其子值可以为基本数据类型,也可以为数组等复杂类型
        data: {
            num: 1,
            msg: "123",
            sexType: [
                "男",
                "女"
            ],
            tip_text: '<a href="">这是一首简单的小情歌</a>'
        },
        // 函数方法,需要注意写法方式。且使用变量时,需要this
        // 函数名:function(){
        // code
        // };
        methods: {
            add: function() {
                if (this.num < 10) {
                    this.num++;
                } else {
                    alert("不能大于10");
                }
            },
            sub: function() {
                if (this.num > 1) {
                    this.num--;
                } else {
                    alert("不能小于0");
                }
            }
        },
    });
</script>
效果图
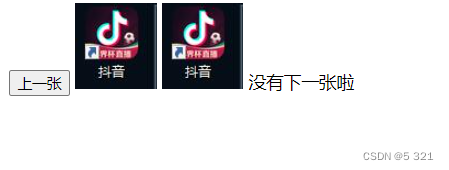
2、图片切换
这里以图片切换为例,分别介绍:
- v-show
- v-if、v-else
- v-bind
<body>
    <div id="app">
        <!--
            v-show:是否显示。本质是控制display属性,即标签存在,只是被隐藏。
            v-if:条件判断显示。本质是控制标签属性,即删除标签。
            v-else:同v-if一致,仅仅是当v-if为假时生效
         -->
        <input type="button" value="上一张" @click="last" v-show="index!=0">
        <img :src="imgSrc">
        <!--
            v-bind:标签属性。用来获取属性标签,可以胜率v-bind。例如v-bind:herf
            v-bind:scr等同于:src
            对绑定变量的另一种使用方法
         -->
        <img :src="imgList[index]">
        <input type="button" value="下一张" @click="next" v-if="index<imgList.length-1">
        <span v-else>没有下一张啦</span>
    </div>
</body>
<script>
    var App = new Vue({
        el: "#app",
        data: {
            imgSrc: "./img/wechat.jpg",
            index: 0,
            imgList: [
                "./img/wechat.jpg",
                "./img/vpn.jpg",
                "./img/douyin.jpg",
            ]
        },
        methods: {
            last: function() {
                this.index--;
                this.imgSrc = this.imgList[this.index];
            },
            next: function() {
                this.index++;
                this.imgSrc = this.imgList[this.index];
            }
        },
    });
</script>
效果图:
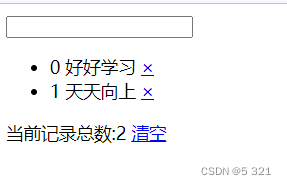
3、记事本案例
下面以一个记事本(叫搜索引擎下拉框更好)为例,分别讲解:
- v-on:keyup
- v-model
- v-for
- 数组添加内容、删除指定索引
- 函数传值
<body>

    <div id="app">
        <!--
            v-on:keyup:获取用户输入内容到函数。
                v-on:keyup.enter:当用户输入后,按下enter键才通知函数。
                更多键值,请查询文档。
            v-model:对数据和表单内容双向绑定,二者同步变化内容。
         -->
        <input type="text" v-on:keyup.enter="tips" v-model="user_text">
        <ul>
            <!--
                v-for:遍历。类似python for循环或java的迭代器写法。
                基础使用:item in Lists
                带索引:(item,index) in Lists
                函数传值:函数名(变量),不需要使用两个大括号引变量。
             -->
            <li v-for="(item,index) in word_list">
                {{index}} {{item}}
                <a href="javascript:void(0)" @click="del(index)">×</a>
            </li>
        </ul>

        <span>当前记录总数:{{word_list.length}}</span>
        <a href="javascript:void(0)" @click="clear">清空</a>
    </div>
</body>
<script>
    var App = new Vue({
        el: "#app",
        data: {
            word_list: [
                "好好学习",
                "天天向上"
            ],
            user_text: ""

        },
        methods: {
            tips: function() {
                // 将user_text的内容添加到列表中
                this.word_list.push(this.user_text);
                this.user_text = "";
            },
            clear: function() {
                // 清空列表
                this.word_list = [];
            },
            del: function(p1) {
                // 删除指定下标的列表
                this.word_list.splice(p1, 1);
            }
        },

    });
</script>
效果图
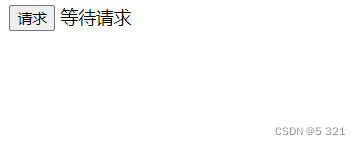
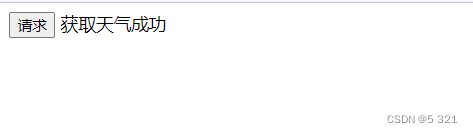
4、axios网络库的使用
<body>
    <div id="app">
        <input type="button" value="请求" @click="send_msg">
        <span>{{msg}}</span>
    </div>
</body>
    <!--
        引入axios库
    -->
<script src="https://unpkg.com/axios/dist/axios.min.js"></script>
<script>
    var vue = new Vue({
        el: "#app",
        data: {
            msg: "等待请求"
        },
        methods: {
            send_msg: function() {
                // 细节处,创建一个变量保存this。若不保存,则无法在下文对变量进行修改。
                var that = this;
                axios.get("http://ajax-api.itheima.net/api/weather?city=%E6%AD%A6%E6%B1%89").then(function(response) {
                    // 此处的this是函数内部的this。
                    that.msg = response.data.message;
                });
            }
        },
    });
</script>
效果图


![[助人为乐]层次分析法](https://img-blog.csdnimg.cn/97cafb8f46bc4bd6830b2387f19d15db.png)

![[Linux]进程控制精讲,简单实现一个shell](https://img-blog.csdnimg.cn/b8dbd2c1012147468d10aa8e81a401e1.png)