目录
简介
一、初识Spring Security(入门案例)
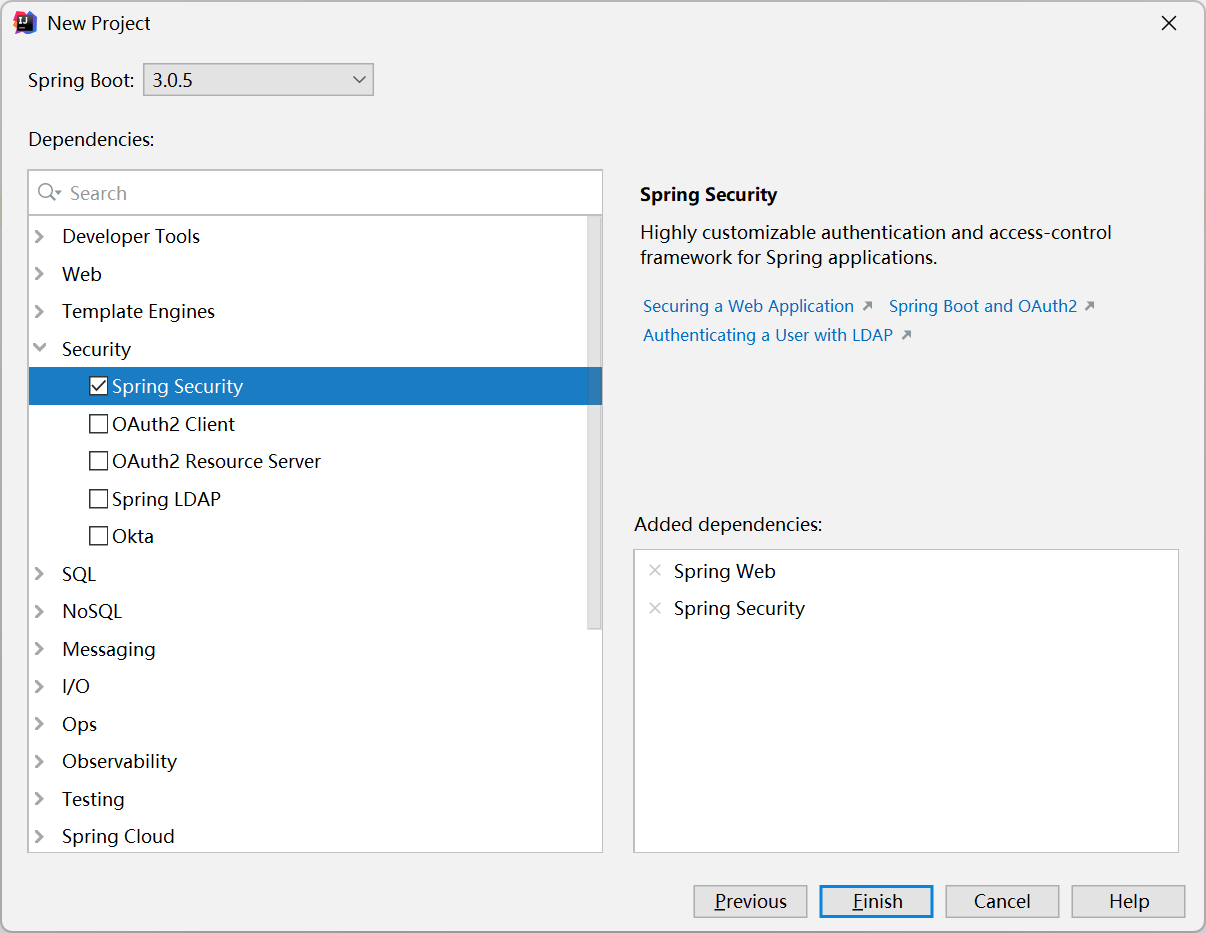
(1)新建project
(2)选择依赖
(3)编写一个 HelloController
(4)启动项目,访问localhost:8080
(5)自定义用户名和密码
二、表单认证
1. 自定义表单登录页
2. 配置spring security
3. 重启项目
编辑
三、认证与授权
1. 资源准备
(1)新建两个controller
(2)资源授权的配置
(3)重启服务访问
2. 基于内存的多用户支持
(1)在内存中配置用户
(2)访问测试
3. 基于默认数据库模型的认证与授权
(1)创建数据库表
(2)引入jdbc依赖,配置数据库
(3)配置spring securiy授权
4. 基于自定义数据库模型的认证与授权
(1)数据库准备
(2)编写实体类User
(3)编写自定义的UserDetailsServiceImpl
(4)编写Mapper
(5)spring security 配置
(6)测试
简介
一般Web应用的需要进行认证和授权。
认证:验证当前访问系统的是不是本系统的用户,并且要确认具体是哪个用户
授权:经过认证后判断当前用户是否有权限进行某个操作
而认证和授权也是SpringSecurity作为安全框架的核心功能。
(1)前后端分离项目登录校验流程:

(2)Spring Security 完整流程
Spring Security 的原理其实就是一个过滤器链,内部包含了提供各种功能的过滤器,如:

一、初识Spring Security(入门案例)
(1)新建project

(2)选择依赖
(3)编写一个 HelloController
@RestController
@RequestMapping("/")
public class HelloController {
@GetMapping("/hello")
public String hello() {
return "hello spring security!";
}
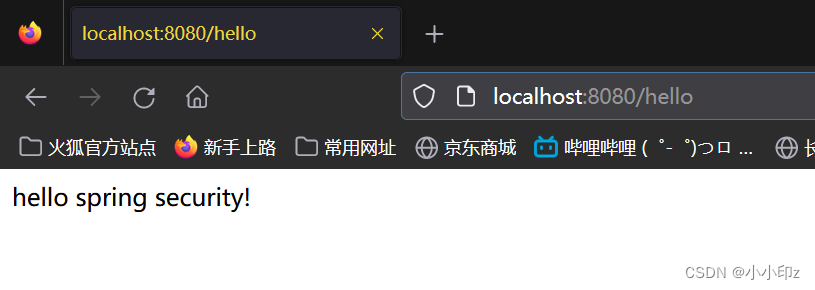
}(4)启动项目,访问localhost:8080
即使没有任何配置,在引入Spring Security后,要访问对应的 URL 资源需要经过HTTP基本认证。
启动后,控制台会打印一个初始密码,如图:

访问localhost:8080,填写登录信息(这就是HTTP基本认证),填写用户名 user


(5)自定义用户名和密码
在配置文件 application.yml 中配置用户名和密码,重启项目之后使用该用户名和密码即可登录。
spring:
  security:
    user:
      name: zy
      password: abc
入门案例总结:

Authentication接口: 它的实现类,表示当前访问系统的用户,封装了用户相关信息。
AuthenticationManager接口:定义了认证Authentication的方法
UserDetailsService接口:加载用户特定数据的核心接口。里面定义了一个根据用户名查询用户信息的方法。
UserDetails接口:提供核心用户信息。通过UserDetailsService根据用户名获取处理的用户信息要封装成UserDetails对象返回。然后将这些信息封装到Authentication对象中。
步骤:
(1)提交用户名和密码之后,会将用户名和密码传给UsernamePasswordAuthenticationFilter
UsernamePasswordAuthenticationFilter是Spring Security中一个非常重要的过滤器,它负责处理基于表单的身份验证,即当用户提交包含用户名和密码的表单时,该过滤器会从该请求中提取用户名和密码并进行身份验证。
(2)UsernamePasswordAuthenticationFilter调用authenticate() 方法进行认证
执行该方法时,它会获取请求中的用户名和密码参数,然后调用 AuthenticationManager 对象的 authenticate() 方法来进行身份验证。如果身份验证成功,则创建一个 Authentication 对象并将其传递给 SecurityContextHolder 中。如果身份验证失败,则会抛出 AuthenticationException。
(3)AuthenticationManager 会继续调用DaoAuthenticationProvider的authenticate() 进行验证
DaoAuthenticationProvider是一个AuthenticationProvider的实现类,用于处理用户名和密码验证的过程。当AuthenticationManager调用authenticate()方法时,实际上是委托给了DaoAuthenticationProvider来处理认证请求。
(4)DaoAuthenticationProvider也会调用 loadUserByUsername() 方法查询用户
在DaoAuthenticationProvider的authenticate()方法中,会先调用UserDetailsService的loadUserByUsername()方法获取用户信息,(这里根据实际情况可能去内存中查找,也可以去数据库查找)然后再将获取到的用户信息与用户输入的密码进行比较,最终确定用户是否通过认证。因此,在认证流程中,loadUserByUsername()方法是一个非常重要的环节。
(5)返回 UserDetail对象
loadUserByUsername() 方法主要是根据给定的用户名查询用户信息,并返回一个 UserDetails 对象。该方法的具体实现可能会涉及到访问数据库或其他存储设备,以获取用户的详细信息。在 Spring Security 中,这个方法通常由 UserDetailsService 的实现类来完成。在实现类中,通常会根据用户名查询用户信息,并将其封装为一个 UserDetails 对象,以便后续的身份验证过程中使用。UserDetails 对象包含用户的身份信息、授权信息和其他详细信息,如密码和是否启用等。
(6)通过PasswordEncoder对象对比UserDetail的密码和提交的密码是否一致
通过PasswordEncoder对象将用户输入的密码加密,然后与UserDetails中存储的加密后的密码进行比较,来验证用户的身份。如果两者一致,则认为用户身份验证通过。PasswordEncoder主要用于将密码进行加密,以提高安全性。
(7)如果正确就把UserDetails中的权限信息设置到Authentication对象中
(8)返回Authentication对象
(9)将认证成功的 Authentication 对象存储在 SecurityContextHolder 中
SecurityContextHolder 会使用 ThreadLocal 来存储认证对象,以确保每个线程都有自己的 SecurityContext 实例。在接下来的请求中,其他过滤器可以使用 SecurityContextHolder.getContext().getAuthentication() 方法获取该认证对象。
二、表单认证
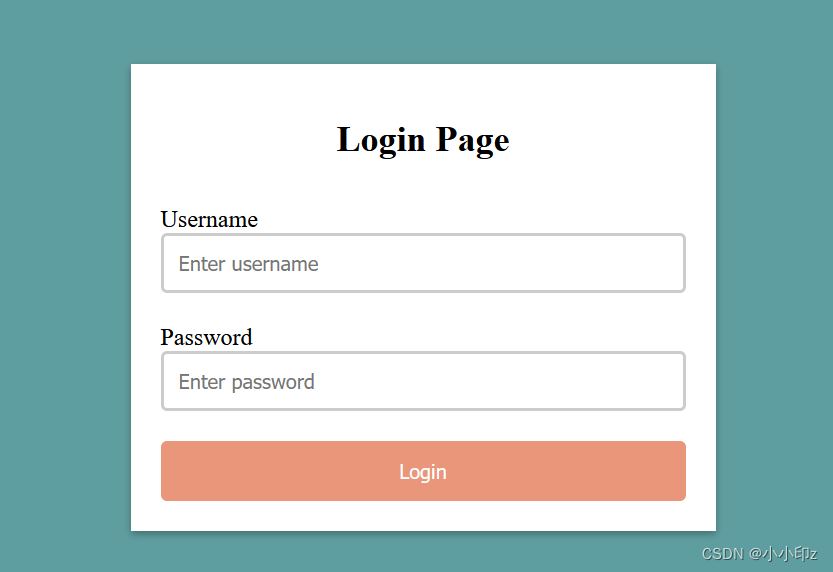
1. 自定义表单登录页
login.html,放在static下
<!DOCTYPE html>
<html lang="en" xmlns:th="http://www.thymeleaf.org">
<head>
    <meta charset="UTF-8">
    <title>Login Page</title>
    <style>
        /* 样式可以自行修改 */
        body {
            background-color: cadetblue;
        }

        .login-form {
            width: 350px;
            margin: 150px auto;
            background-color: #fff;
            padding: 20px;
            box-shadow: 0 2px 5px rgba(0, 0, 0, 0.3);
        }

        h1 {
            font-size: 24px;
            text-align: center;
            margin-bottom: 30px;
        }

        input[type="text"], input[type="password"] {
            width: 100%;
            padding: 10px;
            margin-bottom: 20px;
            border: 2px solid #ccc;
            border-radius: 4px;
            box-sizing: border-box;
        }

        button {
            background-color: darksalmon;
            color: white;
            padding: 12px 20px;
            border: none;
            border-radius: 4px;
            cursor: pointer;
            width: 100%;
        }

        button:hover {
            background-color: #45a049;
        }
    </style>
</head>
<body>
<div class="login-form">
    <h1>Login Page</h1>
    <form th:action="@{/login}" method="post">
        <label for="username">Username</label>
        <input type="text" id="username" name="username" placeholder="Enter username">

        <label for="password">Password</label>
        <input type="password" id="password" name="password" placeholder="Enter password">

        <button type="submit">Login</button>
    </form>
</div>
</body>
</html>
2. 配置spring security
重写 configure方法,接收一个 HttpSecurity 对象,HttpSecurity提供了而很多配置相关的方法:
(1)authorizeRequests() 是 Spring Security 中的一个配置方法,用于定义哪些请求需要被授权才能被访问。该方法返回一个 ExpressionInterceptUrlRegistry 对象,用于配置针对 URL 的访问授权。
通过这个方法,我们可以使用各种方法来进行 URL 的授权配置,例如:
antMatchers()方法用于匹配 URL,并设置需要的访问权限。hasRole()和hasAuthority()方法用于指定需要的角色或权限。permitAll()方法用于指定不需要任何访问权限即可访问。
(2)formLogin()
formLogin() 是 Spring Security 中的一个配置方法,用于指定使用表单登录进行身份验证。在默认情况下,如果没有进行任何身份验证,Spring Security 会自动重定向到默认的登录页面。
通过这个方法,我们可以进行如下配置:
loginPage()方法用于指定登录页面的 URL。loginProcessingUrl()方法用于指定处理登录请求的 URL。usernameParameter()和passwordParameter()方法用于指定表单中用户名和密码的参数名称。successHandler()和failureHandler()方法用于指定登录成功和失败后的处理逻辑。permitAll()方法用于指定登录页面的访问权限。
(3)csrf() 是 Spring Security 中的一个配置方法,用于配置跨站请求伪造(Cross-Site Request Forgery,CSRF)防护功能。CSRF 攻击是一种恶意攻击方式,攻击者通过某些方式获取到用户的授权信息,然后利用这些信息发送恶意请求,从而实现攻击目的。
在 Spring Security 中,CSRF 防护功能默认是开启的,如果想要关闭它,可以使用 csrf().disable() 方法进行禁用。
@Configuration
@EnableWebSecurity
public class SecurityConfig extends WebSecurityConfigurerAdapter {

    @Override
    protected void configure(HttpSecurity http) throws Exception {
        http
            .authorizeRequests()
                .anyRequest().authenticated()
                .and()
            .formLogin()
                .loginPage("/login.html")
                .permitAll()
                .and()
                .csrf().disable();
    }
}
3. 重启项目
访问 localhost:8080/hello,会跳转到:http://localhost:8080/login.html
三、认证与授权
1. 资源准备
(1)新建两个controller
一个是只有管理员才能访问的,一个是普通用户访问的。
@RestController
@RequestMapping("/admin/api")
public class AdminController {

    @GetMapping("/hello")
    public String helloAdmin() {
        return "hello Admin!";
    }
}
@RestController
@RequestMapping("/user/api")
public class UserController {
@GetMapping("/hello")
public String helloAdmin() {
return "hello User!";
}
}
(2)资源授权的配置
请求 /admin/api/** 下的资源,需要检查是否有 ADMIN 角色
请求 /user/api/** 下的资源,需要检查是否有 USER角色
@Configuration
@EnableWebSecurity
public class SecurityConfig extends WebSecurityConfigurerAdapter {

    @Override
    protected void configure(HttpSecurity http) throws Exception {
        http
            .authorizeRequests()
                .antMatchers("/admin/api/**").hasRole("ADMIN")
                .antMatchers("/user/api/**").hasRole("USER")
                .anyRequest().authenticated()
                .and()
            .formLogin()
                .loginPage("/login.html")
                .permitAll()
                .and()
                .csrf().disable();
    }
}
(3)重启服务访问
可以看到,访问 http://localhost:8080/hello 可以成功,访问http://localhost:8080/admin/api/hello会被拒绝访问(403错误码)

2. 基于内存的多用户支持
(1)在内存中配置用户
下面配置中的两个 configure(HttpSecurity http) 和configure(AuthenticationManagerBuilder auth)方法是 WebSecurityConfigurerAdapter 中的两个关键方法,它们用于配置Spring Security 的身份验证和授权。
configure(HttpSecurity http)方法用于配置请求的授权规则,即哪些请求需要什么权限才能访问。
configure(AuthenticationManagerBuilder auth)方法用于配置身份验证的方式,即如何验证用户身份。在这个示例中,我们使用了内存身份验证,通过调用.inMemoryAuthentication()方法,然后使用.withUser()方法来指定用户名和密码,使用{noop}前缀来表示密码不进行加密,最后使用.roles()方法来指定用户的角色。
@Configuration
@EnableWebSecurity
public class SecurityConfig extends WebSecurityConfigurerAdapter {

    @Override
    protected void configure(HttpSecurity http) throws Exception {
        http
            .authorizeRequests()
                .antMatchers("/admin/api/**").hasRole("ADMIN")
                .antMatchers("/user/api/**").hasRole("USER")
                .anyRequest().authenticated()
                .and()
            .formLogin()
                .loginPage("/login.html")
                .permitAll()
                .and()
                .csrf().disable();
    }
    @Override
    protected void configure(AuthenticationManagerBuilder auth) throws Exception {
        auth.inMemoryAuthentication()
                .withUser("admin").password("{noop}abcd").roles("ADMIN")
                .and()
                .withUser("zy").password("{noop}abc").roles("USER");
    }
}
(2)访问测试
使用用户名 admin 密码 abcd ,来登录,可以显示下面内容:

3. 基于默认数据库模型的认证与授权
(1)创建数据库表
在数据库创建了两个用户,分别是:
user 对应的角色是 ROLE_USER;
admin 对应的角色是ROLE_ADMIN。
CREATE TABLE users (
   username VARCHAR(50) NOT NULL PRIMARY KEY,
   password VARCHAR(100) NOT NULL,
   enabled BOOLEAN NOT NULL
);

CREATE TABLE authorities (
   username VARCHAR(50) NOT NULL,
   authority VARCHAR(50) NOT NULL,
   FOREIGN KEY (username) REFERENCES users(username)
);


INSERT INTO users (username, password, enabled) VALUES ('user', '12345', true);
INSERT INTO users (username, password, enabled) VALUES ('admin', '12345', true);

INSERT INTO authorities (username, authority) VALUES ('user', 'ROLE_USER');
INSERT INTO authorities (username, authority) VALUES ('admin', 'ROLE_ADMIN');
(2)引入jdbc依赖,配置数据库
引入jdbc和MySQL依赖
        <dependency>
            <groupId>org.springframework.boot</groupId>
            <artifactId>spring-boot-starter-jdbc</artifactId>
        </dependency>
        <dependency>
            <groupId>mysql</groupId>
            <artifactId>mysql-connector-java</artifactId>
            <version>8.0.26</version>
        </dependency>
配置数据库连接:
spring:
  datasource:
    url: jdbc:mysql://localhost:3306/security-db?useSSL=false
    username: root
    password: 123456
    driver-class-name: com.mysql.cj.jdbc.Driver
(3)配置spring securiy授权
这里使用了 jdbcAuthentication() 方法来启用基于 JDBC 的用户存储,并通过 dataSource() 方法设置数据源,即连接到数据库的 DataSource。
接着,使用了 usersByUsernameQuery() 方法设置查询用户名、密码和启用状态的 SQL 语句,该语句会在用户登录时被执行,根据输入的用户名查询数据库中的用户信息,并将查询到的密码和启用状态用于认证。authoritiesByUsernameQuery() 方法用于设置查询用户角色的 SQL 语句。 最后,使用了 passwordEncoder() 方法设置密码加密方式,这里使用了 NoOpPasswordEncoder.getInstance() 方法来禁用密码加密,即直接将从数据库中查询到的密码作为明文进行比对。
@Configuration
@EnableWebSecurity
public class SecurityConfig extends WebSecurityConfigurerAdapter {

    @Resource
    private DataSource dataSource;

    @Override
    protected void configure(HttpSecurity http) throws Exception {
        http
            .authorizeRequests()
                .antMatchers("/admin/api/**").hasRole("ADMIN")
                .antMatchers("/user/api/**").hasRole("USER")
                .anyRequest().authenticated()
                .and()
            .formLogin()
                .loginPage("/login.html")
                .permitAll()
                .and()
                .csrf().disable();
    }
    @Override
    protected void configure(AuthenticationManagerBuilder auth) throws Exception {
        auth.jdbcAuthentication()
                .dataSource(dataSource)
                .usersByUsernameQuery("SELECT username, password, enabled FROM users WHERE username = ?")
                .authoritiesByUsernameQuery("SELECT username, authority FROM authorities WHERE username = ?")
                .passwordEncoder(NoOpPasswordEncoder.getInstance());
    }
}
4. 基于自定义数据库模型的认证与授权
上面我们使用了InMemoryUserDetailsManager和JdbcUserDetailsManager两个UserDetailsService实现类。下面我们使用自定义的数据库模型,并且使用自定义的UserDetails实现类。
(1)数据库准备
CREATE TABLE my_users (
  id INT(11) NOT NULL AUTO_INCREMENT,
  username VARCHAR(50) NOT NULL,
  password VARCHAR(100) NOT NULL,
  enabled TINYINT(1) NOT NULL DEFAULT '1',
  roles VARCHAR(200) NOT NULL,
  PRIMARY KEY (id),
  UNIQUE KEY username_UNIQUE (username)
);
插入两条数据:

(2)编写实体类User
这个实体类 User 与之前的表 my_users 是一一对应的,每个属性都对应着表中的一个字段:
id对应着表中的id字段,用于唯一标识每个用户username对应着表中的username字段,表示用户的登录名password对应着表中的password字段,表示用户的密码enabled对应着表中的enabled字段,表示用户是否启用roles对应着表中的roles字段,表示用户所拥有的角色
需要注意的是,这个 User 实体类中还有一个 authorities 属性,这个属性是用于保存用户的权限信息的,它不对应着表中的任何一个字段。这个属性在 UserDetailsServiceImpl 类的 loadUserByUsername 方法中会被设置为用户的权限信息,用于进行认证和授权。为了实现这个功能,User 类中还定义了一个 getAuthorities 方法,用于将 roles 字段解析成一个 List<GrantedAuthority> 类型的集合,并且在需要的时候进行懒加载。
@Data
public class User implements UserDetails {
private Long id;
private String username;
private String password;
private boolean enabled;
private String roles;
private List<GrantedAuthority> authorities;
@Override
public boolean isAccountNonExpired() {
return true;
}
@Override
public boolean isAccountNonLocked() {
return true;
}
@Override
public boolean isCredentialsNonExpired() {
return true;
}
//用于将 roles 字段解析成 List<GrantedAuthority> 类型的集合
public List<GrantedAuthority> getAuthorities() {
if (authorities == null) {
authorities = new ArrayList<>();
for (String role : roles.split(",")) {
authorities.add(new SimpleGrantedAuthority(role.trim()));
}
}
return authorities;
}
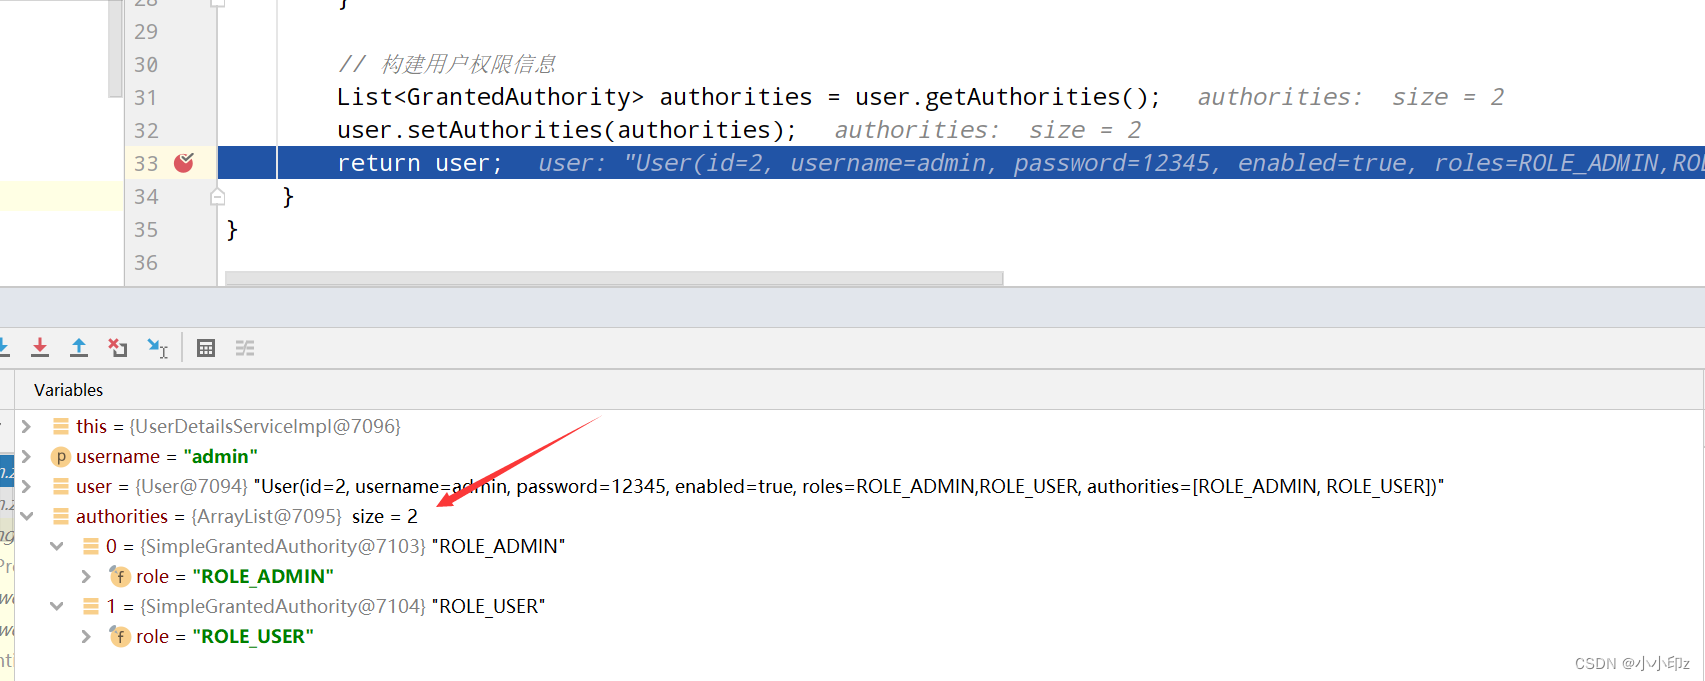
}(3)编写自定义的UserDetailsServiceImpl
这个 UserDetailsServiceImpl 类实现了 UserDetailsService 接口,是用于加载用户信息的服务类。在 loadUserByUsername 方法中,通过 UserMapper 从数据库中查询到对应的 User 对象,然后构建出该用户对应的 GrantedAuthority 列表,最终将该 User 对象返回。
@Service
public class UserDetailsServiceImpl implements UserDetailsService {

    @Autowired
    private UserMapper userMapper;

    @Override
    public User loadUserByUsername(String username) throws UsernameNotFoundException {
        // 从数据库中查询用户信息
        User user = userMapper.findByUsername(username);
        if (user == null) {
            throw new UsernameNotFoundException("用户不存在");
        }

        // 构建用户权限信息
        List<GrantedAuthority> authorities = user.getAuthorities();
        user.setAuthorities(authorities);
        return user;
    }
}
(4)编写Mapper
@Mapper
public interface UserMapper {

    @Select("SELECT * FROM my_users WHERE username = #{username}")
    User findByUsername(@Param("username") String username);
}
(5)spring security 配置
@Configuration
@EnableWebSecurity
public class SecurityConfig extends WebSecurityConfigurerAdapter {

    @Resource
    private DataSource dataSource;

    @Autowired
    private UserDetailsServiceImpl userDetailsService;

    @Override
    protected void configure(HttpSecurity http) throws Exception {
        http
            .authorizeRequests()
                .antMatchers("/admin/api/**").hasRole("ADMIN")
                .antMatchers("/user/api/**").hasRole("USER")
                .anyRequest().authenticated()
                .and()
            .formLogin()
                .loginPage("/login.html")
                .permitAll()
                .and()
                .csrf().disable();
    }
//使用自定义的数据库模型进行认证和授权
    @Override
    protected void configure(AuthenticationManagerBuilder auth) throws Exception {
        auth.userDetailsService(userDetailsService)
                .passwordEncoder(NoOpPasswordEncoder.getInstance());
    }

}
(6)测试
打断点调试,可以看到在使用admin用户登录的时候可以获取到两个角色。