目录
前言
准备工作
工作原理
功能设计
实现过程
基础概念
代理
请求
socket
控制台输入模块
配置文件
bingServer请求
bingSocket消息
子线程入口部分
主线程部分
工具函数
效果展示
写在最后
前言
ChatGPT在当下已然成为炙手可热的话题了,随着GPT-4的推出,网上关于其接口的文章也越来越多。但是今天,我们不聊GPT,说说它的老朋友:newbing
之前我发布了几篇关于对接openAI以及chatGPT的文章:Node搭建GPT接口,Node机器人,语音识别及合成,大家对此类文章的兴趣度还是挺高的,于是我决定深入探索一下NewBing的接口及对话方式,如果有兴趣的话就继续往下看吧
准备工作
- Node环境搭建
- VPN
- 可以使用NewBing的账号
- Edge或chathub谷歌插件(搭建服务可以不需要,只做原理展示)
工作原理
首先我们看看NewBing的实现原理是什么
挂VPN,打开必应,登录bing账号

如果显示使用Edge打开,我们可以下载一个Edge或者使用chathub插件。
这里我以Edge为例,在Edge中我们可以点击立即聊天开始使用

我们打开F12,进入网络菜单进行hack,输入一句对话并发送,开启与newbing的聊天

可以看到,在发送和接收对话时,浏览器发送了一个请求用于新建对话,并建立了websocket连接,最后将对话结果发送到页面


功能设计
知道了程序运行的原理,实现功能就有思路了,我的计划是在node控制台中实现一个与NewBing对话的功能,思路如下:
简述一下上面的流程,使用者通过命令打开newBing控制台,直接输入要发送的对话,等待一段时间后,收到消息反馈,继续下面的对话
这种方式不仅仅可以在控制台中使用,也可以尝试写成服务或websocket的形式,提供接口或消息给客户端调用,这里我就抛砖引玉,将后续的功能留给各位大佬实现
实现过程
基础概念
代理
使用proxy-agent模块可以让请求和socket代理到VPN所在的端口通过代理访问Bing获取消息
import ProxyAgent from "proxy-agent"
const agent = ProxyAgent('http://127.0.0.1:10240')// 访问vpn代理地址
通过agent参数使用代理功能
请求
请求函数使用的是我之前写的一个工具包,配合配套的catchAwait函数食用更佳
import { Request, catchAwait } from "utils-lib-js"
const bingRequest = new Request('https://www.bing.com')// 初始化请求地址
bingRequest.use("error", console.error)// 拦截抛错
const [err, res] = await catchAwait(this.bingRequest.GET("/turing/conversation/create"))// 发起请求
socket
WebSocket的使用可以参照之前的文章
控制台输入模块
使用readline模块可以接收控制台的输入内容
import readline from "readline";
readline.createInterface({
    input: process.stdin,
    output: process.stdout,
}).question('请输入:', ()=>{
    // 输入完成,敲击了回车
})
配置文件
需要注意的是:bing的cookie可以通过在任意浏览器打开NewBing的网站按下F12获取(前提是登录了账号),直接输入document.cookie获取

export const config = {
  cookie: "必应的cookie",
  bingUrl: "https://www.bing.com",
  proxyUrl: "http://127.0.0.1:10240",
  bingSocketUrl: "wss://sydney.bing.com",
};
export const conversationTemplate = {
  arguments: [
    {
      source: "cib",
      optionsSets: [
        "deepleo",
        "nlu_direct_response_filter",
        "disable_emoji_spoken_text",
        "responsible_ai_policy_235",
        "enablemm",
        "dtappid",
        "rai253",
        "dv3sugg",
        "h3imaginative",
      ],
      allowedMessageTypes: ["Chat", "InternalSearchQuery"],
      isStartOfSession: true,
      message: {
        author: "user",
        inputMethod: "Keyboard",
        text: "",
        messageType: "Chat",
      },
      conversationId: "",
      conversationSignature: "",
      participant: {
        id: "",
      },
    },
  ],
  invocationId: "0",
  target: "chat",
  type: 4,
};
bingServer请求
请求就一个接口,暴露接口给外部获取
import { Request, catchAwait, MessageCenter } from "utils-lib-js"
import { config } from "../config.js"
// 请求对话信息接口的响应信息
export type IBingInfo = {
    clientId: string
    conversationId: string
    conversationSignature: string
    result: {
        message: unknown
        value: string
    }
}
// 切换可选项,防止报错
export type IBingInfoPartial = Partial<IBingInfo>
// 静态配置项结构
export type IConfig = {
    cookie: string
    proxyUrl: string
    bingUrl: string
    bingSocketUrl: string
}
// NewBingServer的构造函数配置
export type IOpts = {
    agent?: any
}
export class NewBingServer extends MessageCenter {
    bingInfo: IBingInfo
    readonly bingRequest: Request
    constructor(private opts: IOpts, private _config: IConfig = config) {
        super()
        const { bingUrl } = this._config
        this.bingRequest = new Request(bingUrl)// 初始化请求地址
        this.initServer()// 初始化request: 拦截器等
    }
    // 抛错事件
    throwErr(err: any) {
        this.emit("new-bing:server:error", err)
    }
    // 重置当前请求
    async reset() {
        this.clearBing()
        const bingInfo = await this.createConversation()
        this.init(bingInfo)
    }
    // 清除当前请求的信息
    clearBing() {
        this.bingInfo = null
    }
    // 赋值当前请求的信息
    init(bingInfo) {
        this.bingInfo = bingInfo
    }
    // 初始化request
    initServer() {
        this.bingRequest.use("error", console.error)
        // .use("response", console.log)
    }
    // 发起请求
    private async createConversation() {
        const { _config, opts, bingInfo } = this
        const { agent } = opts
        if (bingInfo) return bingInfo
        const { cookie } = _config
        const [err, res] = await catchAwait(this.bingRequest.GET("/turing/conversation/create", {}, null, {
            headers: { cookie },
            agent
        }))
        if (err) return this.throwErr(err)
        return res
    }
}
bingSocket消息
socket内容比较多,主要是针对不同的message的type进行区分
import WebSocket, { MessageEvent, Event, ErrorEvent, CloseEvent } from "ws";
import { getType, IObject, jsonToString, MessageCenter, stringToJson } from "utils-lib-js"
import { ClientRequestArgs } from "http"
import { config } from "../config.js"
import { IConfig, IBingInfoPartial } from "../server/index.js"
import { setConversationTemplate, Conversation } from '../helpers/index.js'
const fixStr = ''// 每段对话的标识符,发送接收都有
// websocket配置
export type IWsConfig = {
    address: string | URL
    options: WebSocket.ClientOptions | ClientRequestArgs
    protocols: string | string[]
}
// 发送socket消息的类型
export type IMessageOpts = {
    message: string | IObject<any>
}
// 发送对话的结构
export type IConversationMessage = {
    message: string
    invocationId: string | number
}
export class NewBingSocket extends MessageCenter {
    private ws: WebSocket // ws实例
    private bingInfo: IBingInfoPartial // 请求拿到的conversation信息
    private convTemp: Conversation.IConversationTemplate // 对话发送的消息模板
    private pingInterval: NodeJS.Timeout | string | number // ping计时器
    constructor(public wsConfig: Partial<IWsConfig>, private _config: IConfig = config) {
        super()
        const { bingSocketUrl } = this._config
        const { address } = wsConfig
        wsConfig.address = bingSocketUrl + address
    }
    // 将conversation信息赋值到消息模板中
    mixBingInfo(bingInfo: IBingInfoPartial) {
        const { conversationId, conversationSignature, clientId } = bingInfo
        this.bingInfo = bingInfo
        this.convTemp = setConversationTemplate({
            conversationId, conversationSignature, clientId
        })
        return this
    }
    // 创建ws
    createWs() {
        const { wsConfig, ws } = this
        if (ws) return this
        const { address, options, protocols } = wsConfig
        this.ws = new WebSocket(address, protocols, options)
        return this
    }
    // 重置ws
    clearWs() {
        const { ws } = this
        if (ws) {
            ws.close(4999, 'clearWs')
        }
        this.clearInterval()
        return this
    }
    // 抛错事件
    private throwErr(err: any) {
        this.emit("new-bing:socket:error", err)
    }
    // 开启ws后初始化事件
    initEvent() {
        const { ws, error, close, open, message } = this
        if (!ws) this.throwErr("ws未定义,不能初始化事件")
        ws.onerror = error
        ws.onclose = close
        ws.onopen = open
        ws.onmessage = message
        return this
    }
    // 发消息,兼容Object和string
    sendMessage = (opts: IMessageOpts) => {
        const { bingInfo, convTemp, ws } = this
        const { message } = opts
        if (!bingInfo || !convTemp) this.throwErr("对话信息未获取,或模板信息未配置,请重新获取信息")
        const __type = getType(message)
        let str = ""
        if (__type === "string") {
            str = message as string
        } else if (__type === "object") {
            str = jsonToString(message as IObject<unknown>)
        }
        this.emit("send-message", str)
        ws.send(str + fixStr)
    }
    // 收到消息
    private message = (e: MessageEvent) => {
        this.emit("message", e)
        onMessage.call(this, e)
    }
    // ws连接成功
    private open = (e: Event) => {
        this.emit("open", e)
        const { sendMessage } = this
        sendMessage({ message: { "protocol": "json", "version": 1 } })// 初始化
    }
    // ws关闭
    private close = (e: CloseEvent) => {
        const { ws } = this
        ws.removeAllListeners()
        this.ws = null
        this.emit("close", e)
    }
    // ws出错
    private error = (e: ErrorEvent) => {
        this.emit("error", e)
        console.log("error");
    }
    // 断线检测
    sendPingMsg() {
        const { ws } = this
        if (!ws) this.throwErr("ws未定义,无法发送Ping")
        this.startInterval()
        this.emit("init:finish", {})
    }
    // 开启断线定时器
    private startInterval() {
        this.clearInterval()
        this.pingInterval = setInterval(() => {
            this.sendMessage({ message: { "type": 6 } })
        }, 20 * 1000)
    }
    // 清空断线定时器
    private clearInterval() {
        const { pingInterval } = this
        if (pingInterval) {
            clearInterval(pingInterval)
            this.pingInterval = null
        }
    }
}

// 接收到消息
export function onMessage(e: MessageEvent) {
    const dataSource = e.data.toString().split(fixStr)[0]
    const data = stringToJson(dataSource)
    const { type } = data ?? {}
    switch (type) {
        case 1://对话中
            this.emit("message:ing", data.arguments?.[0]?.messages?.[0]?.text)
            break;
        case 2://对话完成
            this.emit("message:finish", data.item?.messages?.[1]?.text)
            break;
        case 6://断线检测
            // console.log(data);
            break;
        case 7://Connection closed with an error
            console.log(data);
            break;
        default:// 初始化响应
            this.sendPingMsg()
            break;
    }
}
// 发送聊天消息
export function sendConversationMessage(params?: IConversationMessage) {
    const { message, invocationId } = params
    const arg = this.convTemp.arguments[0]
    arg.message.text = message
    arg.isStartOfSession = invocationId === 0// 是否是新对话
    this.convTemp.invocationId = invocationId.toString()// 第几段对话
    this.sendMessage({ message: this.convTemp })
}
子线程入口部分
然后通过startBingConversation作为入口函数,对上面的两个模块进行调用
import { NewBingServer, IBingInfoPartial } from "./server/index.js"
import { NewBingSocket, sendConversationMessage } from "./socket/index.js"
import { config } from "./config.js"
import ProxyAgent from "proxy-agent"
import { parentPort } from "worker_threads";

const { proxyUrl } = config// 代理地址
const agent = ProxyAgent(proxyUrl)// 访问vpn代理地址
// 初始化bing请求
const bingServer = new NewBingServer({
    agent
})
// 初始化bing的websocket消息
const bingSocket = new NewBingSocket({
    address: "/sydney/ChatHub",
    options: {
        agent
    }
})
let invocationId = -1// 同一段对话的id
let bingInfo: IBingInfoPartial// bing的conversation信息,BingServer请求的结果
const startBingConversation = async () => {
    initEvent()
    await initBingServer()
    initBingSocket()
}

const initEvent = () => {
    bingServer.on("new-bing:server:error", (...args) => { throw new Error(...args) })// 请求抛错
    bingSocket.on("new-bing:socket:error", (...args) => { throw new Error(...args) })// 消息抛错
    // 接收主线程的消息
    parentPort.on("message", (res) => {
        const { type } = res
        if (type === "sendMessage") {
            // 发送消息
            sendConversationMessage.call(bingSocket, { message: res.message, invocationId: ++invocationId })
        }
    })
}
const initBingServer = async () => {
    await bingServer.reset()// 重置请求
    bingInfo = bingServer.bingInfo
}
const initBingSocket = () => {
    bingSocket.mixBingInfo(bingInfo).createWs().initEvent().on("init:finish", () => {// socket初始化完成
        parentPort.postMessage({
            type: "init:finish"
        })
    }).on("message:finish", (data = "") => {
        // 一段对话完成
        parentPort.postMessage({
            type: "message:finish",
            data
        })
    }).on("message:ing", (data = "") => {
        // 对话时,触发主线程loading操作
        parentPort.postMessage({
            type: "message:ing",
            data
        })
    })
}

startBingConversation()
主线程部分
主线程可以参照之前的打包工具,注册成系统命令,使用bing启动,通过readline进行对话交互
#!/usr/bin/env node
import { Worker } from "worker_threads";
import readline from "readline";
import { defer, logLoop, logOneLine } from "utils-lib-js";
const NewBing = new Worker("./src/index.js");
// 工厂模式
const readlineFactory = () => {
  return readline.createInterface({
    input: process.stdin,
    output: process.stdout,
  });
};
let rl, loading;
// 解决node低版本无readline/promises模块,将异步函数换成promise
const readlinePromise = (...args) => {
  const { promise, resolve } = defer();
  rl.question(...args, resolve);
  return promise;
};
// 启动命令输入
const start = () => {
  readlinePromise("请输入:").then((res) => {
    console.log(`你:${res}`);
    NewBing.postMessage({ type: "sendMessage", message: res });
    loading = logLoop(); // 加载中动画
  });
};
// 关闭命令输入
const clear = () => {
  rl.close();
  rl = null;
};
// 重置
const reset = () => {
  if (rl) {
    clear();
  }
  rl = readlineFactory();
};
// 初始化当前命令窗口
const initBing = () => {
  reset();
  NewBing.on("message", (res) => {
    switch (res.type) {
      case "message:finish": // 收到消息,重置输入框,换行
        loading.isStop = true;
        logOneLine(`Bing:${res.data}`, true, true);
      case "init:finish": // 初始化完成
        start();
        break;
      case "message:ing": // 对话中
        // loading = logLoop(loadList);
        break;
    }
  });
};
initBing();
工具函数
import { conversationTemplate } from "../config.js"
import { readFileSync, writeFileSync } from "fs"
let conTemp: Conversation.IConversationTemplate = conversationTemplate
export namespace Conversation {
    // 对话模型类型
    // Creative:创造力的,Precise:精确的,Balanced:平衡的
    type ConversationStyle = 'Creative' | 'Precise' | 'Balanced'
    // 对话方式
    type ConversationType = 'SearchQuery' | 'Chat' // bing搜索,聊天
    // 模型映射
    export enum ConversationStr {
        Creative = 'h3imaginative',
        Precise = 'h3precise',
        Balanced = 'galileo'
    }
    // 发起对话时传入的参数
    export type IConversationOpts = {
        convStyle: ConversationStyle
        messageType: ConversationType
        conversationId: string
        conversationSignature: string
        clientId: string
    }
    type IMessage = {
        author: string,
        text: string,
        messageType: ConversationType,
    }
    type IArguments = {
        source: string
        optionsSets: string[]
        allowedMessageTypes: string[]
        isStartOfSession: boolean
        message: IMessage
        conversationId: string
        conversationSignature: string
        participant: {
            id: string
        }
    }
    // 发起对话的模板
    export type IConversationTemplate = {
        arguments: IArguments[]
        invocationId: string
        target: string
        type: number
    }
}
// 默认使用平衡类型
const { Balanced } = Conversation.ConversationStr
// 数据文件缓存(暂时没用上,调试的时候用的)
export function ctrlTemp(path?: string): any
export function ctrlTemp(path?: string, file?: any): void
export function ctrlTemp(path: string = "./temp", file?: string) {
    try {
        if (file) {
            return writeFileSync(path, file, "utf8")
        }
        return readFileSync(path, "utf8")
    } catch (error) { }
}

// 配置socket鉴权及消息模板
export function setConversationTemplate(params: Partial<Conversation.IConversationOpts> = {}): Conversation.IConversationTemplate {
    const { convStyle = Balanced, messageType = "Chat", conversationId,
        conversationSignature, clientId } = params
    if (!conversationId || !conversationSignature || !clientId) return null
    const args = conTemp.arguments[0]
    conTemp.arguments[0] = {
        ...args,
        conversationId,
        conversationSignature,
        participant: { id: clientId }
    }
    args.optionsSets.push(convStyle)// 这里传入对话风格
    args.message.messageType = messageType// 这里传入对话类型
    return conTemp
}
效果展示
我们使用npm link绑定全局命令
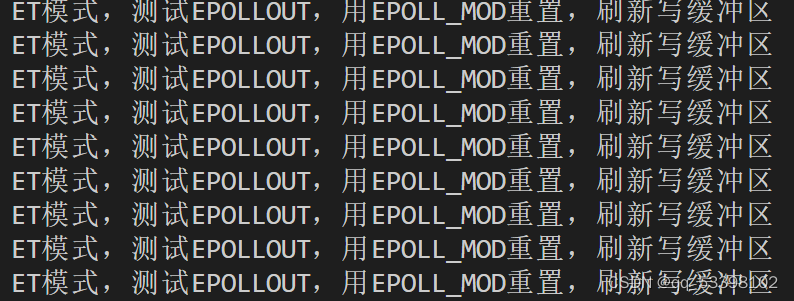
然后使用bing运行命令,并输入对话

写在最后
以上就是文章全部内容了,文章主要讲述了在node中实现一个与newbing对话的案例,希望能对你有帮助,对文章有任何问题欢迎评论或私信。
感谢你看到了这里,如果觉得文章不错的话,还望三连支持一下,非常感谢!
源码:Node-NewBing: 基于node+NewBing提供的AI模型做的案例