SpringBoot
【黑马程序员SpringBoot2全套视频教程,springboot零基础到项目实战(spring boot2完整版)】
SpringBoot 原理篇
文章目录
- SpringBoot
- SpringBoot 原理篇
- 1 自动配置
- 1.17 自动配置原理【3】
- 1.17.1 看源码了
- 1.17.2 小结
1 自动配置
1.17 自动配置原理【3】
1.17.1 看源码了
【笔者用的2.7.4 ,感觉和老师的2.5.4 都已经差别很大了】
换个版本


OK, 前面我们已经说到
它在这个文件中默认加载了很多的自动配置的功能

比如说这儿的第一个就是它默认要加载的一个项
找出来看看这个配置的代码

现在在我们猫和老鼠的案例中 ,加入redis
没加之前的运行效果
package com.dingjiaxiong;

import com.dingjiaxiong.bean.CartoonCatAndMouse;
import org.springframework.boot.SpringApplication;
import org.springframework.boot.SpringBootConfiguration;
import org.springframework.boot.autoconfigure.*;
import org.springframework.boot.context.TypeExcludeFilter;
import org.springframework.context.ConfigurableApplicationContext;
import org.springframework.context.annotation.ComponentScan;
import org.springframework.context.annotation.Configuration;
import org.springframework.context.annotation.FilterType;
import org.springframework.context.annotation.Import;
import org.springframework.stereotype.Component;
import org.springframework.stereotype.Indexed;

/**
 * ClassName: App
 * date: 2022/10/25 13:03
 *
 * @author DingJiaxiong
 */

@SpringBootApplication

//@SpringBootConfiguration
//        @Configuration
//                @Component
//        @Indexed
//@EnableAutoConfiguration
//        @AutoConfigurationPackage
//                @Import({AutoConfigurationPackages.Registrar.class})
//        @Import({AutoConfigurationImportSelector.class})
//@ComponentScan(excludeFilters = {
//                @ComponentScan.Filter(type = FilterType.CUSTOM, classes = {TypeExcludeFilter.class}),
//                @ComponentScan.Filter(type = FilterType.CUSTOM, classes = {AutoConfigurationExcludeFilter.class}
//        )}

//@Import({AutoConfigurationPackages.Registrar.class})
//@Import({AutoConfigurationImportSelector.class})


@Import(CartoonCatAndMouse.class)
public class App {

    public static void main(String[] args) {
        ConfigurableApplicationContext context = SpringApplication.run(App.class);

        String[] names = context.getBeanDefinitionNames();
        for (String name : names) {
            System.out.println(name);
        }

        CartoonCatAndMouse bean = context.getBean(CartoonCatAndMouse.class);
        bean.play();
    }

}
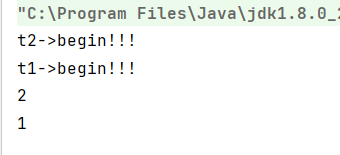
运行结果

这一堆bean ,是没有redis的,现在我加个依赖
<dependency>
    <groupId>org.springframework.boot</groupId>
    <artifactId>spring-boot-starter-data-redis</artifactId>
    <version>2.7.1</version>
</dependency>

OK,现在再试一次

效果超级明显,这就说明它已经加载了所有与redis 有关的bean 了

就是这句话生效了。

再看看这个,好家伙,和我们之前的案例有原理相像啊
点进去看看

嗯,它也没说它是个bean

我的这个也没说,看看它的默认值

这也是我们不配就能用的原因

接着后面它又导入了两组客户端的实现【这就是一个对象里面包另一个对象了,想想我们写配置的时候】
再接着看

如果我没有找到redisTemplate 这样一个bean,我就给你一个,如果你自己定义了,那我就不加载了,因为它怕加载重了
太细了
下面的StringRedisTemplate 也是一样的道理

OK,


1.17.2 小结
- 先开发若干种技术的标准实现
- SpringBoot启动时加载所有的技术实现对应的自动配置类
- 检测每个配置类的加载条件是否满足并进行对应的初始化
- 切记是先加载所有的外部资源,然后根据外部资源进行条件比对
