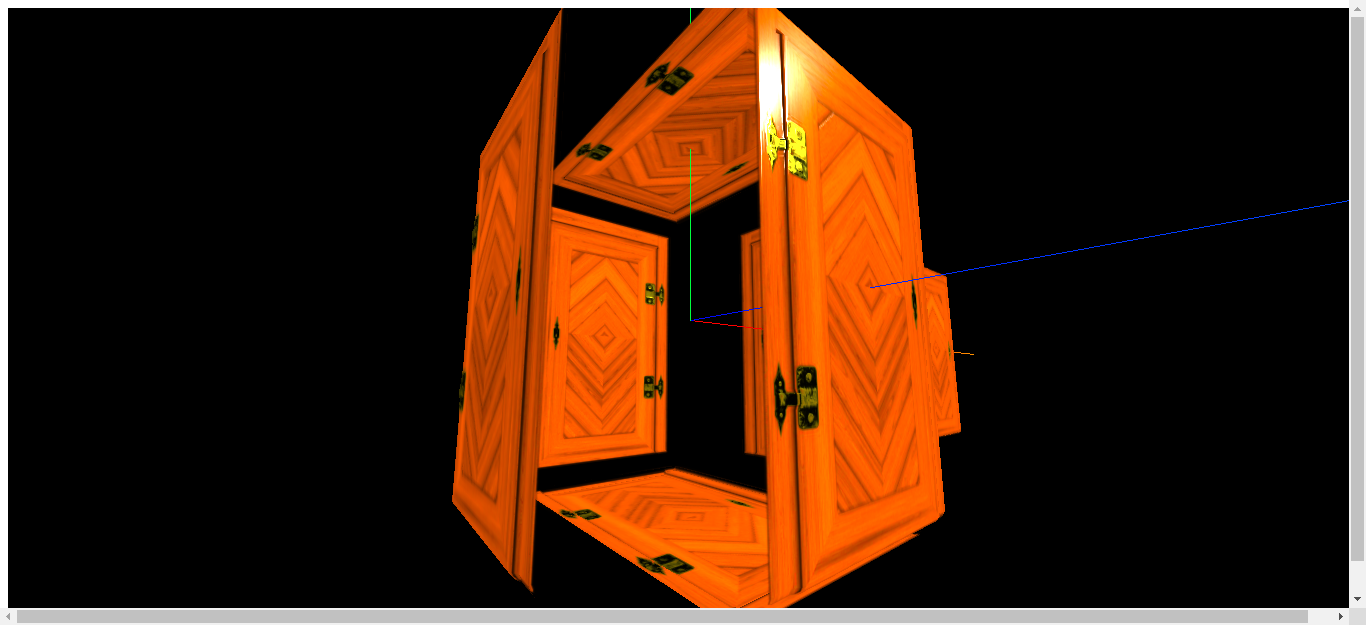
刚刚入门的小伙伴请先查看 three.js 基础认识与简单应用
本文章中的两个注意点,下面也有提到,分别是:
1、 vue项目中使用的贴图路径-->需要把 static文件夹 放到 public文件夹下,并使用 static 开头的绝对路径。
2、使用环境遮挡贴图时,必须要给物体对象添加第二组uv,否则不起作用;
下面就用一个个例子来分析一下每张贴图的作用与效果,每个功能的讲解都在“主要代码”中的注释上展示,不要看着内容很多,很多代码都是重复的,为了便于大家和后期我查看笔记时理解。
一、使用方法与注意点(以颜色贴图为例):
使用纹理贴图的第一步就是导入,three.js专门提供了纹理加载函数
THREE.TextureLoader()var texture = new THREE.TextureLoader().load ( url : String, onLoad : Function, onProgress : Function, onError : Function )
代码示例(官方)
const texture = new THREE.TextureLoader().load(
    'textures/land_ocean_ice_cloud_2048.jpg'
);

// 立即使用纹理进行材质创建
const material = new THREE.MeshBasicMaterial( { map: texture } );
Code Example with Callbacks
// 初始化一个加载器
const loader = new THREE.TextureLoader();

// 加载一个资源
loader.load(
	// 资源URL
	'textures/land_ocean_ice_cloud_2048.jpg',

	// onLoad回调
	function ( texture ) {
		// in this example we create the material when the texture is loaded
		const material = new THREE.MeshBasicMaterial( {
			map: texture
		 } );
	},

	// 目前暂不支持onProgress的回调
	undefined,

	// onError回调
	function ( err ) {
		console.error( 'An error happened.' );
	}
);
**PS**:vue项目中需要把 static文件夹 放到 public文件夹下,并使用 static 开头的绝对路径。如下图:

二、颜色贴图
主要代码:
/**
 * 导入纹理贴图
 */
// 设置纹理加载器
const textureLoader = new THREE.TextureLoader();
// 注意:vue项目中需要把static文件夹放到public文件夹下,并使用static开头的绝对路径
// 颜色贴图
const doorColorTexture = textureLoader.load("static/textures/door/color.jpg");

/*
 *  添加物体
 */
// 创建几何体对象
const cubeGeometry = new THREE.BoxBufferGeometry(2, 2, 2);
// 材质
const basicMaterial = new THREE.MeshBasicMaterial({
  color: "#ffff00",
  map: doorColorTexture, // 映射到材质上的贴图--颜色贴图
});
// 添加到网格中 = 对象 + 材质
const cube = new THREE.Mesh(cubeGeometry, basicMaterial);
scene.add(cube);
示例一:颜色贴图完整代码
/*
 * @Description: 导入纹理贴图-初始材质和纹理
 */

import * as THREE from "three";
// 导入轨道控制器(鼠标控制)
import { OrbitControls } from "three/examples/jsm/controls/OrbitControls";

/*
 *1. 创建场景
 */
const scene = new THREE.Scene();

/*
 * 2.创建相机(这里是 透视摄像机--用来模拟人眼所看到的景象)
 */
const camera = new THREE.PerspectiveCamera(
  75, // 视野角度
  window.innerWidth / window.innerHeight, // 长宽比
  0.1, // 进截面
  1000 // 远截面
);
// 设置相机位置
camera.position.set(5, 5, 5);
scene.add(camera); // 将相机添加到场景中

/**
 * 导入纹理贴图
 */
// 设置纹理加载器
const textureLoader = new THREE.TextureLoader();
// 注意:vue项目中需要把static文件夹放到public文件夹下,并使用static开头的绝对路径
// 颜色贴图
const doorColorTexture = textureLoader.load("static/textures/door/color.jpg");

/*
 *  添加物体
 */
// 创建几何体对象
const cubeGeometry = new THREE.BoxBufferGeometry(2, 2, 2);
// 材质
const basicMaterial = new THREE.MeshBasicMaterial({
  color: "#ffff00",
  map: doorColorTexture, // 映射到材质上的贴图--颜色贴图
});
// 添加到网格中 = 对象 + 材质
const cube = new THREE.Mesh(cubeGeometry, basicMaterial);
scene.add(cube);

/**
 *  3.初始化渲染器
 */
const renderer = new THREE.WebGL1Renderer();
// 设置渲染器尺寸
renderer.setSize(window.innerWidth, window.innerHeight);
// 将webgl渲染的canvas内容添加到body
document.body.appendChild(renderer.domElement);

/**
 * 创建轨道控制器(OrbitControls)
 * 可以使得相机围绕目标进行轨道运动
 */
const controls = new OrbitControls(camera, renderer.domElement);
// 设置控制器阻尼,让控制器更有真实效果,必须在动画循环render()中调用update()
controls.enableDamping = true;
controls.autoRotate = true; // 相机是否自动旋转
controls.autoRotateSpeed = 3; // 自转速度

/**
 * 辅助三维坐标系
 * 红色代表 X 轴. 绿色代表 Y 轴. 蓝色代表 Z 轴.
 */
var axesHelper = new THREE.AxesHelper(7);
scene.add(axesHelper);

// 定义循环渲染方法
function render() {
  renderer.render(scene, camera); // 执行渲染操作
  controls.update(); // 加不加都行
  requestAnimationFrame(render); // 渲染下一帧的时候就会调用render函数
}
render();

// 监听尺寸变化实现自适应画面
window.addEventListener("resize", () => {
  // console.log("画面变化了");
  // 更新摄像头
  camera.aspect = window.innerWidth / window.innerHeight;
  // 更新摄像机的投影矩阵
  camera.updateProjectionMatrix();
  // 更新渲染器
  renderer.setSize(window.innerWidth, window.innerHeight);
  // 设置渲染器的像素比
  renderer.setPixelRatio(window.devicePixelRatio);
});
这是一张静态图片,动态效果自己运行一下就能出现啦!

三、纹理贴图常用属性
主要代码:
/**
 * 导入纹理贴图
 */
// 设置纹理加载器
const textureLoader = new THREE.TextureLoader();
// 注意:vue项目中需要把static文件夹放到public文件夹下,并使用static开头的绝对路径
// 颜色贴图
const doorColorTexture = textureLoader.load("static/textures/door/color.jpg");

/* 纹理-偏移 */
// doorColorTexture.offset.x = 0.5;
// doorColorTexture.offset.y = 0.5;
// 或者
// doorColorTexture.offset.set(0.5, 0.5);

/* 纹理-旋转 */
// 设置旋转的原点--(0.5, 0.5)对应纹理的正中心
// doorColorTexture.center.set(0.5, 0.5);
// // 旋转45deg
// doorColorTexture.rotation = Math.PI / 4;

/* 纹理-重复 */
doorColorTexture.repeat.set(2, 3);
// 设置纹理重复的模式
doorColorTexture.wrapS = THREE.MirroredRepeatWrapping; // 镜像重复
doorColorTexture.wrapT = THREE.RepeatWrapping;
示例:贴图常用属性完整代码:
/*
 * @Description: 纹理贴图常用属性
 */
import * as THREE from "three";
// 导入轨道控制器(鼠标控制)
import { OrbitControls } from "three/examples/jsm/controls/OrbitControls";

/*
 *1. 创建场景
 */
const scene = new THREE.Scene();

/*
 * 2.创建相机(这里是 透视摄像机--用来模拟人眼所看到的景象)
 */
const camera = new THREE.PerspectiveCamera(
  75, // 视野角度
  window.innerWidth / window.innerHeight, // 长宽比
  0.1, // 进截面
  1000 // 远截面
);
// 设置相机位置
camera.position.set(5, 5, 5);
scene.add(camera); // 将相机添加到场景中

/**
 * 导入纹理贴图
 */
// 设置纹理加载器
const textureLoader = new THREE.TextureLoader();
// 注意:vue项目中需要把static文件夹放到public文件夹下,并使用static开头的绝对路径
// 颜色贴图
const doorColorTexture = textureLoader.load("static/textures/door/color.jpg");

console.log(doorColorTexture);
/* 纹理-偏移 */
// doorColorTexture.offset.x = 0.5;
// doorColorTexture.offset.y = 0.5;
// 或者
// doorColorTexture.offset.set(0.5, 0.5);

/* 纹理-旋转 */
// 设置旋转的原点--(0.5, 0.5)对应纹理的正中心
// doorColorTexture.center.set(0.5, 0.5);
// // 旋转45deg
// doorColorTexture.rotation = Math.PI / 4;

/* 纹理-重复 */
doorColorTexture.repeat.set(2, 3);
// 设置纹理重复的模式
doorColorTexture.wrapS = THREE.MirroredRepeatWrapping; // 镜像重复
doorColorTexture.wrapT = THREE.RepeatWrapping;

/*
 *  添加物体
 */
// 创建几何体
const cubeGeometry = new THREE.BoxBufferGeometry(3, 3, 3);
// 材质
const basicMaterial = new THREE.MeshBasicMaterial({
  color: "#ffff00",
  map: doorColorTexture, // 添加纹理贴图到材质 --颜色贴图
});
// 添加到网格中
const cube = new THREE.Mesh(cubeGeometry, basicMaterial);
scene.add(cube);

/**
 *  3.初始化渲染器
 */
const renderer = new THREE.WebGL1Renderer();
// 设置渲染器尺寸
renderer.setSize(window.innerWidth, window.innerHeight);
// 将webgl渲染的canvas内容添加到body
document.body.appendChild(renderer.domElement);

/**
 * 创建轨道控制器(OrbitControls)
 * 可以使得相机围绕目标进行轨道运动
 */
const controls = new OrbitControls(camera, renderer.domElement);
// 设置控制器阻尼,让控制器更有真是效果,必须在动画循环render()中调用update()
controls.enableDamping = true;
// 相机是否自动旋转
controls.autoRotate = true;
controls.autoRotateSpeed = 3; // 自转速度

/**
 * 辅助三维坐标系
 * 红色代表 X 轴. 绿色代表 Y 轴. 蓝色代表 Z 轴.
 */
var axesHelper = new THREE.AxesHelper(7);
scene.add(axesHelper);

// 定义循环渲染方法
function render() {
  renderer.render(scene, camera); // 执行渲染操作
  controls.update(); // 加不加都行
  requestAnimationFrame(render); // 渲染下一帧的时候就会调用render函数
}
render();

// 监听尺寸变化实现自适应画面
window.addEventListener("resize", () => {
  // console.log("画面变化了");
  // 更新摄像头
  camera.aspect = window.innerWidth / window.innerHeight;
  // 更新摄像机的投影矩阵
  camera.updateProjectionMatrix();
  // 更新渲染器
  renderer.setSize(window.innerWidth, window.innerHeight);
  // 设置渲染器的像素比
  renderer.setPixelRatio(window.devicePixelRatio);
});
这是一张静态图片,动态效果自己运行一下就能出现啦!

四、透明(灰度)纹理
主要代码:
/**
 * 导入纹理贴图
 */
// 设置纹理加载器
const textureLoader = new THREE.TextureLoader();
// 注意:vue项目中需要把static文件夹放到public文件夹下,并使用static开头的绝对路径
// 颜色贴图
const doorColorTexture = textureLoader.load("static/textures/door/color.jpg");
// 灰度(透明)贴图
const doorAlphaTexture = textureLoader.load("static/textures/door/alpha.jpg");

/*
 *  添加物体
 */
// 创建几何体
const cubeGeometry = new THREE.BoxBufferGeometry(3, 3, 3);
// 材质
const basicMaterial = new THREE.MeshBasicMaterial({

  color: "#ffff00",

  map: doorColorTexture, // 添加纹理贴图到材质 --颜色贴图

  // alpha贴图是一张灰度纹理
  // 用于控制整个表面的不透明度(黑色:完全透明;白色:完全不透明)
  // 注意:配合transparent:true,一起使用
  alphaMap: doorAlphaTexture,

  transparent: true, // 开启透明

  opacity: 0.6, // 注意:transparent: true,开启后可使用

  // 定义将要渲染哪一面(用于控制贴图贴的地方)
  // 正面(FrontSide),背面(BackSide)或两者(DoubleSide)
  // side: THREE.FrontSide,
  side: THREE.DoubleSide,
});

// 添加到网格中
const cube = new THREE.Mesh(cubeGeometry, basicMaterial);
scene.add(cube);
示例:透明纹理完整代码:
/*
 * @Description: 透明材质与透明纹理
 */
import * as THREE from "three";
// 导入轨道控制器(鼠标控制)
import { OrbitControls } from "three/examples/jsm/controls/OrbitControls";

/*
 *1. 创建场景
 */
const scene = new THREE.Scene();

/*
 * 2.创建相机(这里是 透视摄像机--用来模拟人眼所看到的景象)
 */
const camera = new THREE.PerspectiveCamera(
  75, // 视野角度
  window.innerWidth / window.innerHeight, // 长宽比
  0.1, // 进截面
  1000 // 远截面
);
// 设置相机位置
camera.position.set(5, 5, 5);
scene.add(camera); // 将相机添加到场景中

/**
 * 导入纹理贴图
 */
// 设置纹理加载器
const textureLoader = new THREE.TextureLoader();
// 注意:vue项目中需要把static文件夹放到public文件夹下,并使用static开头的绝对路径
const doorColorTexture = textureLoader.load("static/textures/door/color.jpg");
const doorAlphaTexture = textureLoader.load("static/textures/door/alpha.jpg");

/*
 *  添加物体
 */
// 创建几何体
const cubeGeometry = new THREE.BoxBufferGeometry(3, 3, 3);
// 材质
const basicMaterial = new THREE.MeshBasicMaterial({
  color: "#ffff00",
  map: doorColorTexture, // 添加纹理贴图到材质 --颜色贴图
  // alpha贴图是一张灰度纹理,
  // 用于控制整个表面的不透明度(黑色:完全透明;白色:完全不透明)
  // 注意:配合transparent:true,一起使用
  alphaMap: doorAlphaTexture,
  transparent: true, // 开启透明
  opacity: 0.6, // 注意:transparent: true,开启后可使用
  // 定义将要渲染哪一面(用于控制贴图贴的地方)
  // 正面(FrontSide),背面(BackSide)或两者(DoubleSide)
  // side: THREE.FrontSide,
  side: THREE.DoubleSide,
});
// 添加到网格中
const cube = new THREE.Mesh(cubeGeometry, basicMaterial);
scene.add(cube);

// 添加平面
const plane = new THREE.Mesh(
  new THREE.PlaneBufferGeometry(3, 3),
  basicMaterial
);
plane.position.set(5, 0, 0);
scene.add(plane);

/**
 *  3.初始化渲染器
 */
const renderer = new THREE.WebGL1Renderer();
// 设置渲染器尺寸
renderer.setSize(window.innerWidth, window.innerHeight);
// 将webgl渲染的canvas内容添加到body
document.body.appendChild(renderer.domElement);

/**
 * 创建轨道控制器(OrbitControls)
 * 可以使得相机围绕目标进行轨道运动
 */
const controls = new OrbitControls(camera, renderer.domElement);
// 设置控制器阻尼,让控制器更有真是效果,必须在动画循环render()中调用update()
controls.enableDamping = true;

/**
 * 辅助三维坐标系
 * 红色代表 X 轴. 绿色代表 Y 轴. 蓝色代表 Z 轴.
 */
var axesHelper = new THREE.AxesHelper(7);
scene.add(axesHelper);

// 定义循环渲染方法
function render() {
  renderer.render(scene, camera); // 执行渲染操作
  controls.update(); // 加不加都行
  requestAnimationFrame(render); // 渲染下一帧的时候就会调用render函数
}
render();

// 监听尺寸变化实现自适应画面
window.addEventListener("resize", () => {
  // console.log("画面变化了");
  // 更新摄像头
  camera.aspect = window.innerWidth / window.innerHeight;
  // 更新摄像机的投影矩阵
  camera.updateProjectionMatrix();
  // 更新渲染器
  renderer.setSize(window.innerWidth, window.innerHeight);
  // 设置渲染器的像素比
  renderer.setPixelRatio(window.devicePixelRatio);
});
这是一张静态图片,动态效果自己运行一下就能出现啦!

五、环境遮挡贴图与强度
PS: 必须要给物体对象添加第二组uv,否则不起作用
主要代码:
/**
 * 导入纹理贴图
 */
// 设置纹理加载器
const textureLoader = new THREE.TextureLoader();
// 注意:vue项目中需要把static文件夹放到public文件夹下,并使用static开头的绝对路径
// 颜色贴图
const doorColorTexture = textureLoader.load("static/textures/door/color.jpg");
// 实现透明材质与透明纹理贴图
const doorAlphaTexture = textureLoader.load("static/textures/door/alpha.jpg");
// AO环境贴图遮挡--环境光强度控制
const doorAoTexture = textureLoader.load(
  "static/textures/door/ambientOcclusion.jpg"
);

/*
 *  添加物体
 */
// 创建几何体
const cubeGeometry = new THREE.BoxBufferGeometry(3, 3, 3);
// 材质
const basicMaterial = new THREE.MeshBasicMaterial({
  color: "#ffff00",
  map: doorColorTexture, // 添加纹理贴图
  // alpha贴图是一张灰度纹理,
  // 用于控制整个表面的不透明度(黑色:完全透明;白色:完全不透明)
  // 注意:配合transparent:true,一起使用
  alphaMap: doorAlphaTexture,
  transparent: true, // 开始透明
  // opacity: 0.5, // 注意:transparent: true,开启后可使用
  side: THREE.DoubleSide, //定义将要渲染哪一面 - 正面,背面或两者

  aoMap: doorAoTexture, // 环境遮挡贴图,aoMap需要第二组UV。
  // aoMapIntensity: 3, // 环境遮挡效果的强度。默认值为1。零是不遮挡效果。
});

// 添加到网格中
const cube = new THREE.Mesh(cubeGeometry, basicMaterial);

// 给立方体设置第二组uv
cubeGeometry.setAttribute(
  "uv2",
  new THREE.BufferAttribute(cubeGeometry.attributes.uv.array, 2)
);
scene.add(cube);
示例:环境遮挡贴图完整代码:
/*
 * @Description: 环境遮挡贴图与强度--要添加第二组uv
 */
import * as THREE from "three";
// 导入轨道控制器(鼠标控制)
import { OrbitControls } from "three/examples/jsm/controls/OrbitControls";

/*
 *1. 创建场景
 */
const scene = new THREE.Scene();

/*
 * 2.创建相机(这里是 透视摄像机--用来模拟人眼所看到的景象)
 */
const camera = new THREE.PerspectiveCamera(
  75, // 视野角度
  window.innerWidth / window.innerHeight, // 长宽比
  0.1, // 进截面
  1000 // 远截面
);
// 设置相机位置
camera.position.set(5, 5, 5);
scene.add(camera); // 将相机添加到场景中

/**
 * 导入纹理贴图
 */
// 设置纹理加载器
const textureLoader = new THREE.TextureLoader();
// 注意:vue项目中需要把static文件夹放到public文件夹下,并使用static开头的绝对路径
// 颜色贴图
const doorColorTexture = textureLoader.load("static/textures/door/color.jpg");
// 实现透明材质与透明纹理贴图
const doorAlphaTexture = textureLoader.load("static/textures/door/alpha.jpg");
// AO环境贴图遮挡--环境光强度控制
const doorAoTexture = textureLoader.load(
  "static/textures/door/ambientOcclusion.jpg"
);

/*
 *  添加物体
 */
// 创建几何体
const cubeGeometry = new THREE.BoxBufferGeometry(3, 3, 3);
// 材质
const basicMaterial = new THREE.MeshBasicMaterial({
  color: "#ffff00",
  map: doorColorTexture, // 添加纹理贴图
  // alpha贴图是一张灰度纹理,
  // 用于控制整个表面的不透明度(黑色:完全透明;白色:完全不透明)
  // 注意:配合transparent:true,一起使用
  alphaMap: doorAlphaTexture,
  transparent: true, // 开始透明
  // opacity: 0.5, // 注意:transparent: true,开启后可使用
  side: THREE.DoubleSide, //定义将要渲染哪一面 - 正面,背面或两者

  aoMap: doorAoTexture, // 环境遮挡贴图,aoMap需要第二组UV。
  // aoMapIntensity: 3, // 环境遮挡效果的强度。默认值为1。零是不遮挡效果。
});
// 添加到网格中
const cube = new THREE.Mesh(cubeGeometry, basicMaterial);
// 给立方体设置第二组uv
cubeGeometry.setAttribute(
  "uv2",
  new THREE.BufferAttribute(cubeGeometry.attributes.uv.array, 2)
);
scene.add(cube);

// 添加平面
const planeGeometry = new THREE.PlaneBufferGeometry(3, 3);
const plane = new THREE.Mesh(planeGeometry, basicMaterial);
plane.position.set(5, 0, 0);
// 给平面设置第二组uv
planeGeometry.setAttribute(
  "uv2",
  new THREE.BufferAttribute(planeGeometry.attributes.uv.array, 2)
);
scene.add(plane);

/**
 *  3.初始化渲染器
 */
const renderer = new THREE.WebGL1Renderer();
// 设置渲染器尺寸
renderer.setSize(window.innerWidth, window.innerHeight);
// 将webgl渲染的canvas内容添加到body
document.body.appendChild(renderer.domElement);

/**
 * 创建轨道控制器(OrbitControls)
 * 可以使得相机围绕目标进行轨道运动
 */
const controls = new OrbitControls(camera, renderer.domElement);
// 设置控制器阻尼,让控制器更有真是效果,必须在动画循环render()中调用update()
controls.enableDamping = true;
// controls.autoRotate = true;
// controls.autoRotateSpeed = 2; // 自转速度

/**
 * 辅助三维坐标系
 * 红色代表 X 轴. 绿色代表 Y 轴. 蓝色代表 Z 轴.
 */
var axesHelper = new THREE.AxesHelper(7);
scene.add(axesHelper);

// 定义循环渲染方法
function render() {
  renderer.render(scene, camera); // 执行渲染操作
  controls.update(); // 加不加都行
  requestAnimationFrame(render); // 渲染下一帧的时候就会调用render函数
}
render();

// 监听尺寸变化实现自适应画面
window.addEventListener("resize", () => {
  // console.log("画面变化了");
  // 更新摄像头
  camera.aspect = window.innerWidth / window.innerHeight;
  // 更新摄像机的投影矩阵
  camera.updateProjectionMatrix();
  // 更新渲染器
  renderer.setSize(window.innerWidth, window.innerHeight);
  // 设置渲染器的像素比
  renderer.setPixelRatio(window.devicePixelRatio);
});

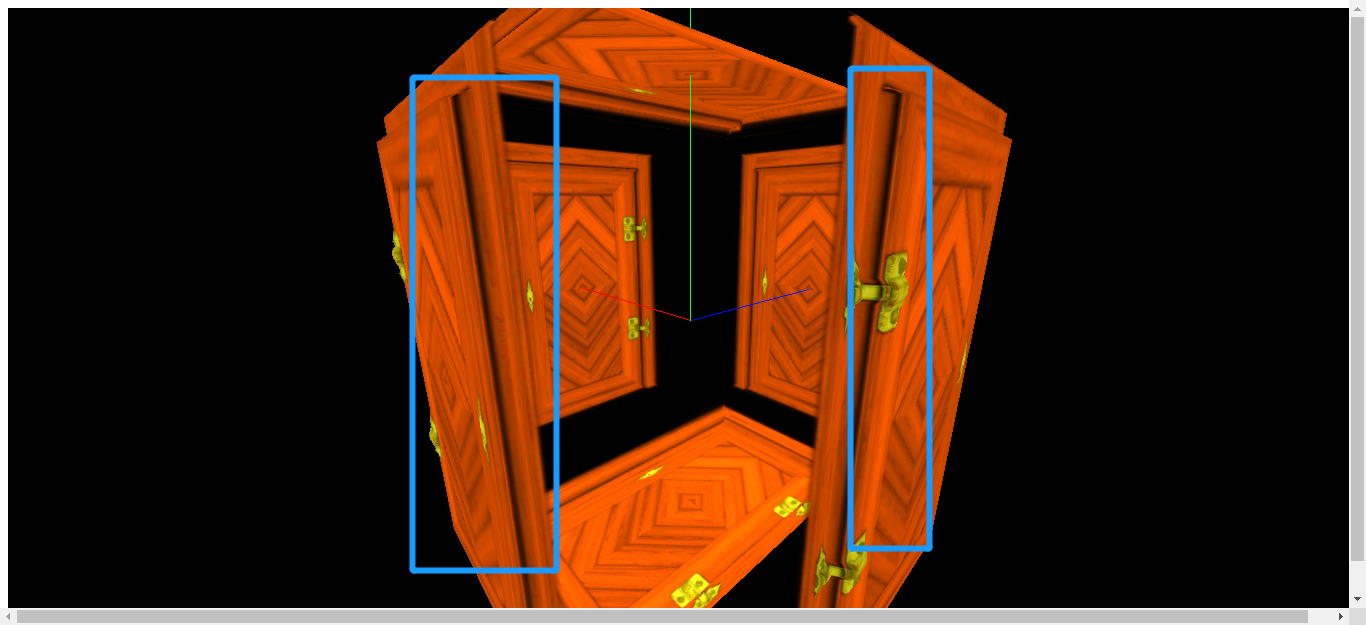
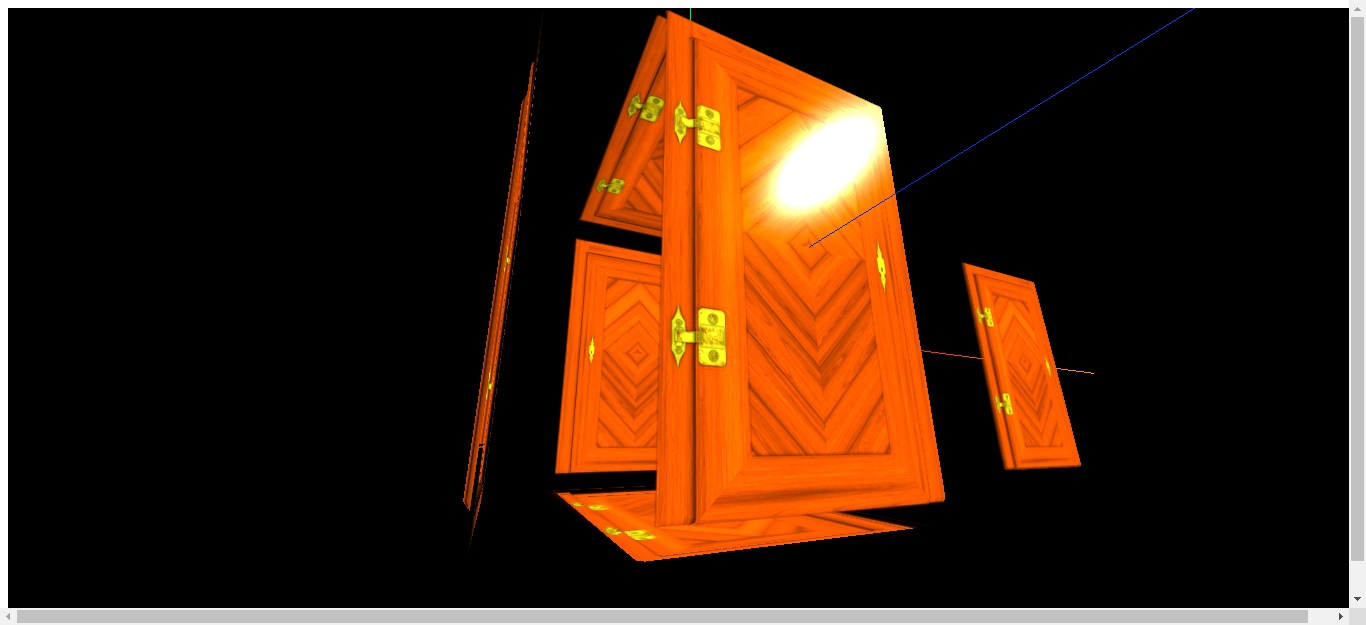
六、displacementMap--置换(位移)贴图与顶点细分设置--要给几何体设置点数属性
主要代码:
/**
 * 导入纹理贴图
 */
// 设置纹理加载器
const textureLoader = new THREE.TextureLoader();
// 注意:vue项目中需要把static文件夹放到public文件夹下,并使用static开头的绝对路径
// 颜色贴图
const doorColorTexture = textureLoader.load("static/textures/door/color.jpg");
// 透明材质与透明纹理贴图--实现只显示门
const doorAlphaTexture = textureLoader.load("static/textures/door/alpha.jpg");
// AO环境贴图遮挡--环境光强度控制--实现门框线的颜色深度
const doorAoTexture = textureLoader.load(
  "static/textures/door/ambientOcclusion.jpg"
);
// 导入置换(位移)贴图-实现门体突出
const doorHeightTexture = textureLoader.load("static/textures/door/height.jpg");

/*
 *  添加物体
 */
// 创建几何体--给几何体设置点数属性
const cubeGeometry = new THREE.BoxBufferGeometry(3, 3, 3, 100, 100, 100);
// 材质--标准网络材质
const material = new THREE.MeshStandardMaterial({
  color: "#ffff00",
  map: doorColorTexture, // 添加纹理贴图
  // alpha贴图是一张灰度纹理
  // 用于控制整个表面的不透明度(黑色:完全透明;白色:完全不透明)
  // 注意:配合transparent:true,一起使用
  alphaMap: doorAlphaTexture,
  transparent: true, // 开始透明
  // opacity: 0.5, // 注意:transparent: true,开启后可使用
  side: THREE.DoubleSide, //定义将要渲染哪一面 - 正面,背面或两者

  aoMap: doorAoTexture, // 环境遮挡贴图,aoMap需要第二组UV。
  // aoMapIntensity: 3, // 环境遮挡效果的强度。默认值为1。零是不遮挡效果。

  displacementMap: doorHeightTexture, // 置换(位移)贴图
  displacementScale: 0.25, // 设置最大突出5公分
});
示例:置换(位移)贴图完整代码:
/*
 * @Description: displacementMap--置换(位移)贴图与顶点细分设置--要给几何体设置点数属性
 */
import * as THREE from "three";
// 导入轨道控制器(鼠标控制)
import { OrbitControls } from "three/examples/jsm/controls/OrbitControls";

/*
 *1. 创建场景
 */
const scene = new THREE.Scene();

/*
 * 2.创建相机(这里是 透视摄像机--用来模拟人眼所看到的景象)
 */
const camera = new THREE.PerspectiveCamera(
  75, // 视野角度
  window.innerWidth / window.innerHeight, // 长宽比
  0.1, // 进截面
  1000 // 远截面
);
// 设置相机位置
camera.position.set(5, 5, 5);
scene.add(camera); // 将相机添加到场景中

/**
 * 导入纹理贴图
 */
// 设置纹理加载器
const textureLoader = new THREE.TextureLoader();
// 注意:vue项目中需要把static文件夹放到public文件夹下,并使用static开头的绝对路径
// 颜色贴图
const doorColorTexture = textureLoader.load("static/textures/door/color.jpg");
// 透明材质与透明纹理贴图--实现只显示门
const doorAlphaTexture = textureLoader.load("static/textures/door/alpha.jpg");
// AO环境贴图遮挡--环境光强度控制--实现门框线的颜色深度
const doorAoTexture = textureLoader.load(
  "static/textures/door/ambientOcclusion.jpg"
);
// 导入置换(位移)贴图-实现门体突出
const doorHeightTexture = textureLoader.load("static/textures/door/height.jpg");

/*
 *  添加物体
 */
// 创建几何体--给几何体设置点数属性
const cubeGeometry = new THREE.BoxBufferGeometry(3, 3, 3, 100, 100, 100);
// 材质--标准网络材质
const material = new THREE.MeshStandardMaterial({
  color: "#ffff00",
  map: doorColorTexture, // 添加纹理贴图
  alphaMap: doorAlphaTexture,
  transparent: true, // 开始透明
  // opacity: 0.5, // 注意:transparent: true,开启后可使用
  side: THREE.DoubleSide, //定义将要渲染哪一面 - 正面,背面或两者

  aoMap: doorAoTexture, // 环境遮挡贴图,aoMap需要第二组UV。
  // aoMapIntensity: 3, // 环境遮挡效果的强度。默认值为1。零是不遮挡效果。

  displacementMap: doorHeightTexture, // 置换(位移)贴图
  displacementScale: 0.25, // 设置最大突出5公分
});
// 添加到网格中
const cube = new THREE.Mesh(cubeGeometry, material);
// 给立方体设置第二组uv
cubeGeometry.setAttribute(
  "uv2",
  new THREE.BufferAttribute(cubeGeometry.attributes.uv.array, 2)
);
scene.add(cube);

// 添加平面--给几何体设置点数属性
const planeGeometry = new THREE.PlaneBufferGeometry(3, 3, 200, 200);
const plane = new THREE.Mesh(planeGeometry, material);
plane.position.set(5, 0, 0);
// 给平面设置第二组uv
planeGeometry.setAttribute(
  "uv2",
  new THREE.BufferAttribute(planeGeometry.attributes.uv.array, 2)
);
scene.add(plane);

/**
 * 灯光
 */
// 环境光
const light = new THREE.AmbientLight(0xffffff);
scene.add(light);
// 直线光源(平行光)
const directionalLight = new THREE.DirectionalLight(0xffffff, 0.5);
// 设置平行光的位置
directionalLight.position.set(10, 10, 10);
scene.add(directionalLight);

/**
 *  3.初始化渲染器
 */
const renderer = new THREE.WebGL1Renderer();
// 设置渲染器尺寸
renderer.setSize(window.innerWidth, window.innerHeight);
// 将webgl渲染的canvas内容添加到body
document.body.appendChild(renderer.domElement);

/**
 * 创建轨道控制器(OrbitControls)
 * 可以使得相机围绕目标进行轨道运动
 */
const controls = new OrbitControls(camera, renderer.domElement);
// 设置控制器阻尼,让控制器更有真是效果,必须在动画循环render()中调用update()
controls.enableDamping = true;
controls.autoRotate = true;
controls.autoRotateSpeed = 5; // 自转速度

/**
 * 辅助三维坐标系
 * 红色代表 X 轴. 绿色代表 Y 轴. 蓝色代表 Z 轴.
 */
var axesHelper = new THREE.AxesHelper(7);
scene.add(axesHelper);

// 定义循环渲染方法
function render() {
  renderer.render(scene, camera); // 执行渲染操作
  controls.update(); // 加不加都行
  requestAnimationFrame(render); // 渲染下一帧的时候就会调用render函数
}
render();

// 监听尺寸变化实现自适应画面
window.addEventListener("resize", () => {
  // console.log("画面变化了");
  // 更新摄像头
  camera.aspect = window.innerWidth / window.innerHeight;
  // 更新摄像机的投影矩阵
  camera.updateProjectionMatrix();
  // 更新渲染器
  renderer.setSize(window.innerWidth, window.innerHeight);
  // 设置渲染器的像素比
  renderer.setPixelRatio(window.devicePixelRatio);
});

七、roughness--设置粗糙度与粗糙度
主要代码:
/**
 * 导入纹理贴图
 */
// 设置纹理加载器
const textureLoader = new THREE.TextureLoader();
// 注意:vue项目中需要把static文件夹放到public文件夹下,并使用static开头的绝对路径
// 颜色贴图
const doorColorTexture = textureLoader.load("static/textures/door/color.jpg");
// 实现透明材质与透明纹理贴图--实现只显示门
const doorAlphaTexture = textureLoader.load("static/textures/door/alpha.jpg");
// AO环境贴图遮挡--环境光强度控制--实现门框线的颜色深度
const doorAoTexture = textureLoader.load(
  "static/textures/door/ambientOcclusion.jpg"
);
// 导入置换(位移)贴图-实现门体突出
const doorHeightTexture = textureLoader.load("static/textures/door/height.jpg");
// 导入粗糙度贴图--实现金属反光,门是完全漫反射(不反光)
const roughnessTexture = textureLoader.load(
  "static/textures/door/roughness.jpg"
);

/*
 *  添加物体
 */
// 创建几何体
const cubeGeometry = new THREE.BoxBufferGeometry(3, 3, 3, 100, 100, 100);
// 材质--标准网络材质
const material = new THREE.MeshStandardMaterial({
  color: "#ffff00",
  map: doorColorTexture, // 添加纹理贴图
  alphaMap: doorAlphaTexture,
  transparent: true, // 开始透明
  // opacity: 0.5, // 注意:transparent: true,开启后可使用
  side: THREE.DoubleSide, //定义将要渲染哪一面 - 正面,背面或两者

  aoMap: doorAoTexture, // 环境遮挡贴图,aoMap需要第二组UV。
  // aoMapIntensity: 3, // 环境遮挡效果的强度。默认值为1。零是不遮挡效果。

  displacementMap: doorHeightTexture, // 唯置换(位移)贴图
  displacementScale: 0.1, // 设置最大突出5公分

  // 材质的粗糙程度。0.0表示平滑的镜面反射,1.0表示完全漫反射。默认值为1.0。
  // 如果还提供roughnessMap,则两个值相乘。
  roughness: 1,
  roughnessMap: roughnessTexture,
});
示例:粗糙贴图完整代码:
/*
 * @Description: .roughness--设置粗糙度与粗糙度贴图
 */
import * as THREE from "three";
// 导入轨道控制器(鼠标控制)
import { OrbitControls } from "three/examples/jsm/controls/OrbitControls";

/*
 *1. 创建场景
 */
const scene = new THREE.Scene();

/*
 * 2.创建相机(这里是 透视摄像机--用来模拟人眼所看到的景象)
 */
const camera = new THREE.PerspectiveCamera(
  75, // 视野角度
  window.innerWidth / window.innerHeight, // 长宽比
  0.1, // 进截面
  1000 // 远截面
);
// 设置相机位置
camera.position.set(5, 5, 5);
scene.add(camera); // 将相机添加到场景中

/**
 * 导入纹理贴图
 */
// 设置纹理加载器
const textureLoader = new THREE.TextureLoader();
// 注意:vue项目中需要把static文件夹放到public文件夹下,并使用static开头的绝对路径
// 颜色贴图
const doorColorTexture = textureLoader.load("static/textures/door/color.jpg");
// 实现透明材质与透明纹理贴图--实现只显示门
const doorAlphaTexture = textureLoader.load("static/textures/door/alpha.jpg");
// AO环境贴图遮挡--环境光强度控制--实现门框线的颜色深度
const doorAoTexture = textureLoader.load(
  "static/textures/door/ambientOcclusion.jpg"
);
// 导入置换(位移)贴图-实现门体突出
const doorHeightTexture = textureLoader.load("static/textures/door/height.jpg");
// 导入粗糙度贴图--实现金属反光,门是完全漫反射(不反光)
const roughnessTexture = textureLoader.load(
  "static/textures/door/roughness.jpg"
);

/*
 *  添加物体
 */
// 创建几何体
const cubeGeometry = new THREE.BoxBufferGeometry(3, 3, 3, 100, 100, 100);
// 材质--标准网络材质
const material = new THREE.MeshStandardMaterial({
  color: "#ffff00",
  map: doorColorTexture, // 添加纹理贴图
  alphaMap: doorAlphaTexture,
  transparent: true, // 开始透明
  // opacity: 0.5, // 注意:transparent: true,开启后可使用
  side: THREE.DoubleSide, //定义将要渲染哪一面 - 正面,背面或两者

  aoMap: doorAoTexture, // 环境遮挡贴图,aoMap需要第二组UV。
  // aoMapIntensity: 3, // 环境遮挡效果的强度。默认值为1。零是不遮挡效果。

  displacementMap: doorHeightTexture, // 置换(位移)贴图
  displacementScale: 0.1, // 设置最大突出5公分

  // 材质的粗糙程度。0.0表示平滑的镜面反射,1.0表示完全漫反射。默认值为1.0。
  // 如果还提供roughnessMap,则两个值相乘。
  roughness: 1,
  roughnessMap: roughnessTexture,
});
// 添加到网格中
const cube = new THREE.Mesh(cubeGeometry, material);
// 给立方体设置第二组uv
cubeGeometry.setAttribute(
  "uv2",
  new THREE.BufferAttribute(cubeGeometry.attributes.uv.array, 2)
);
scene.add(cube);

// 添加平面
const planeGeometry = new THREE.PlaneBufferGeometry(3, 3, 200, 200);
const plane = new THREE.Mesh(planeGeometry, material);
plane.position.set(5, 0, 0);
// 给平面设置第二组uv
planeGeometry.setAttribute(
  "uv2",
  new THREE.BufferAttribute(planeGeometry.attributes.uv.array, 2)
);
scene.add(plane);

/**
 * 灯光
 */
// 环境光
const light = new THREE.AmbientLight(0xffffff);
scene.add(light);
// 直线光源(平行光)
const directionalLight = new THREE.DirectionalLight(0xffffff, 0.5);
// 设置平行光的位置
directionalLight.position.set(10, 10, 10);
scene.add(directionalLight);

/**
 *  3.初始化渲染器
 */
const renderer = new THREE.WebGL1Renderer();
// 设置渲染器尺寸
renderer.setSize(window.innerWidth, window.innerHeight);
// 将webgl渲染的canvas内容添加到body
document.body.appendChild(renderer.domElement);

/**
 * 创建轨道控制器(OrbitControls)
 * 可以使得相机围绕目标进行轨道运动
 */
const controls = new OrbitControls(camera, renderer.domElement);
// 设置控制器阻尼,让控制器更有真是效果,必须在动画循环render()中调用update()
controls.enableDamping = true;
// controls.autoRotate = true;
// controls.autoRotateSpeed = 2; // 自转速度

/**
 * 辅助三维坐标系
 * 红色代表 X 轴. 绿色代表 Y 轴. 蓝色代表 Z 轴.
 */
var axesHelper = new THREE.AxesHelper(7);
scene.add(axesHelper);

// 定义循环渲染方法
function render() {
  renderer.render(scene, camera); // 执行渲染操作
  controls.update(); // 加不加都行
  requestAnimationFrame(render); // 渲染下一帧的时候就会调用render函数
}
render();

// 监听尺寸变化实现自适应画面
window.addEventListener("resize", () => {
  // console.log("画面变化了");
  // 更新摄像头
  camera.aspect = window.innerWidth / window.innerHeight;
  // 更新摄像机的投影矩阵
  camera.updateProjectionMatrix();
  // 更新渲染器
  renderer.setSize(window.innerWidth, window.innerHeight);
  // 设置渲染器的像素比
  renderer.setPixelRatio(window.devicePixelRatio);
});

八、metalness--设置金属度与金属贴图
主要代码:
/**
 * 导入纹理贴图
 */
// 设置纹理加载器
const textureLoader = new THREE.TextureLoader();
// 注意:vue项目中需要把static文件夹放到public文件夹下,并使用static开头的绝对路径
// 贴图
const doorColorTexture = textureLoader.load("static/textures/door/color.jpg");
// 实现透明材质与透明纹理贴图--实现只只显示门
const doorAlphaTexture = textureLoader.load("static/textures/door/alpha.jpg");
// AO环境贴图遮挡--环境光强度控制--实现门框线的颜色深度
const doorAoTexture = textureLoader.load(
  "static/textures/door/ambientOcclusion.jpg"
);
// 导入置换(位移)贴图-实现门体突出
const doorHeightTexture = textureLoader.load("static/textures/door/height.jpg");
// 导入粗糙度贴图--实现金属反光,门是完全漫反射(不反光)
const roughnessTexture = textureLoader.load(
  "static/textures/door/roughness.jpg"
);
// 导入金属贴图-实现金属贴图
const metalnessTexture = textureLoader.load(
  "static/textures/door/metalness.jpg"
);

/*
 *  添加物体
 */
// 创建几何体
const cubeGeometry = new THREE.BoxBufferGeometry(3, 3, 3, 100, 100, 100);
// 材质--标准网络材质
const material = new THREE.MeshStandardMaterial({
  color: "#ffff00",
  map: doorColorTexture, // 添加纹理贴图
  alphaMap: doorAlphaTexture,
  transparent: true, // 开始透明
  // opacity: 0.5, // 注意:transparent: true,开启后可使用
  side: THREE.DoubleSide, //定义将要渲染哪一面 - 正面,背面或两者

  aoMap: doorAoTexture, // 环境遮挡贴图,aoMap需要第二组UV。
  // aoMapIntensity: 3, // 环境遮挡效果的强度。默认值为1。零是不遮挡效果。

  displacementMap: doorHeightTexture, // 唯置换(位移)贴图
  displacementScale: 0.1, // 设置最大突出5公分

  // 材质的粗糙程度。0.0表示平滑的镜面反射,1.0表示完全漫反射。默认值为1.0。如果还提供roughnessMap,则两个值相乘。
  roughness: 1,
  roughnessMap: roughnessTexture,

  // 金属度
  // 材质与金属的相似度。
  // 非金属材质,如木材或石材,使用0.0,金属使用1.0,通常没有中间值。
  // 默认值为0.0。0.0到1.0之间的值可用于生锈金属的外观。
  // 如果还提供了metalnessMap,则两个值相乘。
  metalness: 1,
  metalnessMap: metalnessTexture,
});
示例代码:金属贴图完整代码:
/*
 * @Description:    标准网格材质(MeshStandardMaterial)--.metalness--设置金属度与金属贴图
 */
import * as THREE from "three";
// 导入轨道控制器(鼠标控制)
import { OrbitControls } from "three/examples/jsm/controls/OrbitControls";

/*
 *1. 创建场景
 */
const scene = new THREE.Scene();

/*
 * 2.创建相机(这里是 透视摄像机--用来模拟人眼所看到的景象)
 */
const camera = new THREE.PerspectiveCamera(
  75, // 视野角度
  window.innerWidth / window.innerHeight, // 长宽比
  0.1, // 进截面
  1000 // 远截面
);
// 设置相机位置
camera.position.set(5, 5, 5);
scene.add(camera); // 将相机添加到场景中

/**
 * 导入纹理贴图
 */
// 设置纹理加载器
const textureLoader = new THREE.TextureLoader();
// 注意:vue项目中需要把static文件夹放到public文件夹下,并使用static开头的绝对路径
// 颜色贴图
const doorColorTexture = textureLoader.load("static/textures/door/color.jpg");
// 实现透明材质与透明纹理贴图--实现只显示门
const doorAlphaTexture = textureLoader.load("static/textures/door/alpha.jpg");
// AO环境贴图遮挡--环境光强度控制--实现门框线的颜色深度
const doorAoTexture = textureLoader.load(
  "static/textures/door/ambientOcclusion.jpg"
);
// 导入置换(位移)贴图-实现门体突出
const doorHeightTexture = textureLoader.load("static/textures/door/height.jpg");
// 导入粗糙度贴图--实现金属反光,门是完全漫反射(不反光)
const roughnessTexture = textureLoader.load(
  "static/textures/door/roughness.jpg"
);
// 导入金属贴图-实现金属贴图
const metalnessTexture = textureLoader.load(
  "static/textures/door/metalness.jpg"
);

/*
 *  添加物体
 */
// 创建几何体
const cubeGeometry = new THREE.BoxBufferGeometry(3, 3, 3, 100, 100, 100);
// 材质--标准网络材质
const material = new THREE.MeshStandardMaterial({
  color: "#ffff00",
  map: doorColorTexture, // 添加纹理贴图
  alphaMap: doorAlphaTexture,
  transparent: true, // 开始透明
  // opacity: 0.5, // 注意:transparent: true,开启后可使用
  side: THREE.DoubleSide, //定义将要渲染哪一面 - 正面,背面或两者

  aoMap: doorAoTexture, // 环境遮挡贴图,aoMap需要第二组UV。
  // aoMapIntensity: 3, // 环境遮挡效果的强度。默认值为1。零是不遮挡效果。

  displacementMap: doorHeightTexture, // 置换(位移)贴图
  displacementScale: 0.1, // 设置最大突出5公分

  // 材质的粗糙程度。0.0表示平滑的镜面反射,1.0表示完全漫反射。默认值为1.0。
  //如果还提供roughnessMap,则两个值相乘。
  roughness: 1,
  roughnessMap: roughnessTexture,

  // 金属度
  // 材质与金属的相似度。
  // 非金属材质,如木材或石材,使用0.0,金属使用1.0,通常没有中间值。
  // 默认值为0.0。0.0到1.0之间的值可用于生锈金属的外观。
  // 如果还提供了metalnessMap,则两个值相乘。
  metalness: 1,
  metalnessMap: metalnessTexture,
});
// 添加到网格中
const cube = new THREE.Mesh(cubeGeometry, material);
// 给立方体设置第二组uv
cubeGeometry.setAttribute(
  "uv2",
  new THREE.BufferAttribute(cubeGeometry.attributes.uv.array, 2)
);
scene.add(cube);

// 添加平面
const planeGeometry = new THREE.PlaneBufferGeometry(3, 3, 200, 200);
const plane = new THREE.Mesh(planeGeometry, material);
plane.position.set(5, 0, 0);
// 给平面设置第二组uv
planeGeometry.setAttribute(
  "uv2",
  new THREE.BufferAttribute(planeGeometry.attributes.uv.array, 2)
);
scene.add(plane);

/**
 * 灯光
 */
// 环境光
const light = new THREE.AmbientLight(0xffffff);
scene.add(light);
// 直线光源(平行光)
const directionalLight = new THREE.DirectionalLight(0xffffff, 0.5);
// 设置平行光的位置
directionalLight.position.set(10, 10, 10);
scene.add(directionalLight);

/**
 *  3.初始化渲染器
 */
const renderer = new THREE.WebGL1Renderer();
// 设置渲染器尺寸
renderer.setSize(window.innerWidth, window.innerHeight);
// 将webgl渲染的canvas内容添加到body
document.body.appendChild(renderer.domElement);

/**
 * 创建轨道控制器(OrbitControls)
 * 可以使得相机围绕目标进行轨道运动
 */
const controls = new OrbitControls(camera, renderer.domElement);
// 设置控制器阻尼,让控制器更有真是效果,必须在动画循环render()中调用update()
controls.enableDamping = true;
// controls.autoRotate = true;
// controls.autoRotateSpeed = 2; // 自转速度

/**
 * 辅助三维坐标系
 * 红色代表 X 轴. 绿色代表 Y 轴. 蓝色代表 Z 轴.
 */
var axesHelper = new THREE.AxesHelper(7);
scene.add(axesHelper);

// 定义循环渲染方法
function render() {
  renderer.render(scene, camera); // 执行渲染操作
  controls.update(); // 加不加都行
  requestAnimationFrame(render); // 渲染下一帧的时候就会调用render函数
}
render();

// 监听尺寸变化实现自适应画面
window.addEventListener("resize", () => {
  // console.log("画面变化了");
  // 更新摄像头
  camera.aspect = window.innerWidth / window.innerHeight;
  // 更新摄像机的投影矩阵
  camera.updateProjectionMatrix();
  // 更新渲染器
  renderer.setSize(window.innerWidth, window.innerHeight);
  // 设置渲染器的像素比
  renderer.setPixelRatio(window.devicePixelRatio);
});

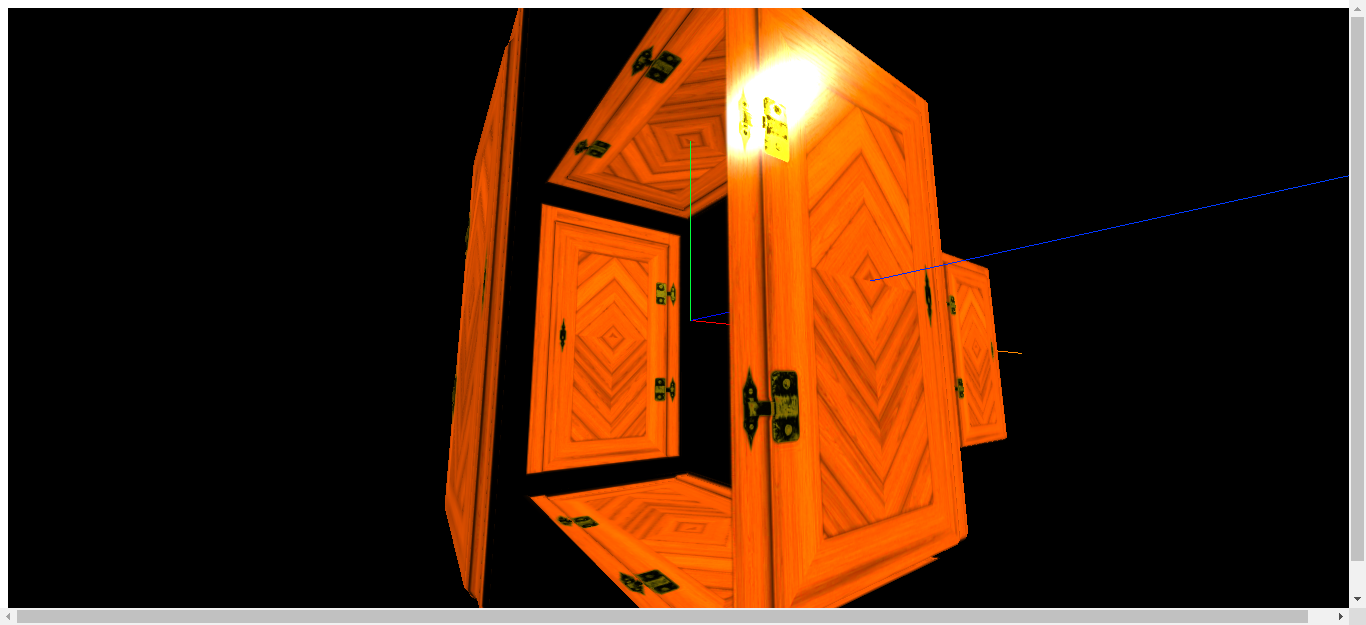
九、normalMap--法线贴图的应用
主要代码:
/**
 * 导入纹理贴图
 */
// 设置纹理加载器
const textureLoader = new THREE.TextureLoader();
// 注意:vue项目中需要把static文件夹放到public文件夹下,并使用static开头的绝对路径
// 颜色贴图
const doorColorTexture = textureLoader.load("static/textures/door/color.jpg");
// 实现透明材质与透明纹理贴图--实现只只显示门
const doorAlphaTexture = textureLoader.load("static/textures/door/alpha.jpg");
// AO环境贴图遮挡--环境光强度控制--实现门框线的颜色深度
const doorAoTexture = textureLoader.load(
  "static/textures/door/ambientOcclusion.jpg"
);
// 导入置换(位移)贴图-实现门体突出
const doorHeightTexture = textureLoader.load("static/textures/door/height.jpg");
// 导入粗糙度贴图--实现金属反光,门是完全漫反射(不反光)
const roughnessTexture = textureLoader.load(
  "static/textures/door/roughness.jpg"
);
// 导入金属贴图-实现金属贴图
const metalnessTexture = textureLoader.load(
  "static/textures/door/metalness.jpg"
);
// 导入法线贴图-改变光照-这里会发现光照照到门缝(凹凸不平的部分)有阴影效果
const normalTexture = textureLoader.load("static/textures/door/normal.jpg");

/*
 *  添加物体
 */
// 创建几何体
const cubeGeometry = new THREE.BoxBufferGeometry(3, 3, 3, 100, 100, 100);
// 材质--标准网络材质
const material = new THREE.MeshStandardMaterial({
  color: "#ffff00",
  map: doorColorTexture, // 添加纹理贴图
  alphaMap: doorAlphaTexture,
  transparent: true, // 开始透明
  // opacity: 0.5, // 注意:transparent: true,开启后可使用
  side: THREE.DoubleSide, //定义将要渲染哪一面 - 正面,背面或两者

  aoMap: doorAoTexture, // 环境遮挡贴图,aoMap需要第二组UV。
  // aoMapIntensity: 3, // 环境遮挡效果的强度。默认值为1。零是不遮挡效果。

  displacementMap: doorHeightTexture, // 置换(位移)贴图
  displacementScale: 0.1, // 设置最大突出5公分

  // 材质的粗糙程度。0.0表示平滑的镜面反射,1.0表示完全漫反射。默认值为1.0。
  // 如果还提供roughnessMap,则两个值相乘。
  roughness: 1,
  roughnessMap: roughnessTexture,

  // 材质与金属的相似度。
  // 非金属材质,如木材或石材,使用0.0,金属使用1.0,通常没有中间值。
  // 默认值为0.0。0.0到1.0之间的值可用于生锈金属的外观。
  // 如果还提供了metalnessMap,则两个值相乘。
  metalness: 1,
  metalnessMap: metalnessTexture,

  // 用于创建法线贴图的纹理。
  // RGB值会影响每个像素片段的曲面法线,并更改颜色照亮的方式。
  // 法线贴图不会改变曲面的实际形状,只会改变光照。
  normalMap: normalTexture,
});
示例:法线贴图完整代码:
/*
 * @Description: normalMap--法线贴图的应用
 */
import * as THREE from "three";
// 导入轨道控制器(鼠标控制)
import { OrbitControls } from "three/examples/jsm/controls/OrbitControls";

/*
 *1. 创建场景
 */
const scene = new THREE.Scene();

/*
 * 2.创建相机(这里是 透视摄像机--用来模拟人眼所看到的景象)
 */
const camera = new THREE.PerspectiveCamera(
  75, // 视野角度
  window.innerWidth / window.innerHeight, // 长宽比
  0.1, // 进截面
  1000 // 远截面
);
// 设置相机位置
camera.position.set(5, 5, 5);
scene.add(camera); // 将相机添加到场景中

/**
 * 导入纹理贴图
 */
// 设置纹理加载器
const textureLoader = new THREE.TextureLoader();
// 注意:vue项目中需要把static文件夹放到public文件夹下,并使用static开头的绝对路径
// 颜色贴图
const doorColorTexture = textureLoader.load("static/textures/door/color.jpg");
// 实现透明材质与透明纹理贴图--实现只只显示门
const doorAlphaTexture = textureLoader.load("static/textures/door/alpha.jpg");
// AO环境贴图遮挡--环境光强度控制--实现门框线的颜色深度
const doorAoTexture = textureLoader.load(
  "static/textures/door/ambientOcclusion.jpg"
);
// 导入置换(位移)贴图-实现门体突出
const doorHeightTexture = textureLoader.load("static/textures/door/height.jpg");
// 导入粗糙度贴图--实现金属反光,门是完全漫反射(不反光)
const roughnessTexture = textureLoader.load(
  "static/textures/door/roughness.jpg"
);
// 导入金属贴图-实现金属贴图
const metalnessTexture = textureLoader.load(
  "static/textures/door/metalness.jpg"
);
// 导入法线贴图-改变光照-这里会发现光照照到门缝(凹凸不平的部分)有阴影效果
const normalTexture = textureLoader.load("static/textures/door/normal.jpg");

/*
 *  添加物体
 */
// 创建几何体
const cubeGeometry = new THREE.BoxBufferGeometry(3, 3, 3, 100, 100, 100);
// 材质--标准网络材质
const material = new THREE.MeshStandardMaterial({
  color: "#ffff00",
  map: doorColorTexture, // 添加纹理贴图
  alphaMap: doorAlphaTexture,
  transparent: true, // 开始透明
  // opacity: 0.5, // 注意:transparent: true,开启后可使用
  side: THREE.DoubleSide, //定义将要渲染哪一面 - 正面,背面或两者

  aoMap: doorAoTexture, // 环境遮挡贴图,aoMap需要第二组UV。
  // aoMapIntensity: 3, // 环境遮挡效果的强度。默认值为1。零是不遮挡效果。

  displacementMap: doorHeightTexture, // 置换(位移)贴图
  displacementScale: 0.1, // 设置最大突出5公分

  // 材质的粗糙程度。0.0表示平滑的镜面反射,1.0表示完全漫反射。默认值为1.0。
  // 如果还提供roughnessMap,则两个值相乘。
  roughness: 1,
  roughnessMap: roughnessTexture,

  // 材质与金属的相似度。
  // 非金属材质,如木材或石材,使用0.0,金属使用1.0,通常没有中间值。
  // 默认值为0.0。0.0到1.0之间的值可用于生锈金属的外观。
  //如果还提供了metalnessMap,则两个值相乘。
  metalness: 1,
  metalnessMap: metalnessTexture,

  // 用于创建法线贴图的纹理。
  // RGB值会影响每个像素片段的曲面法线,并更改颜色照亮的方式。
  // 法线贴图不会改变曲面的实际形状,只会改变光照。
  normalMap: normalTexture,
});
// 添加到网格中
const cube = new THREE.Mesh(cubeGeometry, material);
// 给立方体设置第二组uv
cubeGeometry.setAttribute(
  "uv2",
  new THREE.BufferAttribute(cubeGeometry.attributes.uv.array, 2)
);
scene.add(cube);

// 添加平面
const planeGeometry = new THREE.PlaneBufferGeometry(3, 3, 200, 200);
const plane = new THREE.Mesh(planeGeometry, material);
plane.position.set(5, 0, 0);
// 给平面设置第二组uv
planeGeometry.setAttribute(
  "uv2",
  new THREE.BufferAttribute(planeGeometry.attributes.uv.array, 2)
);
scene.add(plane);

/**
 * 灯光
 */
// 环境光
const light = new THREE.AmbientLight(0xffffff);
scene.add(light);
// 直线光源(平行光)
const directionalLight = new THREE.DirectionalLight(0xffffff, 0.5);
// 设置平行光的位置
directionalLight.position.set(10, 10, 10);
scene.add(directionalLight);

/**
 *  3.初始化渲染器
 */
const renderer = new THREE.WebGL1Renderer();
// 设置渲染器尺寸
renderer.setSize(window.innerWidth, window.innerHeight);
// 将webgl渲染的canvas内容添加到body
document.body.appendChild(renderer.domElement);

/**
 * 创建轨道控制器(OrbitControls)
 * 可以使得相机围绕目标进行轨道运动
 */
const controls = new OrbitControls(camera, renderer.domElement);
// 设置控制器阻尼,让控制器更有真是效果,必须在动画循环render()中调用update()
controls.enableDamping = true;
// controls.autoRotate = true;
// controls.autoRotateSpeed = 2; // 自转速度

/**
 * 辅助三维坐标系
 * 红色代表 X 轴. 绿色代表 Y 轴. 蓝色代表 Z 轴.
 */
var axesHelper = new THREE.AxesHelper(7);
scene.add(axesHelper);

// 定义循环渲染方法
function render() {
  renderer.render(scene, camera); // 执行渲染操作
  controls.update(); // 加不加都行
  requestAnimationFrame(render); // 渲染下一帧的时候就会调用render函数
}
render();

// 监听尺寸变化实现自适应画面
window.addEventListener("resize", () => {
  // console.log("画面变化了");
  // 更新摄像头
  camera.aspect = window.innerWidth / window.innerHeight;
  // 更新摄像机的投影矩阵
  camera.updateProjectionMatrix();
  // 更新渲染器
  renderer.setSize(window.innerWidth, window.innerHeight);
  // 设置渲染器的像素比
  renderer.setPixelRatio(window.devicePixelRatio);
});
