没有数据的前端,是没有灵魂的。明明标题是vue3 + rust ,但日记撰写至今,似乎只有第一篇提及了Rust,这可不行。是时候一股作气,完成大部分页面绘制工作了!
最后再说一次,时间要加速了。 ——普奇神父
文章目录
- 内容主页
- 文章列表页
- 列表组件封装
- 用户文章列表页预览
- 管理员列表页
- 文章内容页
- 封装文章内容组件
- 编辑文章内容页
- 管理员文章内容页
- 管理员登陆页面
- 封装登陆组件
- 编写登陆界面
- 文章编辑界面
- 封装提交组件
- 流转图
内容主页
src/views/BlogsView.vue

<script setup>
    import { NLayout,NMenu,NLayoutSider} from 'naive-ui';
    import { RouterView } from 'vue-router';
    import { ref } from 'vue';
import router from '../router';
    const menuSelect = ref("all")
    const menuOptions = ref(null)
    menuOptions.value = [
        {
            label:"全部",
            key:"all",
        },
        {
            label: "关于",
            key:"about-me"
        },
    ]

    function handleUpdateValue(key, item) {
        switch (key) {
            case "all":
                router.push("/articles/all")
                break
            case "about-me":
                router.push("about")
                break
        }
    }
</script>
<template>
    <n-layout has-sider style="height: 100%;">
        <n-layout-sider
            :bordered="true"
            show-trigger
            collapse-mode="width"
            :collapsed-width="64"
            :width="120"
            :native-scrollbar="false"
        >
            <n-menu
            :collapsed-width="64"
            :collapsed-icon-size="22"
            :value="menuSelect"
            :options="menuOptions"
            @update:value="handleUpdateValue"
            />
        </n-layout-sider>

        <n-layout>
            <router-view />
        </n-layout>

    </n-layout>

</template>
文章列表页
文章列表页和管理员列表页类似的界面,所以我们封装一个列表组件以方便复用。
列表组件封装
列表组件要考虑普通用户和管理员两种情况。
src/components/BlogsList.vue
<script setup>
    import { NList,NListItem,NSpace,NButton } from 'naive-ui';
    import {ref} from 'vue'
    import router from '../router';
    const showModal = ref(false)

    const props = defineProps(['values',"isAdmin"])
    const emits = defineEmits(['jump-to-article'])
    function jumpToArticle(key){
        emits("jump-to-article",key)
    }
    function jumpToEdit(){
        router.push("/edit")
    }
</script>

<template>
    <n-list hoverable >
        <n-list-item v-for="item in props.values" >
            <n-thing
                :title="item.title"
                content-style="margin-top: 10px;pointer-events: none;"
                >
                <template #header-extra v-if="props.isAdmin">
                    <n-button
                    style="margin-right: 3px;"
                    strong
                    secondary
                    type="info"
                    size="small"
                    @click="jumpToArticle">预览</n-button>
                    <n-button
                    style="margin-right: 3px;"
                    strong
                    secondary
                    type="warning"
                    size="small"
                    @click="jumpToEdit">编辑</n-button>
                    <n-button
                    strong
                    secondary
                    type="error"
                    size="small"
                    @click="showModal = true">删除</n-button>
                    <n-modal
                        v-model:show="showModal"
                        preset="dialog"
                        title="确认"
                        content="确认删除文章?"
                        positive-text="确认"
                        negative-text="算了"
                        @positive-click="onPositiveClick"
                        @negative-click="onNegativeClick"
                    />
                </template>
                <template #description>
                <n-space size="small" style="margin-top: 4px">
                    <n-tag v-for="tag in item.tags" :bordered="false" type="info" size="small">
                    {{ tag }}
                    </n-tag>
                </n-space>
                </template>
                {{ item.details }}
            </n-thing>
        </n-list-item>
    </n-list>
</template>
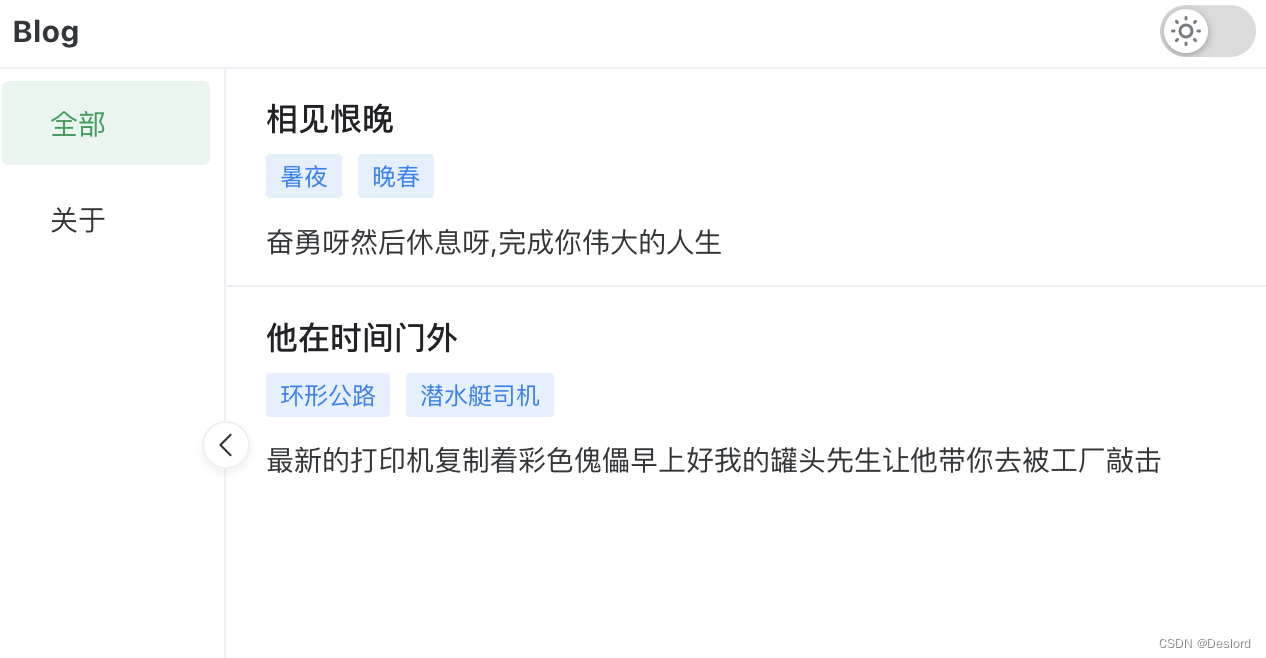
用户文章列表页预览
src/views/BlogsListView.vue
<script setup>
    import BlogsList from '../components/BlogsList.vue';
    import {ref} from 'vue'
    import router from '../router';
    const list = ref(null)
    list.value=[
        {
            title:"相见恨晚",
            tags:["暑夜","晚春"],
            details:"奋勇呀然后休息呀,完成你伟大的人生"
        },
        {
            title:"他在时间门外",
            tags:["环形公路","潜水艇司机"],
            details:"最新的打印机\n复制着彩色傀儡\n早上好我的罐头先生\n让他带你去被工厂敲击"
        }
    ]
    function jumpToArticle(key){
        router.push("1")
    }
</script>

<template>
    <blogs-list :values="list" @jump-to-article="jumpToArticle"/>
</template>
管理员列表页
src/views/AdminBlogsListView.vue
<script setup>
    import BlogsList from '../components/BlogsList.vue';
    import {ref} from 'vue'
    import router from '../router';
    const list = ref(null)
    list.value=[
        {
            title:"相见恨晚",
            tags:["暑夜","晚春"],
            details:"奋勇呀然后休息呀,完成你伟大的人生"
        },
        {
            title:"他在时间门外",
            tags:["环形公路","潜水艇司机"],
            details:"最新的打印机\n复制着彩色傀儡\n早上好我的罐头先生\n让他带你去被工厂敲击"
        }
    ]
    function jumpToArticle(key){
        router.push("1")
    }
</script>


<template>
    <blogs-list :values="list" :is-admin="true" @jump-to-article="jumpToArticle"/>
</template>

文章内容页
封装文章内容组件
src>components>BlogContent.vue
<script setup>
    import MarkDownRead from './MarkDownRead.vue';
    import { NSpace,NCard,NTag,NIcon,NButton } from 'naive-ui';
    import { useThemeSwitch } from '../stores/themeSwitch';
    import {GitBranch,Eye} from "@vicons/ionicons5"
    const themeSwitcher = useThemeSwitch()
    const props = defineProps(["blogInfo","isAdmin"])

</script>
<template>
    <n-space
        style="height: 100%;"
        size="large"
        vertical="true"
        class="blog-read-preview"
        >
        <div class="title" style="margin-top: 20px;">{{ blogInfo.title }}</div>
        <n-card>
            <n-thing>
                <n-space align="center" justify="space-between">
                    <div class="flex-box">
                        <n-icon size="20" :component="GitBranch"/>
                        <div style="margin-right: 15px;">已于 {{ blogInfo.changeTime }} 修改 </div>
                        <n-icon size="20" :component="Eye"/>
                        {{ blogInfo.readCount }}
                    </div>
                    <n-button
                        v-if="isAdmin"
                        text
                        type="info"> 编辑 </n-button>
                </n-space>

                <template  #action>
                <n-space align="center">
                    分类专栏:
                    <n-tag type="info">
                    {{ blogInfo.blogType }}
                    </n-tag>
                    文章标签:
                    <n-tag
                        v-for="tag in blogInfo.tags"
                        type="info"
                        >
                    {{ tag }}
                    </n-tag>
                </n-space>
                </template>
            </n-thing>
        </n-card>

        <mark-down-read  :key="themeSwitcher.active" :active="themeSwitcher.active"></mark-down-read>
    </n-space>

</template>

<style>
.flex-box{
    display: flex;
    align-items: center;
}
.blog-read-preview{
    margin-inline: 15vw;
    max-width: 900px;
}
.title{
    font-size: 28px;
    font-weight: 600;
    width: 100%;
}
</style>
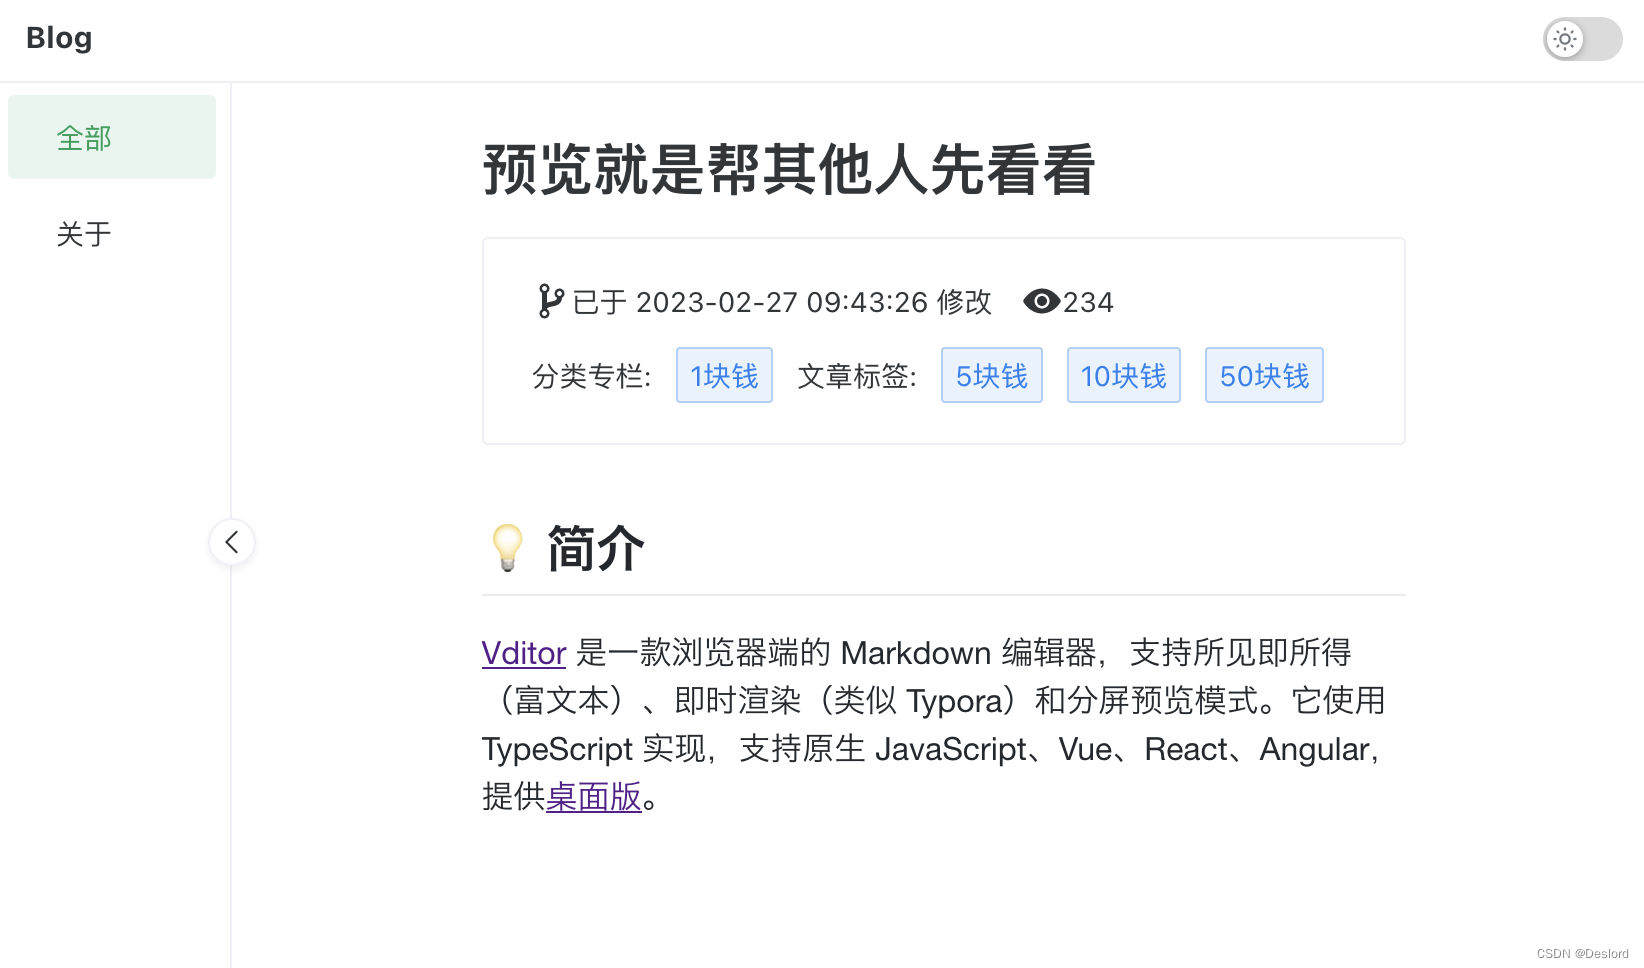
编辑文章内容页
src>view>BlogReadView.vue
<script setup>
    import BlogContent from '../components/BlogContent.vue';
    import { useThemeSwitch } from '../stores/themeSwitch';
    const themeSwitcher = useThemeSwitch()
    const testData = {
        title:"预览就是帮其他人先看看",
        changeTime:"2023-02-27 09:43:26",
        readCount:"234",
        blogType:"1块钱",
        tags:["5块钱","10块钱","50块钱"],

    }

</script>
<template>
    <blog-content :blog-info="testData" />
</template>

<style>
.blog-read-preview{
    margin-inline: 15vw;
    max-width: 900px;
}
</style>
管理员文章内容页
管理员文章内容页就非常简单,只需要对组件isAdmin参数设置为true,即可。
<script setup>
    import BlogsList from '../components/BlogsList.vue';
    import {ref} from 'vue'
    import router from '../router';
    const list = ref(null)
    list.value=[
        {
            title:"相见恨晚",
            tags:["暑夜","晚春"],
            details:"奋勇呀然后休息呀,完成你伟大的人生"
        },
        {
            title:"他在时间门外",
            tags:["环形公路","潜水艇司机"],
            details:"最新的打印机\n复制着彩色傀儡\n早上好我的罐头先生\n让他带你去被工厂敲击"
        }
    ]
    function jumpToArticle(key){
        router.push("1")
    }
</script>

<template>
    <blogs-list :values="list" :is-admin="true" @jump-to-article="jumpToArticle"/>
</template>

管理员登陆页面
封装登陆组件
src/components/LoginCard.vue
<script setup>
import { NForm,NButton,NInput,NFormItem } from 'naive-ui';
</script>
<template>
    <n-card class="loginCard" title="登陆">
        <n-form>
          <n-form-item label="用户名">
            <n-input placeholder="username"/>
          </n-form-item>
          <n-form-item label="密码">
            <n-input
                type="password"
                show-password-on="click"
                placeholder="password"/>
          </n-form-item>
        </n-form>
        <n-button type="primary" block secondary strong>
          登录
        </n-button>
  </n-card>
</template>

<style>
.loginCard{
    margin-top: 12px;
    max-width: 350px;
    width: 50vw;
    min-width: 266px;
}
</style>
编写登陆界面
src/views/AdminLogin.vue
<script setup>
import LoginCard from '../components/LoginCard.vue';
import { NSpace } from 'naive-ui';
</script>
<template>
    <n-space
    style="width: 100%;height: 100%;"
    align="center"
    justify="center"
    >
        <login-card></login-card>
    </n-space>
</template>

文章编辑界面
封装提交组件
<script setup>
    import { NButton,NSpace,NCard,NTag,NIcon,NScrollbar,NCheckboxGroup,NCheckbox } from 'naive-ui';
    import { ref } from 'vue';
    import { Close,Add } from '@vicons/ionicons5';
    const showModal = ref(false)
</script>
<template>
    <n-card
    style="width: 600px"
    title="发布文章"
    :bordered="false"
    size="huge"
    role="dialog"
    aria-modal="true"
    >
    <template #header-extra>
        <n-button
            quaternary
            size="15"
            @click="showModal=false">
            <template #icon>
                <n-icon><close /></n-icon>
            </template>
        </n-button>
    </template>
    <n-space >文章标签:
        <n-tag
            type="success"
            closable
            size="small"
            @close="handleClose">
            一个标签
        </n-tag>
        <n-button dashed size="tiny">
            <template #icon>
                <n-icon>
                    <add />
                </n-icon>
            </template>
            添加文章标签
        </n-button>
    </n-space>
    <n-card style="margin-top: 12px;">
        <n-scrollbar style="max-height: 120px">
            <n-checkbox-group v-model:value="value1">
                <n-space item-style="display: flex;">
                <n-checkbox size="small" value="a" label="擎天柱" />
                <n-checkbox value="b" label="大黄蜂" />
                <n-checkbox value="c" label="声波" />
                <n-checkbox value="d" label="红蜘蛛" />
            </n-space>
            </n-checkbox-group>
        </n-scrollbar>
    </n-card>

    <n-space style="margin-top: 12px;">分类专栏:
        <n-tag
            type="success"
            size="small"
            closable
            @close="handleClose">
            一个专栏名
        </n-tag>
        <n-button dashed size="tiny">
            <template #icon>
                <n-icon>
                    <add />
                </n-icon>
            </template>
            新建分类专栏
        </n-button>
    </n-space>
    <n-card style="margin-top: 12px;">
        <n-scrollbar style="max-height: 120px">
            <n-checkbox-group v-model:value="value2">
                <n-space item-style="display: flex;">
                <n-checkbox value="a" label="a" />
                <n-checkbox value="b" label="b" />
                <n-checkbox value="c" label="c" />
                <n-checkbox value="d" label="d" />
                </n-space>
            </n-checkbox-group>
        </n-scrollbar>
    </n-card>
    <template #footer>
        <n-space justify="end">
            <n-button>取消</n-button>
            <n-button type="warning">发布</n-button>
        </n-space>
    </template>
    </n-card>
</template>
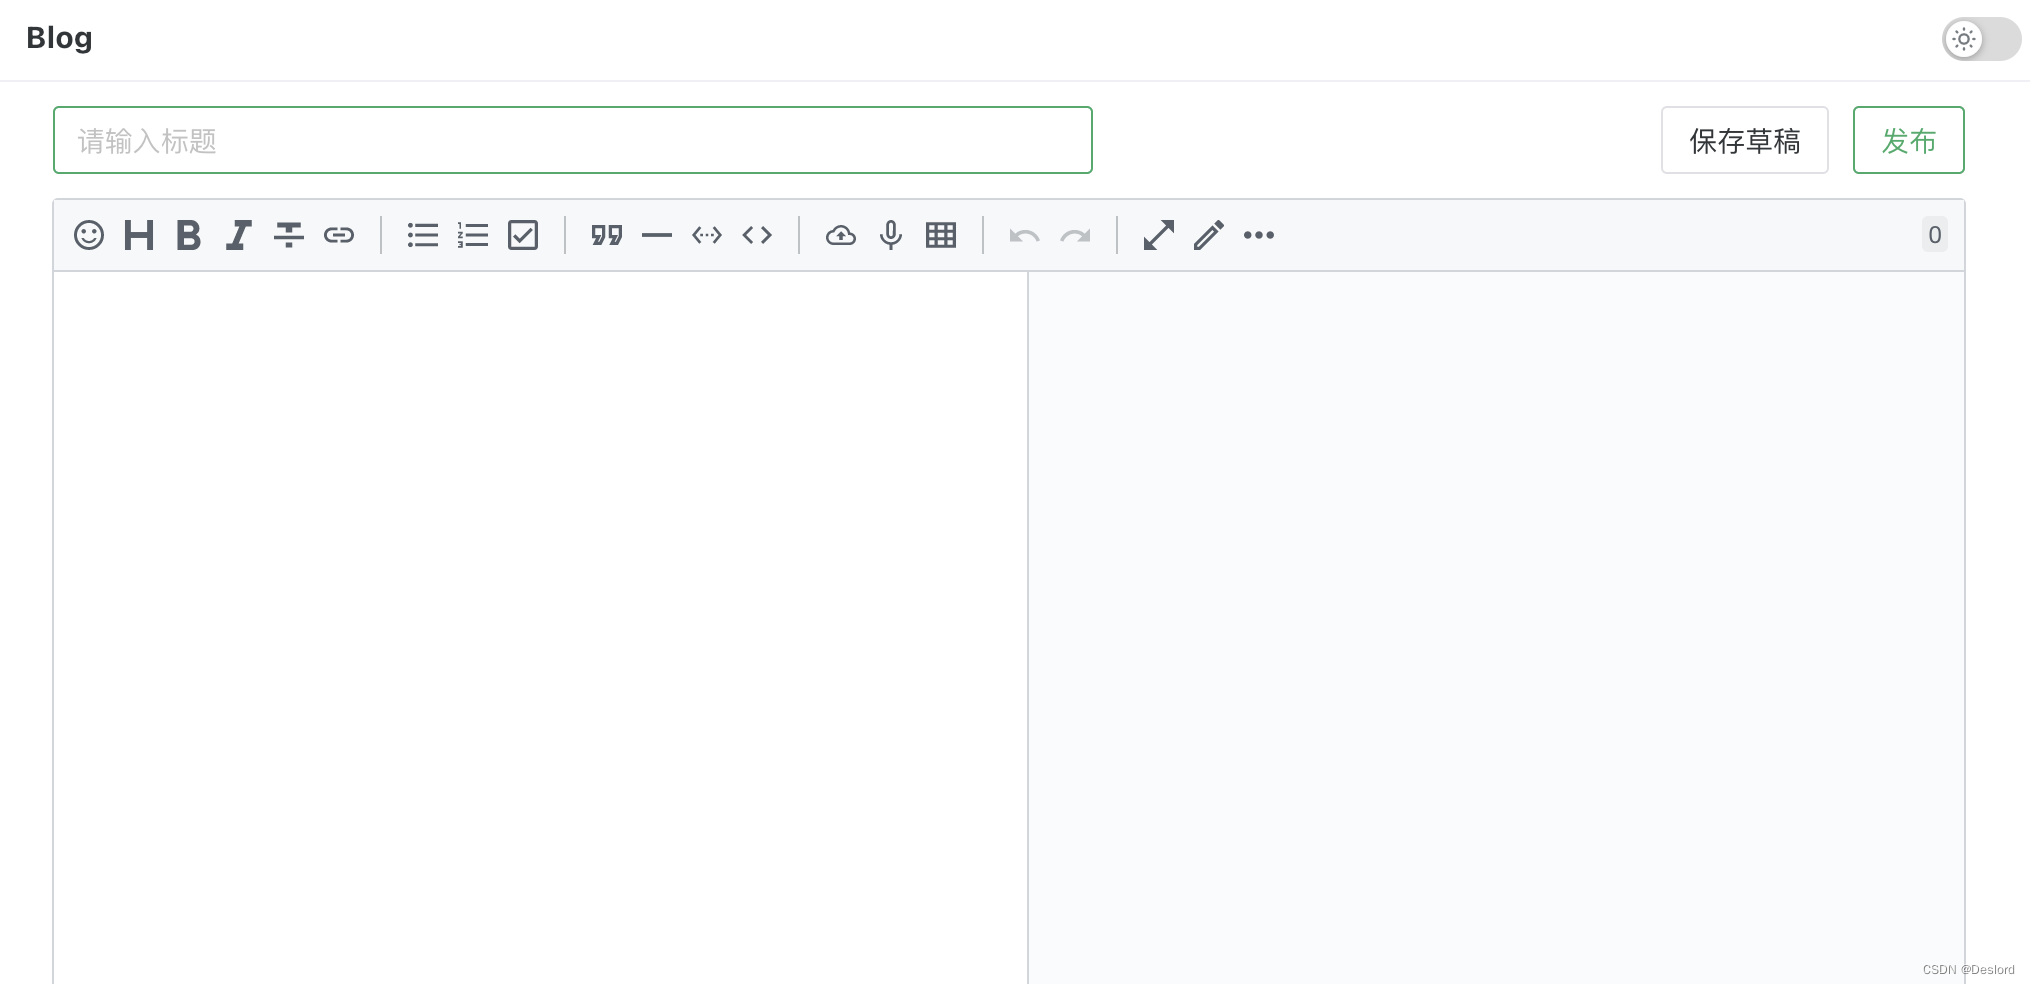
 #### 编辑界面
<script setup>
    import MarkDownEdit from '../components/MarkDownEdit.vue';
    import BlogEditConfirm from '../components/BlogEditConfirm.vue';
    import { useThemeSwitch } from '../stores/themeSwitch';
    import { NInput,NButton,NSpace,NModal,NCard,NTag,NIcon } from 'naive-ui';
    import { ref } from 'vue';
    const themeSwitcher = useThemeSwitch()
    const showModal = ref(false)
</script>

<template>
    <n-space class="editTitleInput" justify="space-between">
        <n-input
            style="width: 50vw"
            placeholder="请输入标题"
        ></n-input>

        <n-space>
            <n-button>保存草稿</n-button>
            <n-button @click="showModal = true">发布</n-button>
        </n-space>

    </n-space>

    <n-modal v-model:show="showModal">
        <blog-edit-confirm />
    </n-modal>

    <mark-down-edit :active="themeSwitcher.active"></mark-down-edit>
</template>

<style>
.editTitleInput{
    width: auto;
    margin-inline: 3.3vw;
    margin-top: 12px;
    margin-bottom: 12px;
}
</style>
流转图
接下来是前端和后端握手🤝的时刻,我们将完善前后端接口,实现建站日记2-确定需求中梳理的功能点。Rust部分也将在下一篇如闪电般归来。