上一篇文章 Three.js初试 介绍了一些 Three.js 的基本概念,这一篇主要是介绍一下它的应用。
结合 Vue3 + Vite 一起搭建一个项目。
项目初始化
Vite 项目构建
兼容性注意
Vite 需要 Node.js 版本 14.18+,16+。然而,有些模板需要依赖更高的 Node 版本才能正常运行,当你的包管理器发出警告时,请注意升级你的 Node 版本。
要构建一个 Vite + Vue 项目,在命令行运行:
# npm 6.x
npm create vite@latest vue-three.js --template vue

# npm 7+, extra double-dash is needed:
npm create vite@latest vue-three.js -- --template vue

# yarn
yarn create vite vue-three.js --template vue

# pnpm
pnpm create vite vue-three.js --template vue
这里,我用的是 pnpm 包管理器。具体可以参考中文官网 pnpm。
Three.js 引入
命令行运行:
pnpm add three
版本为0.150.1
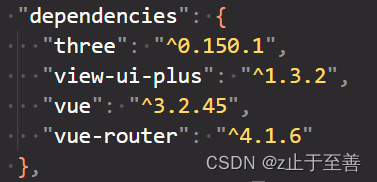
在需要使用 Three.js 的组件内引入
import * as THREE from 'three'
这样,一个 Vue+Three.js 项目搭起来了。
创建容器
<template>
  <div id="container" />
</template>
核心要素:场景、相机、渲染器
创建场景(scene)
// scene
// 创建一个scene
scene = new THREE.Scene()
// 添加颜色
scene.background = new THREE.Color(0x88ccee)
// scene.fog = new THREE.Fog(0x88ccee, 0, 50)
scene.add(new THREE.GridHelper(10))
添加相机(camera)
// camera
// camera用来观看场景里的内容, Three.js提供多种相机,比较常用的是PerspectiveCamera(透视摄像机)以及OrthographicCamera (正交投影摄像机)。
camera = new THREE.PerspectiveCamera(75, window.innerWidth / window.innerHeight, 0.1, 1000)
camera.position.set(0, 0, 0)
camera.rotation.order = 'YXZ'
渲染器(renderer)
// renderer
container = document.getElementById('container');
// 创建一个WebGLRenderer
renderer = new THREE.WebGLRenderer({ antialias: true })  // antialias:true 开启抗锯齿
// 设置设备像素比。通常用于HiDPI设备防止模糊输出canvas
renderer.setPixelRatio(window.devicePixelRatio)
// 设置渲染的宽高
renderer.setSize(window.innerWidth, window.innerHeight)
// 默认为 false. 如果设置了该参数,则启用在场景中的阴影贴图
renderer.shadowMap.enable = true
// 阴影贴图类型定义
renderer.shadowMap.type = THREE.BasicShadowMap;
renderer.outputEncoding = THREE.sRGBEncoding;
renderer.toneMapping = THREE.ACESFilmicToneMapping;
container.appendChild(renderer.domElement);
基本要素
灯光(light)
// 半球形光源(HemisphereLight)
HemisphereLight( skyColor : Integer, groundColor : Integer, intensity : Float )
- skyColor - (可选参数) 天空中发出光线的颜色。 缺省值 0xffffff。
- groundColor - (可选参数) 地面发出光线的颜色。 缺省值 0xffffff。
- intensity - (可选参数) 光照强度。 缺省值 1。
创建一个半球光。
// White directional light at half intensity shining from the top.
var directionalLight = new THREE.DirectionalLight( 0xffffff, 0.5 );
scene.add( directionalLight );
DirectionalLight( color : Integer, intensity : Float )
- color - (可选参数) 16进制表示光的颜色。 缺省值为 0xffffff (白色)。
- intensity - (可选参数) 光照的强度。缺省值为1。
创建一个新的 DirectionalLight。
// light
// 半球形光源(HemisphereLight)
// 光源直接放置于场景之上,光照颜色从天空光线颜色颜色渐变到地面光线颜色。
// 半球光不能投射阴影。
const fillLight1 = new THREE.HemisphereLight(0x4488bb, 0x002244, 0.5);
fillLight1.position.set(2, 1, 1);
scene.add(fillLight1);

// 平行光(DirectionalLight)
// 平行光是沿着特定方向发射的光。
const directionalLight = new THREE.DirectionalLight(0xffffff, 0.8);
directionalLight.position.set(- 5, 25, - 1);
// 如果设置为 true 该平行光会产生动态阴影
directionalLight.castShadow = true;
scene.add(directionalLight);
动画
需要重复调用。
const animate = () => {
  renderer.render(scene, camera)
  requestAnimationFrame(animate)
}
加载模型
如果想要加载外部3D模型,那么就需要用到加载器(loader),而 Three.js 提供的加载器有好多种类型,分别可以加载不同的文件格式。具体可以查看 Three.js 源码里面的 examples/jsm/loaders 文件夹下的各种加载器。
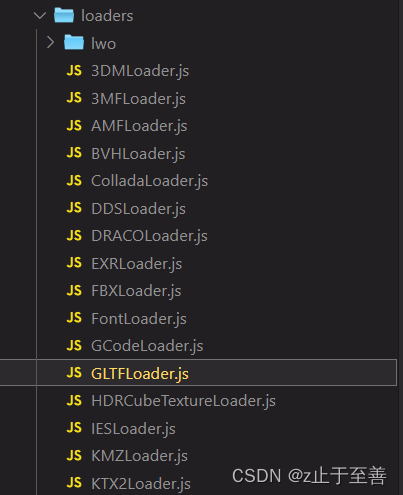
这里用到的是 GLTFLoader ,
import { GLTFLoader } from 'three/examples/jsm/loaders/GLTFLoader'
有了加载器后,就需要一个3D模型素材,可以在网上下载一个。
const loader = new GLTFLoader()
loader.load('./src/pages/building/building102.gltf', gltf => {
  scene.add(gltf.scene)
})
加入控制(WASD)
监听键盘按键
document.addEventListener('keydown', e => {
  keyStates[e.code] = true
})
document.addEventListener('keyup', e => {
  keyStates[e.code] = false
})
if (keyStates['KeyW']) {
  // 摁下W,改变水平方向的向量, multiplyScalar 乘积
  player.velocity.add(getForwardVector().multiplyScalar(speedDelta));
}

if (keyStates['KeyS']) {
  player.velocity.add(getForwardVector().multiplyScalar(- speedDelta));
}

if (keyStates['KeyA']) {
  player.velocity.add(getSideVector().multiplyScalar(- speedDelta));
}

if (keyStates['KeyD']) {
  player.velocity.add(getSideVector().multiplyScalar(speedDelta));
}
监听鼠标
document.addEventListener('mousedown', e => {
  document.body.requestPointerLock()
})
document.addEventListener('mousemove', e => {
  // 当鼠标在锁定状态时
  if (document.pointerLockElement === document.body) {
    camera.rotation.y -= e.movementX / 500
    camera.rotation.x -= e.movementY / 500
  }
})
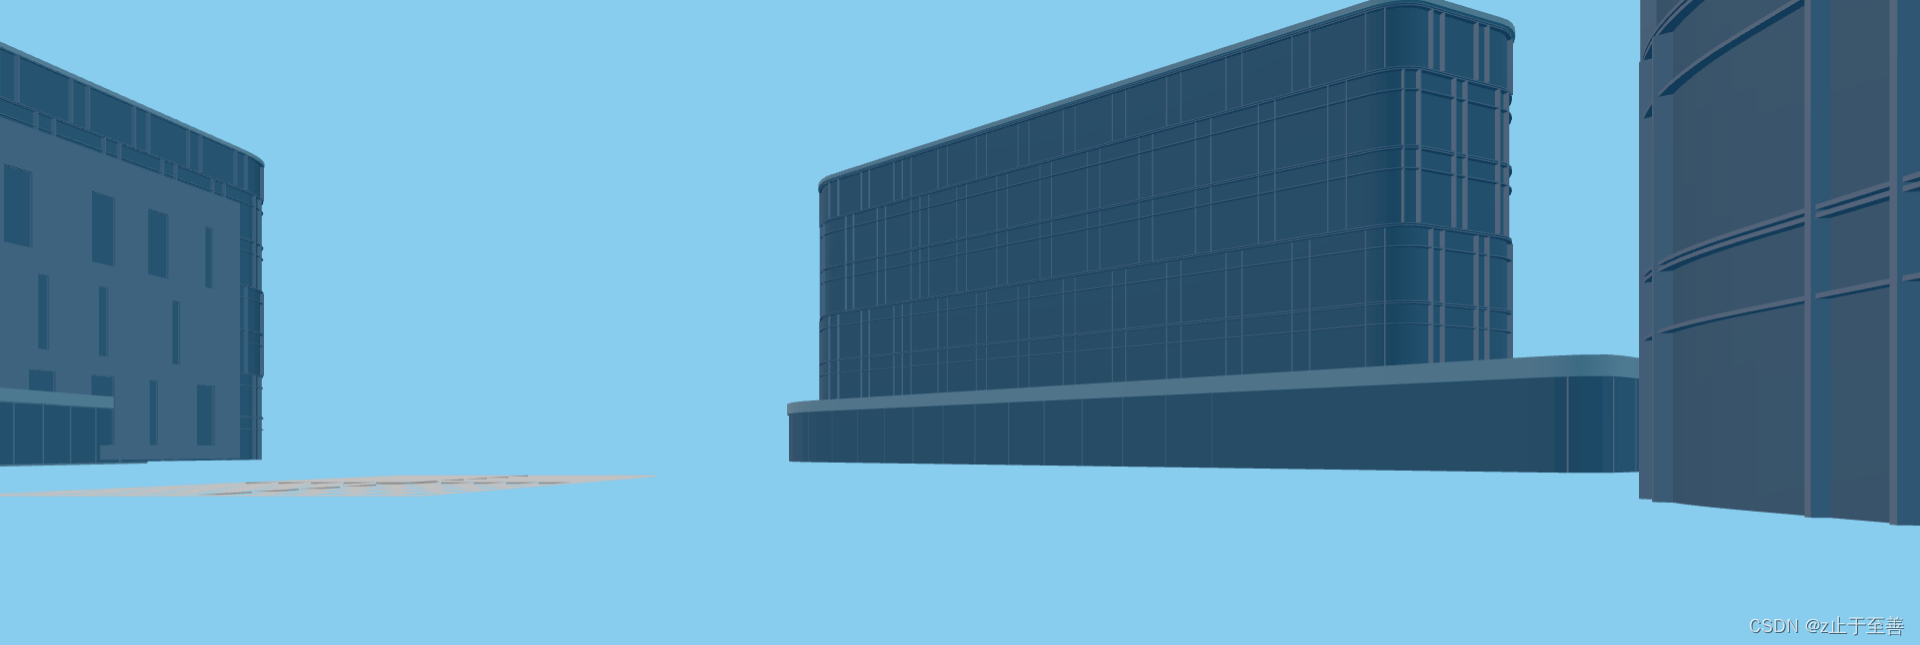
到此,一个简单的3D模型就出来了,作为上手项目,这个很简单,继续在学习中。
完整代码可以参考 代码
