前言
我们一说到spring,可能第一个想到的是 IOC(控制反转) 和 AOP(面向切面编程)。
没错,它们是spring的基石,得益于它们的优秀设计,使得spring能够从众多优秀框架中脱颖而出。
除此之外,我们在使用spring的过程中,有没有发现它的扩展能力非常强。由于这个优势的存在,让spring拥有强大的包容能力,让很多第三方应用能够轻松投入spring的怀抱。比如:rocketmq、mybatis、redis等。
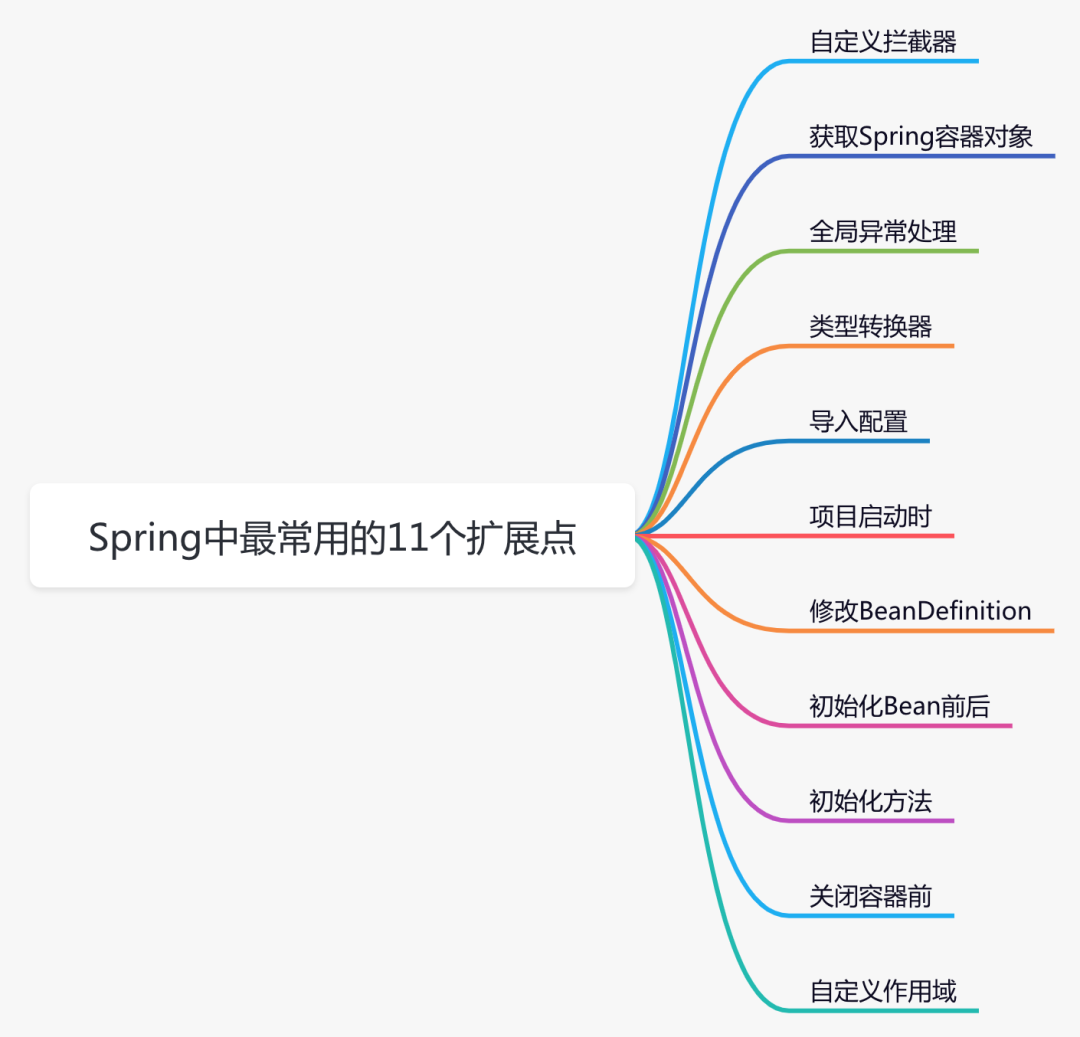
今天跟大家一起聊聊,在Spring中最常用的11个扩展点。
1.自定义拦截器
spring mvc拦截器根spring拦截器相比,它里面能够获取HttpServletRequest和HttpServletResponse等web对象实例。
spring mvc拦截器的顶层接口是:HandlerInterceptor,包含三个方法:
preHandle 目标方法执行前执行
postHandle 目标方法执行后执行
afterCompletion 请求完成时执行
为了方便我们一般情况会用HandlerInterceptor接口的实现类HandlerInterceptorAdapter类。
假如有权限认证、日志、统计的场景,可以使用该拦截器。
第一步,继承HandlerInterceptorAdapter类定义拦截器:
public class AuthInterceptor extends HandlerInterceptorAdapter {

    @Override
    public boolean preHandle(HttpServletRequest request, HttpServletResponse response, Object handler)
            throws Exception {
        String requestUrl = request.getRequestURI();
        if (checkAuth(requestUrl)) {
            return true;
        }

        return false;
    }

    private boolean checkAuth(String requestUrl) {
        System.out.println("===权限校验===");
        return true;
    }
}
第二步,将该拦截器注册到spring容器:
@Configuration
public class WebAuthConfig extends WebMvcConfigurerAdapter {

    @Bean
    public AuthInterceptor getAuthInterceptor() {
        return new AuthInterceptor();
    }

    @Override
    public void addInterceptors(InterceptorRegistry registry) {
        registry.addInterceptor(new AuthInterceptor());
    }
}
第三步,在请求接口时spring mvc通过该拦截器,能够自动拦截该接口,并且校验权限。
2.获取Spring容器对象
在我们日常开发中,经常需要从Spring容器中获取Bean,但你知道如何获取Spring容器对象吗?
2.1 BeanFactoryAware接口
@Service
public class PersonService implements BeanFactoryAware {
    private BeanFactory beanFactory;

    @Override
    public void setBeanFactory(BeanFactory beanFactory) throws BeansException {
        this.beanFactory = beanFactory;
    }

    public void add() {
        Person person = (Person) beanFactory.getBean("person");
    }
}实现BeanFactoryAware接口,然后重写setBeanFactory方法,就能从该方法中获取到spring容器对象。
2.2 ApplicationContextAware接口
@Service
public class PersonService2 implements ApplicationContextAware {
    private ApplicationContext applicationContext;

    @Override
    public void setApplicationContext(ApplicationContext applicationContext) throws BeansException {
        this.applicationContext = applicationContext;
    }

    public void add() {
        Person person = (Person) applicationContext.getBean("person");
    }
}实现ApplicationContextAware接口,然后重写setApplicationContext方法,也能从该方法中获取到spring容器对象。
2.3 ApplicationListener接口
@Service
public class PersonService3 implements ApplicationListener<ContextRefreshedEvent> {
    private ApplicationContext applicationContext;
    @Override
    public void onApplicationEvent(ContextRefreshedEvent event) {
        applicationContext = event.getApplicationContext();
    }

    public void add() {
        Person person = (Person) applicationContext.getBean("person");
    }
}
3.全局异常处理
以前我们在开发接口时,如果出现异常,为了给用户一个更友好的提示,例如:
@RequestMapping("/test")
@RestController
public class TestController {

    @GetMapping("/add")
    public String add() {
        int a = 10 / 0;
        return "成功";
    }
}
如果不做任何处理请求add接口结果直接报错:

what?用户能直接看到错误信息?
这种交互方式给用户的体验非常差,为了解决这个问题,我们通常会在接口中捕获异常:
@GetMapping("/add")
public String add() {
    String result = "成功";
    try {
        int a = 10 / 0;
    } catch (Exception e) {
        result = "数据异常";
    }
    return result;
}
接口改造后,出现异常时会提示:“数据异常”,对用户来说更友好。
看起来挺不错的,但是有问题。。。
如果只是一个接口还好,但是如果项目中有成百上千个接口,都要加上异常捕获代码吗?
答案是否定的,这时全局异常处理就派上用场了:RestControllerAdvice。
@RestControllerAdvice
public class GlobalExceptionHandler {

    @ExceptionHandler(Exception.class)
    public String handleException(Exception e) {
        if (e instanceof ArithmeticException) {
            return "数据异常";
        }
        if (e instanceof Exception) {
            return "服务器内部异常";
        }
        retur nnull;
    }
}只需在handleException方法中处理异常情况,业务接口中可以放心使用,不再需要捕获异常(有人统一处理了)。真是爽歪歪。
4.类型转换器
spring目前支持3中类型转换器:
Converter<S,T>:将 S 类型对象转为 T 类型对象
ConverterFactory<S, R>:将 S 类型对象转为 R 类型及子类对象
GenericConverter:它支持多个source和目标类型的转化,同时还提供了source和目标类型的上下文,这个上下文能让你实现基于属性上的注解或信息来进行类型转换。
这3种类型转换器使用的场景不一样,我们以Converter<S,T>为例。假如:接口中接收参数的实体对象中,有个字段的类型是Date,但是实际传参的是字符串类型:2021-01-03 10:20:15,要如何处理呢?
第一步,定义一个实体User:
@Data
public class User {

    private Long id;
    private String name;
    private Date registerDate;
}第二步,实现Converter接口:
public class DateConverter implements Converter<String, Date> {

    private SimpleDateFormat simpleDateFormat = new SimpleDateFormat("yyyy-MM-dd HH:mm:ss");

    @Override
    public Date convert(String source) {
        if (source != null && !"".equals(source)) {
            try {
                simpleDateFormat.parse(source);
            } catch (ParseException e) {
                e.printStackTrace();
            }
        }
        return null;
    }
}
第三步,将新定义的类型转换器注入到spring容器中:
@Configuration
public class WebConfig extends WebMvcConfigurerAdapter {

    @Override
    public void addFormatters(FormatterRegistry registry) {
        registry.addConverter(new DateConverter());
    }
}
第四步,调用接口
@RequestMapping("/user")
@RestController
public class UserController {

    @RequestMapping("/save")
    public String save(@RequestBody User user) {
        return "success";
    }
}
请求接口时User对象中registerDate字段会被自动转换成Date类型。
5.导入配置
有时我们需要在某个配置类中引入另外一些类,被引入的类也加到spring容器中。这时可以使用@Import注解完成这个功能。
如果你看过它的源码会发现,引入的类支持三种不同类型。
但是我认为最好将普通类和@Configuration注解的配置类分开讲解,所以列了四种不同类型:

5.1 普通类
这种引入方式是最简单的,被引入的类会被实例化bean对象。
public class A {
}

@Import(A.class)
@Configuration
public class TestConfiguration {
}通过@Import注解引入A类,spring就能自动实例化A对象,然后在需要使用的地方通过@Autowired注解注入即可:
@Autowired
private A a;是不是挺让人意外的?不用加@Bean注解也能实例化bean。
5.2 配置类
这种引入方式是最复杂的,因为@Configuration注解还支持多种组合注解,比如:
@Import
@ImportResource
@PropertySource等。
public class A {
}

public class B {
}

@Import(B.class)
@Configuration
public class AConfiguration {

    @Bean
    public A a() {
        return new A();
    }
}

@Import(AConfiguration.class)
@Configuration
public class TestConfiguration {
}通过@Import注解引入@Configuration注解的配置类,会把该配置类相关@Import、@ImportResource、@PropertySource等注解引入的类进行递归,一次性全部引入。
5.3 ImportSelector
这种引入方式需要实现ImportSelector接口:
public class AImportSelector implements ImportSelector {

private static final String CLASS_NAME = "com.sue.cache.service.test13.A";

 public String[] selectImports(AnnotationMetadata importingClassMetadata) {
        return new String[]{CLASS_NAME};
    }
}

@Import(AImportSelector.class)
@Configuration
public class TestConfiguration {
}这种方式的好处是selectImports方法返回的是数组,意味着可以同时引入多个类,还是非常方便的。
5.4 ImportBeanDefinitionRegistrar
这种引入方式需要实现ImportBeanDefinitionRegistrar接口:
public class AImportBeanDefinitionRegistrar implements ImportBeanDefinitionRegistrar {
    @Override
    public void registerBeanDefinitions(AnnotationMetadata importingClassMetadata, BeanDefinitionRegistry registry) {
        RootBeanDefinition rootBeanDefinition = new RootBeanDefinition(A.class);
        registry.registerBeanDefinition("a", rootBeanDefinition);
    }
}

@Import(AImportBeanDefinitionRegistrar.class)
@Configuration
public class TestConfiguration {
}这种方式是最灵活的,能在registerBeanDefinitions方法中获取到BeanDefinitionRegistry容器注册对象,可以手动控制BeanDefinition的创建和注册。
6.项目启动时
有时候我们需要在项目启动时定制化一些附加功能,比如:加载一些系统参数、完成初始化、预热本地缓存等,该怎么办呢?
好消息是springboot提供了:
CommandLineRunner
ApplicationRunner
这两个接口帮助我们实现以上需求。
它们的用法还是挺简单的,以ApplicationRunner接口为例:
@Component
public class TestRunner implements ApplicationRunner {

    @Autowired
    private LoadDataService loadDataService;

    public void run(ApplicationArguments args) throws Exception {
        loadDataService.load();
    }
}实现ApplicationRunner接口,重写run方法,在该方法中实现自己定制化需求。
如果项目中有多个类实现了ApplicationRunner接口,他们的执行顺序要怎么指定呢?
答案是使用@Order(n)注解,n的值越小越先执行。当然也可以通过@Priority注解指定顺序。
7.修改BeanDefinition
Spring IOC在实例化Bean对象之前,需要先读取Bean的相关属性,保存到BeanDefinition对象中,然后通过BeanDefinition对象,实例化Bean对象。
如果想修改BeanDefinition对象中的属性,该怎么办呢?
答:我们可以实现BeanFactoryPostProcessor接口。
@Component
public class MyBeanFactoryPostProcessor implements BeanFactoryPostProcessor {

    @Override
    public void postProcessBeanFactory(ConfigurableListableBeanFactory configurableListableBeanFactory) throws BeansException {
        DefaultListableBeanFactory defaultListableBeanFactory = (DefaultListableBeanFactory) configurableListableBeanFactory;
        BeanDefinitionBuilder beanDefinitionBuilder = BeanDefinitionBuilder.genericBeanDefinition(User.class);
        beanDefinitionBuilder.addPropertyValue("id", 123);
        beanDefinitionBuilder.addPropertyValue("name", "苏三说技术");
        defaultListableBeanFactory.registerBeanDefinition("user", beanDefinitionBuilder.getBeanDefinition());
    }
}
在postProcessBeanFactory方法中,可以获取BeanDefinition的相关对象,并且修改该对象的属性。
8.初始化Bean前后
有时,你想在初始化Bean前后,实现一些自己的逻辑。
这时可以实现:BeanPostProcessor接口。
该接口目前有两个方法:
postProcessBeforeInitialization 该在初始化方法之前调用。
postProcessAfterInitialization 该方法再初始化方法之后调用。
例如:
@Component
public class MyBeanPostProcessor implements BeanPostProcessor {

    @Override
    public Object postProcessAfterInitialization(Object bean, String beanName) throws BeansException {
        if (bean instanceof User) {
            ((User) bean).setUserName("苏三说技术");
        }
        return bean;
    }
}
如果spring中存在User对象,则将它的userName设置成:苏三说技术。
其实,我们经常使用的注解,比如:@Autowired、@Value、@Resource、@PostConstruct等,是通过AutowiredAnnotationBeanPostProcessor和CommonAnnotationBeanPostProcessor实现的。
9.初始化方法
目前spring中使用比较多的初始化bean的方法有:
使用@PostConstruct注解
实现InitializingBean接口
9.1 使用@PostConstruct注解
@Service
public class AService {
    @PostConstruct
    public void init() {
        System.out.println("===初始化===");
    }
}在需要初始化的方法上增加@PostConstruct注解,这样就有初始化的能力。
9.2 实现InitializingBean接口
@Service
public class BService implements InitializingBean {

    @Override
    public void afterPropertiesSet() throws Exception {
        System.out.println("===初始化===");
    }
}实现InitializingBean接口,重写afterPropertiesSet方法,该方法中可以完成初始化功能。
10.关闭容器前
有时候,我们需要在关闭spring容器前,做一些额外的工作,比如:关闭资源文件等。
这时可以实现DisposableBean接口,并且重写它的destroy方法:
@Service
public class DService implements InitializingBean, DisposableBean {

    @Override
    public void destroy() throws Exception {
        System.out.println("DisposableBean destroy");
    }

    @Override
    public void afterPropertiesSet() throws Exception {
        System.out.println("InitializingBean afterPropertiesSet");
    }
}
这样spring容器销毁前,会调用该destroy方法,做一些额外的工作。
通常情况下,我们会同时实现InitializingBean和DisposableBean接口,重写初始化方法和销毁方法。
11.自定义作用域
我们都知道spring默认支持的Scope只有两种:
singleton 单例,每次从spring容器中获取到的bean都是同一个对象。
prototype 多例,每次从spring容器中获取到的bean都是不同的对象。
spring web又对Scope进行了扩展,增加了:
RequestScope 同一次请求从spring容器中获取到的bean都是同一个对象。
SessionScope 同一个会话从spring容器中获取到的bean都是同一个对象。
即便如此,有些场景还是无法满足我们的要求。
比如,我们想在同一个线程中从spring容器获取到的bean都是同一个对象,该怎么办?
这就需要自定义Scope了。
第一步实现Scope接口:
public class ThreadLocalScope implements Scope {
    private static final ThreadLocal THREAD_LOCAL_SCOPE = new ThreadLocal();

    @Override
    public Object get(String name, ObjectFactory<?> objectFactory) {
        Object value = THREAD_LOCAL_SCOPE.get();
        if (value != null) {
            return value;
        }

        Object object = objectFactory.getObject();
        THREAD_LOCAL_SCOPE.set(object);
        return object;
    }

    @Override
    public Object remove(String name) {
        THREAD_LOCAL_SCOPE.remove();
        return null;
    }

    @Override
    public void registerDestructionCallback(String name, Runnable callback) {
    }

    @Override
    public Object resolveContextualObject(String key) {
        return null;
    }

    @Override
    public String getConversationId() {
        return null;
    }
}
第二步将新定义的Scope注入到spring容器中:
@Component
public class ThreadLocalBeanFactoryPostProcessor implements BeanFactoryPostProcessor {
    @Override
    public void postProcessBeanFactory(ConfigurableListableBeanFactory beanFactory) throws BeansException {
        beanFactory.registerScope("threadLocalScope", new ThreadLocalScope());
    }
}
第三步使用新定义的Scope:
@Scope("threadLocalScope")
@Service
public class CService {
    public void add() {
    }
}


