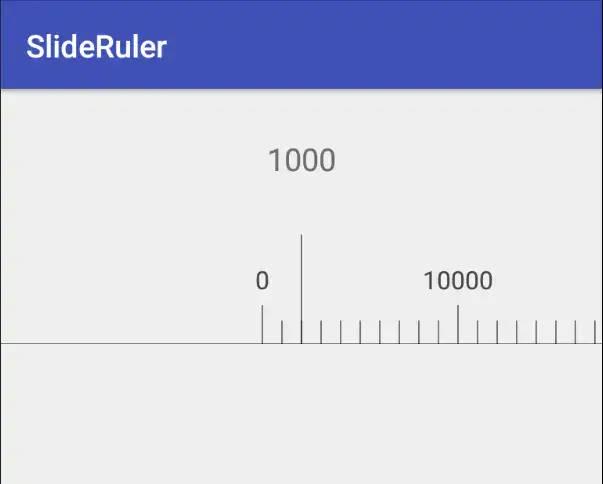
自定义数值滚动尺,这个用的还是挺多的,例如京东金融的通过滚动尺选择金额等,而这次就是高仿京东金融的数值滚动尺。首先看看下效果图,如下:
首先先给你们各个变量的含义,以免在后面的讲解中不知变量的意思,代码如下:
//最小值
private int minValue;
//最大值
private int maxValue;
//当前值
private int currentValue;
//最小单位值
private int minUnitValue;
//最小当前值
private int minCurrentValue;
//字体大小
private int textSize;
//字体颜色
private int textColor;
//线颜色
private int dividerColor;
//指示线颜色
private int indicatrixColor;
//画线的画笔
private Paint linePaint;
//控价的宽度
private int slideRulerWidth=0;
//滑动的宽度
private int rollingWidth;
//屏幕的宽
private int wrapcontentWidth;
//屏幕的高
private int wrapcontentHeight;
//一屏显示Item
private int showItemSize;
//刻度和数值的间距
private int marginCursorData;
//长刻度的大小
private int longCursor;
//短刻度的大小
private int shortCursor;
//计算每个刻度的间距
private int marginWidth=0;
//数据回调接口
private SlideRulerDataInterface slideRulerDataInterface;
//正在滑动状态
private int isScrollingState=1;
//快速一滑
private int fastScrollState=2;
//结束滑动
private int finishScrollState=3;

private GestureDetector mDetector;
private Display display =null;
private Scroller scroller;

public SlideRuler(Context context, AttributeSet attrs, int defStyleAttr) {
        super(context,attrs,defStyleAttr);
        display=((WindowManager)getContext().getSystemService(Context.WINDOW_SERVICE)).getDefaultDisplay();
        //屏幕宽高
        wrapcontentWidth=display.getWidth();
        wrapcontentHeight=display.getHeight();
        //初始化自定义的参数
        TypedArray typedArray=context.getTheme().obtainStyledAttributes(attrs,R.styleable.slideruler,defStyleAttr,0);
        textSize = typedArray.getDimensionPixelSize(R.styleable.slideruler_textSize,(int) TypedValue.applyDimension(
                TypedValue.COMPLEX_UNIT_SP,15,getResources().getDisplayMetrics()));
        textColor=typedArray.getColor(R.styleable.slideruler_textColor,Color.DKGRAY);
        dividerColor=typedArray.getColor(R.styleable.slideruler_dividerColor,Color.BLACK);
        indicatrixColor=typedArray.getColor(R.styleable.slideruler_indicatrixColor,Color.BLACK);
        minValue=typedArray.getInteger(R.styleable.slideruler_min_value,0);
        maxValue=typedArray.getInteger(R.styleable.slideruler_max_value,199000);
        currentValue=typedArray.getInteger(R.styleable.slideruler_current_value,10000);
        minUnitValue=typedArray.getInteger(R.styleable.slideruler_min_unitValue,1000);
        minCurrentValue=typedArray.getInteger(R.styleable.slideruler_min_currentValue,1000);
        showItemSize=typedArray.getInteger(R.styleable.slideruler_show_itemSize,30);
        marginCursorData=typedArray.getDimensionPixelSize(R.styleable.slideruler_margin_cursor_data,(int)TypedValue.applyDimension(
                TypedValue.COMPLEX_UNIT_SP,10,getResources().getDisplayMetrics()));
        longCursor=typedArray.getDimensionPixelSize(R.styleable.slideruler_longCursor,(int)TypedValue.applyDimension(
                TypedValue.COMPLEX_UNIT_SP,25,getResources().getDisplayMetrics()));
        shortCursor=typedArray.getDimensionPixelSize(R.styleable.slideruler_shortCursor,(int)TypedValue.applyDimension(
                TypedValue.COMPLEX_UNIT_SP,15,getResources().getDisplayMetrics()));

        scroller=new Scroller(context);
        mDetector=new GestureDetector(context,myGestureListener);

        //初始化Paint
        linePaint=new Paint();
        linePaint.setAntiAlias(true);
        linePaint.setTextAlign(Paint.Align.CENTER);
        linePaint.setStyle(Paint.Style.STROKE);
        linePaint.setTextSize(textSize);
        //检查当前值是不是正确值
        checkCurrentValue();
    }
其次自定义View也好自定义控价也好
protected void onMeasure(int widthMeasureSpec, int heigh)也是蛮重要的所以照例也讲讲,用来确定控件的大小,代码如下:
    @Override
    protected void onMeasure(int widthMeasureSpec, int heightMeasureSpec) {
        super.onMeasure(widthMeasureSpec, heightMeasureSpec);
        int widthModel=MeasureSpec.getMode(widthMeasureSpec);
        int heightModel=MeasureSpec.getMode(heightMeasureSpec);
        int widthSize=MeasureSpec.getSize(widthMeasureSpec);
        int heightSize=MeasureSpec.getSize(heightMeasureSpec);
        int width;
        int height;
        if(widthModel==MeasureSpec.EXACTLY){
            width=widthSize;
        }else{
            width=wrapcontentWidth;
        }
        if(heightModel==MeasureSpec.EXACTLY){
            height=heightSize;
        }else{
            height=(getPaddingBottom()+getPaddingTop()+(wrapcontentHeight/4));
        }
        setMeasuredDimension(width,height);
    }
代码的意思也很简单,当MeasureSpec里的specMode类型是EXACTLY时,即设置了明确的值或者是MATCH_PARENT时,就直接把MeasureSpec.getSize()的值赋进去,如果不是即为WARP_CONTENT时,就直接赋给屏幕的宽高。控件的宽高都是同一样的做法。
当控件大小确定之后,我们再利用
protected void onSizeChanged(int w, int h, int oldw, int oldh)进行一些变量的赋值,代码如下:
    @Override
    protected void onSizeChanged(int w, int h, int oldw, int oldh) {
        //计算每个刻度的间距
        marginWidth=getWidth()/showItemSize;
        //开始时的距离
        rollingWidth=(int)(marginWidth*cursorNum());
        //整个控件的宽度
        slideRulerWidth=(maxValue/minUnitValue)*marginWidth;
        super.onSizeChanged(w, h, oldw, oldh);
    }
到此我们就可以在onDraw(Canvas canvas)方法里画出初始的界面,而以后的动态只是通过不断的改变数值再进行绘画而已,代码如下:
@Override
protected void onDraw(Canvas canvas){
    //画最基础的两条线
    drawBaseView(canvas);
    //画初始的界面
    drawBaseLine(canvas);
}

//画最基础的两条线
public void drawBaseLine(Canvas canvas){
    //画中间的线
    linePaint.setColor(indicatrixColor);
    canvas.drawLine(getWidth()/2,0,getWidth()/2,getHeight(),linePaint);
    //画底部的直线
    linePaint.setColor(dividerColor);
    canvas.drawLine(0,getHeight(),slideRulerWidth,getHeight(),linePaint);
}

//画初始的界面
public void drawBaseView(Canvas canvas){
    //整数刻度的个数
    int integerWidth= (int)Math.rint((currentValue-minValue)/minUnitValue);
    //剩余不整一个刻度的数值
    int residueWidth=(currentValue-minValue)%minUnitValue;
    //开始画图的X轴位置
    int startCursor=(getWidth()/2)-(marginWidth*integerWidth)-(int)(marginWidth*(float)residueWidth/minUnitValue);
        for(int i=0;i<(maxValue/minUnitValue)+1;i++){
            float xValue=startCursor+(marginWidth*i);
            if(i%10==0){
                //画长刻度
                linePaint.setColor(textColor);
                canvas.drawText((minCurrentValue*i)+"",xValue,getHeight()-longCursor-marginCursorData,linePaint);
                linePaint.setColor(dividerColor);
                canvas.drawLine(xValue,getHeight(),xValue,getHeight()-longCursor,linePaint);
            }else{
                //画短刻度
                canvas.drawLine(xValue,getHeight(),xValue,getHeight()-shortCursor,linePaint);
            }
        }
    }
在drawBaseView()方法里,也很简单,就是在二分之一宽度,画一条直线,然后在控价的底部画出宽度为整个控件的宽度的底线。接着在下方法里
drawBaseView(Canvas canvas)首先用当前值(currentValue)-最小值(minValue)之后再除于最小单位值(minUnitValue)以获取整数刻度的个数
因为有余数的情况,我们再当前值(currentValue)-最小值(minValue)之后求余与最小单位值(minUnitValue)以获取余数
接着我们要获取我们画图的X轴开始的位置,因为最小值只能滑到中间,所以开始的位置为控件一半的宽度(getWidth()/2)
减去计算每个刻度的间距(marginWidth)乘以整数刻度的个数(integerWidth)即marginWidth*integerWidth再减去余数对应所产生的X轴距离即 :
(int)(marginWidth*(float)residueWidth/minUnitValue)4、再通过For循环刻度的个数,不同的进行刻度的绘画,当i%10==0时即为一个大的单位刻度否者为一个小的单位刻度,具体代码我上面已有注释,原理和画中间线一直就不在赘述。
到此我们就已经把自定义控价静态的部分写完了,效果如下:
接着我们用GestureDetector绑定手势事件,根据回调手势事件的方法来改变数据和刷新页面,在GestureDetector里,我们只会回调:
//手指在触摸屏上滑动
public boolean onScroll(MotionEvent e1, MotionEvent e2, float distanceX, float distanceY)

//手指在触摸屏上迅速移动,并松开的动作
public boolean onFling(MotionEvent e1, MotionEvent e2, float velocityX, float velocityY)
这两个方法就可以了。
具体代码如下:
private GestureDetector.SimpleOnGestureListener myGestureListener =new  GestureDetector.SimpleOnGestureListener(){
        @Override
        public boolean onScroll(MotionEvent e1, MotionEvent e2, float distanceX, float distanceY) {
            //滑动刷新UI
            updateView(rollingWidth+(int)distanceX,isScrollingState);
            return true;
        }
        @Override
        public boolean onFling(MotionEvent e1, MotionEvent e2, float velocityX, float velocityY) {
            //快速滑动的动画
            scroller.fling(rollingWidth,0,(int)(-velocityX/1.5),0,0,(maxValue/minUnitValue)*marginWidth,0,0);
            return true;
        }
    };

//动态更新滑动View
public void updateView(int srcollWidth,int action){
    if(action==isScrollingState){
        //正在滑动状态(onScroll())
        rollingWidth=srcollWidth;
        float itemNum=(float)srcollWidth/marginWidth;
        currentValue=(int)(minUnitValue*itemNum);
    }else if(action==fastScrollState){
        //快速一滑(onFling())
        rollingWidth=srcollWidth;
        int itemNum=(int)Math.rint((float)rollingWidth/marginWidth);
        currentValue=(minUnitValue*itemNum);
    }else if(action==finishScrollState){
        //结束滑动(ACTION_UP)
        int itemNum=(int)Math.rint((float)rollingWidth/marginWidth);
        currentValue=minUnitValue*itemNum;
    }
    //判断是否在最小选择值
    if(currentValue<=minCurrentValue){
        rollingWidth=(minCurrentValue/minUnitValue)*marginWidth;
        currentValue=minCurrentValue;
    }
    //判断是否在最大值
    if(currentValue>=maxValue){
        rollingWidth=marginWidth*allCursorNum();
        currentValue=maxValue;
    }
    //回调数值
    if(slideRulerDataInterface!=null){
        slideRulerDataInterface.getText(currentValue+"");
    }
    invalidate();
}
当我们滑动我们的控件是,就会回调GestureDetector里的onScroll()方法,然后rollingWidth+(int)distanceX即当前滑动的宽度(rollingWidth)加上滑动产生的宽度(distanceX)为动态产生的宽度,再除于计算每个刻度的间距(marginWidth)从而得到刻度的数量,有了刻度的数量即可得到当前值
currentValue=(int)(minUnitValue*itemNum);有了当前值调用invalidate();刷新onDraw()即可完成连续滑动时动态绘制。
当我们快速一划时,就会回调GestureDetector里的onFling()方法,在方法里用
scroller.fling(rollingWidth,0,(int)(-velocityX/1.5),0,0,(maxValue/minUnitValue)*marginWidth,0,0);以实现滑动有一个好的动画效果,此时在如下代码里:
  @Override
  public void computeScroll() {
    if(scroller.computeScrollOffset()){
        //快滑刷新UI
        updateView(scroller.getCurrX(),fastScrollState);
    }
}scroller.computeScrollOffset()==true;而scroller.getCurrX()就相当于为动态产生的滑动宽度剩下的也是调用updateView()方法不断的刷新,当
scroller.computeScrollOffset()==false就滑动动画结束了。
最后当我们滑动结束手指抬起时:
    @Override
    public boolean onTouchEvent(MotionEvent event) {
        switch(event.getAction()){
            case MotionEvent.ACTION_UP:
                updateView(0,finishScrollState);
            default:
                mDetector.onTouchEvent(event);
                break;
        }
        return true;
    }
我们也要掉updateView(),以保持滑动的最后结构都指在指针上。
源码地址:
https://github.com/gaojuanjuan/MaterialDesign_V7