OnlyOffice验证(一)DocumentServer编译验证
资源准备
Ubuntu16.04桌面版
验证用的版本[ubuntu-16机接上传ubuntu.04.7-desktop-amd67131.iso,(别用高版本!试过20.04耽误两三天,差点放弃了),使用桌面版是为了后面好编辑。
代理工具
主要是为了资源下载,编译期间需要配置全局代理、git代理和npm代理。全局代理主要是apt和curl用,此处注意npm先别配镜像源让它走代理,apt也不要配置镜像源。(备注:192.168.95.130:7890是代理服务器,win11宿主机192.168.95.130,虚拟机192.168.95.133。模式是NAT模式。)
VMwareWorkstation17
如果是Win11最好还是用这个版本,VMware16好像兼容有点问题。要是不蓝屏此处可省略。
编译
安装Python
如果使用的16.04和上面的版本一样的话可以不用安装,本身自带Python 2.7.12和Python 3.5.2。
sudo apt-get install -y python
安装Git
不配置代理正常也能安装上,就是慢点。
sudo apt-get install -y git
安装后给git配置代理。好处是能提升点下载速度,还有就是到V8模块编译的时候会下载depot_tools,连不上google肯定编译失败。
git config --global http.proxy http://192.168.95.130:7890
git config --global https.proxy socks5://192.168.95.130:7890
此处防止大文件拉取失败又加了点配置,意义并不大网络不稳定该断开还是会断开。
root@t16:/# git config --list
http.postbuffer=524288000
http.lowspeedtime=60000
http.proxy=http://192.168.95.130:7890
core.compression=-1
https.postbuffer=524288000
https.lowspeedtime=60000
https.proxy=socks5://192.168.95.130:7890
配置全局代理
修改环境变量
vim /etc/profile
vim默认没有可以安装一个:
sudo apt-get install -y vim
追加环境变量,然后:wq保存退出
export ALL_PROXY=socks5://192.168.95.130:7890
export HTTP_PROXY=http://192.168.95.130:7890
export HTTPS_PROXY=http://192.168.95.130:7890
使环境变量立即生效
source /etc/profile
如果还不生效就重启虚拟机(reboot)。
下载ONLYOFFICE/build_tools
默认就是master:
git clone https://github.com/ONLYOFFICE/build_tools.git
指定版本(未验证):
git clone --depth=1 --recursive --branch v7.3.2.3 https://github.com/ONLYOFFICE/build_tools.git
编译前准备工作
下完build_tool后,执行cd ./build_tools/tools/linux切换目录,不要着急去执行automate.py,可以看到同级目录下有个deps.py,然后automate.py执行的开始就是检查环境然后调用deps.py去安装基础环境:
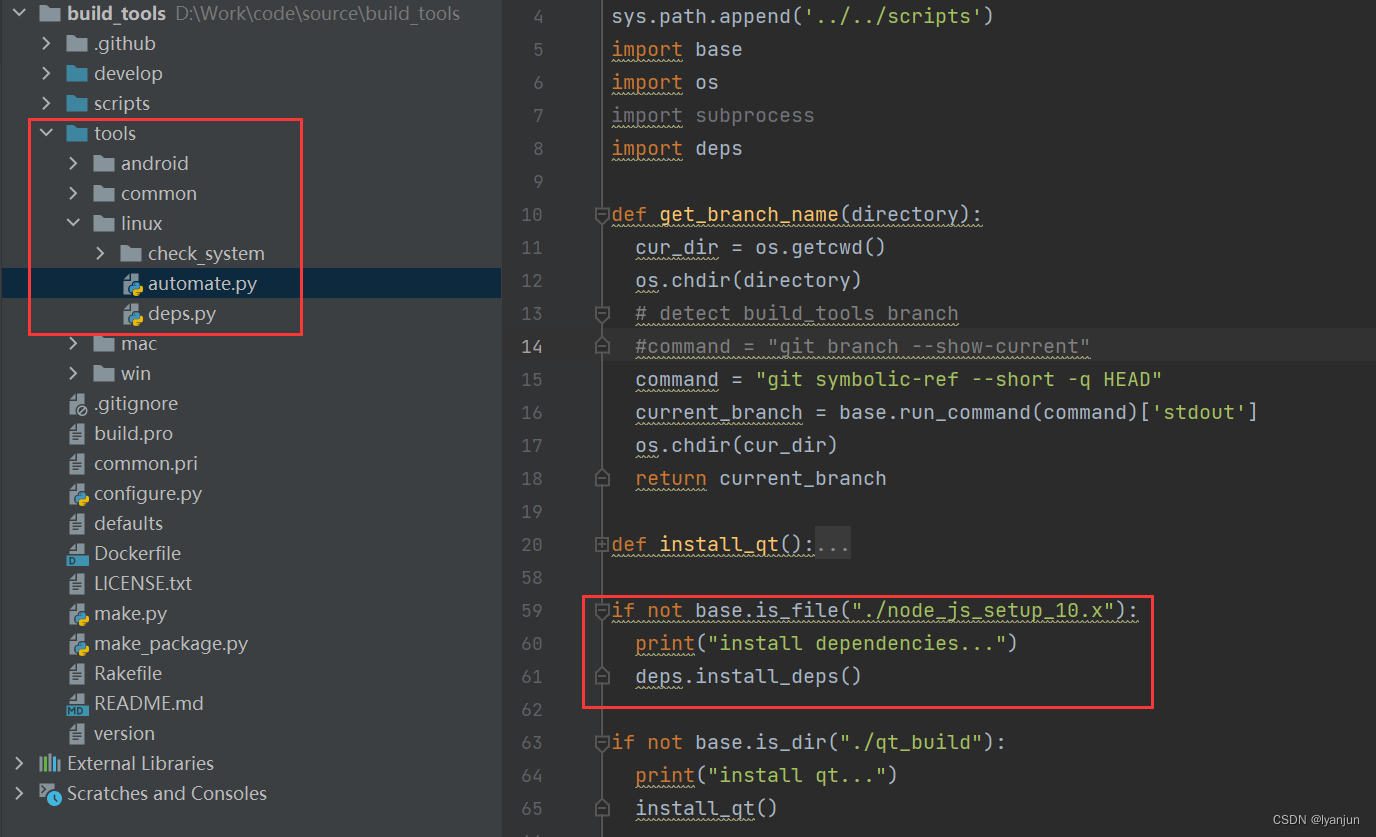
所以可以先执行deps.py安装基础环境(安装完了创建个快照),保证基础环境没有问题再去构建。然而先别着急去执行,还需要修改个地方。要不然curl下载https资源的时候会报错。所以还需要改一个文件:
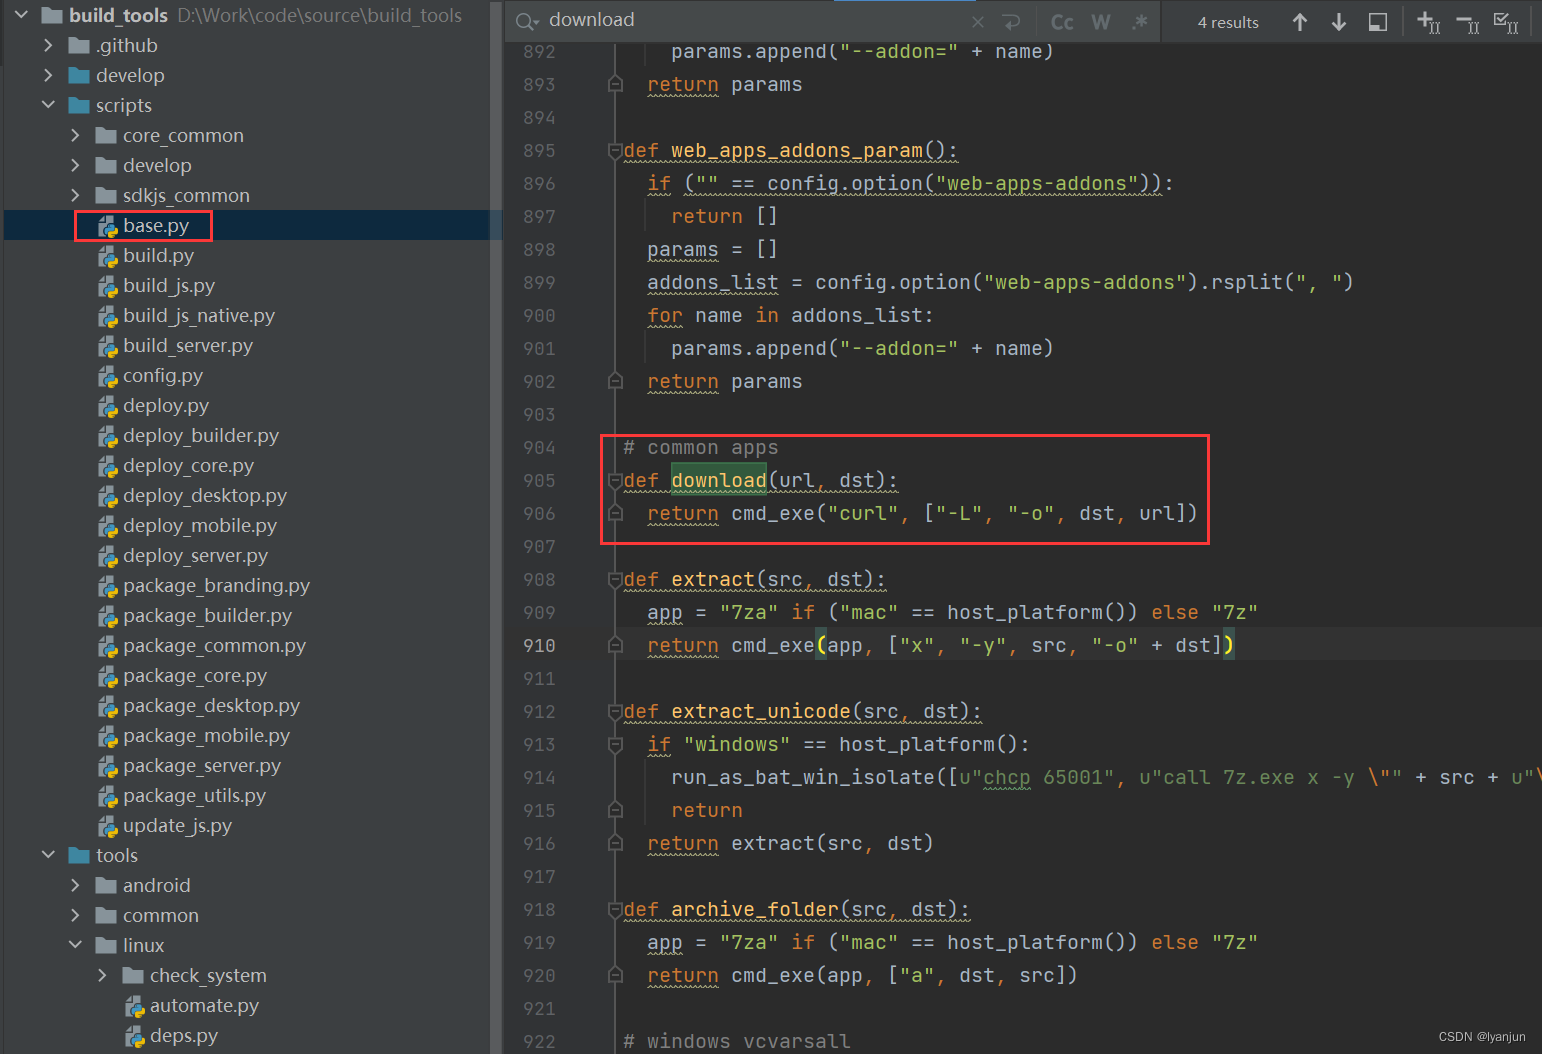
cd ./build_tools/scripts目录修改base.py中的download()方法
修改前
# common apps
def download(url, dst):
  return cmd_exe("curl", ["-L", "-o", dst, url])
修改后
# common apps
def download(url, dst):
  return cmd_exe("curl", ["-k", "-L", "-o", dst, url])
安装基础环境
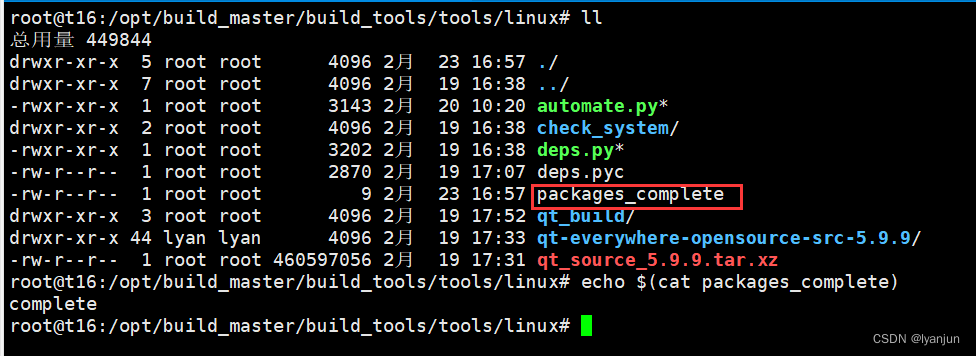
切换目录到build_tools/tools/linux下,执行deps.py可执行文件。随后将会进行进出环境的安装,包括NodeJS和Java环境。经过漫长的等待如果成功就会生成下图标注的文件且内容为complete。
如果中途报错且node已经安装完。则可以先配置npm代理。
node环境检查:
root@t16:/opt/build_master/build_tools/tools/linux# node -v
v10.24.1
root@t16:/opt/build_master/build_tools/tools/linux# npm -v
6.14.12
配置npm代理:
sudo npm config set proxy http://192.168.95.130:7890
sudo npm config set https-proxy http://192.168.95.130:7890
如果一切顺利最终Java也安装完成:
root@t16:/opt/build_master/build_tools/tools/linux# java -version
openjdk version "1.8.0_292"
OpenJDK Runtime Environment (build 1.8.0_292-8u292-b10-0ubuntu1~16.04.1-b10)
OpenJDK 64-Bit Server VM (build 25.292-b10, mixed mode)
执行构建
切换目录到build_tools/tools/linux下,执行automate.py可执行文件。
./automate.py server
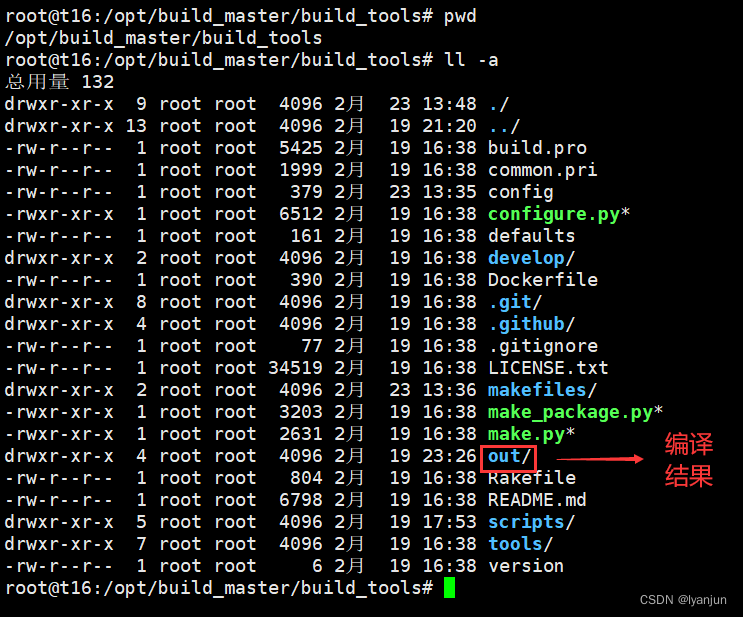
继续慢慢等待几个小时,中途可以睡一觉(做好编译失败的心理准备,如果失败了就删了除了build_tools的源码再来一遍)编译结果在build_tools/out下:
安装运行环境
此处完全按照官网的方式安装配置,先不用考虑Nginx其它方式的部署,数据库切换Mysql,Rabbit连接其它的服务器的问题。总之就是一顿复制粘贴,先运行起来看看效果再说:
安装Nginx
sudo apt-get install nginx
删除默认配置文件
sudo rm -f /etc/nginx/sites-enabled/default
创建配置文件
sudo vim /etc/nginx/sites-available/onlyoffice-documentserver
配置内容如下
map $http_host $this_host {
  "" $host;
  default $http_host;
}
map $http_x_forwarded_proto $the_scheme {
  default $http_x_forwarded_proto;
  "" $scheme;
}
map $http_x_forwarded_host $the_host {
  default $http_x_forwarded_host;
  "" $this_host;
}
map $http_upgrade $proxy_connection {
  default upgrade;
  "" close;
}
proxy_set_header Host $http_host;
proxy_set_header Upgrade $http_upgrade;
proxy_set_header Connection $proxy_connection;
proxy_set_header X-Forwarded-Host $the_host;
proxy_set_header X-Forwarded-Proto $the_scheme;
server {
  listen 0.0.0.0:80;
  listen [::]:80 default_server;
  server_tokens off;
  rewrite ^\/OfficeWeb(\/apps\/.*)$ /web-apps$1 redirect;
  location / {
    proxy_pass http://localhost:8000;
    proxy_http_version 1.1;
  }
}
创建软连接
sudo ln -s /etc/nginx/sites-available/onlyoffice-documentserver /etc/nginx/sites-enabled/onlyoffice-documentserver
重启Nginx使配置生效
sudo nginx -s reload
安装PostgreSql
sudo apt-get install postgresql
创建数据库和用户
sudo -i -u postgres psql -c "CREATE DATABASE onlyoffice;"
sudo -i -u postgres psql -c "CREATE USER onlyoffice WITH password 'onlyoffice';"
sudo -i -u postgres psql -c "GRANT ALL privileges ON DATABASE onlyoffice TO onlyoffice;"
导入数据库脚本创建相关的表。注意脚本的目录,为了方便参考此处贴出绝对目录
psql -hlocalhost -Uonlyoffice -d onlyoffice -f /opt/build_master/build_tools/out/linux_64/onlyoffice/documentserver/server/schema/postgresql/createdb.sql
安装RabbitMQ
sudo apt-get install rabbitmq-server
执行完上面的脚本就完事了,可以执行systemctl status rabbitmq-server看下服务的状态:

初始化数据
只需要执行一次就行,往后直接启动就行了(如果是重新编译,需要重新初始化数据,因为编译数据是重新生成的,没有上一次的初始化数据了)
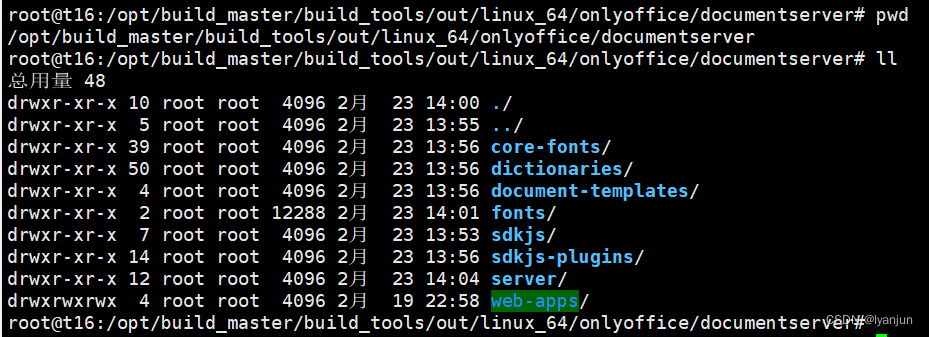
注意目录,以编译结果目录为主,下图为/opt/build_master/build_tools/out/linux_64/onlyoffice/documentserver目录结构(※fonts目录是生成字体数据时创建的):
生成字体数据
cd /opt/build_master/build_tools/out/linux_64/onlyoffice/documentserver/
mkdir fonts
LD_LIBRARY_PATH=${PWD}/server/FileConverter/bin server/tools/allfontsgen \
  --input="${PWD}/core-fonts" \
  --allfonts-web="${PWD}/sdkjs/common/AllFonts.js" \
  --allfonts="${PWD}/server/FileConverter/bin/AllFonts.js" \
  --images="${PWD}/sdkjs/common/Images" \
  --selection="${PWD}/server/FileConverter/bin/font_selection.bin" \
  --output-web='fonts' \
  --use-system="true"
生成演示主题
cd /opt/build_master/build_tools/out/linux_64/onlyoffice/documentserver/
LD_LIBRARY_PATH=${PWD}/server/FileConverter/bin server/tools/allthemesgen \
  --converter-dir="${PWD}/server/FileConverter/bin"\
  --src="${PWD}/sdkjs/slide/themes"\
  --output="${PWD}/sdkjs/common/Images"
运行服务
官网提供的示例都是前台启动程序,这里为了方便可以先起两个会话分别启动文档服务和转换服务,先切换目录到/opt/build_master/build_tools/out/linux_64/onlyoffice/documentserver/server:
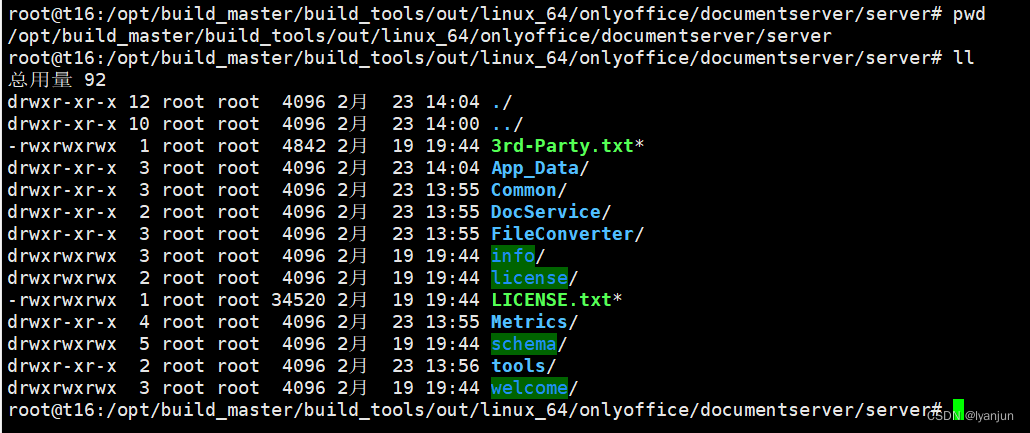
此处可以把全局代理关了,直接编辑vim /etc/profile将代理都注释掉。然后source /etc/profile使其生效。以防万一还是重启比较保险。不用担心Nginx、PostgreSql和RabbitMQ都是自启的。
启动转换服务
cd out/linux_64/onlyoffice/documentserver/server/FileConverter
LD_LIBRARY_PATH=$PWD/bin \
NODE_ENV=development-linux \
NODE_CONFIG_DIR=$PWD/../Common/config \
./converter

启动文档服务
cd out/linux_64/onlyoffice/documentserver/server/DocService
NODE_ENV=development-linux \
NODE_CONFIG_DIR=$PWD/../Common/config \
./docservice

效果验证
基本验证
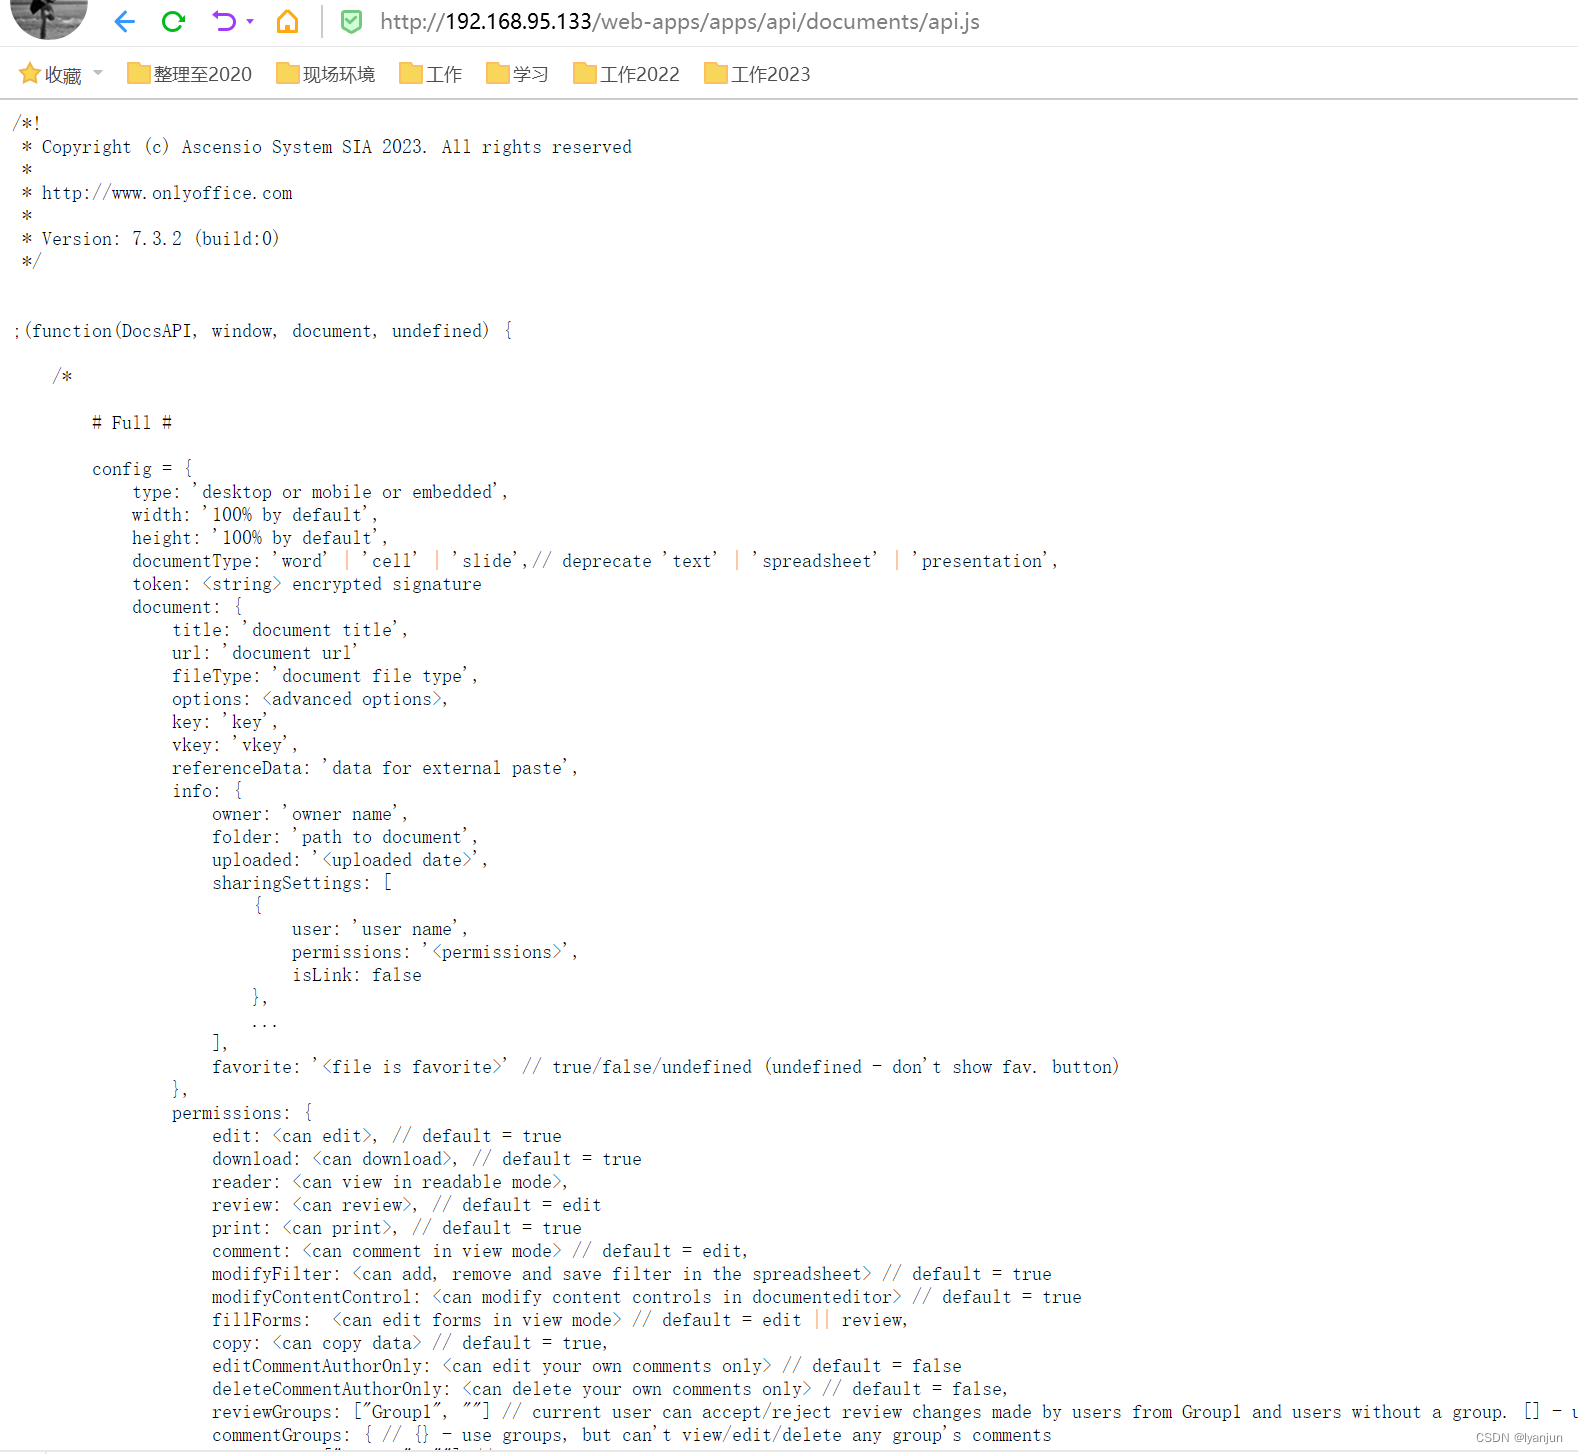
因为Nginx直接配置的80端口,所以直接http访问服务IP即可。welcome欢迎页这时候还没有配置,可以先访问api.js试试。
请求http://192.168.95.133/web-apps/apps/api/documents/api.js:
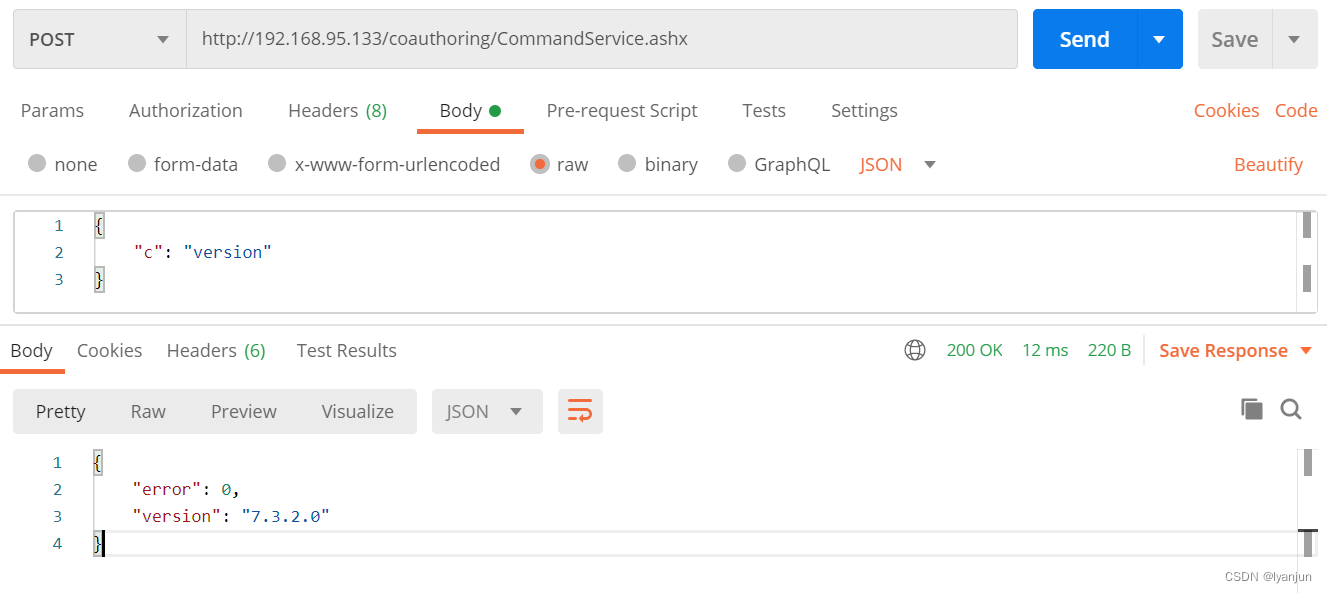
除了这种方式还可以试试别的接口,比如通过Postman请求版本号看看。
请求http://192.168.95.133/coauthoring/CommandService.ashx:
预览文档
基本验证只是看看服务运行没运行起来。毕竟最终还是要看文档在线预览的效果。此处除了example还有什么方式可以快速查看效果?~~~~~还真有,官网提供了一个示例工程,效果还十分的不错。
- 示例说明:https://api.onlyoffice.com/editors/vue
还好有Vue的,毕竟对React不熟,直接下载git clone https://github.com/ONLYOFFICE/document-editor-vue。
同步依赖包要是npm下的慢可以考虑装个yarn。
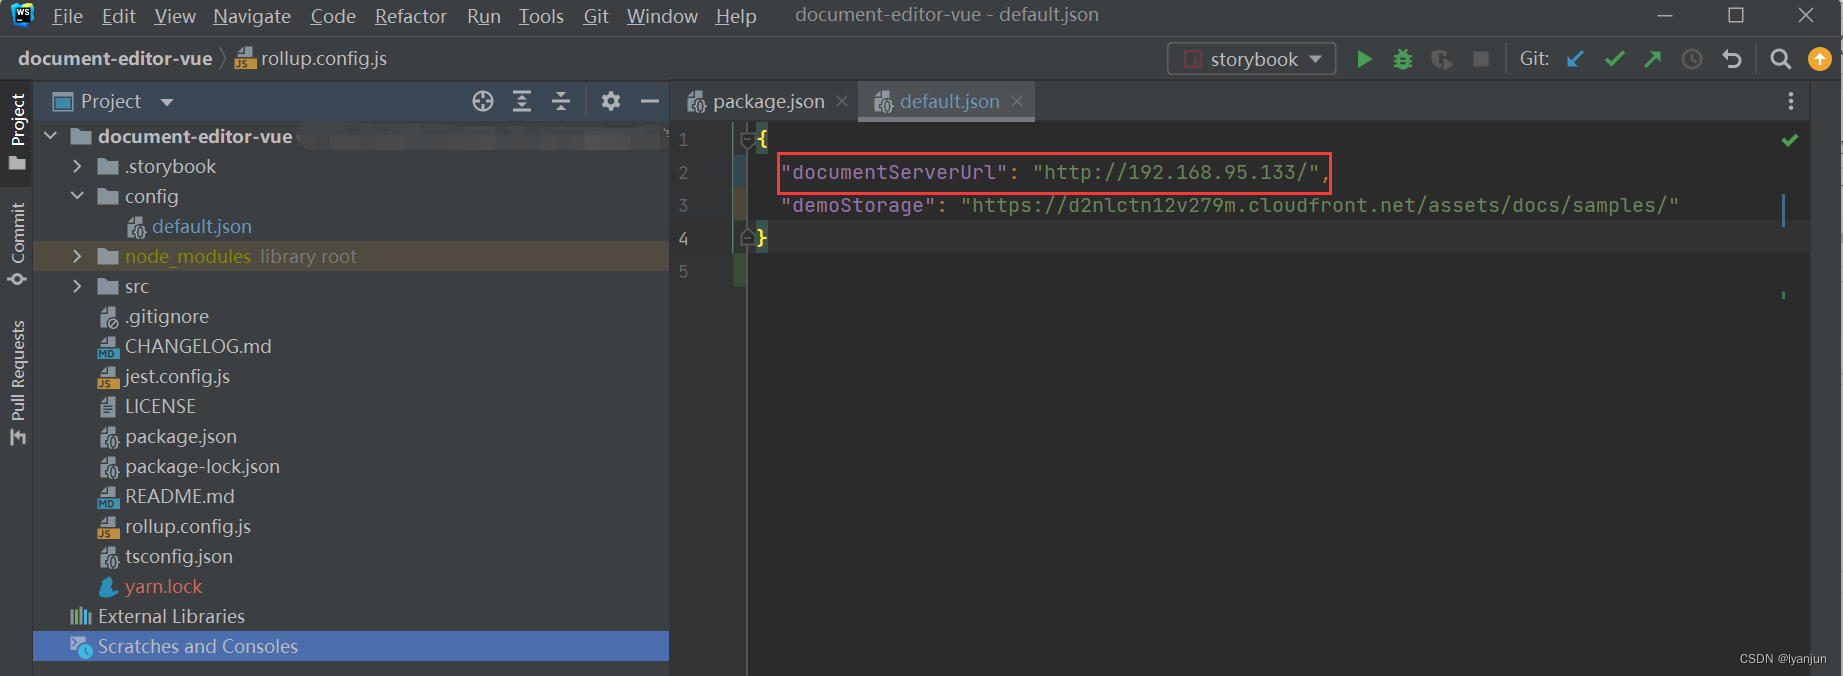
找到default.json改一下服务部署的IP地址。随后启动项目看下在线预览的效果:
Word效果
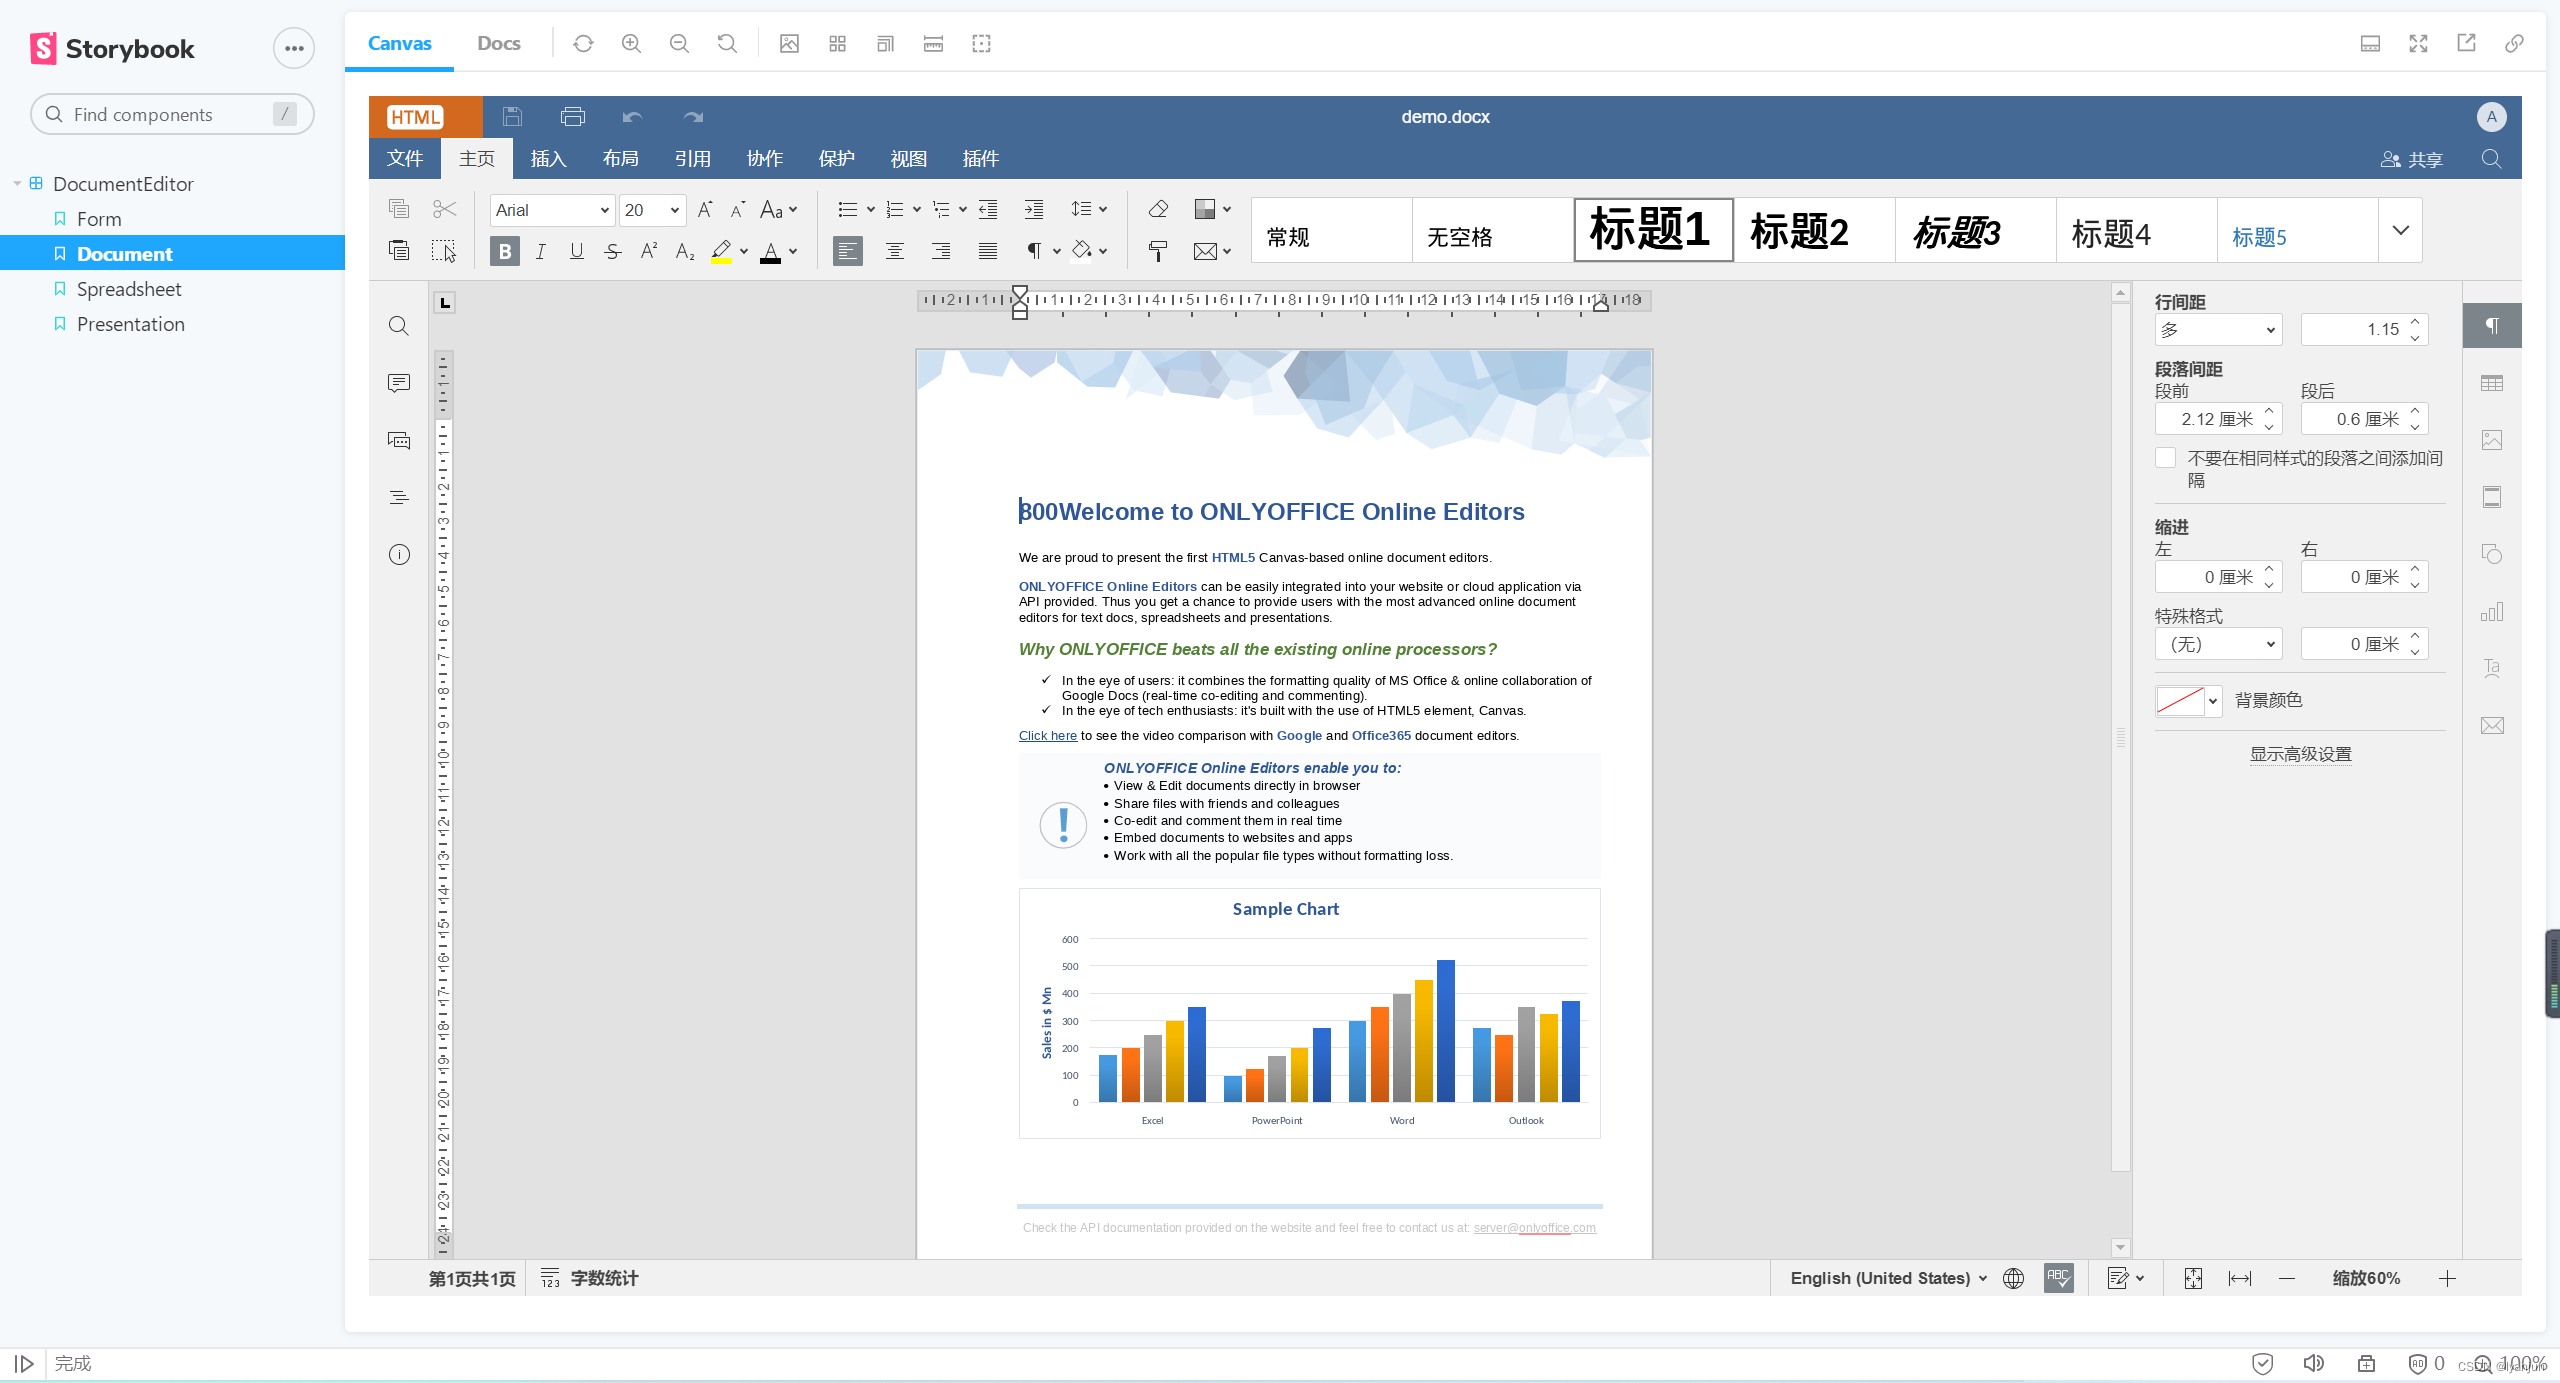
Excel效果
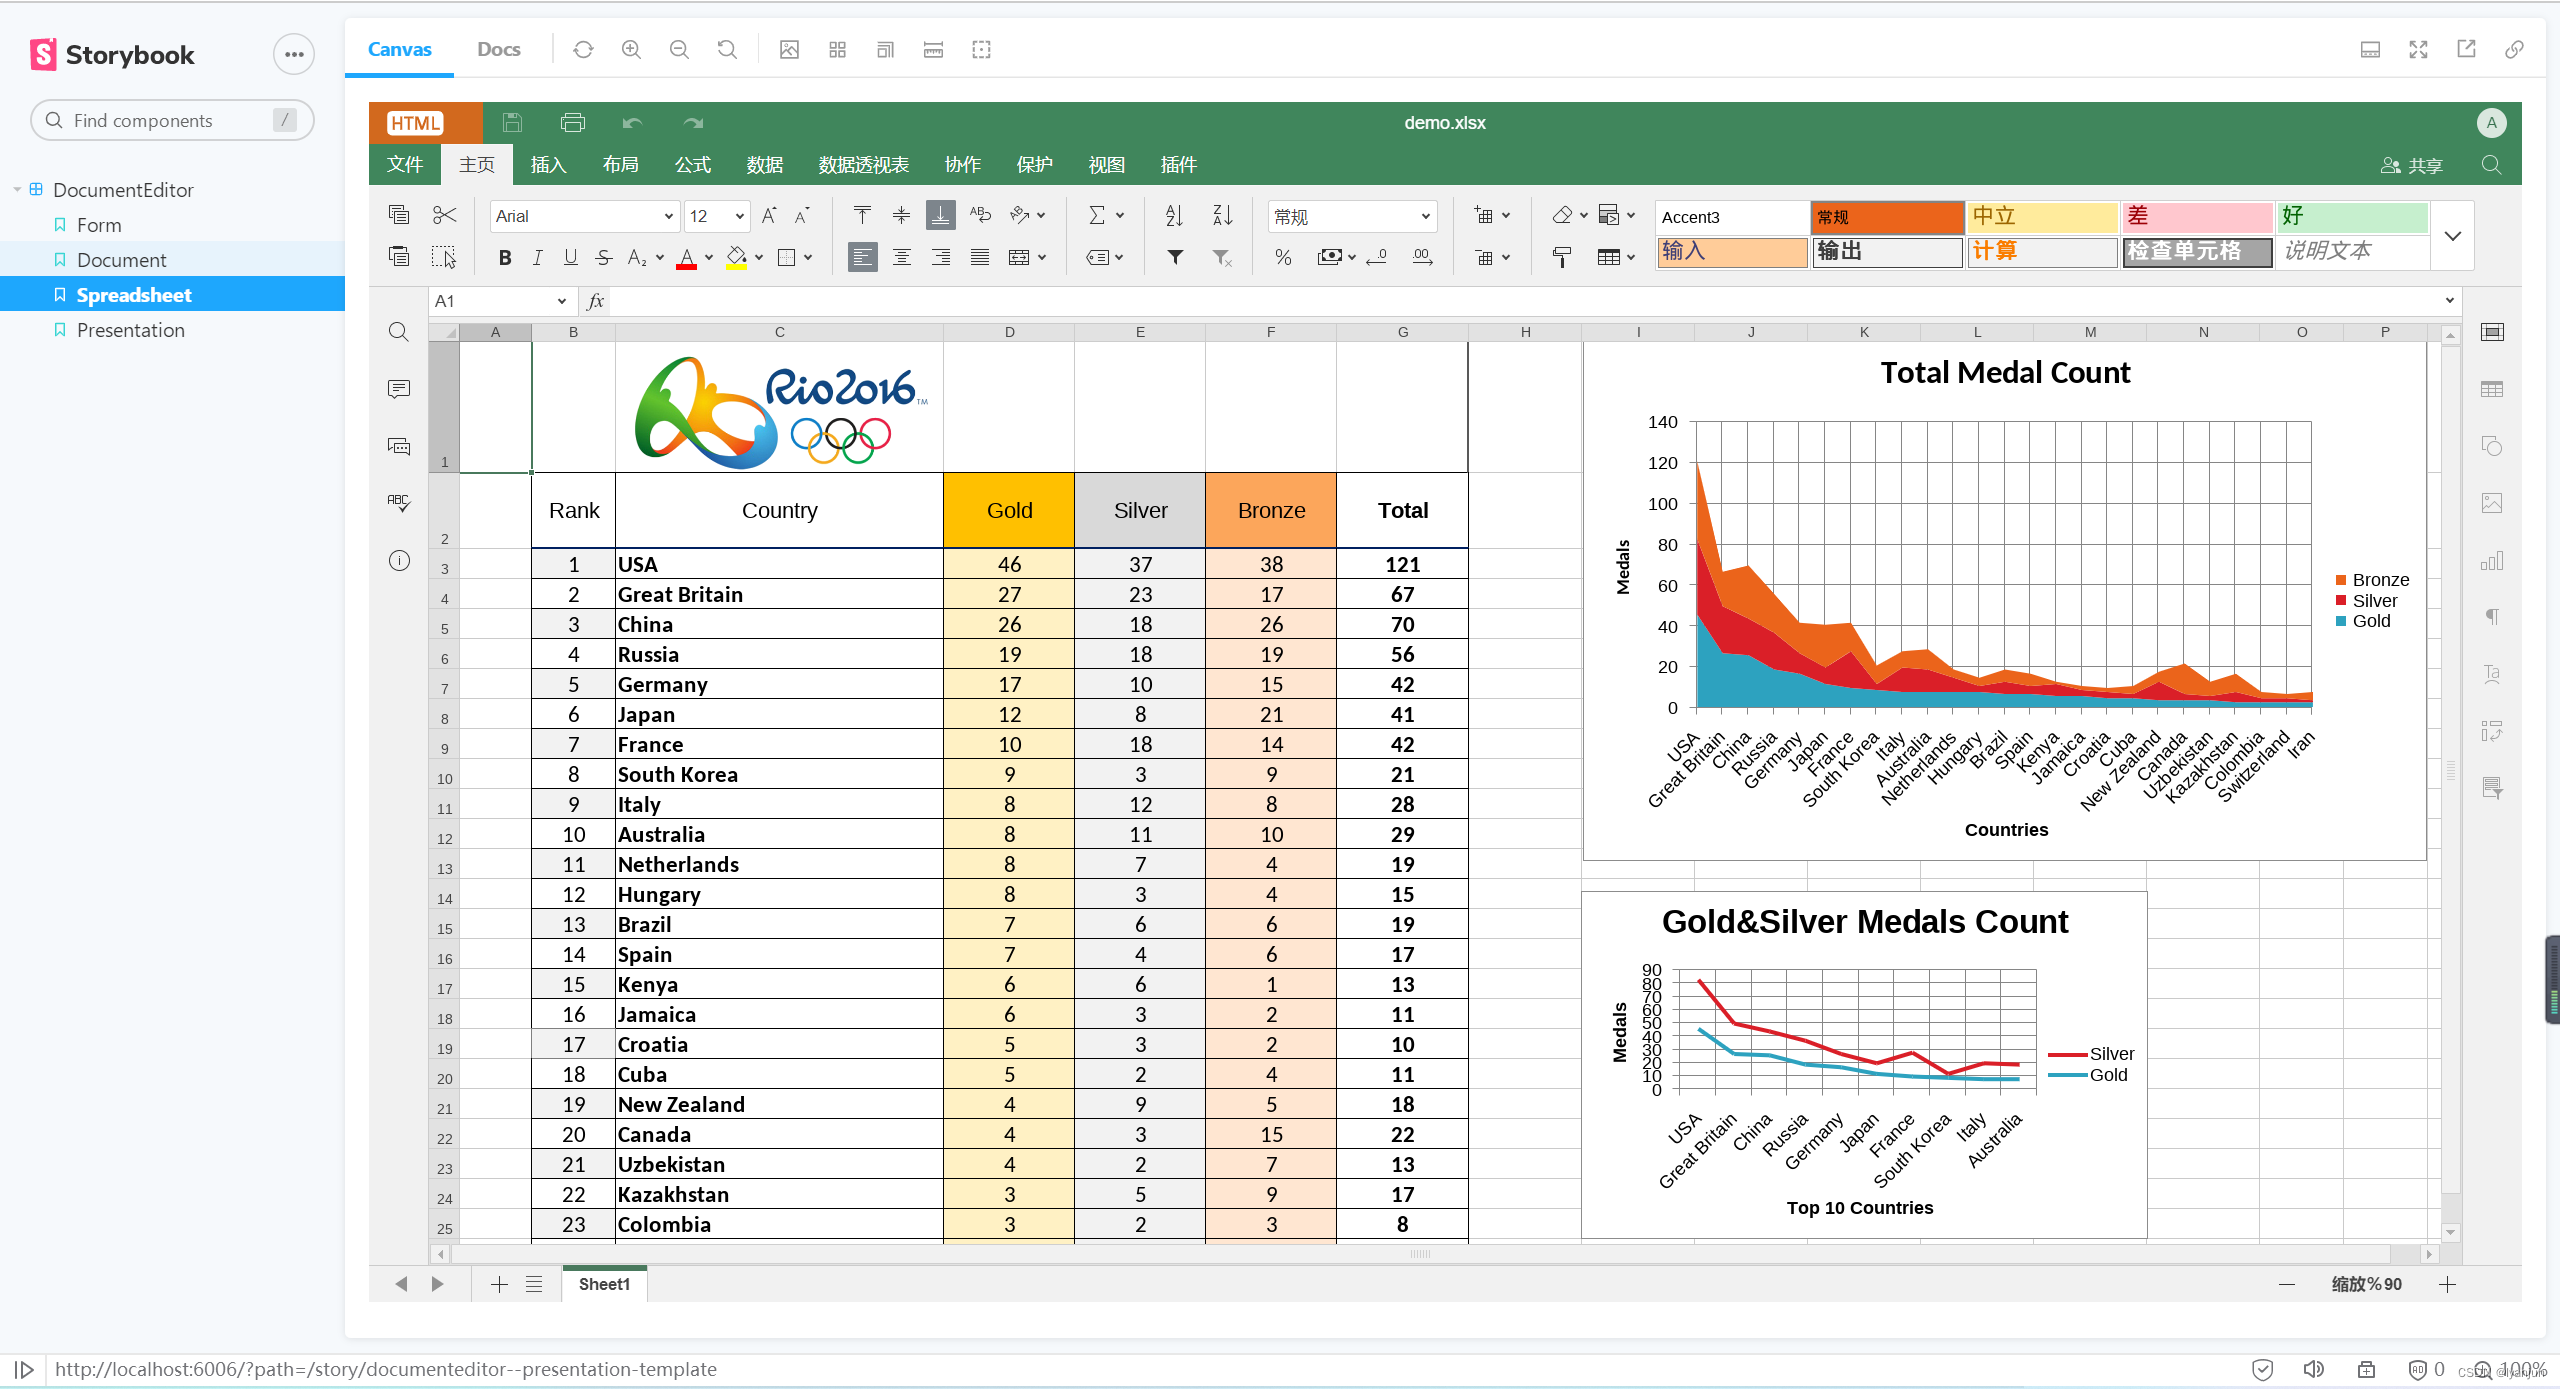
PowerPoint效果

参考资料
- https://blog.csdn.net/lanyingtianshiabc/article/details/108534623
- https://blog.csdn.net/huqngqing/article/details/114635793
- https://github.com/ONLYOFFICE/build_tools
编译步骤主要都是官网提供的步骤,以上资料的评论很有参考价值。
- https://www.songbin.top/search?kw=onlyoffice
这个资料基本就是最全的了,非常具有参考的价值。


![[黑马程序员SSM框架教程] Spring-11-setter注入](https://img-blog.csdnimg.cn/706b50f9eb1448328d49fe53b310fe4c.png)


