前置工作
本机安装maven
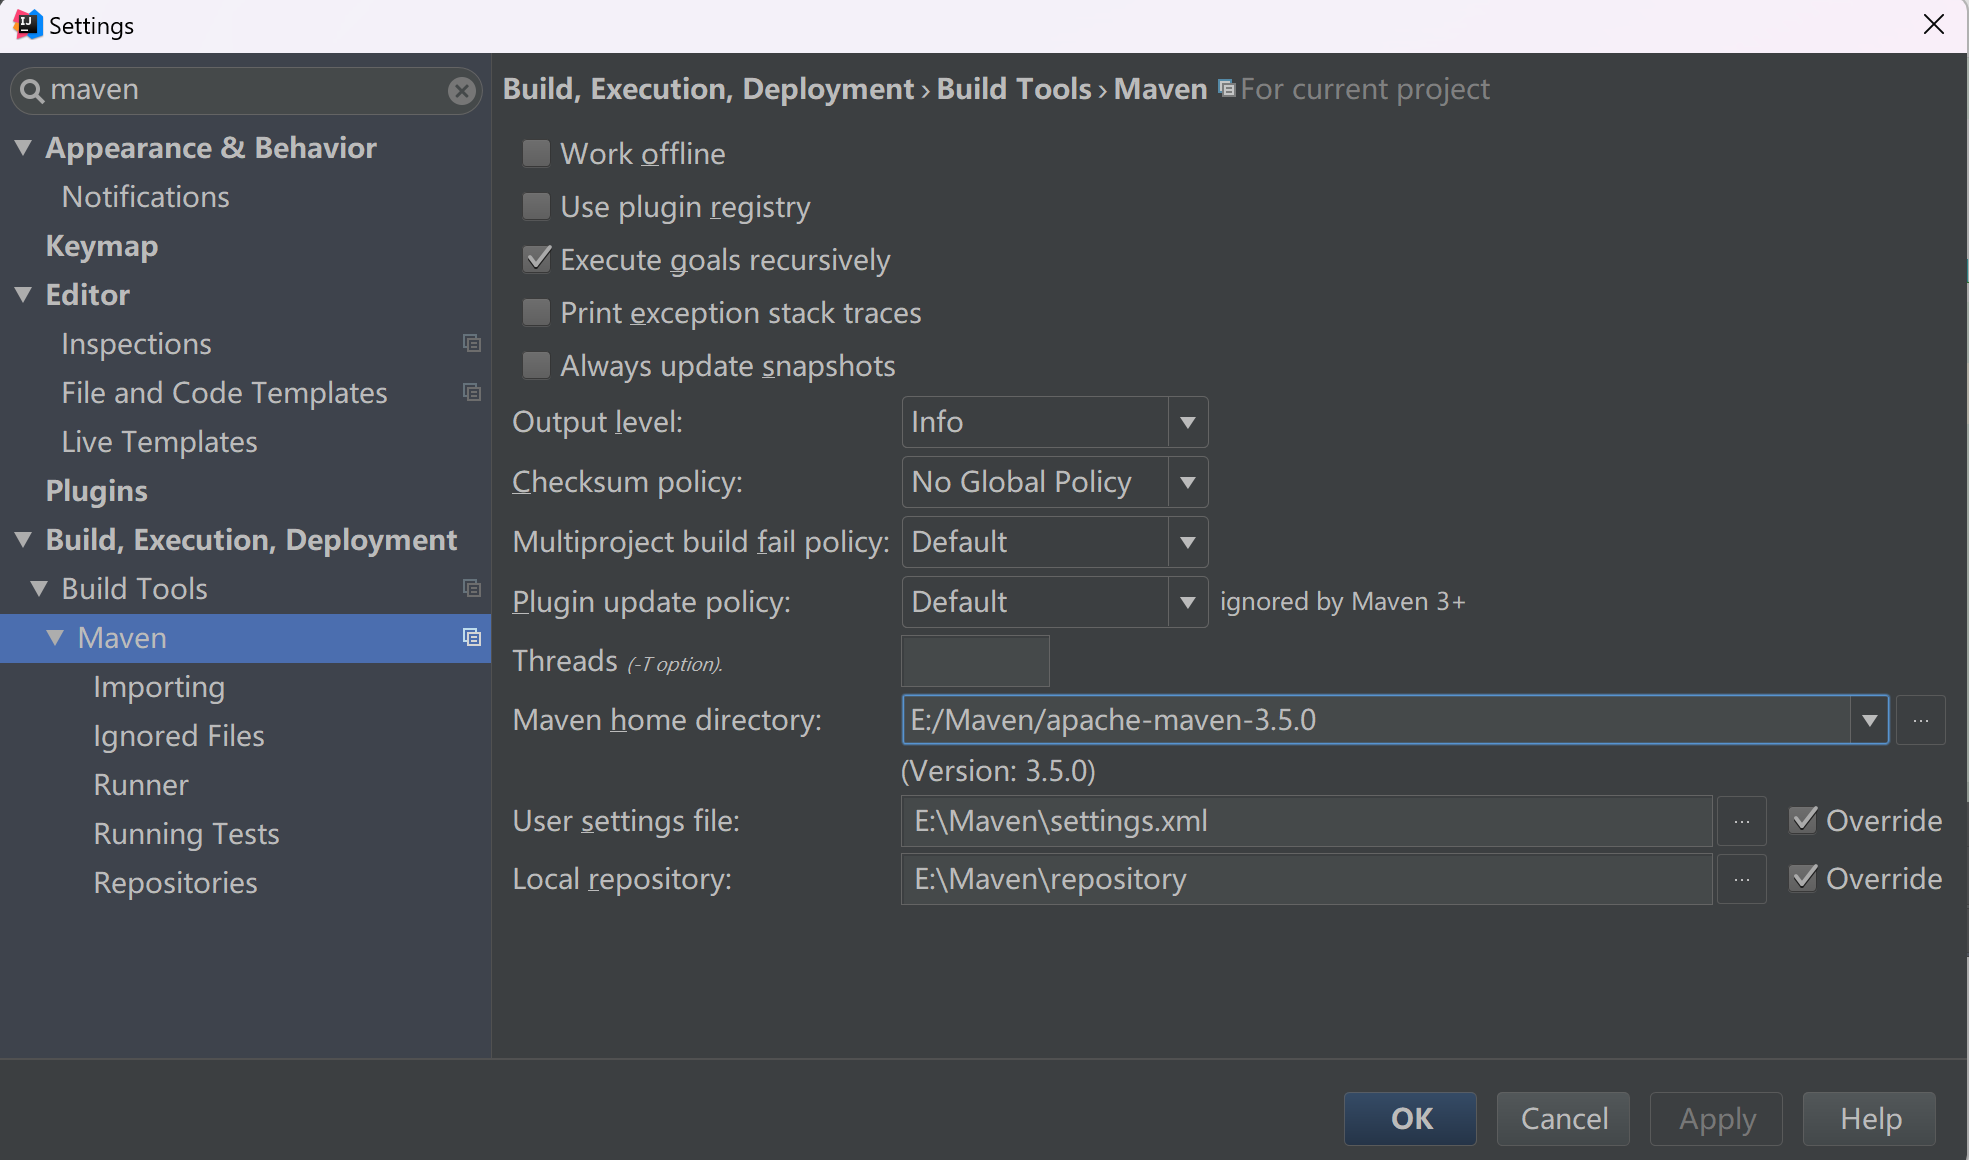
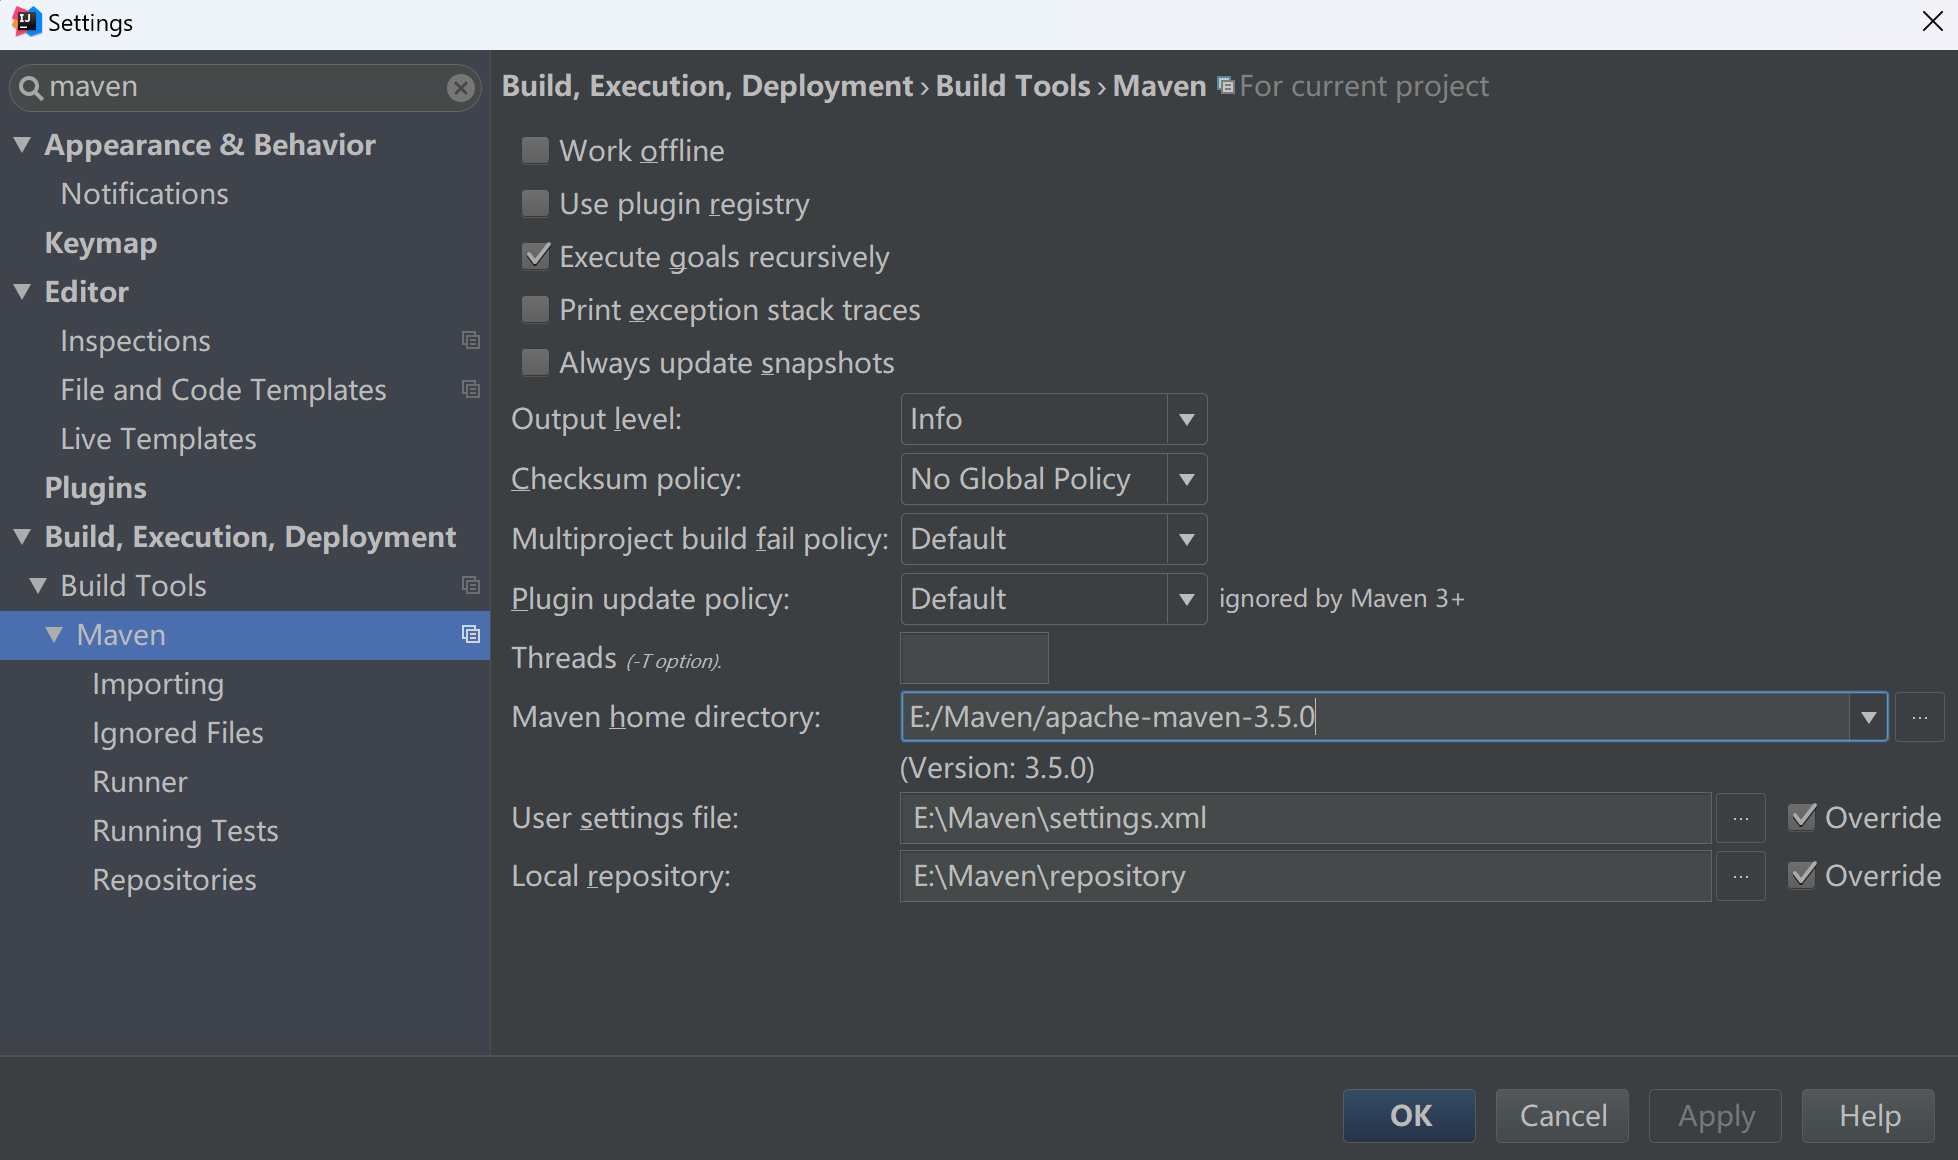
Idea 设置使用本机maven 工具
Settings--->Maven
开始创建maven项目
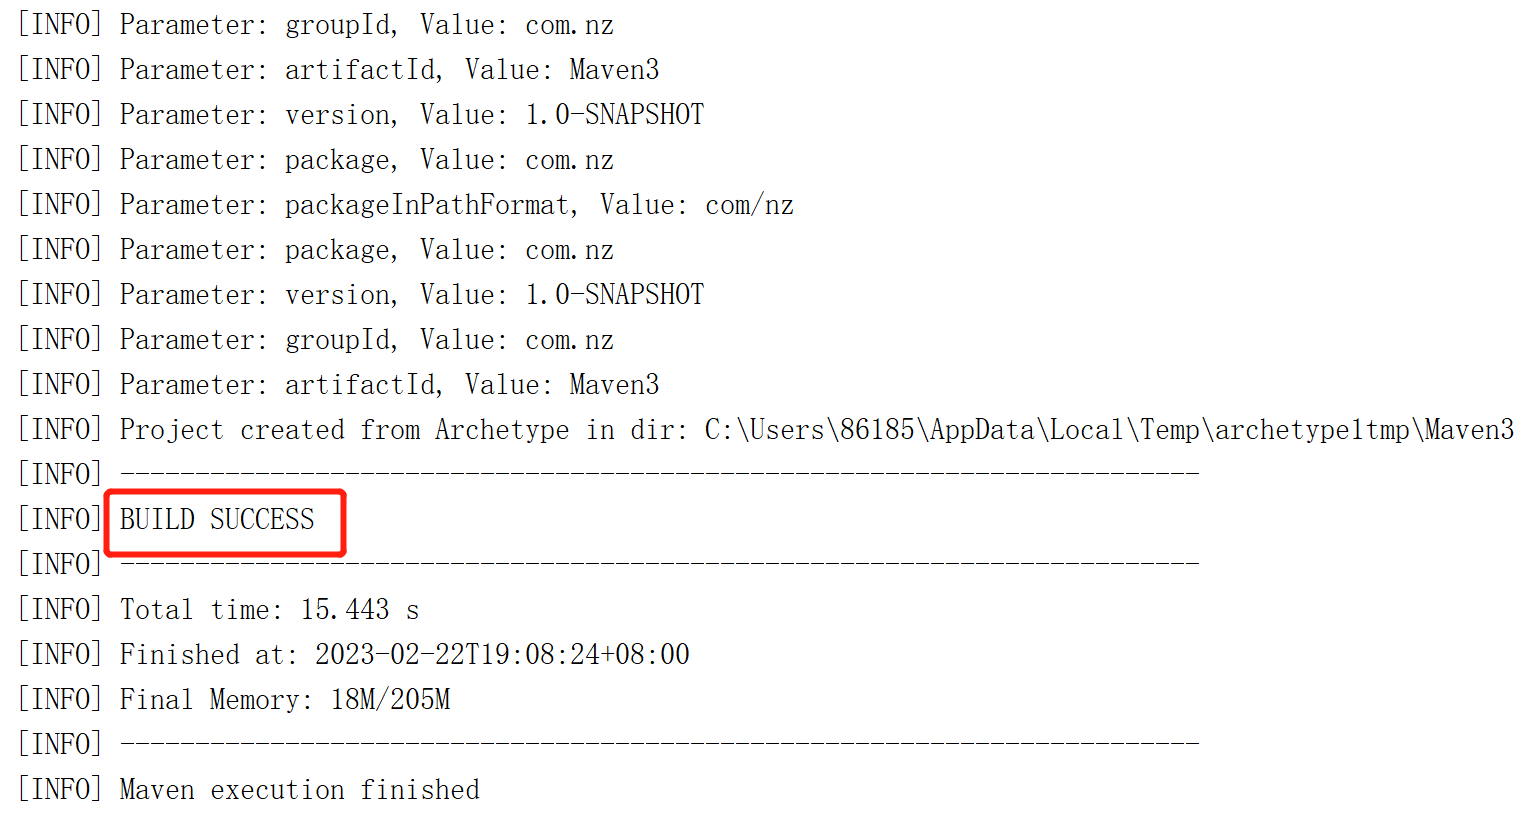
创建maven项目,勾选通过模板创建,选择 maven-archetype-webapp 模板
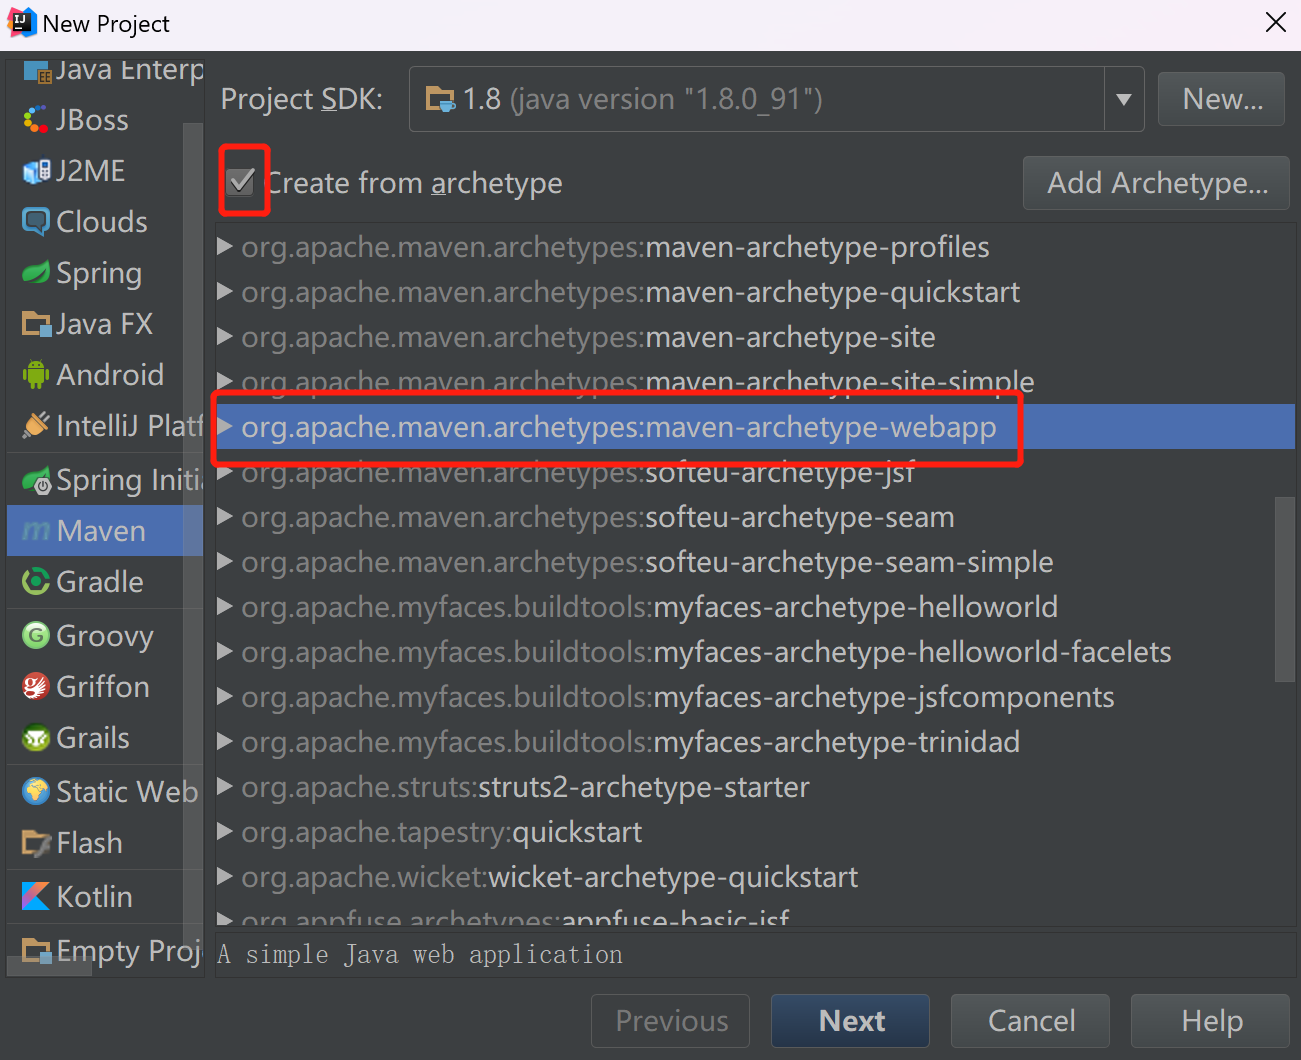
GroupId: 公司名倒序
ArtifactId: 项目名

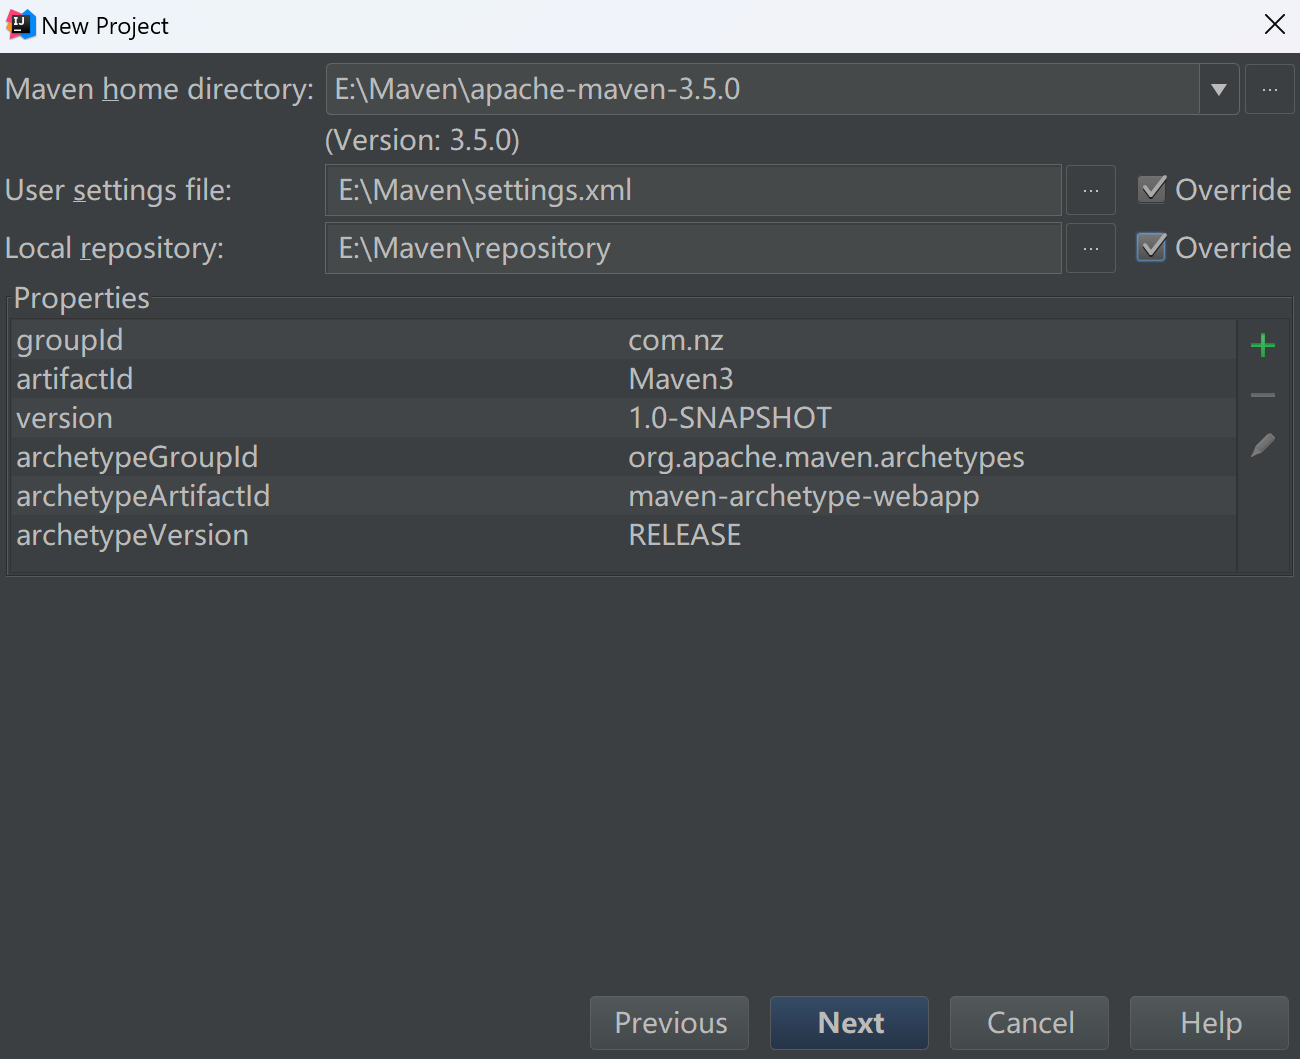
设置本地maven仓库配置
项目文件显示名,和项目名一致

设置maven jar包自动导入
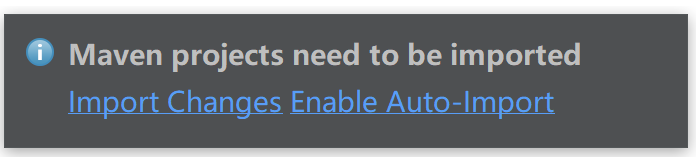
手动导入
打开setting→maven→importing:
选择Import Maven projects automatically
等待结果
检查项目的maven本地配置和仓库
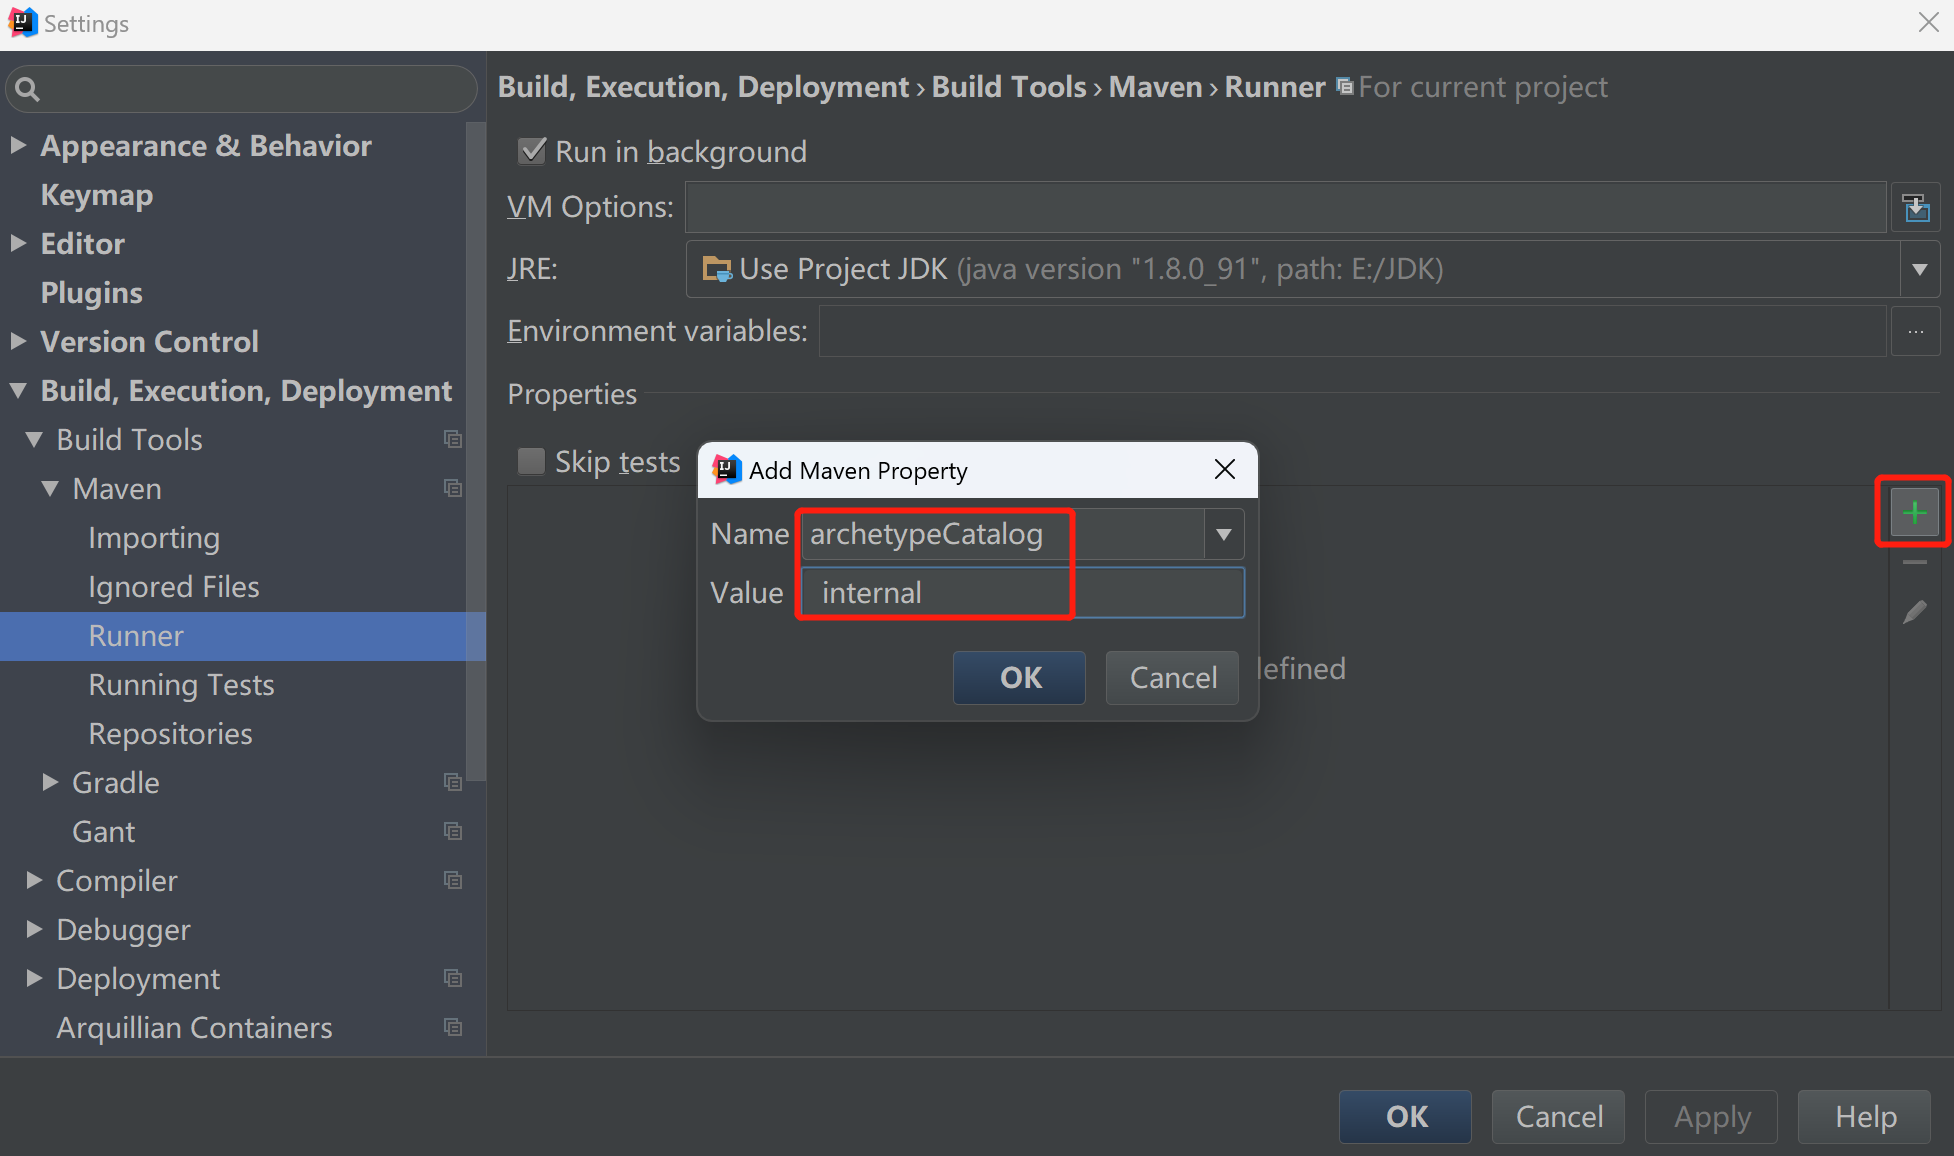
设置参数,加快jar包下载速度可选
maven – Runner
archetypeCatalog -- internal
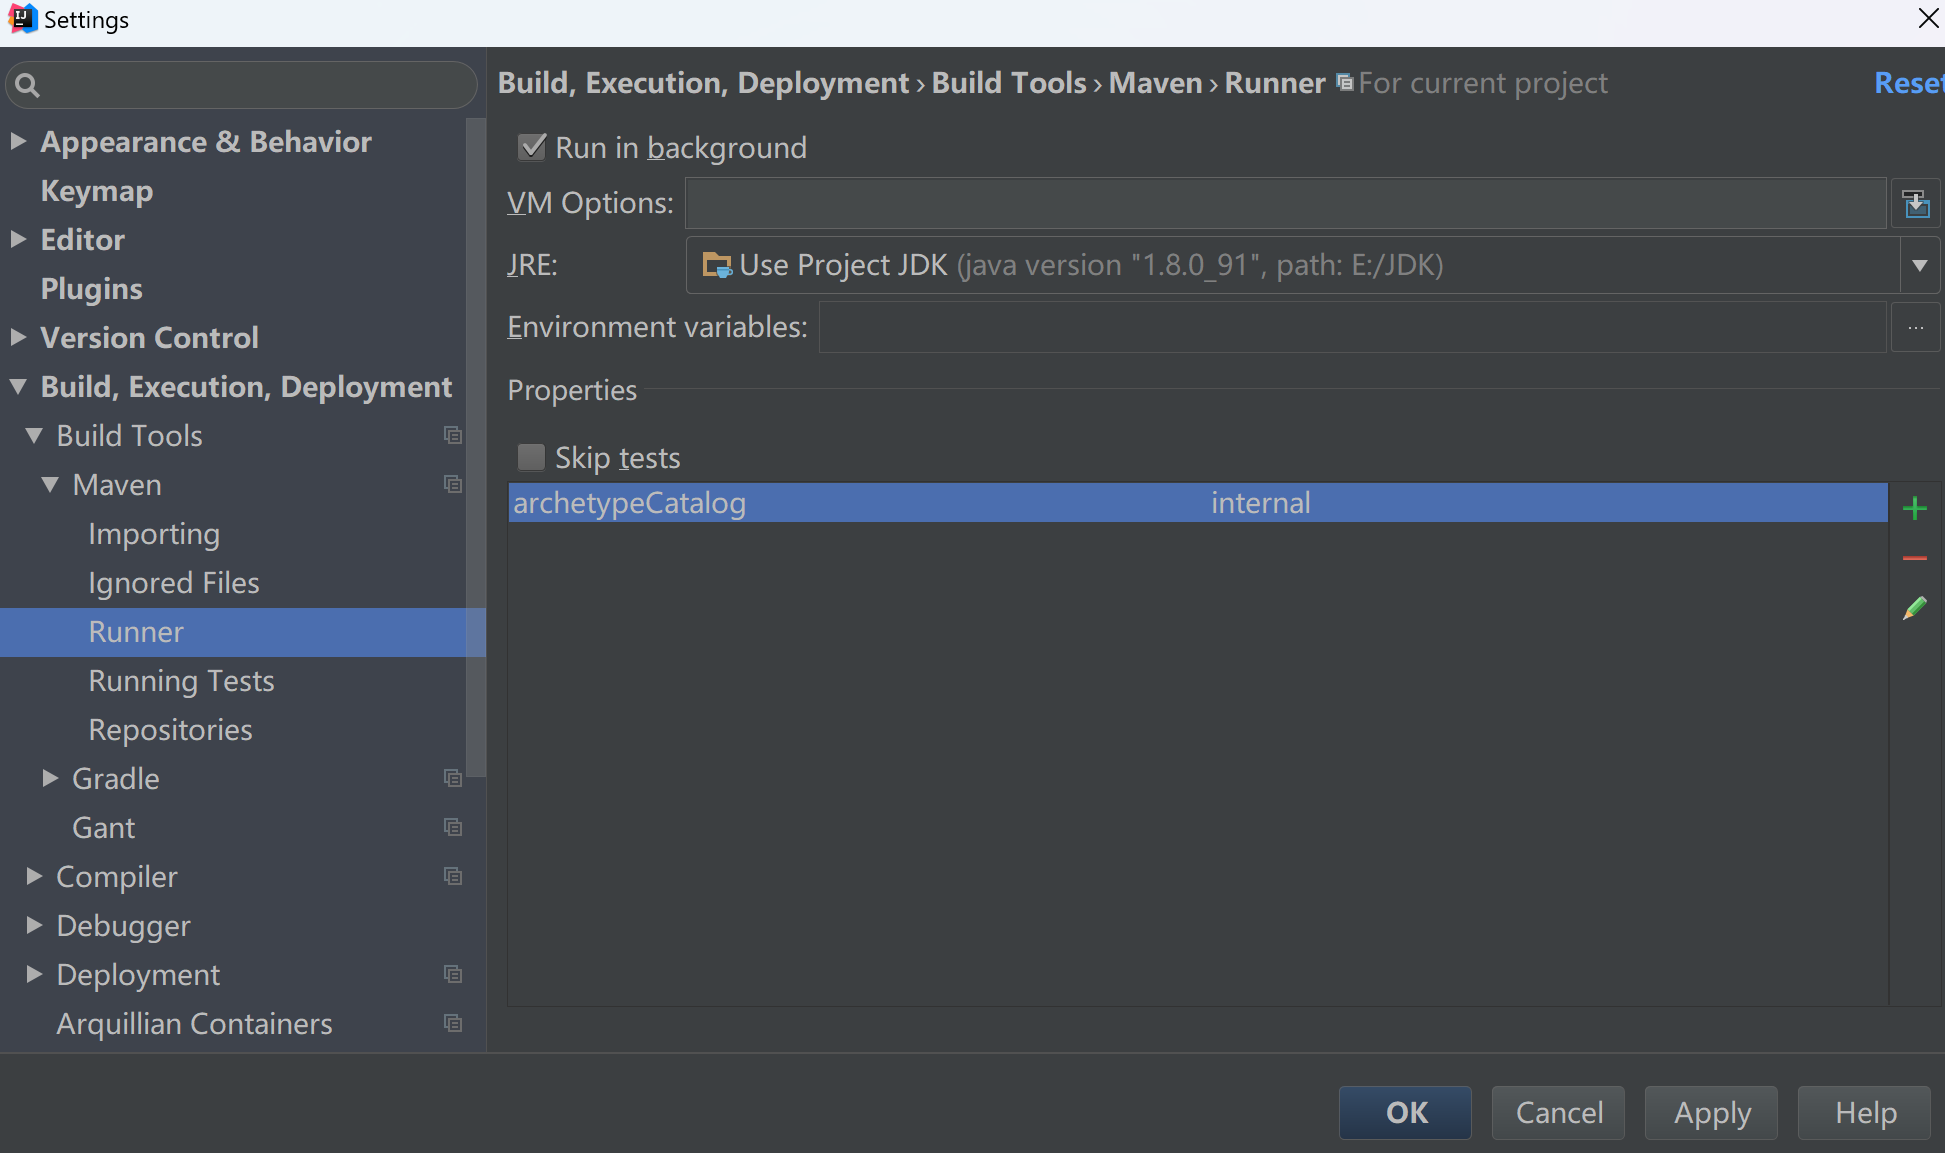
4. 确认或修改maven支持的JDK版本为1.8
打开pom.xml文件
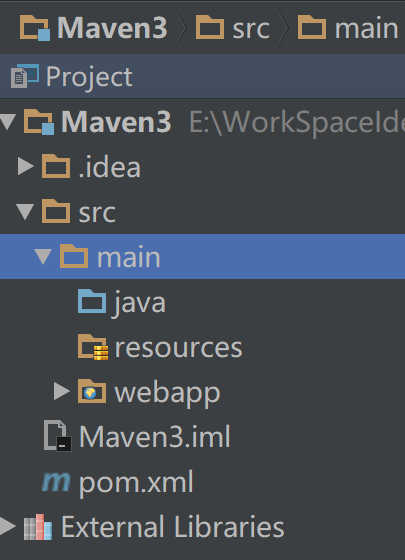
3. 构建maven目录,创建对应文件夹
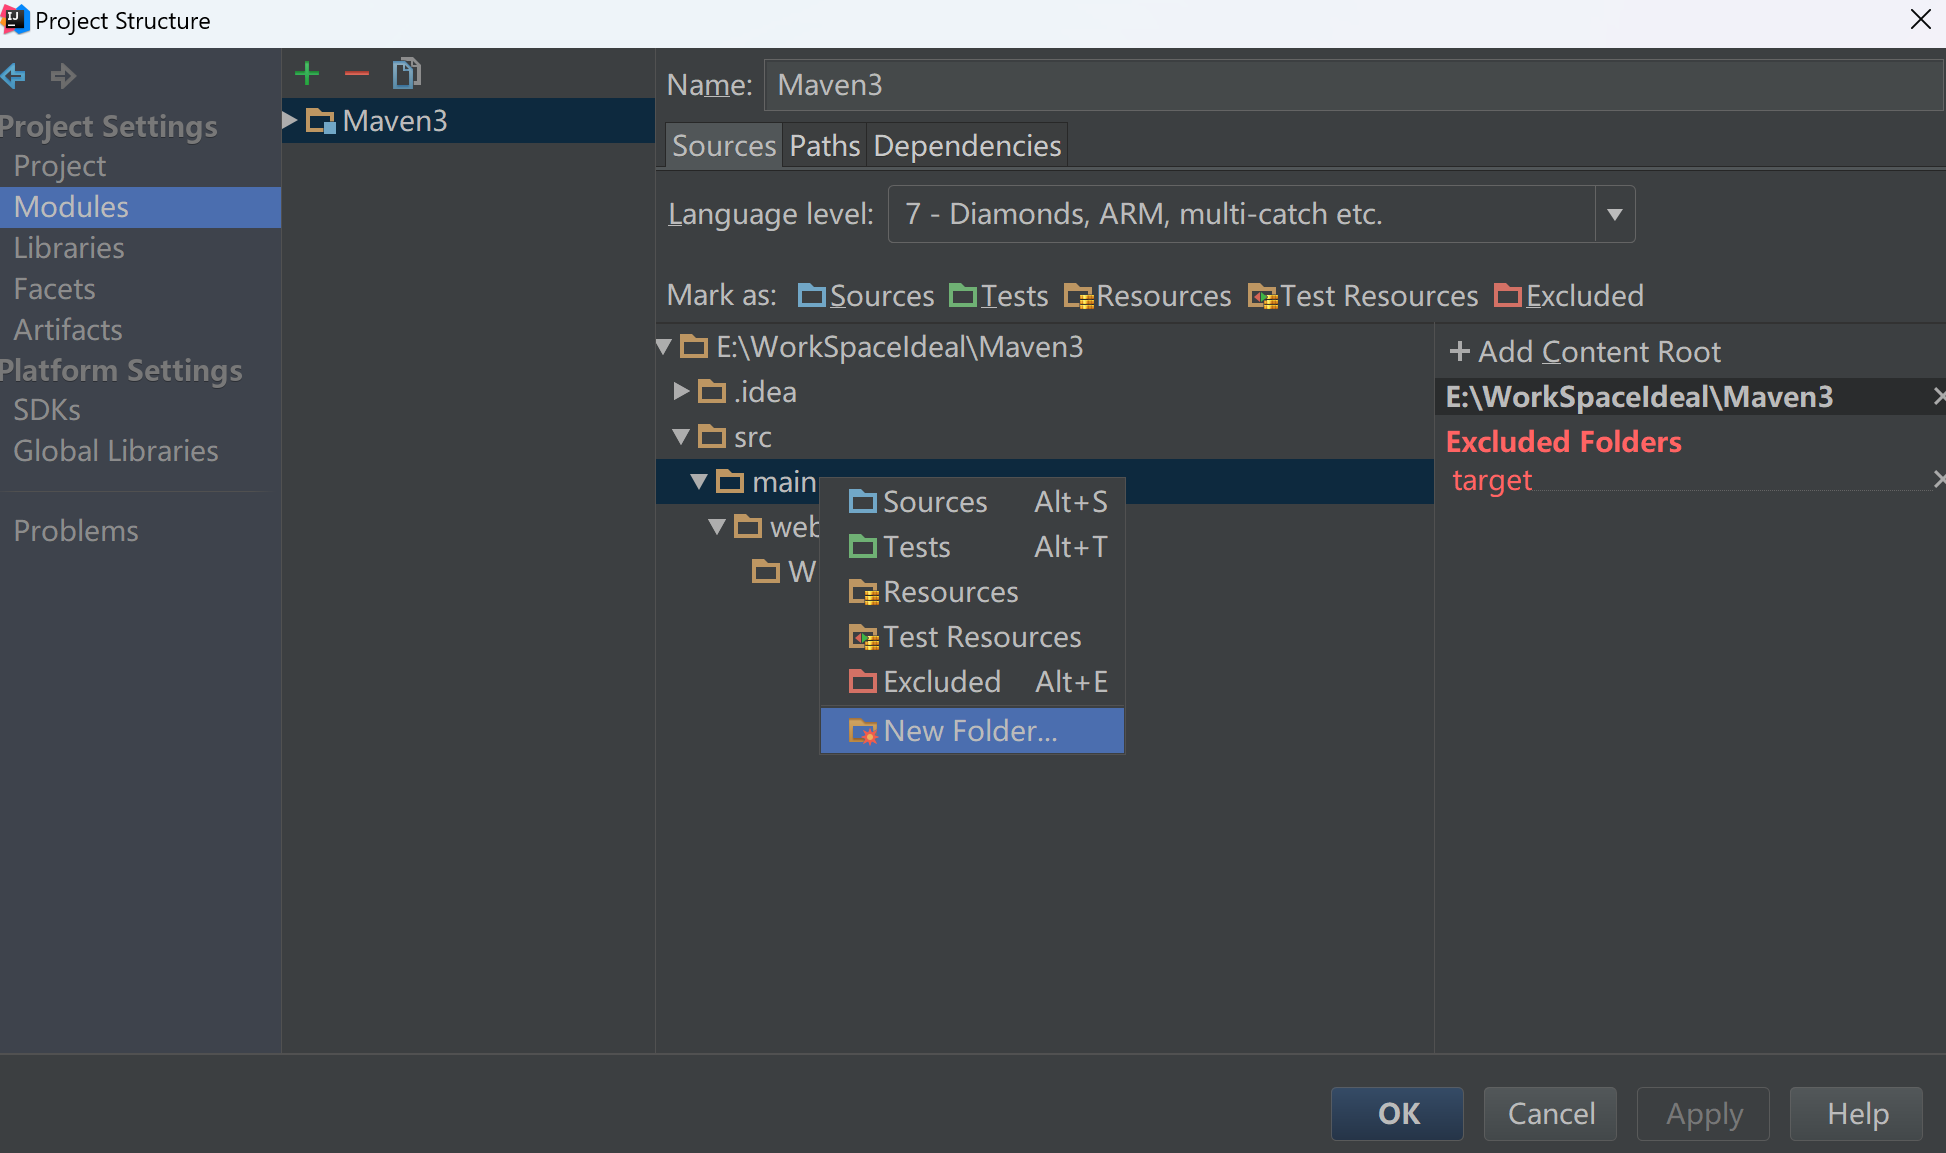
并设置src\main\java为代码源目录
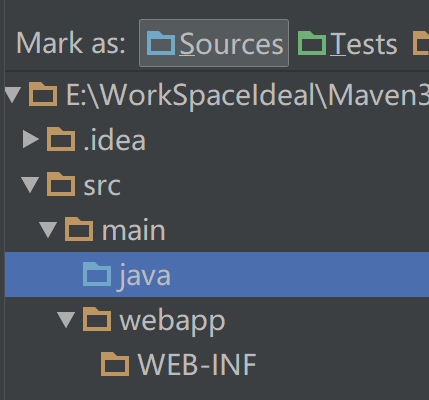
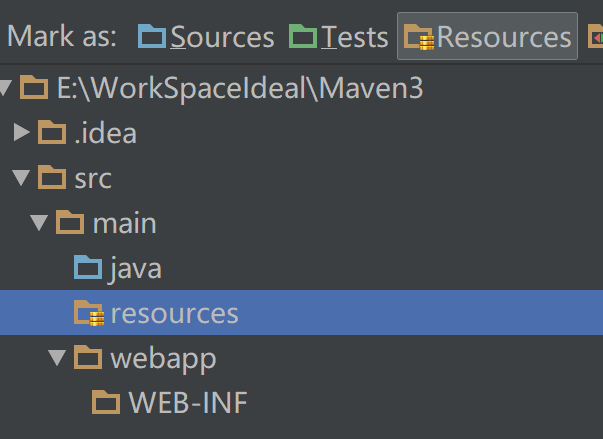
6. 设置src\main\resources为资源文件源目录
后期原config下的配置文件,复制到resources下,并修改对应路径
更换web.xml模板
<?xml version="1.0" encoding="UTF-8"?>
<web-app xmlns:xsi="http://www.w3.org/2001/XMLSchema-instance"
         xmlns="http://java.sun.com/xml/ns/javaee"
         xsi:schemaLocation="http://java.sun.com/xml/ns/javaee http://java.sun.com/xml/ns/javaee/web-app_3_0.xsd"
         version="3.0">
  <display-name>Test_Maven2</display-name>
  <welcome-file-list>
    <welcome-file>index.html</welcome-file>
    <welcome-file>index.htm</welcome-file>
    <welcome-file>index.jsp</welcome-file>
    <welcome-file>default.html</welcome-file>
    <welcome-file>default.htm</welcome-file>
    <welcome-file>default.jsp</welcome-file>
  </welcome-file-list>


</web-app>
新增目录结构如下
7. 添加tomcat组件
Run – Edit Configuration
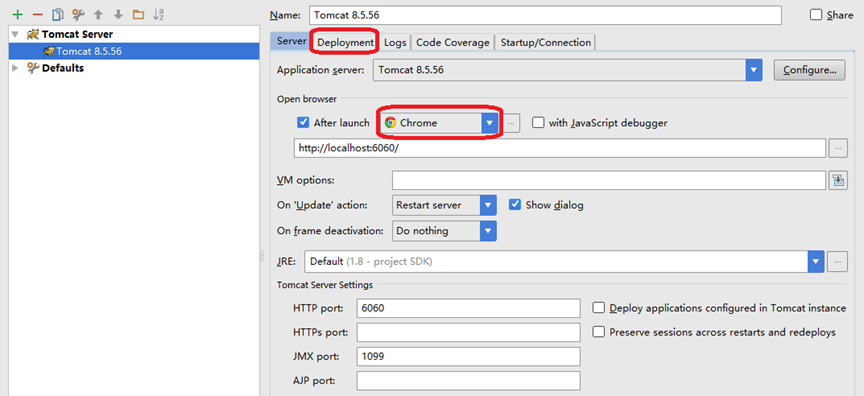
点击Deployment,部署当前maven项目
设定url访问的根目录 http://localhost:6060/