auto-py-to-exe操作方法
auto-py-to-exe 是一个用于打包 python 程序的程序。
本文就是主要介绍如何使用 auto-py-to-exe 完成 python 程序打包。
本文主要分为两节,第一节主要对 auto-py-to-exe 做一些介绍,第二节则是演示 auto-py-to-exe 的打包过程。
一、auto-py-to-exe 基本介绍
本节主要介绍 auto-py-to-exe 以及 auto-py-to-exe 的一些基本使用。
1、auto-py-to-exe 简介:
auto-py-to-exe 是一个基于 pyinstaller 的程序,主要用于 python 程序打包。相比于 pyinstaller ,它多了 UI 界面,这使我们使用起来更为简单,方便,非常适合新手使用。
2、安装 auto-py-to-exe
首先我们要确保我们的 python 环境要大于或等于 2.7
然后在 cmd 里面输入:pip install auto-py-to-exe ,输入完成之后,pip 就会安装 auto-py-to-exe 包了。
安装完成之后,我们就可以输入:auto-py-to-exe,来启动 auto-py-to-exe 程序了。
这样,auto-py-to-exe 就安装成功了。
3、auto-py-to-exe 部分选项介绍
在使用 auto-py-to-exe 打包 python 程序的时候,有许多配置选项需要我们去指定,能正确知道这些选项的作用是十分重要的。下面我将介绍其中一些重要的选项。
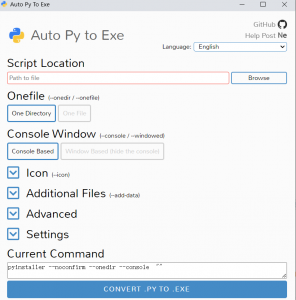
(1) Script Location
Script Location 主要是指定我们要打包的 python 文件
(2) Onefile
Onefile 下有两个选项,分别是:One Directory 和 One File
如果选择 One Directory ,那么程序打包完成后会是一个文件夹的形式展现
如果选择 One File ,那么程序打包完成后就一个 .exe 文件

(3) Console Window
Console Window 主要设置打包程序运行时,是否出现控制台
Console Based : 当打包的程序运行时会显示一个控制台界面
Window Based (hide the console) : 会隐藏控制台界面,主要用于带有 GUI 的 python 程序打包
(4) Icon
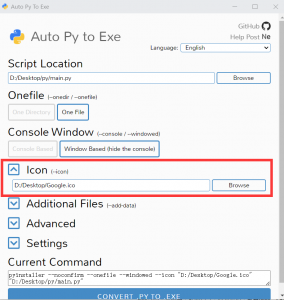
用于指定打包程序的图标
二、auto-py-to-exe 实战教程
本节主要以一个示例(自己写的)来介绍如何使用 auto-py-to-exe 来打包程序。
auto-py-to-exe 打包程序主要分 3 部分,分别是:
打开 auto-py-to-exe
配置打包选项
查看打包效果
1、打开 auto-py-to-exe
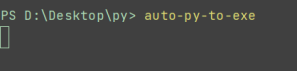
打开 cmd ,输入:auto-py-to-exe
打开 auto-py-to-exe 后,我们就要进行配置选择了。
2、配置打包选项
在打包时,我们要进行的配置主要有:
Script Location
Onefile
Console Window
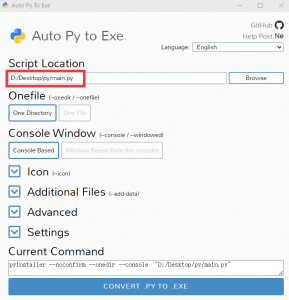
Script Location 选择程序的主程序,在计算器项目里,我们选择的是 main.py
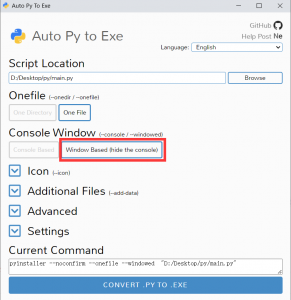
Onefile 选择 One File ,因为一个文件看起来比较简洁
由于项目带有 GUI ,所以 Console Window 选择 Window Based (hide the console) ,
Icon 选择一个 ico 文件,此处不是必要操作,可以不设置
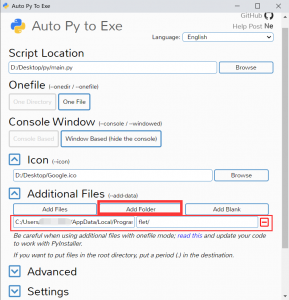
如果程序里面有自己的模块,我们必须把模块的目录添加到 Additional Files 里面。
不然会出现 Failed to execute script XXX 错误
在计算器程序里面我们所有的模块都在 calculation 目录下,所有我们需要将 calculation 路径添加到 Additional Files 里面
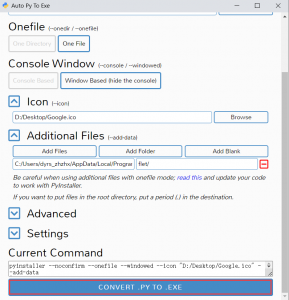
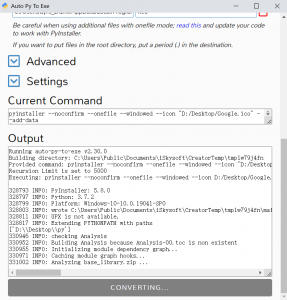
配置完成之后点击 CONVERT .PY TO .EXE 按钮
这样我们就完成一个项目的打包。
3、查看打包效果
程序完成打包后,我们可以点击 OPEN OUTPUT FOLDER 按钮,然后就会打开打包文件的路径。
在打包文件目录中,我们可以看到一个 main.exe 文件,这就是我们打包文件。
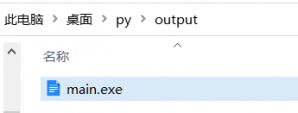
点击 main.exe ,就可以看到我们的程序了。
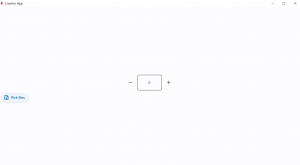
至此,打包工作圆满完成。